Einleitung

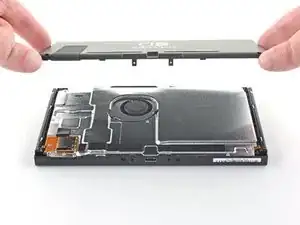
Diese Anleitung zeigt, wie du eine beschädigte Rückabdeckung einer Nintendo Switch Konsole austauschen kannst.

In der Switch sind JIS-Schrauben verbaut, zur Not passen aber auch Bits für Kreuzschlitzschrauben. Sei aber sehr vorsichtig und beschädige die Schraubenköpfe nicht. Die Kreuzschlitz-Bits von iFixit können auch für JIS-Schrauben verwendet werden.

Hinweis: Diese Anleitung und das von uns verkaufte Ersatzteil ist für das originale Nintendo Switch Modell von 2017, aber auch für das neuere Modell von 2019 geeignet (Modellnummern HAC-001 und HAC-001(-01)).

  1. CNuHIy3TUQngv26I
    CNuHIy3TUQngv26I
    pJdtPCFBx3XUI5mL
    IEsgSQkEkZF6cpMS
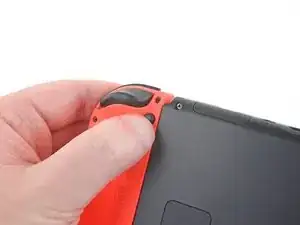
    • Schalte das Gerät komplett aus, bevor du mit der Reparatur beginnst.

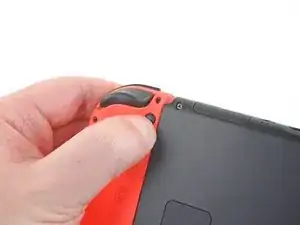
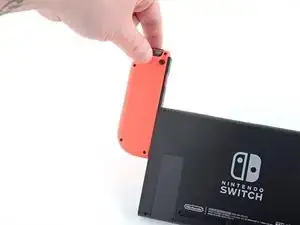
    • Drücke und halte den kleinen runden Knopf auf der Rückseite des Joy Con Controllers.

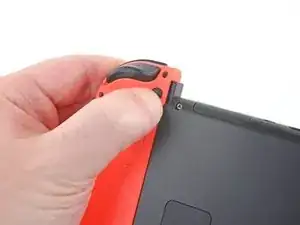
    • Halte den Knopf weiterhin gedrückt und schiebe den Controller nach oben.

  2. PhLTKTPxlZnWR1oL
    PhLTKTPxlZnWR1oL
    FnrSoBPlnixMVSse
    DtwKbJIU1bRDF2mt
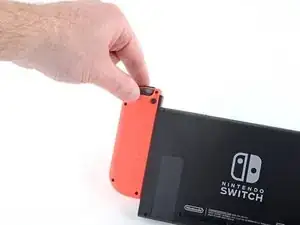
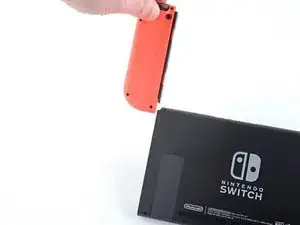
    • Schiebe den Joy Con nach oben ganz aus dem Gerät heraus.

    • Wiederhole das Ganze für den anderen Joy Con.

  3. UM4r1BOEJDYmMfpC
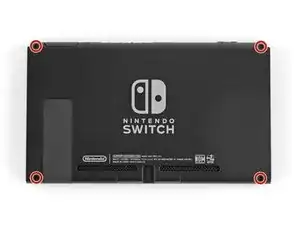
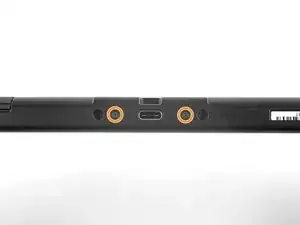
    • Entferne die vier 6,3 mm langen Tri-Point Y00 Schrauben von der Rückabdeckung.

    • Halte während der ganzen Reparatur die Schrauben gut geordnet und achte darauf, dass jede Schraube wieder an ihren alten Platz kommt.

    Had to use a Y0 from my kit - the Y00 was too small to get a grip on the screw.

    cday -

    I also had a much easier time with Y0 versus Y00. Y00 felt like it was starting to strip the first screw I tried to remove.

    Joe -

    My screws took a little coaxing before they were all ready to come out of the back plate, but I remedied this by turning the screwdriver as little as possible with each turn. Use almost no pressure, except for at the very beginning of each screw’s first turn.

    nin10doh -

    I think my screws are stripped, any way to get them out?

    Banjomanperson -

    I hear that using a rubber band can help? Not 100% sure on that though.

    Pifase -

  4. hGXGnEoQjvBhX3wm
    hGXGnEoQjvBhX3wm
    vEpL4RZKItZCNJlV
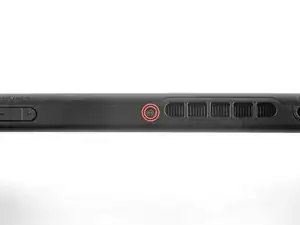
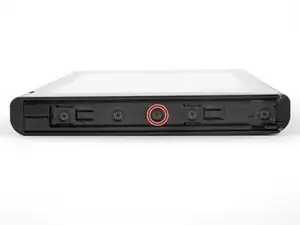
    • Nimm einen JIS 000 Schraubendreher oder ein Ph000 Bit von iFixit und entferne folgende Schrauben, mit denen die Rückabdeckung befestigt ist:

    • Eine einzelne 2,5 mm Schraube an der Oberkante des Gerätes.

    • Zwei 2,5 mm lange Schrauben an der Unterkante des Gerätes

    • Diese Schrauben sitzen sehr fest, um zu verhindern, dass die Schraubenköpfe beschädigt werden, musst du fest nach unten drücken und langsam arbeiten. Wenn die Schrauben nicht heraus kommt, verwende einen anderen JIS 000 oder Kreuzschlitz 000 Schraubendreher.

    Hey guys, I tried removing the upper screw and it won't go out(neither will it go in) any tips how to fix this?

    Thanks

    Nemysis -

    The screw boss might be stripped out. Has the device been taken apart before? If you can unscrew it a little bit to get the screw to peek out, maybe try and grab it with some pliers as a last-ditch effort.

    Craig Lloyd -

    I have the same problem. The JIS 000 tool works great on the joy con rails per step 5 but refuses to turn the bottom two 2.5 mm screws as in step 4. These bottom screws are noticeably smaller than the screws as in step 5. The JIS 000 does not get down into these screws. Hopefully they haven’t been stripped by the wrong tool. So is there a JIS tool that is smaller than 000? I’m stuck at this point…

    david brown -

    We used the JIS 3.0mm screwdriver for both top and bottom screws and it worked

    Brooklyn Gardner -

    Used PH00 to get these out with no problem.

    cday -

    Fun fact: these screw into little plastic tabs that stick out of the rear panel. Apparently those tabs are fragile and easy to just break off…

    Benjamin Fritz -

    My screws came out fine. But they are easily stripped with too much pressure on reassmbly

    Jaxon Lee -

    this screws are way too fragile and way too small so be careful when taking them off dont use much force and unscrew also one of them fell somewhere and spent 30 mins searching for it

    Richard Aguirre -

    PH000 will work if you don’t have JIS000. The large IFIXIT kit has both and I lost JIS000. Just be very careful as you can strip the heads when removing or inserting easier.

    Shawn Spivey -

    One thing that worked pretty well for me with the screws not coming out is slightly prying on the back cover to put them under some tension

    Florian Kraupa -

    Quick note, these screws are not magnetic. A magnetic screwdriver will hold onto any of the others safely, but you need to be careful not to drop these ones in particular.

    Jason Lane -

    These would just keep rotating and not come out. What worked was, as Florian Kraupa suggested, i slid a plastic pick just between the 2 shells near the screws to prise it open slightly, then unscrewed and out they came. They're the smallest screws I've ever almost not seen before, so be careful with them.

    Susannah Carter -

  5. aygPfTuAlccxJXvj
    aygPfTuAlccxJXvj
    DTFNZI2ONKRcbQjd
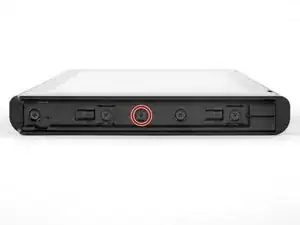
    • In der Mitte auf jeder Seite des Gerätes befindet sich eine 3,8 mm JIS 000 Schraube. Nimm einen JIS 000 Schraubendreher/Bit oder ein Original PH000 Bit von iFixit und drehe sie beide heraus.

    I tried my JIS 000 on Step 5 and was unable to get the screw to budge. It’s partner from the other side came right out with no trouble. Don’t really want to narf up the screw, so I bailed out. Anyone else have this issue?

    mrhoyt -

    Could just be torqued down a bit more! I’d recommend making sure the driver bit seats nicely into the screw, apply some downward pressure, and slowly twist to try and back it out. Good luck!

    Craig Lloyd -

    Yeah I’m having this exact issue. Screw stripped and now I’m stuck. Wish I hadn’t even started.

    Ryan Quinn -

    I did finally get it out- one thing I noticed was some of the screws have blue Loctite on the threads. I guess they figure it’ll get tossed around. This underscores the importance of having the correct tools and making double darn sure you are using the correct size, etc.

    mrhoyt -

    What worked for me here was a Phillips 000, not a JIS 000

    Federico Zivolo -

    One of mine is totally stripped. Guess I can’t do anything now.

    Nick -

    My kit only has two screwdriver heads! The package was open when I received it!

    Cynthia Hyland -

    I had this issue as well. Screw was irreparably stripped. If you can get every other screw out, just keep applying pressure with a flat head screw driver right above the stripped screw and try to break the plastic piece holding onto the screw. It's a very minor invisible bit of damage that will allow you to continue the repair.

    Raymond Garrison -

  6. JXApmLipodX5R25H
    JXApmLipodX5R25H
    RSjFHQEoWWAEbSCr
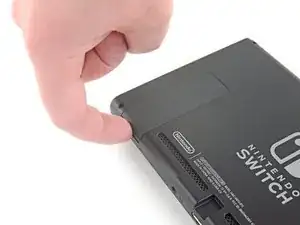
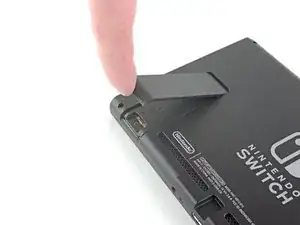
    • Klappe den Aufsteller auf der Rückseite des Gerätes mit den Fingern heraus.

    • Wenn im microSD-Kartenleser noch eine microSD-Karte ist, dann hole sie jetzt heraus, bevor du mit den nächsten Schritt weitermachst.

    Don't put your SD card on your magnetic mat.

    Chris Cotter -

  7. rJ4M2PBV1Z5gOaPS
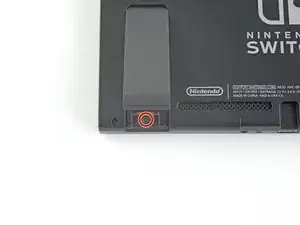
    • Nimm einen JIS 000 Schraubendreher/Bit oder ein Original PH000 Bit von iFixit und entferne die 1,6 mm JIS 000 Schraube in der Vertiefung für den Aufsteller.

    • Klappe den Aufsteller zu.

  8. sJlDUdVfVekGVHQU
    sJlDUdVfVekGVHQU
    4WialnXAlRWtwINs
    tMSpAvarIRbjmCpW
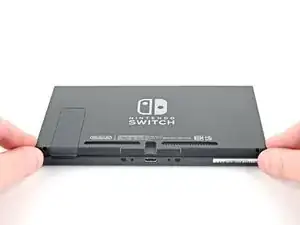
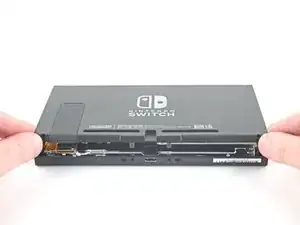
    • Öffne die Cartridge-Klappe.

    • Diese Klappe schließt an der anderen Hälfte des Kunststoffgehäuses an. Im geschlossenen Zustand verhindert sie, dass du die Rückabdeckung komplett abheben kannst.

    • Hebe die Rückabdeckung von der Unterseite des Gerätes her hoch und entferne sie.

    How to remove micro SD port?

    Pull straight up, press back into place when closing back up.

    Christopher Hernandez -

    This step is missing in this guide. Here are the steps from another guide:

    Step 9) Nintendo Switch rechte Joy-Con Sensorschiene austauschen

    Step 10) Nintendo Switch rechte Joy-Con Sensorschiene austauschen

    David -

Abschluss

Vergleiche das Ersatzteil mit dem Originalteil. Möglicherweise musst du fehlende Bauteile übertragen oder Schutzfolien vom Neuteil abziehen.

Um dein Gerät wieder zusammenzubauen, folge den Schritten dieser Anleitung in umgekehrter Reihenfolge.

Entsorge deinen Elektromüll fachgerecht.

Lief die Reparatur nicht wie geplant? Probiere zunächst einige grundsätzliche Lösungen oder frage in unserem Nintendo Switch Forum nach Hilfe bei der Fehlersuche.

Craig Lloyd

Mitglied seit: 10/02/16

30032 Reputation

10 Kommentare

Excellent and concise guide.

The new panel doesn’t come with the sticky grille pieces x 2 on the bottom. Is it supposed to be a straight transfer between the old and the new?

fclbriat123 -

You can transfer the grill to the new back plat

Phillip Norton -

Just did this replacement and there are a few things to keep in mind that this review does not mention. There are x2 square foam pieces that can be transferred to the new panel located at the bottom backside of the old. Also, the game cartridge shield hardware and the kickstand holder hardware have to be taken off the back of the old panel and transferred to the new panel. The kickstand has 2 Phillips #000 screws and the game cartridge shield has 1 Phillips #000 screw

Ryan Talbert -

How do you transfer the foam pieces? Use some heat to loosen their adhesive and then remove them and transfer over the new backplate?

John -
Is the casing the same between the HAC model and the HAD model? This guide doesn’t specify

Julian Webb -

I am using iFixit Pro tool kit. What to do if one of the 000 screw’s cap appears to be stripped off? How to extract it if perchance?

Dr.Genuks -

I had trouble removing the outermost screws, I think they’re actually Y00 as opposed to Y00. Not sure if I’m the only one who’s had an easier time with Y000, if they are I’ll update the wiki

Esme Xuan Lim -

I can’t take out the back screws of my switch with y00 ?

V W -

Detailed guides like this are so helpful!

Swapped the backplates in less than 20 minutes with no issues. I recommend that you press on the screw firmly and turn slowly. Do this and check as you turn and you shouldn't strip any screws.

Yakarot Sennin -

I wanted to support ifixit, and was ok with it being over 3x as expensive as Amazon as it's probably better parts ($13 vs $45). But Amazon had next day delivery whereas here standard is 5-10 days and express is 3-5. I really want to support you guys but you've got to be competitive somehow...

Para Celsus -