Einleitung

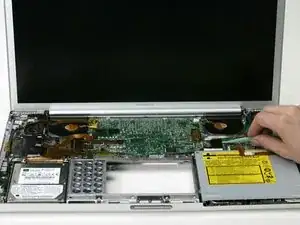
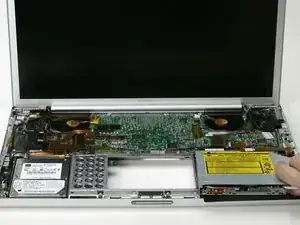
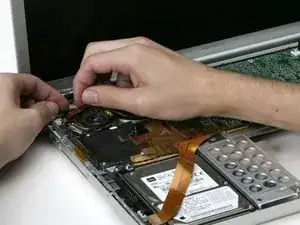
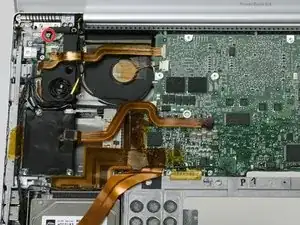
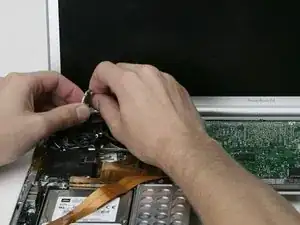
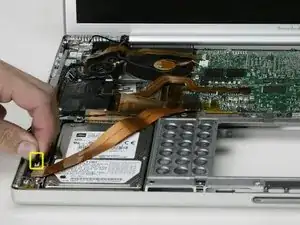
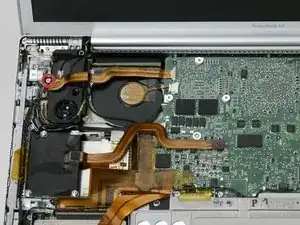
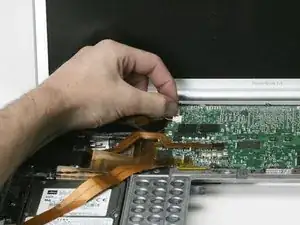
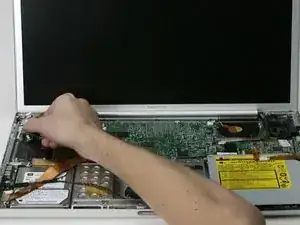
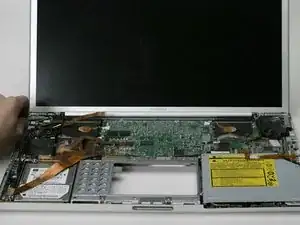
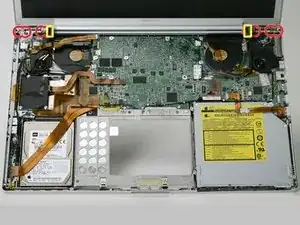
The heat sink and fan together help to keep the processor cool and happy.

  1. 2WWww5RnEcTN5GpI
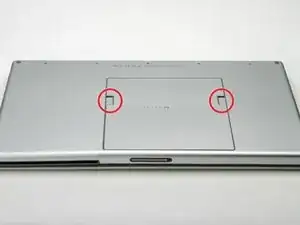
    • Orient the computer so that the side with the line of screws on it is away from you.

    • Use your thumbs to push both battery release tabs away so that the edge of the battery lifts up.

    • Lift the battery out of the computer.

    Which screw driver I have to use here?

    smartvideocanada -

    Phillips #00 Screwdriver: All necessary tools are available to buy at the top of this page if they are needed.

    Sam Love -

  2. HKiuDPS2AXNh5J5P
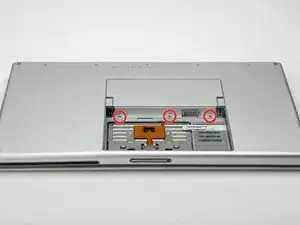
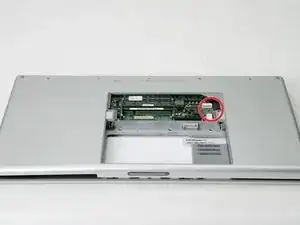
    • Remove the three identical Phillips screws from the memory door.

  3. pJaL3AAyKRmkTPaL
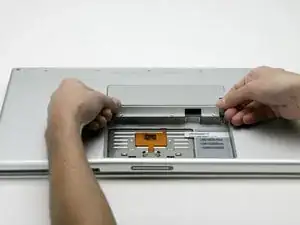
    • Lift the memory door up enough so that you can get a grip on it, and slide it toward you, pulling it away from the casing.

  4. cVGpCkRHVpDFBES1
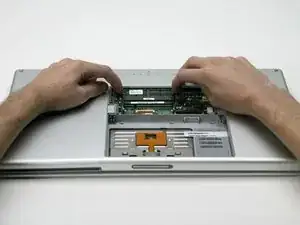
    • Release the tabs on each side of the RAM chip at the same time. These tabs lock the chip in place and releasing them will cause the chip to "pop" up.

    • Pull the chip directly out from its connectors. If there is a second RAM chip installed, pop it out in the same manner.

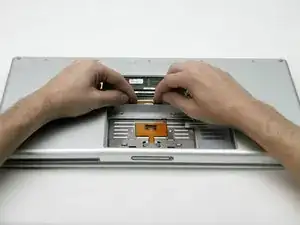
    • This is a diagram of the trackpad ribbon clamp connector you will disconnect in the next step.

    • 1) With your fingernails, grasp the locking bar on either side slide it a small amount (about 1/16" or 2 mm) towards the battery.

    • 2) After disengaging the locking bar, slide the cable out of the connector.

    Where can I get a replacement clip for the ribbon cable?

    applerepairshop -

    you’re a repair shop and you can’t get the connector? or have a stockpile to pull from? I could use that connector too ~

    theothertroll -

    the ribbon cable for keys and trackpad you shown are not consistent - my PB17” A1107 has just the thinner cable like one shown in prior pic~

    theothertroll -

  5. LcS2UCZRdTExOOJx
    • For this step, you only need to move the connector about 2 mm. Pulling too hard or too far will damage the connector.

    • Loosen the trackpad connector by pulling the locking bar toward the battery housing, using the tips of your fingers.

    • Slide the trackpad cable out of the loosened connector.

    • When reattaching the trackpad ribbon cable, make sure that the orange cable is slid into the connector above the locking bar.

    • Note: When reassembling the case, the trackpad cable can get stuck below the slot to the motherboard. It's possible to nudge it out slowly by gently prodding it on either side with a small screwdriver. You don't need to use much force to do this. Eventually it will just pop back out and you can reconnect as per the instructions above. Also, note that the locking bar comes loose so if you see a little piece of plastic lying around when reassembling, that's what it is. :)

    The locking bar is UNDER the cable. It is a tiny grey (metal?) piece the width of the connector. A tiny flat head screwdriver can be handy for moving one side then another in increments towards the battery compartment. Finger nails may be too clumsy for this.

    Stan Pokras -

  6. pfQFIHLc3mulBygo
    • Remove the following 10 screws from the bottom case:

    • Three 1.7 mm Phillips from the front edge of the battery compartment.

    • One 3.9 mm T8 Torx to the right of the memory card.

    • One 6.9 mm T8 Torx at the left edge of the memory compartment.

    • Three 12.4 mm fully threaded Phillips from the center of the row of screws along the back edge of the case.

    • Two 15.1 mm 2.5 mm threaded Phillips, one from either end of the row of screws along the back edge of the case.

    i believe that you have the torx screws reversed here. The longer one should go on the left and vise versa.

    spatz -

    oops, my bad. You're right.

    spatz -

    • Turn the computer over and rotate it so that the DVI port faces you.

    • Remove the four identical Phillips screws spread along this edge of the case.

    • Turn the computer 180 degrees so that the power receptacle faces you, and remove the four Phillips screws (identical to those in the last step).

  7. 1VQNPD5b5qr6rsFe
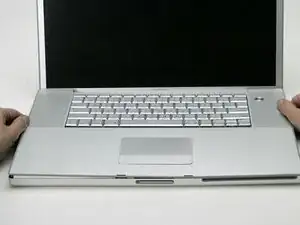
    • Open the computer and turn it so that the screen faces you.

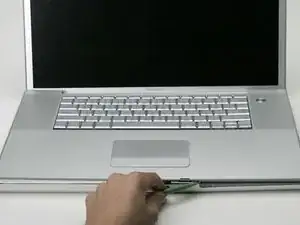
    • Pull the upper case off, lifting from the back, and working around the edges.

  8. L4PZpnAWuJdtIfFw
    • Use a spudger to loosen the casing if it sticks.

    • Once the casing is entirely free, lift it off of the computer.

    BE VERY CAREFUL when replacing the keyboard to thread the keyboard ribbon cable through the slot. The steps didn't appear to make this warning and when I replaced all screws, found that it was jammed and would not come through to connect with the connector. I had to undo a lot of steps to go back and rethread it properly.

    Ted -

  9. i1EmxICVcJTYUbfb
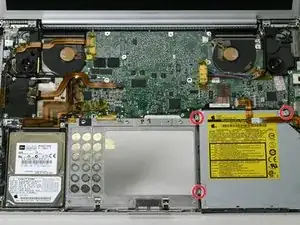
    • Remove the four ( 3 - 6.9 mm & 1 - 4 mm) T8 Torx screws from the four corners of the SuperDrive.

    • The shorter screw goes in the front, right corner.

  10. SgVIuoi5mTUeexAj
    • The optical drive ribbon cable is very fragile. Be sure to gently lift up the cable on the sides. Do not lift up on the cable from the end closest to the display.

    • Carefully disconnect the orange optical drive ribbon from the logic board.

  11. CLu2BgAPS2R31ZVh
    • Lift the optical drive at the right, front corner, and slide it out of the computer (be careful not to catch the PRAM battery cable).

    • If you have a CD or any other object jammed in your optical drive, we have an optical drive repair guide.

  12. xhIaqn5qQWahDIWD
    • Use the method described in the step for disconnecting the keyboard ribbon to loosen the connector on the DC-In board.

    • Pull the cable free of the loosened connector.

  13. lXxKpYUHLrHWAPTZ
    • Remove the single Phillips screw from the Bluetooth board.

  14. b3SmKAVuCvciSbOB
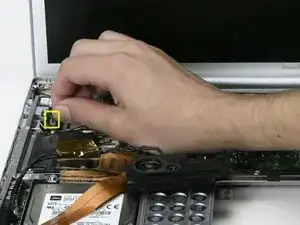
    • Lift the Bluetooth board partially out of the computer and disconnect the attached antenna cable.

    The antenna pulls out from the top,not sideways

    sieg deleu -

  15. IkyQyTASJhSEn6jH
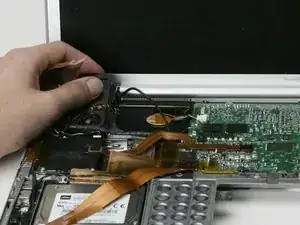
    • Disconnect the black speaker cable from the sound board.

  16. aNH2mDEDPwAOMbxc
    • Remove the single T8 Torx screw from the left speaker assembly.

  17. ANVLF26VvVnsRSHY
    • Disconnect the orange DC-In cable from the logic board.

  18. TfptxmrCAe22AYsj
    • Deroute the cables from the right side of the speaker and lift it off of the logic board.

  19. BiPM4SrBEbUGV6S5
    • Disconnect the rainbow power cable from the DC-In board.

  20. C2BPVYkpPUQCG2ig
    • Disconnect the black and white RJ-11 cable from the top, right corner of the modem.

  21. N4mw51IYiNOeJFIP
    • Remove the two identical T8 Torx screws from the DC-In board.

  22. DRkoCaWVUWxvWeIg
    • Slide the DC-In board to the right and lift it out of the computer.

    • If the DC-In board sticks, you may need to remove the T8 screw next to the DC-In board to free it.

  23. AkEIut6GNJtBcK1T
    • If you have already removed the DC-in board, your computer may differ slightly from the images in this section. This part does not affect this procedure.

    • Close the display (cover it with a protective cloth, if you're worried about scratching the screen) and flip the computer over.

    • Disconnect the two cables and one ribbon in the RAM compartment.

  24. LWCFZTLdxHRESC1G
    • Turn the laptop back over and open it up.

    • Remove the single T8 Torx screw from the right speaker assembly.

    • Deroute the display data cable from the left side of the speaker and pull the speaker assembly off the logic board.

  25. ApfAK4jCKV1jEPyV
    • In order to deroute the speaker cable from the front edge of the logic board, you must disconnect the PRAM battery cable.

    • Deroute the speaker cable from the front edge of the logic board.

  26. qZ23qwCFqWH26Fih
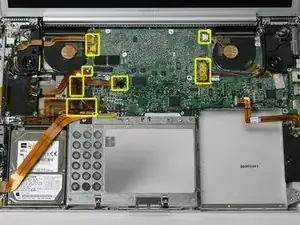
    • Disconnect the 9 indicated cables from the logic board, starting in one place and moving around the board.

    • There should be no cables connected to the top of the logic board at this point.

    • Remove the following 12 T8 Torx screws from the logic board:

    • Four 3.9 mm, three along the front edge of the logic board, and one just above the right fan connector.

    • Three 6.9 mm large-headed screws in the upper, left corner of the logic board.

    • Five 6.9 mm scattered on the right half of the logic board.

  27. AhbCBRRHhqVhmIwm
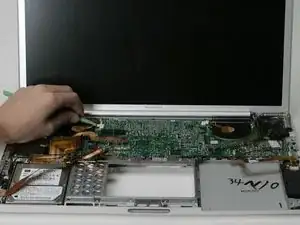
    • Use a spudger to gently (very gently) pry up the left side of the logic board.

    • If the logic board does not immediately come free, it may be necessary to soften the thermal paste between the logic board and heat sink. You can soften the thermal compound using a hairdryer. Move the hairdryer back and forth between the two fans about one inch above the logic board for one minute. At this point, logic board should now come free easily.

  28. jgNGAoP3KwEOtFpu
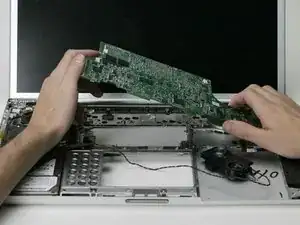
    • Grasp the logic board at the left edge with one hand and at the thinnest section with the other hand. Lift the left edge of the board up to approximately a 30 degree angle (if you don't have your protractor handy, just lift until the DVI port clears the right hinge).

    • Once the logic board clears the ports, slide it out to the left.

  29. cX6d1uAOHx2spSSD
    • Important. When you reinstall a logic board, you'll need to replace the thermal paste that goes between the processor on the logic board and the heat sink. Failure to remove the old paste and apply a new layer can cause the computer to overheat and sustain damage. The following steps refer to replacing the thermal paste between the processor and heat sink; follow these steps only when you are ready to place the logic board in the computer.

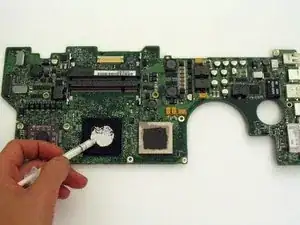
    • Use a firm plastic edge to scrape the thermal material off the raised copper heat conduit in three places. Clean the surface with rubbing alcohol.

    • For more advanced instructions on this procedure, see our Applying Thermal Paste Guide.

  30. Ks2gJPktmXDRFJKK
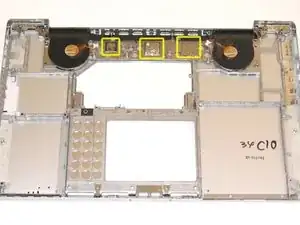
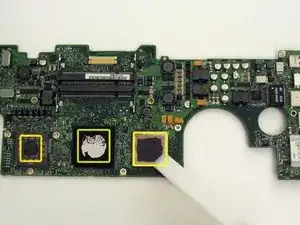
    • Use a firm plastic edge to scrape the thermal material off the three indicated chips.

  31. 63nAQSHg6qwPQPKO
    • Apply a new layer of thermal paste to all three chips.

    • When replacing the logic board, make sure all cables are routed around and above - not under - it, and to connect the two cables that do go beneath before pushing the board into place.

    • When you place the logic board back in the computer, try not to move it around once the processor has come into contact with the newly-applied thermal paste.

  32. 5sXoxPXVwJRGeEeF
    • If you are ultimately removing the heat sink & fan assembly, your computer will differ from the images in this section.

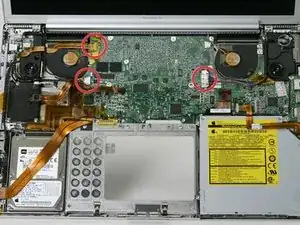
    • Disconnect the inverter cable, the Bluetooth/DC-In cable, and the display data cable from the logic board.

  33. LTKm5T3CVuCQV1Q1
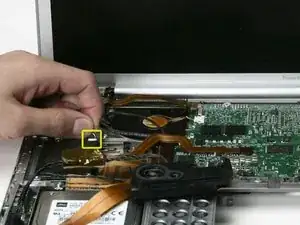
    • Disconnect the Airport antenna cable at the gold connector, making sure you pull only on the gold metal portion of the connector.

  34. 5Es3Fo5pUJnErWDX
    • Disconnect the Bluetooth antenna cable from the Bluetooth board.

  35. OPIhTMwETRWOQvMF
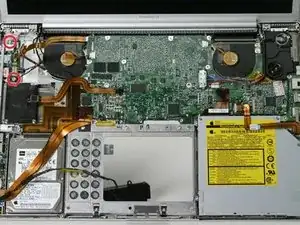
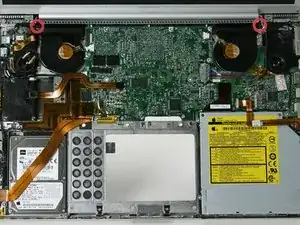
    • Remove one T6 Torx screw from the upper, left corner of the left fan, and one from the upper, right corner of the right fan (2 screws total).

  36. wAk36AbJLNODQWy4
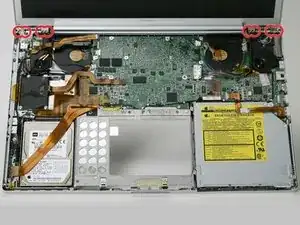
    • From each complete hinge assembly, remove two Torx T6 screws from the outside of each set, leaving two remaining in the middle of each hinge. On each side, the two screws closer to the edge of the computer are shorter than the two screws closer to the center of the computer. Then remove the two inner screws from each hinge assembly. There are 8 screws total.

    when going backwards, be sure to check the previous step before performing this one, to line up the black plastic bits to their places - just inside of the metal screws. if you attach the display without lining them up, you will have to remove it again to re-align them.

    Dan Fries -

  37. 3EhPRfpynBtxVeKM
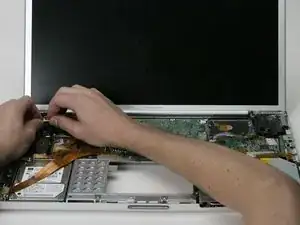
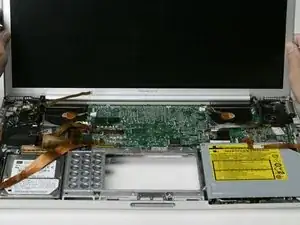
    • Lift the screen assembly away from the computer.

  38. TyFQ33EPavwtrDti
    • When reassembling the display, check to see that the hinges are seated properly before reinstalling the 8 screws of the two hinges. There is a metal phalange on the inside end of each hinge assembly that must be pointed downward and fit into a slot below the inside edge of the hinge. If not, the inside end of each hinge will sit too high and the plastic retaining bracket for the wiring will not sit down properly.

  39. MDLJCjmuEBEiMSFT
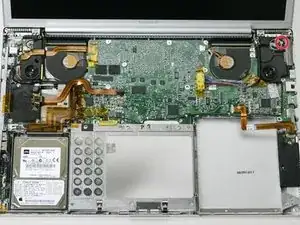
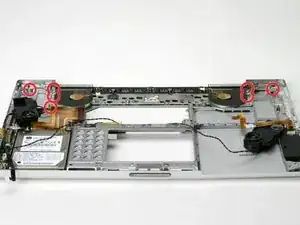
    • Remove seven Torx T8 screws from the heat sink and fan assembly.

    • The screw in the upper, right corner is smaller than the others.

  40. UkQrO25YHjPbYTPO
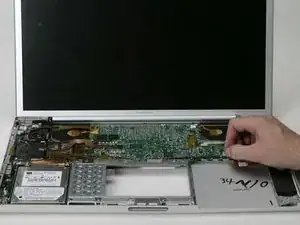
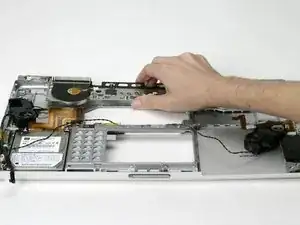
    • Lift the heat sink and fan assembly out of the computer.

    • If you need to mount the heat sink back into the laptop, we have a thermal paste guide that makes replacing the thermal compound easy.

Abschluss

To reassemble your device, follow these instructions in reverse order.
iRobot

Mitglied seit: 25/09/09

0 Reputation

0 Kommentare