Einleitung
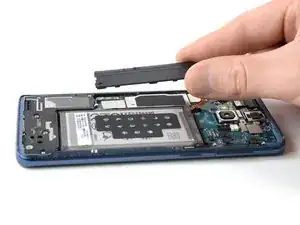
Grundständige Anleitung: Entfernen der Mittelabdeckung im Samsung Galaxy S9.
Werkzeuge
-
-
Schalte dein Smartphone aus, bevor du anfängst.
-
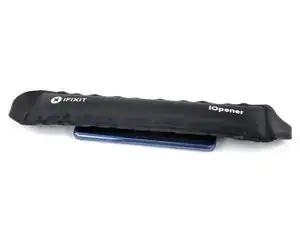
Lege einen erwärmten iOpener auf eine der langen Kanten des Smartphones, um den Kleber unter der Glasrückseite aufzuweichen. Lasse den iOpener mindestens zwei Minuten lang liegen.
-
-
-
In den folgenden Schritten wirst du den Kleber auftrennen, mit dem die Rückabdeckung befestigt ist.
-
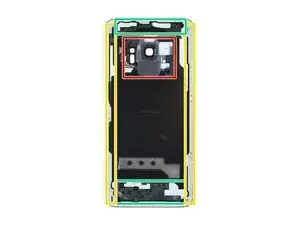
Schneide an den folgenden Stellen durch den Kleber:
-
Hier ist der Kleber dick aufgetragen
-
Hier ist der Kleber dünn aufgetragen
-
Heble oder schneide nicht in diesem Bereich, damit das Flachbandkabel zum Fingerabdrucksensor nicht beschädigt wird.
-
-
-
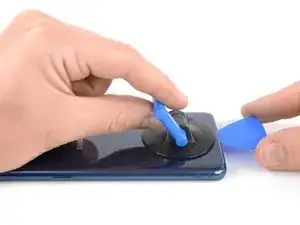
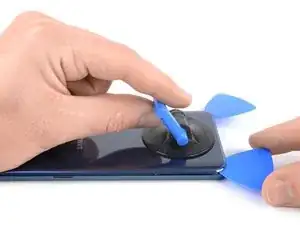
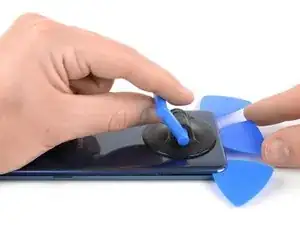
Drücke einen Saugheber auf der Glasrückseite fest.
-
Hebe die Unterkante der Glasrückseite mit dem Saugheber leicht an, um einen kleinen Spalt zwischen Glasrückseite und Rahmen zu erzeugen.
-
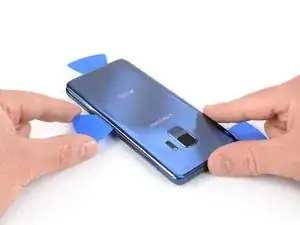
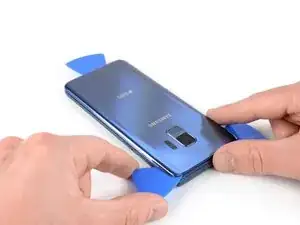
Setze ein Plektrum in den eben erzeugten Spalt ein und schiebe es zur unteren rechten Ecke.
-
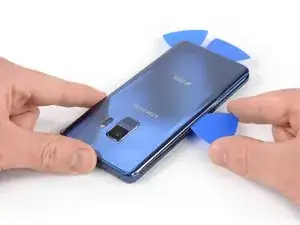
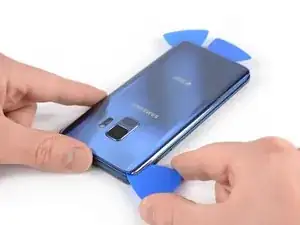
Setze ein zweites Plektrum ein und schiebe es zur unteren linken Ecke.
-
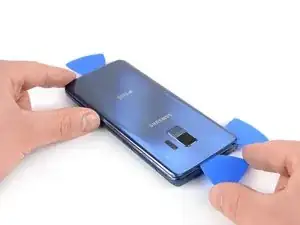
Setze ein drittes Plektrum ein, so dass sich der Kleber im weiteren Verlauf der Reparatur nicht wieder verbinden kann.
-
-
-
Benutze nur die Spitze des Plektrums, während du es von der unteren linken Ecke die Seite entlang ganz nach oben schiebst.
-
Schiebe das Plektrum um die Ecke herum und lasse es dort stecken, so dass sich der Kleber nicht mehr verbinden kann.
-
-
-
Schiebe das Plektrum von der unteren rechten Ecke die Seite entlang ganz nach oben.
-
Schiebe das Plektrum um die Ecke herum und schneide auch den Kleber an der Oberkante des Smartphones auf.
-
-
-
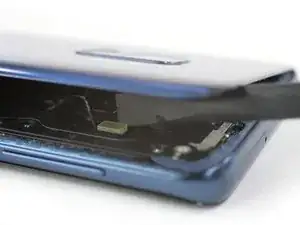
Hebe die Rückabdeckung aus Glas sorgfältig auf der Seite mit den Lautstärketaste an.
-
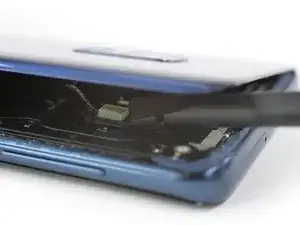
Heble das Flachbandkabel zum Fingerabdrucksensor mit der Kante eines Spudgers hoch und trenne es ab.
-
-
-
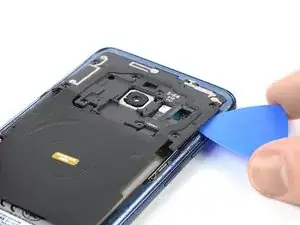
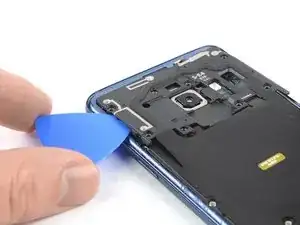
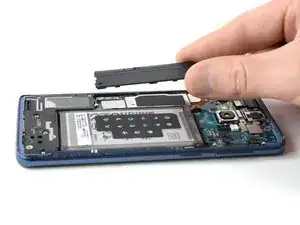
Setze ein Plektrum unter die rechte Seite der Kunstoffabdeckung ein, welche die NFC Antenne und die Ladespule enthält.
-
Heble mit dem Plektrum oder verdrehe es leicht, bis sich die Plastikrasten lösen, mit denen die Abdeckung befestigt ist.
-
-
-
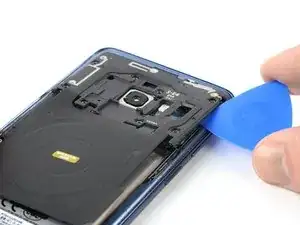
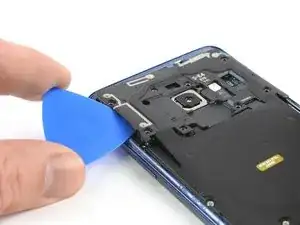
Setze ein Plektrum unter die linke Seite der Kunstoffabdeckung ein.
-
Heble mit dem Plektrum oder verdrehe es leicht, bis sich die Plastikrasten lösen, mit denen die Abdeckung befestigt ist.
-
-
-
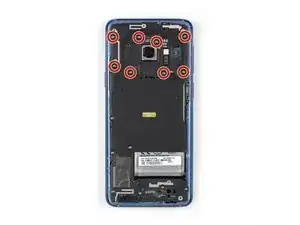
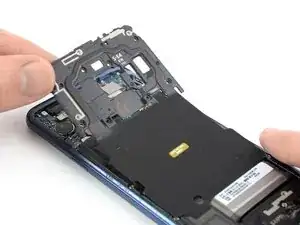
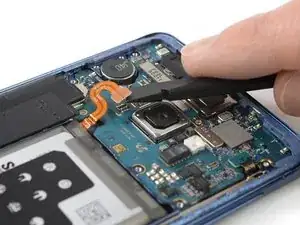
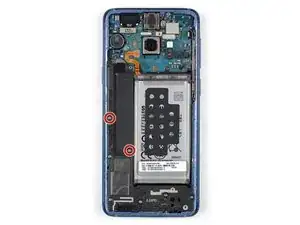
Entferne die beiden 4 mm Kreuzschlitzschrauben, mit denen die Kunststoffabdeckung befestigt ist.
-
Um dein Gerät wieder zusammenbauen, folge den Schritten in umgekehrter Reihenfolge.


Nightmare. Impossible to get the back off so far. Being trying using the iOpener with hair dryer for last 1hr. No chance.
Chris Bunney -
You’re right Chris. I’ve tried on 3 separate occasions now and haven’t been able to budge that back. All that has happened is the pick has taken a piece out of the glass back leaving a rough edge now.
grahamcatto -
it was not easy but doable.
Clinton Stark -
It’s difficult, but the trick I did to get it was to wrap the hot iOpener around a bottom corner, apply the suction cup, then I covered the opener and phone with a paper plate, better insulating the area. Then I set my blow dryer to high heat and low velocity and heated the area under the plate for about a minute. Right after turning off the blower, I took off the plate and pulled the suction cup with a cutter at hand. You’ll hear a bit of a cracking/popping noise when the adhesive is starting to give, just apply a little more force and push the cutter at the seam. This method worked great for me, so good luck and just keep at it — you’ve got this!
Nicholas Weger -
I used nearly boiling water in a storage zip bag on the phone for 10 minutes. I can’t really recommend this method, but thankfully the bag did not leak - an iOpener is probably a much better way to go. Regardless, the bag covered the entire back of the phone, and the phone was too hot to hold, but I still could not get the glass to budge with the suction cup after struggling with it for about an hour and multiple reheats. I ended up epoxying a 2”x2” square of PVC board to the bottom of the cover and built a relatively complex fixture that pulled on the PVC with the turn of a screw while it held down the frame by the edges. After heating the edges up again It did lift the glass enough to get a pick underneath it, but it cracked the glass and it was a pain to slide a pick around the edge while the glass was cracking all the way around. Once I finally got all the glass off, I spent the next 30 minutes (which is what this entire process is supposed to take… what a joke!) cleaning the adhesive off the phone.
drbenton815 -
Heavy Duty Heat Gun from popular discount tool store for the win!
Jesse Meyer -
Well, it is not obvious how to do this. I have no iOpener, but a heat cushion for remedy hurting muscles and sometimes a backpain. It is filled with grain of some kind and it is to be heated in a microwave oven for about 3 minutes. After that I enveloped this cushion round the phone and brewed myself a cup of tea. After ten miutes the phone was warm (almost hot) and I was able to press the tip of a small (very small) knife above the charging port into the connection between the phone body and the backplate. A very small opening emerged slowly (this is the critical point in this process) and I was able to start using the iFixit opening picks. It became obvious to me that the opening picks are too blunt to achive this with them. But after starting carefully with the (very small and very sharp) knife, everything went straight forward. Thou I had to give the phone a second heatpush with my heat cushion before the backplate came loose.
borutberg -
I used my 3D printer heat bed and heated it to 90 Celcius to succeed.
gahute -
It took about 3 minutes on my 90 C printbed to get the first pick in. If the suction cup gives up before the adhesive does, try using some Isopropyl alcohol to clean the back of the phone, and it should stick better. Also, don't apply heat to the screen, just in case that wasn't clear.
Evan Newman -
Used a corn bag (usually used for sore muscles) and incased the phone. It was hot to the touch, but it did the trick. Also needed a knife to have a small enough edge to start prying the back off and get the adhesive to finally pop.
Laurie Hallberg -
Don't Forget Step 0! Turn the phone Off and remove the SIM card tray. just to be safe, I'd recommend making a full backup of your phone onto a micro SD card in case the worst should happen. also, make sure anyone who needs to contact you knows you aren't currently available at your phone number.
Evan Newman -