Einleitung
Wenn Ladebuchse oder Mikrofon kaputt sind, nutze diese Anleitung, um die Komponente auszubauen und zu wechseln. Die Ladebuchse ist mit einem Flachbandkabel zum Mikrofon verbunden. Wenn eines defekt ist, muss die ganze Einheit ausgetauscht werden.
Werkzeuge
-
-
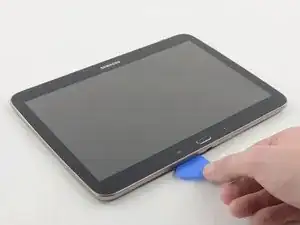
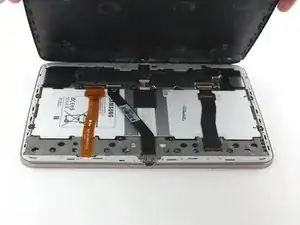
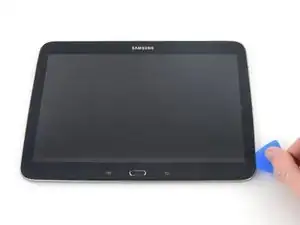
Setze ein Plektrum in den Spalt zwischen Gehäuse und Plastikrahmen.
-
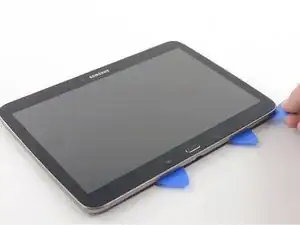
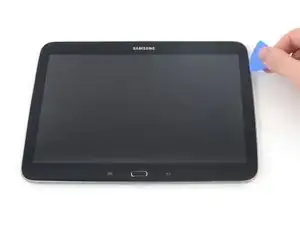
Schiebe das Plektrum um die Kante des Gehäuses bis die Rasten, die das Display am Gehäuse festhalten gelöst sind.
-
Mache solange weiter, bis alle Rasten gelöst sind.
-
-
-
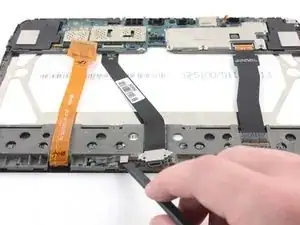
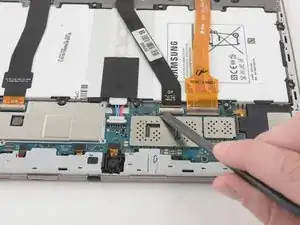
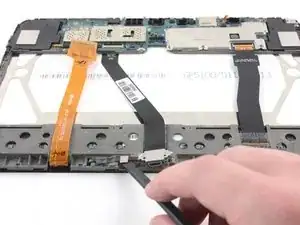
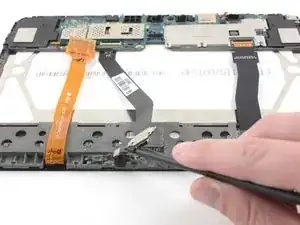
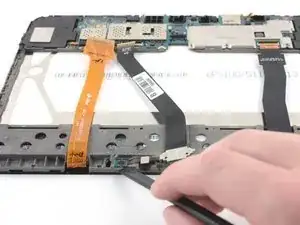
Klappe den schwarzen Sicherungsbügel am ZIF Verbinder des Flachbandkabels zur Ladebuchse mit dem flachen Ende des Spudgers hoch.
-
Entferne das Kabel vorsichtig aus dem Sockel.
-
-
-
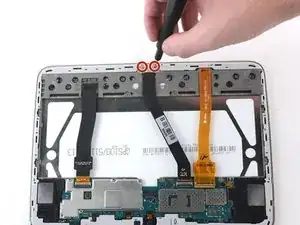
Benutze einen #000 Kreuzschlitzschraubendreher, um die beiden 3 mm Schrauben an der Metallplatte zu entfernen, die die Ladebuchse am Displayrahmen festhalten.
-
-
-
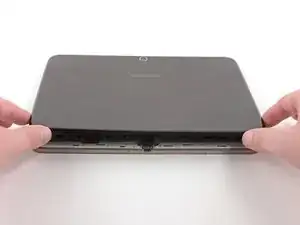
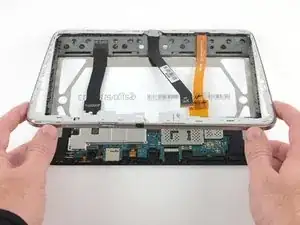
Setze ein Plektrum zwischen Plastikrahmen und Bildschirm.
-
Schiebe das Plektrum rings um den Bildschirm.
-
-
-
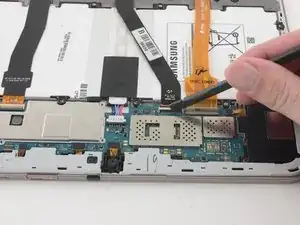
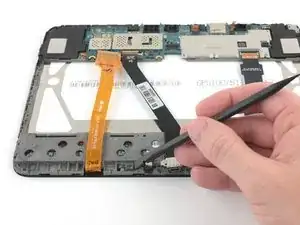
Hebele vorsichtig den Verbinder vom Flachbandkabel des Mikrofons mit dem flachen Ende des Spudgers ab.
-
-
-
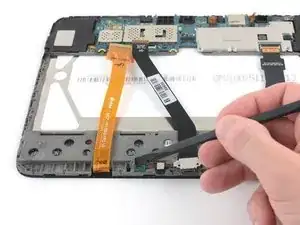
Hebele die Verbindungsplatte mit dem flachen Ende des Spudgers aus dem Displayrahmen.
-
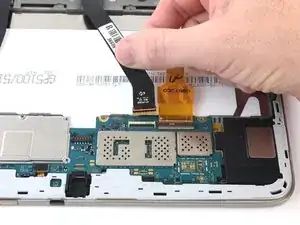
Entferne das Kabel zur Ladebuchse.
-
Um dein Gerät wieder zusammen zu setzen folge den Schritten in umgekehrter Reihenfolge.
9 Kommentare
I'm currently working on this tablet. My friends' kids screwed up the USB port and has part of the connector inside the port missing. Somebody had pried the back of the case open breaking off all of the tabs that are melted down to secure the frame of the case better. There are tabs left that snap the frame to the back but there are places along the edge that show a gap and will now have to be glued to eliminate the gaps. So only pry the case/frame off along the edge of the screen using an iFixit opening tool.
I just received the new replacement USB port today 3/22/17. I bought it on eBay for $3.29 including shipping and took a week to get it. Everything worked out fine. The tablet receives power and charges now. I ended up using hot glue to secure the case frame to the rear of the case. When snapping the screen back on to case frame you may have to squeeze the case and the screen very hard and at the same time force the frame to snap into place.
I completely agree with opening at step 5, went back together beautifully and much easier!! :-)

I would not remove the back of the case. There are around 14 tabs inside that are melted down to secure the frame. Those melted tabs will break off and the back won't be as secure and the edge of the back will have have a visible gap showing. I would remove the case from the screen side as in step 5 of this tear down and use a iFixit opening tool. Use the tool with handle towards the screen to pry the frame away. Start on one long edge and slide the tool along the gap and at same time slightly pry the case away. Then separate a short edge. The corner between the 2 open gaps should just pop away with some prying. Do the same with other 2 edges and corner.
Gary L. Turner -
Kommentar von Gary L. Turner bestätigt. Es geht eindeutig besser das Opening Tool in den Spalt an der Oberseite einzuführen, zwischen dem umlaufenden silberfarbenen Rahmen und dem Display Glas. Die im Foto oben unter Schrott 1 gezeigte Methode ist NICHT zerstörungsfrei. Das (weisse) Back cover und der umlaufende silberfarbene Rahmen sind zwei separate Kunststoff-Bauteile, die an ca. einem Dutzend Punkten miteinander verschweisst sind, und zwar so eng dass kein Fingernagel dazwischen passt. Diese Schweisspunkte zerbrechen bei der im Bild oben gezeigten Methode.
Ralf Hanisch -
sry, “Schritt 1” muss es natürlich heissen, nicht “Schrott 1” ;-)
Ralf Hanisch -
Use the iFixIt Opener. You’ll have to find a large opening, seems like near a piece of tech is easier. Once you get a firm and deep opening, keep working it down.
Shane -
Bitte aufpassen: Dies ist NICHT die Anleitung, um den Akku beim TAB S3 zu ersetzen, dies wird an anderer Stelle beschrieben, leider auf Englisch.
Aber beim S-3 ist es viel schwieriger, da beim S-3 auch das Frontglas entfernt werden muß…..
klement, herbert -
Hier auf Deutsch: https://de.ifixit.com/Anleitung/Samsung+...
VauWeh -