Einleitung

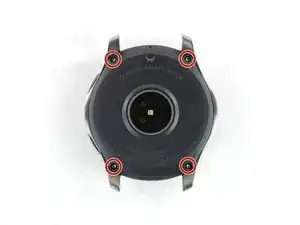
Benutze diese Anleitung, um das Motherboard in einer Samsung Galaxy Watch zu ersetzen.

  1. oX1ZMHLHIYw4KRAU
    • Entferne die vier Tri-Point #00 Schrauben (4,2 mm Länge) auf der Rückseite der Uhr.

    I can't get them to budge

    Irene -

    Same here, its impossible to get the screws off. They’re almost stripped now too.

    Prabhat -

    Sorry to hear that. Here are some tips on how to get those screws off hopefully: Wie man eine rundgedrehte Schraube entfernt

    Tobias Isakeit -

    Just started working on watch. Can not get the screws out. I purchased the recommended tools. Screws won't budge. I have not stripped them yet. How do I get them to loosen up?

    joyce c -

    Same here. I did buy your Electronics repair Bundle. The Y000 is too pointy, we need a flatter tool

    Robertob67 -

    Hi Ladies & Gentleman, please try as follows:

    Use a spray can of "WD 40" with a spray pipe/tube but DO NOT spray into the screw holes. Just spray shortly on a piece of paper, a drop of WD40 will remain at the end of the spray pipe. This drop I put into the screw hole position. Do this for each screw hole and leave the stuff approx. 10 minutes alone. Afterwards use the screw driver as normal to turn the screws out.

    *** After the drop is placed into the hole do not wait too long as WD40 is crawling into "even not existing gaps"

    *** just use a small drop of WD40.

    *** I intend for using 4 new screws as the head (Tri-Pont profile) seems worn out. But if I get new screws for sure I will go for a TORX profile because its the best as you don't need to apply axial force on screw driver.

    Very best regards from Harald (a German machine building engineer)

    Harald -

    Harald again to Robertob67:

    It is NOT the Tool Y000 but the Y00

    Best regards

    Harald

    Harald -

  2. lPBjwQQaeOfSOTcg
    lPBjwQQaeOfSOTcg
    nPHfqyJPI3ouvl2h
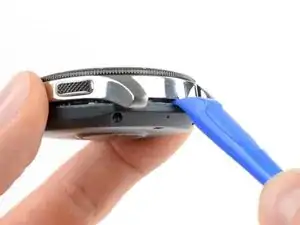
    • Setze ein Opening Tool zwischen die Rückabdeckung und das Metallgehäuse der Uhr.

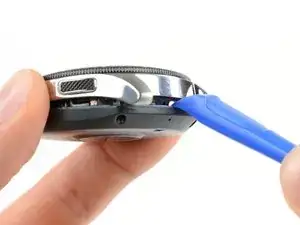
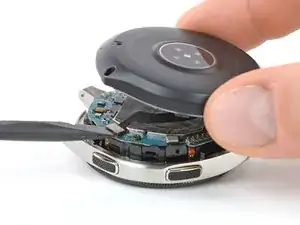
    • Heble vorsichtig die Rückabdeckung aus Plastik auf.

    • Entferne die Rückabdeckung noch nicht. Darunter befindet sich ein Flachbandkabel, das zum Kernstück im Inneren führt.

    You may need to use a small screwdriver or letter opener to pry the case apart. I found with two different spudgers I could not get it to budge.

    Tim Durstenfeld -

    How do I Secure the sealing, and wish material du you use?

    Ejner Bøndergaard -

    I managed to get the back cover to open with an unused pry tool on one side, however, to fully remove it I needed to use 2 iFixit opening picks from my toolkit as the one side wouldn't open with the pry tool.

    Austin Newman -

  3. UMxKpnXkjwF5GcQS
    UMxKpnXkjwF5GcQS
    2NKWLQdU53qmrDhn
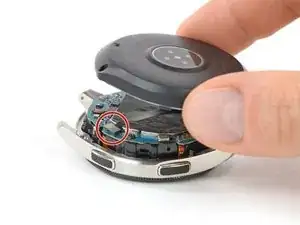
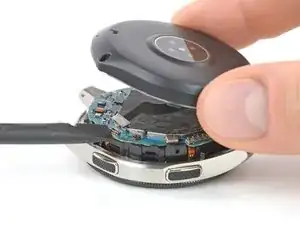
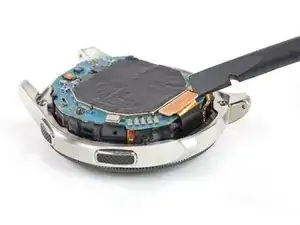
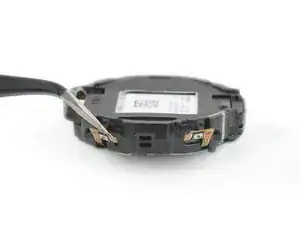
    • Lege die Uhr hin und hebe die Rückabdeckung an, um an den Sensor-Stecker auf dem Motherboard zu gelangen.

  4. YYnqRGUNNCiHtx5A
    YYnqRGUNNCiHtx5A
    f12LRmjkvJO1nq4D
    • Trenne das Sensor-Flachbandkabel mit einem Spudger vom Motherboard ab.

    My 2019 Gear Sport has no flex cable it used a post where the flex cable is. This plugs into the mother board.

    Much better for disassembly.

    William Barron -

  5. xiguJEsYbbLXMC1y
    xiguJEsYbbLXMC1y
    JJ4DvvUUBsjgbQFg
    GXeRPa2QyJplrLfW
    • Entferne die Rückabdeckung.

    • Achte beim Verschließen der Uhr darauf, dass die Gummidichtung unversehrt ist oder ersetze sie gegebenenfalls durch eine neue.

    Has anyone seen a listing for the gasket?

    DaChew -

    anyone where can find the rubber gasket?

    Melvyn Chang -

    is the gasket the Adhesive? If not, what adhesive suggested and how do you apply it?

    batato kr -

    No, the gasket is not the adhesive. As adhesive you can use this under the battery.

    Tobias Isakeit -

    woher bekomme ich eine neue gummidichtung?

    Anja Müller-Dreßler -

    Hat jemand eine Quelle für die Dichtung der Rückabdeckung (rote Dichtung, 3. Bild Schritt 5). Hat jemand versucht die erfolgreich selber herzustellen?

    Helge Korz -

    Falls jemand die Gummidichtung im Netz findet, gerne hier posten. Wir konnten bisher noch keine finden. Selbst rounded.com hat es nicht, und die haben recht viel für (Samsung) Smartwatches.

    Tobias Isakeit -

    Same question : has anybody found a solution for the rubber gasket ? I am not confident at all in the waterproofing of the watch now ...

    Bruno F -

  6. DsLIjXTpV6SEOLfq
    DsLIjXTpV6SEOLfq
    dJjbQPTfgs1tIWMe
    • Benutze einen Spudger, um das Display-Flachbandkabel vom Motherboard zu trennen.

    My display flex cable is cut … is it possible to replace only cable without changing display… if yes please leave a link to buy it

    Akshat Dev -

  7. fcqqMSnq6jErw2dl
    fcqqMSnq6jErw2dl
    sQYyUALKDHUIONNR
    • Hebe das Kernstück aus dem Gehäuse.

    • Der Plastikrahmen des Kernstücks sitzt recht fest im Gehäuse.

    • Führe das Display-Flachbandkabel vorsichtig durch die Lücke im Plastikrahmen des Kernstücks.

    Es sind an den Ecken des Kernstücks ein paar "Plastikdreiecke" mit dem man es mit einem Spudger leichter raushebeln kann!

    Marco Marinkovic -

    Thanks @Marco Marinkovic. There are a couple holes or points, on which to leverage in order to free and lift the core unit. The core unit won't move otherwise as it is anchored there

    Robertob67 -

  8. eH156QnMpc3Rj5Nm
    eH156QnMpc3Rj5Nm
    2tMbYcmIAjk1fAqX
    • Trenne das Kabel des Hall-Sensors mit einem Spudger ab.

  9. WQR2M61RsVDR4uJy
    WQR2M61RsVDR4uJy
    CQFHFreOTaGVMrah
    6LNfZEXhZyGsmaSt
    • Löse die beiden Tasten-Kabel vorsichtig mit einer Pinzette vom Plastikrahmen ab.

  10. fpPT5V1FjJDLAERE
    • Entferne die einzelne Kreuzschlitzschraube #00 (3,4 mm Länge).

  11. GkeT53uBPpCDCoxi
    GkeT53uBPpCDCoxi
    nwJL1vItmEwNSeJr
    LjUXCYMYVXAaSB5H
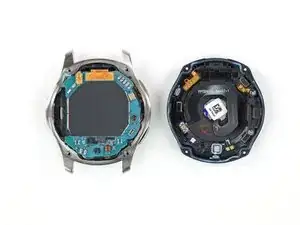
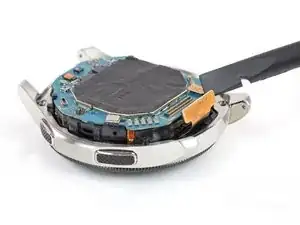
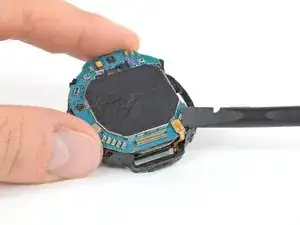
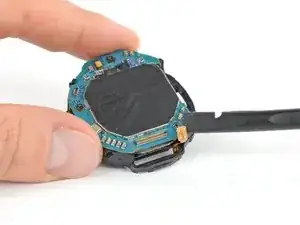
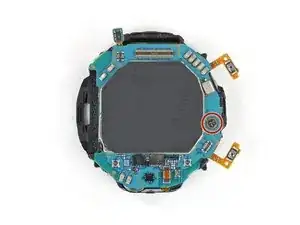
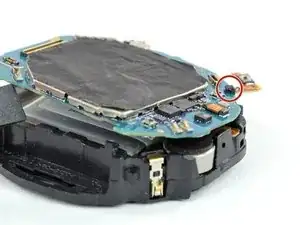
    • Setze einen Spudger in die kleine Lücke unter dem Motherboard, wo sich der Ausschnitt im Plastikrahmen befindet.

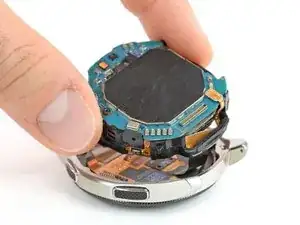
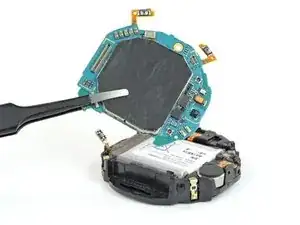
    • Hebe das Motherboard an, indem du den Spudger drehst.

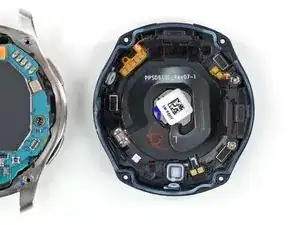
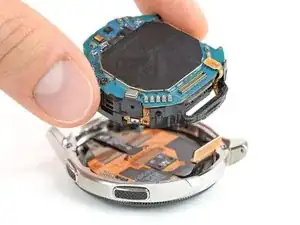
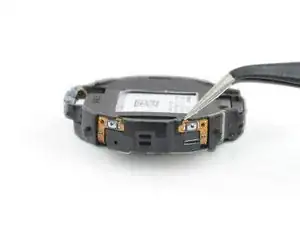
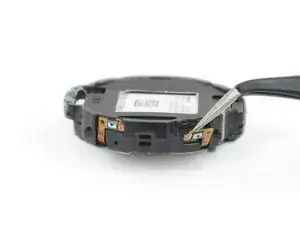
    • Schiebe das Motherboard aus der Kunststofflasche heraus.

    There is a plastic clip holding down the motherboard in the corner opposite to where you’re prying. After lifting slightly, the motherboard should be slid out from underneath that clip to avoid damaging it.

    Mark Ingram -

    Thanks for the hint. Added an additional image and bullet to point that out.

    Tobias Isakeit -

    Also another tab opposite that needs just a LITTLE pressure to unclip to allow you to slide out from other side

    Mike -

  12. fJh3pESPYPd6pgRk
    • Entferne das Motherboard.

    Where can I get a motherboard?

    lorne serpa -

Abschluss

Schalte dein Gerät wenn möglich ein und teste deine Reparatur bevor du das Gerät wieder verschließt.

Um dein Gerät wieder zusammenzubauen, folge den Schritten dieser Anleitung in umgekehrter Reihenfolge.

Lief die Reparatur nicht wie geplant? Versuche es mit einer grundlegenden Fehlersuche oder stelle deine Frage in unserem Antwortenforum.

Entsorge deinen Elektromüll fachgerecht.

Tobias Isakeit

Mitglied seit: 31/03/14

108055 Reputation

7 Kommentare

Anyone know where to purchase a Galaxy Watch mother board?

lorne serpa -

What is the part number, or where can you get the motherboard?

Nick Henthorn -

Where can the motherboard be purchased from for Galaxy Watch ?

Mohammed Aamir -

I got a motherboard on ebay. Including import duties it was something like 90$. Shipped to Denmark.

Definitely cheaper than repair shop and absolutely more fun! :)

Agris Jurjans -

Hello,

Do you know if switching a motherboard from a GW46 Bluetooth only (R800) to a GW46 LTE (R805) is a straight swap or additional parts are needed?

As my R800 sensors are dead and i need to replace the motherboard and the back cover anyway.

Thanks

BRazvy -

The one in this guide is a R805F. Unfortunately I can’t say for sure if it will fit. the Plastics on the core assembly might differ. But maybe it’s enough to compare parts visually.

Tobias Isakeit -

Worked perfectly. Issues that I encountered:

1. Watch back cover was difficult to separate from metal half. I had to get it started with fine, flat, metal tool.

2. Hall sensor cable memory biased to go under motherboard when installing new board (keep it on top)

3. Keep an eye on new button cables when installing the core into the housing (they have a tendency to move out of position.

TomF -