Einleitung

If you need to replace your GameDAC secondary control button, there are a couple of wire connections one needs to be careful for when opening the GameDAC. Follow this guide to safely access and replace the button from the circuit board.

  1. Ow1mgS6UmIklWbmf
    Ow1mgS6UmIklWbmf
    DkiQUOQAXIDcKLXZ
    YLIsaOZbqu1DhtYx
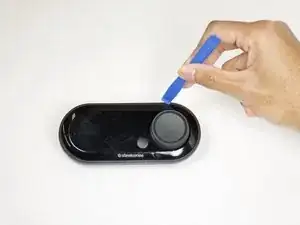
    • Remove the plastic cover using the iFixit opening tool to pry the cover open.

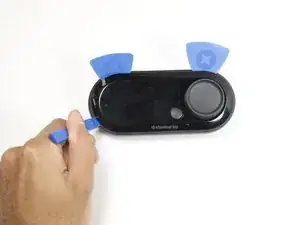
    • Insert opening picks to keep the cover open as you work your way around the GameDAC.

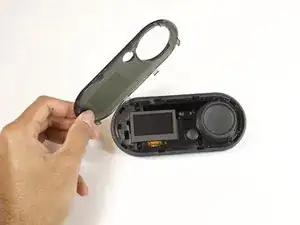
    • Pop the cover off.

  2. UDKnIREeRFVU1tQE
    UDKnIREeRFVU1tQE
    WjODuRbwy2KHSDEP
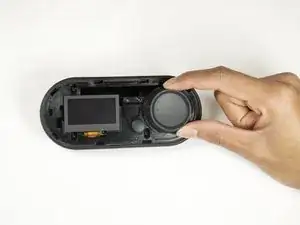
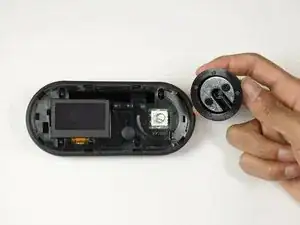
    • Remove the control wheel from the GameDAC by pulling on the knob.

  3. 5QuJ1QKYbm2OQjAK
    5QuJ1QKYbm2OQjAK
    YUJHDZRLVHFNZyXG
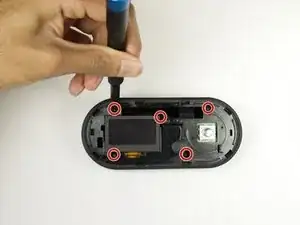
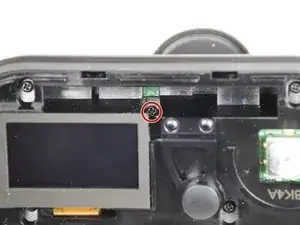
    • Remove the five 6mm screws using the Phillips #0 driver head.

    • There is one screw hidden on the upper right-hand side of the display.

  4. a4yvqLwBTGMxbEMN
    a4yvqLwBTGMxbEMN
    dCSEXVU1I11aGvxh
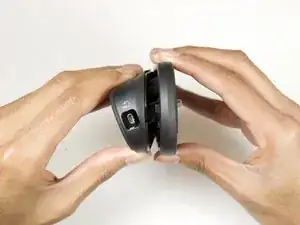
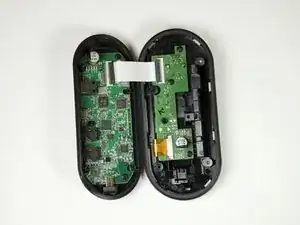
    • Hold the sides of the GameDAC and pull apart.

    • Don't pull the two sides apart quickly or forcefully to avoid tearing the wire connection between the two boards.

  5. lTbUHdlXPfpjBw61
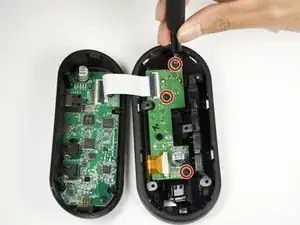
    • Remove the three 4mm screws from the circuit board using the Phillips #0 driver head.

  6. aTvvJLGNeRp3DEJs
    aTvvJLGNeRp3DEJs
    p53eQK2vumFokp2U
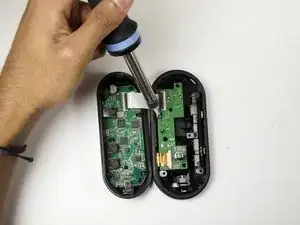
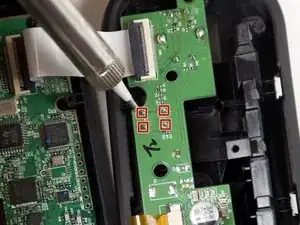
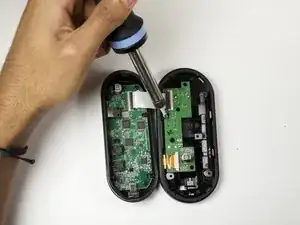
    • Desolder the four button pins from the board to remove the button.

    • For help desoldering connections, follow this useful guide on Wie man Lötverbindungen herstellt und entlötet.

    • Use caution when soldering. The heated tip may cause damage to the board or burn you.

Abschluss

To reassemble your device, follow these instructions in reverse order.
Kyle Chang

Mitglied seit: 24/01/19

1124 Reputation

0 Kommentare