Einleitung

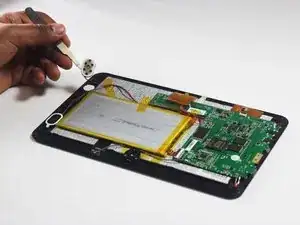
In this guide you will remove the back cover of the device and locate the two speakers inside. You will then remove the speakers by unsoldering them from motherboard and then replace them.

Because this task requires the use of a soldering iron, prior experience with soldering/desoldering will be beneficial.

  1. maUWjIAdwvsjZ6By
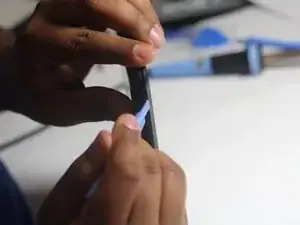
    • Wedge the plastic opening tool between the back cover of the device and the front panel.

    • You will hear a snapping sound as the cover is separated from the body of the device.

  2. lhFeLCWfEiSxICV5
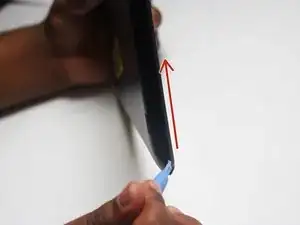
    • Slide the opening tool along the seam between the front panel and the back cover to un-clip the remaining connections around the device.

    • Again, you will hear a snapping sound as the cover is separated from the body of the device.

  3. QIUocuIlYthYw62V
    QIUocuIlYthYw62V
    ixu1Drea45QeXCHY
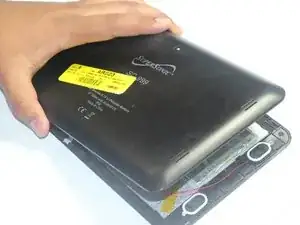
    • Lift the back cover from the body of the device to expose the internal components.

  4. 3kdrevvXeih5RjZM
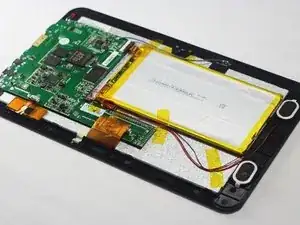
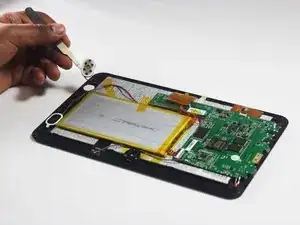
    • Remove the Speakers

    • Use the tweezers to remove the speakers from their compartments.

    Should you have two photos? Is it clear where you removed the speaker from?

    Should you note here that the speaker has wires that will also need to be removed?

    Do you ever mention the tape?

    Lisa Shaver -

  5. 2mNLUOQfeb6lRBpp
    2mNLUOQfeb6lRBpp
    YpSeBxMVtvvPM1dS
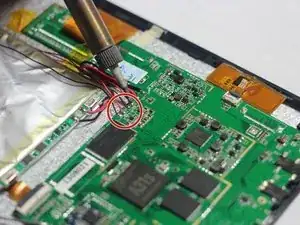
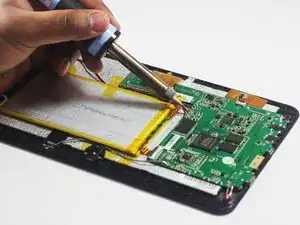
    • Desolder the 4 Speaker Wires

    • These wires connect the speakers to the motherboard. They are the thinnest wires.

    • If you're unfamiliar with soldering or desoldering check out this guide.

    • Be sure to wear protective eye wear. Also, keep in mind that the soldering iron will become extremely hot.

    Again, you are telling what to do, not how to do it.

    Lisa Shaver -

Abschluss

To reassemble your device, follow these instructions in reverse order.
Johncy George

Mitglied seit: 26/03/15

101 Reputation

0 Kommentare