Einleitung
Bitte beachte, dass Microsoft im Laufe eines Produktzyklus die einzelnen Komponenten ändert. Deshalb können die einzelnen Komponenten im Inneren des Netzteiles anders aussehen, als die, die auf den Fotos zu sehen sind.
Ich habe das Netzteil meiner Xbox One auseinander genommen, um es zu säubern. Auf meiner Xbox one war die "Instant On" Funktion ab Tag eins bis Anfang dieses Jahres aktiviert. Wenn diese Funktion aktiviert ist, läuft der Lüfter dauerhaft. Mit der "Instant On" Funktion benötigt die Xbox One ~19W, wenn sie aus ist und nur etwa 4W, wenn sie im Energiesparmodus ist.
Die Menge an Schmutz im Inneren des Netzteiles hängt von verschiedenen Faktoren ab, unter anderem dem eingestellten Energiemodus.
Das letzte Bild in dieser Anleitung zeigt, wie viel Schmutz sich im Inneren von Elektrogeräten sammeln kann und wie wichtig es ist, Elektrogeräte zu reinigen.
-
-
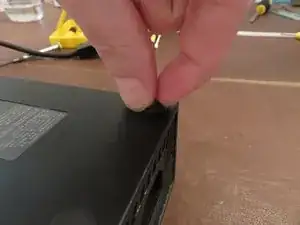
Anders als bei dem Netzteil der Xbox 360 benötigt man kein Werkzeug, um die Gummifüße zu entfernen. Gehe einfach mit deinem Fingernagel zwischen Gummifuß und Gehäuse und ziehe sie nach oben.
-
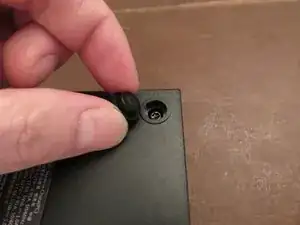
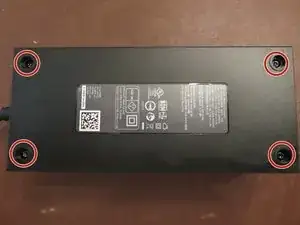
Entferne die vier T10 Sicherheits-Torx Schrauben unter den Gummifüßen.
-
-
-
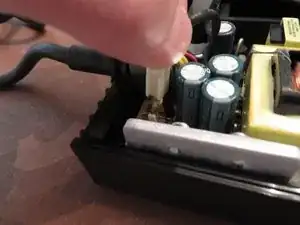
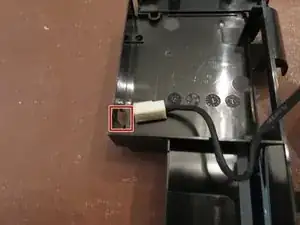
Nimm das spitze Ende eines Plastikspudgers, oder deine Finger, um vorsichtig die Lasche wegzuziehen, die das Netzkabel des Lüfters befestigt.
-
Ziehe das Kabel vorsichtig nach oben, von der Platine weg.
-
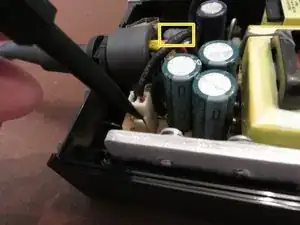
In dem gelben Rechteck in der oberen linken Ecke, ist eine graue klebrige Substanz auf einem Kondensator zu sehen. Das Netzkabel des Lüfters ist darin hineingedrückt und klebt so fest. Löse das Kabel vorsichtig ab.
-
-
-
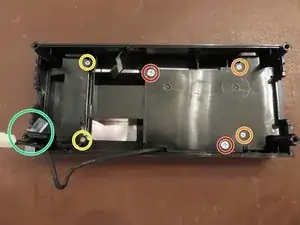
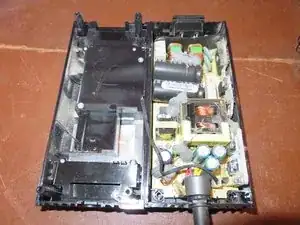
Entferne die beiden größeren Schrauben mit einem Kreuzschlitzschraubendreher.
-
Die beiden kleineren Schrauben (orange) sind sehr fest angezogen. Ich empfehle einen #1 Kreuzschlitzschraubendreher, um sie zu lösen. Wenn die Köpfe der Schrauben kaputt gehen sollten, kann ein Gummiband zwischen Schraubenkopf und Schraubendreher helfen, etwas mehr Halt zu bekommen.
-
Wenn diese Schrauben entfernt sind, greife die schwarze Plastikrahmen an der linken Seite und nimm ihn aus dem Oberteil des Netzteiles heraus und drehe ihn um.
-
Anders als bei beim Xbox 360 Netzteil, muss der Lichtdiffusor nicht herausgenommen werden. Wenn du ihn jedoch trotzdem herausnehmen möchtest, kannst du ihn einfach mit den Fingern herausnehmen.
-
Diese Schrauben haben keinen Nutzen. Bei meinem Modell war unter diesen Schrauben nichts. Es sei denn du hast eine andere Variante, ist es unnötig diese Schrauben zu entfernen.
-
-
-
Hebe den Lüfter an der gegenüberliegenden Seite des Kabels an.
-
Ziehe das Kabel durch die Öffnung im Gehäuse und lege den Lüfter beiseite.
-
-
-
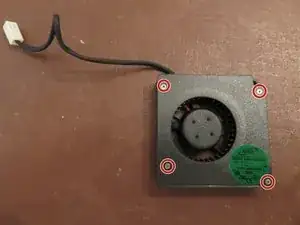
Entferne die vier Kreuzschlitzschrauben #0 und nimm das Oberteil des Lüftergehäuses ab.
-
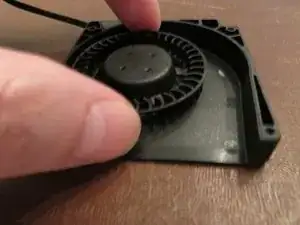
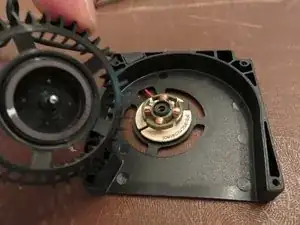
Fasse den Lüfter vorsichtig an und hebe ihn heraus..
-
-
-
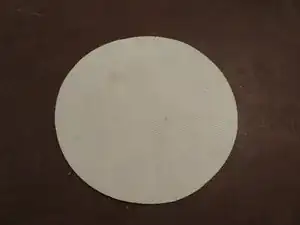
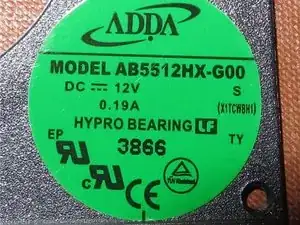
Hier ist der Sticker, der auf dem Lüfter klebt, falls jemand diesen zum Vergleich benötigt.
-
-
-
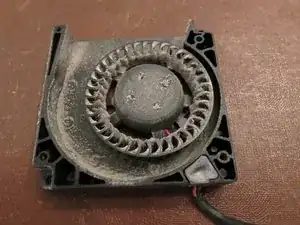
Innerhalb von drei Jahren nach dem Kauf (22.11.2013) und heute (12.8.2016) hat sich jede Menge Staub und Dreck im Inneren des Netzteiles angesammelt.
-
Nach einem Jahr läuft die Xbox/PS Herstellergarantie aus, wenn man keine erweiterte Garantie beim Kauf erworben hat und nach zwei Jahren Läuft auch die Gesetzliche Gewährleistung aus. Reinige deine Spielkonsolen also bevor sie durch Schmutz und Staub kaputt gehen!
-


41 Kommentare
Would this help with the orange light I am getting from the Xbox one power Brick?
Me too having the same question please help!!
kingasd -
Hi! I’ve had many people come to me and ask the same question, if your Xbox One makes a sound when you try to activate it, but there is no light on the Xbox and the power brick is holding a solid orange light, it is most likely the end of your power bricks life. Unfortunately, Microsoft and any other gaming store/supplier stock these anymore, so your last resort would be eBay. 2nd option is if your Xbox doesn’t turn on or make a sound, and your power brick turns white, it’s the console. Long story short, in your situation I would say you might need to invest in a new power brick.
It is your power brick have too get a new one or change the compasitors there's 3 of them I just had too do it
What specifically is the problem angelorestrepo and kingasd? The orange light is an indicator that your system is in energy saving mode. What happens when you power up the unit?
http://support.xbox.com/en-US/xbox-one/c...
Mind you at this point I have no idea what's really going on with either of your systems but it's possible this may be a really simple fix. Check this link and try these simple solutions if you haven't already.
Falls das nicht gelingt mit den Finger-Nägel: Einfach Holzschraube oben vorsichtig eindrehen, Gummifuss löst sich ab bzw. kann an der Schraube herausgezogen werden. Das “Loch” der Schraube sieht man nachher so gut wie nicht mehr.
Flagsoft -
TIP : If you have problems remove the rubbers: Just use a wood screw and gently screw it in the center until the rubber lifts up !
Flagsoft -
My t10 isn't working nothing is its just scrapping away at the screws
Angel Freeny -
Is it a T10 or T10 security bit? Security bit has a hole in the middle
Navy Vet 2015 -
Thank you so much for posting the tool needed for the screws on the bottom !!
kklovesmusic -
I'm here to serve :) glad you got it
Navy Vet 2015 -
I don’t have any screws, it’s just a piece of plastic that I can turn with tweezers
canadian_birdman -
Thanks for the suggestion about using a wood screw —worked like a charm. Just wish I had seen this before I tore one of the feet up trying to get it out.
errolsayre -
Well, All my boots tore apart with a gentle pull. So whgat do you do when you have a rubber circle with a square bit of plastic stuck there now?
Adam Slater -
Hi I’ve been researching this a bit online and many people are saying it’s extremely dangerous, however I need to at least try to fix my power supply as I have no other way to watch tv or play games. If I have a limited knowledge of electrical components would you still suggest undertaking this repair?
Jake -
The wood screw suggestion needs adding to the instructions - awesome suggestion!
Josh Beckett -
Amendment: The wood screw suggestion does not work for all models (I have just broken a couple of rubber boots removing them) - this was because they had a hard plastic center that prevented me screwing in a wood screw to aid removal and forcing me to try and pull them out by hand.
Josh Beckett -
When you peel off the rubber underneath theres like plastic holders above the screws. You have to take the holders off with a pair of needle-nose pliers, then you have the Torx TR10 screws underneath. And yeah it was hard to get the rubber off, I used the spudgers fine tip to remove the rubber.
Americo DeLuca -
CONSEIL: Si vous avez des problèmes, retirez les caoutchoucs: utilisez simplement une vis à bois et vissez-la doucement au centre jusqu'à ce que le caoutchouc se soulève!
moi_alexis01 -