Einleitung

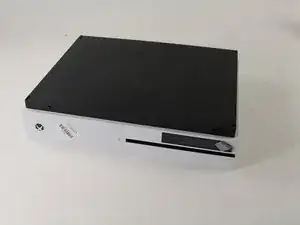
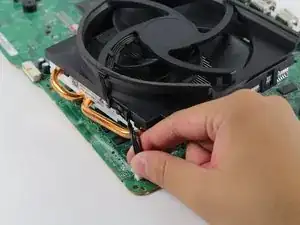
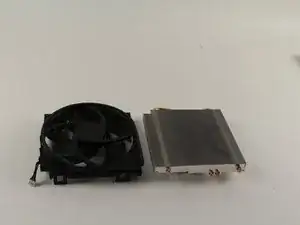
Kühlkörper und Lüfter sind zwar verschiedene Bauteile, ihr Ausbau ist aber gleichartig, da sie zusammen auf der Hauptplatine angebracht sind.

  1. AQtIBB1ZGqHTvNg4
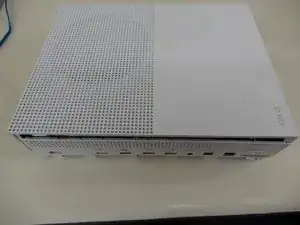
    • Lege die Xbox mit der Bodenseite nach oben.

  2. cI432T5plYCpwsEg
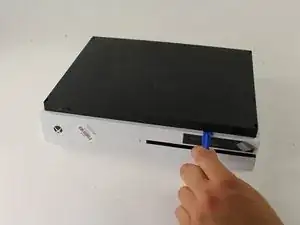
    • Fange auf der Rückseite des Gehäuses an, wo das Garantiesiegel klebt. Setze ein Plastiköffnungswerkzeug in den Spalt zwischen Boden und der Oberseite. Suche die Rasten, welche die Teile zusammenhalten.

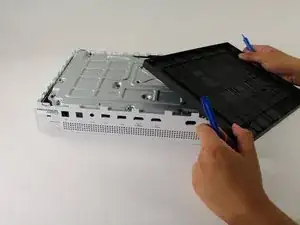
    • Löse die Rasten mit dem Werkzeug. Am einfachsten geht es, wenn du das schwarze Gehäuse weg vom Boden hebelst.

    • Beim Öffnen hörst du klickende Geräusche. Es ist schon recht schwer den Boden abzunehmen.

    • Die Rasten können sogar abbrechen, sei vorsichtig.

    • Es ist empfehlenswert, auf der Rückseite zu beginnen, dort, wo das Garantiesiegel klebt. Löse die Clips auf der Rückseite. Arbeite dich dann an beiden Seiten nach vorne. Wenn die drei Seiten gelöst sind, fange auf der Vorderseite gegenüber des Sync-Buttons an. Sei vorsichtig und nimm dir Zeit, damit sich alles ohne Schäden löst.

    Be careful not to damage the pairing button on this part

    David -

    Important!!

    You've to start from the back corner where is the information label, because there is a main clip behind a warranty sticker

    Cristian Ramirez -

    They should add this to the guide! I didnt know that, and did some minor damage to the bottom piece where that main clip is.

    I dont mind because it's my own Xbox, but what if it belonged to a customer?

    Charles Jackson -

    They should add this to the guide! I didnt know that, and did some minor damage to the bottom piece where that main clip is.

    I dont mind because it's my own Xbox, but what if it belonged to a customer?

    💯% same opinion!

    profnussecke42o -

    This was hard! I tried using plastic pry tools, but they did not work. A metal tool did, but make sure to watch a video or two, to see what you actually are dealing with. After the videos it went quite smoothly.

    Peterdk -

    I legitimately cannot open the case where the warranty sticker is, ive tried everything, im resorting to a fork to try and open this

    Sohail ツShah -

  3. DGFtVxEdoZKRdLMd
    • Wenn alle Rasten frei sind kannst du den Boden vom Gehäuse lösen.

  4. GeIOPswgPOYsuGeJ
    GeIOPswgPOYsuGeJ
    uITOYPJDbxUgf4Lc
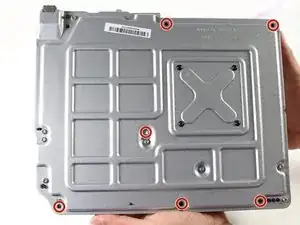
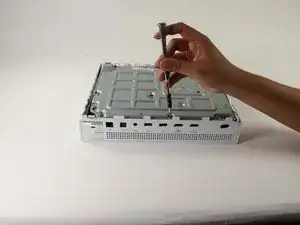
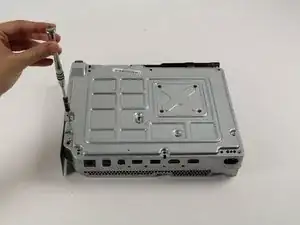
    • Drehe die sechs grünen 50 mm langen Torx T10 Schrauben vom Metallgehäuse heraus. Sie sind mit F1 bis F6 markiert.

  5. 3AbSAfsoTxUrMeTi
    3AbSAfsoTxUrMeTi
    wudY36aHJeyT6WjV
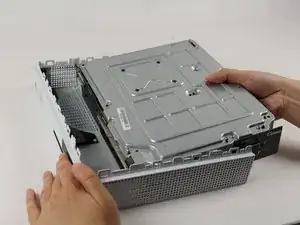
    • Trenne vorsichtig mit der geeigneten Methode das innere Gehäuse vom weißen Außengehäuse.

    • Drücke die weißen Seitenteile hinten nach außen, so dass sie sich vom I/O-Panel ablösen.

    Essential tip: be sure to slide the metal housing backward, away from the from of the case as pictured above, rather than upward. If not, you can easily break off the teeny momentary switches on the IR blaster board!

    Mark Ross -

    “appropriate method is not descriptive like Mr. Ross’s comment. The original poster should edit the description to ensure people do in fact remove the box from the case appropriately. I would also add arrows to the picture.

    Ryan A -

    ____________⬆️

    ↖️Yes! I see it the same way!↗️

    ⬅️Arrows are always a good thing!➡️

    ↙️Can't do anything wrong with them! ↘️

    ____________⬇️

    😅😅

    profnussecke42o -

  6. EFLSsRhhXsAEZnYh
    EFLSsRhhXsAEZnYh
    OjVWJsD26pdrus24
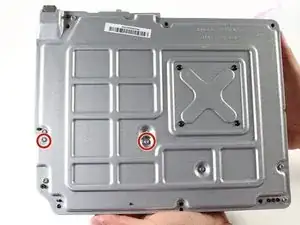
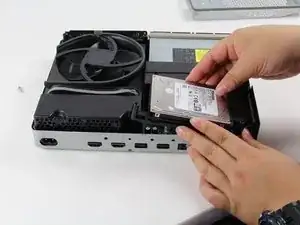
    • Drehe die Konsole herum . Entferne die beiden 10 mm langen Torx T10 Schrauben, markiert C3 und C4, auf der Rückseite der XBox One S, dann kannst du die Festplatte austauschen.

    • Jetzt kann das Kunststoffgehäuse um die Festplatte von der restlichen Konsole abgelöst werden.

    Some of my silver were gold screws, so just letting people know to look out for that!

    jovialkitten -

    The Torx screw circled on the left is actually C5

    Jaryn Wickman -

    I found the same. On my Xbox One S, it's C3 and C5 that hold in the hard drive caddy. C4 holds in the optical disk caddy.

    jamesr -

  7. X2IJJg3NqtsnAcbY
    X2IJJg3NqtsnAcbY
    NAHJXCj1SgvQNjOx
    3fEHBmUuTGRL3omb
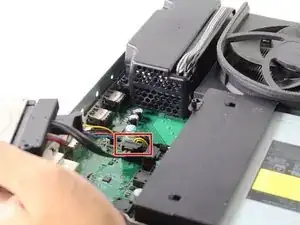
    • Löse vorsichtig die beiden Plastikstecker der Festplattenkabel auf der Hauptplatine.

    Do not disconnect the connector in the second image! There are tiny prongs that bend easily and if bent just a tad bit they will break off. I had first hand experience with this and I ended up breaking my Xbox because I could not put that cable back on.

    [deleted] -

    Do not remove the cable!!!! You can change while the cables are plugged. It took 2 hours trying to put mm precisely all the little pins because of the removal of the cables.

    Please update the post, I could easily end up as the Aaron, breaking the XBOX completly.

    Botond Kopacz -

    Yes, this has also happened to me the connectors had broken and the pins bent and snapped off.

    Samuel Garbutt -

  8. VxZkFMZbQAxM2dKL
    • Entferne die mit "C5" markierte silberfarbene 10 mm Torx T10 Schraube.

    The image shows screw 'C4' witch is the correct screw. 'C5' is for the HDD.

    GoJoel -

  9. IL5gf22gGXMcJsTw
    • Ziehe das Laufwerk ein wenig von der Hauptplatine weg. Löse dann die Stecker von der Hauptplatine ab.

  10. LDNGpA5mc6kvJlfK
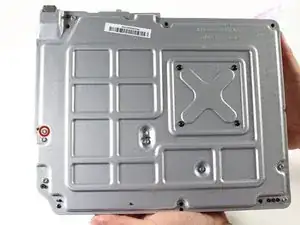
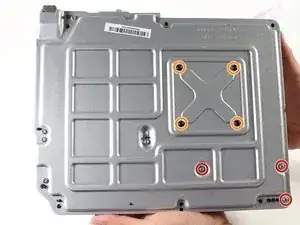
    • Zum Ausbau der Hauptplatine müssen zuerst die mit "C1", " C2", "C6" markierten silberfarbenen 10 mm Torx T10 Schrauben ausgedreht werden.

    • Entferne die vier mit "A1", " A2", "A3" und "A4" markierten schwarzen 8 mm Torx T9 Schrauben.

    The Black screws are T-8 Torx, not T-9!

    Jakub Krzyskow -

    I didnt see this before, so thankfully I was able to use T9 without stripping the screws!

    Charles Jackson -

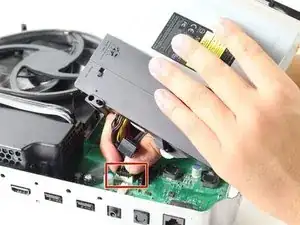
    IMPORTANT! You also need to remove the two T10 screws labeled B1 and B2 in order to remove the motherboard! I had to figure this out on my own.

    Charles Jackson -

    I hust had to remove the red ones and than i was able to lift the powersupply of the mainboard

    Dennis M -

    I had to remove B1 and B2 as well.

    Seen Bee -

  11. VYVC1GvNKhPpRiky
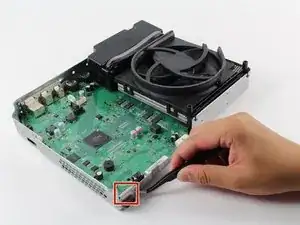
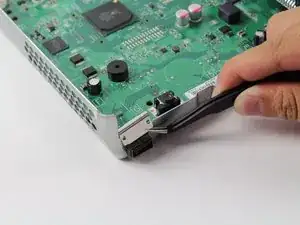
    • Finde den rechteckigen silberfarbenen Halter in der Ecke gegenüber vom Netzteil.

  12. HTtOORoftr1aaQ2q
    • Fasse den Halter mit einer Pinzette an. Ziehe den Halter nach oben weg vom Metallgehäuse. Wackle dabei, falls nötig, ein wenig vor und zurück.

    • Um den Halter abzulösen, darfst du ruhig etwas kräftig ziehen. Das Metall ist biegsam und kann später wieder aufgesteckt werden.

  13. vHit45sPMfFVLkIo
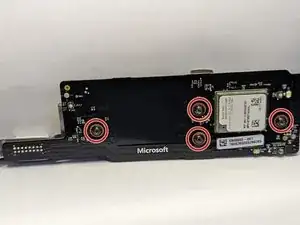
    • Entferne die vier schwarzen, mit "E1", "E2", "E3" und "E4" markierten 8 mm langen Torx T8 Schrauben.

  14. HkRCjZl1Gmbk6Z3D
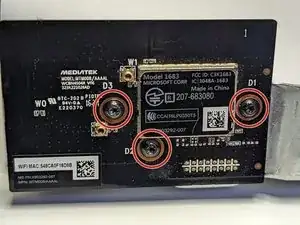
    • Entferne die drei schwarzen 8 mm langen Torx T8 Schrauben, die mit D1, D2 und D3 beschriftet ist. Entferne dann die Mediatek-Platine.

    What bit couldninuse tontake D1-3 screws off

    Amanda Zapata -

  15. agFplIWSUCuRiA26
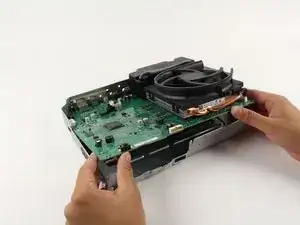
    • Hebe nun vorsichtig die Hauptplatine an den Kanten vom Metallgehäuse her an. Sie sollte leicht herauskommen.

    How do you open it?

    johnluxford07@gmail.com -

  16. sMh4CCC5IEHjNbkh
    sMh4CCC5IEHjNbkh
    B1qhnlDAD1dFkJiX
    dBoMB3VUrXfVfEuY
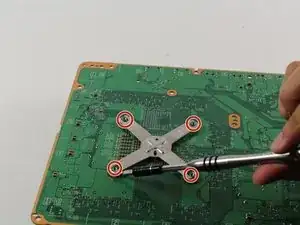
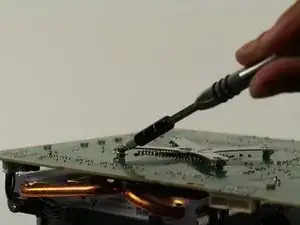
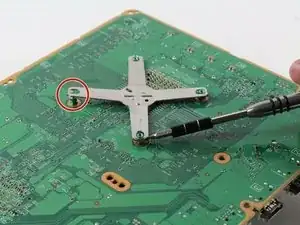
    • Drehe die Hauptplatine herum und suche den X-förmigen Metallhalter.

    • Heble die Ecken des Halters mit einem Plastiköffnungswerkzeug aus den vier kleinen grünen Rasten heraus.

    • In den Bildern wird ein Schraubendreher gezeigt. Benutze lieber ein Werkzeug aus Kunstoff um Schäden an der Hauptplatine zu vermeiden.

    Wenn der Kühlkörper gelöst wird muss die Wärmeleitpaste erneuert werden !!!

    Rich Martinek -

  17. CsqIKYvcZgHbBJSm
    CsqIKYvcZgHbBJSm
    ReBGNJ5DvHhO4OPY
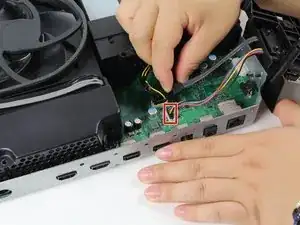
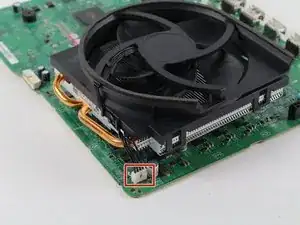
    • Löse vorsichtig den weißen Plastikstecker des Kühlkörpers/Lüfters von der Platine, indem du ihn gerade nach oben ziehst.

    You don’t have to take the heatsink off the motherboard to take the fan off if that’s what you’re after, just take a flathead and lift the clips and that should let the fan go.

    therealdeimy -

  18. UmpOWPULolRypr3L
    UmpOWPULolRypr3L
    ZogLfptOQXEXGYRB
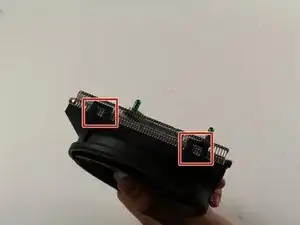
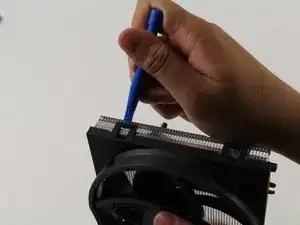
    • Wenn der Kühlkörper/Lüfter von der Platine abgelöst ist, dann heble den Lüfter aus Kunststoff mit einem Plastiköffnungswerkzeug an seinen rechteckigen Clips vom metallenen Kühlkörper ab.

    • Es erfordert wahrscheinlich etwas Kraft, den Lüfter vom Kühlkörper abzuhebeln.

    This guide and the visual diagrams provided are great but shouldn’t you at least mention destatic process, work matt grounding and the need to replace thermal compound for the sake of novices doing at home repairs?

    Mikey in a jar -

    I agree with the comments, though I am not the author; I repair stuff like this for a living. Making manuals on IFIXIT.com is a dilemma. The manuals are great if you are the repair guy and need some basic help on a new device. But if then again, if you are the repair guy, and you have much experience, do I really want to give away all my hard-earned experience to the average home DIY guy who thinks they can do everything without paying anybody for it? My .02 on the comment by Mikey is that indeed, a cursory mention of "additional precautions/procedures" should be included, but not with much detail. In fact, I think ALL of the IFIXIT manuals abruptly end and should have a disclaimer to the effect of, "THIS GUIDE MAY BE INCOMPLETE. INEXPERIENCED DIYers MAY PERMANENTLY DAMAGE OR "BRICK" THE DEVICE. WE HIGHLY RECOMMEND CONTACTING AN EXPERIENCED TECHNICIAN."

    B. A. Computer Services -

    "Cannot edit comment after 5 minutes past" is very stupid. What if I wanted to correct a typo or logic error? 5 minutes is way too short. After 24 hours maybe... So now the community knows why we do not post much on this forum. And BTW, the laws in California are very different than the laws in other states, so some of the issues that are pushed do not apply at all in other states.

    B. A. Computer Services -

Abschluss

Um dein Gerät wieder zusammenzusetzen, folge den Schritten in umgekehrter Reihenfolge.

Erik Ramazzini

Mitglied seit: 26/04/17

2535 Reputation

9 Kommentare

After researching replacement costs through local "fixit" places and Microsoft and cost ranging from $140 to $175 for fan replacement. Decided to take chance on this fan for Xbox one S. https://www.amazon.com/gp/product/B07HD3... Take time taking the bottom black plastic cover off once it gets started its easy. The corner by MS logo has tab that seems a bit thicker and took some doing to get off. Followed this guide did not have to do port removal. Once I got main white case off I just took hard drive and optical drive screws out. Just lifted enough to get to tab holding fan onto heat sink. popped them off and then replaced with this unit. Be aware when putting optical drive and hard drive back in place there are plastic tabs that match to holes on motherboard and let the two units sit down all the way. Also If I recall the hard drive goes in first and then  optical drive. 15 minutes from start to finish. Worked like a champ right off! thanks for the awesome guide!

Don -

ACHTUNG!!! Schritt 15 ist UNNÖTIG bzw. hat so wie hier beschrieben womöglich FATALE Folgen für Eure Xbox! (Es sei denn Ihr wollt aus irgendeinem mir nicht ersichtlichen Grund den Kühler austauschen und nicht den Lüfter.) Denn was hier unterschlagen wird: Löst man den Kühler wie in den Bildern gezeigt von der Platine wird die Verbindung zwischen Kühleinheit und Prozessor unterbrochen und die Kühlpaste zerbröselt und verliert jegliche Wirkung!

Der Lüfter lässt sich auch OHNE Ablösen des Kühlkörpers relativ einfach von diesem abhebeln. Falls dennoch der Kühlkörper von der Platine abgelöst werden soll/muss (oder so wie in meinem Fall im blinden Vertrauen auf die Richtigkeit obiger Anleitung unnötigerweise entfernt wurde) UNBEDINGT Prozessor und Kühlkörper von der alten Paste befreien und neue Paste auftragen (Anleitungen hierfür finden sich im Netz).

hypokeimenon -

Es rät sich auf jeden Fall an, die Wärmeleitpaste zwischen Kühlkörper und Prozessor zu wechseln (besonders, wenn sie bereits trocken ist und beim Ausbau zerbröselt), wenn man sich schon die Mühe macht und die Xbox komplett demontiert.

Die Anleitung zum Austausch der Wärmeleitpaste gibt es hier:

Wie trage ich Wärmeleitpaste am besten auf

macminitosh -

Ach ja: außerdem fehlt in der Beschreibung das Lösen der beiden seitlich angebrachten Funkmodule (in neuren Modellen?) und zwei zusätzliche Schrauben (B1 und B2) müssen auch noch entfernt werden, um die Hauptplatine lösen zu können. ;-)

hypokeimenon -

Regulär alles da. Nur separat aufgelistet
Steven Hering -

completely misses steps of the process. screws B1 and B2 are required to be removed to seperate the motherboard, and you didnt mention removing the power supply at all, its just in one step and gone the next. with the help of another barely helpful guide, i managed to figure out enough of it to get the job done. would recommend you use gifs for certain steps.

Typtyr -

noticed this too i might make a guide with improved steps to help future fixers

Hayden -

Excellent detailed description, which I read after, I had figured it out myself, nevertheless spot on, and easy to follow.

james0sn -

what size fan doser it use as i have some leftover 120mm fans but idk if they will fit

lizzie McDonald -