Einleitung

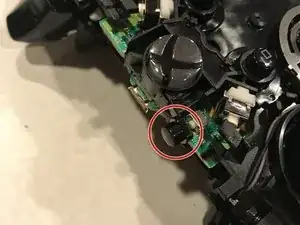
Wenn du bemerkst, dass du keine Vibrationen an den Griffen des Xbox One Kontrollers bei den vorgesehenen Momenten des Spiels verspürst, dann ist vielleicht ein Vibrationsmotor kaputt und du musst ihn austauschen. Die Reparatur ist recht schwierig und erfordert Lötkenntnisse.

  1. vC1HAulr6S1W3TAY
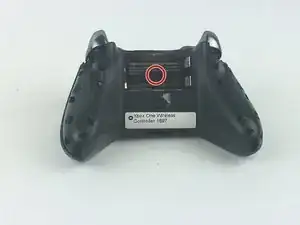
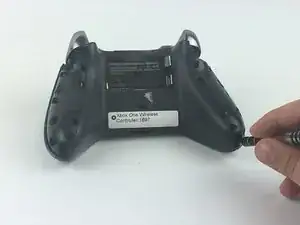
    • Entferne die Abdeckung des Batteriefachs.

    • Entferne die beiden AA-Batterien.

    • Entferne den Aufkleber vorsichtig oder mache ein Loch an der Stelle, an der man die Schraube ertasten kann.

    Note: Screw removal is in Step 3

    jkgarrett17 -

  2. CTyTRM3AVECmFEQn
    CTyTRM3AVECmFEQn
    lHWLG62JPqGEmInL
    nQawGyBwfXs1t1bv
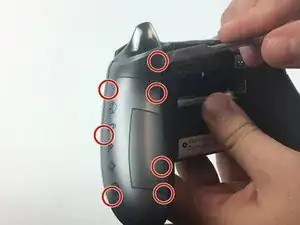
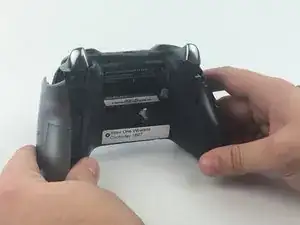
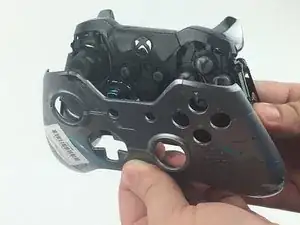
    • Entferne die seitlichen Griffe, indem du den Spudger um die Seitenabdeckungen herum einkeilst.

    • Hebe die Seitenabdeckung an, indem du den Spudger hin und her bewegst. Mach das entlang der gesamten Fuge, um das seitliche Griffteil zu entfernen.

    • Um die Abdeckungen der beiden Handgriffe zu entfernen, müssen jeweils sieben Klammern gelöst werden.

    Absolutely use the spudger to do this. DO NOT just lift up a bit at the bottom and then try to forcefully pull off this panel (as is shown and suggested on *multiple* YouTube videos). You WILL snap the clips. Maybe not all of them and *maybe* none of them, but as the instructions here detail, what you want to do is UNCLIP the clips where they are located, using the PLASTIC spudger. NOT a screwdriver. I watched three separate videos on YouTube where the person said “just stick a screwdriver in there and once you’re able to lift up enough to fit your finger inside, do so, and then just carefully pull the panel off.” That’s not how it works.

    Andrew Sauk -

  3. hKS3w1sepkXoyq2O
    hKS3w1sepkXoyq2O
    2TGpXcUlgetAgZ6b
    ZU4EASHE2puEJBbc
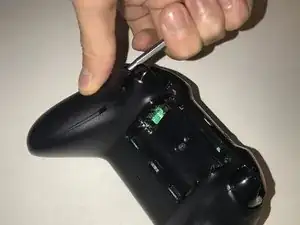
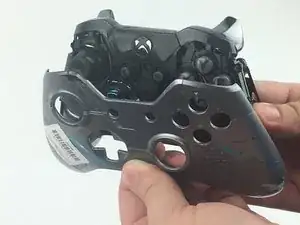
    • Das Entfernen der seitlichen Griffe ermöglicht den Zugang zum Entfernen der Frontplatte.

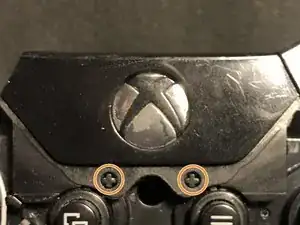
    • Benutze einen TORX TR8 Schraubendreher Grösse 8, um die fünf Torxschrauben TR9 zu entfernen.

    you must also remove the T8 screw hidden under the label in the battery compartment to free the faceplate.

    Dennis Kim -

    Precised by Dennis Kim, but to remove the screws you need a TORX TR8 screwdriver (I guess it’s a Torx size 8)

    James Burton -

  4. TTYlEyoKIMFjqcVr
    TTYlEyoKIMFjqcVr
    XlucDgkdaGKNRCfW
    CqKIbhMBCNeV1Dtc
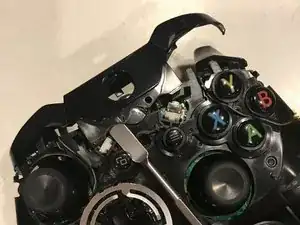
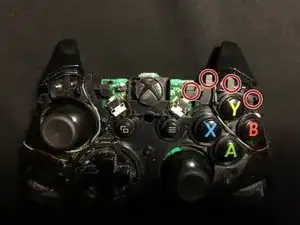
    • Jetzt, da die Schultertasten gut zu sehen sind, solltest du darauf achten, sie von Schmutz und Dreck zu befreien, der sich um sie herum befinden könnte.

    • Die Schultertasten sind durch eine Kunststoffabdeckung in der Mitte verbunden, die sich um den Xbox-Home-Button herum befindet. Entferne dieses Kunststoffteil, indem du die Kunststoffabdeckung über die beiden Stifte hebst, den Home-Button hineindrückst und die Abdeckung in Richtung Oberseite des Controllers ziehst.

    • Achte auf den Sync-Button, der lose unter die Plastikabdeckung gesetzt ist. Vergewissere dich, dass er wieder an Ort und Stelle ist, bevor du die Schultertasten/Kunststoffabdeckung wieder anbringst.

    • Entferne die alte Schultertasten-Einheit, indem du sie von der Kunststoffabdeckung abziehst.

    you forgot to include directions for removing the central cover.

    Dennis Kim -

    And when you do, the connect button pops out, and now I have no clue how to put it back -_-

    Roel Binnendijk -

    The replacement part I bought fit OK but was too snug, with the result that the bumpers wouldn’t spring back so they wouldn’t click and unclick the tiny control switches they connect to.

    After a bit of examination I determined that if I cut out the middle arch section that joins the bumpers, but leaving enough plastic to go under the central plastic cover so that they would be held in place securely, that it was possible to reassemble the controller so the bumpers click and unclick freely.

    Perry Bonewell -

    I had the same issue, But i just shaved the little lugs that connect the button to the switch with a scalpel and used the original plastic black cover. Works a treat and i’ve no fear the button will fall out.. :)

    steve winter -

  5. 5DnoZdbtTOTDbXcZ
    5DnoZdbtTOTDbXcZ
    jnFCICyWB4ByLlmR
    yQfxM236hqQMmkMV
    • Der Controller ist nun bereit für die neue Schultertasten-Einheit.

    • Richte die neuen Schultertasten auf der Oberseite des Controllers aus, indem du die Trigger gedrückt hältst und die vier Stifte auf beiden Seiten ausrichtest.

    • Setze die neue Abdeckung des Home-Button über den Mikro-USB-Anschluss, drücke den Home-Button hinein und ziehe die Abdeckung über die beiden abgebildeten Stifte.

  6. JPu2NPjt4JDTkcoU
    JPu2NPjt4JDTkcoU
    bTwWU4McgI4JfIPm
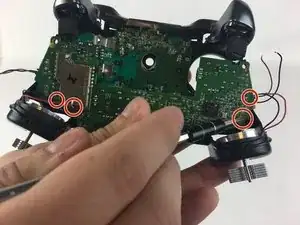
    • Drücke die roten und schwarzen Kabel nach unten und entlöte sie an den Lötpunkten oben auf der Hauptplatine.

    • Benutze die Lötanleitung von iFixit, um die Lötarbeiten korrekt durchzuführen.

    • Sei beim Löten vorsichtig, beschädige keine Bauteile und verbrenne dich nicht.

  7. pvFShW3RVU5XYE4h
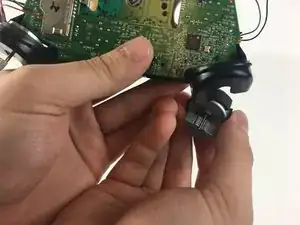
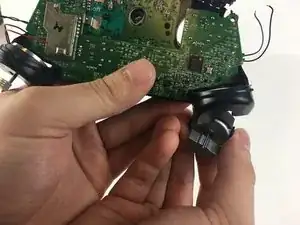
    • Entferne die Vibrationsmotoren.

Abschluss

Um dein Gerät wieder zusammenbauen, folge den Schritten in umgekehrter Reihenfolge.
Ryan Burroughs

Mitglied seit: 25/09/17

1132 Reputation

0 Kommentare