Einleitung

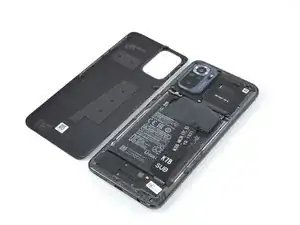
Use this guide to replace a worn-out or dead battery in your Xiaomi Redmi Note 10S.

If your battery is swollen, take appropriate precautions.

For your safety, discharge your battery below 25% before disassembling your phone. This reduces the risk of a dangerous thermal event if the battery is accidentally damaged during the repair.

You’ll need replacement adhesive to reattach components when reassembling the device.

  1. JQSEF3KWJ4cKscTJ
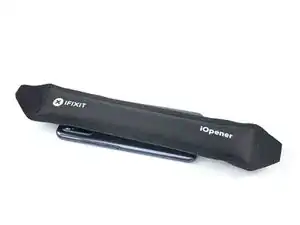
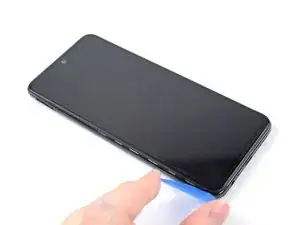
    • Prepare an iOpener and apply it to the back cover for at least two minutes to loosen the adhesive underneath.

    • A hair dryer, heat gun, or hot plate may also be used, but be careful not to overheat the phone—the display and internal battery are both susceptible to heat damage.

  2. mN3kfeEEbAswmYlG
    mN3kfeEEbAswmYlG
    RBsqWBGkMSQPKMcU
    GKwsQRvRcntnUYWH
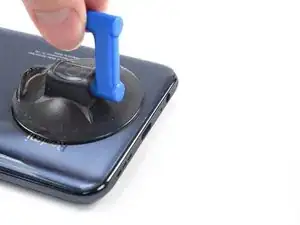
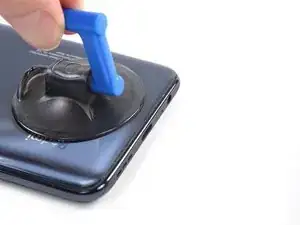
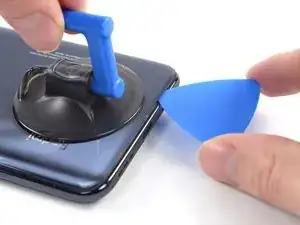
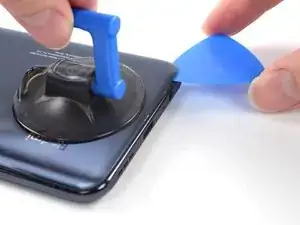
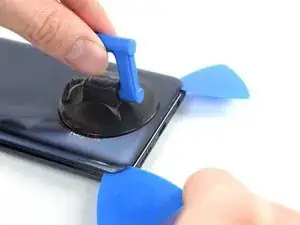
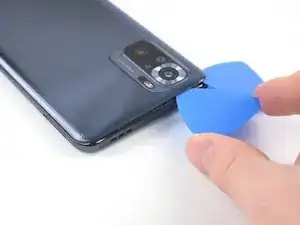
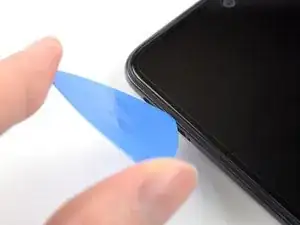
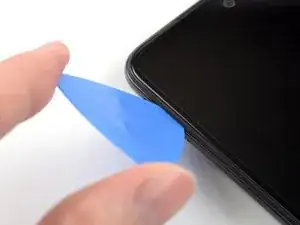
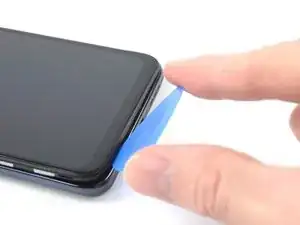
    • Secure a suction handle to the bottom edge of the back cover, as close to the edge as possible.

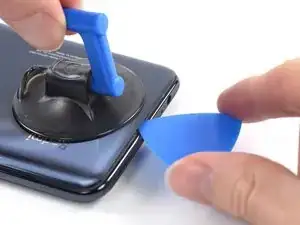
    • Lift the back cover with the suction handle to create a small gap between the back cover and the frame.

    • If you have trouble creating a gap, apply more heat to further soften the adhesive. Follow the iOpener instructions to avoid overheating.

    • Insert an opening pick into the gap you created.

  3. Ak2lxFB1B1E4lr2T
    Ak2lxFB1B1E4lr2T
    acHZIgN6VfCuhNYO
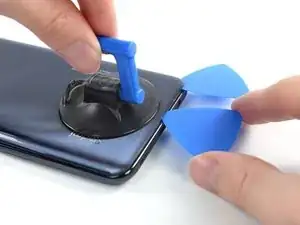
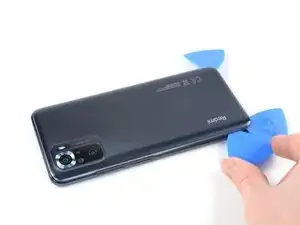
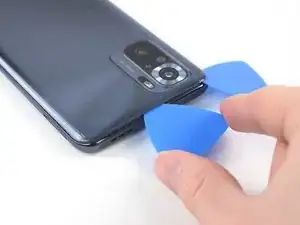
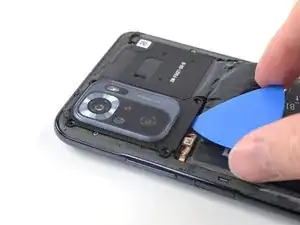
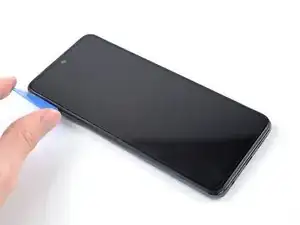
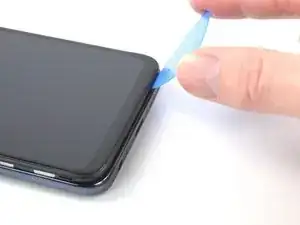
    • Slide the opening pick to the bottom right corner to slice the adhesive.

    • Leave the opening pick in place to prevent the adhesive from resealing.

  4. 5gJGgt6vrcVTNvGR
    5gJGgt6vrcVTNvGR
    msMrk4ggS1BIrAYj
    VGLETTVHFdgwrn6w
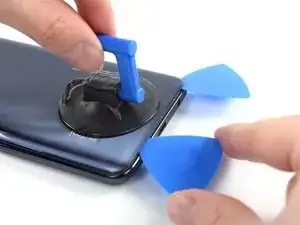
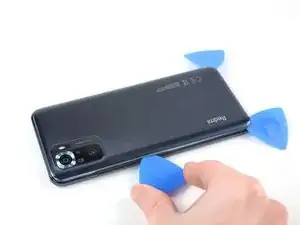
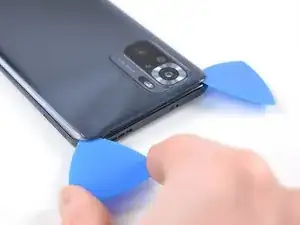
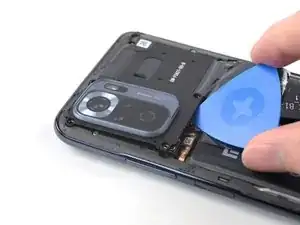
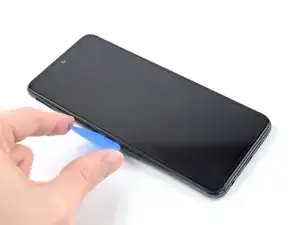
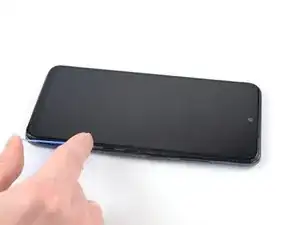
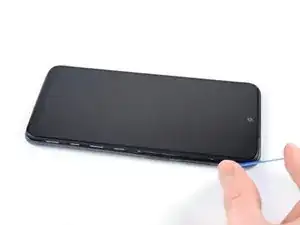
    • Insert a second opening pick at the bottom edge of your phone.

    • Slide the opening pick to the bottom left corner to slice the adhesive.

    • Leave the opening picks in place to prevent the adhesive from resealing.

    • You can remove the suction cup now.

  5. GsQYYVYKKIbLCOoZ
    GsQYYVYKKIbLCOoZ
    ndMZUQZWMCKoLEmB
    21S6EIkWE4uKVPSe
    • If the adhesive becomes hard to cut, it has most likely cooled down. Use your iOpener to reheat it.

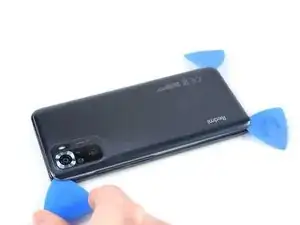
    • Insert a third opening pick at the bottom left corner of your phone.

    • Slide the opening pick along the left edge of your phone to slice the adhesive.

    • Leave the opening pick in the top left corner to prevent the adhesive from resealing.

  6. NVlKyJIhw1NT3htO
    NVlKyJIhw1NT3htO
    KnUYS1luL5fu2HaC
    ELYquZZYYkyS2bq3
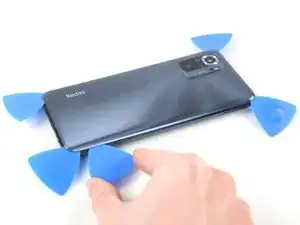
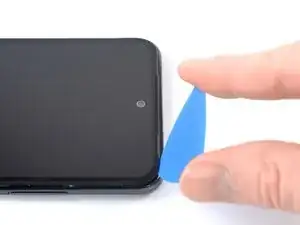
    • Insert a fourth opening pick underneath the top left corner of your phone.

    • Slide the opening pick along the top edge to slice the adhesive.

    • Leave the opening pick in the top right corner to prevent the adhesive from resealing.

  7. oI6IUmhEQXTYAgjP
    oI6IUmhEQXTYAgjP
    2yxfIDLROJrGUidx
    xKtE5VdTiT3PCgNr
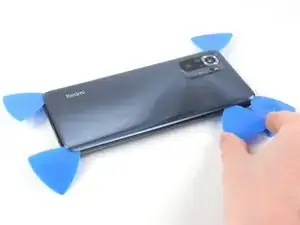
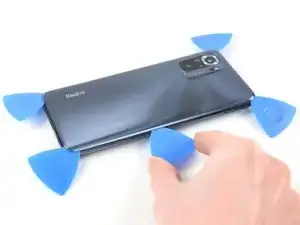
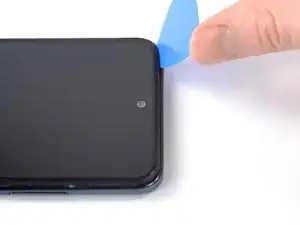
    • Insert a fifth opening pick underneath the top right corner.

    • Slide the opening pick along the right edge of the back cover to slice the remaining adhesive.

  8. KRw4RIH2GrwMyIYn
    KRw4RIH2GrwMyIYn
    r4RGPaolRUMnjcMA
    byIdF41h3RwiHTLi
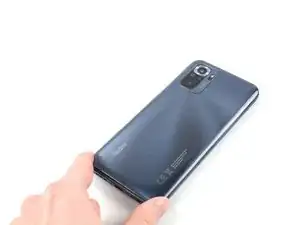
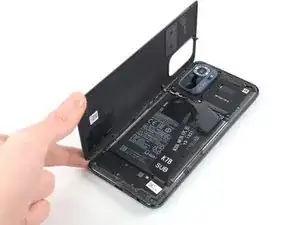
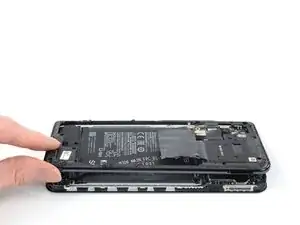
    • Remove the back cover.

    • Apply new adhesive where necessary after cleaning the relevant areas with isopropyl alcohol (>90%).

    • Secure the new back cover with pre-cut adhesive or double-sided adhesive tape. After installing the back cover, apply strong, steady pressure to your phone for several minutes to help the adhesive form a good bond—a stack of heavy books works well.

  9. uWpxqq5VRHYeUwme
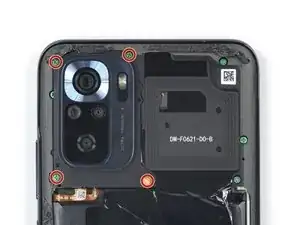
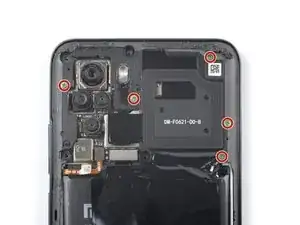
    • Use a Phillips screwdriver to remove the four 3.9 mm-long screws securing the camera cover.

    • One of the screws is hidden beneath an orange sticker.

  10. qLV1VWSiIeRVeUBs
    qLV1VWSiIeRVeUBs
    MDFY2TQT2c4YCxZY
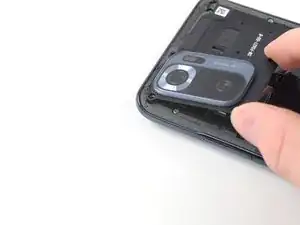
    • Insert an opening pick into the gap beneath the bottom edge of the camera cover.

    • Pry up the camera cover with your opening pick.

  11. HLQt2bwNWZjXYLcy
    HLQt2bwNWZjXYLcy
    G1VXU1a3W1IycpAr
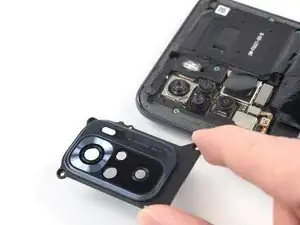
    • Use your fingers or a pair of tweezers to remove the camera cover.

  12. RqnWGlI1yY5TnYOm
    RqnWGlI1yY5TnYOm
    aqA531TBDkEIt4rl
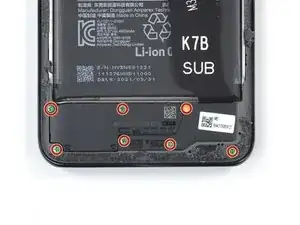
    • Use a Phillips screwdriver to remove the twelve 3.9 mm-long screws securing the midframe.

    • One of the screws is hidden beneath an orange sticker.

  13. f1YaALmMHvMYOJEk
    f1YaALmMHvMYOJEk
    Hc4LtSuTEKaPElXy
    dFNfb6vjDDApiAfx
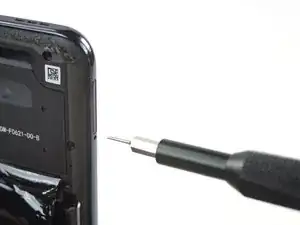
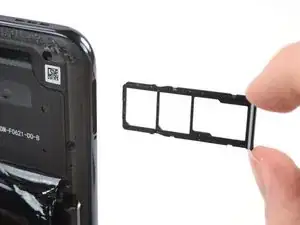
    • Insert a SIM card eject tool into the small hole in the SIM card tray, located at the left edge of the phone.

    • Press directly into the hole to eject the SIM card tray.

    • Remove the SIM card tray.

  14. DeNWUR4ScZcPlPMw
    DeNWUR4ScZcPlPMw
    J1EwERewlsi2CcRH
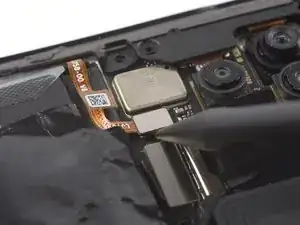
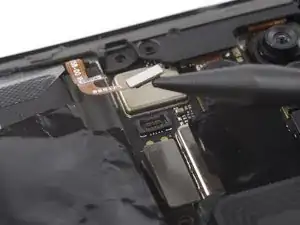
    • Use a spudger to disconnect the power and volume button flex cable by prying the connector straight up from its socket.

  15. TkkmdWDobKBVmMvR
    TkkmdWDobKBVmMvR
    POpWivVcrTTu1CYy
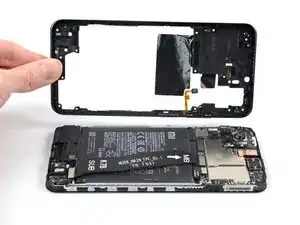
    • The midframe of the Xiaomi Redmi Note 10S is held in place by plastic clips.

    • Insert an opening pick between the midframe and display assembly on the left edge of the phone where the SIM tray slot is located.

    • Make sure to insert the opening pick between the midframe and the display frame to avoid separating the screen from the frame.

  16. MpmxccBAc4rV2utC
    MpmxccBAc4rV2utC
    sJUP1IkxYQffMqZn
    fF1afjoaSgRmat22
    • The plastic clips of the midframe are sitting in place tightly. Releasing them might require some force.

    • Slide the opening pick along the left edge of the phone to release the plastic clips.

  17. mAq2PwLheHKqnWMs
    mAq2PwLheHKqnWMs
    EBWbyYA21CuVOAEq
    • Slide the opening pick along the bottom edge of the phone to release the plastic clips.

  18. hwF3QRGmftVWJAI5
    hwF3QRGmftVWJAI5
    v6cjpWFSHY12jBNq
    yZtKygR2PNIIRQXp
    • Slide the opening pick along the right edge of the phone to release the plastic clips.

  19. CHdbN3gNRVUIrii4
    CHdbN3gNRVUIrii4
    EvavkrMOibp6JRIt
    • Slide the opening pick along the top edge of the phone to release the remaining plastic clips.

  20. nUjgxyjQLOT64p6H
    nUjgxyjQLOT64p6H
    O1AlWmXPOouKZh1l
    5EyIytduWjNnYAPx
    • Before removing the midframe make sure the power and volume button flex cable is freed and not tangled with the motherboard to avoid tearing it.

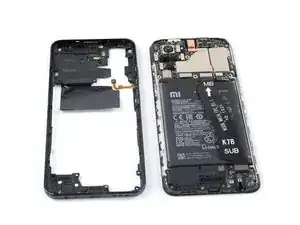
    • Remove the midframe.

  21. DUCOgN4BFUGotwOQ
    DUCOgN4BFUGotwOQ
    VCYfBH1IaXYHbwaX
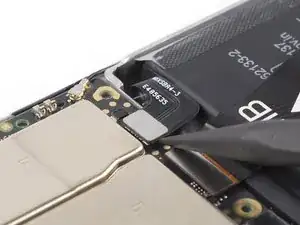
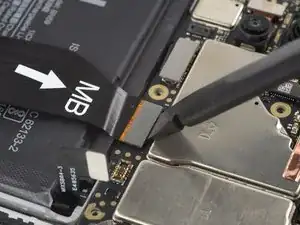
    • Use a spudger to disconnect the battery flex cable by prying the connector straight up from its socket.

  22. I43hpcA4LvfvcZon
    I43hpcA4LvfvcZon
    DVYTOwtKtIPpjyNg
    BCKvGC4rKLdWoJkL
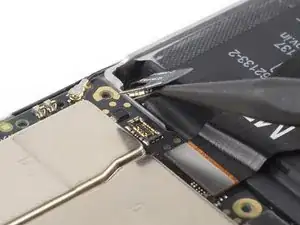
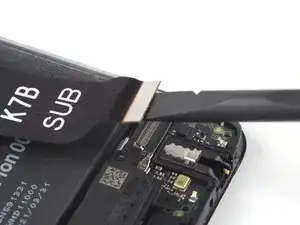
    • Use a spudger to disconnect both ends of the daughterboard connection cable.

    • Remove the daughterboard connection cable.

  23. RkVg4XRv6CQqTkep
    RkVg4XRv6CQqTkep
    mbQwQxGB3DMIZkPT
    nvBUVMDWH6VlYKff
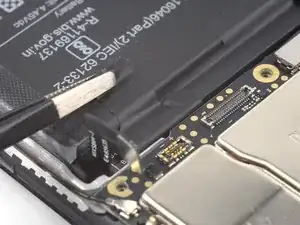
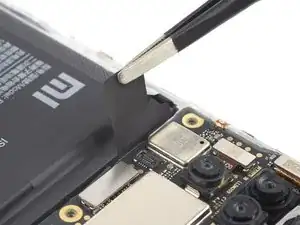
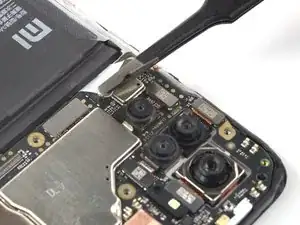
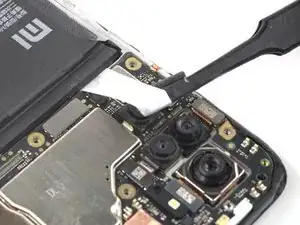
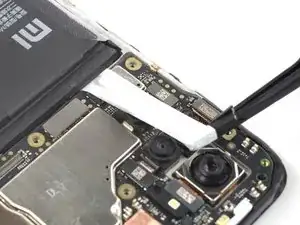
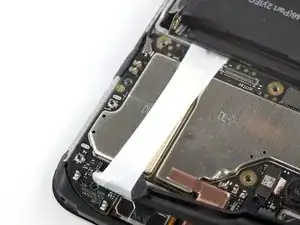
    • The battery is secured to the rear case with two pieces of stretch-release adhesive.

    • Don't jab the battery with any sharp tools. A punctured battery may leak dangerous chemicals or catch fire.

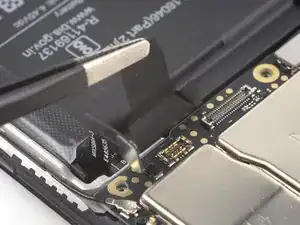
    • Use a pair of blunt nose tweezers or a clean fingernail to peel off both battery adhesive pull-tabs to unstick them from the top edge of the battery.

  24. LVF2aiVHGpgDYBA3
    LVF2aiVHGpgDYBA3
    Jtunkp6QQpWRaRXi
    YyPcZM1qGWEArlr2
    • Grab the first pull-tab with a pair of blunt nose tweezers or your fingers and slowly pull it away from the battery towards the top edge of your phone.

    • Pull hard enough to maintain tension on the strip, but don't force it. Give it plenty of time to stretch and unstick from under the battery.

    • Don't press down on the battery. Hold the phone firmly by its sides.

    • Keep the strip flat and unwrinkled. Try to pull evenly on the whole strip, rather than pulling in the middle or on one side.

    • Pull at a low angle so the strip doesn't snag on the edge of the battery.

    • If the adhesive strip breaks off, try to retrieve it using your fingers or blunt tweezers, and continue pulling—but do not pry under the battery.

    • If the adhesive breaks off underneath the battery and can't be retrieved, continue with the next step.

  25. OvAGb5Z4JHwvXSXJ
    OvAGb5Z4JHwvXSXJ
    xZXrPaKnnRrqvg6n
    osvp421epQTIKbSr
    • Repeat the previous pull-tab removal procedure on the second pull-tab.

    • Follow the same procedure as with the previous strip: don't press down on the battery, keep the strip flat and unwrinkled, and pull at a low angle.

    • If the adhesive breaks off underneath the battery and can't be retrieved, apply a few drops of high concentration (over 90%) isopropyl alcohol under the edge of the battery in the area of the broken adhesive strip(s).

    • Wait about one minute for the alcohol solution to weaken the adhesive.

    • Use the flat end of a spudger to gently lift the battery.

    • Don't try to forcefully lever the battery out. If needed, apply a few more drops of alcohol to further weaken the adhesive. Never deform or puncture the battery with your pry tool.

  26. ZeMOMQKbavLHuipm
    ZeMOMQKbavLHuipm
    RIhiElfwARAMdmag
    iXQJGUoQEEqHKYWZ
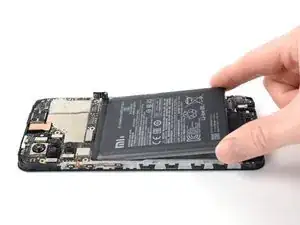
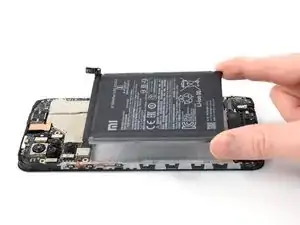
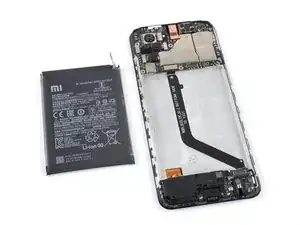
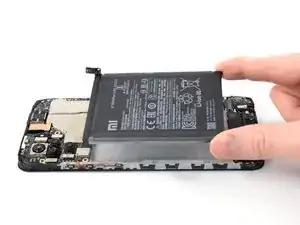
    • Remove the battery.

    • Don't reinstall a damaged or deformed battery, as doing so is a potential safety hazard.

    • If there's any alcohol solution remaining in the phone, carefully wipe it off or allow it to air dry before installing your new battery.

    • Secure the new battery with pre-cut adhesive or double-sided adhesive tape. In order to position it correctly, apply the new adhesive into the device at the places where the old adhesive was located, not directly onto the battery. Press the new battery firmly into place.

    • During reassembly, temporarily reconnect the battery to the motherboard before you press it into place to help align it correctly. Disconnect the battery after it's seated.

Abschluss

If possible, turn on your device and test your repair before installing new adhesive and resealing.

For optimal performance, calibrate your newly installed battery after completing this guide.

Compare your new replacement part to the original part—you may need to transfer remaining components or remove adhesive backings from the new part before installing.

To reassemble your device, follow these instructions in reverse order. During reassembly apply new adhesive where necessary after cleaning the relevant areas with isopropyl alcohol (>90%).

Take your e-waste to an R2 or e-Stewards certified recycler.

Repair didn’t go as planned? Try some basic troubleshooting, or ask our Answers community for help.
Manuel Haeussermann

Mitglied seit: 13/07/22

6386 Reputation

0 Kommentare