Einleitung

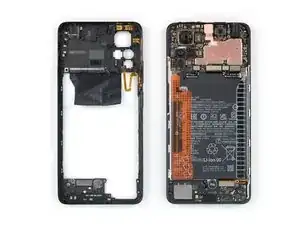
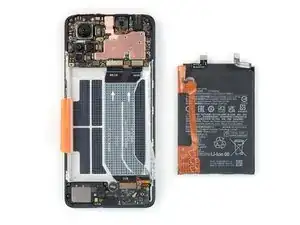
Use this guide to replace a worn-out or dead battery in your Xiaomi Redmi Note 11 Pro.

If your battery is swollen, take appropriate precautions.

For your safety, discharge the battery below 25% before disassembling your phone. This reduces the risk of fire if the battery is accidentally damaged during the repair.

You’ll need replacement adhesive to reattach the rear glass when reassembling the device. Your device will function normally, but will most likely lose its IP (Ingress Protection) rating.

  1. evJ3luRqOXu3JWZN
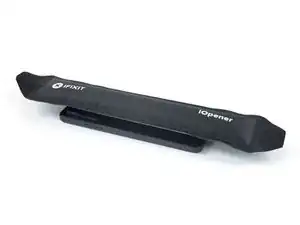
    • Prepare an iOpener and apply it to the rear glass for at least two minutes to loosen the adhesive underneath.

    • A hair dryer, heat gun, or hot plate may also be used, but be careful not to overheat the phone—the display and internal battery are both susceptible to heat damage.

  2. xZmyaNxbCPi4NZyy
    xZmyaNxbCPi4NZyy
    6KaXYn65iFduHxBV
    oXQJTWFWYQlleMwK
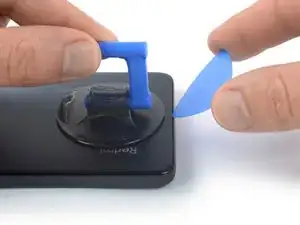
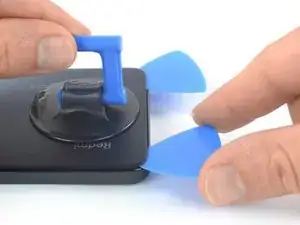
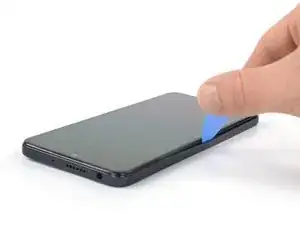
    • Secure a suction handle to the bottom edge of the rear glass, as close to the edge as possible.

    • If the rear glass is cracked, the suction handle may not stick. Try lifting it with strong tape, or superglue the suction handle in place and allow it to cure so you can proceed.

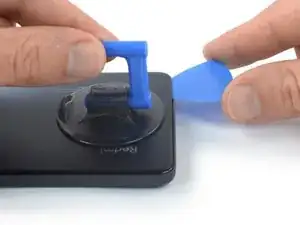
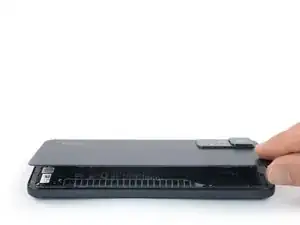
    • Lift the rear glass with the suction handle to create a small gap between the back cover and the frame.

    • If you're having trouble creating a gap, apply more heat to further soften the adhesive. Follow the iOpener instructions to avoid overheating.

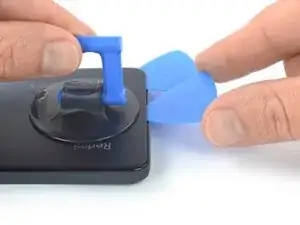
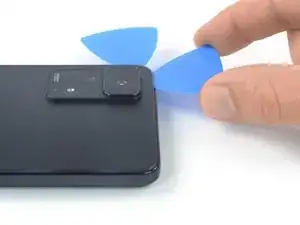
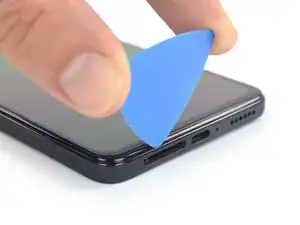
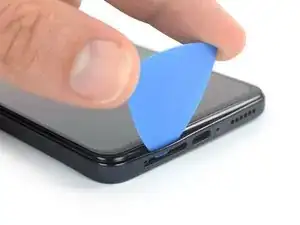
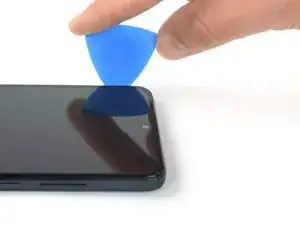
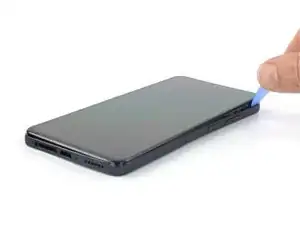
    • Insert an opening pick into the gap you created.

    • Slide the opening pick to the bottom right corner to slice the adhesive.

    • Leave the opening pick in place to prevent the adhesive from resealing.

  3. rsGaYlpanrBgaffu
    rsGaYlpanrBgaffu
    NIVjuAnlQ2WMrTnR
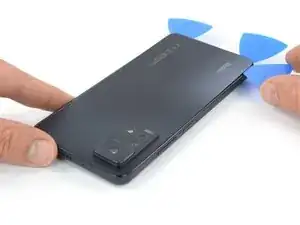
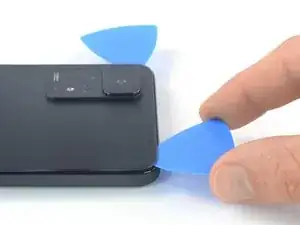
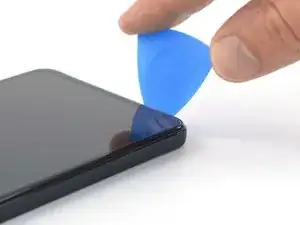
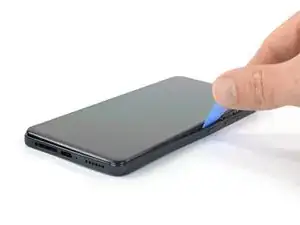
    • Insert a second opening pick at the bottom edge of your phone.

    • Slide the opening pick to the bottom left corner to slice the adhesive.

    • Leave the opening picks in place to prevent the adhesive from resealing.

  4. NB4KtyZwOfLf4QoO
    NB4KtyZwOfLf4QoO
    yuQtuBcQ5vHRrKxt
    bX3TUTNu5yimevdD
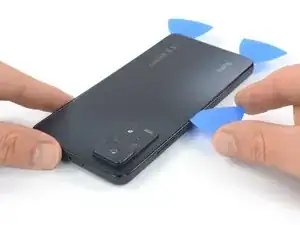
    • If the adhesive becomes hard to cut, it has most likely cooled down. Use your iOpener for one to two minutes to reheat it.

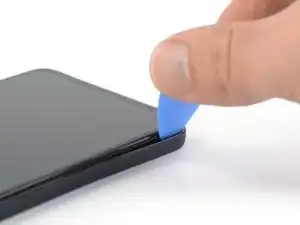
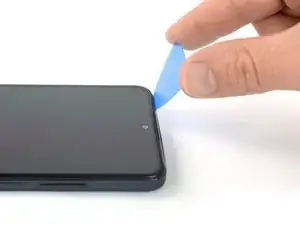
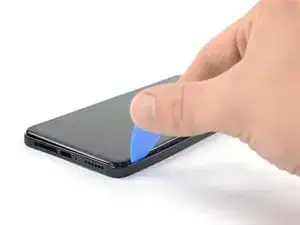
    • Insert a third opening pick at the bottom left corner of your phone.

    • Slide the opening pick along the left edge of your phone to slice the adhesive.

    • Leave the opening pick in the top left corner to prevent the adhesive from resealing.

  5. ajIY1BSpNiNRfV3S
    ajIY1BSpNiNRfV3S
    DiKXmo3YjnaafHjl
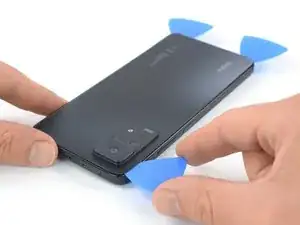
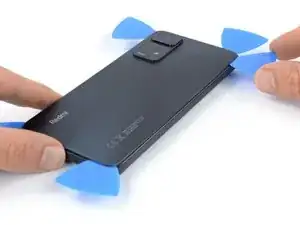
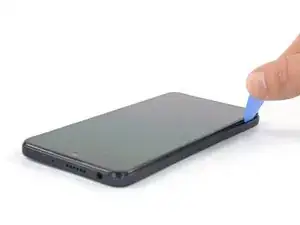
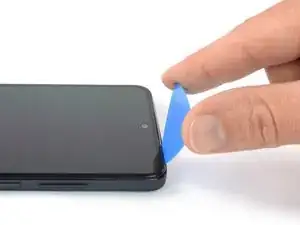
    • Insert a fourth opening pick underneath the top left corner of your phone.

    • Slide the opening pick along the top edge to slice the adhesive.

    • Leave the opening pick in the top right corner to prevent the adhesive from resealing.

  6. OrRJmlMRmkbRN5UL
    OrRJmlMRmkbRN5UL
    qTQbKktsAOG3DOYj
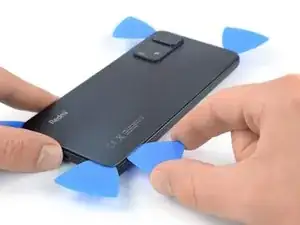
    • Insert a fifth opening pick underneath the top right corner.

    • Slide the opening pick along the right edge of the rear glass to slice the remaining adhesive.

    • At this point, the rear glass should be separated from the frame. If there's still resistance around the edges of the glass, use an opening pick to separate any remaining adhesive.

  7. LA3gMOYwpr2i2FUW
    LA3gMOYwpr2i2FUW
    KiXuWs6sVq4ia6V3
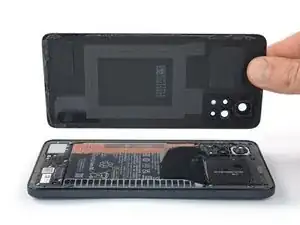
    • Remove the rear glass.

    • Apply new adhesive where necessary after cleaning the relevant areas with isopropyl alcohol (>90%).

    • Secure the new back cover with pre-cut adhesive or double-sided adhesive tape. After installing the back cover, apply strong, steady pressure to your phone for several minutes to help the adhesive form a good bond—a stack of heavy books works well.

  8. ESqfPDeiKpSuZe6J
    ESqfPDeiKpSuZe6J
    3tSaXb5KBaRxJOYW
    nfDXhMukjMN34T3T
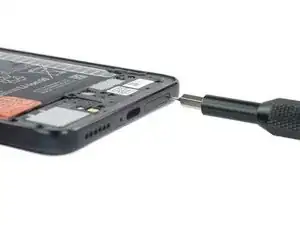
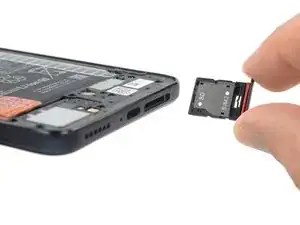
    • Insert a SIM card eject tool, a SIM eject bit, or a straightened paper clip into the hole on the SIM tray located at the bottom edge of the phone.

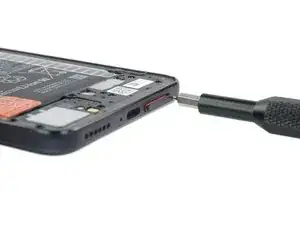
    • Press directly into the hole to eject the SIM card tray.

    • Remove the SIM card tray.

    • If you accidentally inserted the SIM eject tool into a microphone hole, don't worry! You most likely didn't damage the microphone.

  9. HUlTUjHEMdAEnIUy
    HUlTUjHEMdAEnIUy
    fBur6dUvmJZOFYQX
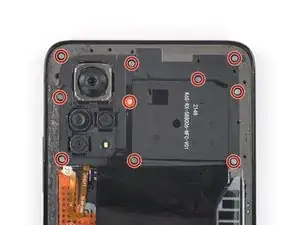
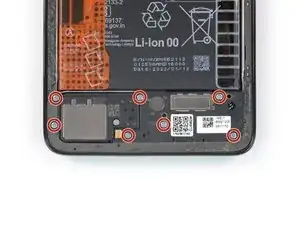
    • Use a Phillips screwdriver to remove the seventeen 3.6 mm-long screws securing the midframe.

  10. dZvccGFidOIhBCJ4
    dZvccGFidOIhBCJ4
    IOvLNDJWoKK24qVL
    • The midframe of the Xiaomi Redmi Note 11 Pro is held in place by plastic clips.

    • Insert an opening pick between the midframe and front panel assembly on the bottom left edge of the phone where the SIM tray slot is located.

    Very hard to do can't get it to work

    Leroy H Walker -

  11. aTUunLIA31DVLkjR
    aTUunLIA31DVLkjR
    UxLSDdGaeyWPJRhJ
    • The plastic clips of the midframe are sitting in place tightly. Releasing them might require some force.

    • Slide the opening pick around the bottom left corner of the phone to release the plastic clips.

  12. ikm3aiBCKjScAhCf
    ikm3aiBCKjScAhCf
    XgPoRLYlSIPoQDea
    ar3aEa3NdHT5Sgch
    • Slide the opening pick along the left edge of the phone to release the plastic clips.

  13. MtRWwMKU3SfmIlEs
    MtRWwMKU3SfmIlEs
    CCHCX3WuRnDVoHke
    jSWlE6coWN1QI5LR
    • Slide the opening pick around the top left corner and along the top edge of the phone to release the plastic clips.

  14. hBxBoWfLcln5fYYJ
    hBxBoWfLcln5fYYJ
    h3nhycQW1sgwJiRY
    tZXLjEVQdd5QLLIC
    • Slide the opening pick around the top right corner and along the right edge of the phone to release the remaining plastic clips.

    • Do not try to remove the midframe all the way yet. The midframe cable is still connected to the motherboard.

  15. 6nMLXOF6PlyU3LWx
    6nMLXOF6PlyU3LWx
    woVJhkUljMob1SaP
    Yie3crGRGdGtrsj1
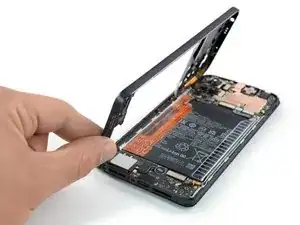
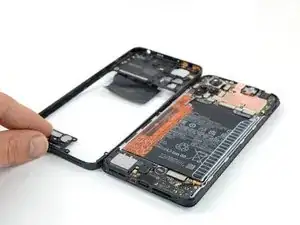
    • Carefully swing open the midframe to the left like you would open the front cover of a book to get free access to its cable connector.

    • Place the midframe next to the left edge of the front panel assembly.

  16. RGb32I4kiAOvNYGH
    RGb32I4kiAOvNYGH
    B3INFOZDlBCaApWn
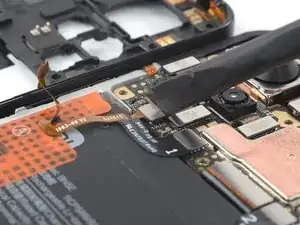
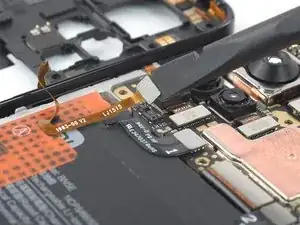
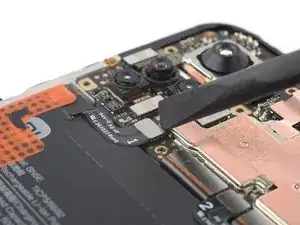
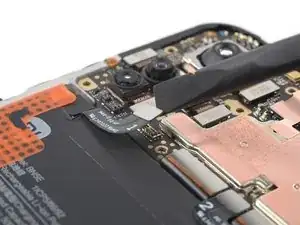
    • Use a spudger to disconnect the midframe cable by prying the connector straight up from its socket.

  17. t554dbRyMO5vtucj
    • Remove the midframe.

  18. pQlOXBTDo5IpDwdm
    pQlOXBTDo5IpDwdm
    qZZ3PSQ5MCaVMoZj
    KpCOq4ga6tUvFdKv
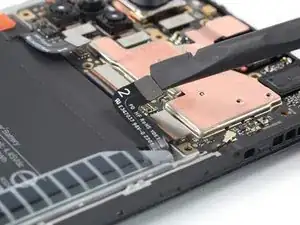
    • Use a spudger to disconnect the left and right battery cable by prying the connectors straight up from their socket.

  19. ZRVhQRXZq2r2YyQ1
    ZRVhQRXZq2r2YyQ1
    KSYWLp4CPWsTt2q2
    U24FrsImXErTEhpH
    • Take care not to puncture or bend the battery with your tool—a punctured or bent battery may leak dangerous chemicals or cause a fire.

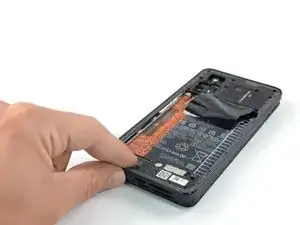
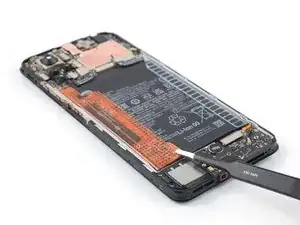
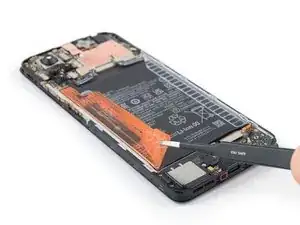
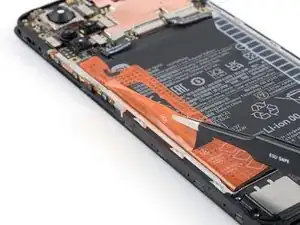
    • Use a pair of blunt nose tweezers or a clean fingernail to peel the orange adhesive strip labeled with an A off the battery.

  20. bwfDcboROWw6m45J
    bwfDcboROWw6m45J
    KJBPrO6ICPQnnWMP
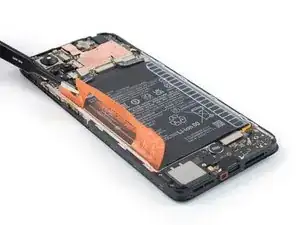
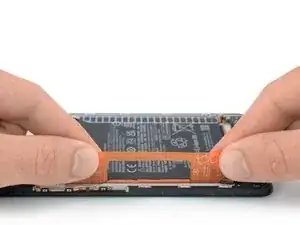
    • Repeat the previous pull-tab procedure on the orange adhesive strip labeled with a B.

  21. BDl4NXc5rbGtCDmp
    BDl4NXc5rbGtCDmp
    y2RXsYeaRvmiU6Y6
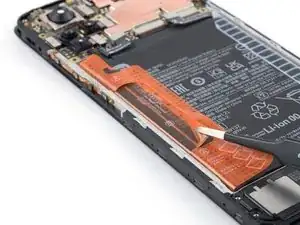
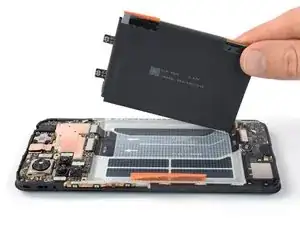
    • Grab both pull-tab ends labeled with an A and pull up on the adhesive strip to lift the battery out of its recess and swing it up to an upright position.

    • If you're having trouble lifting the battery out of its recess, apply a heated iOpener to the screen for two minutes to loosen the battery adhesive.

    • A hair dryer, heat gun, or hot plate may also be used, but be careful not to overheat the device.

  22. vvNq4HKDoeQEN64s
    vvNq4HKDoeQEN64s
    3atAq3qeBv2bSJKn
    JMCF66WPDPZP1Ymw
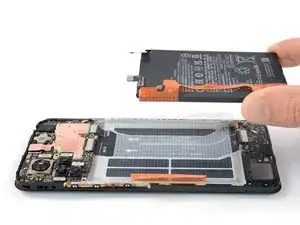
    • Peel the battery off the remaining adhesive.

    • Remove the battery.

    • Do not reinstall a damaged or deformed battery, as doing so is a potential safety hazard.

    • Secure the new battery with pre-cut adhesive or double-sided adhesive tape. In order to position it correctly, apply the new adhesive into the device at the places where the old adhesive was located, not directly onto the battery. Press the new battery firmly into place.

    • During reassembly, temporarily reconnect the battery to the motherboard to help align it correctly. Disconnect the battery after it is seated.

Abschluss

If possible, turn on your device and test your repair before installing new adhesive and resealing.

To reassemble your device, follow these instructions in reverse order. During reassembly, apply new adhesive where necessary after cleaning the relevant areas with isopropyl alcohol (>90%).

For optimal performance, calibrate your newly installed battery after completing this guide.

Take your e-waste to an R2 or e-Stewards certified recycler.

Repair didn’t go as planned? Try some basic troubleshooting, or ask our Answers community for help.
Dominik Schnabelrauch

Mitglied seit: 23/11/16

167866 Reputation

0 Kommentare