Einleitung

Folge dieser Anleitung, um die Festplatte deines iMac durch eine SSD aufzurüsten indem du einen aktualisierten 2,5 bis 3,5" Metall-Einschub verwendest. Diese Anleitung beinhaltet die Schritte zum Einbau des Temperatur-Sensors, sodass die Lüfter deines iMac mit der korrekten Schnelligkeit laufen.

Dies ist nur eine grundständige Anleitung und ist nicht dazu gedacht eigenständig benutzt zu werden. Diese Anleitung ist Teil der Anleitungen zum Austausch der iMac HDD.

  1. HKQbp12ZISQhNfAv
    HKQbp12ZISQhNfAv
    C535jLFwdCXbrulv
    wDWxsjpZCDD5vCjk
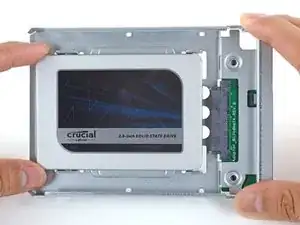
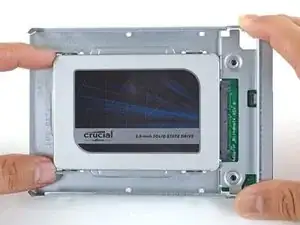
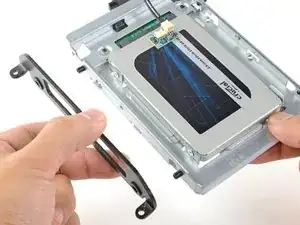
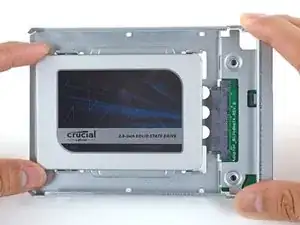
    • Folge den nächsten Schritten, wenn du die Festplatte durch ein SSD-Kit ersetzt.

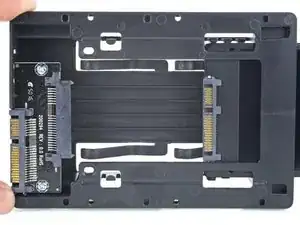
    • Wenn dein Festplatteneinschub so wie auf dem ersten Bild aussieht, dann folge stattdessen dieser Anleitung hier.

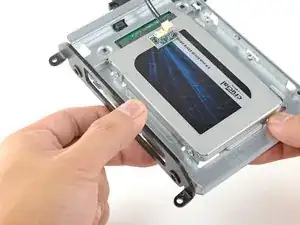
    • Richte die SSD-Stecker mit den Anschlüssen des Metalleinschubs aus.

    • Drücke das Laufwerk gegen die Anschlüsse des Einschubs bis die SSD gut sitzt.

    • Die SSD lässt sich nur in einer Richtung mit dem Einschub verbinden. Wenn die Stecker nicht passen, drehe die SSD um und versuche es erneut.

    In my 21.5 “ imac, there simply isnt enough room to use the plastic ssd enclosure in photo 1 if you want to screw back into the bracket as instructions advise you to do. When trying to put the screen back onto the Imac, it just wouldnt fit. So basically i did not screw in the ssd enclosure fully with the bracket, there is still room for the ssd enclosure and for all of the connections and temperature sensor if you dont screw in the bracket.

    Computer is running fine after a month or so, but i image if we end up moving the imac we should be very careful not to shakeup the SSD too much.

    jacob d -

  2. FtBOnUuDYZJTjvey
    FtBOnUuDYZJTjvey
    RvVXsqFVNCWuybvj
    UmyFUVECjaDZNRjp
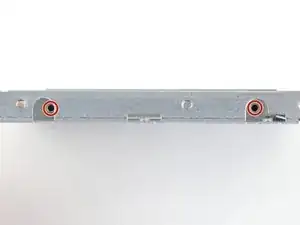
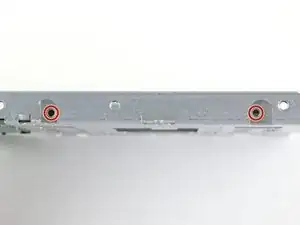
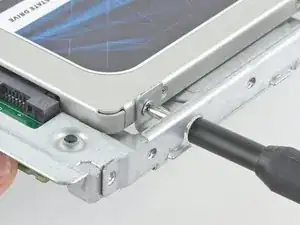
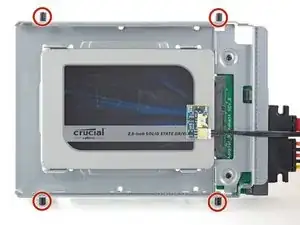
    • Benutze einen Kreuzschlitzschraubendreher, um die vier silbernen Schrauben (zwei auf jeder Seite) an den Kanten der SSD einzusetzen, um sie am Einschub zu befestigen.

  3. HU4PFgCWjYNkrIi4
    HU4PFgCWjYNkrIi4
    gWGSmdLLDiJOASYW
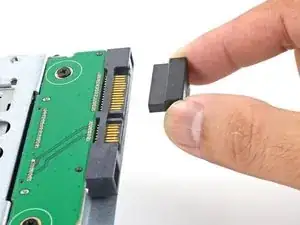
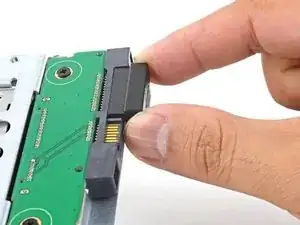
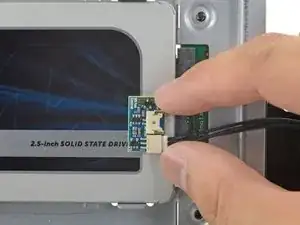
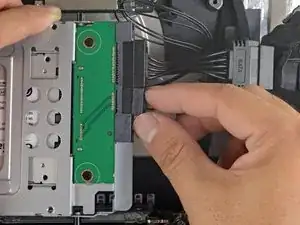
    • Setze das mitgelieferte sensoraktive SATA-Netzkabel in den Anschluss des Einschubs.

    • Das Kabel kann nur in einer bestimmten Richtung eingesetzt werden. Wenn das Kabel nicht passt, drehe es um 180° und versuche es erneut.

  4. nFPHEiNHZQZIIWir
    nFPHEiNHZQZIIWir
    25p6UPH1X2Hpm1ut
    kZJrQ2FKFMAo4eGZ
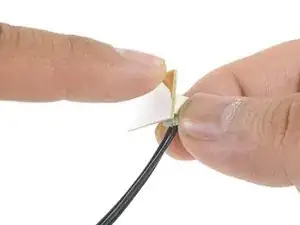
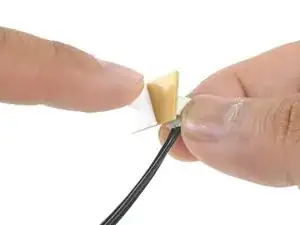
    • Ziehe die weiße Schutzfolie von der Rückseite der kleinen Temperatursensor-Platine ab, um den Kleber frei zu legen.

    • Klebe die Temperatursensor-Platine auf die freilegende Metalloberfläche der SSD nahe am SATA-Stecker.

    • Biege die überstehenden Drähte des Temperatursensors so weg, dass sie beim Einbau des Einschubs nicht im Weg sind.

    I don’t remember these instructions including advice to first install MacOS onto the new SSD hard drive. If you don’t first install MacOS on the SSD before installing it, you will then need to use a different computer to create a bootable USB thumbdrive with MacOS installed on it, which is not as easy as it sounds as you have to format the USB correctly, and then download the OS which can take a while if your internet connection isnt great.

    jacob d -

  5. TB3g2BfZthZmgZof
    TB3g2BfZthZmgZof
    UZXpLNW61PfcoLXO
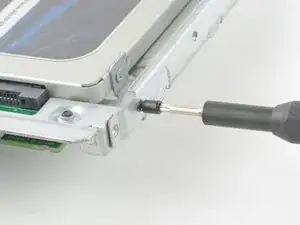
    • Montiere die Haltestifte der alten Festplatte mithilfe eines T8 Schraubendrehers auf die Seiten des Einschub.

    Hallo. Will meine originale HDD wieder einbauen. Wo finde ich hier den Temperatursensor?

    MichaelRom -

  6. Aq2vsCxhf2S3qufG
    Aq2vsCxhf2S3qufG
    6HieMRWYI2Pgc2Yn
    • Befestige alle Halterungen, die von der alten Festplatte abmontiert wurden, auf dem Einschub.

  7. ciVrfTP4LtNtlEV3
    ciVrfTP4LtNtlEV3
    QDKoTyhGQj1clwQP
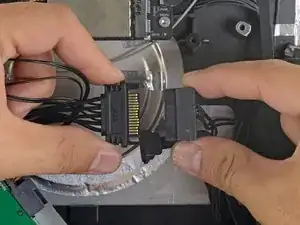
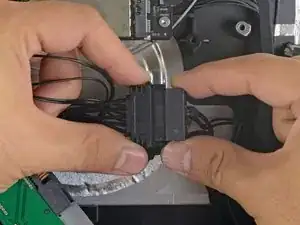
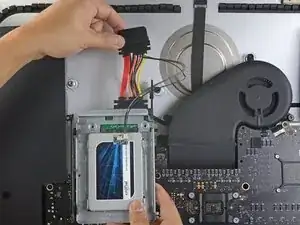
    • Verbinde das SATA-Netzkabel des iMacs mit dem anderen Ende des neuen sensoraktiven SATA-Kabels.

  8. CWAiJZexabkmRKlw
    CWAiJZexabkmRKlw
    UXFeucvE5hqbSPEU
    • Verbinde das SATA-Datenkabel des iMacs mit dem Einschub.

  9. YJqasivdZRKDWMjy
    YJqasivdZRKDWMjy
    FI6EqbMtmSvAcIM6
    DpsoNu5h3obcGm6g
    • Die in diesem Schritt gezeigten Bilder stammen von einem 2017er iMac. Unter Umständen sehen deine Kabel etwas anders aus, aber der Vorgang bleibt der gleiche.

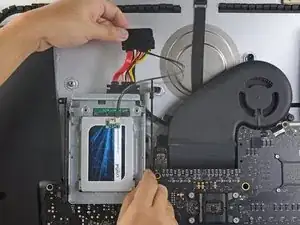
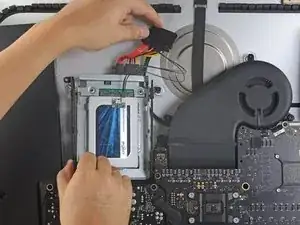
    • Schiebe den SSD-Einschub in den Platz, der vorher von der Festplatte eingenommen wurde.

    • Verlege die SATA-Kabel so, dass sie anderen Komponenten nicht in die Quere kommen.

    • Versuche, die Kabel auf keinen Fall zu knicken, und verlege sie so, dass sie nicht eingeklemmt werden.

    I’m stuck on the last stage. In my 2011 21.5” EMC 2428, Model A1311, I simply can’t figure out how to get the new enclosure back in position to fasten it down. The new sensor cable interferes with the reinstallation. I don’t see adequate pictures above to see how to solve the problem, other than by just letting the new enclosure sit loose in the general area, which doesn’t seem ideal. Suggestions?

    David Hercher -

    Hi David,

    The sensor cable is pretty rigid, which makes it difficult to maneuver the enclosure into place. You may need to make some tight turns on the cable. You can also try running without the sensor cable and see if the fans will work adequately without it.

    Arthur Shi -

    If using a SSD adapter as replacement, does the EMI foam from step 15 go on the bottom of the SSD adapter?

    jim -

    It is a bit disorienting that the photos change from a 2011 to a 2017 model. Also the EMI foam seems to have gone missing in this instructions

    Gregory Robben -

Abschluss

Um dein Gerät wieder zusammenzubauen, folge den Schritten dieser Anleitung in umgekehrter Reihenfolge.
Arthur Shi

Mitglied seit: 03/01/18

218620 Reputation

0 Kommentare