Einleitung

Folge dieser Anleitung, um die Festplatte deines iMac durch eine SSD aufzurüsten, indem du einen aktualisierten 2,5 bis 3,5" Metall-Einschub verwendest. Diese Anleitung beinhaltet die Schritte zum Einbau des Temperatur-Sensors, sodass die Lüfter deines iMac mit der korrekten Schnelligkeit laufen.

Dies ist nur eine grundständige Anleitung und ist nicht dazu gedacht eigenständig benutzt zu werden. Diese Anleitung ist Teil der Anleitungen zum Austausch der iMac HDD.

  1. HKQbp12ZISQhNfAv
    HKQbp12ZISQhNfAv
    C535jLFwdCXbrulv
    wDWxsjpZCDD5vCjk
    • Folge den nächsten Schritten, wenn du die Festplatte durch ein SSD-Kit ersetzen willst.

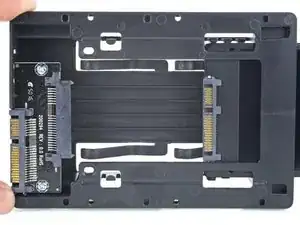
    • Wenn der Einschub der SSD wie im ersten Bild aussieht, dann benutze stattdessen diese Anleitung.

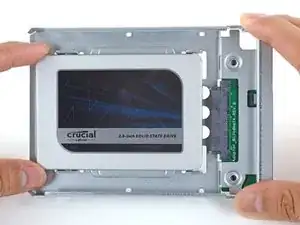
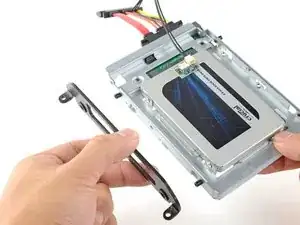
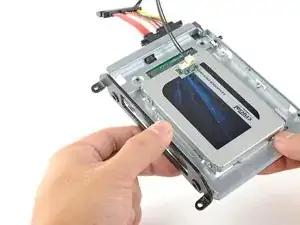
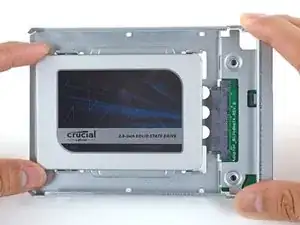
    • Richte die Steckkontakte der SSD mit den Anschlüssen des Metall-Einschubs aus.

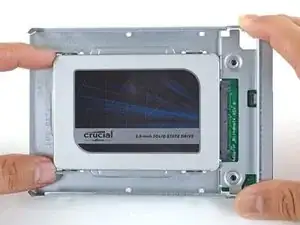
    • Drücke das Laufwerk fest gegen die Anschlüsse des Einschubs, bis die SSD gut sitzt.

    • Die SSD lässt sich nur in einer einzigen Lage in den Einschub einsetzen. Wenn die Steckverbindungen nicht passen, dann drehe die SSD herum und versuche es noch einmal.

    what if I’m installing a hard drive?

    Troy Garcia -

    Didn’t bother with the SSD caddy. Some 3M sticky pads did the trick!

    James Clive -

    Two thoughts on SSD replacement/upgrade:

    1) It would help if some references were made to help us determine what we need in terms form factors. I’ve never used an SSD and see a 2.5” one that would work, but I don’t know if 2.5” SSDs are different (in form factor) from 2.5” HDs. A lot of us are still learning about SSDs and isn’t that what this site is about? (Learning new things about hardware and using hardware?)

    2) I’m not clear if I definitely need a new temperature sensor if I put in an SSD or if

    Hal Vaughan -

    Can I buy the kit without the SSD. I'm thinking of replacing my 3TB hard drive with a 4TB SSD.

    Also, would you happen to know what the maximum hard drive dimension that can fit inside of this iMac? I may try a 14TB hard drive instead.

    Larry -

  2. FtBOnUuDYZJTjvey
    FtBOnUuDYZJTjvey
    RvVXsqFVNCWuybvj
    UmyFUVECjaDZNRjp
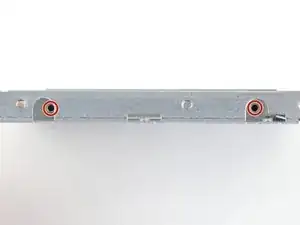
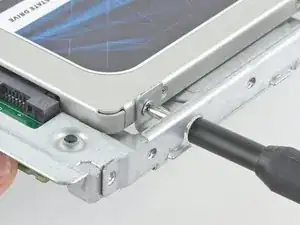
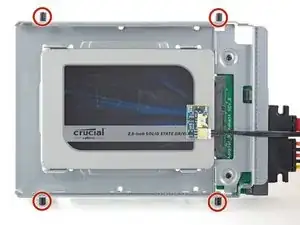
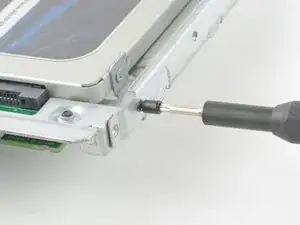
    • Benutze einen Kreuzschlitzschraubendreher, um die vier silbernen Schrauben (zwei auf jeder Seite) an den Kanten der SSD einzusetzen, um sie am Einschub zu befestigen.

  3. quopgXjU6RgRFYYW
    quopgXjU6RgRFYYW
    6FVtDs36uVFQAEUg
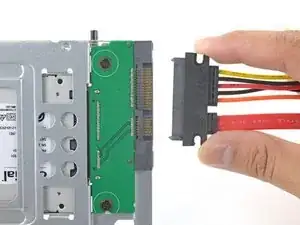
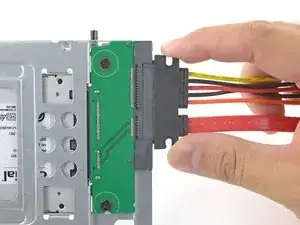
    • Stecke das sensorfähige Kombo-Kabel in den Anschluss am Einschub ein.

    • Der Stecker lässt sich nur in einer Lage einstecken. Wenn er nicht passt, dann drehe ihn um 180° und versuche es nochmals.

    Is the thermal sensor needed? I fitted a replacement SSD and it’s all back together and the iMac’s fans are fine. They don’t go into full max speed mode.

    James Clive -

    If you have a problem with the fans, you can always use Macs Fan Control (free) to set the speed. The sensor is not needed.

    maccentric -

  4. nFPHEiNHZQZIIWir
    nFPHEiNHZQZIIWir
    25p6UPH1X2Hpm1ut
    kZJrQ2FKFMAo4eGZ
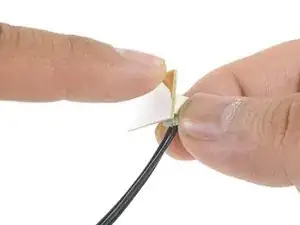
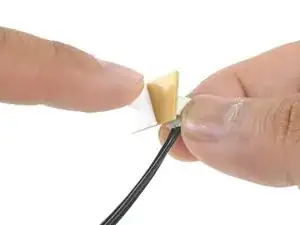
    • Ziehe die weiße Schutzfolie von der kleinen Platine des Thermosensors ab, so dass die Klebefläche frei wird.

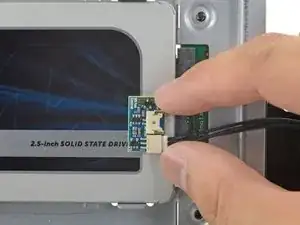
    • Bringe die Platine an einer freien Stelle der Metalloberfläche der SSD nahe beim SATA-Anschluss an.

    • Biege die überschüssigen Kabel des Thermosensors aus dem Weg, so dass sie den Einbau des Einschubs nicht behindern.

    Great pics ! Is that “temp sensor board” is already on my HDD IMAC ?? Or must I buy one ?

    kenclark200 -

    Don’t bother with the thermal sensor. I didn’t fit one and the iMac is working fine and no fans are kicking in.

    James Clive -

    Instructions say to attach sensor to the SSD, but all pictures show it being attached to the SSD carrier. This may not represent accurate SSD temp as much of the carrier dissipates the heat absorbed from the SSD

    chris byrne -

    Confirmed, no need for the extra temp sensor on Mid-2015 iMac. (EMC 2806, Mid-2015 27" iMac). Just changed the old 1TB HDD to SSD, no extra fan RPM after power on.

    Laszlo Nyirfa -

    The adhesive on the sensor is very weak. My sensor fell off after a couple of days. Is there a safe glue to use to adhere it to the SSD? Super glue?

    estyle18 -

    FWIW I bought a 4TB Western Digital Blue SSD. The entire case of the SSD is plastic- there is no metal. Hoping the temp sensor adheres to it okay.

    Kupe -

  5. TB3g2BfZthZmgZof
    TB3g2BfZthZmgZof
    UZXpLNW61PfcoLXO
    • Übertrage die Montagestifte der alten Festplatte mit Hilfe eines Torx T8 Schraubendrehers auf die Seiten des Einschubs.

  6. KBSB2H5m4afo1XQb
    KBSB2H5m4afo1XQb
    yaSlbXuRWxuB6UEm
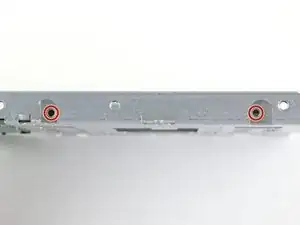
    • Übertrage alle Halterungen, die an der alten Festplatte angebracht waren, auf den Einschub.

  7. SldWU16exyqkJemL
    SldWU16exyqkJemL
    UjNyOhADTniaGyRe
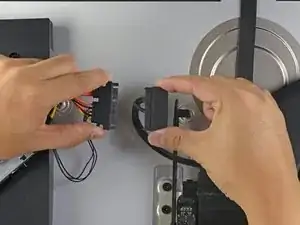
    • Verbinde das Kombo-Kabel des iMacs mit dem neuen thermosensorfähigen Kombo-Kabel.

  8. YJqasivdZRKDWMjy
    YJqasivdZRKDWMjy
    FI6EqbMtmSvAcIM6
    DpsoNu5h3obcGm6g
    • Die hier gezeigten Bilder stammen von einem 2017er iMac. Dein Kabel unterscheidet sich vielleicht ein wenig, das Verfahren ist aber grundsätzlich gleich.

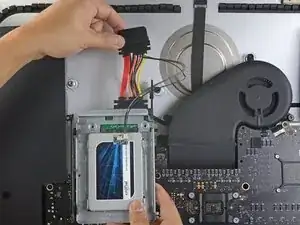
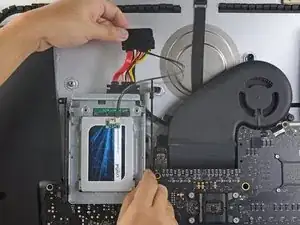
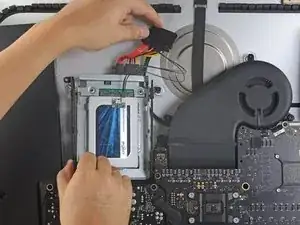
    • Schiebe den SSD-Einschub anstelle der alten Festplatte ein.

    • Führe die Kabel so, dass sie keine anderen Bauteile stören.

    • Versuche, die Kabel auf keinen Fall zu knicken, und verlege sie so, dass sie nicht eingeklemmt werden.

    The SATA cable on my Late 2012 was not long enough to comfortably attach to the end of the temperature sensor array after it was plugged into the new SSD. I had to fold the array and slide it under the SSD and housing. There was much resistance to the folding so I took it slowly to let the wires adjust gradually to the fold so they would not break.

    Bob Enders -

    Unfortunately, the adapter that comes with it isn't long enough to avoid pushing against the screen in the front. One week after upgrading to SSD my screen fell off shattering and breaking the power connector on the systems board. A new screen is ordered but I'm hoping the power connector isn't damaged beyond repair. I'm going to try to adhere the HD adapter to the back inside of the case with 3m adhesive to avoid pressure against the screen.

    Erik Johnson -

    As a newbie, the only other upgrade I have done is to replace my iPhone 7 battery. I had trouble on reassembly.

    This is a great upgrade guide, but it would be important to me to see the reassembly instructions including the cautions.

    For example, I had issues with reattaching the plugs in the phone. I could see having an issue with them here, as well as repositioning the display back into the cabinet.

    I do PCB board repair work and repair pinball machines. But I won’t try this.

    Larry Hamm -

    how do i glue on the new screen? which glue is used?

    Marc Seeh -

    Try 3m double sided tape from Amazon, it available in 3mm width which is ideal for iMac screen. It has a very thin foam and is much better quality than the cheap Chinese kits available on Amazon. You will have to trim it to size with a sharp craft blade as you fit. Don’t risk your screen falling off from using cheap tape in the so called fitting kits!

    Tony Street -

Abschluss

Um dein Gerät wieder zusammenbauen, folge den Schritten in umgekehrter Reihenfolge.
Arthur Shi

Mitglied seit: 03/01/18

218620 Reputation

0 Kommentare