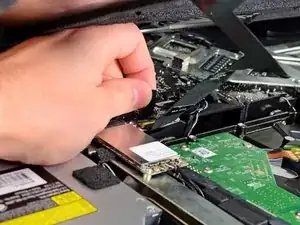
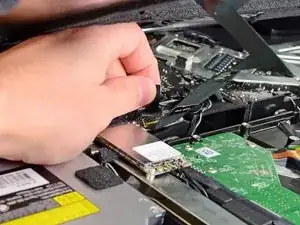
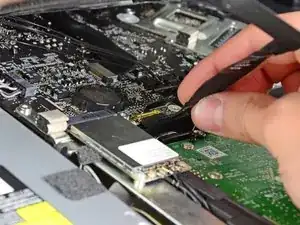
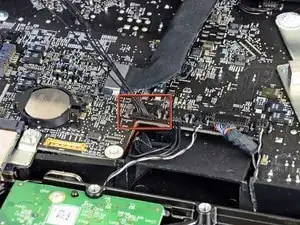
Einleitung

Rüste deine Festplatte zur Speicherplatzerweiterung auf.

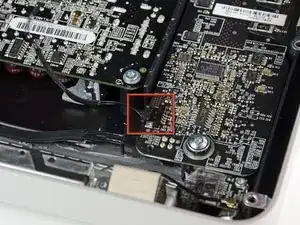
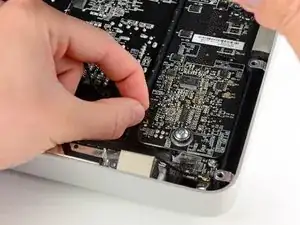
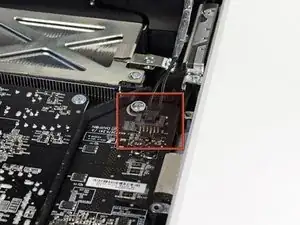
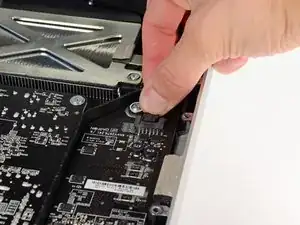
Bei dieser Reparatur wird in einigen Schritten beschrieben, wie du die Festplatte durch eine SSD aufrüsten kannst. Insbesondere wird gezeigt, wie der Temperatursensor der SSD installiert wird, so dass der Lüfter des iMac mit der richtigen Drehzahl arbeitet.

Bevor du am iMac arbeitest: Ziehe den Netzstecker und drücke den Einschaltknopf mindestens 10 sec lang, um die Kondensatoren des Netzteils zu entladen.

Sei sehr vorsichtig und berühre keine Anschlüsse der Kondensatoren und auch keine der offenliegenden Lötstellen auf der Rückseite der Netzplatine.

  1. S6gQ2HIHlQuHu5Sy
    S6gQ2HIHlQuHu5Sy
    EucNhvfCJRsBRgOY
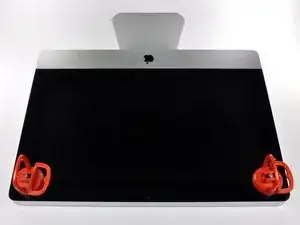
    • Ziehe den Stecker, bevor du anfängst. Lege den iMac auf eine weiche Oberfläche, so wie gezeigt.

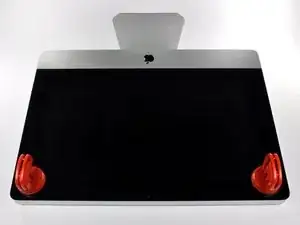
    • Befestige einen Saugnapf in jeder der oberen Ecken der Scheibe.

    • Um die Saugnäpfe, die wir verkaufen, anzubringen, musst du erst den Saugnapf mit dem beweglichen Griff parallel zur Scheibe aufsetzen. Halte den Saugnapf gegen die Scheibe und klappe den Griff hoch, bis er parallel mit dem anderen ist.

    • Wenn der Saugnapf sich nicht festsaugt, dann versuche die Scheibe und den Saugnapf mit einem milden Reinigungsmittel zu säubern.

    Very easy to lift the glass out. Don't jerk too hard.

    kctipton -

    Another comment on DATA & LCD Temp. Sensor cables: I had to remove the vertical sync, and the backlight cable, however, if you have an assistant or/can carefully rotate the screen clockwise/and then have it held up about 5" to 6" at a slight angle, you do not need to remove LCD data cable or LCD thermal cable, however - IMPORTANT: you must have a second pair of hands/or way to securely prop up the LCD. Also, don't rotate too much, since then you will pull out LCD data cable, and it renders the whole exercise moot, or can damage the cable or connector.

    MaximBorzov -

    You don't need suction cups. The screen, held by magnets, can simply be pried off using a very thin blade such as a screw driver and fingers.

    Deepsurvival -

    That's a bad idea. using a metal tool to pry off glass is likely to end with an expensive broken front glass.

    Suction cups are common. Find a couple and do it the safe way. I use some cheap ones that came with iPhone repair kit.

    max damage -

    No need for suction cups, I just stuck my nails (short like guys usually have) between the top part of the screen and body, and it came off easily. I've never done it before, so it seems to be very easy.

    Nikolas Lintulaakso -

    Nails worked for me too

    Rob Dale -

    Just completed the replacement of the optical drive with an SSD using an OWC Data Doubler kit. Attempted to remove the optical drive without disconnecting any cables but found it a bit fiddly to orient the screen for good access. I bit the bullet and disconnected them and found the process less daunting than I imagined. Reconnecting them was similarly straightforward if you're careful.

    Tip: you can skip the step for removing the optical drive thermal sensor connector from the motherboard. Still need to remove the sensor from the optical drive but you can leave that hanging and reattach it to the SSD later.

    osienna -

    I use Garmin GPS suction cup. Work very well

    jc3Dcx -

    I’ve just successfully installed a 1TB SSD in place of my optical drive thanks to the information here- thank you to everyone who has contributed!

    3 comments- the procedure described here seems to vary between HD replacement and dual HD/optical drive replacement. This can be confusing at times.

    Expect there to be minor differences between the layout described and what you find when you open up your iMac. There are also, surprisingly, differences between the HD enclosure description, and the article provided by ifixit.

    I was able to replace the DVD/HD enclosure single-handedly without fully removing the LCD, or deconnecting any of the cables (steps 5-11). It’s a bit cramped, and fiddly, but I was not happy removing any of the cables despite watching videos, etc., since they all seemed to involve applying more force than I was comfortable with. A more detailed description of how to release them might have helped, but even here, there may be minor variations even within the 2389 model.

    Good luck!

    ivan birks -

    I did it several times with one suction cup at the end of a kitchen brush. Once with the blade of a swiss army knive, also ok. And i’m pretty sure it works with fingernails too

    Tai -

    Fingernails are all you need to free the glass from its magnetic hold. If you don’t have them, slip something thin and plastic, like a spudger, at a top corner.

    Max Powers -

    Minha dúvida é a seguinte: após o técnico trocar o HD do meu iMac de 21,5 polegadas, a câmera parou de funcionar. Seria por causa da troca do HD? Tem solução?

    Claudio -

    Creio que o cabo da camera não foi plugado ou deu mau contato… ou até danificado.

    glecyo@gmail.com

    glecyo medeiros -

    I can’t get my glass to budge. I’m replacing a cracked one and now it’s about to shatter.

    jamboxmitchell -

    I know that I'm replying really late but I advise to use clear tape over any cracks so the cracks don't get bigger

    Jace Holmes -

    Check for chips in the glass BEFORE you do this step. If there is a chip when you pull up with the suction cups you will wind up with a jagged mess. If you do have a chip I would advise covering the screen near the chip with clear tape of some kind before lifting out. Mine shattered right at the chip and the resulting glass dust cloud got all over. My solution was buying a new glass screen.

    BCam -

  2. dEfYFtAGakgNBgPI
    dEfYFtAGakgNBgPI
    TRYClBF1GnTXMyiU
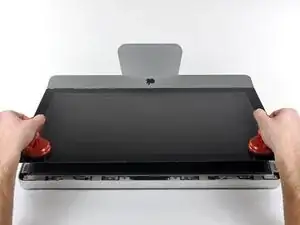
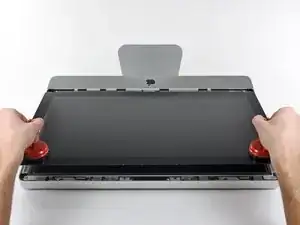
    • Hebe die Scheibe vorsichtig senkrecht zum LCD an, gerade soweit um die Metallstifte, die oben an der Unterseite der Scheibe angebracht sind zu befreien.

    • Ziehe die Scheibe von der Unterkante des iMac weg und lege sie sorgfältig zur Seite.

    • Achte beim Zusammenbau darauf, die Innenseite der Scheibe und das LCD peinlich genau zu reinigen. Jeglicher Staub und Fingerabdrücke werden sichtbar, sobald die Maschine eingeschaltet ist.

    What's the best product to clean the face of the LCD?

    Steve Speirs -

    Microfiber Cloth

    Leonardo Fournier -

    Try your best not touch it in the first place

    Brian -

    Wearing Nitrile or regular surgical gloves helps prevent finger prints if you accidentally touch the glass.

    amiller770 -

  3. Bix4VhiaYBKCt2rZ
    Bix4VhiaYBKCt2rZ
    6JGKWgUCXFHLEUs2
    WGCGZ5OtZPSXnERV
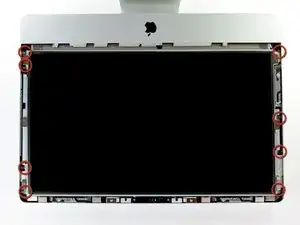
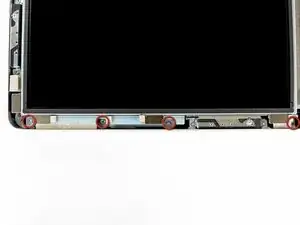
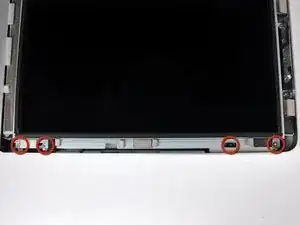
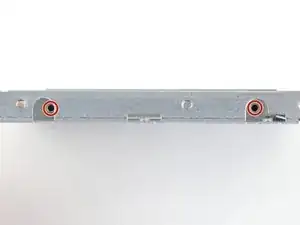
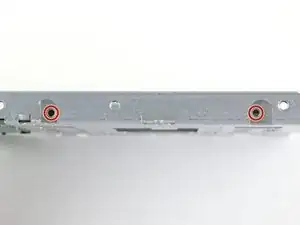
    • Entferne die acht 8mm Torx T10 Schrauben, die das Display am Gehäuse befestigen.

    • Die beiden letzten Bilder sind Detailaufnahmen von beiden Seiten des Displays.

    The metal near the screws is VERY magnetic. Honestly, the hardest and by far most frustrating step was trying to put these screws back in.

    seancourtney -

    I ran into the same problem - easily the most frustrating part of this process. To help deal with it, I took a drinking straw, cut it to be about 2 inches long, and used it as a chute to guide the screw to the hole. Dropping the screw down the straw, it'd still stick to the side due to the magnets, but using my screwdriver, it was easy to push the screw down to where it needed to go, and the straw kept the screw from being pulled out of place by the magnets.

    josh -

    +1 for the straw tip. Worked a treat!

    osienna -

    Hmm… yes, the magnets sucks - literally. But if you use a normal screwdriver or a bit, the screwdriver tip or the bit can be “loaded” by the magnets too. Just move the screwdriver (or bit) over one of the magnets and then “plug” the screw onto the screwdriver’s tip (or bit). It will be held by magnetic force. Just enough to move the screw vertically and very slowly into the whole.

    There are some special screwdriver on the market with “claws” to hold screws, but they are hard to find/to buy and expensive. I sometimes use superglue (a LITTLE) to temporary fasten the screw at the screwdrivers tip. This technique can be used with destroyed screw heads too to optimize adhesion.

    Udo -

    Les vis sont inévitablement aimantées

    Gui -

    Replacing these screws was like playing the most difficult game of “Operation” imaginable. I wish I’d seen the tip about using a straw before I started playing!

    Bret Mogilefsky -

  4. sHKTUAJPVrAGfLvG
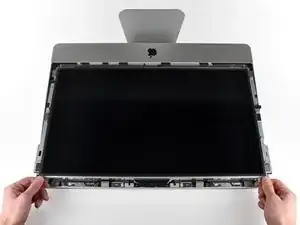
    • Hebe den oberen Rand des Displays leicht aus dem äußeren Gehäuse.

    • Hebe es nicht zu weit hoch. Mehrere Kabel verbinden das Display noch mit dem Logic Board. Wenn du am Display mit angeschlossenen Kabeln drehst oder ziehst, kann dein iMac beschädigt werden.

    You can use one hand to hold the edge up while reaching with the other hand to disconnect cables. You may want to have a prop handy (like a small book) or an extra person to hold the edge up while you disconnect cables.

    kctipton -

    Use the teardown guide for your iMac to familiarise yourself with the layout of everything before you dive in. I was able to get an idea of how much clearance there was once the display is unfixed from the frame, where the optical drive was relative to the base etc

    osienna -

    The harddisk can be removed WITHOUT the next steps. The opening angle of the partially lifted LCD display gives enough room to untighten the two Torx T9 screws of the hard disk bracket, to unplug the two SATA connectors and to carefully lift out the harddisk. There is absolutely no need to dismantle the whole thing.

    All you need is a screwdriver which fits into the room. I’ve used the “Pro Tech Toolkit” from iFixit. The screwdriver with Torx T9 bit fits perfectly.

    The other “tool” you need is either someone who holds the LCD plate or the inner leftover of a kitchenroll, a scrunched paper, a small towel or similar which has to be stuffed between the logic boards and the LCD plate to keep the LCD at its lifted place (careful! don’t unplug any of the cables).

    I’ve opened and changed the harddisks of those 21,5 iMacs a dozen times with the help of the “Pro Tech Toolkit” and a kitchen roll.

    Udo -

    If i want to replace the HD with a SSD, can i still skip the next steps? I think i can’t because i need to change the termal censor, but i would like an other opinion please.

    Danois -

    “Kitchen Roll” - paper towel core.

    kyoder11 -

    Hia,

    thx to IFIXIT and 20+ years of computer repair and building experience (all PC) there was no problem at all to remove a 500 Gb HDD from a mid 2011 iMac and replace it with an 500 Gb SSD Drive (with help from Comtec EDV, where i bought the upgrade kit).

    Skip the steps where people are advised to remove the display. Due to my experience it is def better to leave cables and plugs where they are. I lifted the display 12 cm and fixed this position w/ one pencil in each front corner of the case where the other end of the pencil sticked in ascrew hole of the display-frame. Very easy to operate afterwards! No probs w/ the screws of the hdd-frame.

    Some care-taking of static electricity is advised - wear a wrist cable. And don’t forget to press start button after having removed power chord. I had an Android Tablet on the right side, where i could watch these ifixit pages :-)

    thx to IFIXIT!

    w/ regards from cantbtroo from Berlin

    Hans- Peter -

    Thank you ifixit for the guide. Like so many others I jumped from step 4 to step 10 and left all the cables intact. Felt much safer doing so. Papertowel cores secured the LCD to higher position. There was enough room to remove the old HDD and replace it with a SSD drive.

    Cheers!

    Aapo Kaivosoja -

    I also was able to proceed with rest of instructions, after skillping steps 4-10, just have to be very gentle, i think it would help to have a second set of hands to hold screen above while other hands are uninstalling and installing hard drive, but i was able to do it on my own

    jacob d -

    If you have trouble lifting the LCD or accessing the connectors, check if you have removed the right screws. There are a lot of identical Torx screws that are accessible without removing the LCD that have nothing to do with the screen, I learnt that by nearly breaking mine xD

    Luther -

  5. uYfTvPHNlllVQJ2x
    uYfTvPHNlllVQJ2x
    DcxbvwtDtSCKTL4x
    • Ziehe den Verbinder des Vertikalsynchronisationskabel aus seinem Sockel auf der LED Treiberplatine nahe der linken oberen Ecke deines iMac.

    Tried doing this on my iMac, but this cable would not come out for love or money. No matter what I did, I could not unplug this cable. My iMac is the same 21inch 2011 as this one. Any advice would be greatly appreciated.

    louis.barr -

    use a little poker type thing in your right hand to push on the 2 holes that are on top of the plug and wiggle it out with your other hand,

    Nicholas -

    I was tempted to forgo steps 4-10 but found the inside of the case to be very dusty and decided to do the full disassemble. I struggled getting this vertical sync cable connector out. The trick that worked for me was to prop the display up using a pair of toilet paper tubes then using the fingernails of both thumbs, one on each side of the connector and it came out easily.

    Anthony Zimmerman -

    Great idea of using toilet paper tubes to prop up the LCD! Thanks.

    jim -

  6. Z6oLICdOpXOqb5Sv
    Z6oLICdOpXOqb5Sv
    PXYUsRPelGyf1fRl
    • Drehe das Display soweit aus dem Gehäuse heraus, dass du das Stromversorgungskabel der LED Rückbeleuchtung von der LED Treiberplatine ablösen kannst.

    • Löse das Kabel ab, indem du den Verschlussmechanismus des Steckers hineindrückst während du ihn gleichzeitig aus seinem Sockel ziehst. (in Richtung Unterkante des iMac).

    Slip a thumbnail under the “front” (toward the top of the iMac) of the connector to release its clamp from the retaining ridge. Then push toward the “back” (bottom of iMac).

    Anthony Zimmerman -

  7. npaWnsJX6JZjJGpj
    npaWnsJX6JZjJGpj
    YHJ6aB23ZhsTnt4v
    ynXVQEyhSx2XU5Bw
    • Fasse die Zuglasche am Sicherungsbügel des Displaydatenkabels an und drehe ihn nach oben.

    • Ziehe das Displaydatenkabel aus seinem Sockel auf dem Logic Board.

    • Ziehe das Kabel nicht nach oben, sein Sockel ist sehr empfindlich. Ziehe es parallel zur Oberfläche des Logic Boards.

    I am having a difficult time reattaching the LCD cable. A better description or any tips would be useful here.

    Ben Bauermeister -

    Me too — ditto that.

    Roger Buttermore -

    https://eshop.macsales.com/item/OWC/DIDI... —> abt. 5:30 into the vid. Handle up to slide in, then flip it down to lock the connector in place.

    Roger Buttermore -

    The connector needs to be carefully pushed in parallel to the board with a surprising amount of pressure and the pull tab must be folded back. Not super fragile, but not strong either.

    Isaac Vande Zande -

    I really wish that the fagility of this connector was mentioned in Step 10 or 11.. When i rotated the screen on step 11.. It pulled this connector out and now I can't get it back in.. I hate computers.. HA!

    Philip Nelson -

    This is the most painful part of the whole event. Replacing this cable took me around 30 minutes !

    K. Efe Egilmez -

    I have tried and tried to get this cable back in. How do I know if I have messed it up?

    Christopher Teer -

    Mine seems to be…upside down? Looks like the little flappy lock thing is on the bottom as opposed to it being in top as pictured?

    jinnifer douglass -

    I agree with everybody that this is the critical step in this fix. Removing it is not that difficult, the description is quite accurate, but I would highlight that the “rotate” part of the step could be detailed: the black plastic tab is attached to the metal lock (golden colored) , which should rotate into the direction of the cable almost 180 degrees to unlock the connector. After doing this you can pull the cable out of the connector, PARALLEL to the board and away from the connector. It travels a very short distance to disconnect. After going through the rest of the steps to remove the display, take some time to examine closely the connector and understand what you have to do to reconnect it on assembly. It helps to fully visualize beforehand, since on reassembly it is difficult to see properly.

    Fernando Walker -

    Magnifying glasses are needed for this step. Carefully study the cable and how it attaches to the connector. Take a few pictures to help. This is the most difficult step.

    Norman Staples -

  8. JlRYIragda3eBSWX
    JlRYIragda3eBSWX
    h4kYqkOVNshYIPZn
    • Löse den Verbinder des Kabels zum Thermosensor des LCD aus seinem Sockel auf dem Logic Board.

    When putting the display down on the table, be careful not to kink the flat ribbon cable.

    frank -

    The replacement hard drive I used doesn't even appear to spin up and the Time Capsule restore process doesn't show it as available. It just stays at Searching for disks and never finds it.

    JRBv3 -

    I had to use Disk Utility to partition the drive and then it showed fine. Rookie mistake.

    JRBv3 -

    I managed to damage the LCD thermal sensor socket in the logic board. Now the connector won’t stay in place. I know the missing thermal sensor should cause the fans to spin up (they do spin up after a while), but the screen is blank.

    I connected an external monitor and it works fine, so it doesn’t seem to be a graphics or logic board issue. I also replaced the LED driver board with one from a working iMac, to no effect.

    Can the missing thermal sensor be causing this?

    Rodrigo da Rosa Cesconeto -

    Having the same problem. Black screen, works fine with external display.

    Passerby -

  9. X4PMZJwCtrbQ4ALo
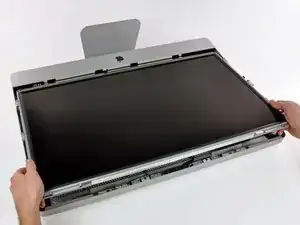
    • Ziehe das Display sorgfältig in Richtung Oberkante deines iMac und hebe es aus dem Gehäuse. Achte darauf, dass sich keine Kabel verfangen.

    Btw, I was pretty safe (& content) with two suction cups - i bought 3 for less than 7 Euros. They were a good help for a glass that hasn’t been removed since 2011. But i am sure fingernails will do a good job, too (of course not mine, cos i have short ones).

    At the end of the job it was even possoible to clean the fan that sucks cool air into the iMac (w/ a paintbrush and a controllable vaccuum cleaner). After that, it’s also a good opportunity to clean the air inlet that is part of the aluminium case (behind the stand - it’s always dusty).

    w/ regards from cantbtroo, Berlin

    Hans- Peter -

  10. NSogTWXkaACgjgqK
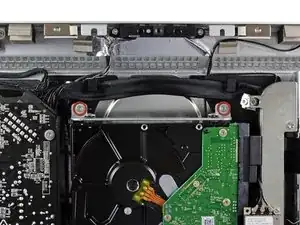
    • Entferne die beiden 9mm Torx T10 Schrauben, die die obere Halteklammer der Festplatte am äußeren Gehäuse befestigen.

    Mine does not look like this AT ALL

    jinnifer douglass -

  11. 16K61KZCLZKDuEXP
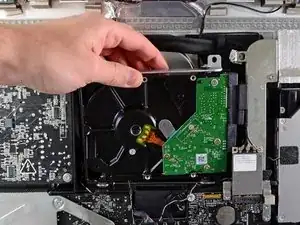
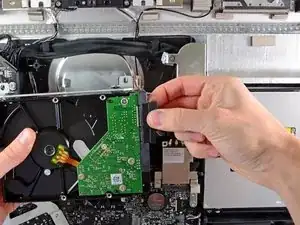
    • Drehe die Festplatte leicht aus dem äußeren Gehäuse heraus und hebe sie aus ihren Befestigungsstiften in Richtung Oberkante des iMac.

    • Passe dabei sehr auf, dass du dabei nicht an die AirPort Karte kommst, wenn du die Festplatte heraushebst.

    Mine seems to still be connected by something else on the other side, and I cannot remove it…

    jinnifer douglass -

  12. QOmONKbiPP5gUKAU
    QOmONKbiPP5gUKAU
    QN4VZmhyLibH2Dbt
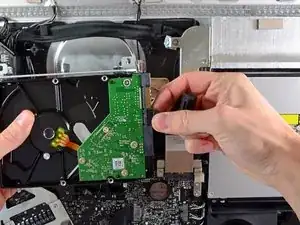
    • Ziehe das SATA Datenkabel und den Stecker der SATA Stromversorgung aus ihren jeweiligen Sockeln auf der Festplatte.

    J’ai un 3ème câble de branché sur le disque dur ?

    Delon -

    My iMac HDD have 3 ports in the back, SATA data, SATA power and a small one that looks like jumpers pins. When i removed the HDD there was a cable in it. Does anyone know what it is? I bought a new HDD and this port is slightly different. Thanks in advance.

    Rodrigo -

    It is a sensor, it is used by the fan control. I did not connect it because my SSD does not have this extra port. So after the iMac reboot, everything worked but the fan was always on (noisy!). I solved this issue by installing a small soft called ssdfanctrl in order to control the fan manually. All good now.

    yeshelolo -

    Pour le remontage, pensez à ajouter l’iMac Intel 21.5" and 27" Mid 2011 SSD Temperature Sensor’

    Une fois cette installation entre le disque et la nappe d’origine, vous pouvez remonter votre iMac.

    Gui -

  13. qlhSZCDqQeK121rE
    • Entferne die beiden Torx T8 Schrauben, welche die obere Halterung an der Festplatte befestigen.

    • Entferne die obere Halterung von der Festplatte.

    Do I do anything with this with regards to the new drive?

    jinnifer douglass -

  14. JhedSXmuBrGyhkRs
    • Entferne die beiden Torx T8 Einschraubstifte von der anderen Seite der Festplatte.

  15. RbMYpyOCxBrjXcDT
    • Löse vorsichtig das Stück EMI Schaumstoff von der Frontseite der Festplatte ab.

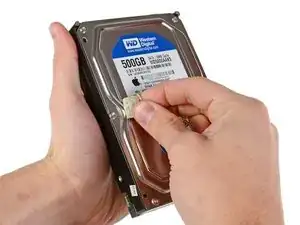
    • Vergiss nicht, dieses auf die neue Festplatte zu übertragen.

    This step and the next don’t align. The HDD pictured in step 15 does not come in a tray or enclosure it’s a solid lump of plastic and metal.

    bdavolls -

  16. HKQbp12ZISQhNfAv
    HKQbp12ZISQhNfAv
    C535jLFwdCXbrulv
    wDWxsjpZCDD5vCjk
    • Folge den nächsten Schritten, wenn du die Festplatte durch ein SSD-Kit ersetzt.

    • Wenn dein Festplatteneinschub so wie auf dem ersten Bild aussieht, dann folge stattdessen dieser Anleitung hier.

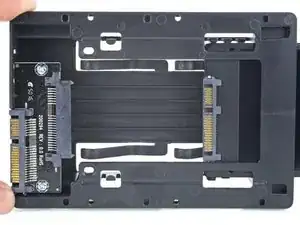
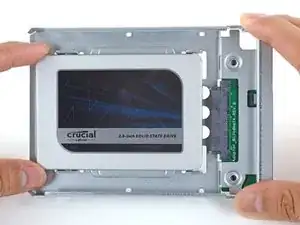
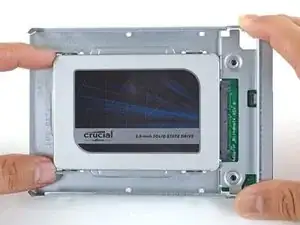
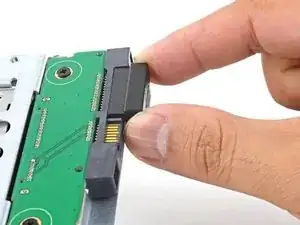
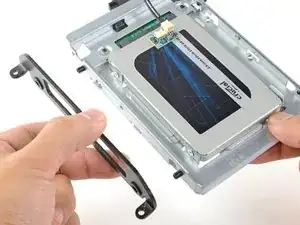
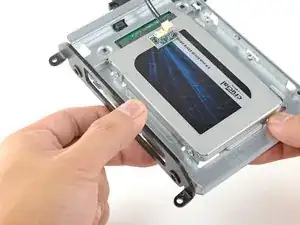
    • Richte die SSD-Stecker mit den Anschlüssen des Metalleinschubs aus.

    • Drücke das Laufwerk gegen die Anschlüsse des Einschubs bis die SSD gut sitzt.

    • Die SSD lässt sich nur in einer Richtung mit dem Einschub verbinden. Wenn die Stecker nicht passen, drehe die SSD um und versuche es erneut.

    In my 21.5 “ imac, there simply isnt enough room to use the plastic ssd enclosure in photo 1 if you want to screw back into the bracket as instructions advise you to do. When trying to put the screen back onto the Imac, it just wouldnt fit. So basically i did not screw in the ssd enclosure fully with the bracket, there is still room for the ssd enclosure and for all of the connections and temperature sensor if you dont screw in the bracket.

    Computer is running fine after a month or so, but i image if we end up moving the imac we should be very careful not to shakeup the SSD too much.

    jacob d -

  17. FtBOnUuDYZJTjvey
    FtBOnUuDYZJTjvey
    RvVXsqFVNCWuybvj
    UmyFUVECjaDZNRjp
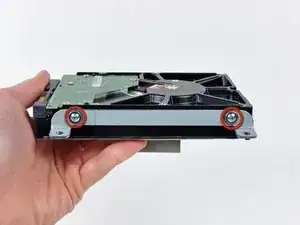
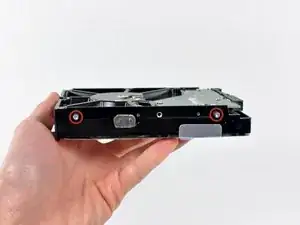
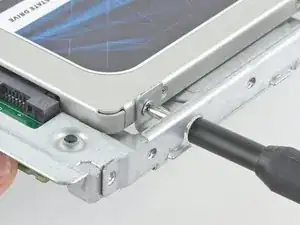
    • Benutze einen Kreuzschlitzschraubendreher, um die vier silbernen Schrauben (zwei auf jeder Seite) an den Kanten der SSD einzusetzen, um sie am Einschub zu befestigen.

  18. HU4PFgCWjYNkrIi4
    HU4PFgCWjYNkrIi4
    gWGSmdLLDiJOASYW
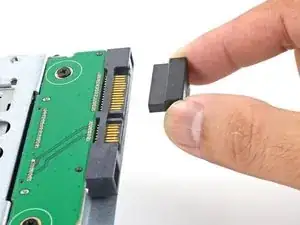
    • Setze das mitgelieferte sensoraktive SATA-Netzkabel in den Anschluss des Einschubs.

    • Das Kabel kann nur in einer bestimmten Richtung eingesetzt werden. Wenn das Kabel nicht passt, drehe es um 180° und versuche es erneut.

  19. nFPHEiNHZQZIIWir
    nFPHEiNHZQZIIWir
    25p6UPH1X2Hpm1ut
    kZJrQ2FKFMAo4eGZ
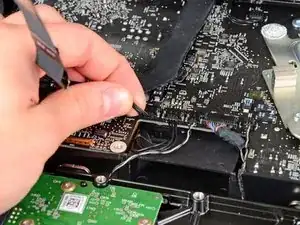
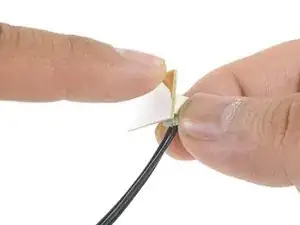
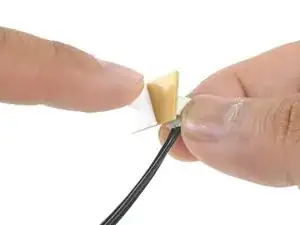
    • Ziehe die weiße Schutzfolie von der Rückseite der kleinen Temperatursensor-Platine ab, um den Kleber frei zu legen.

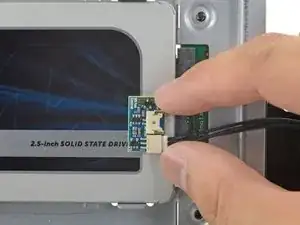
    • Klebe die Temperatursensor-Platine auf die freilegende Metalloberfläche der SSD nahe am SATA-Stecker.

    • Biege die überstehenden Drähte des Temperatursensors so weg, dass sie beim Einbau des Einschubs nicht im Weg sind.

    I don’t remember these instructions including advice to first install MacOS onto the new SSD hard drive. If you don’t first install MacOS on the SSD before installing it, you will then need to use a different computer to create a bootable USB thumbdrive with MacOS installed on it, which is not as easy as it sounds as you have to format the USB correctly, and then download the OS which can take a while if your internet connection isnt great.

    jacob d -

  20. TB3g2BfZthZmgZof
    TB3g2BfZthZmgZof
    UZXpLNW61PfcoLXO
    • Montiere die Haltestifte der alten Festplatte mithilfe eines T8 Schraubendrehers auf die Seiten des Einschub.

    Hallo. Will meine originale HDD wieder einbauen. Wo finde ich hier den Temperatursensor?

    MichaelRom -

  21. Aq2vsCxhf2S3qufG
    Aq2vsCxhf2S3qufG
    6HieMRWYI2Pgc2Yn
    • Befestige alle Halterungen, die von der alten Festplatte abmontiert wurden, auf dem Einschub.

  22. ciVrfTP4LtNtlEV3
    ciVrfTP4LtNtlEV3
    QDKoTyhGQj1clwQP
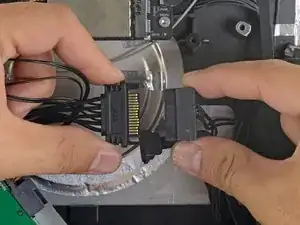
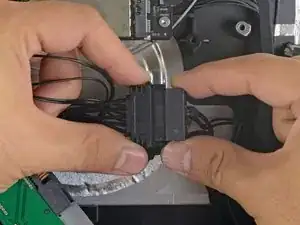
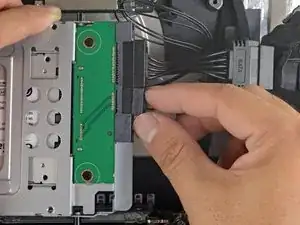
    • Verbinde das SATA-Netzkabel des iMacs mit dem anderen Ende des neuen sensoraktiven SATA-Kabels.

  23. CWAiJZexabkmRKlw
    CWAiJZexabkmRKlw
    UXFeucvE5hqbSPEU
    • Verbinde das SATA-Datenkabel des iMacs mit dem Einschub.

  24. YJqasivdZRKDWMjy
    YJqasivdZRKDWMjy
    FI6EqbMtmSvAcIM6
    DpsoNu5h3obcGm6g
    • Die in diesem Schritt gezeigten Bilder stammen von einem 2017er iMac. Unter Umständen sehen deine Kabel etwas anders aus, aber der Vorgang bleibt der gleiche.

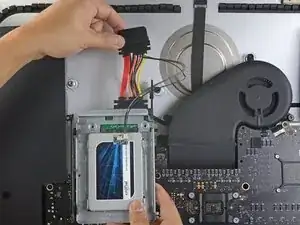
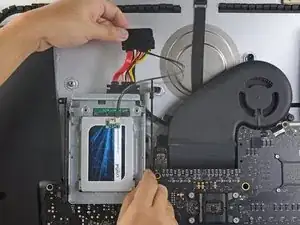
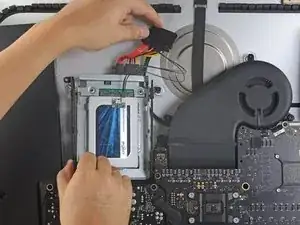
    • Schiebe den SSD-Einschub in den Platz, der vorher von der Festplatte eingenommen wurde.

    • Verlege die SATA-Kabel so, dass sie anderen Komponenten nicht in die Quere kommen.

    • Versuche, die Kabel auf keinen Fall zu knicken, und verlege sie so, dass sie nicht eingeklemmt werden.

    I’m stuck on the last stage. In my 2011 21.5” EMC 2428, Model A1311, I simply can’t figure out how to get the new enclosure back in position to fasten it down. The new sensor cable interferes with the reinstallation. I don’t see adequate pictures above to see how to solve the problem, other than by just letting the new enclosure sit loose in the general area, which doesn’t seem ideal. Suggestions?

    David Hercher -

    Hi David,

    The sensor cable is pretty rigid, which makes it difficult to maneuver the enclosure into place. You may need to make some tight turns on the cable. You can also try running without the sensor cable and see if the fans will work adequately without it.

    Arthur Shi -

    If using a SSD adapter as replacement, does the EMI foam from step 15 go on the bottom of the SSD adapter?

    jim -

    It is a bit disorienting that the photos change from a 2011 to a 2017 model. Also the EMI foam seems to have gone missing in this instructions

    Gregory Robben -

Abschluss

Für den Zusammenbau deines Gerätes befolge diese Anweisungen in umgekehrter Reihenfolge.

Walter Galan

685541 Reputation

80 Kommentare

Hi guys, the tools arrived today and I did already chage the default harddisk against the WD Velociraptor 500GB. For now everything is working fine. The iMac is in the middle of restoring the time maschine backup. Everything worked out as described. Excellent! I was just a little surprised by the magnetic forces which one needs to overcome gently...

tholst -

Is there a temp sensor that monitors the HD? I did the upgrade but now my fan is always on. I must've done something wrong.

Funkpolvo -

Did you use the same brand hard drive? Did check the instructions about cable orientation on the hard drive? Did you double check the LCD thermal sensor cable?

Scott Dingle -

Take a glance at this page for full explanations:

http://www.hddfancontrol.com/imac-hard-d...

I had the same issue here (after replacing the original HDD by a 1TB WB Caviar Blue) and it has been fixed by this utility.

HTH,

Jo Campos -

In response to the software, that does work, however, it can be taken care of hardware wise if our recommendations are followed.

Scott Dingle -

Hi, I'm no stranger to upgrading my Macs (been doing it since 1989). I've followed this guide too since the inside of my '11 iMac is a little less upgrade friendly and my fans spin up afterward as well even if the computer is just sitting there idle. I replaced my factory internal 500GB WD drive with a 2TB WD drive. It doesn't take long before my fans start to spin up. I've checked and rechecked all of the cable attachments. What else could I be doing wrong? What are your referenced recommendations that take care of this with a hardware solution? My best find so far is a donation based version of the above mentioned S.M.A.R.T. tool (http://exirion.net/ssdfanctrl/).

sash5 -

Another device fixed due to iFixit. One iPhone 4, 1 MacMini, 1 MacBook Pro and now an iMac! You guys are better than awesome!!!

ajayme44 -
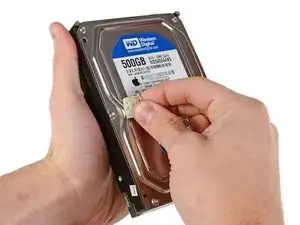
Thank you iFixit, another successful repair. Upgraded 1TB hard drive to 2TB, no issues at all.

pdwickizer -
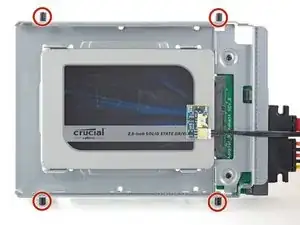
I have been using iFixit for years, so thank you very much for these guides. Invaluable!

But, I have one question.....

It seems that when I replace the HDD, often the microphone goes dead or bad. I never touch the microphone, never touch those cables, so is there any idea why this would happen or what I can do to repair/recover?

I saw one iFixit guide which showed how to replace the microphone, but it gave no source for the part..... help!

David -
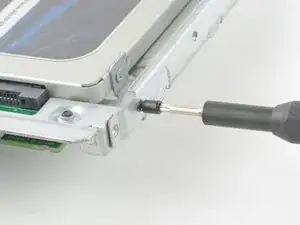
This took me about 15 minutes. Watch step 7 the most; that display data cable is fragile, and you're going to need good lighting to see it.

If you're installing an SSD, you'll definitely need an adapter for it so it seats properly in the iMac's shell. I bought a Newer Technology AdaptaDrive 2.5" to 3.5" Drive Converter Bracket for $14, and it's of excellent build quality. Fits like a glove in there.

Finally, your fan is going to spin up like crazy after your first boot. Don't freak out just yet; follow these instructions after you've turned your computer on (from http://support.apple.com/kb/ht3964):

1. Shut down the computer.

2. Unplug the computer's power cord.

3. Wait fifteen seconds.

4. Attach the computer's power cord.

5. Wait five seconds, then press the power button to turn on the computer.

Dave Mosher -

Edit: That didn't work, but a free application called ssdfanctrl did. Installed, restarted, set to "SMART" control and... completely silent. http://exirion.net/ssdfanctrl

Dave Mosher -

SSDFanControl doesn't work, at least for me on El Capitan. I've seen other complaints about this too.

Glenn -

I replaced the HDD with an SSD. Works great thanks to this guide. Also the DVD drive was broken, I replaced that also.

I really needed HDD fan control to reduce the fan speed. A reset did not help for me, so thanks for that app suggestion in this comment post.

mlter2002 -

Actually pretty easy install of SSD HD. Ordered the Newertech converter bracket and bought the fan control: http://www.hddfancontrol.com/imac-hard-d...

My wife had a couple of great ideas to keep lint and dust down: Use newspaper to set the glass and LCD on (then cover with newspaper) because it is very clean, wear powder free latex gloves to avoid hand oils contaminating computer.

Thanks again iFixit! My iMac is much faster.

tcoates52 -

Upgraded 500 Mb hard drive to 2TB. Thank you for this good guide !

birdlike -

Yesterday I replaced my internal Seagate 500GB with a Seagate 2TB hybrid hard drive without any issues. Was expecting tør fans to speed up due to failing harddisk hardware temperatur check, but everything runs normal :-) improved El capitan startup time from 56 secs to 32 secs. Very happy for this guide

tilst1 -

I would to do the same replacement. Did you purchase the Seagate SSHD 2TB drive (ST2000DX001)? Did it have an Apple logo? And did you have to buy an additional thermal sensor to keep the fans from spinning? Any reccos would help.

dmindel -

Part the First:

Replaced 2428 internal WD 500GB with a Seagate 1TB hybrid hard drive yesterday. Couple of years ago, put in a SanDisk 128 SSD with IFixit hard drive.

My issues with the earlier installation were: 1. bent / broke display data plug teeth twice reinstalling —ambient light, case slipping, fat hand all contributory factors. (Repair guy had to finish it for me — $150.00 plus 2 extra cables.) 2. 128 SSD kept running out of space, was corrupted regularly. Constantly had to use Disk Utility and then MacPaw CleanMyMac 3 to jolly it along. Two different configurations, first I paid for (guy told me Fusion Drive wasn't really necessary), second I got off line about 6 months ago. Problems decreased but never went away. Reminded me of my 1966 USAF experience with a giant room-sized Univac — it was down about half the time.

Roger Buttermore -

Part the Second:

Anyway, I girded my loins for this latest foray into the guts of my 'puter. Lots of research, but I can never lock in a complete step-by-step list of parts, changes to SUDO, etc. So I'm glad to report that my girlfriend showed up at the end of the day with steady, small hands to hold lights and reconnect the LCD thermal sensor cable (my day was spent straightening the tiny pin on the right without breaking it — although the metal cover on LCD plug bent backwards, then broke) and then she helped with that pesky Display Data Plug — angle of insertion, that pull tab and a sinking lack of perception about whether it's seated properly being my previous downfall.

Roger Buttermore -

Part the Third:

OK, my recent experiences:

1. Note to self: Losing 2 T10 8mm Torx screws for reassembly not real brilliant.

2. Fan speed flat out ("SMART" button didn't show up for me using that first recommended utility, but turning iMac off, unplug, waiting etc, then reboot worked - fan still seems noisy but it's not constant.

3. Make a Fusion Drive of your SSD + HDD with Terminal —

A. diskutil list —> to find the mount points for both drives;

B. diskutil coreStorage create FUSION /dev/disk# /dev/disk# —> where # stands for those two different mount points;

C. diskutil coreStorage createVolume lvgUUID jhfs+ “Fusion HD” 100% —> where lvgUUID = that big long serial number that showed up after the last command; AND FINALLY

D. sudo trimforce enable ... WOW!

UberSanDisk was fast before, but FUSION HD 100% SCREAMS.

Roger Buttermore -

Thank you sooo much for this guide !! It saved my iMac after my hard drive crashed. I was able to skip 5, 6, 7 and 8. Because when you are lifting up the display, your elbow can hold it up, while you unscrew the drive and take the Sata cables off. I replaced my drive with an original Apple drive, just 500 GB for testing, but as mentioned so many times before, fans fans fans. So for a short temp time I used Macs Fan Control ( http://www.crystalidea.com/macs-fan-cont... ) instead of the HDD control, not only the charge factor, but its temp, not permanent. I will replace it with Seagate SSHD hybrid drive, if still needed then, get OWC for fan control. Awesome page, thank you soo much. I was kinda lost before, now I have the knowledge, what was wrong and more important, fix it myself and not some shop who charges outrages $$$$$$.

Alexandra -

maybe i have a big arm but i pulled out the data cable, the power cable out of their sockets when I held it with my elbow, and not knowing that I screwed everything back in and turned on the imac - bang, black screen.

took me an hour to refix everything and now it's finally back to normal...

Bruce -

Not a hard install to do - I just ran into the same issues already mentioned here:

- The magnets on the side of the casing really do make working with screws a pain. I ended up using a pair of tweezers to aid me but the suggested above idea of using a straw as a guide is genius!

- You really do need 2 people to safely disconnect the 4 cables before you remove the screen. The cables and sockets are very easy to damage, so it's much safer to have someone with 2 hands or one hand and a flashlight rather than you working with one hand while holding up the screen with the other.

- If you are installing an SSD, you will need an adapter bracket. I only realized this once I got inside my iMac. With a bracket, it's no problem at all.

Jeff -

I agree — data display cable design is the pits. Straw idea is good idea for seating screws near magnets — or a small screw driver with a flat magnet pickup on the back end — goes right in as well. AND... 2 people make all the difference!

Roger Buttermore -

- I ran into the same fan-running-at-full-speed issue after reassembly. Apparently the iMac uses the stock HD's temperature sensor, so when you switch it out it has no sensor and spins on max all the time. As mentioned above, don't pay for HDD Fan Control - use the free Macs Fan Control (http://www.crystalidea.com/macs-fan-cont...). If you have an SSD, you can leave the HD fan permanently set to the minimum (as they emit so little heat).

I read that on some 2009 & 2010 iMacs, the fan issue occurs when one of the cables is put back mis-orieneted. Apparently, one of the connectors can work right-side-up or upside-down, and if you get it wrong it causes the fan issue. 'Anybody know if this is true for this model iMac? Anybody tried this as a fix?

Jeff -

Does anyone have a list of model numbers for supported hard drives that definitely won't cause fan issues? Also, where is the best place to buy them? I have a machine with a failed HD and need to replace it. Thanks!

Geordan Brown -

Hey,

Just replaced the hdd w/ a hybrid drive. Boots without a screen, and external display works fine, but it won't boot with the screen installed. Any thoughts? Thanks.

gabriel molnar -

Thanks for compiling these instructions. I have successfully followed the other ifixit guides for the 2007 iMacs (3 x). For this model, why is the universal drive adaptor a required purchase? I do not see any reference to it in the instructions.

seanemail -

Can i change the hard drive with an SSD ?

Andrea Foderaro -

Takes under an hour, especially if you've done this before and have some practice with the cables. Under 2 hours if you count driving to Best Buy and back to get the replacement HD.

kctipton -

Excellent guide thank you to the author!

Brandon -

Why is the universal drive adapter required?

Daniel Verlaque -

You don't need one if you have other means of attaching your 2.5" SSD to the back wall of the iMac case (like industrial strength Velcro or 3M VHB tape), but the bracket you mount into is a 3.5" space for a full sized desktop drive and SSDs are 2.5". Thus the adapter... just to mount the drive into the bigger bracket area.

brentp -

I was quite fearful about opening my iMac, but I did it anyway, and installed a SSD instead of the dead HDD that was in it, and it works like a new computer, starting up in 20 seconds and apps open almost instantly. My only heart stopping moment was I slipped and dropped the lCD a few inches, but it was fine. Now if I could just find a way to cheaply retrofit it with USB3 or USBc it would be good for another 5 years. BTW I use a free app called Macs Fan Control which lets me use one of the other sensors to control the HD fan. A bonus is the computer is running 35° f cooler so I can't even hear the fan running around 1000rpm.

Michael Crumpton -

Don't touch the PCB with the Lightning Bolt icon. it hurts

CMSuiuc -

He actualizado el HD de 500 Gb de mi iMac con uno de 2 TB!!! Todo perfecto gracias a esta excelente guía. Lo más difícil fue lidiar con el polvo y la grasa de las manos. Ahora tengo una iMac más rápida!! Muchas gracias.

Roberto Herrera -

Anyibe gave an opinion if it's worth replacing the OEM SATA cable with one rated for SATA III? Seems like a logical step since everything is apart, but if someone can definitively tell me that the OEM cable won't degrade my SATA III drive performance I probably won't bother.

(As an aside - geez there's a lot of dust in there. Nice to clean those fans out!)

Patrick Holman -

No this doesn't matter at all so don't bother doing so.

If it was the case, it wasn't the cable but the chipset of the board limiting it.

evo -

Does the drive's temperature sensor continue to work when you detach te sata power cable only?

Or does the de original hdd need sata power as well to provide the drive's temperature values to the iMac?

I'm asking because the drive is faulty and makes noise. I'm placing an ssd in the dvd bay area and don't want to use any software to control the fans.

evo -

Just to repeat my comment from step 4: you do not dismantle everything. Once the 8 Torx 10 screws from the LCD plate are untightend, the LCD plate can be lifted a few centimeters (or inches). It’s limited by the cables but the opening angle is wide enough to untighten the two hard disk bracket screws (Torx 9), to unplug the two SATA connectors and to lift out the hard disk. You need either someone holding the LCD, a third arm or anything soft like a towel or the leftover of a kitchenroll which has to be stuffed between the logic boards and the LCD plate to hold it.

Auf Deutsch: Man braucht keine Kabel zu lösen. Einfach das LCD-Display anheben, am Ende die Papprolle aus einer Küchenrolle, ein Handtuch oder Schal reinstopfen, damit das Display so bleibt und man kann die zwei Schrauben für die HD-Halteklammer so lösen, wenn man einen Schraubendreher hat, der nicht zu lang ist. Die Festplatte bekommt man leicht heraus.

Udo -

Hi Guys! The Upper Hard Drive Bracket is out of stock. I would know if this ssd’s support (of metal) is right as well. >> https://www.ollo.it/digitus-frame-hdd-ad...

Mattia -

Changed the original hard drive to a 1TB SSHD about 9 months ago. Bought a HD Thermal sensor (I believe it was from OWC) that properly controls the fan speed without adding any software to the iMac. Would suggest checking out their product along with the software solutions described above.

Rich Crossley -

Do you really need an adapter bracket? Since the SSD is so lightweight couldn’t you just screw in one side?

Jeremy Gerster -

I typically just use duct-tape to hold it in place.

johann beda -

Worth repeating here… if your replacement HD does not have a thermal sensor, the fan will run continually. The free smcFanControl app is the bees knees: http://www.macupdate.com/app/mac/23049/s...

G Lee -

Many Many Thanks…Cristiano

Cristiano Dallacasagrande -

As already mentioned I didn’t need to unplug any cables, just propped up the LCD panel with a plastic jar and the gap was large enough to go to Step 10 with a standard iFixit screwdriver (on a slight angle). Putting 8x Torx 10 screws back in was probably the biggest challenge but I used L tweezers to guide the screws.

I didn’t use the thermal sensor for 480GB SSD replacement but did use a $5 3.5” to 2.5” bracket, I don’t think you can get away without using one as the mount points are for 3.5” drive and would be too far apart.. unless you are happy to use just ONE (I wouldn’t).

Running vanilla 10.12.3 Sierra did not seem to make fans run loud but I still used smcFanControl app just in case.

Andrew Trofimov -

I completed the upgrade, and only used Velcro and some bracing to secure a 2.5 ssd! Works great!

Alex Fischer -

Pour le remontage, il manque un élément important l’iMac Intel 21.5" and 27" Mid 2011 SSD Temperature Sensor’

Une fois cette installation entre le disque et la nappe d’origine, vous pouvez remonter votre iMac.

Gui -

So everything seems to have worked out and i have turned it back on. However, I am not restoring from a Time Capsule, I am just trying to reinstall the OS. It looks great until it tells me to select a drive to install it on. Its like the computer doesn’t recognize the new drive. Any suggestions?

joel.ryals -

If the drive was not formatted has HFS+ by Disk Utility.app it may not be recognized by the installer. I usually format and install a system on a drive before intalling it inside the machine, but you can use Target Disk mode or maybe Internet Recovery to format it after installation.

johann beda -

Do I need to format the ssd? I installed the ssd and I have high Sierra on usb as well as my time machine back up. I want to clean install OS X and then restore to my back up.

Richard D'Andrea -

Hi Richard,

You will most likely need to format the SSD, but it can be done as part of the OS installation. Check this guide out for more details.

Good luck!

Arthur Shi -

Is there anyway to put attach two 2.5 drives. Say one SSD and one bigger spinning 2.5” drive for storage. Have a bracket that can hold two drives so was wondering if there is a way to daisy chain two drives. If not I assume one could disconnect the CD drive and use those cables? thanks.

Michal Pfeil -

Tried this for the first time and definitely easy peasy! Also realized you do not need to detach any of the LCD cables. Having someone hold the display up a bit to unscrew the two hard drive screws is enough to get it out. Also tried out Macs Fan Control for now and seems to be working fine.

Michal Pfeil -

I just did it

wonderful guide , clear instructions .I found it very useful

thanks a lot IFIXIT

Jaime Salazar -

this enclosure is it available here?

elmer mendoza -

Hi Elmer,

It is sold as a kit here. Otherwise, you can try searching for it online. It’s an IcyDock 2.5" to 3.5" Adapter.

Arthur Shi -

Arthur Shi,

Got it from amazon. Thanks for your reply

elmer mendoza -

Success !!! every bits of instruction was followed and i was amaze , wow !! thanks ifixit, i think my imac 2011 life is extended !!

elmer mendoza -

Tried two iMacs and worked great. Third one though resulted in all three fans spinning at max after booting up with new SSD drive. Tried resetting SMC and PRAM to no avail. Any ideas why this may be? Thanks.

Michal Pfeil -

Well looks like popping in the HDD back in, turning machine on, shutting down, taking HDD out and popping SSD back in fixed the fan issues. Weird but successful.

Michal Pfeil -

Some side notes. Done three of these now and if you are careful you definitely do not need to take out the display and unhook all those tiny cables. Have someone hold the display back enough to take out the HDD screws and pull out drive. Def enough space to do so without detaching any cables. Save yourself ton of time and headache. Also Macs Fan Control also solves the fan issue without needing the temp sensor.

Michal Pfeil -

Help… powered up after install of new SSD and get no image or light on screen but fan that never made any sound before runs like a storm. Help!

Stephen Nadeau -

Hey Stephen,

It sounds like the temperature sensor probe is not operating correctly, so the fan is running at maximum speed. Re-check the temperature board connectors, as well as the hard drive connectors.

Arthur Shi -

Se ci voglio mettere un SSD esistono adattatori?

akenantor -

This hard drive bay works with SSDs. It includes all necessary cables.

iMac Intel 21.5" and 27" (Mid 2011) SSD Upgrade Kit

Questo alloggiamento per disco rigido funziona con SSD. Include tutti i cavi necessari.

Arthur Shi -

Hello. I ordered the repair pack and installed the new CRUCIAL MX500 SSD. I am trying to restore a time machine backup but the disk search is spinning. The SSD is not found, what should I do? Thanks for your help.

Gautier -

Okay, now it's working! My new SSD wasn't initialized, I did it from the disk utility. I thought I could do all the OS updates but I'm stuck on High Sierra on this iMac mid 2011. Solutions to boost the machine to install the latest updates? Thanks a lot

Gautier -

I am curious. The previous version of the A1311, EMC 2389, shows a step to disconnect the temperature sensor cable from the hard drive. Does this version iMac, EMC 2428, not have a temperature sensor cable connected to the hard drive? If not, then whey does the SSD upgrade need to have a temperature sensor?

Kean Ashurst -

Hi Kean!

In this model, it looks like the temperature sensor is integrated into the OEM drive itself, and the wires are integrated into the connectors. Third party hard drives don’t have this functionality. Thus, you need to either supplement it with a break-out temperature sensor, or regulate the temperature with a software solution.

Arthur Shi -

Oof, this was a delicate ordeal, haha! I really thought I screwed the pooch there a couple of times, but I turned it on an et viola! Thank you so much! Although, I will say that the housing I bought did not line up at all with the internals, so I had to get…creative about its seating.

jinnifer douglass -

Do I need to do anything to the new SSD before I install?

Pre install the OS or format?

Kriztopher Abundo -

Hi guys. Around 1 and a half year ago I had my GPU not working because of total loss of thermal paste on it and on heat sink. I had no money by that time to buy a new iMac, so I decided to get courage to follow the guides here and try to fix it and it worked thanks to you all here. By that time I also decided to take out the optical drive (since it is not usable nowadays) and replaced by a SSD with a kit sold here. It is working perfectly. Also by the same time, the old hard disk sent me a goodbye and it is not working since than. Everytime I turn on my computer I have to "eject" it to keep going on.... Now I want to replace it and I have a hard disk here that I could use but I want an advise if it is good or not and if my computer is going to work well with 2 disk. The disk is a Western Digital Caviar Green SATA / 64MB Cache - 1.0TB.

Thanks for any advise.

Fredy -

I open my iMac 21.5” Mid 2011 LCD and I didn’t find any HDD inside.What should i do?

Dildar Begum -

I just did this last night - the iMac had already had an SSD put in by a previous owner, but fans were always running wild unless controlled by software. I bought the OWC in line thermal SATA adaptor and now it's working perfectly. As others have said, Step 7 and its reverse is easily the scariest/fiddliest.

Thanks IFIXIT!

Ross -

I looked for those HDD temperature sensor thingies on ebay but all the ones I found there looked completely different (just a sensor at one end and a small 2-pin connector at the other) even though they also say it's for an "imac a1311". Can those be used as well? If so, where should I connect them?

Stefan Monnier -

Here I installed another HDD with more capacity ..... 1 TB

Fredy Schw -

Je dois être mal réveillé car je ne comprends pas si le DD d’origine est en 2,5 ou 3,5 (le kit contient un adaptateur 2,5 vers 3,5 pour le SSD ET un boîtier externe 2,5) 🧐

Thibaud Chevalier -