Einleitung
Diese Anleitung hilft dir die Festplatte auszutauschen oder nachzurüsten.
Bei dieser Reparatur wird in einigen Schritten beschrieben, wie du die Festplatte durch eine SSD aufrüsten kannst. Insbesondere wird gezeigt, wie der Temperatursensor der SSD installiert wird, so dass der Lüfter des iMac mit der richtigen Drehzahl arbeitet.
Bevor du am iMac arbeitest: Ziehe den Netzstecker und drücke den Einschaltknopf mindestens 10 sec lang, um die Kondensatoren des Netzteils zu entladen.
Sei sehr vorsichtig und berühre keine Anschlüsse der Kondensatoren und auch keine der offenliegenden Lötstellen auf der Rückseite der Netzplatine.
Werkzeuge
Ersatzteile
-
-
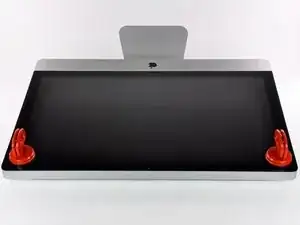
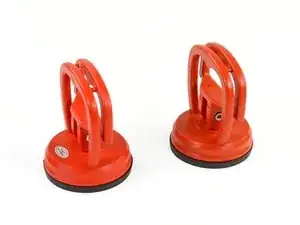
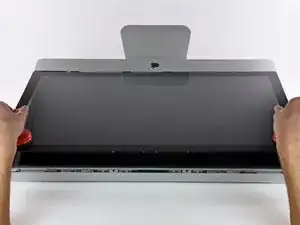
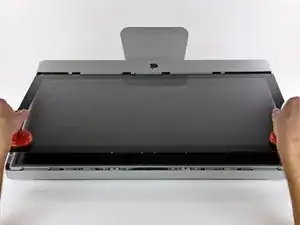
Befestige je einen Heavy Duty Saugheber in den beiden oberen Ecken der Glasscheibe.
-
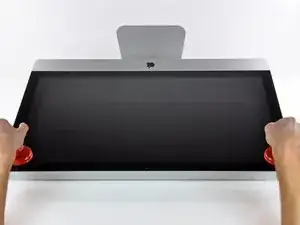
Halte den Saugheber leicht an der Scheibe und hebe den beweglichen Henkel bis er parallel mit dem anderen ist (wie im dritten Bild gezeigt).
-
-
-
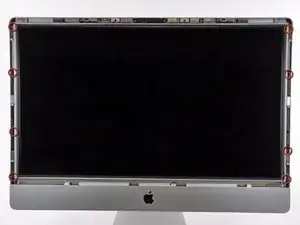
Hebe die Glasscheibe rechtwinklig so weit vom Display weg, dass sich die metallenen Befestigungsstifte an der Unterseite der Oberkante lösen.
-
Ziehe die Glasscheibe weg von der unteren Kante des iMac und lege sie vorsichtig beiseite.
-
-
-
Lege den iMac vorsichtig seitlich auf eine flache Oberfläche.
-
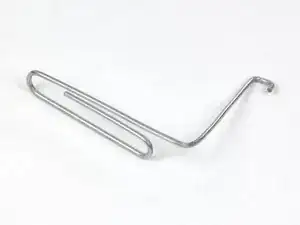
Benutze dieses Werkzeug, um eine Seite der oberen Kante des Bildschirms an ihrem metallen Rahmen zu hochzuheben.
-
Halte den Bildschirm hoch genug, um an die Kabel zu gelangen.
-
-
-
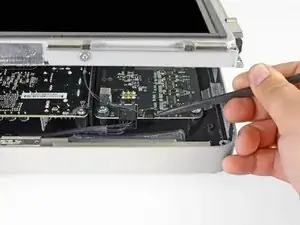
Löse das Kabel für die Vertikalsynchronisierung in der oberen linken oberen Ecke des Bildschirms. Drücke mit der Spudgerspitze auf die Seitenlaschen des Verbinders und lasse diesen so ganz vorsichtig aus seinem Anschluss heraus wandern.
-
-
-
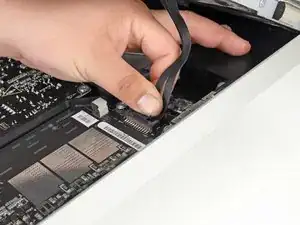
Löse das Kabel der LED Rückbeleuchtung, indem du die Sperrklinke mit der Hand herunterdrückst und diesen in Richtung der Unterkante des Bildschirms gleiten lässt.
-
-
-
Ziehe die schwarze Lasche gerade nach oben, um den ZIF Verbinder des Datenkabels zum Bildschirm zu öffnen.
-
Ziehe weiterhin in Richtung der Oberkante des Gerätes, um das Datenkabel abzulösen.
-
-
-
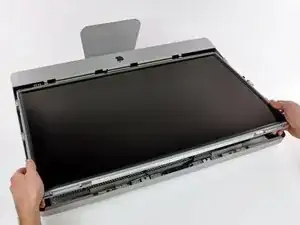
Ziehe nun ganz vorsichtig den Bildschirm in Richtung der Oberkante deines iMac und hebe ihn aus dem Gehäuse.
-
-
-
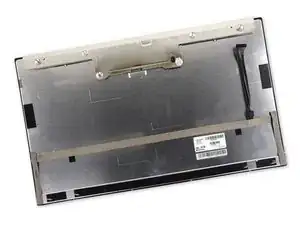
Lege das Display mit der Vorderseite nach unten auf eine glatte, weiche Unterlage.
-
Falls ein Kabel unter einem Klebeband befestigt ist, entferne immer erst das Klebeband. Ziehe nicht direkt am Kabel.
-
Ist ein Kabel mit Heißkleber an dem Chassis fixiert, benutze einen erhitzten iOpener oder einen Fön, um den Kleber zu aufzuweichen . Dann kann man ein Plektrum (Opening Pick) unterhalb des Kabels entlang schieben, um es zu lösen. Ziehe niemals an den sehr empfindlichen Steckern.
-
Schiebe ein Plektrum unter die Schaumstoffteile, um sie vom Display zu lösen und ziehe sie dann vorsichtig ab. Man benötigt unter Umständen dünnes, doppelseitiges Klebeband, um sie auf dem neuen Display zu befestigen.
-
-
-
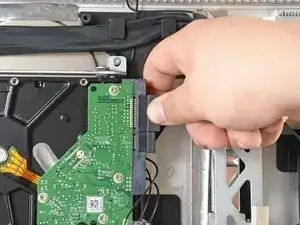
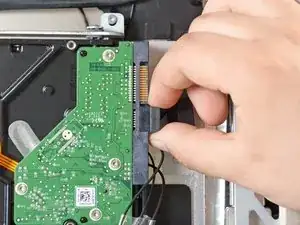
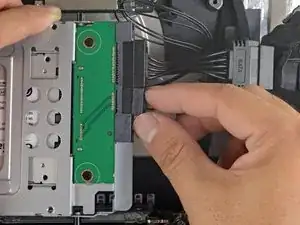
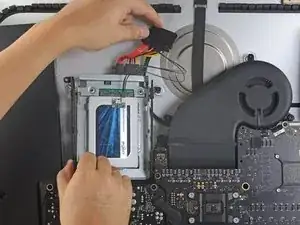
Löse das SATA Versorgungskabel und SATA Datenkabel, indem du sie gerade von der Festplatte abziehst.
-
-
-
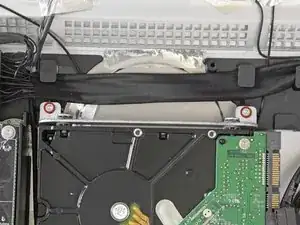
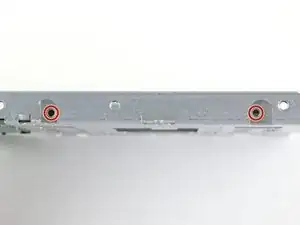
Entferne die beiden Torx T10 Schrauben, welche die Festplatte im Rahmen des iMac befestigen.
-
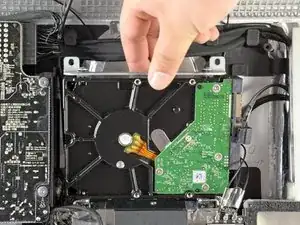
Drehe die Oberkante der Festplatte leicht vom äußeren Gehäuse weg.
-
Hebe die Festplatte aus ihren zwei unteren Haltestiften heraus und entferne sie vom äußeren Gehäuse.
-
-
-
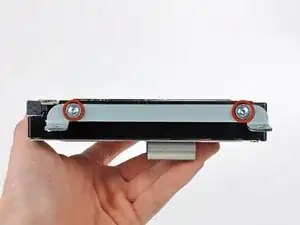
Entferne die beiden Torx T8 Schrauben, welche die obere Halterung an der Festplatte befestigen.
-
Entferne die obere Halterung von der Festplatte.
-
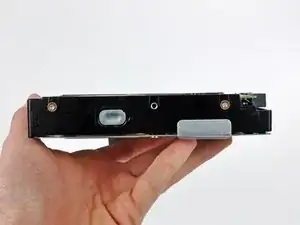
Entferne die beiden Torx T8 Einschraubstifte von der anderen Seite der Festplatte.
-
-
-
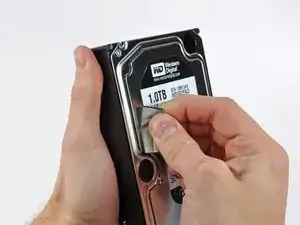
Löse vorsichtig das Stück EMI Schaumstoff ab, welches auf der Vorderseite der Festplatte befestigt ist.
-
-
-
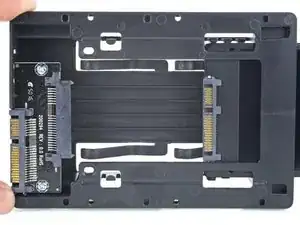
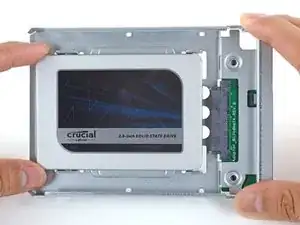
Richte die SSD-Stecker mit den Anschlüssen des Metalleinschubs aus.
-
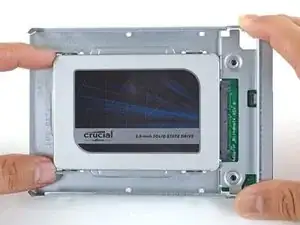
Drücke das Laufwerk gegen die Anschlüsse des Einschubs bis die SSD gut sitzt.
-
-
-
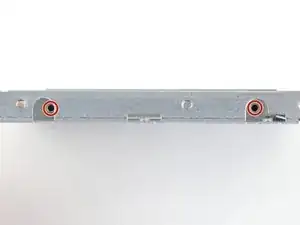
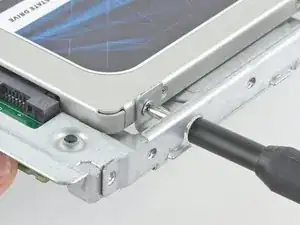
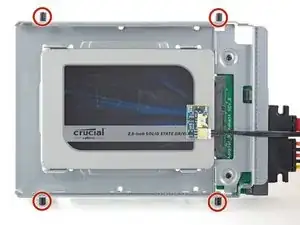
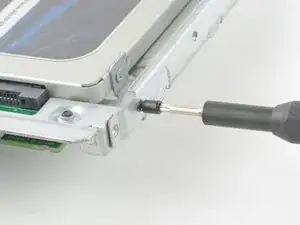
Benutze einen Kreuzschlitzschraubendreher, um die vier silbernen Schrauben (zwei auf jeder Seite) an den Kanten der SSD einzusetzen, um sie am Einschub zu befestigen.
-
-
-
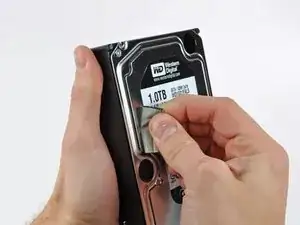
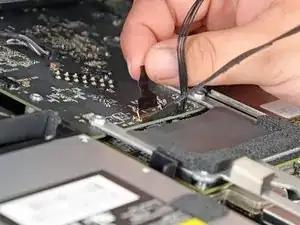
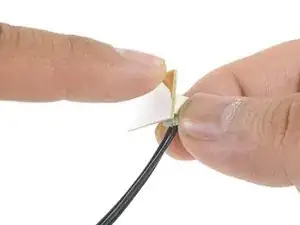
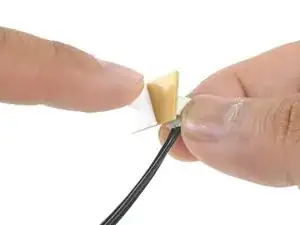
Ziehe die weiße Schutzfolie von der Rückseite der kleinen Temperatursensor-Platine ab, um den Kleber frei zu legen.
-
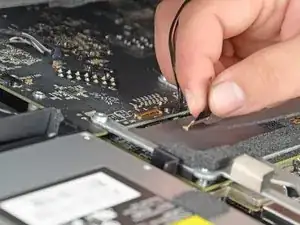
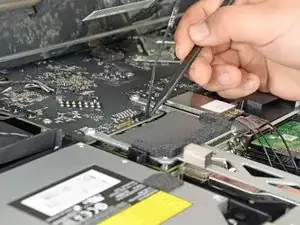
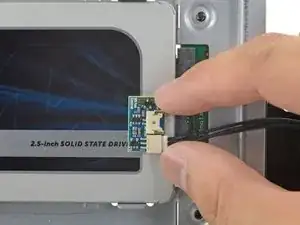
Klebe die Temperatursensor-Platine auf die freilegende Metalloberfläche der SSD nahe am SATA-Stecker.
-
Biege die überstehenden Drähte des Temperatursensors so weg, dass sie beim Einbau des Einschubs nicht im Weg sind.
-
-
-
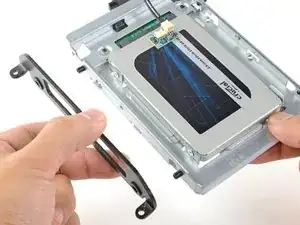
Montiere die Haltestifte der alten Festplatte mithilfe eines T8 Schraubendrehers auf die Seiten des Einschub.
-
-
-
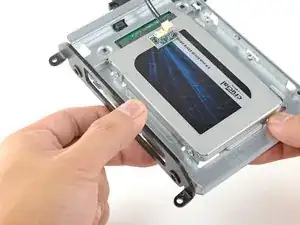
Befestige alle Halterungen, die von der alten Festplatte abmontiert wurden, auf dem Einschub.
-
-
-
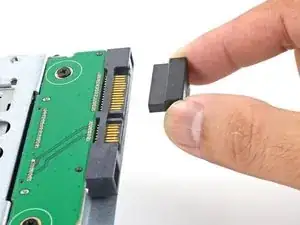
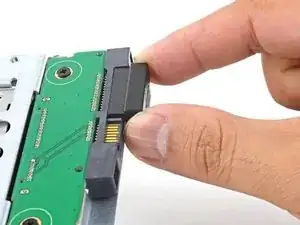
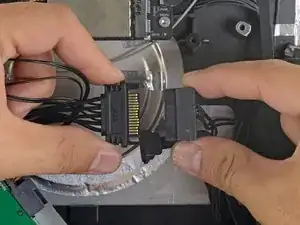
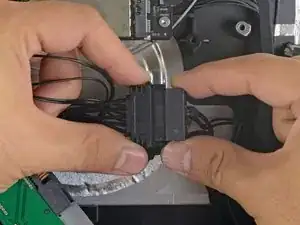
Verbinde das SATA-Netzkabel des iMacs mit dem anderen Ende des neuen sensoraktiven SATA-Kabels.
-
-
-
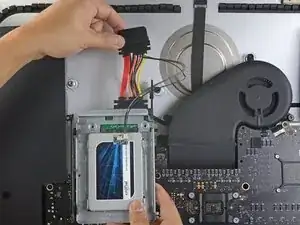
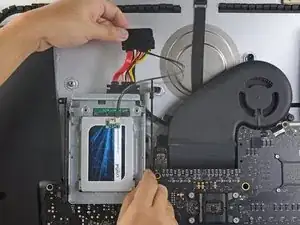
Schiebe den SSD-Einschub in den Platz, der vorher von der Festplatte eingenommen wurde.
-
Verlege die SATA-Kabel so, dass sie anderen Komponenten nicht in die Quere kommen.
-
Um dein Gerät wieder zusammenzusetzen, folge den Schritten in umgekehrter Reihenfolge.
62 Kommentare
Note that if you are replacing the hard drive with a non-Apple hard drive, then you will have problems with the fan running full speed constantly (see http://blog.macsales.com/10206-further-e...). Basically, you'll need to either install a $30 piece of software to control the fans or short out some wires.
jashugan -
You don´t need to short out the wires, just install the free SSD FAN CONTROL app from EXIRION.NET und you´ll be fine :D
remember after the glass, to get the aluminum front off, remove the bay for the memory upgrade on the bottom first before you remove the torx screws ans lift to access the bottom case (Between step 2 and 3)
I'm looking to replace my 3.5" HDD in my iMac (mid-2011) with a 2.5" SSD. Will I need an adapter for this?
Absolutly. You can buy a official one on the Apple Store. I reccommend the dual-drive (HDD & SDD) tho.
I used the newertechnology 2,5–3,5-Adapter for 16 bucks from amazon and it fits 100 %!

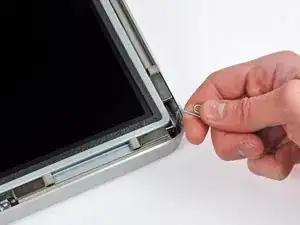
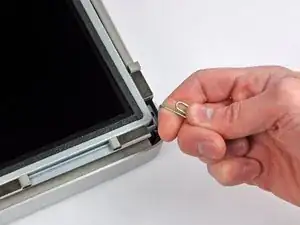


You can easily lift the glass panel off the magnets with only your fingernails (or something thin like a credit card or a guitar pick). No need to buy suction cups you will only use once.
Nick Caron -
Yes, you don't need the specific suction cups to remove the display cover - it's held on by magnets, and if you start at the center by the iSight you can work out to the edges and remove it. I had an iPhone screen suction cup around and it helped with balancing the screen when you pull it out fully, but by no ways is it required.
jtowner -
Great guide and pretty straight forward the only thing that took me ages and I didn't manage to undo were the power btn cable (step 28) and the thermal sensor (step 25) Seemed like they were glued on! Very difficult to remove and obviously conscious so I didn't break anything!
Eddie -
Thanks!!! Worked excellently.
I used a plunger (clean first ;-) to get the screen off, and http://exirion.net/ssdfanctrl/ for fan control.
Then, i did not take out the whole display and left it in the hinges on the bottom side and held it up with two small cardboard boxes. Easy enough to disconnect the hdd then.
I replaced with an ssd, put that into a ssd enclosure. Had to drill an extra hole in it to fasten the pins that hold it in place.
Used Carbon Copy Cloner to make an image from the old hdd, with the sad connected via usb. Checked it of it booted via System Preferences > Startup Disk. It worked so the took the imac apart and replaced the disk. Booted, everything was working as always, only faster!
Frank303 -
I'm replacing my optical drive too. what exactly needs to be plugged into the SSD? I don't have the kit - as I am not sure one is required if I buy something like this: http://www.amazon.com/gp/product/B0056OB...
Can you please advise? Can I do it with this piece, or do I need to get the entire bracket kit?
Allen Borza -
My display data cable forks, with a smaller section going up near the camera board. Where it forks, it is attached to the aluminum plate that attaches around the cpu board. I haven't seen any images that look similar, and I'm stumped at how to remove this second section of the cable. 2010 i7 build to order
Awolf -
Agree with the other comments here. Despite buying suction cups, not sure they were necessary as the screen removed very easily. A sat nav suction cup would do the job fine.
Stuart Bloomfield -
I can confirm that it is possible to remove the front glass using fingernails rather than suction cups. It isn’t easy, but if you try you should be able to pry off the glass.
I did this twice: once at the beginning of the procedure and once again at the end, when I realized that a big pice of lint was trapped under the glass.
gordonhamachi -
Don’t use suction cups. totally unnecessary. screen pops off with fingernails.
Kieran Hobbs -
The reason for caution about suction cups tends to be making sure you don’t apply uneven pressure on the edges of the glass and crack it in the process of removal. I do agree however that some pretty small suction cups would do fine. These suction cups can be had at your local princess auto (Harbor freight) for a few bucks and are useful elsewhere as well. if you use your fingernails or other items just try and do it evenly :)
Abirinder Brar -
good duct tape or gaffer tape wrapped around your hands makes an excellent glass removal 'tool'. Even clear packing tape works a charm.
Stu Blair -
A great first step that minimizes that first gust of dust migration when the glass is lifted is to clean the glass, sides *and the back* before lifting the glass, and then lift SLOWLY. Most of that dust is already trapped inside and pulled up as the screen lifts, but with care you can keep it there (or gently vacuum out with a micro vac…).
John -
before starting any of this…there is a device that you can use that comes with the IFixit kit to format and either clone or restore your hard drive to the new drive…it will save you a lot of headaches..it is a SSD enclosure that you can plug into your existing computer …
Tom Richter -
Thanks for the instructions. Before doing this the first time, suggest to everyone, read through at least twice. This is the easiest step, as you’ll soon see. As for removing the glass, USE suction cups, either the ones the sell here, or others. DON’T skimp. Also wear gloves when handling the glass. Don’t take chances.
ECJohansen -
Duct tape works too!
Dani -