Einleitung

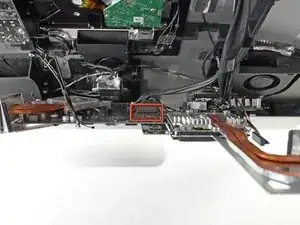
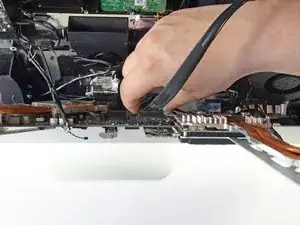
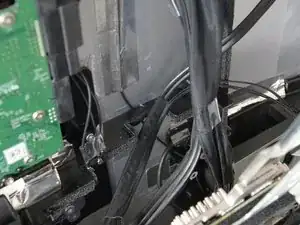
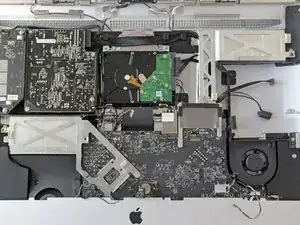
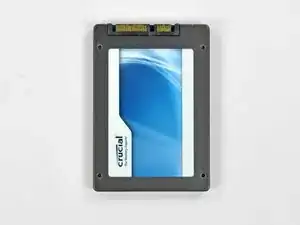
Diese Anleitung wird dir beim Einbau einer zweiten HDD oder SSD helfen. Du musst dabei nicht das optische Laufwerk auf Dauer stilllegen oder entfernen.

  1. uNKhXoCAwZO2RHmR
    uNKhXoCAwZO2RHmR
    aZSFSpF6EqB15Ire
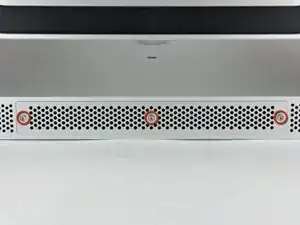
    • Löse die drei Kreuzschlitzschrauben, mit denen die Abdeckung auf der unteren Seite des iMac befestigt ist.

    • Die Schrauben bleiben in der Abdeckung stecken und lassen sich nicht komplett aus der Abdeckung entnehmen.

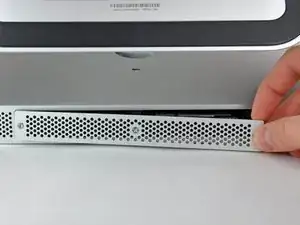
    • Entferne die Abdeckung des iMacs.

    • Beim Wiederzusammenbau die Abdeckung lose einsetzen und mit den Außenseiten in das Gehäuse des iMac einrasten, bevor die Schrauben fest angezogen werden.

    I am going to put a very important comment here. Before you start this process listen to the fans on your iMac do any of them sound obviously loud (think about how quiet your iMac used to sound as a reference) If you notice one or more of them sounding substantially loud compared to the others consider locating a replacement fan prior starting this process. After all if you are already “in the neighborhood” it is a shame to do all this work only to have to disassemble your imac a couple weeks later because you realize the fan is failing. I speak from my own personal learning experience of having to disassembly my iMac 3 weeks later because the HDD was failing and apparently the moving the fan around was just enough to push it to start really under performing.

    Wizbang FL -

    I’m not sure why it is necessary to remove the RAM. As far as I can tell, it can remain in place during this procedure.

    gordonhamachi -

  2. NmuOGaXLTLvKhVlL
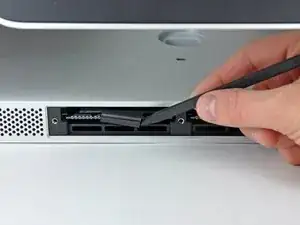
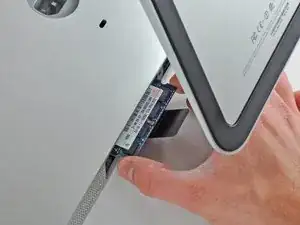
    • Schiebe mit den Fingern oder der Spudgerspitze die schwarze Zuglasche aus Plastik für die RAM Aufnahme aus der schmalen RAM Öffnung.

    Bonjour, j’ai arraché la languette. Conséquence, elle est inutilisable et je ne peux pas retirer la barrette. Comment faire autrement ? Est-ce que cet outil peut être utile ?

    Robert Ainstain -

  3. og4XBxB2FsSmOJBD
    og4XBxB2FsSmOJBD
    gZVIIrJfpMFFxXcV
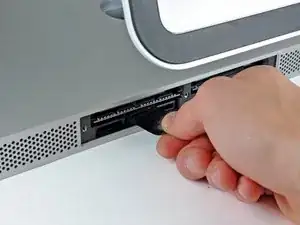
    • Ziehe die schwarze Lasche aus dem iMac heraus, um die RAM Chip aus ihrem Anschluss auszuwerfen.

    • Die RAM Module sitzen oft sehr fest und du musst relativ kräftig ziehen.

    • Schiebe den RAM Chip mit den Fingern aus seinem Anschluss.

    • Wiederhole diese Schritte falls nötig für das (die) andere(n) RAM Modul(e).

    How many 4MB cards can I install?

    nowsc -

    None. 4mb ram is too old to fit into any computer manufactured after like 1998.

    Brett Davison -

    @Brett

    I suggest that you learn your unit symbols before you try to appear clever:

    4mb == 4 milli bits

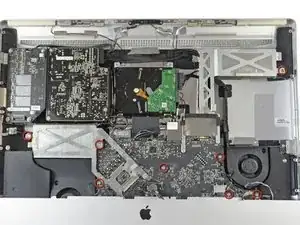
    4MB == 4 mega bytes

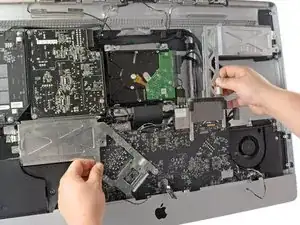
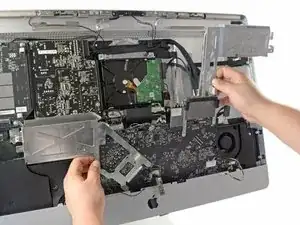
    nowsc was obviously meaning 4GB not 4MB, try not to be a dick.

    Simon -

    Just for the records :

    4 millibits are 0,000000004 MB

    There was never any RAM in mb and the question states MB and nobody except you is talking of millibits.

    You are also a dick if you try to spread “your knowledge” nobody has asked for

    Hein Blöd -

    Take care to note which way out the RAM comes - there is a notch in each RAM and it is not centered, therefore either the notch will be on the left or to the right (depending on which way up you have your iMac). This will make it easier to replace the RAM without damaging anything.

    Mike Haines -

    If damaged the notch inside one pair of RAM slots, is it fixable ?

    Gavriil Bordyukov -

    its not that hard to say that you can add up to 4GB sticks, bringing a total to 16GB

    Charlie Amis -

  4. sQYsHCwlim2WOs5y
    sQYsHCwlim2WOs5y
    wHiunt5LEPRI6Df1
    olRVCyJ2KOMrOshW
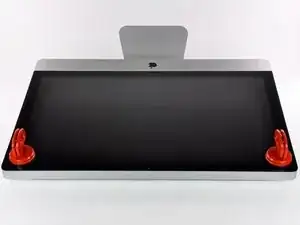
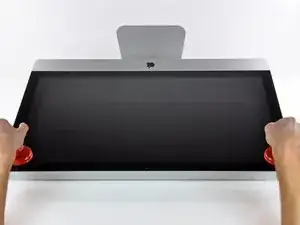
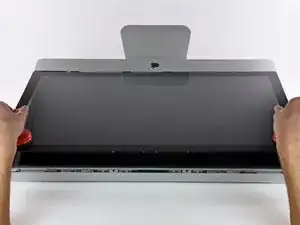
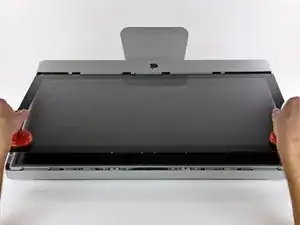
    • Befestige je einen Heavy Duty Saugheber in den beiden oberen Ecken der Glasscheibe.

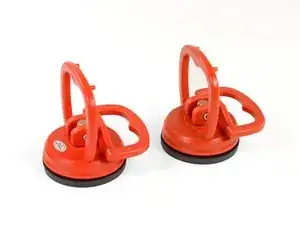
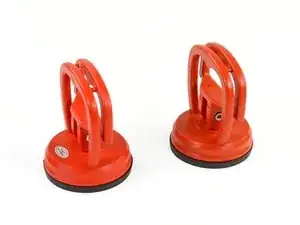
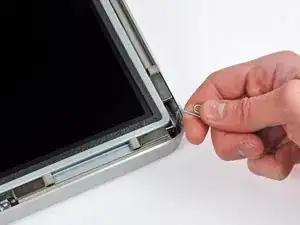
    • Um die Saugheber zu befestigen, platziere sie erst mit dem beweglichen Henkel parallel zur Glasscheibe (wie im zweiten Bild gezeigt).

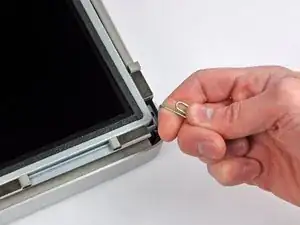
    • Halte den Saugheber leicht an der Scheibe und hebe den beweglichen Henkel bis er parallel mit dem anderen ist (wie im dritten Bild gezeigt).

    • Wenn deine Saugheber sich nicht befestigen lassen, reinige sie und den Bildschirm mit einem angefeuchteten, fusselfreien Tuch. (Am besten verwende destilliertes Wasser und, wenn das nicht hilft, ein 50/50-Gemisch aus weißem Essig und destilliertem Wasser.)

    • Hebe die Glasscheibe nicht nur an den Saughebern hoch, da sie dir sonst runterfällt, wenn ein Saugheber sich löst.

    • Die Originalverpackung des iMacs ist ein guter Ort, um die Glasscheibe abzulegen. Andernfalls tut es auch eine weiche und ebene Fläche, zum Beispiel ein Handtuch auf einem Tisch.

    You can easily lift the glass panel off the magnets with only your fingernails (or something thin like a credit card or a guitar pick). No need to buy suction cups you will only use once.

    Nick Caron -

    Yes, you don't need the specific suction cups to remove the display cover - it's held on by magnets, and if you start at the center by the iSight you can work out to the edges and remove it. I had an iPhone screen suction cup around and it helped with balancing the screen when you pull it out fully, but by no ways is it required.

    jtowner -

    Great guide and pretty straight forward the only thing that took me ages and I didn't manage to undo were the power btn cable (step 28) and the thermal sensor (step 25) Seemed like they were glued on! Very difficult to remove and obviously conscious so I didn't break anything!

    Eddie -

    Thanks!!! Worked excellently.

    I used a plunger (clean first ;-) to get the screen off, and http://exirion.net/ssdfanctrl/ for fan control.

    Then, i did not take out the whole display and left it in the hinges on the bottom side and held it up with two small cardboard boxes. Easy enough to disconnect the hdd then.

    I replaced with an ssd, put that into a ssd enclosure. Had to drill an extra hole in it to fasten the pins that hold it in place.

    Used Carbon Copy Cloner to make an image from the old hdd, with the sad connected via usb. Checked it of it booted via System Preferences > Startup Disk. It worked so the took the imac apart and replaced the disk. Booted, everything was working as always, only faster!

    Frank303 -

    I'm replacing my optical drive too. what exactly needs to be plugged into the SSD? I don't have the kit - as I am not sure one is required if I buy something like this: http://www.amazon.com/gp/product/B0056OB...

    Can you please advise? Can I do it with this piece, or do I need to get the entire bracket kit?

    Allen Borza -

    My display data cable forks, with a smaller section going up near the camera board. Where it forks, it is attached to the aluminum plate that attaches around the cpu board. I haven't seen any images that look similar, and I'm stumped at how to remove this second section of the cable. 2010 i7 build to order

    Awolf -

    Agree with the other comments here. Despite buying suction cups, not sure they were necessary as the screen removed very easily. A sat nav suction cup would do the job fine.

    Stuart Bloomfield -

    I can confirm that it is possible to remove the front glass using fingernails rather than suction cups. It isn’t easy, but if you try you should be able to pry off the glass.

    I did this twice: once at the beginning of the procedure and once again at the end, when I realized that a big pice of lint was trapped under the glass.

    gordonhamachi -

    Don’t use suction cups. totally unnecessary. screen pops off with fingernails.

    Kieran Hobbs -

    The reason for caution about suction cups tends to be making sure you don’t apply uneven pressure on the edges of the glass and crack it in the process of removal. I do agree however that some pretty small suction cups would do fine. These suction cups can be had at your local princess auto (Harbor freight) for a few bucks and are useful elsewhere as well. if you use your fingernails or other items just try and do it evenly :)

    Abirinder Brar -

    good duct tape or gaffer tape wrapped around your hands makes an excellent glass removal 'tool'. Even clear packing tape works a charm.

    Stu Blair -

    A great first step that minimizes that first gust of dust migration when the glass is lifted is to clean the glass, sides *and the back* before lifting the glass, and then lift SLOWLY. Most of that dust is already trapped inside and pulled up as the screen lifts, but with care you can keep it there (or gently vacuum out with a micro vac…).

    John -

    before starting any of this…there is a device that you can use that comes with the IFixit kit to format and either clone or restore your hard drive to the new drive…it will save you a lot of headaches..it is a SSD enclosure that you can plug into your existing computer …

    Tom Richter -

    Thanks for the instructions. Before doing this the first time, suggest to everyone, read through at least twice. This is the easiest step, as you’ll soon see. As for removing the glass, USE suction cups, either the ones the sell here, or others. DON’T skimp. Also wear gloves when handling the glass. Don’t take chances.

    ECJohansen -

    Duct tape works too!

    Dani -

  5. XBLBbPNDcxRAYYWS
    XBLBbPNDcxRAYYWS
    xMmDfMTyn4Ac1SkA
    mqbuAnq3Mon1YWiD
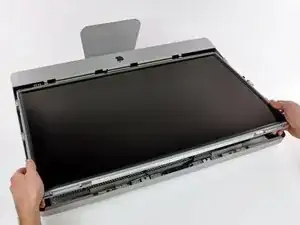
    • Hebe die Glasscheibe rechtwinklig so weit vom Display weg, dass sich die metallenen Befestigungsstifte an der Unterseite der Oberkante lösen.

    • Ziehe die Glasscheibe weg von der unteren Kante des iMac und lege sie vorsichtig beiseite.

    • Trage die Glasscheibe nicht nur an den Saughebern, da sie dir sonst runterfällt, wenn ein Saugheber sich löst.

    • Löse die Saugheber, nachdem du die Glasscheibe sicher abgelegt hast, da der Unterdruck auf Dauer das Glas beschädigen kann.

    • Denk dran, den Bildschirm und die Innenseite der Glasscheibe vor dem Wiederzusammenbau sorgfältig zu putzen, da eingeschlossener Staub oder Fingerabdrücke deutlich sichtbar sind, sobald du das Display einschaltest.

    you should do this mac up, because, for me, one of the suction cup failed, and the glass fall into the lcd screen. Now there is a big hole in it...

    Lau -

    do you still have this panel?

    Alpha Dimension -

    Reassembly: After powering on and running for a few minutes, found a large whitish patch on the screen. Persists after powerdown.

    Turned out to be condensation, though it didn't look like it - more like fine white powder rubbed in. Humidity is very high this time of the year. Fix: start airconditioner in a room, leave it running a while, take iMac in, prise open the glass again. Condensation vanishes instantly. Keep it out for a ~15 minutes running infinite loops to get iMac nicely heated up and fans running. Snap glass back.

    ganesh -

    I used a Swiffer dry cloth to get all the dust off the screen while just blowing with my mouth at a steep angle. I know I didn't get every speck, but the screen looks perfect once assembled and lit again. Removing the glass from the screen is pretty easy if you need to re-clean it.

    Jay Gillibrand -

    I used a microfiber cloth instead, which worked well. The same type as yo use to clean eye glasses, but in a larger form factor.

    Daniel -

    The Swiffer idea worked great! I just brush it over the LCD and glass panel lightly, and all dust particles are gone quickly. The screen after boot up looked beautiful. Thanks!

    dtsai2 -

    I strongly recomment to detach the suction cups while working at the rest of the steps. In my case after half an our i heart a crack noise behind me on the table... The vacuum of one of the suction cups braked the glass! maybe there should be a warning in the Repair guide

    shippe -

    I didn't crack the screen, but it popped out of the shims and then popped back in, as if the glass edge is magnetic or has steel in it to connect to magnets. Be careful with this step — it is pretty nerve-wracking, but doable!

    Alex Reynolds -

    You need a big clean surface free, or at least 2 or more free surfaces because the iMac, the glass and the LCD display are quite bulky. You'll also probably need space for a tablet or a laptop to read this guide while you are working. And don't forget room to work on the optical unit and for the tools you are going to use. I covered a large table with a double layer of bubble wrap. In my opinion it's better to put the glass face down to limit powder sticking on the internal surface.

    Roberto Blandino -

    Thanks good advice! I was wondering exactly about the working space issue!

    matteoslataper -

    I am doing this repair now. After successfully lifting off the glass panel (yay!), dust blew out of the lower open edge. So I sprayed a can of air around edges. But a poof of the “air” condensated on the LCD. Does anyone know if I can clean the LCD same as how the glass is cleaned (damp cloth with equal parts white distilled vinegar/distilled water) and if not then how?

    Amy C -

    Hi Amy,

    To clean the LCD panel, I would suggest using a clean microfiber cloth and rubbing alcohol. Distilled water can be used, but avoid regular water, which contains minerals. Make sure the microfiber cloth is absolutely clean and has no hard particles sticking on the surface, which will scratch your LCD when you wipe it.

    Wet the surface with some alcohol and gently wipe with the microfiber cloth. Wipe in one direction.

    Arthur Shi -

    I find that the LCD is not as fragile as we all think. they are very much like any LCD on a tv or monitor. There is no extra glass on the front of a monitor. Not the 23 HP Pro Displays I have anyway. I know this because I punctured one moving my video wall. so I took it apart to know how its put together. I will say, there are several 'lens’ like sheets and a reflective (silver} sheets that are the same size as the panel. and a 1/8”piece of acrylic, all behind the LCD panel. Take care with them and clean as you would your monitor.

    My suggestion is to stand the iMac up after the panel is secured back into the body of the iMac and clean while its vertical. took me 3 attempts before I realized that while laying flat the surface is large and collects dust with mind blowing speed.

    Stu Blair -

    If the LCD glass is badly cracked and broken you need to be extra careful removing as the sharp shard of broken glass can scratch/harm the underlying screen as they may “fall in or onto” the screen below.

    I found that strategically putting sheets of 8x11 paper(s) under the sharpest, largest broken sections help protect the underlying screen. A vacuum was also helpful removing some of the small glass shards.

    Mark Hilliard -

    Be advised: I did a perfect replacement of the hard drive, temperature sensor to the SSD, LCD screwed in, glass cleaned. I went to put back the final glass, I set the bottom edge in place and as I slowly moved to have the magnets take hold, they pulled the screen out of my gingerly held fingers, and smacked into place……cracking the glass! Ugh! So, on this last step, hold tight as you put the glass back in slowly. It will cost you about 40-50 bucks for a new glass (mine is on it’s way).

    R R MOOS -

    Yikes... that sucks. thanks for sharing this information. I took everyone's advice and removed and placed this back very very carefully.

    iSeeU ChilinHomie -

    Don't trust the suction cups after you remove the screen cover. Used both hands to hold this piece carefully!

    iSeeU ChilinHomie -

  6. wh3OBjUKDTyE5PJg
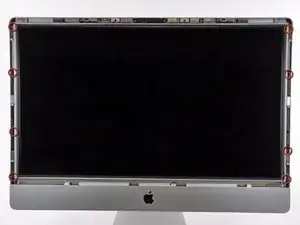
    • Drehe die acht T10 Torx Schrauben heraus, die das LCD am äußeren Gehäuse befestigen.

    • Fasse den Bildschirm nicht mit den Fingern an, da das Fett Rückstände darauf lassen könnte, die schwer zu beseitigen sind.

    • Mittig an der Oberkante der Displayeinheit befinden sich die EMI Dichtungen. Wenn nötig, musst du diese vorsichtig ablösen.

    The screws on the top (left-top, and right-top) are slightly longer than the other six screws.

    henryhsu -

    All screws were exactly the same for me.

    Michael Grace -

    There were only eight screws holding the lcd in place on the sides 4X4

    Barry Gilmore -

  7. ttXfmAnrGKNluJUB
    ttXfmAnrGKNluJUB
    PgqvYSmQiJhaoS2d
    SOdO2xXXeUPLdPcJ
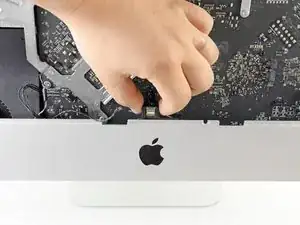
    • Lege den iMac vorsichtig seitlich auf eine flache Oberfläche.

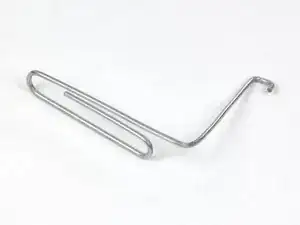
    • Das Display ist mit sehr wenig Spielraum eingebaut, deshalb musst du einen dünnen Haken benutzen, um ihn aus dem Gehäuse zu bekommen. Auf dem ersten Foto siehst du, dass wir dazu eine Büroklammer entsprechend gebogen haben. Eine angewinkelte Pinzette kann auch gute Dienste leisten.

    • Benutze dieses Werkzeug, um eine Seite der oberen Kante des Bildschirms an ihrem metallen Rahmen zu hochzuheben.

    • Wenn eine Seite der Oberkante des Displays etwas angehoben ist, halte sie ausserhalb des Gehäuses, während du die andere Seite ebenfalls mit dem Haken anhebst.

    • Halte den Bildschirm hoch genug, um an die Kabel zu gelangen.

    • Hebe aber die Oberkante des Bildschirms auch nicht zu hoch über das Gehäuse an, da die beiden Komponenten über verschiedene kurze Flachbandkabel immer noch verbunden sind.

    I followed the procedure in the Apple Technician Guide and it was a lot easier. Stand the iMac upright on the stand (as per normal operation) and then carefully tilt the top of the unit towards you while holding the top of the LCD. The LCD just falls forward into you hands. It is also then easier to disconnect the cables.

    iandh -

    This procedure can be VERY dangerous. Why? Because there is the possibility of a gravity disaster if you lose control of the screen and it falls before you disconnect the interface cables. I know. It happened to me. After studying the Apple directions I came to the conclusion that I would need both hands on releasing a couple go the cables and decided to tape off the screen in the open position - which I did very carefully and securely. What I did not account for was the tape not adhering. Needless to say when it came loose the screen fell and ruined the connector sockets (and my computer). This could also happen just trying to hold the screen with one hand while spudging the connectors apart with the other as well. SO. LAY THE iMAC DOWN! DO **N O T** GIVE GRAVITY THE CHANCE TO RUIN YOUR DAY like it did mine!

    Gary Kimes -

    The right side was much more stuck in place then the left

    John -

    It’s the fourth time I follow this guide, power supply, gpu and dual hd operations carried successfully and I feel and works munch more relaxed with the iMac laying horizontal on his back. I’m lifting the screen with two hooks at the same time, no torsion on the frame makes munch easier to lift it.

    Then I put in the corners two pieces (two short pencils do the job) of about 3 1/2”, 9 cm, to maintain lifted the screen while disconnecting the ribbons.

    Now the GPU I’ve changed in 2017 has lasted less than three years and here I am to change it again.

    Cesar Martin -

    After disconnecting the first ribbon you can lift the screen more than 5”, enough to access the other ribbons easily.

    Cesar Martin -

    As others have posted here, Do NOT let gravity assist you. Put the iMac on it’s back when doing the remaining steps. Also, use some type of hook to assist you in terms of lifting out the display assembly. Expect some resistance, since it does weigh a few pounds. Also, as you’ll see in the next step, you can help yourself by using something to brace it at each corner to keep it lifted. Some have suggested chop sticks, bic pens, etc. Use something approx. 4-5” in length. That will give enough clearance, and not put strain on the cables.

    ECJohansen -

    To spare a paperclip, I had better to use a good needlenose plier, catch the iron frame just near the corner, and hook up.

    Stefano Vignato -

    Used plastic spudgers as levers, one pointed to start in the corner, then two flat, working across gently. When I got to the middle and pried a bit, the top lifted all the way across, allowing access to the cable in the next step. I decided against doing this with the unit standing vertically.

    Dave Winn -

  8. gOrFxvCeMbW4EiHr
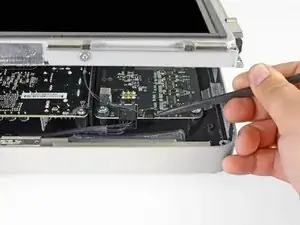
    • Löse das Kabel für die Vertikalsynchronisierung in der oberen linken oberen Ecke des Bildschirms. Drücke mit der Spudgerspitze auf die Seitenlaschen des Verbinders und lasse diesen so ganz vorsichtig aus seinem Anschluss heraus wandern.

    After disconnecting the VSync cable, I was able to keep the screen wedged apart by 8" which gave me enough working room to extract and replaced the hard drive without having to remove Step 6 - 8. This resulted in a faster change out of the hard drive.

    ITSupportGuy -

    Amen brother! These are great guides, but could be improved with tips to simplify some processes. I just did the same as you, and it was quick and easy, with less chance to damage cable connections.

    Hobowan Kenobi -

    thank you for the tip. faster swap-out and less risky. cheers

    Eric -

    Totally agree. I did exactly the same. Less chance for mistakes having to do and then undo steps 6-8 and faster and easier. The whole process was shockingly simple. Sad I waited so long.

    JLTX -

    After disconnecting the first cable, I was getting ready to disconnect the second cable when I realized that the amount of opening necessary to get to the second cable, is also sufficient to get to the hard drive, so why go the extra steps. I used a wedge I had close by to very carefully keep the screen up, to enable removing the hard drive with both hands. If you are replacing the hard drive, skip to Step 11.

    Bret -

    I did this and supported the LCD with two chopsticks. Jumped right to step 11. Power supply replaced; no fuss. Great suggestion. Thanks.

    Mahlon Gumbs -

    I did this and I agree. I don’t know about the alternative (doing steps 6-8) because this is my first time doing this but it was definitely quick and “safer” than disconnecting a bunch of cables (the Vsync cable alone was scary bc it feels so fragile). Only downside is you have to replace the HDD while holding a heavy panel with one hand. That being said, there was more than enough room to get around.

    This quicker method also came in handy when I had to open it up again right after closing it because I forgot to install a piece 😂🤦🏻‍♂️

    adam -

    Once I put the tip of a very small flat-head screwdriver on the other side of the spudger tip, the connector popped out.

    Alex Reynolds -

    This is the answer :-) After 10 mins of faffing about on my own I read the manual (this) and this tip took less than 1 second to get the connector out. Thank you so much, me fellow workers were getting annoyed at my swearing.

    simonf -

    I've managed to break off the fitting in step 6 trying to remove the screen, would anyone know the part to buy or how to fix this?

    jonostainsby -

    It is very hard to detach the connector with the spudger. I tried forcing the connector out with the spudger by pushing on one side and then the other repeatedly. After several times it finally came out. A tool would be useful for this; there must be special plyers for doing this. Fingernails on either side seems most obvious, but maybe there is a downside to this ?

    Daniel -

    Rocking it back and forth with some “outward” pressure on both sides was the key. This was the only connector in this upgrade that gave me a problem.

    Stephen Genusa -

    with some confidence and mechanical inclinations this is the only cable you need to disconnect to replace the hard drive. pointer finger on one side thumb the other, pull up.

    jason kawaja -

    display propped carefully and two spudgers rocking simultaneously worked great for me to get this free.

    THEN still be careful, a small loop of tape held the cable to the back - that has to be gently pulled away to let the screen lift.

    John -

    Hi do you sell new sync cables? The little plastic piece on the end that attaches to the motherboard smashed

    Jonathan -

    Use either a spudger or a small flat head screwdriver to loosen the sides of the connector. Then use small needle nose pliers to disconnect the cable. It’s easier than trying to wedge your hand in there.

    ECJohansen -

    On the 2011 27 Inch Mac I have it doesn’t appear to have the Vertical Sync cable attached to the screen. Is that right?

    rlagden -

    Both of the cables (grey and black) popped out of the plastic connecter. Can someone tell me in which slot each cable is supposed to be pinned in ? Thanks...

    Dom -

    I broke the vsync cable removing it. Any tips on how to replace it? The wire is hair thin and I have trouble stripping even much bigger ones. I don't suppose iFixit sells a replacement?

    SLuke Jones -

  9. Pi2cpjaIVJJYaV4H
    • In diesem Schritt gelangen deine Hände in die Nähe der offenliegenden Rückseite der Stromversorgung. Berühre nie die Rückseite der Stromversorgung, die vielen großen Kondensatoren können heftige und gefährliche Stromschläge austeilen.

    • Löse das Kabel der LED Rückbeleuchtung, indem du die Sperrklinke mit der Hand herunterdrückst und diesen in Richtung der Unterkante des Bildschirms gleiten lässt.

    Do step 7 first. The cable is much shorter and more fragile, you'll have more space to remove the other cables if that one is removed first. On my mac, the cable in step 7 was glued down and had to be freed up before I could pull the connecter out of its socket.

    maccentric -

    Just skip step 6,7,8 and 9 with this powerful tools: two bic pen holding the frame.

    Look at pictures: https://www.dropbox.com/sh/5jwam38drgcov...

    fabio4 -

    I also used two pens to hold the display panel up and I had to detach only the vertical sync cable from the display on step 5. Much easier!

    Timo Laak -

    Hello Fabio, can you please re-up the picture? It doesnt seem to be online anymore :(

    Thanx a bunch!

    Esteban Garcia -

    Good idea! I used two chopsticks as they are longer. Placed them near the corner and use one of the T10 screw's hole in the side of LCD panel to prop it up. Fit perfectly and very sturdy. This gave me plenty of space to work with the replacement.

    dtsai2 -

    I skipped step 6, 7 and 8 and were using some flip chart pens to put them between the frame and the display to make the work on the hard drive. Works great.

    Rita -

    Thanks for the tip. Works a treat!

    john -

    I don’t get how smite six can be skipped—we’re these steps renumbered at some point? How could you even lift the display if you didn’t remove the screws in step 6?

    Frank Stickney -

    With the help of an assistant, I was able to skip steps 7 - 10 to remove the hard drive. Once you remove the cable you move the forward and up. Have your assistant hold the display and you can easily remove and replace the hard drive.

    babuckman -

  10. arryLkrny6S4AYHj
    arryLkrny6S4AYHj
    2dMZl4aNwpn4RZVj
    • Ziehe die schwarze Lasche gerade nach oben, um den ZIF Verbinder des Datenkabels zum Bildschirm zu öffnen.

    • Ziehe nicht zu kräftig sonst könntest du Verbinder und Anschluss beschädigen.

    • Ziehe weiterhin in Richtung der Oberkante des Gerätes, um das Datenkabel abzulösen.

    i mess up my date zif connector is it fixable?

    LUIS -

    me too. All went well expect replace this flat cable which is tricky almost when my view is low and I've got big finger. I broke the cable end connector to motherboard but I don't know if I damaged the connector on motherboard. I'm waiting from Apple service for diagnostic.

    I would suggest on the guide to add a step to explain how sensitive is to replace this cable. iMac should lay on the back and it should have some stuff to maintain the motherboard elevated in order to insert the display port flat cable to the motherboard on a less stressful way.

    strcarlos -

    This image is 100% inaccurate. My mac has a different style connector that needed to be pinched on each side to release the cable.

    Alex Nelson -

    Its not 100% incorrect for him as this was his connector. It was only incorrect for you.

    asthomas -

    Its accurate for my Mid 2011 3.4ghz iMac so it could be different for different iMac model years.

    Chris -

    The ZIF display cable is tricky to get back in. I would suggest that this cable be the first one to be put back during reassembly. You need maximum wiggle room and visibility for this. Push in the display power cable *after* this one.

    ganesh -

    How do you get the ZIF connector back in? Some screenshot or instruction would be very helpful. I cannot get mine back in.

    Brian Bowlin -

    This is really difficult, but essentially it slides in - with no discernible click. A *slight* tug on the lever lets you know its connected. Horrible thing.

    Use the ‘bic pen’ trick and you don’t have to remove this for most things but I had to go ‘back in’ to remove the super drive. I then used the tip next down and removed this connector at the screen also and put this end back in first with no screen in the way.

    Jem Marsh -

    I found the best way for me to reinstall the ZIF cable in was to lay LCD panel on its face and gently peel the black tape on upper part of lcd to expose and remove the connector there. At this point the ribbon cable is free and you can insert the hard to align connector to the board. Set LCD into imac and connect the small push connector next to the ribbon cable on board. It was easier to see and then reconnect the cable to the upper portion of LCD and tape it back over. Reinstall other connectors etc. This way worked best on my 27" iMac as it was much easier.

    thewiseone71 -

    The is a great tip

    Jem Marsh -

    I had to replace the cable due to damage from trying to reinsert it at the logic board and I found it best to re-attach it exactly the way that thewiseone71 describes it above. If you disconnect the part at the top with the tape around it, this goes much easier and there is less of a chance of damaging the port on the logic board where it attaches at the other end. I think some photos of this port, and the way this cable goes back in would be a great addition to this tutorial. Replacing this cable would also make a great tutorial.

    lana.lawrence -

    So like everyone else, I managed to screw this up. Do you remember where you picked up the replacement, or what I should look for specifically when looking for a new one? I looked on amazon, but the label on the one I found doesn’t match what is on mine.

    Thanks!

    Jeff McConnell -

    What would be really helpful to this guide, and this image is the closest I can find in the sequence, is a quick summary of exactly where the diagnostic LEDs are on this model (and what they mean, although the latter is easily googleable). I only mention this as I believe my PSU is goosed as no LEDs are illuminated anywhere, however I can only find references to 2009 and 2010 of the similar MYs which evidently have diagnostic LEDs in a different place, hidden under tape, and I suspect numbered differently. So I can't be 100% certain!

    Mark Whitehead -

    I can see why some people are breaking the connector in step 7. You do initially pull the tab up, perpendicular to the logic board, which unlatches the connector, but then it is finally disconnected by then pulling the tab toward the top of the computer, parallel to the face of the logic board. I found it easier, after disconnecting the sync cable in step 5, to then prop up the bottom of the LCD, in order to better reach the ZIF connector, the LED backlight driver cable and the display power cable.

    randy3833 -

    I messed this bit up too. It says “pull up”. As the iMac laid flat on the table, I pulled towards the ceiling, bending the pins. It should say “pull towards the top of the machine” or something.

    I managed to straighten them out with a tweezer. Looked like a couple of pins were missing at the end, but it looks ok.

    Now I have to figure out what I have done to the temperature controller, the fans blow on full speed all the time here. :)

    Thor Hammer -

    Like others that have commented, this cable is a major PITA. I used both a headlamp to illuminate the area, and the iPhone’s Magnifier app to zoom in. The connector on the motherboard is flat, low profile and characterized by a thin narrow slot. The key to removing the cable is to slide the cable out, (after flipping that bar forward). Re-attaching the cable is the same - carefully sliding the cable into that slot, while keeping that bar pulled backward, until the cable was in place.

    For me, this was the most difficult part of the hard drive replacement. I spent more time on this than anything else.

    ECJohansen -

  11. M1aCZuMPZndRtiE4
    • Löse die Stromversorgung des Displays neben dem Datenkabels mit der Spudgerspitze.

    need more description than “disconnect” here. It took my awhile to figure out that it’s was a “back toward” connector.

    John Oakley -

    Thanks John, would you give a short suggestion on how to help other users to remove such a “back toward” connector to make it clearer?

    Angel -

    I broke 1 of the pins on the logic board side when reconnect. Now my iMac have no display. Not sure how to fix it.

    Need better description here with close-up photos to avoid accident like mine.

    quanghuymt -

    It’s pretty simple, using ifixit IC Extractor/Connector Puller by gripping gently and carefully the tips of the connector and pull straight up towards the HDD. You can also use a spudger and gently very slowly walk it up towards the HDD.

    Chris -

    I missed up the pins on display power cable. They are very very tiny and fragile.

    John Hill -

    Cheat on this one. Loosen the tape on the back of the display. That gives you more slack on the cable. The connector is pretty standard.

    ECJohansen -

    I could not reconnect this cable. How to put back?

    Jagat Limbu -

    Jagat, it’s easier if you lift the other side of the display.

    Olivier Deschamps -

  12. BrXZfUaIwRRTUdE6
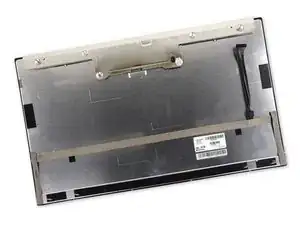
    • Ziehe nun ganz vorsichtig den Bildschirm in Richtung der Oberkante deines iMac und hebe ihn aus dem Gehäuse.

    When I opened up my iMac, I was surprised at how dusty it was inside. You might want to have a vacuum cleaner handy to vacuum up the dust inside the case. Be careful not to vacuum up the screws, though!

    johnhugh -

    do not use a vacuum cleaner, it has ESD!!!!!

    find a vacuum that is for computer use that has no ESD

    Kurt L Nelson -

    FYI...I did this fix, upgraded my mid 2011 27" to a Samsung 850 EVO SSD Hard Drive. Everything went great except for two parts...

    1. When I started up with my install media I got a three beep error and I could not install. I ended up using the CRTL-R at startup and did a network install that downloads an image of the original OS that comes with the system and allows you to install with the correct file.

    2. Hard drive fan was spinning at full speed the whole time. This was annoying to say the least. Another person on this thread commented on this and said that you had to buy a $30 piece of software to fix it, I actually found another one that is free and works quite well (http://exirion.net/ssdfanctrl/).

    zackduchene -

    Just completed the upgrade and put a 1TB SSD in. I have used this software and seems to do a good job. http://www.crystalidea.com/macs-fan-cont...

    adrianh -

    There seems to be a missing step here. All the while one is removing the cables from their sockets it is supposed that the screen which is quite heavy is suspended in mid air… no, you are holding it up with one hand while doing everything single handed while in all honesty it would be nice to have both hands if for nothing else to steady your movements. So. Lets add a step. Lets figure out a solution and use some kind of prop until the screen is removable.

    Gary Kimes -

    ESD = Electrostatic Discharge

    Gary Kimes -

  13. snOWxVAYeqCHdIUU
    • Lege das Display mit der Vorderseite nach unten auf eine glatte, weiche Unterlage.

    • Falls das Display ersetzt werden soll, müssen einige zusätzliche Komponenten vom alten auf das neue Display übertragen werden. Vergleiche die Rückseite des alten Displays mit dem Ersatzdisplay. Schaue dir alles genau an und entferne alle Kabel, Sensoren und Schaumstoffteile, die bei dem Ersatzdisplay fehlen. Befestige sie am Ersatzdisplay.

    • Falls ein Kabel unter einem Klebeband befestigt ist, entferne immer erst das Klebeband. Ziehe nicht direkt am Kabel.

    • Ist ein Kabel mit Heißkleber an dem Chassis fixiert, benutze einen erhitzten iOpener oder einen Fön, um den Kleber zu aufzuweichen . Dann kann man ein Plektrum (Opening Pick) unterhalb des Kabels entlang schieben, um es zu lösen. Ziehe niemals an den sehr empfindlichen Steckern.

    • Schiebe ein Plektrum unter die Schaumstoffteile, um sie vom Display zu lösen und ziehe sie dann vorsichtig ab. Man benötigt unter Umständen dünnes, doppelseitiges Klebeband, um sie auf dem neuen Display zu befestigen.

  14. M3tf6F3FZsijVyIi
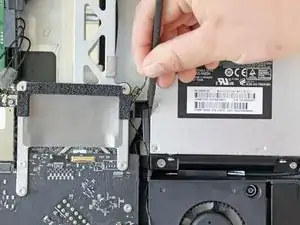
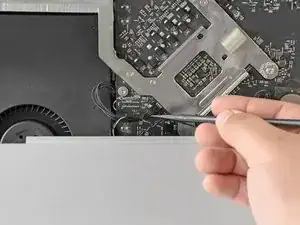
    • Ziehe mit dem flachen Ende eines Spudgers das optische Datenkabel aus dem optischen Laufwerk heraus.

  15. vAtPHhLWfMMFENNX
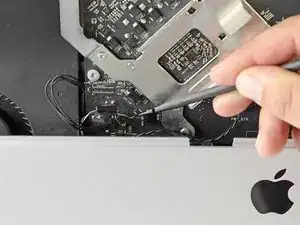
    • Ziehe mit der Spudgerspitze den Verbinder des Temperatursensor des optisches Laufwerks aus seinem Anschluss.

  16. fR4TRSvwuanFoeiV
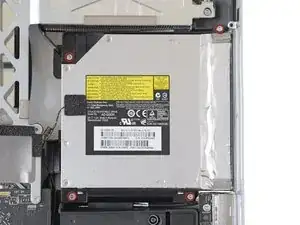
    • Entferne die vier T10 Torx Schrauben, die das optische Laufwerk am Gehäuse des iMac befestigen.

    • Der Kopf der unteren linken Schraube ist ein bisschen größer als die anderen.

  17. AveUrl4FaMZ441EI
    AveUrl4FaMZ441EI
    KcnvrZvyIeKyKbOq
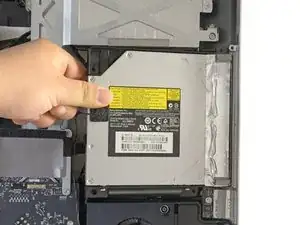
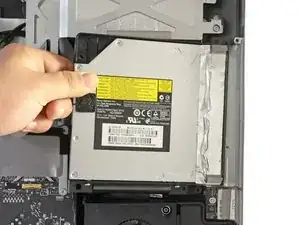
    • Hebe die linke Seite des optischen Laufwerks leicht an, ziehe es dann seitlich weg um die Zentrierstifte zu befreien.

    • Passe dabei auf, nicht das Kabel des Temperatursensors des optischen Laufwerks zu beschädigen.

    There are two small plastic positioning pin holes on the right of the optical drive. When you replace the drive, make sure to align the pins with the holes as you slide the drive back into place.

    gordonhamachi -

  18. 6ZRm2gKe6VmAKAIt
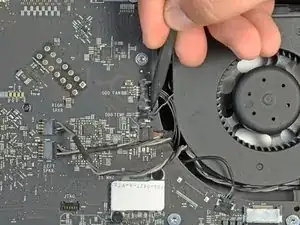
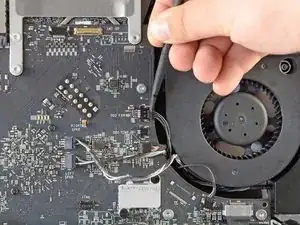
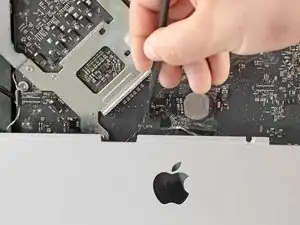
    • Verwende das flache Ende des Spudgers, um den Anschluss des Ventilators für das optische Laufwerk aus dem Sockel herauszuziehen.

    I would recommend placing STEP 21 (L/R speaker connector disconnect) before STEP 17…because the speaker wires sort of go over/on top of the connector in STEP 18. By putting step 21 first, those wires can be lifted and pushed aside making steps 17-20 easier.

    thburrows -

    I second the proposal by thburrows to remove the L/R speaker connectors (Step 22) before Step 15. It can make the Steps 15, 18, and 19 a bit easier.

    drdodo -

  19. baaRl6uXgqLxsUmV
    • Verwende die Spitze des Spudgers, um den SD-Anschluss aus dem Sockel zu entfernen.

  20. JJ3YxbyUYMXeU6We
    • Verwende das flache Ende des Spudgers, um den I/O-Anschluss aus seiner Fassung zu entfernen.

    • Alternativ kannst du an den Seiten des der Anschlusses drücken, um ihn langsam aus der Fassung zu bewegen.

  21. nU1DGC2VVL2F6KbQ
    • Verwende das flache Ende des Spudgers, um den Mikrophon-Anschluss zu entfernen.

  22. KxPLHewgAdtt2yYt
    KxPLHewgAdtt2yYt
    ZxIQBfITdfhcIsvI
    • Entferne mit dem flachen Ende des Spudgers den rechten und linken Lautsprecheranschluss.

  23. FcIRZTlS1RucliAR
    FcIRZTlS1RucliAR
    NfnEZ4wPPveQkWWi
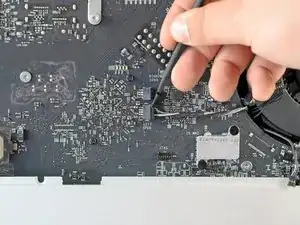
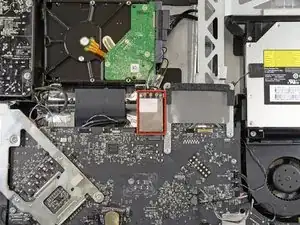
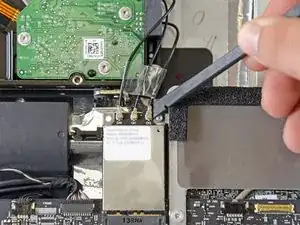
    • Finde die AirPort-Karte oben in der Mitte des Logic Boards, direkt unter der Festplatte.

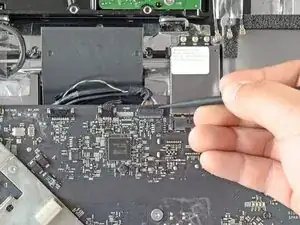
    • Verwende das flache Ende des Spudgers, um die Antennenkabel zu entfernen.

    • Trenne die Antennen nicht, indem du die Kabel herausziehst, da dies die Kabel oder Anschlüsse beschädigen könnte.

    • Die Antennen haben Markierungen, die dir die Reihenfolge anzeigen. Die Antenne, die keine Markierung hat, gehört in "CH0", die Antenne mit einer Markierung gehört in "CH1" und die Antenne mit zwei Markierungen gehört in "CH2".

    Do not disconnect the wires. Way over complicated. Follow the OWC instructions instead: unscrew the single Torx T6 screw and then wiggle the airport card off of its socket completely. No need to remember markings or add warnings about sensitive cables. Very easy step if done as described.

    Pim -

    If you do it this way check the optical connections afterwards. They are easily disturbed and in my case 2 of them came adrift. Fortunately I spotted this before re-installing the screen.

    startingtopuff -

    I concur with Pim. The WiFi card Torx screw in question is a T6 size.

    thburrows -

    I tried to unscrew the torx T6, but for some reason the screwdriver did not fit the screw. I had a T6. The screw is acting like the head is stripped already. Oh well, disconnected the tiny cables just fine.

    Andrew Van Vlear -

    When “pry” antenna cables off their sockets, you need to move them vertically. Too much lateral force to pry open can damage the sockets. I think it is better to describe this process as lift up the anntenna cable connectors upward.

    drdodo -

    the markings were different with my imac 27” 2,7 GHz : ch0 - 2 marks, ch1- 1 mark - ch2 - no mark.

    dannysunrun -

    I had to go back in and I agree with Pim that it is better to unscrew the T6 Trox and take the card off than ‘popping’ off the cable heads. My card was in the socket tightly so had to ‘wiggle’ out horizontally, but much better than potentially damaging the cable head sockets.

    drdodo -

  24. CdMPGBBOSYQnrjef
    • Verwende das flache Ende des Spudgers, um den Anschluss des Kamera-, Bluetooth-, und Umgebungslicht-Sensors zu entfernen.

    I have got the ssd installed as my second drive using the dual drive kit. However, after reassembling everything, the CPU fan is running at full speed. Apple Hardware Test shows a failure for the error code TA0P, which points to a failure of ambient temperature sensor/connector. I have reassembled this machine 3 times now, with and without the ssd installation components and the problem is not going away.

    Does anyone know a fix for this? I do not have warranty on this machine (2011 iMac. 27'') to get the logic board replaced for free. However, I'm willing to get the sensor connector checked by a technician if that would fix it.

    Requesting help! :-(

    Gurpartap Singh -

    Does the additional sata cable has one male and a female end or else? Could someone post a link to the right cable on amazon for example?

    tokamilian -

    Today I have completed the installation of a Crucial MX100 254GB successfully. With help of the guides from ifixit and OWC it was not that difficult.

    However, when I booted my iMac the fans started raving.

    I reset SMC and PRAM several times. Opened the machine again to check connectors and cables. Same story as above.

    Everything looked fine, but the fans kept spinning at max. Seems like a booby- trap, it happens again and again.

    I would prefer things to work different but I now use Macs Fan Control to keep the peace.

    I hope this riddle will be solved one day.

    Clemens -

  25. PlivHULDNIdx5Qc2
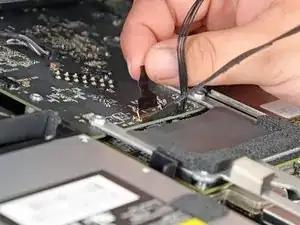
    • Verwende das flache Ende des Spudgers, um den Anschluss des Festplattenlüfters zu entfernen, indem du auf die Laschen drückst.

    Anyone know what the empty socket between steps 25 and 26 is for?

    maccentric -

    It’s a factory diagnostic port. You’ll find most Mac’s have such a port sometimes its not wired in followup generations of the logic board.

    Dan -

  26. jNHCAYHrs1KtdWCo
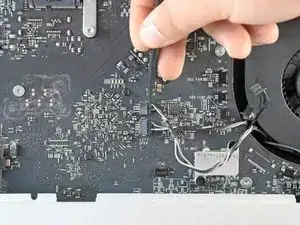
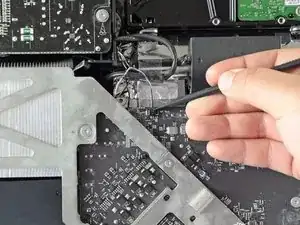
    • Verwende das flache Ende des Spudgers, um den Thermal-Sensor-Anschluss zu entfernen.

  27. bCbRQfQJalJvRfHq
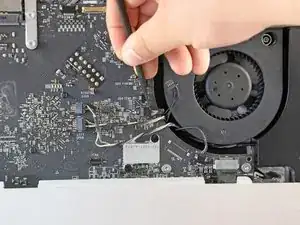
    • Verwende den flachen Rand vom Spudger, um das CPU-Lüfter-Kabel zu entfernen.

    When you pry up the connector make sure you don’t knock off the two resistors at the bottom left of the CPU fan and the ambient temp sensor!

    Dan -

  28. 5m5hRxwnckhdupHY
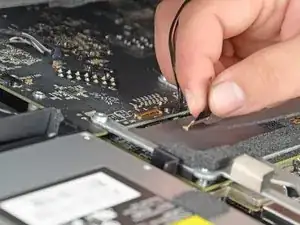
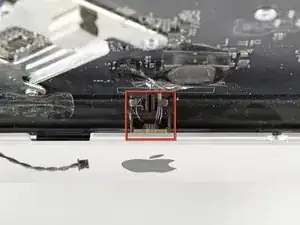
    • Verwende das flache Ende vom Spudger, um den Umgebungs-Temperatur-Sensor zu entfernen.

  29. 32pAnPKWUdvrAemM
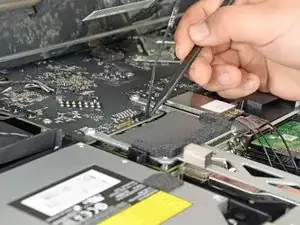
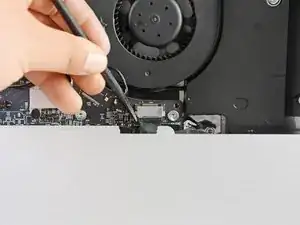
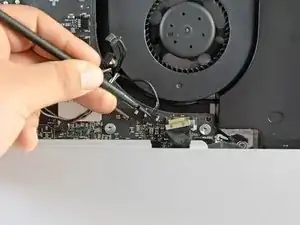
    • Verwende das flache Ende des Spudgers, um den Power-Button-Anschluss zu entfernen.

    Broke power button connector on logic board

    Trying to find the name of this connector, any help would be greatly appreciated

    Thanks!

    Andy Jamieson -

    Found it — the part is 51021-0200

    Andy Jamieson -

  30. QGmSpiTTnqXBFdGF
    QGmSpiTTnqXBFdGF
    3kQjNQ1EvX1xLVX1
    • Du findest den IR Sensor hinter dem schwarzen Apple Logo.

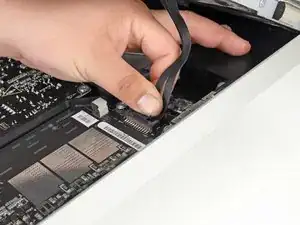
    • Ziehe, wenn notwendig, das Klebeband ab, das den IR Sensor bedeckt.

    • Entferne den IR Sensor, indem du ihn gerade nach oben aus dem Gehäuse ziehst.

    • Entferne den IR Sensor nicht ganz aus dem iMac, da er noch mit dem Logic Board verbunden ist.

    The infrared sensor can be unplugged from its connection on the MLB and removed from the case completely. Doing this makes it much easier to reposition the MLB after ‘surgery'.’

    clinton -

    I agree with clinton. It is easier to disconnect the sensor cable and remove the IR sensor module by sliding it out.

    drdodo -

    I accidentally broke the plug/cable when trying to reconnect..Does anyone know where I can find a replacement?

    nsposato303 -

    The cable side or logic board side?

    Dan -

  31. mmnYhL2LEUahXfpc
    • Entferne die acht T10 Torx Schrauben, die das Logic Board und den Kühlkörper am iMac befestigen.

    The screws are of various lengths, so note carefully which order you remove them so as to replace them correctly. Especially note that of the three screws surrounding the right fan, the one closest to the optical drive is slightly longer that the other two (which are the same length).

    Matt Strange -

    Les vis ont des tailles différentes, pensez à repérer où va telle et telle vis.

    Olivier Deschamps -

    As Matt Strange stated, of the eight screws, seven are different sizes and length, so keep track of which screw came from where.

    drdodo -

    Ne pas oublier la huitième vis tout en haut dans le coin

    Pierre-Aurélien Georges -

    Don’t forget the (8th) screw at the top right of the case holding down the heatsink.

    enigmaticca -

  32. Xvh2peEuHiVMWOWi
    Xvh2peEuHiVMWOWi
    aOBVNMOewcthJLV5
    • Hebe und drehe das Logic Board und den Kühlkörper gleichzeitig weg vom iMac-Gehäuse, bis du Zugang zur Rückseite des Logic Boards hast.

    On the back of the MLB, below the graphics card socket, are 4 connections. While freeing the board, & as you tilt and lift it, gently rotate the whole assembly a bit less than 90˚ to the right, i.e. clockwise. This provides the slack needed to reach behind the board and disconnect them.

    Should you want to completely remove the MLB (in order to repair a dead Graphics Card, for example) be sure to note the orientation of these 4 rear cables. During re-assembly, replace these in the same orientation. Otherwise there will be a tangle and you will experience problems getting the MLB back in place.

    clinton -

    I was able to change the graphic card without unplugging the 4 cables behind the motherboard. It was a bit difficult because I only have 2 hands and had to hold the MB while unscrewing the GC but it’s possible. Thanks a lot for the trick about rotating the MB. It was useful.

    Alexandre Lourdel -

    Vor der Entfernung des Logic-Boards ist es ratsam, die von den Halterungen entfernten Kabel am Rahmen und am Lüfter mit Klebeband festzukleben. Es besteht sonst die Gefahr, dass beim Einsetzen des Logic_Boards einzelne Kabel unter dem Logic-Board eingeklemmt oder verdeckt werden.

    Herbert Hürzeler -

  33. uBbuxV4qCbym3WoD
    uBbuxV4qCbym3WoD
    ANJakapNSyjDFAW4
    • Du findest den zweiten SATA Anschluss neben dem primären SATA Anschluss.

    • Stecke das SATA Daten- und Stromkabel an.

    • Das Ende des Festplattenkabels mit nur einem Stecker gehört in den Anschluss auf dem Logic Board.

  34. CRL1kPKRTEYhBsqP
    CRL1kPKRTEYhBsqP
    cwOlZwZy52Jm1J5N
    • Führe das neue SATA-Kabel durch dieselbe Aussparung wie das erste Kabel, und in den Schacht des optischen Laufwerks.

    • Nicht alle 27" iMacs (2011) haben die Aussparung im optischen Laufwerk, durch die das SSD Kabel geführt werden kann. Wenn du einen dieser iMacs hast kannst du das Kabel einfach unter dem optischen Laufwerk entlang führen.

    • Platziere das Logic Board wieder an seinem Platz, ohne die Kabel zu bedecken oder einzuklemmen.

    • Achte darauf, dass das SATA Kabel so viel Spiel wie möglich hat und nicht mit anderen Kabeln verdreht ist.

    • Sorge dafür, dass die Kabel nicht übereinander liegen; sie müssen so flach wie möglich liegen.

  35. UORsnEViqBZGUbVu
    UORsnEViqBZGUbVu
    jVXKUr1yEj1qnGAU
    aMHcoBh2SXB1PR5n
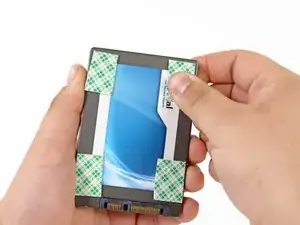
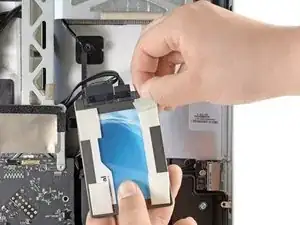
    • Um die neue Festplatte in deinem iMac zu befestigen, klebe starkes doppelseitiges Klebeband in alle vier Ecken auf der Seite des SATA Anschlusses.

    • Entferne auf einer Seite die Plastikfolie vom Kleber.

    • Drücke die freigelegte Klebefläche in eine Ecke der SSD.

    • Achte darauf, nicht die SATA Anschlüsse mit dem Kleber zu bedecken.

    • Wiederhole die oben genannten Schritte für alle 3 Ecken.

  36. sgofsY6qP2ZHE1nN
    sgofsY6qP2ZHE1nN
    UqqHKSDphfjqeE4P
    vLgVBQxMqCG3aX2V
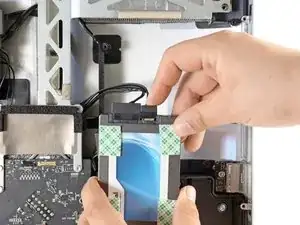
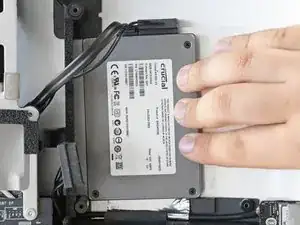
    • Schließe das SATA Daten- und das Stromkabel an die jeweiligen Anschlüsse der SSD an.

    • Entferne die Rückseite des doppelseitigen Klebebands.

    • Klebe die SSD hinter das optische Laufwerk so weit wie möglich in die untere linke Ecke.

    • Löse das Klebeband nicht wiederholt ab und verklebe es dann wieder, da es mit jedem Mal schwächer wird.

    • Wenn du mit dem Platz deiner SSD zufrieden bist, drücke sie gegen das Gehäuse, bis sie gut befestigt ist.

    • Wenn du das optische Laufwerk wieder installierst wird das SATA-Kabel zwischen dem Schaumstoff und dem Laufwerk gehalten.

    Mac upgrades website do an optical bay conversion kit that means you do not need to remove the board and the whole install takes about 30mins. Also, fan issues- if you carefully remove the thermal sensor from the optical drive (its only stuck down with a little glue on the drives surface ) you are removing and then stick it onto the surface of the new hard drive the fans work perfectly.

    Colin Bladon -

    This guide says that “When re-installing the optical drive, the SATA cable will be sandwiched between the foam padding and the optical drive.” There’s not much foam padding to sandwich in the iMac that I have open.

    Richard Murray -

    Do apple place the ssd drive behind the optical drive as a factory installed ssd ?

    I have one of these iMacs and would like to replace the 240Gb ssd with a 1Tb

    thanks

    Craig -

    @Craig, not sure if you ever got your answer but you should see the SSD as soon as you pop off the display. To others out there, with a HDD iMac, you can also add a second (SSD) drive to the right of your HDD, behind the frame for the graphics card (GPU). I’ve done this on a 27” with the smaller GPU and it fit very well.

    Justin Orrell -

    Placing SSD behind optical drive inside iMac 2011 - is a really bad idea! This is the only air channel for a video card’s heatsink. And it’s already partially occupied by the optical drive. There is a lot of place in the central area, where original HDD was placed. And if you are really into upgrading that gorgeous classic, the best thing you can do - throw HDD out. This is also will give you a lot of new free space inside. And also will free up another SATA slot, so you will be able to install a pair of SSD, while keeping optical drive (or 3 SDD w/o optical).

    Thomas Ashcraft -

    Thats not true, the air flow is from the bottom to the top not from the side.

    Dan -

    The previous comment is actually true. I installed for the 2nd time a SSD behind the optical drive (first one died after 10y of use) and didn’t take care to put it to the side. The airflow got somehow blocked by the SSD and 3 days later my graphics card is dead. Be careful when you install SSD to make sure it’s well fixed to one side.

    Siegfried Loeffler -

    I’ve put in a ton of SSD’s none have failed because of being placed behind the optical drive and the GPU in this series often fails! With or without a SSD placed behind the optical drive. My own 2011 27” system has gone through four GPU boards and it doesn’t have the SSD mounted behind the optical drive. The HDD and the GPU each have dedicated fans.

    The root issue is we push the graphics too hard playing heavy games and/or doing image or video work on this series. Apple (AMD) didn’t realize the speed apps would progress using more power than they anticipated during the design process.

    Dan -

Abschluss

Arbeite die Schritte ab Schritt 27 in umgekehrter Reihenfolge ab, um dein Gerät wieder zusammenzubauen.

Phillip Takahashi

Mitglied seit: 22/08/11

85572 Reputation

71 Kommentare

Don´t forget to take out the RAM first. Otherwise it is very difficult to replace the logic board back in it´s place.

B Riefel -

Excellent guide. Thank you!

I got through everything, turned on the iMac, got the start up gong, and ... nothing. Screen stayed black and the fans started blowing like crazy, indicating failure of Apple Hardware Test. All my attempts to remedy (zap PRAM, reset SMC) failed. Uh oh.

Opened the machine back up, took out the LCD, and re-seated all four connections from display panel to logic board. Crossed my fingers and put it back together. This time, the displayed turned on, the Apple logo appeared, system booted up, and the new SSD appeared on the desktop. Yay!

The connectors from the LCD are delicate. It's tricky to seat them properly without damaging them, but don't close it up without a positive click on each one.

The upgrade has been fantastic so far. SanDisk 120GB SSD. Dramatic speed improvement. Well worth all the surgery on the machine.

claytonhibbert -

in step 22 you can see the wifi cables are not connected anymore. but there is no step that shows you should disconnect them

R Sonnema -

+1 Unfortunately mine has been broken (CH1 cable is out from the UFL connector). Unfortunately I do not now how to repair it.

It would be important to add this step in order to protect others falling into the same issue.

PeterZ -
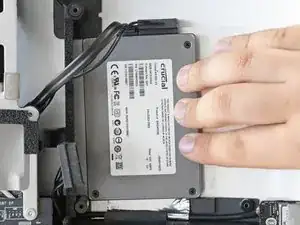
i followed this guide to the T. used a 240gig Corsair GS and after it gets far along the boot process the fans blow at max speed! i took the monitor off again to make sure i had all the connections in the right place. there was one i was missing... the ambient temp lol. but i plugged it back in and still fans blow full blast :( gonna keep messing with it to see if i can figure it out :)

paulhizo -
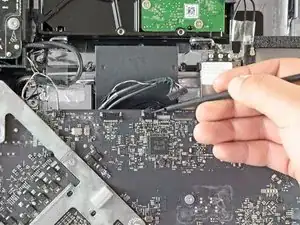
Hi, I have successfully installed a 1TB Seagate Hybrid hard drive and everything seems fine, except the fans are blowing at full speed constantly. Is this because the heat sensor for the optical drive is missing now? Has anyone got a solution?

Thank you

Andy -
It's because the standard Seagate drives contain a proprietary thermal sensor. you will have to purchase HDD Fan Control to get it to stop. It's the only solution short of shorting out the thermal sensors (dangerous).

Install the trial and you'll see.

http://www.hddfancontrol.com/

Steven Hanlon -

I wouldn't recommend using HDDFanControl, because its not really a long term fix... I used it for a while, but it frustrated me that the fans didn't idle until the machine was fully booted, so if you need to do anything in single user mode, safe mode or even a boot camp or separate OSX boot up, you cannot use it. In the 2011 range, i'd recommend using this as a long term hardware solution

http://www.thebookyard.com/product.php?p...

Jon Ridley -

All sorted!! I didn't realise I could install the optical drive back over the new hard drive, the fan keeps both very cool. Once I connected the optical drive & thermal sensor the fans calmed down to 1100 rpm. If you don't want to install the optical drive just take off the thermal sensor and connect it to the new hard drive and the logic board. Another thing I have learned in this experience is you need the optical drive in to install Windows (bootcamp) or you get a partitioning error at install. It is a safety feature Apple incorporated. Hope this helps others!! Thanks again for the replies

Andy -

OWC has a pretty good vid of this mod, including lots of important cautions which are absent from this guide. OWCmacsales is the channel name. I will be using all available material as this mod is high on the pucker-power scale.

Russell Hodin -

Why has double sided tape been used in this guide instead of the SSD brackets that are designed to be screw mounted under the optical drive? there are 3 screw mounts allocated to the mounting of the SSD. With the heat that is generated by the iMac machines, i'd be worried about it losing its bond and falling down, especially using tape bought from Boots instead of high strength industrial tape...

Jon Ridley -

We found that Apple removed the SSD brackets / screw holes in later units of the same model, and we wanted a universal solution that would help everyone add a dual drive to their iMac.

Miroslav Djuric -

The hack worked perfectly, thank you ifixit team & support!

There was a slight amount of compression when re-setting the logic board, but it doesn't appear to have stressed or pinched anything (yet). It certainly goes in a bit awkwardly. It does suffer a bit of a twist while man-handling it in & out. A bit unnerving.

The first set of suction cups had a defect and one wouldn't hold, & ifixit sales got one in the mail lickety split. +5 stars, ifixit sales!

A few suggestions managing airborne dust:

— do the hack on a windless, foggy day

— see the OWC video for how to handle & temporarily store the glass & LCD

— use a small camel-hair brush to drag dust mites to the edge of the LCD or glass during re-assembly.

Not sure what I'll do about internal dust in a year or so . . .

Russell Hodin -

I followed this guide successfully with the kit from ifixit and everything works very nicely. However, I somehow lost the sd card cable, which is not a big deal since my mom doesn't use the sd card slot. I'll put it back next year when I replace the hdd.

If you are planning on doing this, I have a couple of suggestions for you:

* count the cables you disconnect

* before putting the logic board back in, tape all the cables to the sides with some masking or electrical tape and count them again

* try not to touch the lcd, fingerprints are a pain to remove, don't touch the underside of the glass panel either, put it down suction cups down

The guide may look scary, but it's really not that bad.

Rafael Kitover -

Don't forget to install Trim Enabler or Chameleon SSD Optimizer for TRIM

Trim Enabler: http://www.groths.org/software/trimenabl...

Chameleon SSD Optimizer: http://chameleon.alessandroboschini.it/

Pepijn -

In the guide step 32 I see that connector is L-shaped, but in the kit picture it is not L-shaped. How important is to have L-shaped connector? Is there a place for a straight one?

Ivars Strazdins -

Thanks to you iFixit ! Perfect guide !

Iron42 -

I did this upgrade this week and was successful. I definitely don't recommend attempting this if you've never done a PC build, studied PC repair, or don't have steady hands. It helps a lot if you have a spare laptop playing the OWC video and playing/pausing it as you do each step. Also, I wore latex gloves to help prevent fingerprints from getting on the LCD.

A tip for migrating to the SSD: install a new OS instead of cloning. After I installed the SSD, I could not get into the Recovery due to some error, which using Recovery is an essential step to migrate OS X from the HDD to the SSD. A way around this issue is downloading Mavericks via the Mac App Store and do a new OS X install. From there, install OS X on your new SSD, then use the Migration Assistant to move everything to your new drive, which it does really well for you. Then, you can toggle Startup Disk in System Preferences (in case you aren't booting using the SSD).

Oh, and don't forget to manually enable TRIM on your new SSD.

mtlangr -

I installed the ssd and now I have the cpu fan running at full blast. it seems to start about 10 seconds after the iMac starts. I've go far as to undo and redo all of the steps TWICE. I've also detached the ssd and the cpu fan still runs at full blast. I've also tried the software solution and nothing works? It seems to be running at 3800 constantly. Any ideas? Please HELP!

andrewbpark -

Hi Andrew,

did you get that solved ????

I have the same problem now :-(

Thanks

Uwe

digdagdigedag -

Great guide.

Today I installed a Samsung EVO 840 250GB SSD behind the optical drive and swapped out the original 1TB Seagate HDD for a 2TB one. Works great.

This is not a very difficult thing to do. Just keep calm.

The hardest thing was to put the motherboard back in place...

My tips:

1. Read the steps a couple of times.

2. Have someone helping you holding the panel up while disconnecting those 4 cables.

3. Use a spudger and your fingernails to remove the cables. (spudger on one side/tab, fingernail on the other tab, or if possible just fingernails.

4. Mark every cable you disconnect (for example "pwr btw"). This make the rewiring a piece of cake.

5. Don't clean the "glass" with anything other than very hot water. I held it on the edges and held it in the shower. Any glass polisher or so will give you a headache. (I have tried to get it really clean several time before) Now its as good as new.

6. Yes. The fans WILL spin, but I use HDD fan control. Now it's super-SILENT ;)

twebbas -

There are too many steps in this guide that are unnecessary. Reading the comments, it seems like people are making mistakes and having problems. Follow the online video at OWC and it is an easier process, although still advanced. When you buy an SSD kit, it includes the proper length SATA cable and thermal double-sided tape. Someone commented about an SSD bracket behind the optical drive. Apple did not include the SSD bracket unless you bought the Mac build-to-order directly from Apple with their SSD installed. That is why thermal double-sided tape is used to secure the drive behind the optical drive. It won't go anywhere because the drive rests on the top of the optical bracket when you press it against the back panel, and the optical drive is re-installed in front of the SSD holding it in place. I did this upgrade about a year ago using a Samsung 840 EVO 1TB SSD and it is awesome.

Peter Hillman -

Done it in a hour and a half, great guide! "Hardest" part was replacing the mother board :s.

If you want to save money, you can buy your tools on eBay, 1st prices 3$ Torx T10, 3$ opening tools set, 10$ sata power cable, guitar pick instead of suction cups

Remi Nguyen Dinh -

Well. First I tried to source all of the parts in Canada, thinking it would take forever to get here from ifixit. I wasted more time doing that than anything else. It took 3 days for the HD, cables and repair kit to get here.

I have worked on, in and around computer my whole career so I was eager to take this on. The tear down and installation were straight forward (have the guide handy) but getting the main board seated in the right spot was frustrating to say the least. It wouldn't go back in, it took me over 30 minutes of careful attempts . It is all in there now and I am extremely happy with the performance and the storage!

You will need a fan controller software.

clevepohl -

Anyone know of a GOOD 'how to' on using the terminal to make this a functional Fusion Drive? I can't get mine to unmount to wipe then merge it, been trying for 2 days

William Evans -

I used this guide when I did a similar upgrade to my 21.5" iMac. Worked like a charm. http://blog.macsales.com/15617-creating-...

zachary -

Nice, and thank you very much for the guide !

Now I have a very strange behaviour here.

Since I installed the "Dual Hard Drive Kit" (the second cable basically) the FIRST SATA connector doesn't work any longer !

(I installed my second drive, wondered why it was not recognised, though it might even be broken 'till I switched the two disks and found out now my new disk was recognised but the old one was no longer visible).

My main objective was to switch my old (slow !) 1TB disk for a new 2TB with 4GB SSD cache.

So that's done.

But any idea why the primary SATA connector would no longer work ?

Is there anything like "primary" and "slave" switch (sadly known in the PC world ...) I should worry about ?

TIA for you help, and best regards,

Roger

Roger Kapp -

After installation of this setup my ODD Fans are going crazy. I did run a AHT and the error told me there is something wrong with the ODD temp sensor. So i tried replacing the temp sensor with a new one. I also tried removing the SSD and get back to the default state, also nothing.

Any tips or tricks on how to resolve this?

simonelberts -

just installed a SSD, but now I can't hear any sound from the OS. when I start the MAC, I get the usual "Bong", though. What mistake did I do? should I be looking for?

Mandarina Duck -

can't you just use the optical drive sata connectors to connect the new HD? just wondering cos i've seen other solutions which seem to attach the hd to a mount and then re-plug the optical sata cable back to that mount and looks MUCH MUCH MUCH easier.

i'm still to do this i've just ordered the kit, but if i would have seen the other kit before i would have ordered that one instead i think :/

https://eshop.macsales.com/item/OWC/DDIM...

Albert -

So many of us are having issues with the fans running at high speeds but no response from ifixit. Frustrating that they don't pay attention to their users

Jeffrey Hanley -

I did the upgrade and now my computer gives me the 3 tones of no ram installed no matter what way I insert the ram? Any suggestions.

Rick Hahn -

Hi, is it possible to add two SSDs and totally 3 disks?

Ferhat Yurdam -

Hello! I looked all of the instructions and read all the comments, but did not understand why so many complex actions with removing the motherboard? Why no one uses optibay as here: iMac Intel 21,5" EMC 2389 zweite Festplatte einbauen ???

Zhurik -

EVERYONE WITH FAN ISSUES: After searching for days only finding conflicting explanations for my fan issues, this site explains it all:

https://thisdoesnotcompute.org/2012/12/3...

I installed the SSD as described below the optical drive, but the fans still went full blast. I thought this was only supposed to be happening if you replaced the original drive?

Well, at least it is now properly explained, and a solution exists.

Karl Ivar Dahl -

UPDATE: I still had fan issues after the "shorting trick" described above. However, running Apple Hardware test I found that I had a ambient CPU temperature sensor error. THIS DID NOT SHOW UP AS AN ERROR USING FAN CONTROL SOFTWARE, all sensors reported OK. I t turns out that sensor sockets can very easily be installed reversed when reassembling. It was very easy to fix when the sensor was identified. If you have trouble running the Apple Hardware test, have a look at the sensor connections: The solid plastic side should be down.

I now have no fan issues with an SSD installed as secondary, keeping the original HDD intact to make a great fusion drive. The "shorting trick" is probably only necessary if you replace the drive with the SSD.

The morale is: RUN THE APPLE HARDWARE TEST, do not trust the sensor values reported by the fan control programs.

Booting with D or OPTION-D should start the hardware test. This did not work for me, so I googled to find instructions on bootable USB stick installation.

Karl Ivar Dahl -

Stupendo tutorial molto esaustivo e ben illustrato. Complimenti.

ilario bignasci

edelweiss7 -

I have a question about this. What is the procedure to make a 2nd SSD the boot drive instead of the original HDD? Do I need to swap SATA Cables or can this just be done during the OS X Install? Thanks!

corymullen -

Option key at boot lets you specify boot device (DVD or external drive or secondary drive), but otherwise - if you're already in macOS on the old drive, goto System Preferences and select Startup Disk. You get to pick and choose whenever you want!

quiksel33 -

Successfully completed, was not so difficult :)

John Grace -

Excellent guide, thank you very much. I have just followed it to replace the SSD in my iMac (added 3 years ago following the same guide) and I took the opportunity - while I was up to my elbows in iMac bits - to swap the CPU. Replaced the OEM Core i5-2500S with an i7-2600. So far, touch wood, everything is running just fine. Thank you again!

davidhollway -

Addendum to my previous comment, because apparently there’s only a 5-minute edit window, grrr..

A couple of observations:

- Have a can of dry compressed air to hand. You’ll need it to blow dust off the exposed LCD panel (as the guide says, do NOT touch the panel… even wiping it with a cloth can leave a residue). Chances are there’ll be an accumulation of dust on the internal fans & heatsinks. Take the opportunity to give everything a good blast.

- Screwing the LCD back is perhaps the trickiest part, because there are strong magnets around the chassis frame (to hold the glass front panel). The screws will try to “snap” to the magnets rather than lining up. Care, patience, & a steady hand are required. A sleeved screwdriver would make this MUCH easier.

davidhollway -

More points - wish I could have put these in one comment but there’s a length limit. I’m trying to be useful here!

- There are a LOT of small connectors (temp sensors, speakers, fans, etc etc). I suggest small labels to put on the cables as you remove them; easy to miss one as you put them back, or make a mistake.

- The screws that hold the mainboard in place are of different lengths. Make a note of which screw came from where, so you can put them back in the right place.

That gives me an idea - hey, iFixit, why don’t you make available life-size templates of device internals, so that someone following your guides can print out the template and use it as a place-mat to keep the screws while working? I.e. “this screw came from the corner of the mainboard, so I will temporarily store it on that location on the printed template”…?

davidhollway -

Not a bad idea! Paper printouts have their limitations though—one good sneeze or gust of wind and everything gets messy fast. Printouts are also arguably a bit wasteful as people tend to use them once and then toss them out. If you haven’t yet, give the magnetic project mat a try—personally it’s my favorite tool for electronics repair, hands down. Congrats on a successful repair!

Jeff Suovanen -

I use markers of different colors to mark the position of the connectors and screws.

Just paint the male and female of the connector with the same color and do the same with the heads of the screws and a paint point of the same color in the PCB.

alozano -

Complimenti, tutorial molto comprensibile ed esaustivo. Bravo

edelweiss7 -

Upgrade done. It is hard to connect the lcd to the motherboard (step 10). The first time I didn’t do it well and when turn on the computer, the display doens’t show nothing and the vents run like crazy. I turn off, connect again the connector (step 10) and all run well! Five star to this guide.

André Senra -

I added a 500GB Samsung SSD and also replaced the i5 2500S with a i7 2600. It works like a breeze! Had some issues with the ram, causing beeps after reassembly, but fortunately that was solved when switching the ram sticks a bit. Now I have a very fast iMac and together with 20GB of ram, a nice machine to do development on. Hoping that newer iMacs will again be more serviceable, but for now I am happy with this one!

Peterdk -

Successfully added a 1TB Samsung SSD in a little over an hour, cloned the old HD over and voila! This has breathed new life into my iMac and I couldn’t be happier.

Laura Calabro -

ì have my imac with fans running at full speen now do you have any idea why it would do this after adding the ssd ?

Kerian Thibault -

Hi everyone, I have a problem installing SSD behind the optical drive. Under the DVD there are 4 screws that prevent me from positioning it as a guide. the only way is to insert SSDs horizontally and when I get back up the reader fails to take the DVDs and can't even reject them, most likely it goes wrong or is slightly compressed. How can I do?

Jack -

Jack - Did you push the drive against the black vertical rail? The curvature of the back case on the right side will push the drive to far forward which will interfere with the optical drive. I also find the drive needs to be mounted vertically flat with the connectors either at the top or bottom.

Dan -

Does this work on a 21.5” 2011 iMac?

Evan -

This is the wrong guide! Jump to this one for your 21.5” system Installing iMac Intel 21.5" EMC 2428 Dual Drive Kit. The adapter & its kit is the same iMac Intel 21.5" (Mid 2011) Dual Hard Drive Kit

Dan -

Just wondering why the 27” iMac kit isn’t interchangeable with the 21.5” kit?

Thanks.

Arthur Dinham-Peren -

The 21.5” version has discreet cables unlike the 27” version which has the exact same cables but has a heat shrink tube to hold the cables together. this is done to protect the cables from the higher heat and their placement.

Dan -

I finally solved my FANS BLOWING AT HIGHT SPEED problem (hardware solution, no software)

Running the Apple Hardware Test (booting with D key. If you are in an infinite loop, you need to be connected to your modem physically) send me the “4SNS/1/C0000008 : TAOP - - 124 “ error code, relative to the Ambiant thermal sensor.

It seems that it’s really easy to invert the ambiant thermal sensor as you replugged it into the socket (step 28 as you remount your mac).

As visible in the picture in step 28, the grey cable should be oriented to the bottom of your mac as the black one must be to the upper side.

Don’t use software solution because your mac is really downgrading performance (espicially GPU usage) in order to prevent burning component.

albert einstein -

Placing SSD behind optical drive inside iMac 2011 - is a really bad idea! This is the only air channel for a video card’s heatsink. And it’s already partially occupied by the optical drive. There is a lot of place in the central area, where original HDD was placed. And if you are really into upgrading that gorgeous classic, the best thing you can do - throw HDD out. This is also will give you a lot of new free space inside. And also will free up another SATA slot, so you will be able to install a pair of SSD, while keeping optical drive (or 3 SDD w/o optical).

Thomas Ashcraft -

Thats not true! the air flow is from the boot to the up not to the side.

Dan -

Hallo, ich habe das genau so gemacht wie in der Anleitung. Aber wenn ich beide Festplatten angeschlossen habe ist der i mac 20” tot und macht gar nichts. Am alten Anschluß läuft die ssd oder die normale Festplatte und wenn ich sie am ssd Anschluß am Board abklemmen läuft die ssd oder die normale Festplatte auch.

Aber es darf nur eine angeschlossen sein.

Was habe ich falsch gemacht?

Gibt es einen Trick?

Vielen Dank

Andre

Andre -

Translation: Hello, I did it exactly as in the instructions. But when I have connected both hard drives the i mac 20 ”is dead and does nothing. The ssd or normal hard disk runs on the old connection and when I disconnect it from the ssd connection on the board, the ssd or normal hard disk also runs. But only one may be connected. What have I done wrong? Is there any trick? Many thanks Andre

Dan -

Sie haben angegeben, dass Sie einen 20 "iMac haben. Ist das richtig? Wenn Sie diese Liste überprüfen, um Ihr System auszuwählen, iMac Intel 20" Repair

You stated you have a 20" iMac is that correct? If it is review this listing to select your system iMac Intel 20" Repair

Dan -

Excellent guide. Mission accomplished.

Stefano Vignato -

Por aqui deu tudo certo só usei um sofware para monitorar o cooler … o resto esta funcionando perfeitamente

Tiago sakakibara -

Translation: Here everything worked out fine, I only used a software to monitor the cooler… the rest is working perfectly

Dan -

Does anyone on here know if I can externally fix my old hard drive to the my present Mac . My old computer screen just went black , and I need to get some information of my old hard drive ? Thanks liam … email. carasac@gmail.com

Liam -

Yes, just get an external HDD case which can hold your drive and make sure the port connection if offers works with your new system. Many offer USB-A connections which then can via an adapter can connect to a USB-C port.

Dan -

I combined this guide with the hard drive (main) replacement (iFixit) and one from OWC to add another drive using their Data Doubler in place of the DVD drive. Net result is 3-1 TB SSDs in a 2011 27" iMac. Also upgraded RAM to 32 GB. Running Monterey 12.3.1 via OpenCore Legacy Patcher.


That was fun!

tjod -

How does this work for a Mid-2011 iMac-27 that had the "fusion drive"? I have already "spilt" the SSD and HDD and replaced the HDD with a 4 TB HDD. I suspect the 256 "blade" SSD is getting "long in tooth" and would like to replace it with a higher capacity SSD.

Daniel O'Leary -

The Fusion Drive is really only the base HD in size, the blade SSD is only a cache drive to speed up the file (data blocks) to load

The dual drive config is a bit different as both drives are accessed. The boot drive (blade SSD) as it’s the faster of the two I/O ports and the SATA data drive often the original HDD or some times replaced with a second SSD. As your data files don’t need the faster I/O.

Dan -