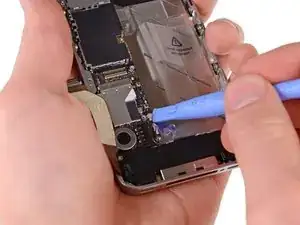
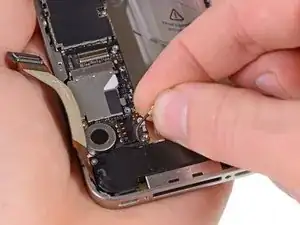
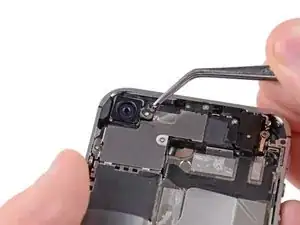
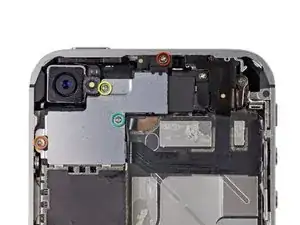
Einleitung

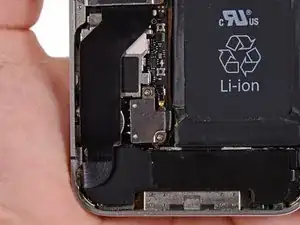
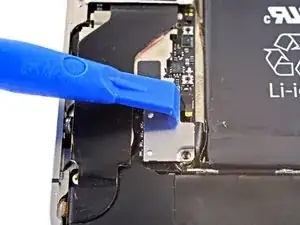
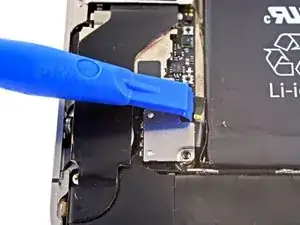
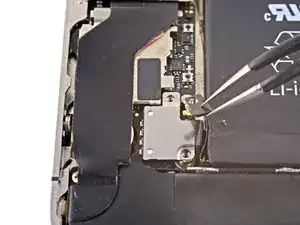
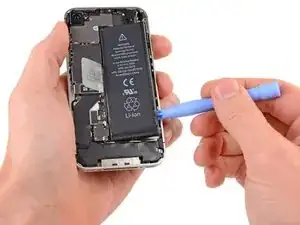
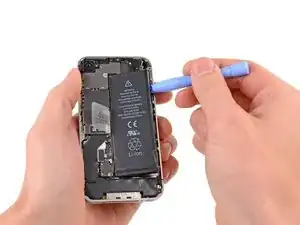
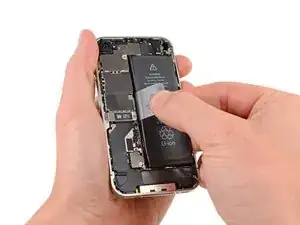
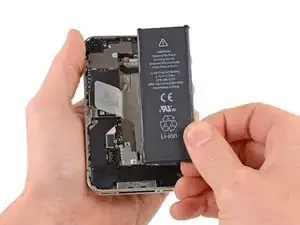
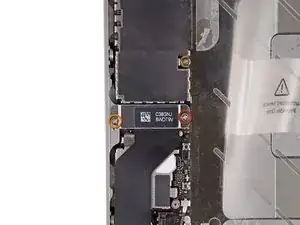
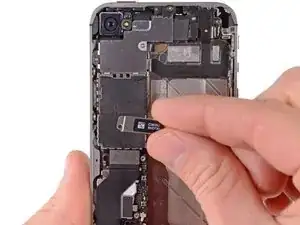
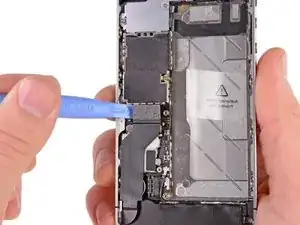
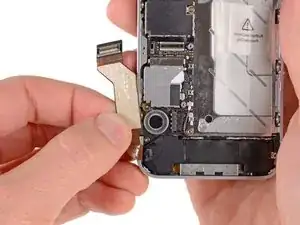
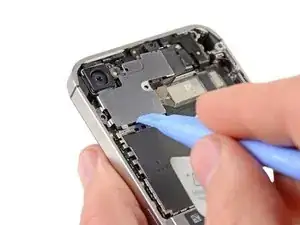
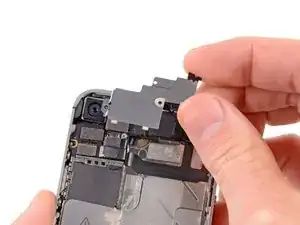
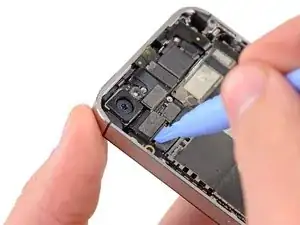
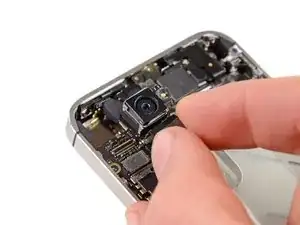
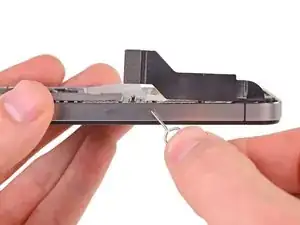
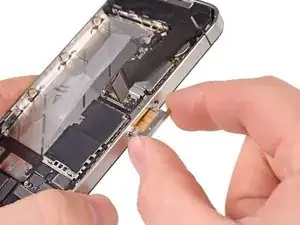
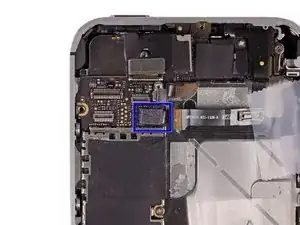
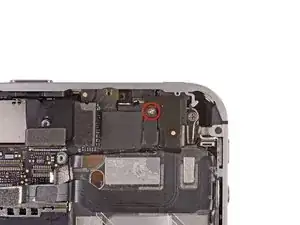
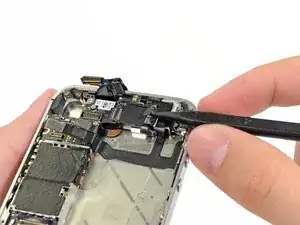
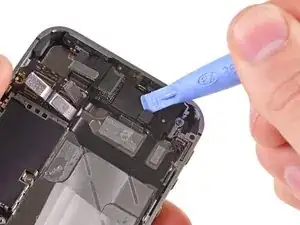
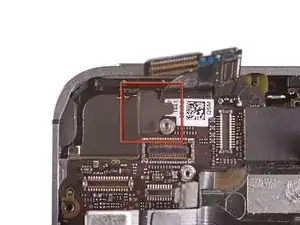
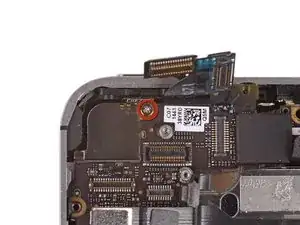
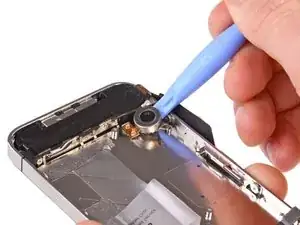
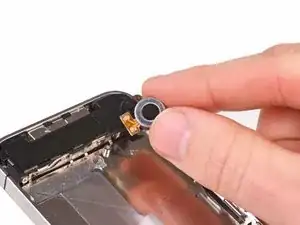
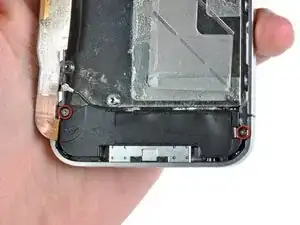
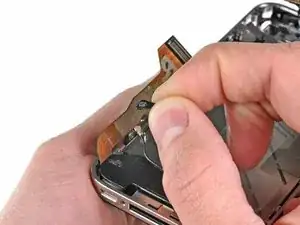
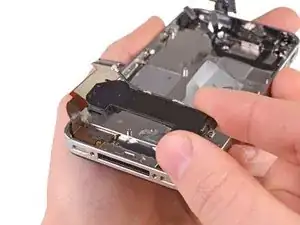
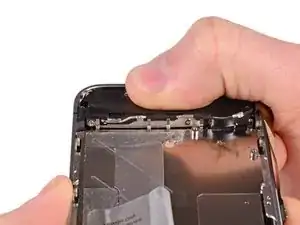
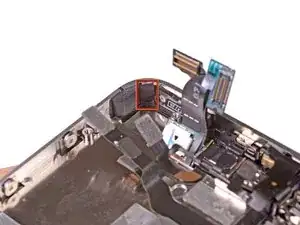
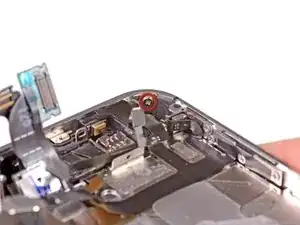
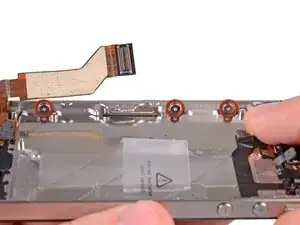
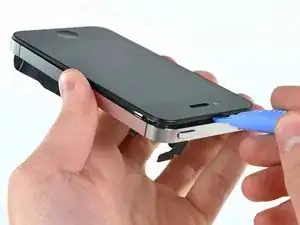
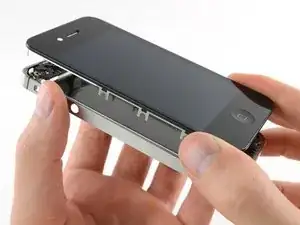
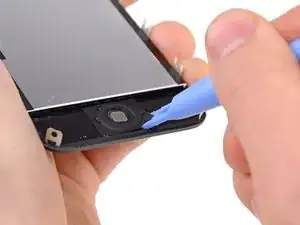
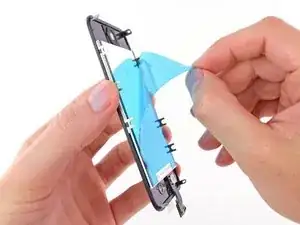
In dieser Anleitung erfährst du, wie du ein gesprungenes Display an deinem iPhone 4s ersetzen kannst.

Nachdem du das gesprungene Display erfolgreich ausgetauscht hast, schütze es mit einem Screen Protector vor Kratzern.

  1. diXGGSBdV3Eqd21F
    • Bevor du anfängst, entlade deinen iPhone Akku auf weniger als 25%. Ein geladener Lithium-Ionen Akku kann Feuer fangen und/oder explodieren, wenn man ihn aus Versehen punktiert.

    • Schalte dein iPhone aus, bevor du mit der Demontage beginnst.

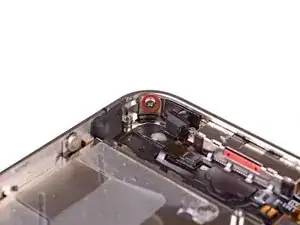
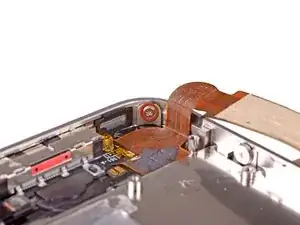
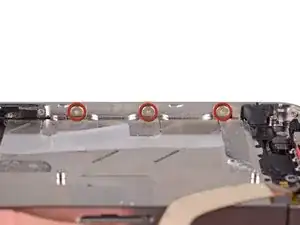
    • Entferne die beiden 3,6 mm P2 Pentalobe Schrauben neben dem Dockanschluss.

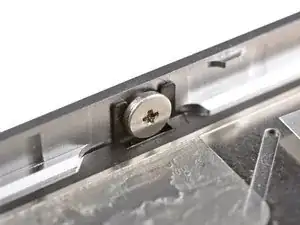
    • Vergewissere dich, dass du den Schraubendreher gut im Schraubenkopf ansetzt, wenn du die Pentalobe Schrauben entfernst, denn sie können leicht beschädigt werden.

    The Liberation Kit just stripped the screw. Now what.

    nimpsy -

    Had local iPhone repair shop remove the screw. Repair complete!

    nimpsy -

    I left the battery in and everything above the middle, using a pen knife to flex the logic board, I had plenty of room to else the old out and the new in.

    Worked well and saved a lot of time.

    Keith M -

    After reviewing the steps I decided to follow this guy's advice and left the battery in.....one less item to possibly foul up. I don't know if it made it any faster (first time to open my phone, so nothing to compare it to) but I can say that my phone is charging for the first time in 6 months :D

    Jennifer -

    BEFORE YOU START:

    1) This is doable but not easy, quick or without risk.

    2) If this is your 1st time, the whole process can take >2 hours (half of it reading this fixit manual and notes, which I highly recommend!)

    3) I highly recommend placing a large, thin clean white cloth on the table. This prevents screws from rolling around and you will clearly see anything falling out.

    4) If you have them, use tight surgical (latex) gloves. This prevents you from greasing up contacts.

    5) Have e.g. a big old egg box ready, so you can place the screws in order (and maybe write step/screw size on the side).

    6) I bought my display from "Generic" on Amazon ($20.36). Screen works fine and tools were ok but not great (screw drivers do not withstand force needed to unscrew some).

    7) I had my own 2mm Phillips screw driver and a 2.4mm flat (for the big screws).

    8) Have a nice cold beer by your side! Good luck!

    superedu111 -

    Sounds like this comment relates to a screen replacement, not a rear panel replacement. No way a rear panel replacement would take 2 hours - can be done in 2 minutes!

    Jonathan Deamer -

    I was paranoid about stripping the pentalobes - I used the ifixit pentalobe screwdriver TOGETHER with a layer of Glad Wrap (cling film or saran wrap for the non-Aussies) over the pentalobe holes - absolutely no problems. Guess it helps the driver head gain purchase?

    Anyway hat tip to this guy:

    http://modmyi.com/forums/hardware/806092...

    jimforbes -

    It's also called glad wrap in the US as well. :)

    Scorppio500 Webmaster -

    After seeing the comments about trouble finding the carrier, I shut down the phone, did a soft reset (by holding the power and home buttons until it started and then shut down and stayed off), and removed the SIM. After the repair, I replaced the SIM and plugged it in to the charger. It started up and found the carrier (Verizon, as it happens) immediately. I would guess that only the soft reset made a difference, but I did both.

    DavidLewis -

    Thank you David, will I need to reload operating system if I replace thr logic board? I'm hoping to use a 32gb boards from a locked but working phone to place in my 8gb device. Thanks for your advice,

    Sharif

    Sharif Bagnulo -

    I pried one end of the back off only to find 2 funny little screws holding the other end on so I took my Dremel, like Jack said, and ground those suckers out. Once I had the back off I loosened all the screws then turned it upside down and shook the crap out of it. The screws went flying everywhere and fell on the floor. Its my moms house so of course she's got gross brown carpet. How am I supposed to find my screws in that? I get the vacuum out and go over every inch of the floor to suck up all them screws. Then I dump the bag on the table and all I find is a bunch of hair and gods knows what else, but no screws. When I look for my phone I see its covered in all that stuff that came out of the vacuum. I mean, what's up with that? How can I work on my phone if its covered in dirt? Nobody said anything about that, did they? The average guy's gonna screw up his phone big time if he follows these instructions and nobody warns him about all the dirt that's gonna end up in his phone. Are you kidding me!! Now what?

    Marv -

    Here's a little vacuum trick for anything small: put nylons/panty hose over the end of the hose and then you don't have to dig thru the bag contents.

    paul -

    Marv you a first class pleb! Please don't try and fix anything again. Tool

    ticklejahfancy -

    It's clear who's at fault here, Marv.

    It's as clear as the day has long legs. It's your Mom's fault.

    Milfs who make earth-tone carpet choices, are more likely to twerk, than tweek.

    And as far as trimmin the hedges are concerned, she's more likely to float a turd in the punchbowl,

    than to give you your inch.

    I know you think I'm crazy. But everyone else agrees. We all politely try to the other way...

    Your cuck stops here. We'll not near me, go over there...

    Nathan Brazil -

    my screws are stipped and i am going though the front glass to get to the logic board could some one give me a guide on how to get to the board please... thanks

    Caleb Croft -

    all you need to do is remove the clip over the wifi antenna and the one that actually attaches the wifi antenna to the iphone two steps to do this job...

    Ray Leahy -

    The physical battery replacement went off without a hitch, and saw that the phone had no network connection, but also had no way to unlock. The slide lock said "Slide for Emergency Call" over my custom wallpaper and sliding would give the passcode screen, but it would reject the 6 digit passcode (it would buzz and go dark after the 4th digit, re-awakening and putting in the last 2 would indicate bad passcode). Very frustrating! I get it into recovery mode and convinced iTunes to "update" the OS, but it still didn't let me in. I performed a restore to fully factory reset the phone, and it worked! Sort of... the start screen kept being replaced by "Temperature - phone needs to cool down" but it's cold. Temp sensor is on the battery and returning to old battery fixed it. New battery is bad, and phone is wiped. Fun night.

    I'm going to guess that disabling the password might save you from a similar fate. So, I'll suggest BEFORE YOU START, backup your phone and disable the passcode. Good luck.

    Ian Epperson -

    Same here.. Going through that terrible night myself! Guess you had to return your battery right?

    Nuno Alves -

    Is it possible to replace front glass only? If so, please provide a manuel

    Iva -

    Yes, it is. But it's very difficult and risky. Forget it... Have a look here: https://youtu.be/L_kCY05jR10

    Jiri Altman -

    I didn’t find this particularly difficult, even though I’m pretty inexperienced at this sort of work. I watched the video overview to get me going and then followed the steps in the guide. My tips would be to keep the screws and parts organised as you dismantle, and ensure you read all the reassembly tips as you go; it’s easy to skip over them. I also found using the Liberty Kit to replace the pentalobe screws was worthwhile.

    Poor old Marv of Feb 2015. Suggest he sticks to chopping logs.

    graemebagnall -

    caught fire as soon as I replaced the back phone destroyed

    Stuart Laurie -

    The battery on the phone is swollen so I need to replace it but I can’t turn it on to drain the battery, what do I do?

    Beetroot -

  2. GHnnnMrDFAXwZtaN
    GHnnnMrDFAXwZtaN
    1SkPGIKGX2tPwBIB
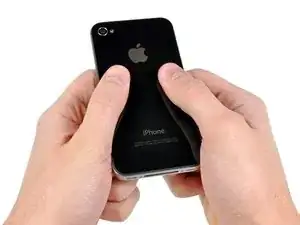
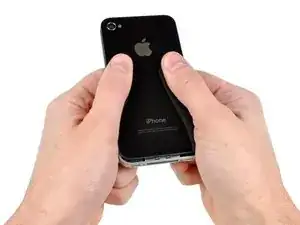
    • Drücke das Rear Panel Richtung Oberkante des iPhones.

    • Das Panel bewegt sich ca. 2 mm.

    how can i take out the screw if it is stripped

    Manny Chaidez -

    with a small driller, but I guess it is very difficult. Never attempted that myself on an iPhone.

    lantzero -

    There is no screw in Step 2?

    Is the screw stripped or the head stripped?

    I have used superglue on the screwdriver to remove a stripped screw, it would turn but not come out, with superglue I could turn and pull the screw out. May also work on a stripped head.

    Trevor -

    If you are careful, use a Dremel tool and a micro drill bit (sold where Dremel tools are purchased) to drill it out. Last resort kind of thing, good luck.

    Jack -

    Why isn't it moving? I removed my screws.

    Thomas The Train -

    I pried one end of the back off only to find 2 funny little screws holding the other end on so I took my Dremel, like Jack said, and ground those suckers out. Once I had the back off I loosened all the screws then turned it upside down and shook the crap out of it. The screws went flying everywhere and fell on the floor. Its my moms house so of course she's got gross brown carpet. How am I supposed to find my screws in that? I get the vacuum out and go over every inch of the floor to suck up all them screws. Then I dump the bag on the table and all I find is a bunch of hair and gods knows what else, but no screws. When I look for my phone I see its covered in all that stuff that came out of the vacuum. I mean, what's up with that? How can I work on my phone if its covered in dirt? Nobody said anything about that, did they? The average guy's gonna screw up his phone big time if he follows these instructions and nobody warns him about all the dirt that's gonna end up in his phone. Are you kidding me!! Now what?

    Marv -

    I didn't see any extra screws holding the back in place. I had to use the included pry tool to get the back off. Just start at the bottom and pry gently...if you just "pull" like the guide says it won't work.

    Brian -

    Don't use too much force to slide the back -- the back on my phone was hard to slide, and I bent and broke a silver metal contact tab at the top of the back (on the inside).

    perryskeath -

    Super easy fix. Thanks for the tutorial!

    Terrence Carlson -

    Those little screwdrivers are easy to mix up, for those of us without ultra-perfect vision! Once I used the correct screwdriver, and my 13yo son's little fingers and perfect eyes, it went smoothly! Also my son noticed that the rubber piece around the camera len was covering the camera; it likely slid out of place when sliding off the back cover. A little playing around (with plastic tools only!) and it looks perfect now!

    ashleedawg -

    sorry but the rear panel is not pushed up. I pulled out the screws in the step 1 but still the rear panel does not move with even when I push it strongly.

    Doo Re Song -

    I too tried to push and slide the rear cover without success. I then tried just pushing the bottom edge up with my thumbnails. It moved very easily forward. Just a few mm movement is needed and then the cover can be removed.

    Michael Lakeman -

    The finger friction approach did not work for me, even when using a sticky pad.

    Here is what worked for me: Grab the iPhone in your right hand with the screen facing your hand and the top facing your body. Find a sharp edge of a desk or counter and place the bottom of the phone's back cover on is so that when you push it, the back cover remans against the desk with the body of the phone sliding free. BE GENTLE as this approach takes far less force than the finger friction approach.

    lesfam5 -

  3. SMVEDtS5veUqF1BJ
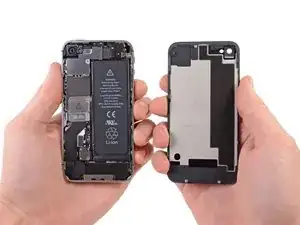
    • Zieh das Rear Panel von der Rückseite des iPhone weg und pass auf, dass die Kunststoff-Clips, die am Rear Panel befestigt sind, nicht beschädigt werden.

    • Entferne das Rear Panel vom iPhone.

    On reassembly, be sure to clean the metal plate at the place of contact with the tiny pressure contact mentioned in step 4.

    Harald Brandt -

    I pried one end of the back off only to find 2 funny little screws holding the other end on so I took my Dremel, like Jack said, and ground those suckers out. Once I had the back off I loosened all the screws then turned it upside down and shook the crap out of it. The screws went flying everywhere and fell on the floor. Its my moms house so of course she's got gross brown carpet. How am I supposed to find my screws in that? I get the vacuum out and go over every inch of the floor to suck up all them screws. Then I dump the bag on the table and all I find is a bunch of hair and gods knows what else, but no screws. When I look for my phone I see its covered in all that stuff that came out of the vacuum. I mean, what's up with that? How can I work on my phone if its covered in dirt? Nobody said anything about that, did they? The average guy's gonna screw up his phone big time if he follows these instructions and nobody warns him about all the dirt that's gonna end up in his phone. Are you kidding me!! Now what?

    Marv -

    The replacement panel I got had two sheets of protective plastic on the inside and one on the outside. I used a toothpick to carefully lift and peel the two inside sheets off. One small one was over the lens on the inside. The other was over some large brown sheet of unknown function (though I think it goes over the battery). When I peel that away, some of the brown material tried to lift of with it, so be very careful.

    Dave Hein -

    From this point go to step ?? Just peel off the tape from the chip. Take some aluminium foil and cut a hole the size of the chip (Use a second layer of foil if you don't thrust it). Heat the chip as described at temperature 300 deg C for 5 minutes. Let it cool down. Reassemble and ..... hura WIFI is on again.

    Lucasa Clearman -

  4. u23hwWMVRVfTHhXJ
    u23hwWMVRVfTHhXJ
    OBHZOWftDKmmoQlB
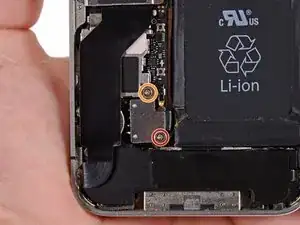
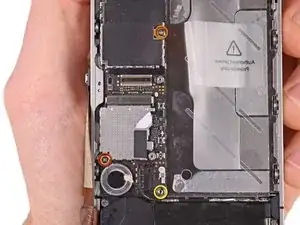
    • Entferne folgende Schrauben, mit denen der Akkuanschluss am Logic Board befestigt ist:

    • Eine 1,7 mm Kreuzschlitzschraube

    • Eine 1,5 mm Kreuzschlitzschraube

    This step needs a few more caveats.

    The bottom screw on my phone was locked with some thread adhesive, and required more force to loosen it than I expected.

    Even after removing the screws, the battery connector was rather firmly seated, and required a fair bit of persistent gentle prying with the opening tool before it came loose.

    The ground clip came loose and nearly flew off while loosening the connector, so it would really help people if there were a warning on this step to watch out for the ground clip and make sure it doesn't bounce away.

    threephi -

    I had the same problem with the ground clip! I’m glad that I didn't for it.

    iScott -

    The battery connector is attached to the battery. You're not going to completely lift it out and remove it. It pulls out from the socket you can see in step 5 picture 3. The pressure contact (little black and gold thing) will probably just slide out from under the connector. Not a problem.

    DMcG -

    I completed this successfully, but this step gave me the most trouble. The pressure contact is really difficult to reseat. So much so that it should probably be called out more clearly in it's own step.

    Greg Fulco -

    If your pressure contact pops out you might find the video at http://www.hightechdad.com/2013/05/07/ho... helpful

    Martin Cleaver -

    I found this link to be incredibly helpful in identifying how/ where to put the pressure contact back in place

    Elizabeth Harris -

    In french: attention avant de retirer le contacteur de la batterie. La vis du haut tient "en sandwich" une petite pièce métallique noire et dorée. Cette pièce a pour but de faire contact de masse avec le dos de l'iphone quand il est refermé. Donc il ne faut pas la tordre. Quand les deux vis du contacteur sont retirée, attention au moment de débrancher le contacteur: cela va faire bouger cette pièce qui ne doit pas être abîmée ni tordue. Au remontage, il faut bien la remettre en place sous le contacteur de batterie: il est tout à fait possible de mettre d'abord le contacteur, puis de glisser la petite pièce au dessous pour qu'elle soit bien à sa place, le trou en face du trou de vis et du trou du contacteur. En remettant la vis, la pièce tient bien en place. Elle doit bien continuer à dépasser de manière a faire contact avec le dos de l'iphone.

    stephane lecreux -

    Top screw didn’t move with iFixit Philips #000 driver. The metal is too soft and in the result the screw was damaged while still in place. Having nothing to lose I also tried #00 and #0. Any way to remove the stuck screw? I would gladly saw it off if I could.

    viktorcode -

    Ok, I had to drill the screw to break it. It was very delicate and time consuming operation. But in the end the screw cap finally broke off and I was able to remove the battery!

    viktorcode -

    The Liberation Kit Philips head screwdriver strips the battery connector screws! It stripped the ne 1.7 mm Phillips screw circled in red in the photo above. I was able to remove the other screw, then I lifted the battery connector off while the red screw was still in position and wound the connector around in circles while lifting upwards and managed to unscrew the stripped screw. Advice, find a decent philips heard screwdriver for the internal screws like the two found on the battery connector.

    remsta -

    Bottom screw was totally stuck, nothing could budge it. I removed top screw, heated up battery with hair dryer to release the glue, pulled it out using the spudger. Lifted up the metal plate thing (after taking out the ground piece and putting it aside). Cut off the flexible bit between the plate and the battery and twisted the plate around the screw as you did.

    Well, the screw eventually came out—but only the top half! Yes, it split in two. Then the bottom half came out, still attached to the thing it was screwed in to (a sort of barrel).

    I put the new battery in, put the bottom half (with the barrel) of lower screw back in its original position, replaced the ground piece and positioned the new plate over it, and screwed the top screw back in. Then put the top half of the lower screw in and tightened it.

    Et voila!

    Extra: It was helpful to discover that the 1.5 and 1.7 mm measurements refer to length of screw, not size of Phillips head.

    Claudia Baragiola -

    When reassembling, use EST tweezers to get align the pressure contact over the top screw hole. using the pointy end of a spudger to assist: put the point through top screw-hole on the battery connector, then through the pressure contact and into the screw-hole. this will help to keep the small piece in place while re-seating the battery connector. Leave the top hole spiked as such until the screw in the bottom hole is gently fastened. Remove the spudger and replace the top screw.

    tallismanproductions -

    Pressure contact needs to be remain EXACTLY in the same position if you remove/replace battery. I had to re-open my iPhone 4S after a battery replacement (the mobile connectivity was lost) and tweak the position of the Pressure to restore functionality.

    Peter Schoeman -

    I used my 16x magnifier loupe to be certain I had the pressure sensor aligned with the screw hole - no problem, no stripping. I consider it indispensable for tricky steps like this, and IFixit sells a similar tool for just $14.

    Jen Morris -

    The pressure connector is the battery connector under the silver plate. BE CAREFUL. It seems like it'd be really easy to tear that pressure connector out without meaning to. The bronze and black thing is the ground, *not* the pressure connector. If you remove it just keep track of it and re-install it.

    Brian -

    The phillips head screwdriver provided in the ifixit repair kit does not work well this these two screws after my first attempt at unscrewing the screws became stripped. The 1.7 mm phillips screw gave me the most trouble. It took an hour to unscrew after the screwdriver from the kit stripped the screw. I used a piece of masking tape over the screw for grip to loosen it, then used finger nail clippers as pliers to unscrew. I would recommend investing in a better screwdriver for this one step. Assembly is otherwise simple and easy.

    teeteebaby5 -

    Here's a tip if you're having trouble removing the 1.7 mm screw. I had real problems removing it – the 1.5 mm screw came out easily using a Phillips #000 screwdriver but I almost stripped the 1.7 mm screw using the same screwdriver. What I did instead was use a flathead screwdriver from the iFixit pro tech toolkit I got, the one with a "–" sign and 1.0 size. That worked perfectly!

    Lars -

    When disconnecting the battery make sure to use a plastic tool not a metal tool that could short out the battery

    Ethan Chow -

    I would agree that a decent magnifier would help as the screws and components are small.

    Also take necessary precautions to ensure the screws are not lost or mixed up.

    Other than being a bit fiddly (particularly the earth connector), the only challenge I had not covered was that the battery was fixed with glue close to where the connector is and despite releasing the battery along the side, I couldn't get the battery to lift out using the tab. In the end I had to use the plastic tools to gently lever the battery away, working from the outside edge and ensuring I wasn't levering against the volume control buttons.

    The new battery is in and following the advise given, I hard reset the phone and all my usual functions are now running... and if this £18:00 fix gives the phone another year or two of use, it will be well worth the effort.

    Dave Mann -

    Vous dites "Le connecteur de batterie s'enlève verticalement de la carte mère. Ne forcez pas latéralement"

    Ou placez vous la verticalité ? pour moi c'est connecteur d'alimentation en bas, bouton d'alimentation en haut ?

    Parce ce que sur la photo suivante, vous enlevez le connecteur de la gauche vers la droite ... c'est à dire latéralement ...

    Soit nous n'avons pas le même sens vertical / horizontal, soit il y a un GROS problème dans l'explication, ou dans la traduction.

    En tout cas, à la lecture de votre explication, j'ai essayé d'enlever le connecteur vers le haut !!

    Donc il m'est maintenant impossible de remettre la batterie neuve, le connecteur est cassé !!!

    Bravo pour l'expertise ifixit :(

    Appoline -

    I've gone through this process twice now. I found this video also very helpful: https://www.youtube.com/watch?v=nYYdbk3U...

    The little contact thing that sits under top screw is always the biggest hassle to fit back into place (I do it after attaching the battery cable) with tweezers from ifixit.

    My personal tips:

    - plan that the incredibly tiny screws or the top-screw contact thing, might get away from you. so work in a space where you can find them easily. Not over carpet, etc.

    - I use strips of tape on a piece of paper to secure the screws while they are out, and position them so I know which one goes on top of battery connector, and the one on bottom.

    - If you have access to a spouse's/mate's iphone, in Accessibility settings there's a Magnifier option (triple-click home button) which does an amazing job at magnifying stuff at a circa 4-6" distance. Lacking any good magnifying glasses, this feature helped a lot. https://www.imore.com/how-use-magnifier-...

    Wayne Walrath -

    Why the guide don't mention PH000 or PH00 instead of Phillip 1.7 mm / 1.5 mm? I didn't know it is PH000 until some comments here save my time. Thanks guys

    wanhor -

    I wonder if the two screws shown on the picture are not inverted. It would seem logical to me that the longest (1.7mm) screw be placed on the upper hole, (where there is the yellow circle) ie on the hole where there is extra thickness (of the gold plated grounding contact sheet metal) in the sandwich. I have not checked, however, I just put the screws in the same location as found.

    Yves -

    I was able to remove the screws without problem, but almost stripped one of the screws when reinstalling the battery connector. Be careful how much force you use!

    Matt -

    It does not work

    Jonathan Sousa -

    When removing the 1.7 mm Philips screw, on rare occasion, the socket it is threaded into, might come out with it. (It depends on how little of that blue glue was used underneath on the assembly line.) Grab the socket under the removed plate between your fingers and use your Phillips screwdriver to back out the 1.7 mm screw from the old shield. Then once separated, thread back in the socket, into the case where it came from. You will want to do that before installing the new battery. You will need a small flat blade to span the socket hole in order to thread it back in snug. When the 1.7 mm screw is threaded back in with the new shield (with the Phillips screwdriver), it should tighten the rest of the way. Don’t over tighten. Great little kit!

    Jim Henkel -

  5. URrRcGhMwIR4lYhX
    URrRcGhMwIR4lYhX
    6l1sKE2hsWX6cRTE
    4Am2Fi2QwG2tGSEQ
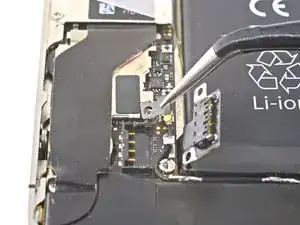
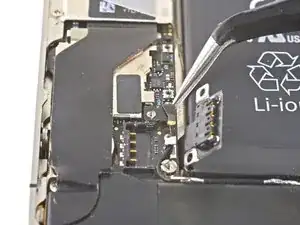
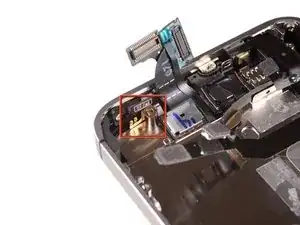
    • Schiebe den Druckkontakt weg vom Akkustecker, bis er aus seiner Position frei wird.

    • Entferne den Druckkontakt.

  6. HUcFR6h5PcxoAgbZ
    HUcFR6h5PcxoAgbZ
    iCRgdOflxjRR4JvT
    oW1gVoxXfOPsci5s
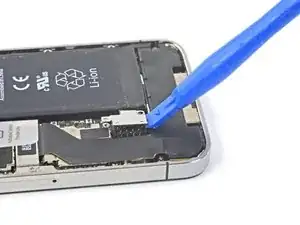
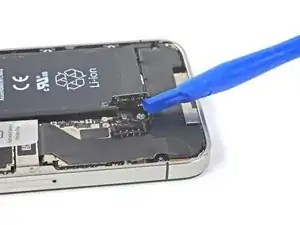
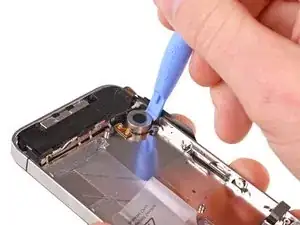
    • Löse den Akkustecker vorsichtig mit einem Plastiköffnungswerkzeug aus seinem Anschluss auf dem Logic Board.

    • Beginne den Stecker an der Unterseite anzuheben, indem du die Spitze des Werkzeug zwischen Lautsprecherumfassung und Metallabdeckung des Steckers einsetzt.

    • Der Akkustecker löst sich senkrecht zum Logic Board ab. Wende keine seitlichen Kräfte auf.

    • Achte darauf, dass die am Logic Board festgelötete Fassung des Akkuanschlusses nicht abreißt. Vier winzige Lötstellen warten geradezu auf dieses Missgeschick!

    No idea what exactly this step means. I just pulled the battery connector without trying to move the pressure contact. Installed new battery, plugged in connector and aligned the pressure contact slightly for the screw to fit.

    Got a big scare as the phone would not connect to the cell network at first boot, only WiFi. Shut it off and when it rebooted it seemed to work. WIll probably know in a day or so if everything works fine or if there are interference issues, etc.

    andries -

    This is normal ... removing the battery resets internal clock to start value and your provider doesn't accept that, hence no network.

    Going online through wifi or manually setting date right corrects this after a reboot.

    Dreetn -

    The black & copper contact piece is missing from my iPhone. Does that explain why my phone won't restore and keeps re-booting? I have tried every kind of restore with no luck. Any ideas?

    ozarkana -

    After reassembling the iPhone I the GSM connection wasn't working. After cleaning all parts with isopropyl alcohol it still didn't work. What solved my problem was to turn on WiFi and then synchronizing the date and time which was set to 1970-01-01. After a reboot everything worked just fine. :)

    Florian -

    I had the same problem. Thanks for the solution!!

    Manolis Mylonakis -

    thanks for this!

    Bill McNamara -

    The black ground contact needs still more "flagging." This is a simple metal strip that is attached ONLY by the 1.5mm (upper) screw. It will help if you look at it before you remove the upper screw. Notice the gold contact arm and point. That contact point must be in a plane above every other surface inside the device when you replace the battery connector, because it makes a ground contact with the metallic inner surface of the device back plate.

    When I replaced it, I used the Pentalobe driver to line up battery connector and ground contact with the screw socket post. I then attached the 1.7mm (lower) screw loosely, removed the Pentalobe driver gently, and inserted the 1.5mm (upper) screw into the assembly. There is a tab on the ground contact that helps it align properly once pressure begins to applied. I completed driving the upper screw, pressing lightly with the spudger on the battery connector plate to make sure it was seated on the pressure contacts. Finally, I completed driving the lower screw.

    Matt McCaffrey -

    I didn't find any need to remove the pressure contact. I just pried the battery connector up (gently) with a spudger and left the pressure contact in place. Connected the new battery and aligned the pressure contact screw hole. Replaced the screws, finished reassembly and all was good.

    Roger Mercer -

    After reassembly, the CELL CONNECTION WASN'T WORKING. You might need to slightly bend the contact in step 5 up just a little, so it will make contact with the metal back plate. Did that and it worked perfectly.

    Great kit, great instructions, thanks!

    AirPhonesApp -

    all those teeny screws...and the world is so...well...BIG!

    go slow and put those parts INTO something...

    putting them "on" something will just cause heartache and and an infected bladder...

    °¿°

    after a lot of froofroo and very errant iphone behaviour problems, i concluded that that tiny grounding piece must be being lazy as hello. i spread it out a bit to ensure a better contact with the back plate and everything appears to be working smoothly.

    did this repair, as well as the battery replacement...GTG!!!

    spoke too soon, i 'spect...random reboots persist.

    richard -

    Just went through the replacement and the battery "plug" (step 5) on my replacement battery was slightly misaligned relative to the metal plate used to screw it onto the board. The plastic and "gold" "plug" was slightly askew on the metal plate, which meant that when the plug was inserted, the screw holes (step 4) were poorly aligned.

    I managed to pull everything back into line using the screws, but the QC on these replacement batteries is a bit suspect.

    cvdwl -

    Guess what happens when you rotate that ground connector 180 degrees...it grounds what I deduced to be the heat sink of the power amplifier for the speaker! So it is silent. It took me a couple of attempts to discover this as I was distracted by the new speaker not sitting down properly and a little dot of stuff under the main connector stuck to the pins. The latter was cleaned-off with a pin under 5x magnification followed by some isopropyl alcohol.

    I suggest that Step 5 is more explicit about the orientation of this ground connector. It's only obvious after a really close look and if one has a lot to do like I did, it's a long time before one comes back to this step so the correct orientation is not obvious.

    Michael Scollay -

    I accidentally removed the pressure contact and I was not able to put it back in place and so far haven't ran into any problems. Is this safe??

    Vasu Reddy -

    I did it als well. All Funktionen well.but i am Not sure if that reduce battery power? Thanks very much for information

    Lupus -

    The hole in the pressure contact aligns with the top screw. The IFIXIT tool kit I bought contained a black sharp “thing” that I used to align the pressure contact with the top screw hole. I used this tool to align the bottom screw hole also. I put the bottom screw in first but did not tighten it all the way. A good magnifying glass with a light helped a lot. Tim

    Tim -

    Aligning with the black pointy “thing” definitely helps. Also, the small copper end of the contact piece is supposed to stick up once attached, to make contact with the back plate of the phone after re-assembly. The piece slides under the silver metal plate, and the the pointer can be used to align the silver plate hole and the black/copper plate hole in place for the screw.

    Rog -

  7. 3x4MEffU4mQO6rPS
    3x4MEffU4mQO6rPS
    NuZ5DMLZaTPpx14A
    • Achte beim Zusammenbau darauf, dass du den Druckstecker sorgfältig an seinem alten Platz ausrichtest. Er muss, wie auf den Bildern gezeigt, auf dem Stift für die Kreuzschlitzschraube aufliegen. Dabei muss der Goldkontakt in Richtung Akkuanschluss zeigen.

    • Säubere den Druckstecker mit einem Fettlöser wie Isopropylakohol oder Windex, bevor du ihn wieder einsetzt. Die Fette an deinen Händen können Störungen an der Funkverbindung verursachen.

    Without that contact. Will the iPhone still use wifi? I need an answer ASAP!

    Gabriel Vaughn -

    Nope, Just tried it and without it it won’t connect to cellular or WiFi

    posthumus -

    What if i lose that little metal ? Huhu

    Zheea Patang -

    Reattached it before removing the battery in next step? Or you mean upon reinstalling after all following steps ? Little confused why I would disconnect then reconnect then take battery out ? Or that is just for reinstalling?

    Nikko M -

    Hi Nikko,

    You’re right—reattach it when you reassemble the phone. I’ll re-word it to hopefully clarify that.

    Arthur Shi -

    Arthur, you still need to re-word steps 7 & 8 ;-)

    Excellent job highly appreciate by the way!

    Regards,

    Antoine L

    Antoine Labourgade -

    Thanks Antoine!

    I’m not sure what needs to be re-worded in step 8?

    Arthur Shi -

    What if you lose it?

    Andy Shen -

    Can I use 72% ethanol instead of isopropyl alcohol?

    Hohoho Hahaha -

    As I understand it 72% is good for disinfecting, but at that concentration there's a lot of water and therefore residue once it evaporates. I think that you'll need a higher concentration to get the best results.

    Sam Goldheart -

  8. gFUkInbcuXZYwHXB
    gFUkInbcuXZYwHXB
    ppPFuQ3FZMrdNTZY
    • Führe die Kante eines Plastic Opening Tools zwischen den Akku und die Außenschale relativ weit unten am iPhone.

    • Fahre mit dem Plastic Opening Tool entlang der rechten Kante des Akkus und heble an mehreren Stellen, um ihn vollständig von dem Kleber zu lösen, mit dem er an der Außenschale befestigt ist.

    • Wenn der Kleber zu stark ist, dann gib einige Tropfen von hochkonzentriertem Isopropylalkohol (mehr als 90%ig) unter die Kante des Akkus.

    • Lasse den Alkohol etwa eine Minute lang wirken, damit der Klebestreifen geschwächt wird.

    • Hebe dann den Akku behutsam mit dem flachen Ende eines Öffnungswerkzeugs hoch.

    • Versuche nicht, den Akku mit Gewalt herauszuhebeln. Tröpfle mehr Alkohol hinein, falls das nötig ist, um den Kleber zu schwächen. Verforme niemals den Akku und stich ihn nicht an.

    • Wenn sich noch Reste vom Alkohol im Smartphone befinden, dann wische sie vor dem Einbau des neuen Akkus sorgfältig weg, oder lasse das Gehäuse gut austrocknen.

    This can be very tricky because sometimes theres just too many glue on the back of the battery, and eventually the battery will be deformed.

    Carlos Lopes -

    Yes, there did seem to be a lot of glue holding my battery in. At first I was afraid of breaking it, but after reading up on the subject I've learned that it is okay if the battery gets a little deformed. Due to the nature of the battery it will still work if slightly deformed.

    djlogic26 -

    I found the plastic pull tab to be useless. Peeled pretty much the whole battery out from the left side. Used a probe to "break" a few strands of glue to help. Just watch the connector and ribbon cable in the lower left corner as you pry up so you don't crimp them or damage them.

    gregsrow -

    Try a used plastic credit/gift card to apply gentle pressure to lift the battery out of the phone, the short edge of the card fits within the gap on the logic board side between the battery and video cables. You can also use it on the opposite side if there is room between the battery and iPhone frame. This has worked on all of the 4 and 4s models I've replaced screens on.

    I offer an alternative image if interested.

    Wallace Karraker -

    Removing the battery wasn't necessary. I attempted the removal but decided not to in the end. It didn't get in the way at all.

    BigFatCat -

    i also skipped the battery removal step. the battery didn't get in the way, but it did make it difficult to see if the wifi grounding fingers (step 14) were underneath the case lip. everything worked in the end though so i don't think removing the battery is a strict requirement.

    rippergirl -

    How can you not remove the battery in a battery replacement fix? Step 14, there are only 7 steps. Me thinks these comments are getting mixed up between different fixes!

    bluezzer -

    I did not remove the battery to do a Speaker replacement and had no issues with getting the Speaker out/in. So, steps 4 and 5 are required but not step 6.

    rcrodriguez2 -

    The plastic tab is not attached to the battery. I just pried from the right and slid tools under until I broke all the adhesive.

    DMcG -

    I found it easier to start by pulling the plastic lip to loosen the battery, then, if needed, use the plastic tool to pry from the side.

    superedu111 -

    I tried to get the battery out as depicted in the first picture. It deformed and is now broken. Not happy. It seems better to leave it or get it out by gently pulling the tab.

    Paul Baars -

    Please, Please, PLEASE avoid using probing elements to try remove batteries. I have had dozens handed in to me with punctures and two that actually started smoking due to people trying to prise the battery out. DO NOT DO IT.

    The best way I have found to remove the battery is this process;

    1) Try remove it with the pull tab directly, some will come out, some will not. Do NOT use excessive pull force else it'll deform the battery and reduce the capacity.

    2) If the pull test didn't work, then get a hot air gun on medium and warm up the area around the battery for about 30 seconds, focusing on the perimeter of the battery. If you see ANY popcorn'ing then you're too hot, you don't want to cook the battery.

    2.1) Wait about 30 seconds for the heat to now wick underneath the battery to soften the adhesive.

    2.2) Now try pull the battery up, the extra heat should have softened the glue that you can remove the battery without excessive force and without sticking objects under the battery.

    Paul L Daniels -

  9. ZNxdZ31y5ttBojdB
    ZNxdZ31y5ttBojdB
    DRKCGkrpIYWEDlUC
    • Ziehe an der freigelegten Kunststofflasche, um den Akku vom Kleber zu lösen, mit dem er am iPhone festgemacht ist.

    • Sei vorsichtig, wenn du an der Lasche ziehst, da diese sehr leicht abreißen kann.

    • Entferne den Akku.

    • Falls dein Ersatzteil in einer Plastikhülle geliefert wurde, dann entferne sie vor dem Einbau, indem du sie vom Flachbandkabel abziehst.

    • Wenn das Kabel deines neuen Akkus noch nicht die richtige Form hat, dann biege das Kabel in die richtige Form, bevor du den Akku in das Smartphone einbaust.

    • Schließe beim Einbau des Ersatzakkus den Akkuanstecker zeitweise an das Smartphone an, um so zu prüfen, ob der Stecker genau passt. Wenn der Akku dann festgeklebt ist, trenne den Akkuanschluss wieder ab.

    • Führe nach dem Austausch einen Hard Reset durch. Dieser hilft diverse Probleme zu vermeiden und eventuell trotzdem nötige Fehlersuche zu vereinfachen.

    Be VERY careful NOT to pull off the part of the connector that is on the logic board! Mine now has only contact but no solder until I can get a small enough soldering iron and a less shaky pair of hands!

    Rob Hendricks -

    I lost the 1.5mm and 1.7mm screws when replacing my 4s battery. Is there a place that sells just these two screws? I bought a 4s screw kit from Zeeton.com but figuring out which screw out the of 39 screws were the the 1.5mm and 1.7mm was impossible.

    admin -

    Buy a cheap pair of digital callipers ($20 -$30) and it will be clear. You can then use them to measure all kinds of things instead of squinting with a ruler.

    bluezzer -

    I bent the wire of the silent button on right top of the battery. Now the silent botton don't work. The wire on the bent is half-cut. BE CAREFUL when you put the new battery inside!

    orzo -

    Was having a hard time getting the screws back into the battery connector. Read another tip online that helped - pushed the end of my phillips screwdriver into some soft candle wax which gave it just enough stickyness to have the screw stay attached to the screwdriver while I was moving it toward the hole. Thought I'd pass that along.

    bill -

    I did as wazzamagu did (and stated above), "My Pentalobe tool was slightly magnetized so I used that to bring the screws in for tightening with the Philips screwdriver." That made replacing the screws fairly easy. Thanks for all the advice on this page. It was not hard at all. Go slow and carefully, everything is smaller in there than I expected. The "searching" thing came up as it seems for most people, but just took a reboot and all is fine.

    amorteguy -

    TO ALL WITH NETWORK PROBLEMS!

    I had the same issue with "searching network". After resetting the network settings in settings it did work perfectly!

    Klemt -

    Took about 15 minutes. The only thing that was confusing was the reference to parts, using the partname, and I didn't know what they were referring to. So I had to figure it out by the photos. Slightly frustrating. Got it in and it worked. My problem then, was it kept SEARCHING and couldn't find my carrier. I followed everyones advice on here, plugged phone into my computer to itunes. then turned off network settings in settings, then turned them back on, and I got 3 bars. good to go.

    sally -

    Instructions were good and everything works fine after replacement. Needed to use a tweezer on the pressure contact on the top screw of the battery. Thanks

    jeff -

    I swapped out the battery today. No real issues. Pretty easy task.

    ddbbsr -

    For the past couple of months, my phone had been dying very fast. I knew that my phone's battery capacity was getting quite low as this phone is older now, and is out of warranty. So I ordered a replacement battery about a week ago, and just installed it yesterday. The install was pretty easy, if you pay attention to where everything belongs. But my draining issue has not gone away. It stays charged a bit longer, my capacity is at almost 100%, yet it can't even hold a charge over night. I'm not sure what is causing this and would love any tips or stories from someone else!! Please help!!

    loucksls92 -

    Beim Einbauen des neuen Akkus ist es sinnvoll diesen zuerst anzuschließen und dann erst wieder in die richtige Position zu bringen da man so dass Anschlusskabel besser verlegen kann

    Andreas Richter -

    OMG thank you iFIXIT, the apple store wanted 3 times the cost of this repair kit. It took less than 5 minutes with most of the time spent trying to prise out the battery as it was glued in nice and tight but steady pressure from the spudger did the trick.

    I think the best advice would be to touch nothing with your fingers as with careful use of the spudger I was able to position the tensioner point no problem. Everything else was nice 'n' easy.

    Finally there was no cell connection only Wifi when I powered up so I simply powered down and up again and all is well in the world!

    Thanks again.

    Yvonne Frankl -

    The battery was incredibly hard to remove. I slid the spudger underneath the battery from the right side as far as it would go. Then, I worked it from the bottom to the top. The battery still was adhered and wouldn't budge using the pull tab. I wound up leaving the spudger underneath the battery at the top and then pressing down on the bottom of the battery to get leverage. After a few strong pushes, and then swapping the top and bottom in the last sentence, the old battery came loose.

    I used tweezers to hold the tiny screws and align them with the screwdriver head before taking the screw to the destination hole.

    One more tip.. if you don't have any other cartons or containers convenient, use the box that the product comes in as a workspace for holding the tiny screws while you work.

    Steve B -

    good tips, i took a couple of photos so i knew what it should look like and removed the screws and placed them in the order i removed them pretty easy if you take your time and be gentle

    Sam B -

    Be VERY careful not to pull on the plastic tab before you fully detach the adhesive or else you will rip the tab clean off. If you did this it is still possible to remove the battery. I just used the guitar pick tool things to slowly work it through the adhesive and under the battery

    Zach Mangs -

    It is possible to remove and replace the upper antenna WITHOUT removing the logic board!! So skip from step 7 to step 21 to 26 and 27.

    What -

    Stuck on searching after unplugging and plugging in the battery?

    This is due to the date and time being set back to default. To fix this you will need to synchronize the date and time back to what it is currently.

    You can do this by either:

    - Connecting the phone to either a Wi-Fi network, Cellular Network (Mobile Data).

    - Connecting the phone to iTunes (It will synchronize the time automatically once iTunes is opened and can detect and access the iPhone).

    Once the date and time is synced you will need to turn airplane mode off and one as it may display 'Searching... 3G' or if it still says searching (which most of the time happens if the sim card has a sim pin lock enabled on it) you will then need to turn the phone off and on.

    Ben -

    Watched the video and ordered the kit, followed all the steps and it all went brilliantly - thank you all so much.

    diegodesignsbiz -

    Is it suggested that I add more adhesive with the replacement battery?

    Sam Love -

    One thing I noted with the replacement battery - from AussieBattery here in Australia; not from iFixit - but the same problem might occur; is that the cable on the new battery had to be 'tamed' (bent here & there like on the old battery, before I could reseat the screws and even the battery itself. One again the black - pointy & flat ended - spudgers, that we use in desktop iMacs, were helpful in getting under that battery and releasing it from sticky-!&&*! I used a pair of '2.5' reading glasses for this job, but '3.0' might have been better, as those screws are INFINITESIMALLY small!!!!! :(

    amicuset -

    Thank you IFIXIT! The battery replacement went very well for me. I was exceedingly careful with the minuscule fasteners. Reading through the instructions, watching the video and reading these comments before jumping in helped. I found the parts and tools to be of good quality. I feel like I beat the system! I used a pair of diopter 3 reading glasses which was a real aid. I hope my comment encourages others...

    Colin Murdoch -

    My rare earth magnets came in handy when I managed to lose the little grounding connecter screws. Those little guys will go flying if, while trying to align them for reassembly, pressure gets applied in just the wrong way. I say one fly out and bounce off my shirt, then it was gone, on the floor I presume. I grabbed my stack of 8 little magnets, waved it around on the floor under where I was sitting and what do you know? A little screw was stuck to it! I never would've found it just by looking...

    William Wingstedt -

    You really need to include information about the pressure sensor. It WILL inevitably pop out, leaving us wondering how and in what order it should be replaced. I had to look elsewhere for videos outside of iFixit to figure this out. Also, tell us which screwdriver to use using the label on the bit (PH000, P2, Y000, etc.). Providing only the sizes of the screws does nothing to help determine the appropriate bit to use when they aren’t labeled as such. Otherwise thank you!

    Thomas Price -

    I replaced the battery and the phone started right up. But I cannot get it to charge It was half charged when it went in new and I plugged it into a charger Checked it later - not charged. So tried another charger and the green charging light still will not come on . Any suggestions? Thanks Don

    Donald Brown -

    My iPhone 4s somehow has another connector on the battery. I cant connect the new battery to the phone. Its a complete different looking connector. And yes its never been replaced before or opened. The iPhone is one of the first versions for the german market after the fall of the simlock. Pls help

    macadi -

    If it doesn’t look like what you’re seeing here, it’s probably not an iPhone 4S. Check the model number carefully. People mix up the regular and “S” models all the time. ;)

    Jeff Suovanen -

    I succeeded to replace the screen, but I made a mistake with the batterie cable, and it finally broke, seems that the cable was too long and I was forced to make too tight loop.

    Maybe a series of photo to explain how to make this the right way.

    Serpieri -

    yoooo that was so easy and fun man!!!!!! love y’all

    Felix Santoyo -

    January 21st, 2020. My original iPhone 4s battery finally kicked the bucket. I just finished installing the new battery with ifixit.com and their parts kit. $16.99 and 30 mins of my time and the phone lit back up and is currently doing the charge for calibration. Thanks so much ifixit!

    Cynthia Biondo -

    I succeed without any trouble. Tools and guide are excellent! Thank you

    Fabrice Bianchi -

    Great instructions. Couple of things. If new battery comes with a removal tag make sure you remove the old tag, Step 7 could be clearer, the pressure connector just falls loose when you first remove the battery connector and its hard to work out how correctly realign.

    Excellent product - and now for a glass of Australian Shiraz to celebrate

    Paul Upton -

  10. PdGlGGtZlEJmTIJW
    PdGlGGtZlEJmTIJW
    n6fVJQMVjYxFvtOn
    • Entferne die folgenden Schrauben, die das Dock Anschluss Kabel am Logic Board befestigen:

    • Eine 1,5 mm Kreuzschlitz Schraube

    • Eine 1,2 mm Kreuzschlitz Schraube

    • Entferne die metallene Abdeckung des Dock Anschluss Kabels.

    Are the screw sizes switche up by any chance? A 4S i have here has the left hole bigger and one of the screws didn't want to go into the right hole when it went nicely into the left one.

    primozresman -

    Fabulous tutorial! Many thanks! i have now a working iPhone back after display crash and glass brake!

    In Step 8 I think the colors of the screws are inverted. The larger screw is at the left (near the sideboard) and the smaller is in the middle, near the battery (iPhone 4S).

    Markus -

    Was trying to fix guide but accidently messed some things up in formatting and I too also believe the picture is incorrectly displaying the 1.5mm(which is the left screw) and the 1.2mm(which is the right screw.

    Mars Starcruiser -

    I believe the guide is correct, but be careful as the screws are not the same as the other 1.2mm screws from later on. Length is the same, but the diameter is not... just keep them all separate.

    Dave -

    Organizer: tape cheap duct tape tacky side up to a tray. Get a ball point or roller ball pen. For every screw, write step number and a letter for color (R, O, Y, etc.) then stick the screw there. I bumped the table and nothing moved. Also use a big white towel as a work surface: nothing bounces away if you drop it. This helped re-assembly

    griffn -

    Also remove 4 screws holding metal cover plate adjacent to camera lens, remove plate to expose camera plug. when removing the rear facing camera, be careful not to loose the small grounding finger mentioned in step 21

    Robin -

    Same for me as for various other posters here: the bigger screw goes on the left, the smaller on the right. Doesn’t fit the other way.

    jack.jansen -

    Switch the position of the screws, it’s incorrect in the pic.

    laurenzano.alex -

  11. p15l6OCRP2fLFcVt
    • Benutze die Kante eines Plastic Opening Tools, um das Dock Kabel nach oben aus seiner Fassung auf dem Logic Board zu hebeln.

  12. qBCtTZEGFXeY2DOf
    • Löse das Dock Anschluss Kabel von dem Kleber, mit dem es am Logic Board und der Seite des Lautsprechergehäuses befestigt ist.

    My gold adhesive has torn, exposing a sliver of the flat wire beneath it. I have put a bit of insulation tape to prevent any contact between the wire and the top of the vibrator and metal piece on the logic board. I don't know if this is sensible or not. Depends whether the gold adhesive is intended to be an electrical contact with these bits, or an insulator from these bits! I will post to update once the phone is powered up / blown up!

    David Thorne -

    I just broke the cable with frame. Careful…

    adrielito_loquito_2006 -

  13. qKjJBSOFoSeOrJfX
    qKjJBSOFoSeOrJfX
    C5TW6AWa4VpiD5Uo
    • Heble mit der Kante eines Plastic Opening Tools das Kabel der Mobilfunkantenne aus seiner Fassung auf dem Logic Board.

    • Hole das Kabel der Mobilfunkantenne unter den Metallhalterungen vom Logic Board hervor.

    Ok, I did all the steps and phone seems to be OK, wifi is actually working again, yaaay.

    But cellular connection is messed up. It will have full reception (5 pins) for about 10 seconds, then drop to 1 pin for a couple seconds, then go into "searching" mode. After a few seconds in "searching" mode it will go back to full reception and the process repeats itself in a timely fashion, over and over again. Obviously I messed up somewhere but where? Which connections are faulty/beyond repair?

    Colorblend -

    I dismantled the phone again and concluded that the digitizer cable was kind of loose (don't know if that affected anything, but i put it down firmly this time). I had 2 problems, the cellular connection I mentioned plus the phone would charge to 3 percent, die, and then repeat the procedure. What I did was I took out the battery, the tin plate above the cables, and lifted the dock connector. So I did not redo that much. I cleaned all contact surfaces as I had been told but chose to not do before.... I also took out the grounding clip by the battery connectors and bent it upwards quite a bit while also peeling away 2 mm of the black insulation material on the back of the phone to make sure the grounding clip connects well to the back of the phone. I also cleaned that surface with window cleaner, which is basically isoprypol alcohol as has been recommended. The cellular antenna connector I pushed down firmly to make sure it was connected, I was gentler the first time, now everything works.

    Colorblend -

    Note that the antenna cable goes around the the right side of that little guiding hook/finger. On the photo it shows the cable on the left of it. The hook is almost right below the socket.

    jasperm -

    Thanks Jasperm, that info was a big help!

    Don Hayashi -

  14. KGKf2N3w1ESThk2e
    • Beachte den äußeren Plastikring, der auf dem Blitz der Rückkamera aufliegt. Er kann leicht verloren gehen, wenn er bei der Demontage nicht entfernt wird.

    • Um den äußeren Kunststoffring zu entfernen, kannst du eine Pinzette, ein Plastic Opening Tool oder einen Spudger benutzen.

    Sometimes found stuck to the inside of the back cover.

    Jeremy Jones -

    Don't do it!!! you can skip that, it will stay and its more of a pain to remove it.

    Nic Harper -

    This is unnecessary step!! Don't do that!!

    javamonk -

    Agreed, mine was stuck inside of the back cover

    fidelvila -

    So was mine - thanks for telling! Rests of soft glue could be scratched off the place - so the ring was already off and I looked for it everywhere.

    Ida -

    Mine was stuck to the cover too, thanks for posting.

    davisyang -

    Mine too, thx :)

    Katja Huovinen -

  15. vOLW4xMnIjTCTxtA
    • Entferne die folgenden vier Schrauben, mit denen die Kabelabdeckung am Logic Board befestigt ist:

    • Eine 2,7 mm Kreuzschlitzschraube

    • Eine 2,6 mm Kreuzschlitzschraube

    • Eine 1,3 mm Kreuzschlitzschraube

    • Eine 1,2 mm Kreuzschlitzschraube

    On reassembly, note that the metal lip below the (red) 2.7mm screw and to the right of the (green) 1.2mm screw goes between the ribbon cable and the main logic board, as can be seen in the picture for Step 12. If you don't get this right, the 2.7mm screw is difficult and, worse, there's a risk the edge of the lip will tear the ribbon cable.

    David Bruce -

    I had challenges here. As noted, the metal lip below the (red) 2.7mm screw and to the right of the (green) 1.2mm screw goes between the ribbon cable and the main logic board. That lip points away from you, towards the screen, THEN BENDS UP towards the power button. You need to pull the metal shield down a little (which stresses the ribbon cable) to get the hook-shaped feature free.

    griffn -

    The fastening on the board came loose when trying to remove screw the 1.2 mm Phillips screw. So the screw hole for that screw is still attached to the cover that I removed.

    Aasmund Gravem -

    Got to step 13 and could not remove the 1.3mm screw (yellow circle), even using a different Phillips head screwdriver than the one that came with the kit. So frustrating. Was able to remove the other screws leading up to this point without difficulty (used the saran wrap trick on the other screws to prevent stripping, but this 1.3mm screw just would not budge).

    Ended up abandoning the screen replacement--luckily the phone works after putting it back together.

    Gayle -

    In my case, the 1.3 screw (yellow) wouldn't tighten on reassembly. I might have tightened too much so that it stripped the screw hole. Anyone know whether this has damaged the board in some way. The phone works fine, but concerned about the long run.

    Casltech -

  16. FKLIuCeFCMOCdLSJ
    FKLIuCeFCMOCdLSJ
    bV2JhVuybBN22KND
    • Heble mit der Kante eines Plastic Opening Tool die Laschen der Kabelabdeckung aus ihren Schlitzen auf der EMI Abschirmung auf dem Logic Board.

    • Entferne die Kabelabdeckung aus dem iPhone, und zwar ausgehend von der Kante, die sich am nächsten an der Oberseite des iPhones befindet.

    If you just very slightly twist this plate clockwise as you are lifting it out, it will help as there is a little hooked piece at the lower edge on the very far right. You have to be careful not to turn it too much though because this hooked piece is right beside a ribbon that could be damaged.

    Trisch -

    To add to Trisch's comment:

    If turn the plate clockwise doesn't do the trick, the hooked piece on the lower right comes off when you pull the plate towards you a tiny bit. Still, watch out not breaking that ribbon the hooked piece is behind of.

    jasperm -

    If you're having trouble removing the EMF shield, try using a plastic prying tool to lift the top right part while pushing it ever so slightly downwards with a finger. Consult this video for details: https://youtu.be/8fujLMaxJsw?t=6m42s

    oysteinespedal -

  17. TCMU5T4AUYklaBQP
    TCMU5T4AUYklaBQP
    Dft5LOI5XPLoOSsG
    • Heble den Stecker der Rückkamera mit der Kante eines Plastic Opening Tool aus seiner Fassung auf dem Logic Board.

    • Achte beim Hebeln darauf, dass du keine Komponenten auf dem umliegenden Bereich auf dem Logic Boards beschädigst.

    • Entferne die Rückkamera aus dem iPhone.

    • Unter der Rückkamera befindet sich eine kleine Gummidichtung. Stelle vor dem Wiederzusammenbau sicher, dass sie richtig eingesetzt ist.

    Im pretty sure that when you reinsert the cam the grounding clip has go to between metal sticker and the cam body, or the camra wont be grounded

    Michael Rygaard -

    I've got a trouble at this step. Is there anybody who could help me out with my problem? When I was removing the camera module, accidently removed small element, which is marked with the red line http://i63.fastpic.ru/big/2014/1022/4e/9...

    As I figured out - that is the SMD capacitor. After that Iphone was switched on, and it seems to be working fine at the moment, but I am very scared, if it will continue to work well without that small piece. Anybody to help?

    soubi8 -

    In my case, the grounding clip was taped to the camera! In addition, my repair process stopped at this step as the left screw on the power button had come out and was floating around next to the camera slightly stuck to the tape. This was lucky since a loose screw in an iPhone under the logic board would be a bad omen.

    Michael Scollay -

  18. fLI1mRbSOZaKsNoZ
    fLI1mRbSOZaKsNoZ
    UQ5LnXU2sx24sVZr
    • Entferne die SIM-Karte und den SIM-Einschub mit Hilfe eines SIM Card Eject Tools oder einer Büroklammer.

    • Dies kann beträchtlichen Krafteinsatz erfordern.

    • Entferne die SIM-Karte und den Einschub vom iPhone.

    I have an Iphone 4 but the inerds look more like this 4S than the 4, except I do not have a SIM card port. What's up?

    Dave -

    Probably a CDMA (Verizon) iPhone 4.

    Pepper -

    Is there a reason for waiting until step 18 to remove the sim card and its holder? I can do it right before I start without much force, is this not better?

    jmaelzer -

    I don't see any reason. So it was my step 1 to remove the SIM card.

    Ida -

    I agree that the SIM card should be removed before you even start. After I completed this repair (waiting until this step to remove the SIM), the SIM card and holders won't go flush with the side of the phone anymore. The phone still works and everything else is fine, it's just annoying that I have a SIM holder sticking out about 1mm. I'm not certain this step caused this, but I'm just letting folks know that I agree with jmaelzer.

    Song -

    for the life of me I can NOT get this sim card and holder out!

    Lori -

    While "This may require a significant amount of force." may vary by individual device, I found it to be true. I used a straightened paper clip held with a (really good) pair of needle nose pliers and pushed straight in until it fully popped out.

    Orac -

    To be honest, it's really hard to remove SIM card without a correct tool.

    Beck Sisyphus -

    You have to PUSH the paperclip IN, then the tray pops OUT.

    Floris Jansen -

    I agree. Push in.

    ivesrubl -

    ifixit needs to edit this: "significant force" is NOT needed! I started to bend out the hole until I read the last post- just push the tool straight in, the SIM card will eject easily.

    soopamandan -

    That may depend on the specific device; significant force *was* needed to eject it in the case of the phone I'm working on. Putting it back in, however, was very easy and didn't require any significant effort.

    Orac -

    Is there any reason why you still have the ribbon cable under the little metalic plate (right under the sticker that says "Authorized Service Provider Only") plugged in in STEP 10. And it is without any instruction step removed in STEP 12? I mean it's not like it is complicated, but when I got to that part I was confused there for a minute that I forgot some step, and then reassured myself that I did everything as it said in the manual.

    [deleted] -

    I have done everything correctly but when i turn the phone on all i get is a blank screen. The phone operates as normal i.e. it rings, vibrates etc but the screen is just blank so you can't actually do anything with it :(

    anyone had the same issue?

    mark -

    FWIW, I found it easier to replace during re-assembly by turning the phone front-side up, as on the Sprint-locked one I was working on, the SIM card faces that way. Otherwise, it tends to fall out (down) while trying to re-insert it if the phone is face down.

    Orac -

    Popped the SIM card holder out no prob - but there’s no SIM card. This is a Virgin Mobile phone, does that matter?

    Ray -

    There is a rubber spring that fits on the power button hinged wire bar that slipped out of place here (button was stuck, no click), take a look at it here: http://geulah.net/test/

    uhf mhz -

  19. Mxv3hbYVZUJ6PIB5
    Mxv3hbYVZUJ6PIB5
    yT42J5cG4AWJfcaM
    • Entferne die fünf Kabel, die sich an der Oberseite des Logic Boards befinden, in der folgenden Reihenfolge:

    • Kopfhörerbuchsen-/Lautstärkereglerkabel

    • Kabel der Frontkamera

    • Touchscreen Kabel

    • Displaydatenkabel

    • Power Button Kabel (befindet sich unterhalb des Kopfhörerbuchsen-/Lautstärkereglerkabels, wie im zweiten Foto dargestellt ist)

    • Um die Kabel zu trennen, hebe mit einem Plastic Opening Tool die Steckverbindungen hoch und entferne sie aus ihren Halterungen auf dem Logic Board.

    • Achte darauf, keine der kleinen und empfindlichen auf der Oberfläche installierten Komponenten zu beschädigen, wenn du die Kabel trennst.

    There is an additional cable that you have to disconnect that's under the headphone jack cable. You have to do this before you try to remove the logic board. Otherwise, you'll rip that cable.. and I just freaking did.

    Dennis -

    The digitizer cable won't reach! I've already ripped it off once. which disconnect are you talking about?

    kct16k -

    I just ripped off the power cable ... i can live without the power button though!

    Oreste Attanasio -

    is that sarcasm or is there really a way to turn on the phone without the power button?

    Sharn de Wet -

    The only way to turn on an iPhone without a power button is to plug it in to power. If it was shut down while connected to a sync cable then disconnect and reconnect for it to turn on.

    Ben -

    I just broke off the power button as well because I forgot to disconnect the cable. Thank goodness for chargers and assistive touch!

    grilledsoap -

    Need to remove the shield over the connectors first. Look at the other guides for the 4S they show the 4 screws and how to lift the shield out, take out the camera etc.

    Paul -

    True, these steps are missing from the instructions. See for example 15-17 steps here: iPhone 4S Display ersetzen

    zzkovacs -

    During reassembly, I noticed that the data display cable is rather stiff. It may be a bit tricky to get it reconnected, but you'll know once it's in.

    bsporer3 -

    That power cable connector is very delicate. I managed to tear it just a tiny bit in the curve of the cable too. So I’ve got another part on order now. Apart from that the screen replacement went great ;) I’m not sure at which step the tear actually happened, it might have been during re-assembly when I was trying to get all these cables to stay on top of rather than go behind the motherboard. Realizing how easy that is to tear and keeping that in mind as you do this is important.

    james -

    I ripped the power button cable(didn't see it), any chance it could be outlined with a dotted color in the future? (I'm bad at reading the warnings)

    Eli Goethel -

    It was a lot easier for me to use a fingernail to remove these cables. It provides a lot less force, and is more likely to remove the cables without damaging them as they are very easy to break.

    jack jones -

  20. x1kpQwouNioFZbNb
    • Entferne die 1,5 mm Kreuzschlitzschraube, mit welcher der Erdungsclip nahe der Kopfhörerbuchse am Logic Board festgemacht ist.

    During reassembly, note that this small 1.5 mm screw goes into a thread in the head of the larger 4.8 mm standoff screw near the headphone jack.

    gregm -

  21. a6CfxAA1rmwrmMMf
    a6CfxAA1rmwrmMMf
    CjI6tnFYCCtuQVNu
    • Heble mit der Spitze eines Spudgers den kleinen Erdungsclip vom Logic Board weg.

    • Greife den Erdungsclip vorsichtig und entferne ihn vom iPhone.

    • Vor dem Wiederzusammenbau, reinige alle Metallkontakte am Erdungsclip (nicht die sich treffenden Hälften der Steckverbindungen) mit einem Entfetter. Die Fette an deinen Händen können Erdungsprobleme verursachen.

    (be careful but gently forceful; the part doesn't come out without effort)

    Carol Wade -

    Prying this off took the most effort as it's a squarish 'C' clip with two small 'teeth' like points that grip the bottom.

    Ferd Roseboom -

    You can use the edge of a plastic opening tool to easily lift the other side of the grounding clip.

    Grigory Entin -

    Top for taking the grounding clip off: use the spudger on that end, and use a prying tool ever so slightly on the opposite end to get it out of that little part catching it, then it will come out easily.

    Lua Tech -

  22. vrncEZeUtLXgEsok
    • Entferne die 4,8 mm Abstandsschraube nahe der Kopfhörerbuchse.

    • Abstandsschrauben lassen sich am Besten mit einem Abstandsschrauben-Schraubendreher oder-Bit herausdrehen.

    • Es geht zur Not auch mit einem kleinen Flachschraubendreher - sei aber extra vorsichtig, dass du dabei nicht abrutschst und umliegende Bauteile beschädigst.

    I used a metal spudger from the Pro Tech Toolkit to remove the standoff, seemed to work better for me than a flathead screwdriver.

    Dirk Blom -

    The flathead screwdriver provided is much too small to remove this piece!

    gluethje76 -

    I recommend that steps 20 and 21 are swapped. It's much easier to remove the wifi antenna flex from the board using the blue spudger if the board/PCB is still secured with the 4.8mm screw.

    Removing the screw first makes the PCB move up too much when you're trying to detach the wifi flex and can lead to mishaps.

    Paul L Daniels -

    Not all screwdrivers are equal. I took mine in the shop and ground the blade thinner then made sure the end was square and flat. You can do this with an emery board or sand paper. You want a good fit in the stand-offs.

    griffn -

    The iFixIt standoff screwdriver is a great help.

    Lua Tech -

  23. RSgPtw5t4Z2JPVoE
    • Trenne mit einem Plastic Opening Tool die Wi-Fi Antenne vom Logic Board.

    Great Guide and thanks. Now...what if i snapped the wifi antenna cable together with its male connector from the board? Like tearing it apart ? Can this be replaced by any chance? Thanks!

    spyrosandreou -

    I also had a problem with the connector breaking off, but after putting everything together, the WiFi seems to work like before, so I guess there is no problem there...

    Dirk Blom -

    Ok so no fret here if you accidentally pull off the metal insert placed on top of the actual antenna. This step needs to be rewritten imo, the deal here is that there is an actual 'socket' looking deal underneath here that you need to lift up. There is a metal tab semi'glued' to that part of the antenna and it does come off easily, however all you need to do is press them back together to get them back, I believe it to be a range 'extender' of sorts.

    So your looking to actually lift up what looks a lot like a ribbon cable as well in this step. YOU SHOULD NOT HAVE A PIECE REMOVED IN THIS STEP, it's still in the case at this point.

    Ben -

    I have connected my wifi antenna to the phone but when my phone switches on the wifi button is a grey colour and won't let me turn it on, help?

    melissamerin -

    When reassembly - take care with flat cable, which might be pushing connector to side. If so - I found easy to put connector in place before tightening screws on step 23 and 22. Because then logic board can move a bit when repositioning connector and to slide right place before connecting it properly.

    Samuel Lackman -

  24. GEwANWcj2nNQpgEt
    GEwANWcj2nNQpgEt
    XoXHJBXhE2VOsYN4
    • Falls vorhanden, entferne das Stückchen schwarzes Tape, welches die versteckte Schraube nahe des Power Buttons verdeckt.

    • Entferne die 2,6 mm Kreuzschlitzschraube, die das Logic Board nahe des Power Buttons befestigt.

    • Sei vorsichtig, wenn du diese Schraube und den mit ihr befestigten Powerkontakt entfernst; die Kontaktlasche wird sich mit der Schraube lösen.

    • Beachte den kleinen Gummipuffer unter den Bildschirm & Digitizer Kabeln (die über dem QR-Code angebracht sind). Dieser Puffer kann sich beim Entfernen des Logic Boards lösen oder an den Kabeln hängenbleiben und sich später lösen.

    Dimension given are Length of screw. I think it meant to say 2.6mm screw.

    Jon -

    Note that there is a rubber insulator that is loosely attached to the PBC that can be seen in the upper right corner of the red outline near the tag with Q5M on it. It falls off after the logic board is removed and should be replaced before reassembly.

    ghodges -

    where the heck does it go back on the logic board?! It fell off during removal and I cant seem to locate it in the pictures. :(

    Shaun Brown -

    As noted: Put the bumper back right above the white bar code label. The label says Q5M on the far right side. The bumper goes on the edge of the board to protect the ribbon cables that bend over the board.

    griffn -

    So, my 2.6 Philips screw near the power cable just spins and spins. It happened the first time, so I know I didn't strip it. Any ideas?

    thebacks -

    So, I couldn't gind the tape and instead of digging around. I did what no one should do. I twisted and pulled. So now the screw that holds the upper left corner on broke that part of the logic board off. Everything else went back great....Phone won't turn on. Am I screwed here?

    cdays01 -

    step 13 - “One 1.3 mm Phillips screw”

    step -22 “Notice the small rubber bumper under the screen & digitizer cables (which are detached at top above the Q-code)”

    “Note that there is a rubber insulator that is loosely attached to the PBC that can be seen in the upper right corner of the red outline near the tag with Q5M on it”

    now, the problem :-)

    while assembly the iPhone I screw by mistake the 2.6 mm instead of the 1.3, and without noticing I break the 1.3 base screw from the motherboard :-/

    Now, the rear camera is not working.

    I couldn't figure in the picture above, if the rubber bumper you mean, is under that screw or above the Q5M tag ?

    Can it be that the dewar camera don’t work because of that broken screw?

    Any idea how to fix it?

    Is there any option to buy the rubber bumper, if I lost it ?

    Appreciate any help,

    thanks!!

    Simon -

    Under the screw is a ground clip from step 25. I tweezed it out here since it might bounce free while pulling logic board out. Use a big white towel as a work surface to prevent wayward bouncing bits from flying off the table.

    griffn -

    Caution: the image with the QR code is "mirrored" --> look at it "reversed" !

    jacquesfforster -

    If your driver is just spinning in this step, you may be trying to turn the offset screw instead of the phillips screw beneath the tape. The tape is not obvious, and I found tweezers helpful when removing it.

    Rog -

  25. IGNYXioaR3G1EceD
    • Entferne die folgenden Schrauben, mit denen das Logic Board am Gehäuse befestigt ist:

    • Eine 2,5 mm Kreuzschlitzschraube am Vibrationsmotor

    • Eine 2,4 mm Kreuzschlitzschraube

    • Eine 3,6 mm Abstandsschraube an der Seite des Logic Boards nahe des Akkufaches.

    • Verwende ein Abstandsschraubenbit und einen Bithalter, um die einzelne 3,6 mm Abstandsschraube zu entfernen.

    • Es geht zur Not auch mit einem kleinen Flachschraubendreher - sei aber extra vorsichtig, dass du dabei nicht abrutschst und umliegende Bauteile beschädigst.

    I used a metal spudger from the Pro Tech Toolkit to remove the standoff, seemed to work better for me than a flathead screwdriver.

    Dirk Blom -

    The Kit Provided flat head screw driver didn't fit in the stand off screw heads on my IPhone 4s. I had to use it in only one side of the screw notch to slowly twist them out. Its doable but could use a larger flat head, but the blade needs to be micro thin.

    Clay -

    I wound up stripping one of the screws on this step. Was frustrating but I found if I too a sharp knife and gently went back n forth I was able to make a little notch to use a flat head and got it off. Other than that all went well.

    Christopher Imhoff -

  26. RBZMsjXSwixZEdOK
    • Hebe das Logic Board, ausgehend vom Ende des Lautsprechergehäuses, und schiebe es von der Oberkante des iPhones weg.

    • Entferne das Logic Board.

    • Vor dem Wiederzusammenbau, reinige alle Metallkontakte am Logic Board (nicht die sich treffenden Hälften der Steckverbindungen) mit einem Entfetter. Die Fette an deinen Händen können Erdungsprobleme verursachen.

    • Es befindet sich ein kleiner Gummipuffer an der Oberkante des Logic Boards, wo die Digitizer und Bildschirmkabel aus dem Gehäuse kommen. Er schützt die Kabel dort, wo sie über der Oberkante des Logic Boards liegen. Er kann entweder an den Kabeln hängen bleiben oder vom Logic Board abfallen, wenn es entfernt wird.

    After I had lifted the logic board and moved around a little a small rubber piece fell off. Approx. 1 cm long and 2 mm wide. I'm guessing it's for some sort of isolation between the board and the chassis. Where should it go when I reassemble the phone?

    The piece I'm referring to can be seen on the table in the upper right corner in this video: http://www.youtube.com/watch?v=IVQtgD89e...

    Simon Fransson -

    It sits between the logic board top-edge and the two ribbon leads from the screen. Its purpose is to stop the PCB cutting in to the FPC leads over time due to vibrations. If you require I can send a photo.

    Paul L Daniels -

    hey, i removed the logic board and gave it a bit isopropanol spray. is this ok? how can i found out if it is working? is it possible to remove something from the logic board? thank you :)

    bne -

    On reassembly, make sure you lift up the power button cable before installing circuit board. I thought I had all of the cables lifted until after getting to step 17 (in reverse) only to find out power cable was under the circuit board. Added 15 minutes to my process.

    juanocasio -

    I had a similar problem as I was back tracking steps to perform something I missed and actually broken the power and sensor cable (the one that is connected to the digital board first during re-installation. A secondary order and another 20 minutes took care of it. Glad you were able to not hit that barrier.

    mattwilber -

    Check this... Rubber Bumper Location =)

    http://mac4mac.co.uk/viewtopic.php?f=2&t...

    knoppixx90283 -

    On reassembly, you are putting the plate under the spaghetti. I went back a few times to get all the cables out. Here is a check list before you tighten any logic board screws or try to jam the top edge of the board in place:

    Counter clockwise from upper right near power button:

    - Wi-Fi Cable from step 21

    - 5 cables near the camera from step 17.The ‘blue’ power cable underneath loves to hide. The ‘orange’ front facing camera cable can get kinked under the board during re-install (no more selfies on this phone).

    - Dock cable from step 9

    - Cell Antenna from step 11

    Go slow. Look twice.

    griffn -

    Before logic board re assembly it is nice to use scotch tape ( temporarily) to bend all the connections above the battery compartment . Doing as such avoid to have the power button connection remaining below the logic board .

    thierry28722 -

  27. 4VkeiPAL2Pcn4Foo
    • Achte darauf, den kleinen Erdungsring für die Rückkamera beim Power Button nicht zu verlieren. Dieser wird oberhalb der Platine angeschraubt und mit schwarzem Klebetape bedeckt.

    if I LOSE it, what will happen?

    Actually, i DID lose it.

    XuKaimeng -

    Hi. This little clip is responsible for the image stabilization on the 4S. When the iPhone 4S was launched, one of the things that were different from iPhone 4 was Image Stabilization, specially when the user was filming. This clip holds the camera module in place while the phone is shaking in the hands of the user. Pretty high tech :D

    Pedro de Almeida Silva Chaves -

    Apparently it had uncovered my iPhone before, because when I did not find this piece uncapped here. I need to know which function is on the iPhone and if it is very important. How could I get?

    Raul Tejada -

    Hi, I had the phone apart to replace the wifi chip.

    Has anyone found a source for the two nano sized SMD resistors, because this also causes "no wifi" syndrome due to them being important for the I2C lines.

    thanks!!! -A email testing_h "at " yahoo.com

    Andre De Guerin -

    I think this is one of the parts I didn't put back in... Does it affect anything?

    Also, Took apart my iPhone 4S to fix the screen and battery... Now the camera light doesn't turn on and I'm left with two pieces. Help!

    Here are the parts: http://imgur.com/DsYtdlR

    Nicole -

    Left part: See step 5 - "Take notice of the small black ground clip on the upper screw of the battery connector".

    Right part: See step 25 - "Be sure not to lose the small grounding finger for the rear facing camera near the power button".

    Simon Fransson -

    I removed this in step 22 even though it only slightly alluded to it. If you did, too, don't panic. Go find your step 22 parts and verify it is there. :)

    christopherjwells -

    What are the consequences of losing the 'small grounding finger for the rear view camera'?

    3chris3rivers3 -

    Hi. This little clip is responsible for the image stabilization on the 4S.

    Pedro de Almeida Silva Chaves -

    I did it. No problems!!!

    I used a Tupperware orange peeler as a plastic opening tool and didn't touched any screws oder other inner parts.

    I had to do it two times, because my old 4S 64GB has a broken WLAN Chip on the logic board, and my wifes 4S has broken her display glass. So I took her logic board into my 4S body. Now we have one running iPhone 4S 64GB instead of two broken phones.

    HaJo -

    HELP! Miy clip does look different, and i have no idea how to fit it in

    slipknot660 -

    This little piece was missing when I opened my phone, seems it was lost last time I sent it to the repair shop for screen replacement.. :-( but it does take pictures

    Jose Fernandez -

  28. PeVPiJ1dVgB4WYDe
    PeVPiJ1dVgB4WYDe
    QlcMWKuQQYHAaDtK
    WjfDpAp32wRvrbaP
    • Zwänge ein Plastic Opening Tool zwischen den Vibrationsmotor und die Seitenwand des iPhones.

    • Heble den Vibrationsmotor nach oben, um ihn aus der Klebeverbindung zum iPhone zu lösen.

    • Entferne den Vibrationsmotor.

    How do you reinstall the vibrator? Can the adhesive be used again for the reinstallation or do you need some new adhesive pad for installation?

    Moritz -

    Very tacky adhesive. It is reusable. It also took the kind of slow, hard leverage the battery requires to remove.

    griffn -

  29. MAIHBkyGRJk6sCwM
    • Entferne die beiden 2,4 mm Phillips Schrauben von den Seiten der Lautsprechergehäuse-Einheit.

  30. mlLZmSlcFsAZVaSv
    • Entferne die kleine Kunststoff-Klammer unter der Schraube, die am nächsten am Dock-Verbindungskabel liegt.

    Rounded screw on the black metal piece.... fml what should i do

    Randy Peaslee -

    What to do if I lost the bracket? Without it, the screw really has no purpose, as the left side of the speaker enclosure assembly just slides up past it and the wifi grounding fingers slide up from under the lip.

    LaurenB -

    I could not see it and flipping over the phone, or what’s left of it, it dropped. Where to put it back though ?

    Clément Marshall -

  31. qPSRG3F3eD1gCWGE
    qPSRG3F3eD1gCWGE
    DedBL3i1eVIFislt
    • Entferne die Lautsprechergehäuse-Einheit vom iPhone.

    • Bevor du die Schrauben der Lautsprechergehäuse-Einheit wiedereindrehst,stelle sicher, dass die Wi-Fi Federkränze unter dem Rand in dem Metallgehäuse des iPhones befestigt sind, wie auf dem zweiten Bild dargestellt.

    • Stelle vor dem Wiederzusammenbau sicher, dass du alle Metall-zu-Metall Kontakte zwischen den Federkränzen der Wi-Fi Antenne und dem Gehäuse des iPhones mit einem Entfetter reinigst. Die natürlichen Fette an deinen Händen können möglicherweise Interferenzen verursachen.

    Careful not to lose the tiny rubber spacer that sits below the mic enclosure - I nearly did as it is not mentioned here, probably because it rarely comes out. See mention and photo of this in this guide, step 20: Dock Connector Replacement

    hutchwilco -

    I had some problems with the cellular cable during re-installation. It actually had gotten scratched to where the wire was actually worn and the silver cable was visible. I discovered this once it was all closed and the phone's cellular status was always "Searching...". A little bit of electrical tape over the exposed area seemed to take care of this.

    mattwilber -

    Successfully reinstalled the display, but now the lower speaker doesn't work. I'll have to reopen it to find out what's up. So many possibilities for error.

    apathos1 -

    I "lost" one of the screws securing the speaker, but re-assembled it anyway without the RH screw. Everything worked; then I realised where it might have gone. The speaker has a magnet which will attract any loose screws nearby. Sure enough, that's where I found it when I opened it up again.

    Brian Pingree -

    I was trying to get the little triangle spacer in place to get the speakers installed. I had it in some tweezers trying to see what I was doing wearing some magnifying goggles, when the spacer shot out like a watermelon seed from between your fingers....Never got a clear view of where i went but it looked like it went sailing over into a part of the room where there is loads of little small bits+pieces in loads of other bigger boxes and containers...it sailed off into the land of the lost. I'd be lucky to happen to see the little booger during spring cleaning...I won't hold my breath. Anybody know where i can buy such a thing?

    edit- I made a replacement out of some scrap plastic . Doesn't look too bad. Not sure about thickness. So I'm just gonna put everything back together and hope for the best.

    Mike McIntosh -

    buy a equal phone that is perhaps destroyed AND locked . that is how I have replaced many parts I have done what you have done . I now have parts I may never use but ... who knows I just aim for the phones I have extra parts for

    michael andrie -

    As ++hutchwilco++ mentioned don’t forget to put back the rubber spacer on the bottom right side of the speaker (as seen on picture from step 29). Comes on the bottom of it, between metal bezel and speaker.It is a marking on the speaker.

    I’ve seen mine and I have struggled to find it’s place.

    IonelX -

  32. 2L2HZTvBY1HxCXYA
    • Entferne das schwarze Tape, welche die Befestigungslaschen des Displays verdecken.

    • Beachte: Diese Schrauben in der Ecke haben nicht die gleiche Stärke wie die anderen 1,5 mm Schrauben. Lege sie separat beseite.

  33. OkYyNFOCIWJWrxdx
    • Entferne die 1,5 mm Kreuzschlitzschraube, welche die Display Einheit nahe des Power Buttons befestigt ist.

  34. nmkCcqL1V2EUUiCh
    • Entferne die 1,5 mm Kreuzschlitzschraube bei der Kopfhörerbuchse.

    • Für einen erleichterten Zugang zu der Schraube, besonders beim Wiederzusammenbau, ist es einfacher die Kopfhörerbuchse zu entfernen.

    Be very careful when removing this screw, as the angle of your screwdriver may risk stripping it. In order to be 100% safe, it may be worthwhile to remove the headphone jack connector. (There is a guide to do this as well.)

    Kris -

    I've never taken this phone apart before and this screw is missing entirely.

    sarawr -

    This screw, as well as being difficult to get to in order to remove it, is very difficult to replace. Much patience is required as you can't get the right angle on the screwdriver to start with.

    I suspect, given there are 10 screws holding the screen in !!!, that this one could be left out during a rebuild... especially as 'sarawr' mentioned her phone didn't even have one in in the first place.

    Richard Aston -

    I also had problems getting at this screw, you really need to move to Step 27-31 of removing the headphone jack.

    iPhone 4S Kopfhöreranschluss-Kabel ersetzen

    Don't recommend going any further and messing with the antenna. Then resume to step 34. Likewise ensure you back track when reassembling.

    beckerma -

    I too had difficulty removing this screw, mainly because the ifixit bit driver is somewhat fat and gets in the way. Luckily, I had bought the replacement screen from iCracked and their provided screwdriver was somewhat thinner.

    Be careful with this and have patience!

    Logan Kennedy -

    This screw was very difficult to reinstall. I spent 50 minutes and much patience to get it back in without stripping it. I thought about not reinstalling it but pressed through making the job "complete" with no left over parts. The great thing is the phone works well saving a ton of money not having to replace it.

    jamesrowland56 -

    Yes, this screw it's hard to reinstall. Here is what worked for me. I put the screw carefully on the side of the magnetic bit driver. Then I carefully aligned the screw perpendicular to its hole. Then I applied just a little bit of force to seat the screw in the hole. I carefully slid the screwdriver away and the screw stayed there in the right alignment. Then I went back in with the screwdriver and very carefully tightened it, making sure that it was threaded properly. It worked.

    adammenter -

    Brilliant tip.

    chris -

    Be careful "pushing aside" the headphone jack! I wanted good access to the upper-right display screw so I attempted to move the jack. It is not easy to tell that the jack is tethered to the secondary mic which is visible just to the left of the jack in the photo. The secondary mic needs to be removed at the same time as the jack. I broke the secondary mic off, and then needed to replace the headphone jack/secondary mic/volume button/mute button flex, which is an even harder repair!

    cpwittenberg -

    I had exactly the same thing happen, cpwittenberg! Be careful, everyone who decides to take off the headphone jack! That secondary mike attachment is VERY easy to tear off.

    suzanneb -

    This screw stripped for me, I tried a few different 'tricks' to get it out. (Rubber band, super glue, even solder) Nothing worked. I ended up just snapping the display off of it, then snapping the corresponding piece on the new display.

    Kyle McNally -

  35. rafoTGdlYVYW1YEI
    • Entferne die 1,5 mm Kreuzschlitzschraube beim unteren Mikrofon.

    For the re assembly of those ones , first locate the two slightly larger screws which goes on top of the iPhone and use a long philips magnetic screwdriver which use the edge of the iPhone as a guide to re assemble those screws . otherwise it will get on your nerves . When doing that , be sure the screen is properly flush with the frame .

    Thierry de Montblanc -

  36. y2d2JnbDvavWUUTr
    • Entferne die 1,5 mm Kreuzschlitzschraube beim Dock Anschluss Kabel.

  37. kO16ko1EeRXPd4tr
    kO16ko1EeRXPd4tr
    SuRlhfVWJreSuZGJ
    • Löse die drei großköpfigen Kreuzschlitzschrauben entlang der Lautsprecher-Seite des iPhones jeweils um eine halbe Umdrehung.

    • Es ist nicht notwendig, diese Schrauben vollständig zu entfernen. Wenn du die Display Einheit wieder einsetzt, achte darauf, dass sich die Dichtungen nahe den Schraubenköpfen befinden (wie im zweiten Bild zu sehen ist).

    Two of these screws refused to budge so I had to use a pair of pliers to carefully loosen them.

    jux -

    I almost finished, but 2 screws won't come off! Now I'm stuck.... the screen broke off, but I can't put the new screen in because the prongs from the old screen are still stuck. Any advice on loosening the last 2 screws?

    kct16k -

    I can not get two of the washers out they wont even losen just a little :/ my hands are hurting and i just dont know what else to do i have searched and searched in hope to fine an answer and can not PLEASE HELP!

    Shanaya Parsons -

    Cling wrap, 1-3 layers between the screwdriver and the screw, helped me get the grip i needed.

    Also, I found if I put the phone on it's side for this step, I could screw straight down against the table and put more force into it.

    Jonathan Hesser -

    My iPhone was missing one of these screws, but the two left they came out easily. I also tried the half-turn technique but gave up after washers were jammed or on the wrong side. I had no difficulty removing these completely and refitting them properly.

    Other than raiding a dead iPhone, does anyone know where I could buy two additional screws with washers?

    Michael Scollay -

    I also had problems here. I needed to use quite pressure, and find best bit. For me it was PH000 from Ifixit's kit.

    maxim -

  38. avwYJnbxBLvhM4LM
    • Löse die drei großköpfigen Kreuzschlitzschrauben entlang der anderen Seite des iPhones um jeweils eine halbe Umdrehung.

    I found that I had to remove the 6 side screws and washers completely, because the new front tabs were bent inwards. To reinstall them all, I supported each screw on the up-facing tip of a magnetic screwdriver, then I placed the washer onto the screw with a tweezers, and then I inserted the screw upwards into its hole, never changing the orientation of the screwdriver.

    cpwittenberg -

    Magnetic screwdriver, washers on the end. Brilliant tip, thanks.

    chris -

    It is very easy and helpful at the end of this step, to gently push down the screen holders in the 6 spots with screws and washers, that way the screen gently comes out and you don't have to poke with anything.

    superedu111 -

    I had to cut out some of the flaps of the new screen in order to fit (also one of the corners like on step 31)... I have no idea if the replacement part was bought wrong or if it was a compatibility issue (my iPhone 4S was bought in London and the replacement from iFixit).

    Ivan -

    help me, i have one sweep screw on this point

    chechechingon -

  39. lC2UMIjboXttVTDL
    • Heble die Display Einheit vorsichtig mit einem Plastic Opening Tool rundherum nach oben.

    While removing the Front, a black rubber piece fall off and I have no idea where it came from.

    Has anyone a suggestion?

    http://cl.ly/image/2J083x0m1Y1z

    Martin Weber -

    Same here. Anyone any idea where it belongs?

    Martin Vonwald -

    Found it - it can be seen on the photo of step 22 right above the QR code.

    Martin Vonwald -

    If you cannot easily get the plastic opening tool in, you can gently push from the back in the corner near the head phone jack, where you can see a bit of black at the bottom. The black part is part of the display assembly.

    kai -

    Thanks for tip. I couldn't get anything started with the pry tool. Pushing a glass panel from the back seemed rough, but it worked.

    griffn -

    CAUTION with inserting plastic tools to make a lever and pull up the LCD. I've inserted a guitar pick too deep in the corner and I've broken the LCD. It's very very sensible component; now I'm a believer! :) It's much better to suck it with a suction cup or to push the LCD out by the back side (use the tiny metal part where the screw goes).

    Paulo Gazola -

    great tip! THANKS

    Lua Tech -

    Found using the small suction cup to help pull the screen up and then used the opening tool to pry apart.

    Michael Lemaitre -

    I’ve struggled a lot with this step.

    My solution was to use a suction cup placed on the middle or middle/left or right of the phone.

    The sides of the display come off easier in the middle area (display is bending easier) therefore you can place a guitar pick tool

    in between and make your way up to the upper part of display then on the bottom side of display.

    IonelX -

  40. kDlRBL1CCWwVhYZL
    • Entferne die Display Einheit vom iPhone.

    When you reassemble the device, be absolutely sure that the digitizer cable is pulled all the way through the slot ...it tends to get stuck since it has a sharp edge for whatever reason. Failing to notice that, the digitizer cable wont reach its socket. But not only that! Pressing the display against the case will introduce a more or less sharp bend to the cable which likely results in a broken digitizer cable, hence a broken digitizer!

    Tobias Beer -

    Tobias is absolutely correct. It is imperative that you carefully straighten and feed the digitizer cable through so it has enough strain relief to make the connection. The key is to fold it up and once fed through, make sure it is as tall as it companion. Fail to do this and you have to take everything apart as it won't mate to the logic board ... yeah ... I had to do this.

    Rayeng -

    Also, depending on the condition of the old (broken?) display, watch for any debris/glass fragments that may obstruct re-assembly. I found that the replacement I was installing wouldn't sit flat, until I checked closely and found a *tiny* sand grain sized bit of glass off to one side of the home button. Once that was removed, the new display fit just fine. It probably can't be emphasized enough not to force anything; if it doesn't fit right, check it - and keep checking until you find the obstruction.

    Orac -

    Snapped my digitizer cable by trying to pull it. apparently it just wouldnt fit on the logic board!!!

    Miqdad Remtula -

    When putting everything back together, if you encounter "searching" for long time for your wireless signal, just manually set time/date and restart phone. It worked for me!

    KF

    Kelvin -

    Use step 39-40 of Home button replacement. Be careful not to tear gasket and don't go further and remove gasket.

    iPhone 4S Home Button Dichtung ersetzen

    beckerma -

    Once my screen was removed, a piece of rubber fell out of the phone onto my work surface. I sweated and looked for half an hour, at the frame in my hand and at all the photos in the guide, for a place that it might fit. I eventually gave up, and my phone has been working fine without it, but where is this piece supposed to go?

    http://screencast.com/t/VZnwEgo4Se

    Daniel Brauer -

    I had the same exact thing happen to me. I couldn't see where this piece came from either. Just like you, I gave up and reassembled my phone. It works just fine. I still held on to the part just in case, but I don't expect any problems.

    djlogic26 -

    It's been a month now, and I've been using my phone with no problems at all. Battery life is great, it has all sorts of reception, and there are no unusual sounds as the phone is shaken or put under pressure. Whatever that piece is, I feel like it's not important enough to put back in.

    Daniel Brauer -

    I didn't remember to look inside the iPhone 4S for this piece of rubber but I believe they are present in both AT&T and Verizon iPhone 4's. The rubber wraps around the edge of the main logic board where the display and digitizer cables wrap around. It's not needed for proper operation but may protect the cables from long term flex and wear against the edge of the board.

    Wallace Karraker -

    It attaches to the logic board by where the cables for the display assembly sit next to it. I guess it protects the cables from the hard edge of the logic board.

    codyandreasen -

    When you are putting the new screen on make sure the little wires are pulled all the way through! or else you will be very frustrated 15 steps later and have to go back again.

    bryanreale2 -

    To add to the last comment, one of the of the digitizer cables was was too short. I disassembled it twice to figure out it was folded. When I straightened it out it snapped. A 12.0 repair turned into over a 100.00 when I had to replace the screen assy. But, still cheaper than a new phone.

    apmorency -

    If you use an aftermarket replacement, the backlight might flicker until you temporarily disable autobrightness or let it sit for up to 6 hours. There's quite a few comments about this on other forums but figured one here would be relevant. Otherwise, this was great.

    Matt Mazzuckelli -

    Broke my digitizer cable. %#*!^@. This is by far the hardest part. Failure is here. :(

    jeshii -

    When removing the screen from the casing, a screw fell out from somewhere - I have no idea where from or what it does - anyone have any ideas?

    Tim -

    Oh, and all screws I removed are accounted for

    Tim -

    I'm having an issue with the front camera's clear plastic ring.

    When I try and put the replacement front display on the front the ring does not seem to line up with the camera.

    Any tips?

    andre -

    Try putting the ring around the camera itself rather than adhesing it to the new screen and trying to line it up. Its a simple solution but I admit I certainly didnt think of it right away and had the same trouble as you

    Dave Davidson -

    Nick has the right answer- the grooves on the ring will slide into the gap around the camera. I realized this the hard way by glueing the the ring to the display side. Luckily I was able to get it off without totally destroying it.

    madmaxmedia -

    +1 for the tip of Nick Hughes.I spent 10 minutes trying to figure out why the front screen was not aligning, thinking it was one of the six washers that were misaligned. Then I noticed that there was pressure around the front-facing camera when I tried to push together the parts near the top edge. As my front-facing camera wasn't exactly aligned the way the glued-on plastic ring was aligned, all the jiggling I tried did not fix the problem. I took the ring off the front panel and dropped it in around the camera and after a few tries, I got the alignment.

    henning -

    Fellas, is it possible to detach digitizer from the front cover? I got this pink front cover I want to install in my GF's iphone, but it came without a digitizer? So can I just remove the old digitizer and install it into the new front cover?

    Matt -

    Did everything to Step 37.. then Step 38 (yep the step of replacing the screen) almost discouraged me due to the presence of the rubber-like ring on the replacement screen (around the back camera). Since this ring was also present on the phone body, both prevented the new screen from fitting nicely. It wasn't obvious for me at first until I forcibly removed the ring from the replacement screen. Re-screwed every piece and it works like charm!!!

    A serious recommendation for anyone attempting repairs: get the toolkit from iFixit!!! Don't also forget the magnetic mat - it is a MUST!!!

    Emmanuel Ngwane -

    Look closely at the digitizer cable before you reinstall the screen. The cable is wider at its base and that part sits flush against the panel when you receive it. It doesn't look like it goes quite alongside the display data cable, but it does; do a quick check to make sure that both are the same length, and if they're not, look to see if the wider part of the cable is not pressed flat. You'll need every millimetre of length to connect it properly.

    Also, you might be tempted to believe that the digitizer cable goes through the small hole above where the display data cable goes (it's pretty hard to see where things came from when you first remove the display). It doesn't; it nestles right against the display data cable. If you try to put it through the small hole, you're apt to rip the top off it by accident. There's really nothing more frustrating than painstakingly taking apart an iPhone only to break your replacement part.

    rob -

    Getting the digitizer cable threaded without having it fold or kink is, without question, the single hardest part of this whole repair. Everything else requires just being meticulous, measuring twice and cutting once, and making sure you use a reasonably light touch when detaching contacts, etc.

    And after 37 steps (o hai Hitchcock!) you feel like you're home free.

    But the digitizer cable is the last henchman between you and the Bond villain, the last lock protecting the treasure.

    After you've threaded it through, pull GENTLY to make sure it extends fully (both cables should be about the same length), and check on the underside to make sure there's no fold. This is where a mm or two makes ALL THE DIFFERENCE. Keep checking it occasionally as you screw down the screen, because you don't want to have to go back after you've installed the logic board.

    And I've replaced with both iFixit kits and 3rd party screens. The cable is always an issue-- but with patience they DO extend far enough.

    Alex Pang -

    Agreed. Had to troubleshoot by tearing the iPhone again only to notice this stupid mistake, digitizer cable was ripped.

    It is very sensitive, be very careful.

    Tommi Topio -

    Ditto on not pulling too hard on the digitizer cable. Mine tore trying to reassemble. There went $20. Reassembled with my cracked screen until I can get another replacement. Now I know and knowing is half the battle....

    Cody Schafer -

    Hi guys , i’m having problems when mounting the new lcd. In particular, It is very difficult to make it “completely” fit inside the metal “frame”. As long as I apply force, it stays in, but as soon as I stop manually keeping the frame and the new screen together, it just disassemble. When I try to fasten the 6 lateral screws (see steps 35-36) it barely holds together, with the “corners” moving out of the frame and making it impossible to fast the 4 corner screws (steps 31-34).

    Any suggestions ??

    Claudio Montalto -

  41. kiJUJKtEjddHOJHl
    kiJUJKtEjddHOJHl
    QJ3eBBqHwFcQA2Ta
    • Um erfolgreich eine neue Display Einheit einzusetzen, beachte folgendes:

    • Denke daran, den Home Button von deinem alten in das neue Display zu versetzen (in den meisten Fällen ist er nicht vorhanden). Die Dichtung des Home Buttons ist aus dünnem Gummi, deshalb muss man darauf achten, dass er nicht reißt. Überprüfe auch, ob das Gitter für die Lautsprecheröffnung vorhanden ist; falls nicht, verwende das vom alten Display.

    • Entferne den Schutzstreifen (normal in blau oder pink) vom neuen Panel, bevor du es einsetzt.

    • Wenn dein Ersatzdisplay nicht mit einem 7 mm starken durchsichtigen Kunststoffring um die Frontkamera herum geliefert wird, verwende den Ring vom alten Display.

    can some one tell me how to test the new display before reinstalling it?

    Bin Lee -

    How do I stick the speaker mesh and plastic ring back on?

    Doc Brown -

    Careful, when I removed the blue plastic coating on my replacement display, it peeled up the silver sheet component too. make sure the sheet separates properly

    websites140 -

    The 7mm plastic ring can be a pain when refitting the display.

    But it's your lucky day because It only takes 2 extra steps to remove the front camera and make it a lot easier. ;-)

    Niels -

    My replacement display from the ifixit kit is slightly thicker than the original. It is hard to spot, but you will feel it when using the home button.

    Martin Vonwald -

    My old front was sufficiently cracked that the camera ring is long gone. Hope it work anyway!

    poly -

    I found that the corner holes for my new display would not line up with the old frame & I wasn’t able to get one of the small screws in. My suggestion is to check this to make sure there is adequate exposure of the threaded hole. If there isn’t use a Dremel grinder to raise the level of the corner holes in the new display, being careful to not get grinding dust over everything. This should be done before the protective pink film is removed from the new display.

    RICHARD SCHINELLA -

  42. UUZyDFHcjYGqbAKY
    UUZyDFHcjYGqbAKY
    ydEDGNL5MKfXFiyS
    D3rRVrtrkCdrsBpG
    • Unabhängig davon, ob du ein Ersatzdisplay installierst, oder das vorhandene Display weiterverwendest, solltest du folgendes beachten:

    • Glätte vorsichtig das Digitizer- und das LCD-Datenkabel und führe sie durch den schlitzförmigen Ausschnitt im äußeren Gehäuse.

    • Das mittlere Foto zeigt, wie das Touchscreen Kabel in ganzer Länge richtig installiert wird.

    • Dieses Foto zeigt die falsch installierte Display Einheit , mit zu viel Schlupf im Kabel, so dass es eine Schlinge formt, die im Schlitz hängen bleibt. Das dritte Foto zeigt diese Schlinge.

    • Wenn das Kabel nicht korrekt installiert ist, reicht es nicht bis zu seinem Anschluss. Versuche nicht, es mit Gewalt dahin zu ziehen, weil es sonst von den scharfen Kanten der Aussparung beschädigt wird und reißen kann. Entferne in diesem Fall die Display Einheit, ziehe das Kabel glatt und führe es ordnungsgemäß erneut durch den Schlitz.

    the picture on the right is the wright one

    Matthias Bauerpfundstein -

    I made a very dumb mistake and ripped the cable.

    It is very sensitive, I cannot address how important patience is with this step :D

    Tommi Topio -

    Be VERY careful to ensure that what you see when you're doing the repair matches the picture showing the 2 cables approximately the same length. It's really easy to trap the rear cable

    laptop -

    I’ve accidentally bended the digitizer cable, not too much, but after reassembly the iPhone the whole screen went white with flickering vertical lines. I messed up the LCD. Be very carefully! this is a very sensitive cable.

    maurizioviera -

  43. UMimtmSH4kRdurSc
    • Berühre beim Wiederzusammenbau nicht den metallenen Bereich unten am LCD Datenkabel, da dies Probleme mit dem LCD verursachen kann. Wenn du es versehentlich berührst, reinige es mit einem alkoholgetränkten Tuch , bevor du fortfährst.

    • Reinige den Touchscreen nach dem Wiederzusammenbau mit einem alkoholgetränkten Tuch, bevor du das Gerät wieder einschaltest. Der Alkohol hilft dabei, andauernde statische Elektizität abzuführen, die Probleme mit dem Display verursachen kann.

    • Schließe das iPhone nach dem Wiederzusammenbau an eine Wechselstromquelle an, bevor du es zum ersten Mal einschaltest. Sobald das iPhone erfolgreich hochgefahren ist, kannst du es von der Stromquelle entfernen.

    • Schütze das neue Display mit einem Screen Protector vor Kratzern.

    I did everything as in the guide (or at least I hope), I reassembled the phone and everything but when I connect it to the charger continues to make a sound and will not turn on.

    What does it mean?

    Maura79 -

    have you found any solution ?? Because i have the same problem and i have no idea about what to do

    MWino -

    Try re-seating the dock connector cable. The charger connection goes through this connection to the iPhone.

    richguard -

    So my screen works, ive connected to my network, and i can even make phone calls. but im getting terrible quality of sound from the top speaker. anyone know which part i may want to clean/check the connection on?

    Bilardo -

    I have the same issue, did you find a solution?

    slipknot660 -

    I have the same issue, did you find a solution?

    slipknot660 -

    After reassembling with new screen, plugged into charger/computer the phone just repeatedly says "blunk". Once I re-plugged in the old screen, it worked fine. No bunks. I assume this means the phone boots up (~1m), then blunks if it can't get the screen. Amazing tutorial, but a tricky and time consuming venture. I'm about 8 hours in, with a half-dead phone.

    but was it worth it -

    After following the guide to the exact, front-facing camera does not work properly.

    Anyone know how to fix this? You go into camera app, click to turn it to front-facing, it trys to come on put gets stuck and goes to what looks like it is trying to focus? Sorry it is hard to explain.

    Before screen replacement, I believe it was working, not 100% for sure though.

    Nancy -

    did you forget to reconnect the front facing camera cable?

    TheYootz Media Group -

    When I finished the repair, the touchscreen was no longer working and it said it was disabled for over 3000 minutes. Was there something I did wrong in the repair or was this out of my control?

    riojas2021 -

    Why should i connect the iPhone to the AC first?

    Miloslav Krejza -

    +1 on this one

    Dajka Ferenc -

    Cracked the screen yesterday, thought it was the little clear ring that went around the front facing camera but it was a little rectangular piece that may have been for the proximity sensor. Bought a new screen which had no such plastic piece and all went back together smoothly with the front facing camera ring in place.

    Stephen Franklin -

    The clear ring for my replacement screen was installed about 90 degrees out of alignment. New screen failed to come together with the case frame. I carefully removed and replaced it in the correct orientation. Not sure what adhesive to use…used very small amounts of clear Gorilla glue…awaiting drying results.

    Jim Reed -

    I'm no stranger to replacing screens, but having read through this I decided to buy a secondhand replacement 4s phone instead.

    chiff23 -

Abschluss

Arbeite die Schritte in umgekehrter Reihenfolge ab, um dein Gerät wieder zusammenzubauen.

Walter Galan

685541 Reputation

162 Kommentare

Excellent guide, thank you.

One thing to note, on Step 23 i'm not so sure the screw is a 1.6mm, pretty sure it's larger than that.

Great stuff, thank again!!

gary -

Exellent guide, i made the change in about 2 hours. No problem or confusion any time. Thanks!

Tobbe -

Helpfull tip... I printed these instructions and then taped each screw to the spot in the instructions with scotch tape.
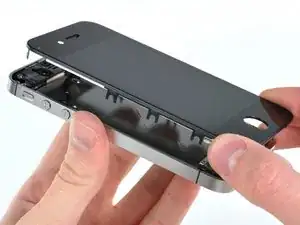
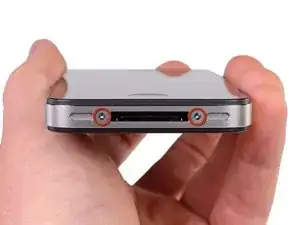
Kevin Keenan -

AWESOME guide - very impressed. All works but I did wind up with an extra part so I must've improved upon Apple's design. The part is a small, rectangular grounding clip (black and gold) with a single brass finger and a hole through the black part... this is NOT the one mentioned in Step 26. Not sure from where it came off & not inclined to dig back into it - but would love to know where it was from. It's 1:30 am here and I may be overlooking something idiotic... any help would be much appreciated. Thanks again, Jim

Jim McAward -

Turns out my "extra" part was the one that James Molyneux mentioned, which comes out as part of Step 5. (The clip provides a bit of extra ground contact between the back of the WiFi antenna and the rear case.) Again, totally awesome instructions - thanks!

Jim McAward -

I used rubber gloves to completely disregard the whole washing with windex

Marvin Regalado -

Thank you so much for this guide. It was a tremendous help!

I definitely recommend buying the tools to go along with the teardown. It's pretty much an impossible task otherwise.

leviasay -

Super, Works perfectly. Thanks !

Thierry COTEN -

After the entire grueling process, I was confident in my repair. Everything works... Except the touch screen. I disassembled and re-assembled at least 3 times but to no avail. Everything seems to be working fine, no tears, bends or breaks in the cables... Anyone having a similar issue? So bummed...

1force1 -

The cable of the digitizer was likely damaged. Happened to me because of my carelessness. Had to change the screen again.

jppellet -

If it happened only to a portion of the screen(probably horizontally), also doubt if the digitizer cable correctly and firmly been connected. no touch on portion of screen..

takeshi wan -

EXCELLENT guide. Part recommended, LCD (digital assembly) was the exact fix I needed. Step by step with recommendation & tools were perfect. One of the blue plastic tools did break but my son was able to work without it after. It took him 1hour & 50 mins. I read everybody's ideas and helpful hints & all were very much appreciated. Thanks Again :)

cbabin1119 -

I noticed that I lost all of my pictures and videos while completing this procedure. My text messages and other data remained, but my pics and videos were wiped out.

djlogic26 -

The black tape in step 22 seems to be important to put pack. I did have problem with a touchscreen that did not work from time to time. The black tape was forgotten and when putting it back the Iphone worked fine.

Peter H -

happy with replacement, great guide. two things happened; while reassembling I realised late that I had caught the power button connector cable under the logic board; I had to go back and lift logic board to find and reconnect, but now power button does not work at all. Bummer, but you can get at most of functions with the assistive services module. Second issue is I have noticed what I think might be a change in calibration of the GPS; I use RunKeeper and suddenly my routine morning run seems to have stretched in length and increased in pace! not sure what to do here--any advice?

paulgilna -

I stupidly removed the battery connection whilst the phone was on with a small flat metal screw driver, which in turn has blown something up in the phone. has anyone else done this before an know what part it is i now need to replace?

Vinnie Ebbrell -

Great Guide.

Did the change in a bit more than 2 hours with some little breaks in it... so I would say working time about 2h.

First at turning on I was shocked, because the iPhone couldn't find any network (carrier), but a few reboots later and after setting time and date it was fine. (Read somewhere that setting the time could make a difference in detecting carriers)

dominic -

You wrote the details the way I should have. but there is no point in just repeating all you said, Thanks ;-)

Pierre Merineau -

I'm thinking of following this guide to fix my missus iPhone 4S as if I bought the parts it's a lot, lot cheaper than paying someone else to fix it. Is it wise for me to have a go at repairing her phone? (She dropped it and smashed the glass but the phone is still usable)

Aaron -

I made a crude MS paint outline with circles and shapes where all the screws and parts go, print the drawing, and set all the parts where they go...makes it very simple

Rob -

Thanks for a great guide! Unfortunately, I have lost the triangular bracket on step 28. Does anyone know how I can buy a new one?

A Bundy -

Outstanding guide. Worked. Key is to stay organized!

alex sass -

Awesome guide. I was lucky to have a friend tell me to Google "iPhone screw chart" before I performed these steps. I printed out the screw chart & set all the tiny screws/parts on it. Really helped for re-assembly.

Also wanted to mention that I bought my screen from Group Vertical on Amazon, shipped from USA + PRIME eligible. It arrived in 2 days, very high quality.

Good luck - remember take your time, never force anything. Some of the adhesive is strong especially on the battery and vibrator. Don't forget to transfer your speaker shield and home button. Do these with extreme caution or they will rip.

Michael Bane -

Excellent Instructions, I have changed my Display assembly with the above steps.

Thanks

Manish Bajpai

Manish Bajpai -

I've just done a front display change on my wife's phone using this and your videos on YouTube as my guides. Excellent instructions and very clear photos. It's really useful that they blow up so big as you can see so much detail in them. Brilliant! Thanks very much. =o)

Colin -

Thank you so much for this guide! Some fellow student brought their iPhone with a screen replacement up to the "Nerdery" in our school (I have no idea whose it was). The procedure went well, I would have been lost without this guide. The documentation is great! Telling us the screw sizes really helped because I was able to organize them and label them with the magnetic project mat.

One slight error on my part however. After I completely reassembled the phone and was turning it on, I noticed that the screen replacement didn't have the mesh covering for the earpiece! Tomorrow I am going to redo the whole thing just so I can take the mesh covering from the old screen and install it on the new one.

Pro tip: Pay very close attention to all of the little details! Get the magnetic project mat with marker, it helps so much. If you don't have it, you will confuse screws and lose parts.

Thanks again for the great guide!

Spencer -

Just saying if you buy the project mat and a replacement screen (you are now in the project about $40) - for only another $20 someone will fix it for you....

Jordan G -

Looks easy but I'm too distracted to deal with tiny screws.place called phone kings in Memphis repaired mine for $20. I bought my own screen off eBay. Well worth it to me

sam -

So am I just reconnecting or do I need a whole new digitizer?

kuulparker24 -

Used this guide to fix a friends' iPhone 4S this evening. Very clear, concise directions helped me make an easy repair in an unfamiliar situation. Thank you...

Chris -

Thank you, very much!

Brian Meskill -

Excellent Guide! it was a bit time consuming but i took the slow and cautious route and with the iFixit pro toolkit had all the tools i needed for the job plus with the magnetic project map all the many parts and screws stayed organized! (no i wasn't paid to say that lol) but the disassembly wasn't as big of a nightmare as i thought it would be. Keep up the great work!

Greg -

Took apart my iPhone 4S to fix the screen and battery... Now the camera light doesn't turn on and I'm left with two pieces. Help!

Here are the parts: http://imgur.com/DsYtdlR

Nicole -

@ Nicole.

The picture shows the parts from step 4 (third picture) and 25.

I am sorry to tell you, you will have to open the phone again.

Good luck.

Pierre Merineau -

Hi!

After replacing the new display my phone won't charge...:( any tips to fix this?

Best regards Kim

Kim -

@Kim

My guess is to take a look at the step 29 to make sure the contacts are placed properly

Pierre Merineau -

Absolutely the best procedure I've ever followed. The only thing I'd suggest is making it possible to display the large photograph for other than the first photograph in each step. (Of course, it's possible that this is already possible and that I simply am not smart enough to figure it out). Anyway, managed to repair my daughter's phone in a little over 2 hours - I'm wrapped! Thank you so much fixit.com.

Andy Linahan -

Best and clearest tutorial I found for the 4s, could not have done it without your clear instructions and pictures! Thanks for the tutorial!

lowlead -

Excellent guide! The reinstall process should be explained based on some key items to be reinstall

Jorge -

It took me about 2.5 hours and part of the key was to identify with post it every part as indicated on each step and color and size with the help of an assistant for parts organization

Jorge -

Thank you very much!!! Excellent guide, I would have never been able to do it without this guide!

Be VERY careful when you put the new replacement screen (STEP 37).

I cut the data cable of the digitizer and had to wait another 2 weeks before getting a new replacement screen! The digitizer cable must not be bent at all otherwise it will not reach to its socket on the logic board!

All the other steps were almost easy to do!

pascalgilbert -

Incredible bad quality spare part (iPhone 4s screen). incredicle bad quality tools, I'm non asking for Wiha tools, but these are really terrible. First chance: flat cable from digitizer broken (I use to manage with thiskind of cables). Buy a 2nd screen (big mistake!). The screen is terrible and you can see the six leds in the top, like you have six bulbs over your screen. Problems with signal. Disassembled again and applied isopropanol to contacts. Fantastic, the bad screen quality traped some drops between screen layers. Had to dissasemble the screen to try to dry the drops (which ofc appeared on the image). Assembled the phone again. Power button did not work at all, and display image was as poor as before cleaning the layers. Very low brightness in front view and normal from a 170 degrees angle... Well, opoened the phone again, with others tool ofc, since the ones provided by ifixit were unusable, pull out the main board to protect my data and throw the rest to bin. Buy some screen cheaper from eBay.

franciscovl -

You sound like the WORST tech in the world. No offence, but half your story sounds like bullshit to me.

Grant Ormsby -

Excellent guide! Thanks so much for all of the detailed pictures. I used the previous user's suggestion about taping all of the screws and parts to a print out, which helped immensely in the reassemble. The whole process from start to finish took about 3 hours, and there were no surprises. The warnings in the guide about little bits here and there to watch out for were very helpful in avoiding mistakes, so use them!

Shannon -

So I did everything as following everything works flawless except my auto lock button on top of the phone, or power button I think its called. Everything was properly connected any chance as why it wont work ? I have to wait a minute everytime for my phone screen to go back to lock status. If I do a factory reset could this work ?

david vargas -

Great guide. Instructions were easy to follow and pictures really helped. My screen and back look like new.

irobert13 -

I found same problem with step 8. Accidentally screwed up and added a new step 9 and 10 by mistake which I can't seem to remove. But as for step 8. the red 1.5mm screw is on the left and the orange 1.2mm screw is on the right.

Mars Starcruiser -

Excellent guide, left no questions about what should be done.

coreyrm21 -

Did the whole fix, and everything seems to be working fine exept the phone can't find any network. It is stuck searching. I reopened the phone and checked the antenna conection, but I can't see anything wrong with it.

Aasmund Gravem -

But after a few resets I found the reason... I had turned of cellular data ;) Now everything works smoothly and I have a shiny whole screen. I only wish I had bought a battery at the same time, so I could have improved the lifetime for my device a bit more. Cheers.

Aasmund Gravem -

I have replaced the display assembly once and it was time intensive and grudgingly slow because you don't want to tear any of the flat wires but I was thorough and diligent and it paid off.

Something they do not tell you in this guide is to create a diagram of the iphone and draw where each screw goes as you remove it because there are more screws than I am sure of I can provide you a precise number but some of the screws are different sizes so you have the potential of damaging your phone or it not working correctly upon reassembly. I actually traced the phone, drew out each part and screw then taped the screw to the piece of paper.

Note: Be careful working on a surface that is not flat because if you are working with the screws there is a possibility it could fling off the paper and it does not take much for this to happen so be careful people and good luck!

Nephew -

The "difficult" tag, I think is probably going to put some people off. fiddly and time consuming but not that difficult.

Get a helping hands clamp, a good work light and a good pair of fine point tweezers

The multitude of tiny slightly different screws is a real pain. order a spare set before starting. Also have a tray to put them in with a label to identify which one goes where because you will never be able to tell them apart by eye.

I must have missed a connection as I had to do part of the reassembly twice but a careful check sorted it.

SO in conclusion - just do it! it isn't that difficult unless you are really clumsy and have fingers like sausages! Its incredibly liberating which I guess is what the founders of Ifixit discovered when they started.

I think iFixit is probably one of the finest resources available anywhere, I wish I had thought of it, wish it had more of a following here in the UK and would love to help develop it here.

Fantastic job -well done and thanks

simon -

Having stripped the phone and completed assembly my screen appears and all buttons work but I can,t swipe/slide to unlock. Any suggestions?

I have gone over the whole process three times and the same thing each time. I have also replaced the black tape in step 22.

malcolm -

Just completed two phones this guide was very helpful. Word of advice, get the power button for your new screen. Reuse of the old one will not seal the button properly.

jelk123 -

This guide is wonderful. I did it. Thank you so much fixers.

Onur Koc -

Excellent Guide and the comments are well worth reading. I installed the first replacement and it did not work. Had to reinstall the old broken one while I waited for a replacement (of the replacement). Followed the instructions when I received the replacement and all is well. The best suggestions by far are the latex gloves and some sort of egg-crate to put the parts in.

Go my part from Inkojet. They were gracious about replacing the "installed" part. I tested the second replacement by plugging it into the MB before I took the whole thing apart again. I highly recommend testing first (and so does Inkojet).

Wade

Wade -

Just wondering - how did you test the new screen by plugging it into the motherboard? Do you open up the device and "unplug" the digitizer and LCD display cables from the logic board, and "plug in" the cables from the new display assembly? I wish I had done this, I am having issues and don't want to waste a lot of time re-doing the repair if I got a bad part.

kagunderman -

Use a large white sheet of paper (I taped 4 81/2 x11 sheets of paper together) to place components/screws on. Circle the components/screws and write the step number in the circle. This will make reassembly a breeze.

juanocasio -

After reassembly, the CELL CONNECTION WASN'T WORKING. You might need to slightly bend the contact in step 5 up just a little, so it will make contact with the metal back plate. Did that and it worked perfectly.

Great kit, great instructions, thanks!

AirPhonesApp -

Excellent instructions. This was a difficult procedure and I don't recommend it for the novice. I bought the magnetic project mat to kee track of all the parts. I highly recommend getting this as it helped keep all the little screws and parts organized. Thank you iFixit for making this repair possible!

markcooperstein -

This has, quite literally, been the most enjoyable thing I've done in a long time.

Took me three hours to do on the dot, and that was with what appears to be an old guide now! (The unverified version is how my phone was set up).

I printed out the guide and taped the screws to the corresponding step, it helped immensely! I want to do this for a living...

kudzu -

After this my iphone wont turn on. not working :(

M4dsk1llzz -

It took 3 hours but just because I didn't want to mess things up. Overall, easy! I paid particular attention to step 5 and 22 with those 2 little pieces and I took a couple of pics before. iPhone looks like new!

tonikosova -

Didn't work at first! I was devastated. I think I hadn't pressed the display data connector to the logic board hard enough. Anyway taking everything back apart and starting over made the screen work. Colours are a more bleached and cool then I remember, but the screen looks good. So glad to have done this on my own (with your great guide). Thank you!

Flore -

For all those people experiencing issues with the power button - take off the back again (steps 1-3) then skip ahead and do steps 13-14, and just double-check that the connecter for the power button is plugged in. it's sneaky and hides under the headphone/volume cable (see step 17). I fully missed it when i did it, so had a look through the instructions again and viola. Step 17 has a second image to show you where it should be

Liam -

Everything came apart and went in nicely (don't mention the list screw or the time looking for it). I might have over tightened a couple of the screws on the sides. It shows up partially lit during startup. Otherwise seems to be fine.

beansbacon -

Hi, I just follow up the guide, but i im unable to turn on the iphone, something is wrong, but no signal, i disassemble twice and assemble twice and nothing. iphone is dead :(

Any advice ?

rodrigovelazquez -

and my iphone is dead

M4dsk1llzz -

After chaning my display it doesnt react on touch. It's ligtning up when i push the home button but don't react on touch. Someone who knows what can be wrong, have I missed something or have I broken something? Any clues?

uhlrog -

Awesome guide! followed it to the letter. My digitizer didn't match up the first time, whoops! :) A little back tracking to get the ribbon through and I was golden. When fixing electronics never force anything. If you have to back up the bus just to get one little cord unstuck, do it. Its not worth paying another $40 for another display because you couldn't take the time to go back. That said I'm super happy I came to Ifixit I will recommend to all my friends in the future.

kellywstonge -

This was an amazing guide. Be sure to feed the digitiser cables through safely....they do reach if you get it right. Took me 2 screens to get the repair right, but now I have an immaculate phone having replaced the front screen and back cover, so I can sell to get a 6 plus. Thanks for the wonderful guide....ps lost 2 tiny screws along the way so get a magnetic mat if you can.

Glenn -

Great guide for repairing the 4S of my daughter! Thank you very much!

peyrardfabrice -

Worked great till the end. Stupid screen off this site didnt even work!

comkid16 -

After replacing the cracked face, my iPhone does not come back on, tried recharging, still no life. Any thoughts on where I went wrong?

It worked before the replacement.

Robert McMullan -

According to me, there are 3 possibility: 1) the new screen is broken. It happens, because it is a very breakable component; for example it could have been broken during the shipping or when you assemble it. 2) you broke (or you don't connect) the battery 3) You did a fatal damage on the motherboard. In this case you can't do anything else.

bion993 -

Excellent guide, very nice kit. Just gruelling to actually do it given the screws are to f... small.

Ferdinand von Kalm -

ifixit con i suoi strumenti e le sue guide mi ha cambiato il lavoro! tanks....i love ifixit

Luxit Vitiello Reparo -

Great Guide, I did it (almost) successful.

I have just a "little" problem. My iPhone can do videos (with frontal and rear camera, both), but it can't do photos. It's very strange: if I open the camera app on video mode, it works; instead if I open the camera app on photo mode, it doesn't work (black screen).

At beginning, I thought that I broke the camera, but when I see that it works in video mode, I can find a sense in this.

Can someone help me?

bion993 -

Thanks!! Just switched the logic board out of a smashed case into the case of a 4s that someone dropped in wine... new screen.... best parts from each cleaned up.....Now works great! fun having two iPhones open and in pieces on your table.

Tony -

One thing I would recommend is to make several outlines of your phone on a piece of paper and as you remove screws and parts, put them on the outline in the location they were in with regards to the inside of the phone. For the screws, I would put them on my outline on the paper where they came from, but would also write on the paper the step number (and if necessary color...some screws in the steps have a red circle, orange circle, etc). This replacement is not hard at all, but you have to be careful and take your time.

amaroudis -

Thank you very much for this guide - very easy to follow and it was a complete life saver for a water damaged phone! When first dried out and plugged in, the screen was blank and it just kept making the charger connected sound over and over. Followed these instructions to take it apart and it turned out there was a little bit of corrosion on the digitizer, display and main camera cables. Cleaned everything (incl. letting the logic board swim in IPA for a day), reassembled and now it works like new :)

PS. For anyone having issues with reinserting screws or screwdrivers that look like they'll strip the screws, I got my set off Ebay for almost nothing and it works like a charm. The philips and pentalobe are also slightly magnetised so you can put the screw on the end where it sticks and just lower it into the phone

Anna -

On step 30 when you are reconnecting the cables it's very important to install the power cable first. The power cable is underneath the headphone jack cable which can be seen in step 32 (you have to look really close). It would be nice to have a step added showing to reconnect the power cable before doing step 32. This caused my iphone-4s power on button to not work. Had to tear down again to find where the power cable was.

brianjacobs1000 -

After reassembly there is no display, and when I plug it in it keeps buzzing.

I opened it back up and checked all connections, and every thing looks exact. any ideas

RobW -

You CAN do this fix, I promise, just budget two hours at least. Some tips that helped me: (1) use surgical gloves throughout your project instead of the alcohol swab - it's much easier and less time intensive, (2) take a couple of sheets of paper, number the steps and have some scotch tape near by; as you go through the steps, tape the small parts and the screws (label them by color too!) to the step they go with so you don't lose anything or put something where it shouldn't be, (3) order the #000 screwdriver - it does NOT come in the liberation kit and you WILL need it for step 4, (4) have tweezers at the ready, (5) don't force anything (especially the cables) but if you're having trouble, don't be afraid to push or pry a little harder - just be mindful of the delicate pieces.

wcalvertfc -

Most important!!!! do not pinch connectors from display. This is super easy to do and this is the first step. I noticed the screen was difficult to place and discovered that the connector was pinched. Screen is now ruined and I am back to square one. This should be the first comment.

lee -

i turned my phone around to grab a screw and one small piece fell on the table. i have absolutely no idea where it should go ..

can someone help me ?

https://drive.google.com/file/d/0B55lw2b...

the pic is here, it's the piece next to the SIM rack (for size reference)

thanks!

arnauddedecker -

At first I wasn't sure I could do this, but I told myself "Hey you're handy with tools and have a degree in Electrical Systems....YOU CAN DO THIS!" LOL. By following the guide step-by-step and being careful not to misplace anything I successfully replaced a completely shattered screen on my phone. I have just ordered the speaker assembly and an iFix tool kit so I can fix my wife's iPhone as well. This may be a hobby I can get into and who knows, I may just be able to start a small business fixing electronics in a few years. Thanks iFix for not only supplying the parts I needed but all of these invaluable guides as well!

Chris Benamati -

$40 down the drain. I snapped one of the LCD connecting cables that seemed far too short. It was standing straight up instead of bending over. I'm putting the phone back together with the old one, getting my stuff off, and considering it a $40 lesson. I have done a lot of these, but something seemed really wrong with the cable compared to the broken LCD I removed. Also a waste of several hours now.

conclusionsyllogism -

Well the new screen works great, but the lock button now doesn't work. Does anyone have any idea what may have caused this or how I could put it right?

Simon Davies -

Excelent guide. Thank you for the detailed step by step guidance, specially the tips on hidden things, falling things or traps. Amazing. I couldn't believe it worked back again at the end. :-)

Marcus Klein -

Fantastic Guide Guys! My parts came from the Aussie MacFixIt shop and were all good, and probably genuine. I had many faults to solve: Screen delamination in the bottom left corner, earpiece and main speaker distortion, home and power button intermittent, no phone mic at all, dock connector dodgy and the battery would die in a few seconds from 49%. Where I've got some value to add in the relevant sections, I will.

Michael Scollay -

1) I made my own magnetic mat by printing out an iPhone 4s screw chart, putting it on a metal cookie sheet, and putting strong magnets (I used little round "Mighties") in each spot for a screw. As I went through the process, I wrote the step number from the iFixit guide on my screw chart.

2) For my workspace, I placed everything on a white dish towel, so I could easily find dropped screws.

3) Tool-wise....I also kept a magnifying glass handy, wore latex gloves, used Q-tips and rubbing alcohol to degrease parts when needed, used a pointy tweezer, and a *magnetic* screwdriver.

kagunderman -

just received iphone 4s display assembly repair kit form ifixit...

can't wait to replace mine, a little bit nervous actually...

Ezwan -

What does it mean I did wrong if the new screen is really bright all the time, especially near the middle.

Richard Thomas -

Perfect.

The WI-FI was not working anymore after reparation, but it is a known problem. 30 minutes into the freezer and WI-FI was back.

anne guillaume -

Excellent easy to follow guide.

Thank you so much.

Gerrie Wattie -

I followed this guide to a T and now I am unable to charge my phone unless it is turned on. If the phone is off and you go to plug it in the charger, it goes straight to apple icon and turns the phone on. What did I do wrong? What can be done to fix this?

Nancy -

This guide is brilliant. Take time, don't force anything, identify the parts and have a magnifying glass and tweezers handy. Worked like a dream and easier to put together than you might think. Thank you!

Anthony Williams -

After reading through these instructions and comments I now feel able to attempt the job at hand Just need to find right part for replacement will post how I get on ..

comcob -

Step 32 killed me, ripped the ribbon for the top micorphone ribbon. The the digitizing ribbon tore on step 40. Ruined phone. Was way better off with a cracked screen.

keithogren -

I have just finished replacing my screen and now i have black grey and white lines everywhere! It wont turn on except to do that and then it turns off after a short while.... What have I broken? Please help me!

Henry Howeson -

한국어는 아직 서비스가 되고있지않아요.

재능기부 형식으로 번역중인데, 가입해서 한국어로 번역좀 해주세요.

단, 구글번역은 좀... ㅋ

morakko -

wait... lolwut?

Lee -

Hi all.

I have the same "blink" issue as stated above. Same sound as when you plug it in the charger or to the computer, but screen remains dark.

I took it apart again and re-assembled but this does not help....

Any hints on how to solve this?

Thanks

Philipp

Philipp Wechner -

This guide is awesome all others only givevery little info and videos are hard to keep up with . This guide is very easy and step by step instructions are " AWESOME! "

THANK YOU

Dolores Williams -

Gosto muito desse site e seus tutorial, estão de parabéns muito brigado.

David Santos -

Just finished my wife's phone and as far I have been able to tell, everything is working properly. A few comments:

1. As others have said, the keys to success are Patience, Care, Organization, No Brute Force.

2. Unless you do this for a living, or say once each day on average, it is going to take you the better part of 3+ hours to do it properly. And if you don't do it properly, there's really no sense in doing it at all.

3. If something doesn't seem right, in particular during the reassembly, BE PATIENT. Never use brute force! Review the text and the photos. Zoom in on the photos -- they give remarkable detail.

4. I would note that in step 14, the cable cover has a claw on it that makes it far more difficult to remove than it would seem. The claw is on the lower corner of the far right end. You just need to carefully wiggle it back and forth to get it to release its hold down below. Again, do not brute force it!

dpbrick -

Two other notes:

1. The relative sizes stated for some of the screws are incorrect. Pay particular attention when removing several screws during one step that you know which came from which hole. Or just be careful during reassembly, using very light torque, that each screw is threading in properly.

2. There are ample opportunities for "gotchas" in this procedure. The instructions are excellent overall, but you kind of need to have a feel for how much force, for example, it takes to reattach the many cable connectors. If light force doesn't seem to be doing it, check and recheck the alignment of the pins. I reiterate that brute force will leave you with a very expensive paperweight.

3. If I had realized beforehand that this procedure would mean a nearly complete disassembly of the phone, I might have hired someone else to do it. But as iFixit says on the box: "You got this!" (sic) You can do it if you work very carefully. If you get frustrated, take a break.

dpbrick -

I finished the repair, and the screen turned on, but the touch screen will not work. Please Help!

TheAdvancedNoob -

Help! I ripped the dock connector cable! What do I do?

Ivan Yu -

I ripped the dock connector cable while peeling it off (step 10) Help!

Ivan Yu -

You can find a replacement dock connector here and a guide for the replacement procedure here. Be careful, and good luck!

Jeff Suovanen -

At some point towards the end of the disassembly, possibly when removing the dock connector (it was a display and dock repair), out popped a tiny black rubber rectangle. It's 2mm long x1.5 mm wide x 1mm thick with adhesive on one side. I can't find any mention of it anywhere. I doubt it's important, but I hate extra pieces :/

Mahir Abrahim -

it is just a little bumper that goes against the speaker

Joseph Gans -

Great guide. I have no expertise and this took me much less than an hour

Joseph Gans -

Best in class

swaim3 -

Exellent guide,thanks again.

Davide Lambertini -

Great Guide

I replaced with screen by following the steps carefully, only issue I had was to to with the front camera, the replacement screen had a stupid little plastic circular cover which was stopping the screen from seating in properly, removed it and it went in no problem.

thomastodd78 -

Realy great work from smart person.

thanks a lot.

ASA -

Excellent guide! Perfectly described!

Jiri Altman -

Excellent ! Took me 1.20 hr to replace both the display and back cover (on a Friday night, back from the bar). Thanks a million !

Mathieu Brousse -

Excellent work, with this guide you cant really say the job is difficult! took me 20 or less to get this done through the guide :) Thank you Ifixit!

Petter Berget -

Excellent guide. Between it and the video, it was a challenging but quite doable fix. A couple of pointers.

(1) My biggest difficulty was putting back the corner screen screw on the corner next to the audio jack. The jack gets in the way when taking it out and when putting it back but it is when putting it back that one understands why Jonny Ive got rid of the darn things ;). A pain in the arse to put that screw in such a tight angle. Got there at the end.

(2) When you put that logic board back make sure not to cover the Power button cable (located underneath the headphone jack/volume button cable) as described in Step 17. It is short so it tends to slip under the board. Check you have 5 cables in that area after putting the board back in place. If it got under just lift the board slightly and use a plastic tool to hook it out.

carloscorderob -

Can I do the replacement without removing the battery? One of the screws holding the battery won't come out!!

nadalina_barbie -

Excellant Guide. Worked well for me.. In the first time, teared the digitizer cable ( thought it was just folded), So have to get new display and this time i was careful not to repeat.

All I needed was couple of Beers and calm env .

Sethu -

The display of my iPhone 4S crashed as it fell from my hand. I asked for another display but the start button did not fit correctly, unfortunately the display crashed again due to the start button, and I stopped using the phone for some time. Also some screws had worn out. I asked for another display, a new start button, and a set of screws, and my old iPhone 4S is back on again. NOTE: The new start button no longer brings the printed white box, but I do not care, the iPhone works very well. Regards

[deleted] -

Thanks for the guide. Took me about an hour all in all

Anton Dykyi -

Thanks for all. Very good guide.

Give me confidence.

Sonia da Nova

sonia -

Very thorough guide, thank you

Jeff Moore -

Excellent service. Thanks a lot!

rorabo -

Excellent and accurate instructions. Thanks a lot!

Peter Sandl -

ottima la spiegazione riparare diventa un gioco. Grazie

Stefano Mascali -

beh…un gioco…un gioco un cazzo! Io ho riparato tutto perfettamente, poi, finito di riassemblare, mi sono accorto che avevo dimenticato di riposizionare il pulsante home sul nuovo frontalino: una martellata sui cglni avrebbe fatto meno male! ho dovuto riaprire tutto!!

info -

Excellent guide furthermore the remark at step 49 concernig "do not touch the metallic area at the base of the LCD data cable, as this can cause problems with the LCD. If you do touch it accidentally, clean it gently with an alcohol wipe before continuing" is very important!!

Well done and thank you

Dario -

Super tuto très précis ! Les boîtes à œuf pour stoker les pièces à chaque étape est une astuce particulièrement pratique

Vu la difficulté j'ai hésité des mois avant de me lancer et ma j'ai un bel iPhone tout neuf comme en 2012. Pas de regrets donc , mais patience et méticulosité pendant deux heures

Merci

D´aboville -

Thank's guys, this was really nice to follow and it worked out perfectly. I'm kind of proud of myself! But the credit goes to you.

On some steps it would have been nice to have even more detailed photos (which would especially be useful for reassembly), but it also worked without it.

Big thumb up!

Franziska Weppelmann -

I was looking on another video when i replaced my screen so i missed too peel off the protective backing (usually blue or pink) from the new panel before installing it. but it seems to work fine with it on anyhow or should i removit?

Mikael

Mikael -

I always leave my protective backing on. I’ve replaced many iPhone parts, and I’ve only had to remove the protective backing on the Plus size iPhone 6/6s/7/8.

Zachary Smith -

Good stuff! Took me about 1.5 hours (replaced battery as well). This is not my first repair, but definitely the longest, most number of steps. Keeping track of all the different screws (and other little bits) is key.

jrwwallis -

Hi, as I was putting new screen there is a small silver thing came off. Have no idea where it came from. It was little hard to put the screen back so I put little pressure. This is my fourth time changing the screen. Never noticed this silver thing before. Any help?

Bushra Mah -

I’ve got it! Nevertheless, I have to say that quality of the spare display is lower than te original display by Apple.

I specially refer to the mirrored internal side, wich has a worse reflection

info -

Many thanks for this valuable guide!!!

During disassembly to repair the LCD of my iPhone 4s I found this little rubber inside just after removing the mainboard.

And there’s no reference of it in your guide.

have a look here:

https://drive.google.com/open?id=1VJNJhU...

Do you have an idea where is it’s place? thanks in advance

Mario

Mario Di Stefano -

I guess this should be placed on top of the motherboard where one of the cable strips from the top comes curves around the board.

Mark -

one of the screws in the corner or the phone is striped. What can i do?

Dudefoxlive -

Fantastic guide

Have a problem, after reassembling the touch sreen dont work, the phone start up , aks or the simlock code , the touchscreen dont

react on my sweeping.

can you tell me where to liik for.

thanks

rik

Rik kegels -

Au top iFixit comme d’hab MERCI !!

EXODE films -

I need Help. My touchscreen does not sense touch. I don’t know what to do.

Zachary Smith -

You rock!!!!!! Every thing is clearly explained in very good and clear English. I followed the tutorial to replace logic boards for 2 iPhones 4s and every thing worked fine.

Thank you for sharing

richard -

I did it! Twice! I swapped the screens between 2 4ses and they both work! Not really that hard, just long and fiddly.

Sam Bach -

Read all 43 steps carefully. Took phone to repairers and all works great. I know my limitations. :)

R Hibberd -

Thank you for this detailed guide. Fixed mine. The plastic opening tool broke while prying up the battery. I reshaped it with a utility knife and it worked. I laid out all screws/small parts on a paper duct tape. It took me 1.5 hours to disassemble and 3 hours to reassemble. There were a couple of challenges in the reassembly. First, the home button rubber, speaker mesh and camera clear ring had to be replaced from old screen to the new one. The double sided tapes were to be replaced due to the tiny broken glasses. My home button doesn’t work well after the repair. The new double sided tape probably wasn’t put precisely. Second, the corner screw by the headphone jack was really difficult to screw on. I had to take out the headpboe jack. Third, the new screen doesn’t work well. When pressing the right bottom corner on screen, a brighter spot appears at the middle of the screen. Overall, I’m happy with this repair. Many thanks to the author of this guide and of the “headphone jack cable” guide.
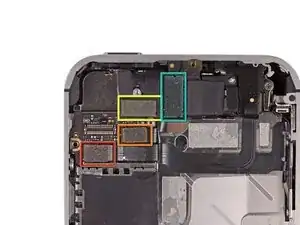
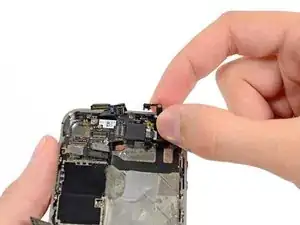
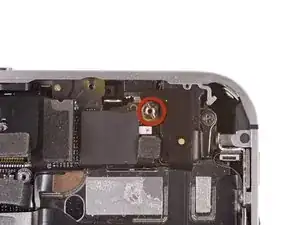
Yangbin -

When pressing the right bottom corner on screen, a brighter spot appears at the middle of the screen

This sounds like something is pressing on the middle of the display from the inside. Might be best to open it back up and make sure everything is installed and positioned correctly.

Jeff Suovanen -

Excellent guide, I completed my repair in about 2 hours. I used a sheet of paper and taped the parts to it. I wrote down each step that required a piece to be removed.

Ryan Jungemann -

2 hours and change…

edsilmon -

Had to replace my broken Screen, Home Button and the Battery. Worked step wise. After completing, the Phone started up fine but the touch was not working, there were lines (colorful) being displayed on the screen. Later I broke down everything started from a scratch now the phone is dead nothing is happening?I am stuck….HELP!!

Tshering Dhandup -

This video was so helpful. I’ve watched a couple of videos that were much longer. I like this one especially because you have included steps below. I have repaired three (one twice) phones. Thank you so much!

fler_d -

It was the first time I tried something like that…..and it worked nicely.

I never thought I could manage that.

But with this step-by-step-guide it was quite easy…..it took me a little bit more than two hours because I always double-checked everything.

THANK YOU!!!

Andreas Conrad -

Did it in 30 mins very good guide

Dylan -

I lost the little piece of plastic attached to the flash mentioned in step 14, what do I do? Will this affect anything?

Valerie Martinelli -

Excellent guide, I completed my repair in about 4 hours. I used a block-notes and for every step taped the parts to a sheet. I wrote down each step that required a piece to be removed. After all every thing is ok, my Iphone looks like new! Thank you

Maurizio Esposito -

Excellent Guide but unfortunately the Screen from ifixit was not of good quality. The Home button did not fit in the whole. I checked with the original screen and the button worked again perfectly. Something must have been wrong with the ifixit-screen.

Lorenz Nufer -

I’m sorry to hear that! Please contact our customer support and we will get the issue resolved!

Arthur Shi -