Einleitung

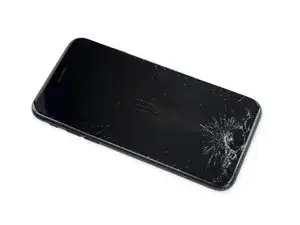
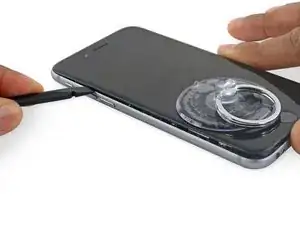
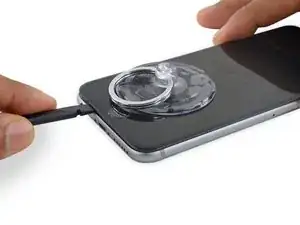
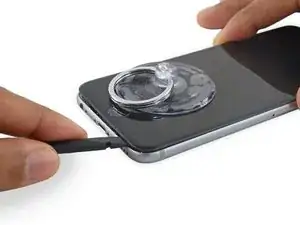
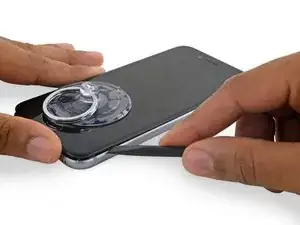
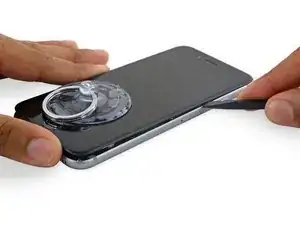
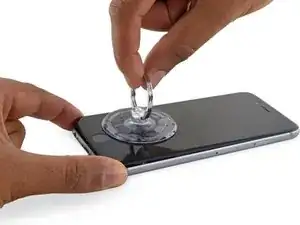
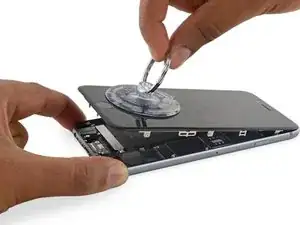
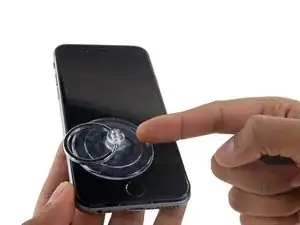
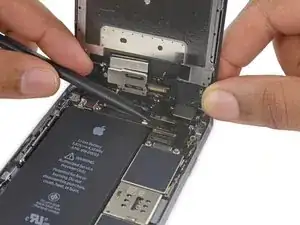
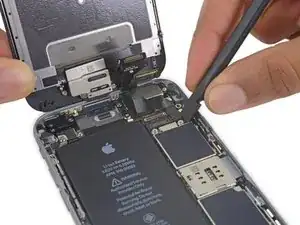
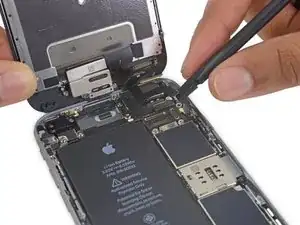
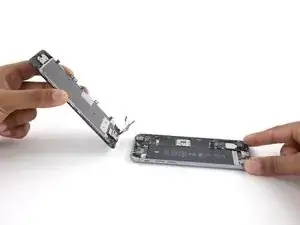
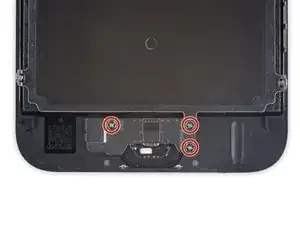
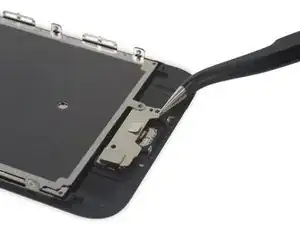
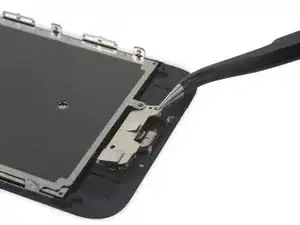
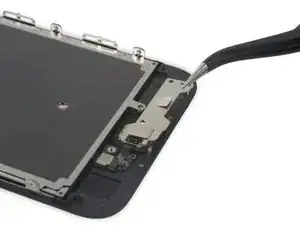
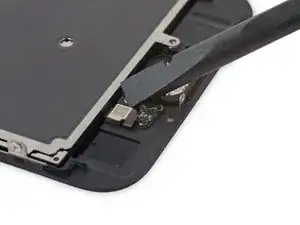
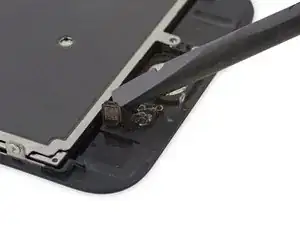
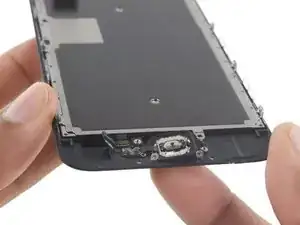
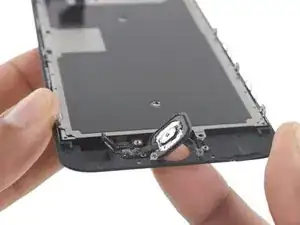
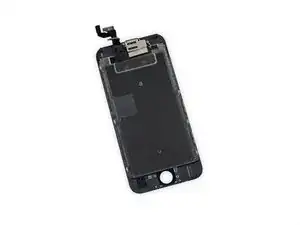
In dieser Anleitung zeigen wir dir, wie du das defekte Display deines iPhone 6s tauschen kannst. Dieses Ersatzteil ist schon mit der Fronteinheit, dem Ohrhörer-Lautsprecher und der EMI-Abschirmung ausgestattet, dadurch vereinfacht sich die Reparatur.

Du musst nur noch das alte Display ausbauen und den Home Button auf das Ersatzteil übertragen. So funktioniert Touch-ID (d.h. der Fingerabdrucksensor) auch weiterhin.

  1. JATCLqMKWMWEOJKD
    • Bevor du mit dem Ausbau beginnst, entlade den Akku auf unter 25%. Ein geladener Lithium-Ionen Akku kann Feuer fangen oder explodieren, wenn er aus Versehen beschädigt wird.

    • Schalte das iPhone aus, bevor du mit der Demontage beginnst.

    • Entferne die beiden 3,4 mm P2 Pentalobe Schrauben an der Unterseite des iPhones links und rechts vom Lightning-Anschluss.

    Hi, just got the repair kit that came with IPhone 6S battery. I felt that there’s no explanation on which tool to use to remove the two 3.4mm P2 Pentalobe screws. It’s not helpful just to say “Remove the two 3.4 mm P2 Pentalobe screws on the bottom edge of the iPhone, next to the Lightning connector. “. It’s more important to explain how and what tool to use. The repair tool kit tools were not marked at all and it’s not right to assume that people know which tool or part to use. Please kindly address this issue. Thanks. Janet

    Janet Monaghen -

    @beingchen For the P2 pentalobe screws you should use the driver bit marked P2. Might be a little hard to see but it’s there, etched into the side of the bit.

    Jeff Suovanen -

    It’s very clear which tool you need. As it says these are “3.4 mm P2 Pentalobe screws” - so you need a 3.4 mm P2 Pentalobe screwdriver…

    alexanderbrix1987 -

    Just a P2 driver—3.4 mm is the length of the screw.

    Jeff Suovanen -

    If you can’t identify which screwdriver in the kit to use, you probably shouldn’t be working on your phone. Just sayin’

    Keith Hockenbeck -

    Is it ok to replace the battery if the phone screen is broken?

    Reem -

    Of course! As long as the screen and battery are disconnected from the motherboard, you can replace anything!

    Charles Bejarano -

    is it possible to change my battery on my iphone 6s and use a battery that has been already used in another 6s

    morgan durnford -

    Yeah it would work, but if the battery heath on the 2nd battery is bad, just get a new one.

    Charles Bejarano -

    @moe6802 Removing the battery can damage it, and it shouldn’t be used afterward. It may seem fine, but even minor battery damage can lead to a fire hazard. Not worth it for such a cheap part. If you need a battery, just get a new one.

    Jeff Suovanen -

    How do you discharge a battery? Do you just let the battery drain or is there something less time consuming that you can do?

    Matthew Petts -

    There is no easy way to discharge the battery in “less time”. Perhaps the fastest way is to play a visually-complex modern game or otherwise make your phone do a lot of work.

    Lance J -

    So my phone screen is completely black causing me to see nothing that is on my screen. And the battery is above 25%, near 100%. What do I do??

    Jessica I -

    you should post a question on the answers forum

    Seizure Salad -

    you should post a question on the answers forum

    Seizure Salad -

    I can’t the screws with the P2, seems that the screws are stuck, what can i do?

    Alberto Jabiles -

    My kit came with 3 screws. Are those to replace these 2 P2 screws? And what’s the third one for?

    Daniel Morse -

    If it came with 3 screws, then it’s an extra one just in case if a replacement screw gets lost.

    Charles Bejarano -

    My display is cracked/broken and not functioning. The slide bar doesn’t work. How do I shut down my phone?

    Timothy Huss -

    i have replaced several ipod batteries and laptop work, but these screws seem to loose but do not come out. how am i to remove them.shake the iphone?it seems the ioen is not in my kit, is that how to remove them?

    this seems idiotic but i remember some other system magnets that firt make your screws easier to keep, but this might be changed….any video? this seems 1st step blues!!!!

    makinfilms -

    never ind ishook it… is that in the guide?….iopener is not in the kit……never was before is this an upsell? do i skip it? i dont have it

    makinfilms -

    My screws aren’t coming out either. I’ve loosened them, but they aren’t coming out. I’ve shaken the phone, given it some slight bangs…nothing.

    Jesse Fisher -

    The following info is not given until step 21 in the instructions, and probably too late at that.

    DO NOT disconnect or reconnect any of the cables in this device until the battery itself has been disconnected!

    Don’t skip that step, intending to do it at the end, as you may damage the phone.

    ffissk -

    2 thoughts:

    1) Really? Steps 14-17 are about disconnecting the battery first, and step 17 notes “so it doesn’t get reconnected while you work.” How’d you get to step 21 and miss 14-17?

    2) These pages are user-editable. (Probably (hopefully) “curated” by iFixit staff.) You should add a warning to step 17 (or step 24).

    Bass Clef -

    NOW THAT YOU’VE REMOVED 2 SCREWS, and

    BEFORE YOU SNEEZE them into oblivion, or under the refrigerator (which is the same in many houses)

    MAY I suggest:

    1) Obtain:

    — a piece of paper, such as normal printer paper (not too much writing on one side)

    — a piece of tape, not too sticky, like masking tape (duct tape would be bad)

    ——— 1-1.5 inches (2.5-4 cm) wide

    ——— 6-8 inches (15-20 cm) long

    — a pencil (or pen)

    2) Put the paper on the side of your work area

    3) Lay the tape, sticky side up, on the paper

    4) Fold each end of the tape (~1 inch/2.5cm) back under itself, so the folded part faces the paper. Press the folded-back tape onto the paper

    You now have Sneeze & Wind Insurance for your tiny bits!

    5) Put the 2 pentalobes end down on the top end of the tape, next to each other. Push them a little onto the tape so they stick

    6) Use your pencil to note on the paper next to the screws: “1. Pentalobes”

    Now you may proceed with dissassembly, without worrying about telling the 1.5mm from the 1.6mm screws.

    or about sneezing!

    Bass Clef -

    My phone has a bad battery and a bad connector and I wasn’t able to get all of my photos before it died. Is there any chance I won’t lose them when I replace the battery? Or, is there any way to charge a 6s battery with a bad connector?

    Liz R -

    There is a great chance that photos, which are stored to flash memory, which is solid state memory, which is not affected when power is lost, will be there, right where you left them, once you restore power to your device. You could install a partially charged battery into your phone and then retrieve the important things, like your photos, if you don’t intend to continue using the phone. Else look at replacing the lightning connector assembly. Here: iPhone 6s Lightning Connector Einheit austauschen

    TimD -

    The P2 is not getting the screws loose at all. I have tried this several times and no budge on my iPhone 6s.

    Cassandra Vigil -

    To avoid to be screwed by lost or mixed screws:

    - Use magnetic pad, wipeable

    - Write the ifixit- steps next to the screws (maybe even with their sizes) and other bits removed

    with a non-permanent marker

    - When finished, simply wipe the pad, and it’s ready for the next repair

    Hope that helps.

    Ulrich Janßen -

    I found a pentalobe 1 driver to work much better.

    joelkevinjones -

    The suction cup didn’t hold at all. I tried Windex and then hospital grade alcohol, but nothing worked. Finally had to use two exacto knife blades to begin lifting the screen. As soon as I got a little gap, used the spudger tool the rest of the way, The small philips driver didn’t fit the screws exactly, but with a little effort they came out. My battery adhesive strips snapped immediately and I had to remove the original battery the “hard way”. The kit came with replacement display adhesive but no explanation how to use it. I got some on - so better than nothing. Overall I’m happy with the results, and the new battery is charging now.

    Daniel Wolf -

    First step problem? Couldn’t get the screws out. I checked my other iPhone and realized the screws were missing!Just started prying it apart.

    Hoyt Smith -

    I went through the whole procedure, replaced the battery and got the screen back on. Then the 2 pentalope screws would not go into their sockets. They sink in all the way and spin, but it appears there are no threads to grab. The screen seems to be in position since I can insert a plug into the headphone jack without trouble. Did anyone else have this problem. Using the phone now with no screws. Yikes.

    Walter Plante -

    Hi Walter, in case you’re still dealing with this or anyone else has the same problem, check that the screw bosses on the bottom of the screen are straight and line up with the screw holes on the case. They should be at a 90° angle to the screen, but they’re easy to accidentally bend and could’ve gotten flattened against the screen.

    Adam O'Camb -

    I recommend a loop of tape attached to the table, and placing the screws on the tape in the order they were taken out. identifying the screws to put back is a simple matter of going the other way back up the tape.

    David Taylor -

    Did the repair for the second time, each time faster and easier. This steps by step is amazing and crystal clear no mistake possible.

    Jean-Gabriel Duquesnoy -

  2. VZtFUbiTGlxKvKuS
    VZtFUbiTGlxKvKuS
    nEk1gF4aPAU5BRUh
    jIumJl2vN3XDIiSv
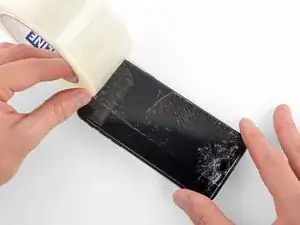
    • Wenn dein Display-Glas zerbrochen ist, dann solltest du weiteren Bruch verhindern und Verletzungen während der Reparatur vermeiden, indem du das Glas mit Klebeband abklebst.

    • Klebe durchsichtiges Klebeband in überlappenden Streifen über das Display des iPhones, bis die ganze Oberseite bedeckt ist.

    • Dieses Verfahren hält Glasscherben fest und sorgt dafür, dass die Struktur erhalten bleibt, wenn du am Display hebelst und es hochhebst.

    • Ziehe eine Schutzbrille auf, um deine Augen vor Glassplittern zu schützen, die bei der Reparatur herausspringen können.

    • Wenn das Glas so zerbrochen ist, dass ein Saugnapf bei den nächsten Schritten zu schwierig anzusetzen ist, dann solltest du versuchen, ein Stück sehr starken Klebebands (etwa Panzer-Tape) zu einem handlichen Griff zusammenzukleben und damit das Display anzuheben.

    In case of broken glass you can make the suction cup much more effective by covering the glass with a broad piece of translucent tape which eliminate air leakage through cracks in the glass.

    lionno1 -

    Il n’est pas nécessaire de mettre beaucoup de scotch.

    Au contraire plus vous mettez de scotch, plus il y aura de défauts et la ventouse ne collera pas.

    Une bande bien positionnée suffit.

    Chloé Bossuette -

    I’ve used hot glue on low setting to remove all types of crystals. The hot glue will release with a little iso alcohol. No damage to glass or plastic faced crystals or screens. Use a narrow piece of wood as a prying handle.

    Emilio Gonzalez -

    I recently had issues with removing the glass with the suction cup. I have done this many times with older generation iPhones but this time the glass seemed sealed on quite solidly. I told myself that the last option would be to use the screwdriver tip. After all my attempts, I transitioned to the option of using the screwdriver tip. Surprisingly, it was the easiest thing ever. I placed the 1mm flathead screwdriver at the interface between the glass and the cover (normal start location) and pried up very gently. Voila, the glass came up and I can’t even notice any dents or scratches. It felt much easier than the suction cup technique. If the suction cup is giving you a hard time consider using that 1mm flathead.

    forhereyesonly -

    This is definetly the best option to open this thing up. I’ve spend 30min with trying to heat it up and remove it using the suction cup. I needed 3sec with the 1mm flat screwdriver and i t was’nt scary at all. No dents nor scratches here too. Thanks for your comment.

    Berggorilla -

    thank you!!!!!

    Adrian Phan -

    Great suggestion to use the screwdriver!! Thanks, it really helped

    obo12759 -

    Duck Tape worked great for me. Thanks for the great instruction!

    Michael -

    Tried several types of tape but finally used this screw driver solution. At first I wasn't pushing hard enough for fear of damaging things but with just a bit of extra force I was able to open it right up. Everything is fine with only a slight scratch on the frame.

    Wesley Shank -

  3. mVwKmKcVbplDkJAo
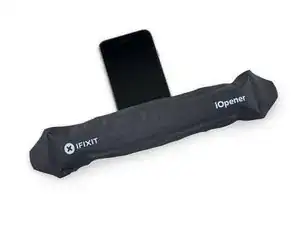
    • Optional kannst du die Unterkante des iPhones mit einem iOpener oder einem Haartrockner für etwa eine Minute leicht erwärmen.

    • Wärme macht den Klebstoff weicher, mit dem das Display befestigt ist und erleichtert so das Öffnen.

    What about specifying the hot air temperature?

    Nicola Centrone -

    The glue softens pretty easily, so the exact temperature isn’t critical. Get it slightly too hot to touch. If you have trouble, heat it a little more and try again.

    Jeff Suovanen -

    What temperature on the screen separator lcd machine and for how long?

    Manraj Gulati -

    This is the first time I opened my 6s since it was purchased new four years ago. Even without heat, constant and firm works enough to be able to squeeze the flat edge of the spudger. From that point and without any additional pulling from the suction, twist the spudger gently to “walk” it open on both sides.

    Family Juinio -

    I used a hand towel folded in half and a clothes iron on the cotton setting (med-high heat, no steam). Placing the doubled towel between the phone and the iron, I would set the iron down for about 20 seconds (my iron has a timer that beeps when left horizontal for too long). Lift the iron, check the temperature (aiming for just too hot to touch), reposition as needed, repeat. It took me a while, but that’s because I took my time not knowing how fast this would heat. All-in-all, about 2 minutes to reach the right temperature to loosen the adhesive (it IS tenacious).

    Sarah Wruck -

    Holy. Redii eirhejbrd

    Andy Carson -

    just been given a 6s to repair, for this stage would a hot water bottle work ??

    Steven James -

    I used a hot-water bottle to keep the iPhone warm while prying patiently, though the moving surface added to the challenge.

    Before that, I put the iPhone - screen facing down - to warm on the coffee cup heater (45°C) of an espresso coffee machine. Half an hour seemed more than enough.

    A hot-water bottle filled with water at 60°C would do the job I think.

    Later repeated the same heating before removing the adhesive strips under the battery (allowed me to extract each strip successfully, rolling it on the body of the spudger).

    And also before putting the new display assembly adhesive under heavy book weight.

    Aubin -

    I heated a stone pestle in the air fryer, wrapped in a cloth.

    Ark -

    I didn’t have any of the heating tools listed here so I improvised:

    To soften the glue I heated water in a pan (not boiling but quite hot).

    I put the phone in a thick plastic bag in the water for about 20 - 30 seconds. (I checked the bag was properly watertight first by dipping it in water – minus the phone). Maybe I was lucky but the screen came away easily doing it this way.

    Henrik Dahle -

    Clean the glass screen first with eye glass cleaner wipes (alcohol). Hair dryer on hot with low air speed works excellent. Aim the heat at 45 degrees (phone face up) and move around the perimeter for about 1 minute. The edges should be hot enough to barely touch without burning your figures. This seems to get the glue hot enough at the edges for easy removal. Warm the glass face a bit and also warm the suction cup, this makes the suction a lot better and the suction cup won’t come off like it will if the face and suction cup are cold. Later when removing the battery, heat the bottom with the hair dryer for about 30 seconds and the top of the bottom of the battery where the 2 tabs are for the tape behind the battery. This makes for simple removal of the battery tape under it.

    Keith Paget -

    Here’s what I did to open my iPhone (I had it open in under 1 minute): 1) I has one of those rice/barley filled eye masks that you heat up in a microwave. I heated it for 1 min and then placed my phone face down onto it for 1-2 min. 2) I placed the suction cup onto the left lower corner and the “tweezers” into the headphone jack. Pull upwards with the suction cup and hold the phone’s body down in place with the tweezers. 3) a gap will open. Slide the edge of a razor blade into the gap (not too deep) 4) insert the plastic triangular guitar pick tool into the gap next to the razor blade. Slide sideways with the triangular tool to make the gap large enough to insert the spudger. 5) insert the edge of the spudger tool (curve down) into the, now widened, gap. 6) slide the spudger tool along the edges of the iPhone. Opened!

    jennismith2 -

  4. LtuRrFCWgKIDSXQE
    • Beim Öffnen des Displays des 6s wird ein dünner Klebestreifen durchtrennt, der einmal um das Gehäuse verläuft. Wenn du den Klebestreifen lieber ersetzt, halte jetzt einen Satz neuer Klebestreifen bereit. Es ist möglich, die Reparatur ohne Ersetzen des Klebers zu beenden, und wahrscheinlich merkst du keinen Unterschied in der Funktionalität.

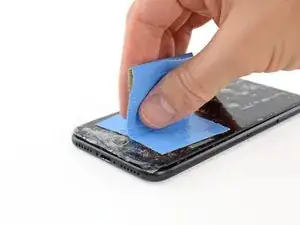
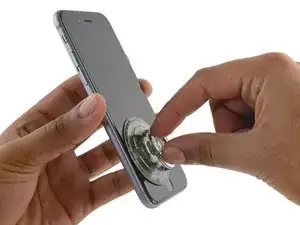
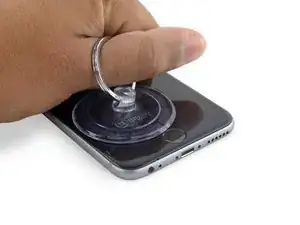
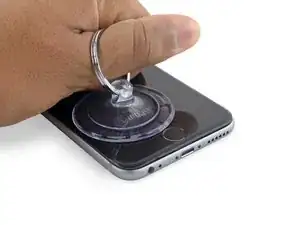
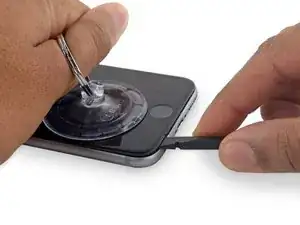
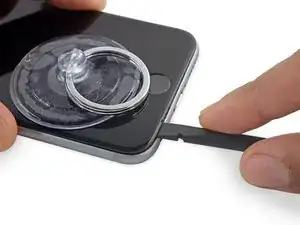
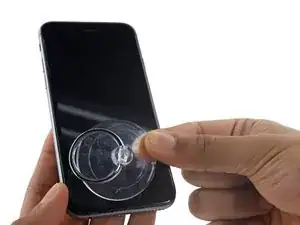
    • Bringe einen Saugheber an der unteren linken Ecke der Display-Einheit an.

    • Achte darauf, den Saugheber nicht auf den Home Buttons zu setzen.

    • Wenn dein Display stark gesplittert ist, dann haftet der Saugheber vielleicht besser, wenn du das Display-Glas mit durchsichtigem Paketband abklebst. Du kannst anstelle des Saughebers auch sehr starkes Klebeband (Panzer-Tape) benutzen. Wenn das alles nicht hilft, dann klebe den Saugheber mit Sekundenkleber an dem zerbrochenen Display fest.

    Hello, I was wondering if there was a guide of how to replace the adhesive strips, thank you

    Pablo Reyes -

    The suction cup will not work if you have a shattered screen. I put a tip of an exacto knife between the glass and side frame above the power connector, carefully pried up then used the spluger to pry the rest of the way up.

    johnmurphyjr -

    Tape will work as well in order to create a smooth surface

    Nick Stine -

    Even tape didn’t work on my first shattered screen 6S disassembly. Had to reset to the exacto/thin blade technique.

    Peter Bovey -

    For me, it seemed like I only had one shot at the suction cup. It stuck on firmly the first time, but I noticed in the instructions that it was placed more on the side. I detached my suction cup and repositioned it and now it doesn’t stay (sucked) on. Hmmm.

    Frank Terence -

    Can you use the iSclack opener to open the iPhone 6s?

    Joe Koffee -

    The iSclack is helpful, although you have to use it a bit differently than you would on, say, a 5s or 6. The iSclack alone isn’t strong enough to pop the display open, because of all the adhesive around the perimeter of the 6s display. But you can use it to lift the display just enough to get a tool in there and start cutting the adhesive. Basically, the iSclack does the same job as the suction cup shown here, with maybe a bit less fuss.

    Jeff Suovanen -

    My screen was SUPER shattered… the hair dryer did the trick. Patience it definitely the key… I tried putting tape over the glass but the suction cup wouldn’t stick to it at all but it stuck to the broken glass for a few seconds. I taped it up when I was finally able to move onto the next steps to keep the glass from getting everywhere then peeled it off for Step 10.

    Mandy Ng -

    Hi, it looks like, from reading the comments, that separating the display assembly from the phone is a tricky step.

    Would the piece of equipment, in the link below, be any use at this stage? Seems it could be used for all makes and models.

    Any info would be appreciated.

    https://youtu.be/8it4o9tx8tQ

    Michael -

    I have a screen protector on my phone. I was wondering if it was going to be problem for the suction cup.

    jeffreyleung2002 -

    I can only suggest to use a hair dryer to loosen up the adhesive underneath the display. Mine was stuck so hard it wouldn't barely move. After warming ist up I could softly pull ist up with way less power

    olonetzky -

    A question, has anyone had success removing a cracked (not shattered) screen? My phone has a single diagonal crack from the top right corner down to the left side. Will the suction cup still work?

    goblazers -

    The suction cup material was very stiff and wouldn’t adhere well even after thoroughly cleaning the screen. Applying heat from a hair dryer helped with that, too.

    Karleen Smith -

    A packing tape handle worked well for me instead of the suction cup. I folded a piece of packing tape in half leaving two ends to stick to the part of the screen indicated for the suction cup placement and used the center fold as a handle.

    Diana Riddle -

    I found that a 3rd hand helped here. Lots of heat and as others say, a strong, steady pull, but you are only creating a gap to get the spludger in, not ripping the screen away from the body. Once I created the teeny gap I had someone else get the spludger in to hold it open while I shifted my grip.

    Steve -

    I’ll throw in here for other noobs as someone who just read ALL the comments and had things go pretty well without a hitch.

    Adhesive here goes ALL the way around edge. I think think many people’s frustration comes from in adequate heating and/or only heating the inferior edge area. I went with 5 min of a rice/shoulder thingy, (uniform rectangle folded in half on a plate, 3 min in the microwave) Plate side was hot potato hot and stayed so.

    Other inference and comment curating:

    a. Use pointy spudger end inserted slightly into headphone jack to hold down phone while pulling up;

    b. 2mm lift MAX the insert something to hold while you bring the flat end of the spudger around (I just used the flesh of my finger;

    c. Twist spudger ONLY zero -20 degrees when inserted;

    d. Avoid spudgering above or between the pentab screw holes.

    e. Avoid sticking the spudger in more than 2 mm as you slide up the left and right edges. If you catch, back it out a bit until you can keep sliding.

    Aaron -

    Also all props to Ifixit for addressing many issues with earlier versions of this and their replacement kit! A lot of complaints are clearly obsolete now.

    And if this your first time block out an afternoon and be glad if it only takes 20-30 minutes. Rushing causes breakage more often than not.

    Aaron -

    I’m in a third world country without access to a hairdryer. Is there anyway else to loosen the adhesive?

    Dylan -

  5. UYamh1NRDiavS45O
    UYamh1NRDiavS45O
    QA6gV5PButgq4dsF
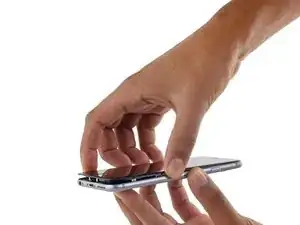
    • Halte das iPhone mit einer Hand fest und ziehe am Saugheber, um das Front Panel vom Rückgehäuse zu trennen.

    • Nimm dir Zeit und wende feste, konstante Kraft an. Die Display-Einheit sitzt, im Vergleich zu anderen Geräten, sehr fest.

    • Wenn du zu stark ziehst, könnte die Display-Einheit beschädigt werden. Übe gerade so viel Druck aus, dass ein kleiner Spalt zwischen der Display-Einheit und dem Rückgehäuse entsteht.

    • Wenn es immer noch zu schwer geht, dann erhitze die Vorderseite des iPhones mit einem iOpener, einem Haartrockner oder einer Heißluftpistole, bis du sie kaum noch anfassen kannst. Dadurch wird der Klebstoff, mit dem die Kanten des Displays befestigt sind, weicher.

    No, really. Do this on a table and use less strength than you think. If you open the display the whole way at this step you can easily rip the home button connections and one of several display connections at the top. <— too much experience... :(

    chuymatt -

    Wow, that was tough. Patience, patience, patience. Did not use the iOpener, just firm and consistent pulling with the phone on a flat surface. When the suction cup comes off... clean the display surface and go back at it. I did use the pointed end of a spudger inserted into the headphone jack to hold down the bottom case whilst I pulled on the suction cup. Once there was sufficient room (see next step) you can just get the spudger (flat end) to slide in slightly.

    plisi -

    If you're lifting up on the glass, how are you supposed to hold the rest of the phone down? Is it by holding the camera end down with the side of your hand and rotating your hand, or using your other hand (not pictured) on the edges (seems very difficult), or using a spudger in a jack?

    Bryan -

    I got a fingernail on the metal edge and that did the trick.

    David Heinbach -

    On the 6s, which has an annoying black adhesive strip holding the display assembly on, I use the iSclack to loosen a very small area near the home button then insert a thin spudger and gently twist it a bit to release the adhesive. Do this around the bottom and both sides of the phone to release the screen. I usually have to break some of the adhesive strands when the opening is big enough.

    scentaur -

    My spudgers just too thick for initial insertion. In the end, fingernail on my thumb got me started, and I was able to get plastic picks in there to work it. The microwavable iOpener gel strip really helped.

    Heidi Moser -

    Thanks plisi, your comments are helpful. I had to apply pressure several different times. Didnt realize until about the seventh time applying pressure that what I was doing was slowly loosening the adhesive. Patience is truly the key with this step. You may not think you're progressing but it's slowly prying away.

    amylofton -

    What happens if the cup won't even stick to the display because it is cracked and it will not hold air near the bottom of the phone?

    Jaredrett -

    hey everyone, i just did my first iphone 6S display...after many 5, 5c, and 5s iphones...just keep trying and carefully insert the spunger where they said...right around the headphone jack. The black adhesive makes it very tough to get it off unless you work at one corner. Be careful...but you can do it! ;-)

    David Althaus -

    Use a razor, and go along the outside of the phone carevilly using the razor as a spudger. it will efficiently cut and weaken the adhesive while spudging the screen away from the frame. only takes 15 mins.... Use a workbench razor, not a flimsy one. If possible, use one where one side of the razor has a gaurd on it for better grip. Take it slow and try not to scratch the frame. Lots of pressure and patience is key!!!

    Goodluck!!

    -J

    Jaredrett -

    The first time you pull it apart there's black glue tape that you'll have to compete with to get it open. Be careful

    Jeff -

    Use a hairdryer about 2-3 inches from the phone on high heat for about a minute, moving the dryer the entire time. The phone opened for me in less than a minute after trying for several minutes without heating up the phone.

    Todd Leach -

    Careful ..delicate work. I also used a hot hair dryer around the perimeter for just a couple minutes to help loosen the adhesive bond. I then used my sadly short finger nail to help loosen the edge. I placed dental floss under the corner & carefully lifted the display very very slowly. This worked within about 3 minutes. As mentioned earlier the adhesive used in the iPhone 6s is very strong but this routine worked like a charm & was quick!

    Mary Blocher -

    Much easier to do using the Spudger that is provided in the Pro Tool Kit. It has a thinner fin type head. The Spudger provided in this repair kit is definitely too thick and makes it far more difficult.

    Tyler Brady -

    The spudger is too thick and the glue is too strong. Pulling up broke the glass below the power button. Now I am out $200 for a repair, plus a battery. Bummer. I am VERY good at repairing things. The adhesive on this is very very strong. The pentalobe tip that they send with the kits not milled well and I had to take a file and flatten the tip to get it to work - it is not finished well at all. I used the kit for the iPhone 6 for my Mom and had no problem. I am 51 and have been fixing things since I was very young.

    greghabiby -

    Well, I shattered my screen trying to do this. So now I need a battery and screen repair. Not happy.

    Carolann Parran -

    Me too! Be gentle!

    Matthew Simoenau -

    Me as well, I went very slowly, was working the spudger around the edge and then it shattered. Just going to buy a replacement phone and I was replacing the battery to gift this to my sister as a hand-me-down and now it’s not worth it. Perhaps I can sell the kit second hand…

    kpederso -

    Removing the display was the hardest part of the whole job. The adhesive is very strong, but just be patient. What I ended up doing was to use the suction cup, the flat end of the spudger, and an iFixit opening tool. I used the suction cup on the screen as directed. Then I placed the flat end of the spudger just a bit into the charging port and held down the phone body by the spudger on my work mat. I pulled up on the suction cup, pushed down on the spudger, and inserted the thin iFixit opening tool in the small seperation. I took my time and worked my way around all of the edges. After that it was really easy. I was able to reuse the adhesive, and my new battery install went just as planned.

    Eric Olson -

    Use a hair dryer as per the suggestions and this will definitely make the job easier and reducing the risk of breaking the display . Keep a steady pull of the display, don’t rush and it will start to show the small separation gap. An issue is that it will go back in place if you stop pulling before you can use the spudger tool. The suction tool that came with my repair kit did not have a ring on it as per the guide picture. It has a blue handle that is open on the side. I sat at my kitchen desk and opened a drawer. I hooked the open edge of the suction handle around the drawer side edge which me a third hand. I held the phone with one hand and pulled it away from the desk drawer. Once the separation started I could use my other hand with the flat edge of the spudger to complete the separation. Hope this helps.

    emaneht -

    Hair dryer - 1 minute until it’s hot like a fresh mug of coffee. Then as soon as you see the smallest gap, insert a razor blade above the phones jack, I needed to slide it towards the charge port and back. Once it slips in keep it there and use your spudger to enlarge the gap and slide it along the corners.

    Steve Esson -

    Yes, I used the tip of a sharp knife as a pry tool to get me started. Since the screen was cracked anyway I figured I had nothing to lose. It went fine.

    David Heinbach -

    Also tried it with the hair dryer - worked like a charm. 5 Minutes and the phone was open. The whole repair procedure took me about 45 minutes, and was ok. Re-assembling the three display-connectors has been a bit tricky, but with careful movements and taking the time it needs it was not a big problem. New display is very good, phone looks like new :-)

    Christian Woelk -

    My glass was broken and the suction cup wouldn’t hold on the tape. I used a very thin knife an slowly worked between the glass and the phone frame. Please keep in mind that my phone had been run over by a Ford F150, so I really had nothing to lose.

    Michael Cleveland -

    What is unfortunately unclear is just how to 1. apply sufficient force and keeping the phone secure with only one hand, 2. whether this is best done on a table to use its opposing surface to secure the phone.

    The suction cup is a worthless tool because flexes too much to provide a good hold. Mine slipped and popped away three times. -The last time causing a crack in the screen.

    ffissk -

    Glad I read these comments about the screen cracking because I was really trying to force this thing open (with some heat applied already), but it wasn’t budging. Kept applying heat and light force and eventually it started coming apart. The suggestion for placing the pointed end of the spudger in the headphone jack while prying up worked for me and an extra set of hands would have been ideal.

    In the end, with the spudger in the headphone jack, placed a guitar pick in between the screen and the backing and slid it along the bottom left. Left the tip of the guitar pick in to hold the gap and then was able to use the spudger to complete the process as shown.

    Nicholas Anchor -

    Beware! I cracked the screen. Used iOpener, iFixit spudger etc. I managed to get the spudger into the gap by the headset socket and worked my way up the left, when I came to do the right the screen was cracked. I was taking it slow and steady but clearly that wasn’t enough. Be VERY careful.

    James -

    Heat is essential, and take it very slowly. Also take seriously the instruction to open just enough to get the spudger in there—then do the real work with that. The suction is just to get started. I had my son insert the spudger as soon as there was any gap at all, then worked it according to the guide.

    I did this on a card table with a vinyl surface so I could lay the phone down. Then I held the metal frame on both sides while pulling the suction cup—my son having the spudger at the ready. Definitely be patient! I had to restart several times when the suction cup popped off and I accidentally reengaged the clips pressing it back on.

    Matt Burleson -

    I didn’t have any of the heating tools listed here so I improvised:

    To soften the glue I heated water in a pan (not boiling but quite hot).

    I put the phone in a thick plastic bag in the water for about 20 - 30 seconds. (I checked the bag was properly watertight first by dipping it in water – minus the phone). Maybe I was lucky but the screen came away easily doing it this way.

    Henrik Dahle -

    I did the hair dryer three or four times and applied all of the pressure i could on the suction cup and it just wouldn’t budge. My phone is old and i had a waterproof case on it for a long time that really pressed down on the glass so it would seal. I think having that on for three or more years really sealed the glass!!!! Didn’t want to break it so will live with my battery as is…..it last most of the day and i am usually around a car charger or home. Just thought i would add a comment that said man i gave it my best shot and opted not to do it. I really liked the kit though and the tool will come in pretty handy to repair other small things.

    David Petr -

    This was waaaaay the hardest bit for me. Took ages Almost gave up. Allow AT LEAST twenty minutes. Endless patience pulling, then resting for a bit then pulling again. S.T.E.A.D.Y Keep at it long after your inner voice is saying ‘why did you think you could do this. You have never mended anything in your life.’ Then you see the gap and like a steady bomb disposal expert you quietly winkle it apart.

    Cindy Clarke -

    Used heat from a hairdryer, gentle pulling to lift the glass at the position above the headphone jack one to 2 millimetres with the suction cup, then put my thumbnail in the gap and pulled up gently a bit more to fit the spudger, and mainly slid the spudger as indicated around the glass, bottom first, and then sides to within about a centimetre of the top at most, to release the display. I found very little prying is needed. Once a gap of about a millimetre or 2 is created, that is enough to release the display from the adhesive.

    Nando -

    Run a little isopropanol along the seam at the bottom end (I had no syringe, so I dipped the handle end of a spoon in and ran that along). Leave a couple of minutes, then warm with a hair drier. It will pop right off with the suction cup.

    robthebrew -

    It was so much easier after I removed the two screws from step one… LOL! With heat, the screen should come up quite easily. You definitely don’t want to pull too hard. I introduced a small illumination artifact into the screen where the suction cup was attached. I’m not sure whether this was due to the suction cup or excessive heat. I was using a heat gun and trying to warm the screen evenly so it wouldn’t crack. But the temp might have been too high. Next time I’ll just heat the metal around the edges.

    len -

    don’t forget the screws like my stupid self did!!!

    trevorsklar -

    After 45 minutes of using a hair dryer the entire time while suction cupping it some 50 times (kept popping off), I finally was able to create the gap needed to remove the display. I found steady pulling of the suction cup was useless. I had to quickly pull,release,pull,release,repeat and this nudged the tape apart, which had the constancy of dried superglue. Not easy, but this phone was 7 years old,....

    skypilota72 -

    Got this done in about 2 minutes!! I used a space with that had a fan function. Held up my phone to it for a few minutes, also heated up the suction cup. I didn't have extra help, so the whole "pull suction cup with left hand, hold down phone by headphone jack with right hand, and insert pick with ??? hand" wasn't going to work. I was able to hold the phone down while also pulling up on the suction cup all with my left hand (almost like i was peeling the screen up). Stuck a plastic Opening Pick in the small opening, then slid in the flat end of a spudger. I could not rotate the spudger like in the photo (photo 2 of step 6), the screen was stuck on too tight, so I just started sliding the thin end of the spudger around. I held the phone up in front of the heater during this. I also used the pick to cut adhesive along the way.

    Kelly Archer -

  6. rPIMYZHbibAOYHdc
    rPIMYZHbibAOYHdc
    5EBC41yWprchTGbs
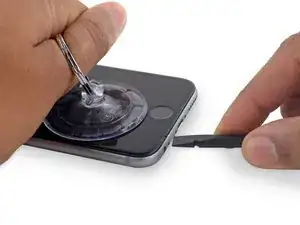
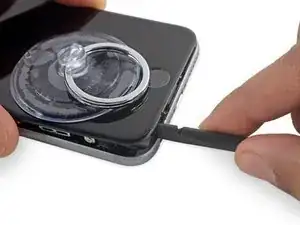
    • An der Unterseite des Displays, direkt über der Kopfhörerbuchse, befindet sich eine Kerbe. Das ist die sicherste Stelle, um mit dem Aufhebeln des iPhones zu beginnen.

    • Platziere die flache Seite des Spudgers in den Spalt zwischen Display und dem hinteren Gehäuse, direkt über dem Kopfhöreranschluss.

    WARNING: easy to stretch/ruin the adhesive

    As you proceed, know that you must keep ALL of the adhesive stuck to the phone. If any stays stuck to display, it can become permanently stretched as you are prying and lifting. Then you’ll need to buy the replacement adhesive, once it’s back in stock!

    Jason -

    If you’re opening the phone at all, you’re compromising the adhesive. There is absolutely no way to somehow open it perfectly so you can re-use it. Fortunately, it’s cheap and fairly easy to replace—and not even that critical on the 6s series anyway, since it’s not doing any real waterproofing.

    Jeff Suovanen -

    I had a badly cracked screen. Packing tape helped the suction cup stick. Heating the phone helped soften the adhesive, and in the end I pried the screen up at the headphone jack with a sharp pointy knife. That helped me get the spudger underneath. Not recommended if the screen is ok, like for a battery replacement, but mine was cracked so I figured I had nothing to lose. Great guide.

    David Heinbach -

    There are two relatively delicate brackets that the two P2 Pentalobe screws screw into. They can be easily bent during this prying open process. I ruined one on my phone and I’m hoping the phone will function with just one bracket.

    dougdalglish -

    +1 on the pointy knife to get the screen pried up. I couldn’t get the suction cup or tape to adhere well enough due to the glass being so shattered. I heated it for quite a while with the hair dryer on high, got a very sharp knife tip under the glass where the “notch” is, and used that to pry upward while another person slid the end of the spudger into the gap I was holding open with the knife. This one step was basically a three-handed job.

    johnjustinirvine -

    Do not insert the spudger at any time directly beneath the home button because it will crack the screen at the point.

    daniel vellone -

    +1 to never trying to lift the screen from directly beneath the home button.

    Romke -

  7. 4ILEXRusvNsRyHle
    4ILEXRusvNsRyHle
    ZCr4FobpXTMhhY1E
    • Drehe den Spudger in eine hochkante Position, um den Spalt zwischen Display-Einheit und dem Rest des iPhones zu vergrößern.

    No need to turn the spudger full 90°. Just turn it a little.

    Martin Born -

    should have a warning to be very gentle when doing this as the screen is glass - i shattered my screen following this guide

    Martin McAnespie -

    Do not twist spudger! Broke my screen. Thanks, iBrokeIt.

    Trevor Snow -

    As others have said, do not twist the spudger. To release the display, you only need to create a gap of a few millimetres. Better to slide the spudger as directed to release the adhesive, bottom left and right.

    Nando -

  8. VOdCwqsQCGqnPWej
    VOdCwqsQCGqnPWej
    VE3WcIEOoas1UGDV
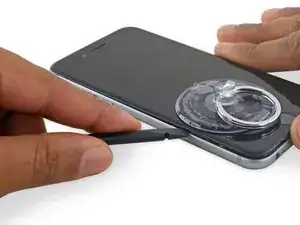
    • Füge das flache Ende auf der linken Seite des iPhones ein, zwischen Display-Einheit und Rückgehäuse.

    • Fahre mit dem Spudger auf der linken Seite in Richtung obere Hälfte des iPhones, um den Kleber zu trennen und die Klammern zu lösen.

    I’ve found it very easy to open the phone with one of the blue opening picks.

    Just slide it along the left and right side of the display.

    Martin Born -

    Excellent idea. No matter which tool you use take your time so not to damage the display assembly further. Even a cracked screen is a great test tool or spare to use while doing other repairs when it still comes on.

    Bryan Solo -

    Do not go into the top left corner too far your screen will crack i learned the hard way

    Kevin -

    Your phone died

    Ipod Touchh0 -

    ok but where js the oart about puttung ut back together? mine diesnt snapinto place,……

    makinfilms -

    Use two spudgers.

    One placed in the original breech position to be used as a wedge.

    The other to get worked around the unit.

    These spudgers are going to get destroyed in the process and will not likely be great for another repair.

    ffissk -

  9. PrYCNWaPE232iSWU
    PrYCNWaPE232iSWU
    gWoFF2NNCNrSLqFJ
    • Entferne den Spudger und füge ihn erneut im unteren Teil des Gerätes ein, genau dort wo du mit dem Öffnen begonnen hast.

    • Fahre mit dem Spudger in Richtung rechte untere Ecke des iPhones.

  10. ZQHs5IDcYElVbat6
    ZQHs5IDcYElVbat6
    Xg6Iu3yX1XjO4UiN
    • Fahre mit dem Spudger weiter die rechte Seite hoch, löse dadurch den Kleber und die noch festsitzenden Klammern.

    This is some important step here I reckon. I didn’t release the clips individually and gradually, so when I pulled, the two halves of the phone separated quite suddenly and the cables ripped in half. Had to order a screen.

    Neil Bass -

    How do I release the clips individually? Is there a good explanation?

    Dan Schwartz -

    i personally use a utility knife and it helps separate the metal bracket that's on the screen from the phone housing

    Andre G. Bashore -

  11. PQVDqVrmZjEyXiRA
    PQVDqVrmZjEyXiRA
    MAPg3UrKPBx2YTxe
    • Nutze den Saugnapf, um das Display zu öffnen, dadurch sollte auch der letzte festsitzende Kleber entfernt werden.

    • Öffne das Display nicht weiter als 90°, da es immer noch durch drei Kabel mit dem Telefon verbunden ist.

    Prop it up on something

    Nick Stine -

    an old iPhone box and a rubber band lightly around the display works great to hold it at 90

    Christa -

    You could use a clock weight with 2 socks wrapped around it and an elastic band to keep the screen at a 90 degree angle.

    AudiRo808 -

  12. BeCr2QfjOsKYedGg
    BeCr2QfjOsKYedGg
    XfGaCXcSuLUBRd4R
    • Ziehe an der Kunststoff-Noppe, um die Vakuumversiegelung am Saugnapf zu lösen. Entferne dann den Saugnapf von der Displayeinheit.

    Pulling up on the “nub” is a futile waste of time.

    ffissk -

  13. lhyFVdXNmHJuvCNC
    lhyFVdXNmHJuvCNC
    RQOYQlb6PVVZfRY2
    rpvcWrYwKQvcyJI2
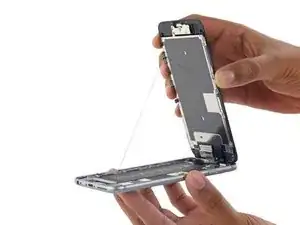
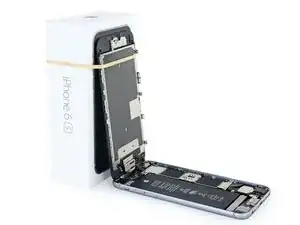
    • Öffne das iPhone, indem du das Home Button-Ende des Front Panels vom hinteren Gehäuse wegklappst und dabei die Oberkante des Mobiltelefons als Scharnier verwendest.

    • Öffne das Display um ca. 90 Grad und lehne es gegen etwas, damit es abgestützt ist, während du am Gerät arbeitest.

    • Befestige das Display mit einem Gummiband, während du arbeitest. Das verhindert ein ungewolltes Dehnen der Displaykabel.

    • Zur Not hilft eine ungeöffnete Getränkedose.

    Smart idea :)

    x226 -

    on the third picture, the screen is opened more than 90 degrees.

    Mirza Zohaib -

    It said about 90 degrees

    Nick Stine -

    Actually it literally says, “Don't open the display more than 90º, as it is still connected at the top by three cables that may break if stretched.”

    David -

    In the second picture I was originally wondering what that diagonal piece of material was. Now that I've done a repair I can say that it's the sticky adhesive around the edge of the phone lifting up with the screen.

    jonl -

    Be careful when separating the halves not to pull off the black tape on the back of the screen half. Mine was stuck to the two halves and I thought it was double sided tape to holding the halves together. It was shredded in separating the 2 halves. It turns out it covers up some kindof of silver paste (purpose unknown) on the back of the screen so I cut a put a piece of plastic film to match it and taped it in place. We’ll see what happens…

    Jamey Gerlaugh -

    can of soup and rubber band did the trick.

    Big Al -

    this is bs as they do not tell you reverse how to snap the fuker back on…..putting it in back on!,!!! the guy asks for points for writing thus? why not make a video you dirk….and how to put it back on….what about the other adhesive?..? you moron it says mothing…anyone else have a link? oi could barely put the screws back in..

    takimg the fuker apart is easy….putting the $@$* together again? humpty dumpty!”!!!

    makinfilms -

    When replacing the screen, make sure to get the top (camera side) lip in first, then work downward along the sides, getting the edge with the home button in last.

    johnjustinirvine -

    i normally use the long pick as a prop like that on a vehicle

    Andre G. Bashore -

    It should be noted that to camera end of the screen body needs to hook under the edge of the body…..the hooks of the screen frame need to be under the rim of the main body and snugged toward the camera end to easily close the cover and have it properly clip. These hooks are not really a proper hinge but clasps that need to be under the rim of the main phone frame/edge!! This way the screen easily will return to its closed state nicely gently snapping into place!!

    BRIAN Lee -

    EVERYONE read this comment. It is KEY.

    Also reverse order for getting screen clipped back in means pressing along the right side top to bottom corner. Then the left. Between that and this comment sandwiches back in like a cinch.

    Aaron -

    I used a full beer can and 2 elastic bands to hold the face at 90 degrees. One elastic at the top and one at the bottom keeps the face still at 90 degrees. This allows you to work on the phone easily. I did not remove the face totally to redo the perimeter glue as I have never dropped my phone in the water over the “long” time I have had it.

    Keith Paget -

    On reassembly, notice that the top does not snap in. There are hooks that must be engaged before levering the halves back together

    Brian Bygland -

  14. UCFVo6ViPYHOBoSr
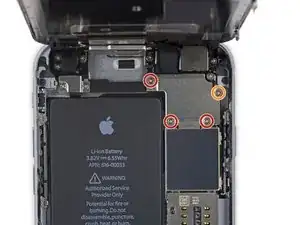
    • Entferne die beiden Kreuzschlitzschrauben von der Kabelabdeckung des Akkuanschlusses. Sie haben folgende Längen:

    • Eine 2,9 mm Schraube

    • Eine 2,2 mm Schraube

    • Achte bei der gesamten Reparatur darauf, dass deine Schrauben geordnet bleiben und sorge dafür, dass sie wieder genau an ihren ursprünglichen Platz zurück kommen, damit dein Smartphone nicht beschädigt wird

    In order to put the correct screw back where you took it out mark the head surface and a small dot beside the hole with a pen. Use coloured pens if you want the exact location for each screw/hole. This goes for steps 17, (23) and 29 too.

    lionno1 -

    Please! Please! Please! Invest in a Magnetic Project Mat or its equivalent from fixit. It will assist you with completing your repair.

    Ian Baldwin -

    I just taped down a 8.5 x 11 white piece of paper on my desk and drew a rough image of it, then ‘taped’ the screw I removed to the “image” on paper. It worked just fine. (My first time ever opening an iphone, so give it a shot!)

    italianchick99 -

    If you missed it from the beginning (like I did) it’s the #000 Philips for all screws except the Pentalobes.

    Max Cox -

    if you get a plastic ice cube tray, and a fine marker pen, text the sizes on each cube compartment as you follow the guide, also stops the screws getting lost

    Brendan Cranny -

    used sheet of A4 paper and bluetak - stick screw in bluetak, write location & size on paper

    Kev Salmon -

    mine is missing a screw!!! this is bs! this was mynmithers ohone nonone ooened it….one screw only…im liesed offf

    makinfilms -

    For some odd reason the screw “One 2.2 mm screw “ orange circled seems to be stuck and can not be unscrewed.

    Ahitagni Mandal -

    that could be because of the threaded part might have been broken (i've run into that a few times) never fun but pretty easy to work around it if needed

    Andre G. Bashore -

    Take a picture of the opened phone. Print it out. Put double sided clear tape over the picture of each screw. Stick the screws to the tape on the picture where they belong.

    Jeffrey Smith -

    Rounded corner, both here and Display cover, takes the Longest screw.

    David.

    David -

    For removing screws, I used a piece of paper and sketched the screw locations and screw sizes in the appropriate pattern for each step I was working on removing screws. I folded clear packing tape in a loop so some sticky area was on top for each screw so they did not fly away when the hair dryer was on or in case I knocked the paper while working beside it. This kept all the screws in an easy pattern with descriptions for later install. Worked slick.

    Keith Paget -

    Ordered a replacement kit, opened my Iphone 6S, got to this step... surprise, my OEM battery connector is at the TOP ! I am stuck, what now?

    Michel Lavallee -

  15. Tkg3BNWC4uLteBVu
    Tkg3BNWC4uLteBVu
    OCYCpUjUcUb4fpD5
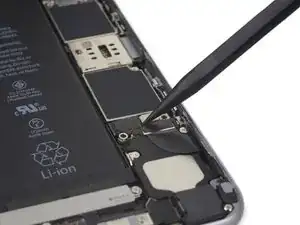
    • Entferne die Kabelabdeckung des Akkuanschlusses.

    Little bit of adhesive holds this down- you do have to use the tiniest bit of force.

    Edward Coe -

    Pay careful attention to the orientation of this plate so that when it comes to re-installation you put it back the correct way. Sounds obvious but I’ve found it inverted in one customer’s phone, which led symptoms of charging failures and repeated spontaneous restarts.

    Jonathan Bradley -

    that's something i've never heard happening before wow

    Andre G. Bashore -

    The replacement battery’s connector is just slightly thicker vs the original. When I put the screen back on (also a replacement part from Ifixit) I get a blue shadow because the battery connector is putting pressure on the screen.

    steven pruchniewski -

  16. aFOebibjGPDG3kKj
    aFOebibjGPDG3kKj
    bmSuTNCd2VYuDBgj
    JUQVpTsWOMexRdXU
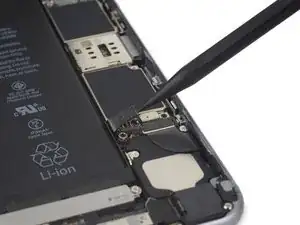
    • Heble den Akkustecker mit dem spitzen Ende eines Spudgers vorsichtig von seinem Anschluss auf dem Logic Board.

    Be sure not to skip this step. It is crucial. I have had many repairs where the screen will not light up after the repair if the battery had not been disconnected and reconnected.

    Andrew spoelstra -

    Thanks for the tip, Andrew.

    William Turner -

    It should also be mentioned, DO NOT USE A METAL SPUDGER. You could short the battery to other nearby metal parts. I've done that, the battery clip arced to the metal cover on some of the logic board chips, and my phone wouldn't power back on for 3 days. They should put a caution caption on this step. I've had this happen on a 5S as well.

    Frank -

    Thanks for the tip, Frank.

    William Turner -

    SERIOUS WARNING!: During *reassembly*, you should NOT reconnect the battery connector until the VERY LAST step (upon reassembly!), as many people, including myself, apparently have smoked (burned, destroyed) the main Logic board. This happens when you reconnect the LCD/digitizer assembly FPC cable. ifixit should modify this instruction to be very explicit about this!

    enoughstatic -

    It sounds like several people, including myself, had trouble charging the new replacement battery past about 10%. This ended up being due to the new battery not having a non-conductive insulator. The way to solve this is by adding a small piece of electrical tape to cover the battery connector before screwing in the battery connector bracket over it. You may want to do this on the first go-around.

    If you do experience that problem, I found the answer here and it worked perfectly: iPhone battery not charging after DIY battery replacement. Why?

    Heather Pastushok -

    Thanks to Heather Pastushok (and Behrang Mohajer at “iPhone battery not charging . . .) for this important detail. My iFixit battery came with a thin layer of black foam insulation on the top surface of the battery connector, but even gentle pressure from a blunt plastic tool (pushing the connector in place) scraped an exposed spot. A carefully trimmed piece of black electrician's tape provided peace of mind. The iPhone 6s is good as new with the battery now at 100%!

    Robert Dering -

    To reduce risk of battery arcing , as soon as the old battery connector was detached, I wrapped it with insulation from connection all the way to the battery body. Did the same with the new battery to eliminate concerns about shorts while checking fit position to assure the connector would match up with the receiver. Only removed the insulation after all other connections had been restored, so plugging in the battery was the last step before closing the case.

    Robert Dering -

  17. EmMxeVeeFdYTQXiE
    EmMxeVeeFdYTQXiE
    URwJFPnPqkwAgWJ3
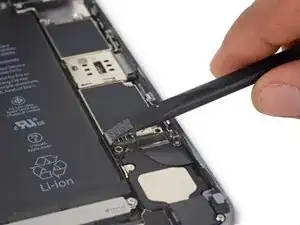
    • Drücke den Akkustecker vom Logic Board weg, so dass es während der Reparatur nicht zu einer unbeabsichtigten Verbindung mit dem Anschluss kommt.

    If you remove the grey bar with the word “TAPTIC” next, removal of the battery adhesive is much easier. It can be pulled straighter back with less chance of tearing. Here’s an image with the securing screws identified.

    If you securely anchor the screen to a can of soup, it is not necessary complete step 16 Front Panel Assembly. I was able to remove the two bottom (1.2 mm) screws and the 2.8 mm screw, but could not get the upper (1.2 mm) screw. I was able to remove the old battery with the Front Panel Assembly left in place.

    Edward Dziuk -

    Amazing tip Edward, I followed your tip exactly and agree to definitely remove the “TAPTIC”

    italianchick99 -

    Hi what it is called black cover between battery connector and sim card tray? Thanks

    Rajendra -

    How in the world does one reapply the edge adhesive without making a mess?

    gary -

    I misread the directions and pulled off the whole large sheet first. I was able to align the bottom of the smaller sheet into the edge of the phone and get the adhesive into the right area. It was a little tricky but once it dropped down it was in the right place. I would have liked an indication of which was top and which was the bottom of the adhesive. The corners seemed slightly different and I aligned the bottom ones carefully.

    Diana Riddle -

    the new battery from ifixit came with a dented connector and wont connect to the logic board. What do I do?

    Adam Frederick -

    are you suuuuuure you didn’t dent the connector? i know if i had received a battery with a dented connector, i’d immediately contact the seller so you probably dented it yourself and now you’re trying to trick all us but we’re on to you.

    unibody deluxe -

  18. X3YWxpBc3PiXXvuS
    • Entferne die folgenden vier Kreuzschlitz Schrauben, die die Kabelhalterung befestigen:

    • Drei 1,2 mm Schrauben

    • Eine 2,8 mm Schraube

    Thank you for this great guide!

    I was able to skip removing the display assembly and logic board steps and lay the speaker upside down on the bottom edge of the logic board without putting undue pressure on the antenna cable making this a much easier and quicker repair for me. If you choose to leave the display assembly connected, I recommend using a rubber band to hold it to a box of similar size at a 90 degree angle to prevent damage and stress to the attached cables.

    So, the steps I skipped were Steps 16 through 34 and Steps 37 through 45.

    scentaur -

    You need to remove the screen completely if you want to replace the adhesive gasket around the outer phone edge.

    Glen Paetz -

    The 1.2mm screw in the top left corner is refusing to come out, any help?

    Harry Allinson -

    I’m also having this issue now, what did you do to get the screw out?

    Belmin Husanovic -

    Sounds common but no solution? I keep working at it but no luck. Anyone find a way in the last few years?

    Kurt Mickelson -

    There’s no trick… Make sure you’ve got the right driver, press down HARD, and crank it. If it’s stripping, check your driver and consider moving up one size. Resources: Screwdriver Best Practices & How to Remove a Stripped Screw - Good luck!

    Jeff Suovanen -

    Bullshit theres no trick, use a small magnet, or whatever size u have,

    mxcombust -

    why does the battery fix kit not include the #00 bit needed to unscrew all 3 1.2mm screws?!?! !#^&@@ off.

    robertdjclark -

    Either a #00 or a #000 bit should work fine here. Some #0 bits will also work if the point is fine enough. Same goes for a lot of JIS bits. As long as it doesn't strip or slip, you're good.

    Jeff Suovanen -

    My kit's screwdriver failed about the time I got to the last few steps in this tutorial. I had a cheap precision set with a #000 bit but that refused to seat in the screws. I went to Home Depot, bought a lifetime guarantee Husky precision set with #0000 through #0 bits and that worked beautifully on every screw.

    David Shaddock -

    The screwdriver in my kit doesn't remove the bottom two screws! any reason why?

    anujfolsom -

    I actually followed all the guide but isn’t the front panel disassembly skippable? And if so what are the benefits of removing it? Cause i had quite a hard time putting back in the connectors of the 3 flex cables.

    GiovanniB -

    You need to remove the screen completely if you want to replace the adhesive gasket around the phone’s outer edge.

    Glen Paetz -

    I have the 6s from Dubai. the top left screw is different with the rest. I am stuck on this screw. i am clue less why this top left + screw.

    Anyone have the same issue?

    Evander Lorenz -

    A precision screwdriver set is a wise investment for doing any of this work. I got a set from iFixit that is very well machined. Don’t expect the cheap drivers with kits to last more than one disassembly-assembly, if that! Also don’t keep mangled bits or drivers…throw them out!!!

    Peter Bovey -

    what crews  should I use in this step PH000. OR Y000 OR P2 Plz help me

    mshary alzhrany -

    The kit provided with the replacement Battery of iPhone 6s does not include the right bits to remove the three 1,2mm screws! I had to remove it without removing the display.

    Matthias Wagner -

    I too experienced a problem with the size of the screwdriver here (supplied in the iFixit kit.) My phone also had a 5th screw right in the center of the plate - another 1.2mm. I removed and replace it without problems.

    Scott Young -

    @scottvyoung Sounds like you’re working on an iPhone 6. These instructions are for the 6s.

    Jeff Suovanen -

    Screws are very small and very difficult to put back in!! Lost 2-3 screws

    Put phone back together and of course doesnt work Waste of Money!

    Thomas Kintigh -

    I purchased a “screw set” for an i-Phone 5 and have slowly been cannibalizing it whenever I lose a screw. It has been invaluable and the set includes enough screws that I have been able to cover all that have been dropped and lost for 3 i-Phones now. Using a magnetic mat has also limited my screw loss considerably! All of these items were purchased through IFIXIT at very reasonable cost. Thank you IFIXIT!

    Peter Bovey -

    The ifixit kit supplied screwdriver for the display cable bracket did NOT fit. (disappointing) So, I used scentar’s (comment above) method of a large rubber band wrapped around a book weighted kit box to hold it at 90 degrees. Leaving the screen attached and then removing and replacing the battery.

    laffinbuz -

    I had a problem reassembling the iPhone, my touchId wasn’t working any more even if the home button was working correctly. I don’t know why but loosening these 4 screw a bit made it work again. If I tight them again it doesn’t work. Maybe this can help someone.

    Alex Mufatti -

    @alexmufatti I had the same exact issue and luckily came across the same solution by trial and error. However a few weeks later Touch ID suddenly stopped working again and I think it’s the same issue. I was hoping somebody came across a more permanent solution.

    Michel Chemas -

    I was nervous not following this guide step-by-step, but as others mentioned I did not have the correct ‘bit’ size to remove the 3 screws circled in ‘red’ in the above diagram. I skipped steps 17, 18, 19 BUT used the ‘tip’ in step 11 to prop the front screen without removing the front display completely and I was still able to replace battery.

    italianchick99 -

    how to measure the screw? from the head or from under the head?

    Balieltello -

    Measurements in the guide are for the entire length of the screw, including the head, as measured with an ordinary digital caliper.

    Jeff Suovanen -

    I was unable to remove the display cable bracket. Therefore I was unable to remove the display, which meant I couldn’t replace the screen seal. ☹️ The small Phillips bit seemed too pointed so it couldn’t get into the screw deep enough to grip. The second Phillips bit was too big. It makes me wonder if I got the correct tool kit with my battery replacement kit.

    Mark Morris -

    The display does not have to be removed! If you secure it in place with a rubber band as advised (actually one at the top and one at the bottom works best - stops the bottom half of the phone sliding towards you) , it will quite happily sit there while the battery is replaced. It’s definitely better not to have to remove and reconnect those display connectors!

    J-P jpfromadelaide -

    I’ve done this with an iPhone 5 and an iPhone 6S. I did not remove the display either time; I was afraid of damaging something unnecessarily. It’s definitely not necessary to remove it! I had an extra set of hands and eyes to help me be careful, but if you get the battery adhesive strips off cleanly, it’s easy to leave the display on.

    Matt Burleson -

    I skipped 17 to 22 as I was not redoing the perimeter glue. Worked well for me, except the phone will not be water proof.

    Keith Paget -

    no need to remove the display. I did not even secure it..just did the replacement carefully. All worked out well. Also unless you are planning on submerging the phone in the water replace the perimeter glue. Otherwise it works just fine with out it.

    Igor Kapitanker -

    Perfect. I followed the instructions and it worked to a "T". For the critics who don't know, the screwdriver handle is magnetized and will hold the tiny screws in place while you remove or insert them. After the battery replacement the phone seems to be going through some type of setup. I'll wait and see what happens after its charged to 100%.

    Bob Harris -

    The "Three 1.2 mm screws" seem to be particularly fragile either that or the PH00 and the PH000 are the incorrect drivers - this part of the guide should be clearer on what driver should be used as every time I touch these screws I seem to strip them 😩

    Hope this helps

    Regards

    Lewis Dexter Litanzios -

    IMHO this is not neccessary.

    A Guy Called Guy -

    I took A Guy Called Guy's advice and skipped this entire Front Assembly Step and went straight to Step 23.

    Kelly Archer -

  19. Q6DLMHNJxFZSLvIV
    Q6DLMHNJxFZSLvIV
    dW3Skxs2Qsklb1cU
    • Entferne die Abdeckung der Displaykabel.

    What can I do if one of the screws get stripped?

    Zoe Shadzad -

    Mine has an additional 1.2 mm in the center of the cable bracket.

    Romke -

    IMHO this is not neccessary.

    A Guy Called Guy -

  20. DFrxB3OWDCFJlMuW
    DFrxB3OWDCFJlMuW
    efDnQ5L4xFYarO2k
    • Löse mit dem Spudger oder einem Fingernagel den Stecker des Frontkamerakabels von seinem Anschluss vom Logic Board, indem du es gerade nach oben hebelst.

    Note carefully the order that they are removed.  My new display had them in the WRONG order and I spent about 2 minutes trying to figure out what was wrong until I compared the new screen with the old screen and saw that they were in wrong sequence.  Fortunately they were relatively easy to fold out of the way and put them in the right order.  After that they popped right into place.  The new cables don’t have the “fold” yet so display had to be held at 90 degrees until all three were installed and the cover reattached.

    David Rogers -

    I pop up these screen connectors using my fingernail. After doing a lot of repairs, this is the easiest and fastest way to get them loose.

    Kenneth Hilstan -

    pad under earspeaker is lost, where to buy?

    Balieltello -

    For me, both the camera flex cable and the digitizer cable from step 20 came out together. Made me wonder in step 20 where was the cable I needed to release :-)

    Jean-François Schmitz -

    Are there any tips for plugging the connectors back in, besides don’t push on the center of the digitizer? It felt like I could really mess up the pins if they weren’t aligned correctly and I tried to push them in too firmly.

    Diana Riddle -

    IMHO this is not neccessary.

    A Guy Called Guy -

  21. 2C6YWNRbN1xEP6AN
    2C6YWNRbN1xEP6AN
    C3JebmxAcjefVgvo
    • Löse den Stecker des Digitizerkabels vom Logic Board, indem du es gerade nach oben hebelst.

    • Wenn du das Kabel wieder verbindest drücke nicht in der Mitte des Steckers. Drücke erst an einem Ende, dann am gegenüberliegenden. Beim Drücken in der Mitte des Kabels kann der Stecker verbiegen und beschädigt werden.

    I can't seem to get the digitizer cable to snap back into place. Any suggestions?

    gbmazur -

    Yes--if you, like me, could not get the digitizer connector to seat, you've probably got confused on the reassembly order. I had to remove the EMI shield (seven screws), and reinstall it ON TOP of the big flap tongue that comes with the new digitizer, rearranging the order of the connector tails. Note that one of the connectors is a bit shorter than the other, and one of the receptacles on the iPhone is shorter as well. Make sure you're laying down the tails and connectors in the right order when you reassemble! The display data cable--sideways to the others, toward the outer edge, goes first. Then the longer connector, and finally the shorter one. When they're seated, they're seated, and you'll be sure of it.

    David Shaddock -

    Patience. I had trouble but after some time got it back in. Didn’t have to rearrange anything like above ^. Maybe the design was changed.

    Cbirdsey -

    I have no audio through the earpiece after completing the process. I have removed and reseated all cables several times. What’s wrong?

    Tobin Antpusat -

    Same problem…. any suggestions?

    Antonio Sacchet -

    My touch id does not work anymore after battery replacement. Can it be that its due to badly connected digitizer cable to connector? Everything else seems to work perfectly. Thanks

    cyp -

    I can get one end of the thing to fit in to place, and then when I move over to push the other side down, the first side pops back out.

    Samuel Martin -

    I've got the reassembly order backwards and installed the battery first, and the digitizet seccond. I think I fried something, because smoke came out of the socket. Can anyone tell me what needs to be replaced?

    Christiaan Erkelens -

    IMHO this is not neccessary.

    A Guy Called Guy -

  22. ouGNonyQp2fylirv
    ouGNonyQp2fylirv
    gFMNQTROC11nAGmb
    • Der Akku muss abgetrennt sein, bevor du das Kabel in diesem Schritt ablöst oder wieder verbindest

    • Löse den Stecker des Displaydatenkabels aus seinem Anschluss auf dem Logic Board, indem du es gerade nach oben hebelst.

    I notice there are 3 flex cables, does this disassembly guide apply to the verizon version of iPhone 6s? I don't want to order the wrong digitizer screen for my new and improved iPhone that i somehow managed to crack the screen on.

    Bailey Duncan -

    There are four cables to disconnect here to complete this process, at least on my phone. The replacement screen also had 4, so no problem.

    Scott Young -

    My replacement screen had only two connectors while the old screen had 3. I sent it back for replacement. Not sure what went wrong here, because everything else fit perfectly. So what model could this replacement screen have been intended for?

    Martijn Vos -

    I am having a hard time reattaching the LCD cable. Is it possible I bent the connectors? Or possibly the gaskets around it are interfering? I’d like to just pull all of that waterproofing gasket off! >:(

    Amanda Cooper (Doula) -

    Did you end up going this? My screen is black so I'm trying to figure out what i did

    Alex Tanner -

    I neglected to detach the battery before taking this step and upon reassembly I have no display. What might be my next step to repair.

    Dennis Gagomiros -

    You can try reseating the cables, but the likely answer is that your logic board’s backlight circuit is blown. If you power on your phone and you can see an image on the display by shining a bright light on it, your backlight circuit is toast. This is a common repair and very fixable, but requires microsoldering equipment and expertise. It’s not a DIY.

    Jeff Suovanen -

    I made the same mistake and I'm wondering if you got a fix for it? Is the damage done on the screen assembly or phone itself?

    goesprotocall -

    My screen replacement only comes with two flex cables but all of the videos are showing three. It is not working to connect the flex cables to the connectors

    cellabella1 -

    The third flex cable would be for the front-facing camera, sensors, etc. If you bought a display that doesn’t include those components, you’ll need to transfer them to your new display first, and then you’ll be able to install it and plug everything in. The instructions are over here. Good luck!

    Jeff Suovanen -

    The important warning about making sure that the battery is disconnected may be more beneficial at the BEGINNING of these instructions.

    ffissk -

    I mean if you follow the guide it literally says to disconnect it first. Step 15

    Nick -

    There are four cables to disconnect here to complete this process. My replacement only got 3, what should i do?

    Vincent Ladida -

    IMHO this is not neccessary.

    A Guy Called Guy -

  23. U2JJTtEXgAuBqOlJ

    If you're replacing the adhesive, be sure to check the two tabs on the display that receive the pentalobe screws before setting the display on the new adhesive. The tabs on my display were bent inward slightly—just out of reach of the pentalobe screws. I didn't bend these out before setting the display and was forced to re-open the display to adjust them, ruining my carefully placed adhesive.

    cdinger -

    There is no need to remove camera or the logic board if all you want to do is replace the lightning assembly. Leaving things in place will save you a number of steps. Proceed directly to Step 35 and save yourself all this work.

    Ira Goldman -

    Also read comments on step 37 as others have also pointed out that there is no need to pull logic board and you can skip those steps mentioned.

    Ira Goldman -

    Unless you are replacing the speaker you can skip to step 34 as there is no need to remove the logic board.

    Bryan Solo -

    My replacement display was not functional, but I didn’t test it until after my adhesive was already applied. Might be worth double-checking the replacement screen works before applying the adhesive at all. (though I’m glad I tried it before closing it up!)

    Ben -

    When reconnecting to the logic board, reverse the order, so display first, then digitizer and finally camera. The front pannel slides into small edge of the backchannel. So start at the top when you put front and back together.

    Joep Willemsen -

    be sure battery is disconnected before reassembling the display —in case you reconnected it to position battery

    Christa -

    If reapplying adhesive, I would strongly recommend that you wait until you are reassembling the phone. Otherwise, trust me, it gets really sticky and limits your mobility around the phone. I had it all over my fingers by the time I finally got the old battery out and the new one in.

    Justin Tilghman -

    Removing the battery was a challenge as the old adhesive snapped before it came out so I had to use a hair dryer to warm the adhesive before slowly peeling the battery off. I still manage to puncture the batter and nearly had a fire. When inserting the new battery I didn’t leave enough room for the connector to fit beside it so I had to pull it off, plug the connector into its port, then insert the battery. I think the instructions should warn you to leave enough room for the connector to tuck in beside it.

    The kit came with a new adhesive gasket but I could not find the instructions on how to install it. But after 45 minutes I had it done and my iPhone 6S is back in working order. Don’t forget to ‘hard’ reset the phone on start up, run the new battery all the way down. Otherwise this is a very good value time and money wise.

    Ramon Pabalan -

    I preferred not to use the adhesive edges around the phone, as this makes replacing the battery in future more time consuming. My iPhone works fine without the adhesive.

    Mark Morris -

  24. nUZDVH56J6lqOyDH
    • Entferne die 1,7 mm Kreuzschlitz Schrauben, die die Home-Button-Einheit befestigen.

    • Ziehe diese Schrauben nicht zu stark an, sie könnten sonst die Vorderseite des Displays beschädigen.

    When reinstalling, I had to experiment with how tightly to turn the screws, I first turned them all the way in but the home button wouldn't 'click' at all then, so I loosened the left most screw a touch and now it clicks and feel perfect. Not sure which screw is technically the best to adjust.

    amadscientist -

    When reinstalling the screws be careful not to over tighten and strip the holes.

    John Livingston -

    INCOMPLETA

    Manca tutta la parte che riguarda l’auricolare (altparlante o earpiece) che porta con se il rivelatore di prossimità e il microfono ambientale. Manca la descrizione delle plastiche da recuperare per essere riportate sul nuovo display. Manca la parte di separazione del touch controller dl backframe metallico (anch’esso da svitare e non menzionato in questo articolo…)

    Insomma un tutorial incompleto e anche inutile, a mio avviso.

    Mario Di Stefano -

    When i assembled my new homebutton, I couldn’t mange to make it work properly. The screws, as described earlier, had to be adjusted but even this wasn’t enough. Once I put the iPhone case together and tightened up the screws it would push the metal cover all the way so the button wouldn’t click. After trying multiple screw settings I came to a somewhat unorthodox solution. I placed a piece of folded paper under the left corner of the metal cover. Now it wouldn`t press the button anymore and the paper keeps everything in place until fully reassembled.

    max -

    Is this step necessary if you weren’t able to make the fingerprint recognition feature ever work in the first place?

    Neil Bass -

    Hi Bub, you look marvelous. Guess what? your ifixit screen  didn’t come with a button so ha ha, it is necessary. But you my man are lookin so fine. Bye.

    Neil Bass -

    Totally necessary, as you found, but even if you had a new home button, it wouldn’t work, because the Secure Enclave information that encrypts the storage is stored within that assembly, so if you put in a new one, you’re not getting to the storage on the device anymore.

    johnjustinirvine -

    Yeah, super light on the screws here when you put them back in. I have a bit of stage lighting right over the screw area, so I’m thinking that’s coming from being put in just a tiny bit too tightly.

    johnjustinirvine -

  25. aLdRY2dGdyDSoy2M
    aLdRY2dGdyDSoy2M
    HCuSprpFGtYAcaG2
    hNgxHDoTFr2cei1s
    • Hebe den unteren Teil der Home Button Abdeckung an, bis die kleine Klammer auf der rechten Seite sich löst.

    • Ziehe die Home Button Abdeckung unter der EMI-Abdeckung heraus.

    You have to lift it just a bit over the grey plastic knob on the left side.

    Martin Born -

    My Home-Button was kind of “fixed” and didn’t “klick”, after I’ve reattached the Home-Button-Bracket and fixed the screws. Solution was, to slightly bend the bracket “away” from the Home-Buttons klick-dot.

    Robert Hoppe -

    Thank you! Just a comment: when reassembling, I found it easier to slide the bracket from the bottom up (not from right to left) as the third image here may imply.

    jaderzelaya -

  26. 3u2lIbmjHYwdT1Sh
    3u2lIbmjHYwdT1Sh
    1Ofw5epCCr3HRpDO
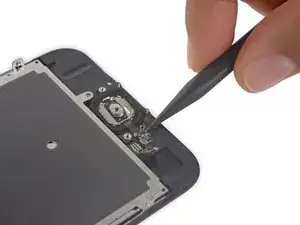
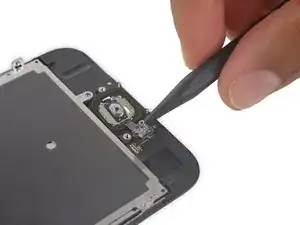
    • Nutze einen Spudger, um den Anschluss des Home Buttons zu lösen, welcher sich auf der Rückseite des Displays befindet.

    Make sure you're not heating it before you've popped the connector from its socket or else the socket might come loose.

    Sam Decrock -

    You may need to use 2 picks/spudgers to do this as I have found that the socket and connector do not disconnect so easily. Place 1 on the socket and use the other to disconnect the connector.

    Bryan Solo -

    Thanks, Bryan this helped a lot.

    Antonio Gomez -

    Yes, I was glad I was changing both screen and battery so had two repair kits and two picks. It helped to separate that connection carefully with two tools.

    Diana Riddle -

    When I did this step, the home button connecter tore right off at the bend in the thin ribbon. Not sure how - I got through other somewhat delicate steps in this project without damaging anything.

    Anyway, phone won’t even power up now (I put it back together hoping that I could navigate around the interface somehow without home button).

    New home button assembly on order from iFixit.

    John Matz -

    I think it broke because there’s some adhesive right under where the thin neck joins to the casing. I did the same!

    Chris White -

  27. khVJ16SAljiyePAu
    khVJ16SAljiyePAu
    uiJuGt46BBWjr1xi
    • Die Gummidichtung um den Home Button ist sehr dünn und reißt leicht.

    • Wende ein wenig Wärme an (mit einem iOpener, einer Heißluftpistole oder einem Haartrockner), um den Kleber aufzuweichen, mit dem die Dichtung des Home Buttons festgeklebt ist.

    • Drücke vorsichtig mit der Fingerspitze den Home Button von der Vorderseite der Displayeinheit her nach oben. Drücke fest und gleichmäßig, damit sich die Gummidichtung des Homebuttons langsam vom Frontpanel löst.

    What happens if the gasket ends up as toast? I had to re-assemble without and hope for the best.

    Todd Strack -

    I think its main function is to keep moisture and dust out. Short-term probably nothing bad will happen; long-term, I’d guess you might have higher risk of contamination or corrosion on internal components.

    Jeff Suovanen -

    The video shows the the tech heating the bottom at this so it releases easier. I heated mine with a hair dryer. Came off fine.

    Patrick Egan -

    Also remember to check the front and make sure any tape you applied is not covering the button. Doh!

    Steve Esson -

    I also used the pointed spludger to gently pry up the rubber gasket after heating the backside with a hairdryer

    robert langley -

    When reassembling, my button has become somewhat less responsive. The finger print works fine and the button clicks when pressed. But sometimes when clicking, it responds immediately, but other times I have to continuously press the button or press really hard. Any tips or ideas what I might have done wrong??

    zed0132 -

    Slow and steady is the name of the game here. Heat it with a hair dryer, push the home button up through the bottom (as if you were pressing it, just a little harder), and keep heating it while you have it stretched. Eventually it will sort of snap out on one side, and then slowly work the pressure from underneath around the edge.

    johnjustinirvine -

  28. 1CEVGy5y2EJJNIN2
    1CEVGy5y2EJJNIN2
    Xj1eEtDkWVMNQdvb
    • Löse sorgfältig das Flachbandkabel des Home Buttons mit der Spudgerspitze von der Rückseite des Displaypanels ab.

    When replacing the ribbon cable assembly, make sure to get the “blob” correctly centered over its two pin holes. One is ringed with metal, and one isn’t. When you have the blob over the pin holes, it helps to align the connector correctly. Once the blob is in place, push back the edge of the connector facing up toward the base of the screen until it snaps into place behind a little plastic ledge just above the blob. Once that’s done, reconnecting the top cap is much simpler.

    johnjustinirvine -

  29. jNPYjQFKlTqpepEi
    jNPYjQFKlTqpepEi
    PLgORUJffKyaXNhO
    • Entferne die Home Button Einheit.

    If you’re purchasing a replacement front panel part from ifixit, you can stop here. The remaining steps remove parts that are included with the replacement assembly.

    John Livingston -

    I have two i phone 6s both screen are broken,so can you please replace them with any type of i phone….

    Please..

    Thank you.

    Lokesh pandit -

  30. JSUFKab5MLPVMlXD
    • Nur das Display bleibt übrig.

    Thank you for a thorough and complete guide. The different views of each step helped tremendously. My daughter appreciates it as well, because that means I didn't have to deprive her of her phone for too long.!

    Todd Chafin -

    On reassembly two very important things...1 - remember to remove the blue/green protective plastic cover from the back of the new screen before putting it back together. You will notice the tab sticking off to the right side of the screen near the volume buttons. 2- take special note of how the two tabs sticking out at the bottom of your replacement screen on either side of your home button. They should be close to vertical or perpendicular to the screen face or they won't be close enough to start the pentalobe screw when finishing the reassembly. Tried to post picture but couldn't figure out how to. You can do this! ;-)

    David Althaus -

    also dont forget to remove the front camera, some digitizer kits donty include them

    Thomas Judd -

    Install the new adhesive seal (the one you peeled off in step 3) before you install the new screen. I forgot and it was tricky to line up with with all the connectors in place.

    Jim Wong -

    Yes, REALLY don’t forget, when you’re done with the home button removal to THEN also remove the front camera. For this, please follow this tutorial: iPhone 6s Frontkamera und Sensor Einheit ersetzen

    samuel hugli -

    I've replaced the screen on a friend's 6S but now it'll only turn on by booting/ rebooting - it won't turn on from standby using the power button/ for incoming calls. I've updated to the latest version of iOS but the issue is persisting. In difference to the guide, I also had to move the camera assembly from the old screen. Has anyone had a similar issue?

    Kevin Rennie -

    I recently replaced the whole casing of the iPhone 6s and afterwards, I just wanted to put the screen back in and then one of the three connectors on the logic board broke. So my iPhone 6s looks brand new, but don’t works anymore. Very Nice….

    Completely Failed

    Moritz Holzleitner -

    This is the third screen I have replaced. This one on an iPhone 6S. I always lose a screw! however, it was only one of 4 holding a cover plate on. Replaced new home button with old one. touch id works great. Daughter very happy!

    huttmayo -

    Thanks very much. I thought my phone was beyond repair, the frame was very bent so I accidentally broke the screen. But having my phone with a cracked screen is better than my phone not working at all.

    Jack Batten -

    Horrible time, glue sheet wasn’t the right size had glue stuck everywhere. Had to scrap it.

    mdanihy -

    I’m really sorry to hear of the bad experience! If you purchased the part from iFixit, please contact our customer support and we will get it sorted for you!

    Arthur Shi -

    Top notch guide. Did this as our first iFixit guide, to breathe new life into the 6S. Son did it with me watching (nervously making comments) over his shoulders.

    Thanks to all who created and supported this guide.

    Habel -

Abschluss

Arbeite die Schritte in umgekehrter Reihenfolge ab, um dein Gerät wieder zusammenzubauen.

Jeff Suovanen

Mitglied seit: 06/08/13

407156 Reputation

137 Kommentare

Muito bom. Já aprendi muito consultando os tutoriais da IFIXIT. Parabéns.

Eder Macario -

Solution worked very well - a couple of comments: 1. With a cracked screen the suction cup doesn't hold very well, I was nevertheless able to get the screen corner off with some heavy prying above the headphone jack as suggested in step 4. 2. In the replacement part I received, the order of the digitizer and camera cables was reversed, I had to tuck the digitizer cable back under the camera cable to get them down in the correct order. Great pictures and guide from ifixit.

stread777 -

Agree with both points. The guide is also missing steps (or mention of) moving the camera/sensor/etc to the new digitizer. I didn't think about it until I wondered why the old screen had 3 cables and the new one only had 2.

nerdatheart -

Thanks for the tip, I had the same issue with the suction cup not working on the cracked screen. Applying clear packaging tape over the screen helped but it still didn't come apart. Ended up using a blow dryer on the highest setting to help melt the adhesive around the bottom of the phone (being careful to not let it heat up too long) which eventually made it possible to wedge the spudge inside.

The guide and photos were great along with the replacement part from iFixit. Probably the easiest screen replacement I've done so far.

gotchay -

Try putting packing tape in the center of the screen. This will keep the glass chunks in and the suction cup will stick to it.

Michael St. Hilaire -

I jus replaced the display of my iPhone everything works correctly except for the light sensor, the auto brightness setting is now useless, everything else (camera, speaker, and such) works just fine. Any ideas why?

Enrique Gutierrez -

You may have not properly seated the proximity sensor, check to assure all plastic label stickers have been removed from the from and that it is properly seated. If it is damaged you will have to purchase a new flex.

Alec -

you may have bent the ribbon cable on accident, those parts are very inexpensive and easy to replace.
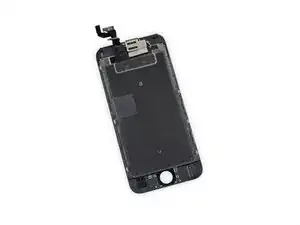
Michael St. Hilaire -

Stread777 I found that using a wide clear packaging tape adhered to the display that is larger that the suction cup allows you to maintain suction and pull the display up to insert splunger.

I also had to reroute cables

stolz9708 -

excellent guide 10/10

Margaret King -

If your display assembly came with it's own "new" home button installed and the target broken phone has NEVER used the fingerprint function...can you use the one on the new assembly without iOS complaining?

William Turner -

I really liked this guide but what i did not like was that it did not show how to remove the metal part from the screen, nor the speaker and camera. If possible please add this! Otherwise great guide as usual on ifixit!

Johan Andersson -

You skipped the introduction, didn't you? :) The guide you want is right here.

Jeff Suovanen -

I have order several different iPhone 6S screens from my supplier. When testing the screens I noticed without any other components plugged in (proximity sensor) just the screen I can use touch unless I cover the ear speaker area. The display doesn't dim which I wouldn't expect it to without the proximity sensor plugged in. But, is this a bad screen or a sensor of some kind in the actual screen cabling that senses light without proximity sensor?

Brady Davidson -

I have noticed with some cheaper 6S screens that the proximity sensor will not work. If that is the case for you make sure that you scratch off the black film that is on the glass where the proximity sensor is suppose to go. It is not the prettiest thing but it is functional!

Gadget Tech - PDX -

I've disconnected the 3 seperate pins (display data, digitizer and camera flex) why when i search for a screen on say amazon or ebay do the replacements only have 2??

A Fearn -

The third connector is for the front-facing camera flex/sensor assembly. A lot of screens are sold without it, so you have to transfer that part over from your old display before you reassemble everything. At the top of this guide, you'll find a link to a longer/alternate guide for transferring components over to a bare-bones replacement screen. If you prefer to save yourself the hassle, just stick with the guide you're seeing here and use the pre-assembled part linked at the top.

Jeff Suovanen -

Thank you for another excellent guide!

Christa -

https://www.injuredgadgets.com/LCD_Scree...

The way the cables look on this one i'm guessing is correct, could someone please tell me if this is the right fit for Verizon iPhone 6s please or send me a link to the one i need to get!!!!

Bailey Duncan -

That's an iPhone 6 display, as opposed to a 6s. They are not compatible. The correct part for the 6s is linked at the top of this guide.

Jeff Suovanen -

I replaced a screen and there's a "ghost touch" issue. Did I do something wrong or is it a defective display?

John Cavaliere -

It could be the part itself is defective or you bent a ribbon cable while putting it together. I had a similar issue once. The LCD worked perfectly fine when I tested it before I popped the screen back on. When I popped the screen in it didn't work, when I popped the screen back out with the cables still connected it worked. I returned the screen and swapped it out with a new one and it worked fine.

TLDR: it's probably the replacement screen itself.

John Cavaliere -

I don't understand , i have different displays , different producer and in my 3 different iPhone 6S the same problem.

WAPIK -

Hi I jus replaced mine. Any idea why my cameras don't work

Front or back

Tashan O'Neal -

WARNING!: You should NOT reconnect your battery FPC cable / connector until the VERY LAST reassembly step! Modify your reassembly procedure to move this "re-connection" of the battery connector until very last. I can't stress this enough. My logic board is now burned (it smoked upon reconnecting the LCD replacement part, because the battery was already reconnected and "live". The problem is that if you don't have the FPC connector aligned just perfect to the header (on the logic board), you create a momentary short (when the pins aren't aligned well)... this causes the Logic board to instantly burn. Save yourself trouble.

###You have been warned###

enoughstatic -

Sorry to hear you had such a bad outcome. The guide directs you to disconnect the battery first and reconnect it last, which is the correct procedure (and just good practice for electronics repair in general). There is no danger if the steps are followed in order. I don't know if it's any consolation, but at this point you most likely have a blown backlight circuit, which is a straightforward fix for a good microsoldering expert. There are several that frequent our Answers forum, so you may want to reach out to one of them to see about restoring your phone to working order. Good luck!

Jeff Suovanen -

The same seems to happened to me, I disconnected the battery before connecting the lcd, but I also seen no display and burn smell

lcorsini -

I followed this tutorial to replace my broken iPhone 6s display, everything went fine, everything working after the replacement, but the display kind of has a pink hue to it. Does anybody have had the same impression? I mean, is that because of the quality of the replacement part or may I have done something wrong during the repair process?

David -

I have the same problem. Did you find a solution yet? or did you just got used to it?

Donat -

Replaced my broken screen and the display works but the touch screen is not responding to any touch or pressure. When the old screen is put back the touch screen works fine . I have tried 2 different new screens with the same result.

Brian

Brian -

Please try to reseat the digitizer ZIF connecter (the one under the front camera cable). Hope this helps!! I work at a repair place, so please reply to me if it doesn’t so I can assist you.

Jake Rose -

I replaced the screen complete and battery and lightning / headphone jack all at the same time. Smooth as silk.

joshuabogage -

the screen was tough to get loose! ifixit sent a guitar pick with it that worked better than the spudger . little plugins are picky. maybe if i had smaller hands it would have been easier but it took less than an hour, Im happy!

Dan Powell -

Tried this repair on a broken 6s screen. The repair was easy, and the guide was helpful, but my touch ID does not work now. Does anyone know what the problem is

Jackson Kroger -

you have damaged the touch id flex cable

Computer Hacker -

I got this error but it turns out I just didn’t get the TouchID plug seated well. Got back in, snapped it down, and all is well again.

Jon Emmons -

Hey all! I replaced the screen just fine, the guide was amazing! However, the new screen powers on, displays the Apple logo for about five seconds then turns off…then it repeats. I don’t have to touch the phone, and it will do this over and over again. It’s doing it currently.

I tried the trick of holding down the power button and the home button and it all it does is turn off the phone and start it back up again with the exact same issue.

Any ideas?

Thanks!

Kellan Bradshaw -

You’ll probably need to do a bit of troubleshooting to isolate the issue. You can find some suggestions here and here. Good luck!

Jeff Suovanen -

I replaced my friends screen the other day and it took only about 30 or so minutes. I used the pro tech toolkit that you can buy from Ifixit and this guide and I had a smooth install and her phone was up and running in no time, fantastic guide.

Grass -

The phone would not boot! The battery was at about 15% before I started. After I replaced the display the phone would not boot. After disassembly & reassembly numerous times looking for a problem, even reinstalling the old display-no boot. In final desperation I plugged in the charger-the phone booted! Apparently if the battery voltage gets too low it will not start the phone after the battery has been disconnected or the phone disassembled.

I don’t know if this problem has an explanation or was unique to my repair.

maltman -

My 6s id doing the same. How long did you leave yours plugged in before it booted?

Cade Billions -

Thank you for a most detailed and insightful tutorial! This my 4th i-Phone screen repair/replacement and this was by far the best tutorial I have utilized. There were no surprises and the sequential photos really made this job safe for myself AND the phone!

Peter Bovey -

Nice tutorial!

i have replaced screen and new screen is half black with the other half show semi white and with vertyical lines…

connectors look clean and undamanged… . any thoughts?

Hood -

Just a warning: my replacement screen does not work well with polarized glasses. It blacks out in the normal ‘vertical’ position. Whereas my original apple screen worked great with polarized glasses when vertical and only slightly dimmed when in the horizontal position.

davecivello -

I have done this reapair but force touch isn’t working on the new screen. Any ideas on why?

My new screen also has a slight pink tone to it, but I think I’ll get used to it and probably wont think of it. As long as I get my force touch to work again..

Björn Tirsén -

I just finished a full screen assembly replacement and all seemed to go smoothly. However, like Kellan, Once I reassembled and turned the phone on, it has been stuck in an endless reboot loop of showing the Apple logo for a few seconds, then turning off and repeating.

Any ideas what’s wrong?

Jonathan Elison -

@jonelison Try the suggestions here and here. Good luck!

Jeff Suovanen -

Just finished the repair on my wife’s phone. Really straight forward. Moving the home button was really easy too!! Turned the phone back on and everything worked just as it should. Thanks!!

Stephen Silva -

Hi all! I replaced the screen according to the instructions. But when i start up the phone the display shows vertical stripes across the screen. The connectors and cables don’t show any obvious damage. When I reinstall the old screen no problems appear. What could be the problem?

Martijn Mooij -

I completed this guide and it went smoothly. The hardest part was installing new screen adhesive and removing and installing the home button onto the new screen without damaging it. Patience is needed to complete this without any problems. I notice a slight color difference between the OEM screen and my repacement screen. I took a phone call shortly after finishing my install and noticed that the new ear speaker does not sound good. It sounds like it has a lot of feedback, which my 2 year old oem speaker had none of.

Nathan Stark -

Do I need the Display Assembly Adhesive in order to replace a broken screen?

Tobias Vielmetter-Diekmann -

@tividi Replacing the display assembly adhesive is recommended but not required. If you get the fix kit linked at the top of this guide, it comes with replacement adhesive.

Jeff Suovanen -

Hello, I completed the guide and replaced the new screen from ifixit. But the screen wouldn’t turn on. I replaced the original cracked screen to check if I had done anything wrong… Its working fine…. Any solutions?

vimaladithya -

This is my first repair, and everything is great except now that I have came to the last step and am unsure on how to reassemble the device; I do not know what you mean by “in reverse order". Are you saying to start from step 28 and go all the way back to step 1?? Prompt answers are greatly appreciated.

Isaiah Gadsden -

28,27,26,25,…….1

willpowers51 -

I tried this, but my screen wasn’t broken? so why should I do this?

Carl Jefferson -

Similar issue as noted above, the new screen is dead. I can get the original cracked screen to work, but can’t get anything on the new. Second pro replacement kit i’ve gotten that was dead after replacement. Replaced quite a few screens in the past, never had an issue. Would have been less trouble to pay the extra twenty bucks for the guy at the mall to do it.

jmason -

Hi question.

If screen was broken. But Home button and touch ID work. If I will replace the screen. I will not have a problem with touch ID in the feature?

Arkady Shustov -

no because you are you going to transfer the home button on to the new screen.

hilmary -

good guide! repair done

Spence -

cool. success. just remember when reattaching the 3 cables at the end that the 2 horizontal ones are in the right order. I spent 10 minutes trying to connect the first cable as it was actually on top of the second cable (from when I added the camera, prox sensor ,etc).

just required flip on over the other at the base of the cables. and then they connected properly.

altomic -

Thank you, this guide worked perfectly and the repair process was relatively simple. The only tricky bit was reconnecting the home button connector—it didn’t ‘click’ clearly into place so I wasn’t sure if I did it right, and I didn’t want to press too hard. After reconnecting the new display, I powered the phone on and confirmed that the home button worked before removing the adhesive release liner and finishing the repair.

philballman -

I’m having the same issue with this install as some above have had: I install the replacement screen, reassemble everything, but when I press to turn on or plug in the phone nothing happens. The screen is just black. The old screen worked fine, but was only cracked. I’ve opened everything back up to check the cables/connections, disconnected everything, reconnected again, tried booting, and still nothing. Did I(we) just get a glitchy replacement? I’d love to see a response to this particular issue if anyone’s come across the same thing. Thanks.

davejmoz -

Reconnect your old screen and see if it still works as expected. If it does, you may have received a defective replacement screen. If it doesn’t, you may have damaged something during your repair. Did you disconnect the battery when removing and installing the screen as instructed?

Jeff Suovanen -

Everything is great but the light sensor doesn’t work

I traied two different iPhone 6s the same problem

is there anything on the new iPhone LCD lights sensor should I remove it before installation??

raid amri -

Fix went smoothly, and the display is fully functional - but despite replacing the display adhesive, the sides of the screen don’t seem to want to stay tightly fit. Anyone know the reason for this? And perhaps a fix?

Thanks

Brooks Anderson -

Stuck on one section while installing the new screen, adding the Touch ID/Home Button and when screwing the plate that holds the Touch ID/Home Button from the back, the screws do not reach in enough to screw into the holes. Tried pushing down as hard as I could without damaging the assembly. Screws will fit into the old screen assembly but not the new assembly from IFIXIT.

Shane -

Thanks for censoring my post. The real &&^&^$^ deal.

awesom_o -

@awesom_o I deleted your comment because it contained incorrect information—when performed as instructed, this repair does not disable any of the phone’s functions. Many, many people have done this with no problem, so to say it “sucks” and tell everyone not to try it is misleading. That said, I can tell you were frustrated and I’m sorry you had a bad experience. If you want to share your thoughts in a slightly more constructive, less-scaremongery fashion, I’ll be happy to leave them up. The point of having a comment system is to help each other identify (and hopefully resolve) issues like the ones you experienced. You can also try the Answers forum if you want detailed help. Plus, if you bought your parts from iFixit, we have a crack team of customer service reps dedicated to helping you resolve problems and making sure you didn’t get a defective part. You just have to reach out. Hope this helps.

Jeff Suovanen -

As at least one person stated, I wasn’t sure the home button cable was attached. It doesn’t click in. It’s a matter of having it in the right place, and then screwing the plate down on it. Fortunately, I had it placed properly, and upon powering up, it worked. Other than that, the only challenge is dealing with tiny screws with old eyeballs. :) Great guide!

Gregory Aden -

Instructions were, super concise, and very easy to follow. Make sure to take your time, and this was significantly easier than some of the other phones on the market to work with. Many thanks to the author.

Matt Howe -

Worked a treat, thanks OP. Home button had 3 screw holes and 2 screws so I stole a screw from the dead screen I was replacing.

Eric Bostrom -

light sensor dont wrok after purchase iPhone 6s LCD Screen and Digitizer Full Assembly . Help?

Hector Tejada Izquierdo -

Tutorial incompleto!

cleytonjardim -

Got it done, a little shout out to ifixit, the repair kit is EXCELLENT! It literally has everything you need to replace a screen on an iPhone 6s. Many thanks for the comprehensive kit.

Mike Jacobs -

Excellent guide. Due to the mechanics of adding prerequisite guides, I am guessing the step about lining up the new adhesive along the edges of the bottom panel was omitted because it doesn’t work in reverse. The comments above are helpful in that regard. Pretty self-explanatory, though. Overall, great job.

Alyson Eggleston -

Habe das erste mal Akku und Display gewechselt. Hat alles ganz wunderbar funktioniert, sehr gute Anleitung. Jetzt startet das IPhone 6s nicht. Bildschirm schwarz. Was kann ich machen?

Martin Kröger -

i got my new display in and everything went fine but now the phone restarts every 5 minutes. when i replace the new screen again with the old one it worked again. Did i do anything wrong? i had no issues replacing the screen.

Also it kind of did not know the exact battery percatage. turned off and on again and then showed 1 %.

felizian -

I have replaced the screen of my iPhone 6S, but 3D Touch does not work. Is this feature missing from the screen from iFixit or is there something I may have done wrong ?

Julien Pierron -

The iFixit part should be fully functional, including 3D Touch. If your old screen still works, you could try reinstalling it as a quick test—if 3D Touch works again, then your new screen may be defective and you should exchange it. Reach out to customer support and they can fix you up. Good luck!

Jeff Suovanen -

I was hesitant to do this repair myself, but it went fine. All the additional comments at each step were helpful. I combined this with a battery replacement and a new life proof case and it’s like I have a new phone! I’m glad I went with ifixit, the tools, packaging and support were all top-notch.

David Heinbach -

Recently performed what seemed was a successful replacement of the display assembly and now it seems the touch is inconsistent and clicks while scrolling or is not sensitive enough at times. Any thoughts?

chadwhick7 -

Please try to reseat the digitizer ZIF connecter (the one under the front camera cable). Hope this helps!! I work at a repair place, so please reply to me if it doesn’t so I can assist you.

Jake Rose -

Managed to do this today and everything went great following this guide! Except for one thing: my 6S frame is bent (#bendgate) and I’m pretty sure this is why the new digitizer assembly doesn’t sit quite completely flat on the end that is bent… Does anyone have any suggestions for this? Right now near the top the screen isn’t flush and has a visible gap between it and the back/frame of the rest of the phone…

Tristan Smythe -

This is the second time I’ve saved an iPhone using repair parts kit from ifixit! The screen kit was delivered on time yesterday. This morning opened the repair kit, everything is well packaged and the tool kit and parts are very high quality with everything you need. The most difficult part of the process is prying the old screen off. I used a hair dryer to heat the phone front and back to loosen the adhesive. Then I used the suction cup tool to pull on the screen. It took a while but eventually the screen started to come off and then I was able to use the pry tool to work it completely loose. I overtightened one of the screws on the home button assembly, stripping the hole so the screw would not stay in place. The guide warns against this! I had to leave the screw out but the phone seemed to work fine without it. The phone looks and operates like new now!
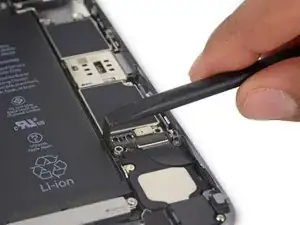
David Parker -

Thank you so much for this very important information about repair of the phones

kassim -

For extra excitement, I had no replacement adhesive…so I used some Sugru for this project. Very easy to apply with the spludger.

Gabriel -

Excellent guide and all steps worked like a charm.

maybe just one remark: if the display is not broken (mine needed to be replaced due to a blind corner) the adhesive is so strong that simply pulling it up with the suction cup will take forever. I used a hair dryer to soften the glue and then the display came loose with ease…

olonetzky -

Great guide, my new screen works!

Peter -

Hello all, what about the screen gasket. Did that come with your kit? How do I get one of those?

cediv -

Comes with the kit and is also available separately. Please see the parts list at the top of the guide.

Jeff Suovanen -

Thank you! iPhone 6S, screen cracked to a million pieces. The clear packing tape worked like a charm to secure the broken glass AND to make the “handle” to remove the screen assembly. Using the hair dryer to warm up the edges was necessary. After that, the screen assemble came off easily. The longest, most tedious part, was the removal of the old adhesive and cleaning of the the case with alcohol. Very important step to ensure the new adhesive sticks, retaining the water resistance of the device.
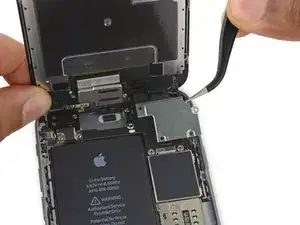
After clicking the screen assembly in place, I discovered the the 2 bottom screws wouldn’t bite into the holes inside. So I had to remove the new screen, to bend the holes back toward the edge. so the screws would reach. Luckily I had not applied pressure or heat yet.
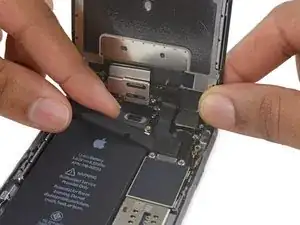
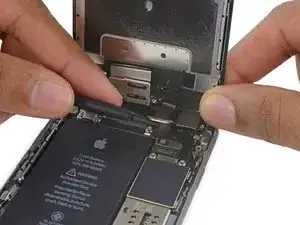
Time consuming? yes, but not very difficult. Just don’t rush it, make sure you have time, and read the whole guide before you even start.

Big Al -

What great guide. And what a great feeling to repair and upgrade your own electronics. Thank you iFixit!

orocasa -

Success! This was a fantastic guide, but I ended up having to take it to a shop, because after three tries the screen still wouldn’t light up. The tech was able to use my iFixit parts, though. He said I had bent the pins on the LCD cable. Dang. And that one actually seemed relatively easy to reattach (unlike the digitizer cable). Despite the mistake I made, it was fun to take the phone apart, and I feel pretty bada** knowing how it all fits together now. I’ll definitely order from ifixit again. Thank you for enabling all of us!

Jill Carlsen -

Just tried the whole thing and everything went well but the homw button is not working. any help please?

Bassic Lessons -

Replacing the battery and the screen took me about thirty minutes. The most difficult part of the repair was getting the battery cable snapped on and snapping the screen back into place (you have to slide it up a little bit at the top before you can snap in the rest of it), but other than that it was much easier than i thought. The screen is raised slightly and it appears to have a little more red light than the original screen, but it isn’t enough of a difference to complain.

Mitchell Wallin -

My other screen had came with 4 connections at the top of the screen and this new screen I ordered have with 3 and they are different sizes and do not match up with my phone. It is a 6s and that’s the same screen replacement I ordered

Morgan Forkey -

It sounds like you have an iPhone 6. A fully assembled iPhone 6 screen has four connectors; the iPhone 6s screen has three. Check the model number on the back of your iPhone to verify.

Jeff Suovanen -

necesito sacar el boton de inicio?? o lo puedo dejar y poner la pantalla normalmente?

Lucho Perrotta -

My phone lit on fire and I stabbed myself in the eye with a screwdriver and then fell down the stairs! Just kidding, everything went well. Thanks for all the work iFixit does for our right to repair.

Bryan Willem -

The screen I got came with adhesive. What do we do with that? Any tips?

zed0132 -

Here is a guide for the display adhesive, and here is one for general custom-cut adhesives. Hope that helps!

Arthur Shi -

Merci Beaucoup pour vos explications toujours aussi riches d’enseignements j’ai enfin réussi à avoir de nouveau la fonction Touch ID (heureusement que je n’avais jeté le vielle LCD)

Ce serais bien de renseigner les gens afin qu’ils sachent que la fonction Touch ID donc le bouton accueil est appairé avec la carte mère du portable.

Encore merci

Erwan Le Dez -

Replaced battery on iPhone 6s. Went well, but now touch screen does not always respond. Phone runs a string of numbers (is touch 5, get a string of 2s). Hit the on off buttons few times and then works normally. Help.

Len -

did you ever figure this out? I am having a similar problem. This dissent happen the first time I replaced a 6S screen. But thing time, I am getting a lot of ghost touches. makes typing and scrolling impossible. Thanks

Big Al -

I replaced the iPhone 6S screen assembly with the replacement from ifixit (my second 6S I have done) but it seems the digitizer is not calibrated correctly as it is hard to type accurately, and scrolling in apps like YouTube and Facebook is very jittery. Like there is more than one point being touched.

for example, every time I try to type “$” it registers a “7” as well. (“$7”) could there be something shrink with the part? Maybe something wrong with the installation?

Big Al -

Hi Big Al,

It does sound like the digitizer is receiving additional touch signals. Please contact our customer support and we’ll get that sorted out for you.

Arthur Shi -

I replaced my Iphone 6s screen with a cheapest one from Amazon rather then the one propose on Ifixit, with the original home button. But now the phone is blocked on this message : Iphone is disable connect to itunes. Will your screen prevent the phone of the problem? Could it work with an original screen ? Thank you so much for your help

Yoan -

Great guide! Maybe add the fact that for some 3rd party displays, you also need to transfer the front speaker and camera assembly (as someone said before, it can be done by following step 23-30 from this guide: '''iPhone 6s Front-Facing Camera and Sensor Assembly Replacement''')

Sigfrid Stjärnholm -

Is it possible to replace a shattered iPhone 6s screen with the screen from a separate 6s that screen works but is otherwise unusable or would the screen be damaged from removing it then reinstalling it

Joshua Martin Stockwell -

I transferred over the home button and now I do not have touch ID available… everything else works. How can I fix this issue?

Michael Jakuszewski -

This all worked great EXCEPT I can’t get the home button to “click”. When I’m repositioning it and adding the shield I can feel how it physically clicks, but as soon as I add the three screws, it seems to get locked in place and won’t click. Reassembling the phone, the home button seems to sit lower in the screen than normal and won’t click. I’ve taken it apart and reassembled several times but can’t figure out how to get the home button to seat correctly.

Anthony H -

Hi Anthony! You may need to adjust the tightness of the three screws in order for the Home Button to click. Carefully test the button and loosen the screws slightly until it clicks.

Arthur Shi -

It’s become clear that the home button simply doesn’t fit into the hole in the new screen. When I put it back in the old screen, it sits right in the hole, clearly a proper fit, and doesn’t slide around. In the replacement screen it just doesn’t fit the hole. I can try to line it up, but it doesn’t “drop” (from the back) into the cutout. Is there some issue with proper sizing of the home button holes on the 6S replacement screens?

Anthony H -

Sorry to hear of your troubles! I haven’t heard of that issue before…it maybe that you got a defect screen. Please contact our customer support!

Arthur Shi -

Replacing a shattered screen with a new one. Full replacement including the home button, etc. After reassembling, the screen came on for a while, complained of home button not working and after about one minute went off. Dismantled, checked everything all over again. The screen is responsive but no display. A mess!

vaima.shamar -

You have to be carefull if you buy the screen only because it does not come with the rear camera or phone speaker and you’ll have to pull it out of the old or damage screen. I did it taking pictures of wen I was disassembling the Phone and front camera so I did not forget how to assembly the front camera and the phone speaker

franbene1 -

Hallo, bei der Anleitung fehlt der Schritt, dass das Display einen neuen Klebestreifen bekommt.

Nach dieser Anleitung wird nach einiger Zeit das Display klappern.

Grüße Stephan

Stephan Hager -

excellent, thanks.

Richard Myerscough -

iPhone 6s pani me girl gaya hai bilkul bi nahi call raha hai please help me

Manoj Sen -

I purchased a replacement screen for my 6s from iFixit, and replaced my shattered screen using this guide. Sadly, I found out after the fact that that this replacement breaks Apple Pay/Wallet. Everything else works just fine, but I’d suggest a clear disclaimer at the beginning of this guide that explains this huge caveat. I would have looked for an alternative had I known better.

Brian Miller -

Hi Brian,

The screen replacement should not break the Apple Pay/Wallet functionality. It sounds like the NFC capabilities which Apple Pay uses may be disrupted. I would suggest carefully rechecking the press connectors to make sure they’re all fully seated, and look for any torn cables.

Arthur Shi -

Great guide! Still using this device and repaired the screen for the second time now. Thanks a lot!

Markus -

What are some possibilities if you fail to disconnect the battery during installing the new screen? Also, my screen stopped working on my phone after I dropped it, installed the new screen (without disconnecting the battery) and it is still blank. It does not show charging, boot-up or anything. Any suggestions?

Devon Pinkston -

This is mabey the 10th screen replacementI’ve done, and I just want to say it’s just lazy and unhelpful to tell a beginner to just do the steps in reverse to put it back together. Getting the display, digitizer &, camera cables situated back together properly is, to me, the hardest part of the procedure.

Aj Ylizaliturri -

Installed new screen but nothing comes on? Anybody experience same issues?

GNtechIRL -

Followed all the steps, screen purchased from this store but there is no lights or anything. It makes sound when connected to charger so battery is connected correctly. Is it possible that screen is faulty?

GNtechIRL -

It may be a faulty screen. The first thing I’d check is if the backlight is blown. Turn on the iPhone and shine a bright light at the screen. If you can see unlit graphics, then it’s the screen backlight. Please contact our customer support and we will get the issue resolved!

Arthur Shi -

Did you not forgot to take off the protection plate at the back of the screen? And the front camera and earphone speaker?

Simon Villaeys -

Great guide. Thanks for putting it together. Just one note to be careful of inadvertently turning the iPhone back on when trying to get the display off. It happened and no way to turn back off until Step 16 with the battery disconnect.

John Boles -

Muito bom já mim ajudou muito nos momentos mais

deciocosta348 -

Die Displayeinheit ausbauen und tauschen ist Dank der Anleitung einfach. Zum Schutz der Ressourcen sollten Smartphones servicefreundlicher hergestellt werden.

Roderich Vogelmann -

Worked perfect. I will say, those screws are tiny for my big hands and bad eyes. But if you follow this step by step, you’ll do fine.

Scott Gray -

Guide was perfect. Screen repair completed successfully. Screen came off fairly easily without heat applied (this was during an autumn evening so wasn’t too warm inside). For the home button, I used a hairdryer to ease it off, again with no issues. Most fiddly part was the adhesive that holds the screen. Mid way through reconnecting the screen, I realised that adhesive tape wasn’t applied and had to disconnect it again (super easy second time around though). Mucked around with getting the adhesive to come off the blue backing and on to the phone frame, then it got caught on the protective film of the screen. However it all came together in the end. What a great feeling to see the phone turn on and the screen looking schmick! Great stuff iFixit and community!

Interestingly, some internal screws were missing when I opened up the phone. I suspect this happened when the phone battery was changed at a non-Apple phone store many years ago. Another reason for doing the repair yourself - you can trust your own workmanship.

Rostislav Troyak -

Thanks, it's the second time my 6S display has shattered from a drop. More drops than breaks. The adhesive is the biggest challenge. Thanks for the instructions.

Jon Martinez -

Hello, after reassembling iPhone 6s following battery replacement, I have a very small <1mm gap btwn the screen and body. This is only on the left side bottom 1/2 or 1/3 of the phone. Rest of perimeter marries nicely to body with no gaps. I ensured the top “hooks” were seated properly under the frame (as suggested -Thank You!!!) and worked down each side gingerly when reattaching the screen. Pentalobe screws reinserted no problem. I cleaned off most of the black adhesive and did not reinstall new adhesive.

Any ideas how to rectify this small gappage? I tried pressing it down on the edge as hard as I dare but worried about cracking the screen or damaging something inside.

Thank you in advance for all the great advice, instructions, and suggestions.

CcC -