Einleitung

Diese Anleitung zeigt, wie der Akku ausgetauscht werden kann.

Du brauchst dazu eine sehr feine Lötspitze und Kenntnisse im SMD-Löten.

  1. yu3R6ctSdYjnKKbU
    • Stelle sicher, dass der Shuffle wie gezeigt ausgeschaltet ist, bevor du anfängst.

  2. olvqPkbJWOhi2g6a
    olvqPkbJWOhi2g6a
    qSBrUYcPtlmKn6BA
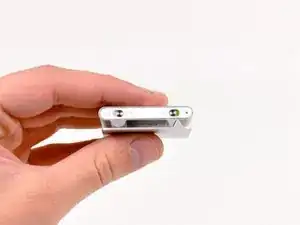
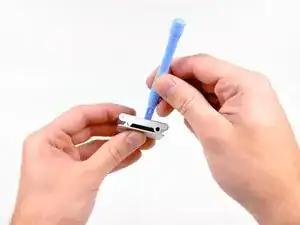
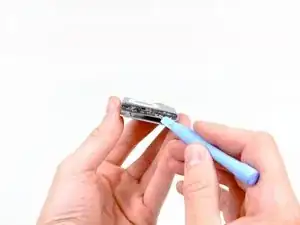
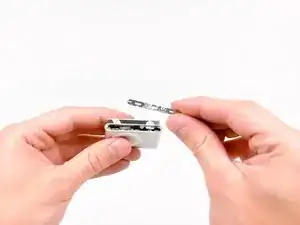
    • Benutze die Kante deines iPod-Öffnungswerkzeugs, um die Kunststoffabdeckung auf der Seite des Shuffle mit der Kopfhörerbuchse abzuhebeln.

    • Entferne die Kunststoffabdeckung und lege sie zur Seite.

  3. nffFKTnWPCsHobTt
    • Entferne die beiden Kreuzschlitzschrauben an der Seite mit der Kopfhörerbuchse.

  4. qBvayWrKREDhA4ot
    qBvayWrKREDhA4ot
    f4HYBEoLT2AKnTGm
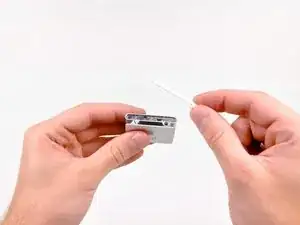
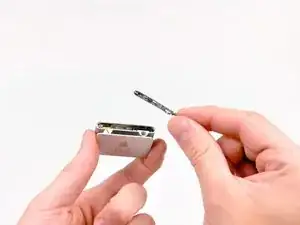
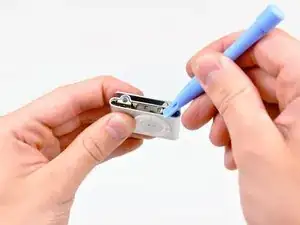
    • Entferne mit der Kante eines iPod-Öffnungswerkzeugs die Metallabdeckung an der Seite mit der Kopfhörerbuchse.

  5. 3NK3TnFAUCiHRQsX
    3NK3TnFAUCiHRQsX
    p3DwX42N2l2sDF6F
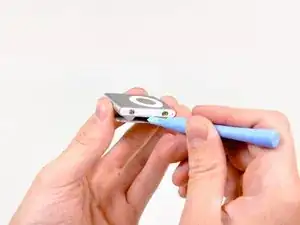
    • Heble mit der Kante eines iPod-Öffnungswerkzeugs die Kunstsoffabdeckung an der Tastenseite des iPods ab.

    • Entferne die Kunststoffabdeckung und lege sie zur Seite.

    The On-Off switch here is turn around. Usually it is green when the iPod is turned on.

    Nils Kober -

    The plastic cover has small clips at either edge in the middle and alongside the button. Put the iPod opening tool in about a third of the way in from either end to avoid breaking the clips.

    Daniel Foster -

  6. GZymyU1WiYZHWNkj
    GZymyU1WiYZHWNkj
    fHgqlQwQf5fI4eDw
    • Entferne den Hold- und den Shuffleschieber mit einer Pinzette

    Thanks for this great instruction. Little note: Not important for the function, but contrary to the images the green side of the on/off-slider originally must point in the opposite (inner) direction.

    Martin -

  7. awgEW6YLvkEesK1o
    • Entferne die beiden Kreuzschlitzschrauben an der Tastenseite des Shuffle.

  8. V1UvFgLfwAEj2p3A
    V1UvFgLfwAEj2p3A
    dSHoHWk5lMud4Su6
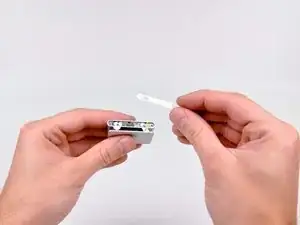
    • Entferne mit der Kante eines iPod-Öffnungswerkzeugs die Metallabdeckung an der Tastenseite des Shuffle.

  9. p3gTWTx1yxSsuRmo
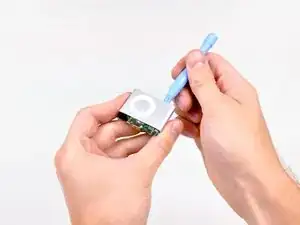
    • Heble mit der Kante eines iPod-Öffnungswerkzeugs die Metallplatte an der Seite mit der Kopfhörerbuchse ein wenig aus der Rille im Gehäuse.

  10. SIIe1uGoCXT3ZtVd
    SIIe1uGoCXT3ZtVd
    hVIbeX2pftDmGJQE
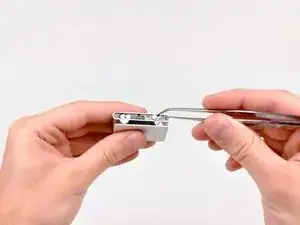
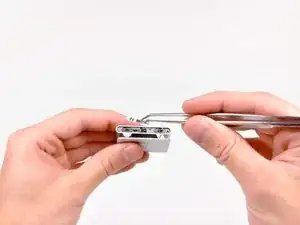
    • Drücke mit dem iPod-Öffnungswerkzeugs die Logic Board Einheit soweit aus dem Gehäuse, dass du sie an den Kanten fassen kannst.

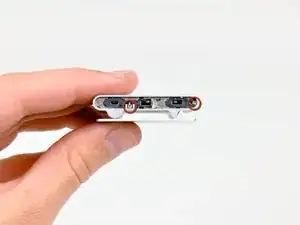
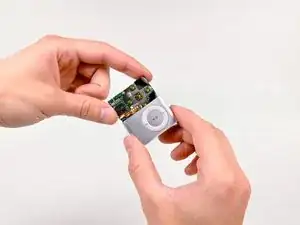
    • Ziehe die Logic Board Einheit aus dem Gehäuse heraus.

  11. PqVsjCjUVxVmPX2g
    PqVsjCjUVxVmPX2g
    LwuFKCj4UtFwUgum
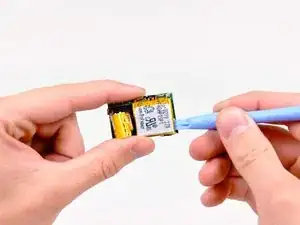
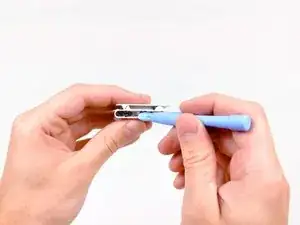
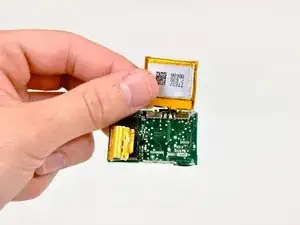
    • Löse mit der Kante eines iPod-Öffnungswerkzeugs die den Klebestreifen ab, mit dem der Akku am Logic Board befestigt ist.

    • Klappe den Akku hoch, damit du an die Lötstellen auf dem Logic Board herankommst.

    • Bevor du die Anschlussdrähte ablöten kannst, musst du erst den Schutzlack von den Lötstellen abkratzen.

    • Erhitze die Lötstellen mit dem Lötkolben und entferne gleichzeitig die Anschlussdrähte mit einer Pinzette vom Logic Board.

    • Bringe die Plus- und Minusleitung nicht zusammen.

    • Wenn du noch nie gelötet hast, kann dir unsere Lötanleitung helfen.

    Using the Soldering tip to heat the resin covering the Battery Wire Connections will allow easy removal of the Resin Covering Without Damageing the Logic Board with Scraping.

    lloyd193 -

    Battery is Lithium 3.7 volt 100-120 mA dimensions 3mm x 23mm x 23mm

    Search on eBay for 3.7 v 032323

    chi tran -

    How do i know if the battery is faulty?

    jaithish -

    If after leaving the charger plugged into a known good power source overnight and the green indicator light on the shuffle is not lit, there’s a pretty good chance the battery is dead.

    Andrew Lisenby -

Abschluss

Im dein Gerät wieder zusammenbauen, folge den Schritten in umgekehrter Reihenfolge.

Andrew Bookholt

578335 Reputation

19 Kommentare

Followed your clear instructions and made a successful battery change. It would be helpful to explain that both cover plates are held ond by double sided sticky tape and to give caution on the location of the miniclips on the control cover - I cut through 2 of them by mistake. Thanks for the help.

Regards, Frank, North yorkshire, UK

FrankF -

I rarely find instructions so detailed and foolproof. I ended up with a "new" iPod saving a bunch of money.

Read on about the incidents I encountered.

The working end of the plastic pry tool snapped off rendering it useless, but not before it irreparably bent the pink housing. The suggested screwdriver for which I paid extra did not undo the tiny screws, and I eventually tapped them out with a miniscule eyeglass-repair screwdriver. (Is it a coincidence I did not see a screwdriver in any of the photos?)

Ditto on the suggestion that the super-sticky adhesive presents itself as an obstacle. A suggestion to apply pressure slowly as the adhesive releases would have been helpful.

robinondeck -

I loved that the instructions were really easy to follow. It would be helpful to mention that the logic board ought to be really carefully pushed out. It was difficult in my case and I had to apply a considerable amount of force to slowly push it out.

Despite taking care to control my strength and push it out, part of the protective yellow tape got torn and one of the components was dislodged and broken. It must've been pretty important cuz unfortunately my iPod didn't work after I put it together in one piece. I'm sure the fault lies in my carelessness, the instructions were great. I hope you guys have better luck with yours (:

Jane -

just to add what Frank said: the white plastic control cover has 6 tiny clips; two either side of the sliding switches and two in the middle. I found that gently levering the cover up by inserting the tip of an Xacto blade through the holes the sliders ride in avoids damaging the clips. Be careful not to turn the iPod on when you do this or scratch the green paint next to the on/off slider.

James -

Does anyone have what the best approach to removing the resin from the solder points?

Matt Rausch -

To remove the resin use a Q-tip and some solvent.

Rick -

We followed the instructions, it worked!!

I scraped the epoxy off of the solder points with the end of the #00 screwdriver (using it like a file).

My FIL did the soldering, with a big blunt tip, he's amazing.

Thank you!!

Running Around -

Do you know anyone who will perform this process for me? Also, is it still possible to get batteries for the 2nd generation Ipod shuffles?

burt34 -

Really.. I am thankful to you (Andrew Bookholt), Also it would be more helpful if you mention the link where the original battery will be available.

Senthilvelan K -

Mine had no clips at the plastic control cover because it was glued to the metal stripes with double-sided adhesive tape. It tooks a while until I realized this but I didn't damage something. I used a thin piece of metal, to separate the plastic cover from the metal stripes.

Andreas -

Does anyone know where I can buy a battery for this iPod?

Eva Cruz -

Taking apart didn’t seem too difficult with this instruction and the comments (glued covers). Lets see now for part 2 (getting a replacement battery and soldering) and part 3 ( putting it together).

Pesche B -

Where do you get a replacement battery for a 2nd gen shuffle?

formathe -

Ebay or Amazon. Generic size is 302323 Li-polymer 100mA to 110mA battery. Got mine for $3 each from aliexpress.

Herburger -

I have had success by soaking each end in 99% isopropyl alcohol for a few hours to let it break down the adhesive. That way you won’t break tabs on the switch side.

Also, to remove the resin - you can melt it off with the soldering iron instead of using a metal implement to scrape it off.

Herburger -

Thank you! Seems to have worked OK - charging the new battery now…. - I’ll see if it plays when it’s charged up I used alcohol to ease the sticky tape, as advised by another person on here…. VERY fiddly and I should have used a much smaller soldering iron tip - maybe a thin nail or something. Need good eyesight!.

Peter Quinnell -

Hi, change ipod battery’s is very hard but these instructions are very helpful.

Most harder is desoldering battery because the space between + and - is very little.

thanks a lot

A French guy

Aurélien Cassand -

This stops at taking the battery out. Is there nothing about putting a new battery in, and the process of reassembly (and what may be required, e.g. more soldering, epoxy, etc.)?

Phillip Clark -

Excellent tutorial!!!

bernard saucier -