Einleitung

This guide will teach someone how to access and remove the screen display of their iRulu AX760. In following this guide you will learn how disconnect and replace the screen display.

  1. 1ScST16yOaVp2Pnu
    1ScST16yOaVp2Pnu
    tYy1rXAew14fhHSL
    HImJRLqfSCRq4m6O
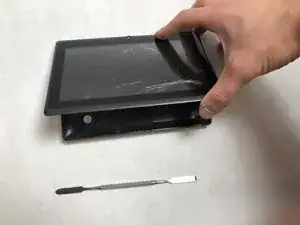
    • Use a plastic opening tool or metal spudger to free the rear cover.

    • Insert your spudger into the side of your tablet.

    • Crack open each edge and remove the cover.

  2. eGeZptofqs6JTo2C
    • Open your tablet.

  3. cimALSTOXHX5p1Sh
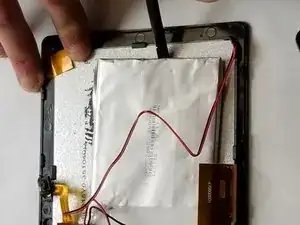
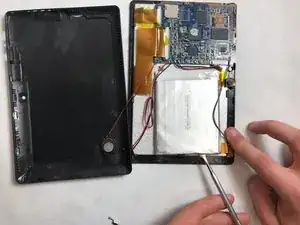
    • Take your plastic flat head tool and insert it under the battery.

    • Lift the battery up.

    • Make sure to remove any tape from the battery.

  4. x6d2OJ55ceTpwud5
    x6d2OJ55ceTpwud5
    OEYUs6wEbIssDxUu
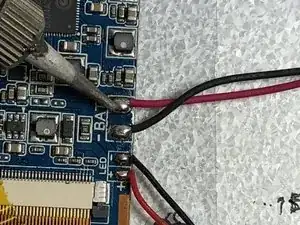
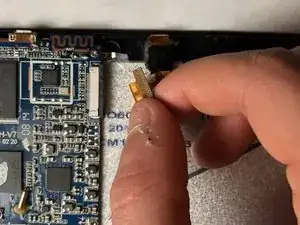
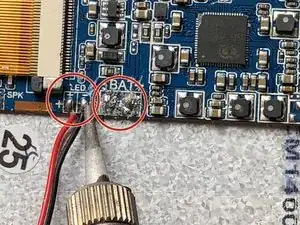
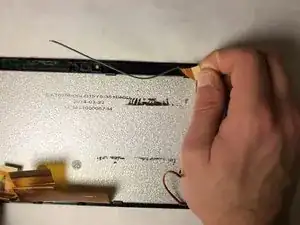
    • Use a soldering iron to remove the solder that connects the black and red wires of the battery to the motherboard.

    • Keep the wires of the battery taught.

    • The iron should only be pressed to the solder for 2-3 seconds max.

    • Be very carful, the soldering iron will be very hot!

    • Visit this link for information about soldering. Wie man Lötverbindungen herstellt und entlötet

  5. 1LZqMsKy3BDZ4DGX
    • Remove your old battery and replace it with the new battery.

  6. miFe1CGfH1qAvXvx
    miFe1CGfH1qAvXvx
    sq1XOUKYqVvC2Du2
    • Use the plastic spudger to pry the tabs open on the digitizer ribbon sockets.

  7. Xen6cRDQvLVXgsXZ
    • Pull the digitizer ribbon cables straight out of their sockets.

  8. 1HyRbi6cLCselyZD
    • Pull the camera out of the device.

  9. RQwqAZyRnKHmaUJp
    RQwqAZyRnKHmaUJp
    D6Rnxeyoe4GFFDYV
    • There are two thin adhesive strips under the battery that run vertically along the left and right side.

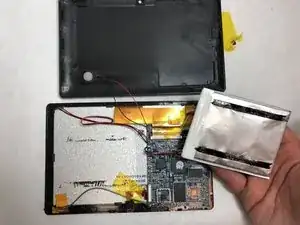
    • Carefully wedge a plastic card or spudger under the battery and along both adhesive strips. Gently work the card or spudger up and down to free the battery.

    • Do not use metal tools, and do not bend or puncture the battery.

  10. DLL2BIjvxHrWJm6V
    DLL2BIjvxHrWJm6V
    KEMQoTmcH1tOtVNn
    dD2eir6wRKVDkRVX
    • WARNING: SOLDERING IRONS BECOME EXTREMELY HOT. DO NOT TOUCH

    • For information on soldering and desoldering, check this link.

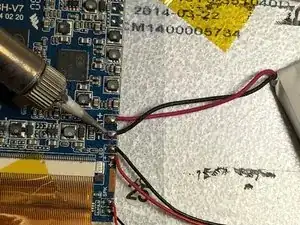
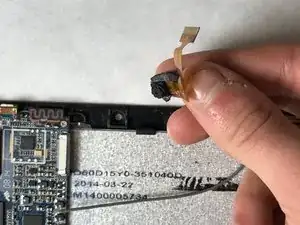
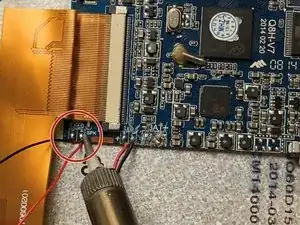
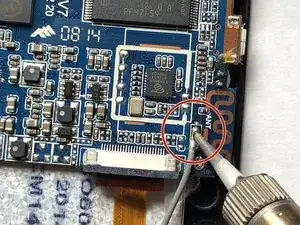
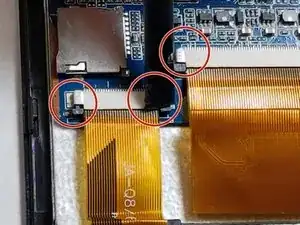
    • You must desolder several sets of contacts before attempting to remove the motherboard.

    • You must desolder the BAT (battery), LED, SPK (speaker), and ANT (antenna) contacts.

  11. qlfNF4Iq2GIRQdNd
    qlfNF4Iq2GIRQdNd
    IZmVWooH3EMB5U2i
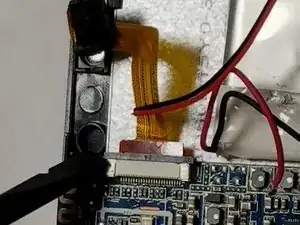
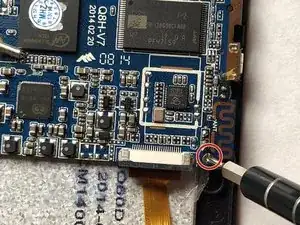
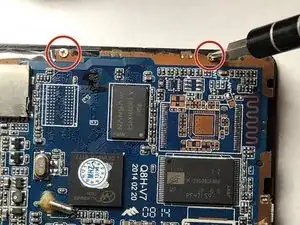
    • Unscrew the motherboard from the screen with the JIS #000 Screwdriver, a Phillips-head type screwdriver

  12. YgcNKnLKyLFesrCN
    YgcNKnLKyLFesrCN
    DAKiTslaVXwDdBWd
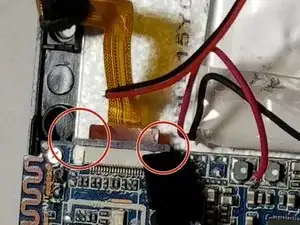
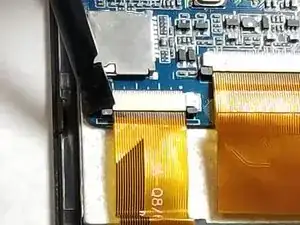
    • Use a plastic spudger to push the tab, releasing the motherboard from the screen. You can now remove the old motherboard.

    • You will not need a metal spudger in order to re-place the motherboard

  13. aM6euAB1Fh3PqaVP
    • Remove the plastic peel attached to the back of the screen display.

  14. Q6X2PhxuFM1UmrlT
    Q6X2PhxuFM1UmrlT
    VQfqJoSbkFF3jQTi
    • Remove the grey wire from the back of the screen display.

  15. 4Bnaeo5qnBNAfZxy
    • Insert the plastic spudger underneath the screen display and lift.

  16. D1kc6HBHDPbwhktD
    D1kc6HBHDPbwhktD
    YCSFPMEjwrnitmRO
    • Continue lifting the screen by hand and pull it out until it is completely removed.

    Is it possible to hook another monitor up to this board

    soundmin7 -

Abschluss

To reassemble your device, follow these instructions in reverse order.

Jamison Kritz

Mitglied seit: 20/03/18

218 Reputation

0 Kommentare