Einleitung

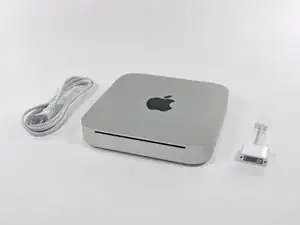
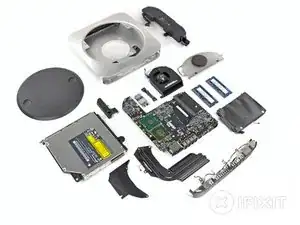
Join us as we take a peek inside at Apple's newest revision of the Mac Mini, now with an HDMI port!

Check out the YouTube video slideshow of the teardown as well!

  1. mPfd61EPuVSXgm2q
    • Well folks, after much clamor, it seems the engineers at Apple have finally included an HDMI port in an actual Apple product.

    • Notable Tech Specs:

    • 2.4 or 2.66 GHz Intel Core 2 Duo processor

    • 2 GB of RAM (expandable up to 8 GB)

    • NVIDIA GeForce 320M graphics processor with 256MB of shared DDR3 SDRAM (the same as the most recent MacBook)

    • HDMI port with support for up to 1920-by-1200 resolution

    • AirPort Extreme 802.11n Wi-Fi wireless networking

    • SD card slot

  2. YD3sTUSrGgQENOZh
    • Contents of box:

    • Mac Mini

    • HDMI to DVI adapter

    • Power cord

  3. UAAYxfUf2FGUfxDH
    UAAYxfUf2FGUfxDH
    na4JMQrUFyajntG5
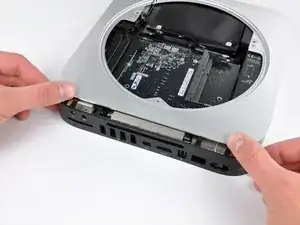
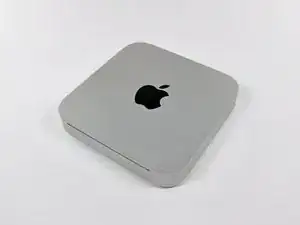
    • Departing from previous generations, the Mini's unibody top enclosure is machined from a single block of aluminum.

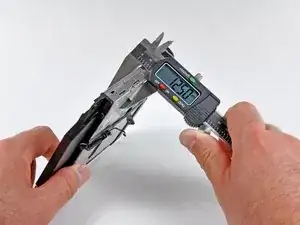
    • Measuring 1.4 x 7.7 x 7.7 inches and weighing only 3 lbs, this is truly one for the books.

    • The black logo and other accents match quite nicely with the styling of Apple's iPad and recent iMacs. Congrats, Mini, you're no longer the black sheep of the family!

    • The model number for this new unit is A1347.

  4. 4piwSKG2QajoUFuk
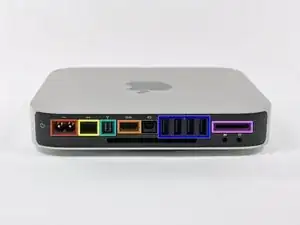
    • The Mini's new port layout is indeed surprising:

    • AC power in

    • Built-in 10/100/1000BASE-T ethernet

    • Firewire 800

    • HDMI

    • Mini DisplayPort

    • Four USB 2.0 ports, down one from the previous Mac Mini

    • SD card slot

  5. MAGyJ3peoZLiwGqy
    MAGyJ3peoZLiwGqy
    U2GxWGLvFFlqmQMP
    2s55WIYOBLjgTVmA
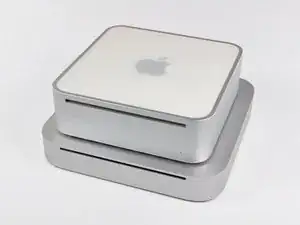
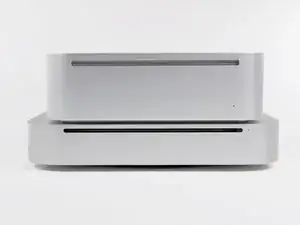
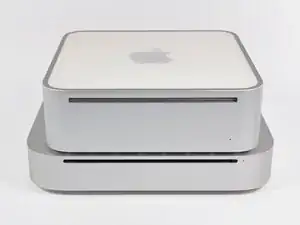
    • In comparison to the Mac Mini model A1176, the Mid 2010 is thinner and wider.

    • There is a definite difference in height between the Mid 2010 and previous iterations.

    There isn't much difference in volume. The new model is just a few cubic inches smaller, and it contains the power supply now.

    The old model can comfortably be laying on its side, saving desk space. I wonder how it would work with the new thinner case? I like the looks of the new design though.

    Joonas Kauhanen -

  6. MY4xrAfS5rTUiqSg
    MY4xrAfS5rTUiqSg
    SCDjcn61EdmvokER
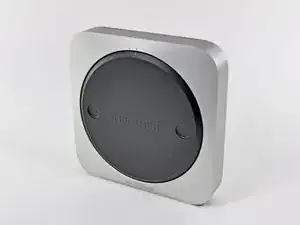
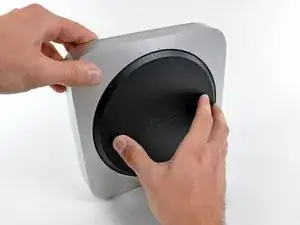
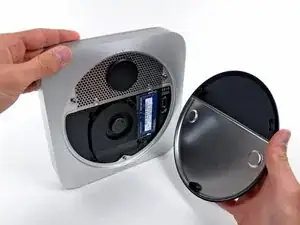
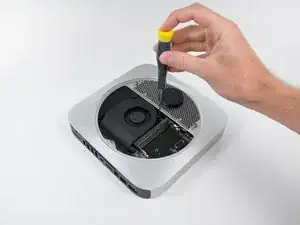
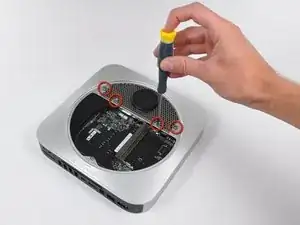
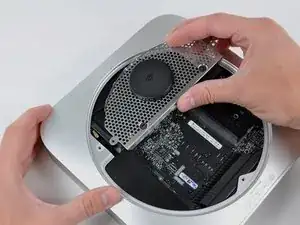
    • With a simple counter-clockwise twist, the black access plate can be removed for easy RAM and fan access.

    • Gone are the days of the putty knife...you will be missed old friend...

    I wish this was shaped like the logo

    rab777hp -

    Apple's new motto is "If you machine it out of a solid block of aluminum, they will come."

    Justin Freid -

    I want the Apple shaped hole. With the bite!

    rab777hp -

  7. ZZAODYmmdCHgCEwS
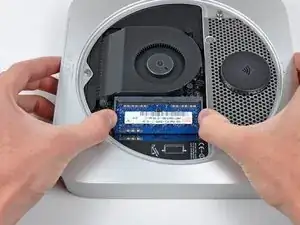
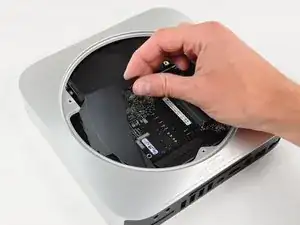
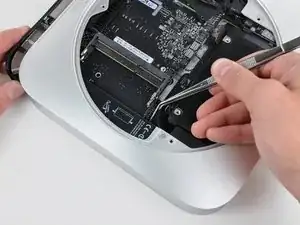
    • Much like many other new Apple products, removing the RAM is quite feasible this time around.

    • This little guy comes with two SO-DIMM slots capable of supporting up to 8GB of RAM.

    • Our base unit came strapped with two gigs of RAM.

  8. mQo1Z4UvatvVCo4P
    mQo1Z4UvatvVCo4P
    rQNY5q3ZqHWVFt2J
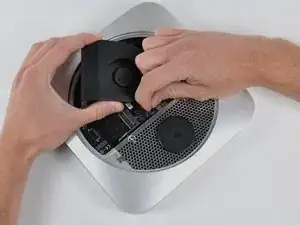
    • After removing two screws, the fan can be lifted out to access its power connector.

    • The connectors inside this machine look pretty consistent with those found in Apple's current product lineup. Nothing too new here.

    • All three fan screws are isolated with rubber dampers; a feature not seen on older apple machines. Low noise and vibration are big selling points for Apple these days, and the new Mini's idle emission of 14 dB is a testament to those design goals.

    Since not everybody has seen the Mac Mini connectors before, they are removed most easily by lifting up on the wire-end of the connector. Use care as it is very easy to break the plastic that retains the pins in the connectors. Using something soft and thin, like the end of a plastic wire tie to lift the connector is safest. Do not pry against the motherboard. Not much lifting force is required to remove the connectors, but done incorrectly, the connectors can be damaged fairly easily.

    Doug -

    Thanks much Doug. Big oversight in teardown description

    mrmarria -

    You’ll need a Torx T6

    nirv -

    The fan connector is a Vertical Insertion (JST)

    • Important: These connectors are extremely fragile. Use extreme care. Major repairs may be needed if damaged.

    • Use a black stick under the cable, next to the connector, with a finger over the top for support, or grasp cables with tweezers, and lift straight up to remove.

    • Keep connector level to board when disconnecting and reconnecting.

    • When connecting, verify that the grooves in the connector face down.

    • Press evenly when reconnecting or connector can be tipped up and not fully seated.

    nirv -

  9. OJdd15lFp2nttRDh
    OJdd15lFp2nttRDh
    mhw2S5vC2i2MQQrb
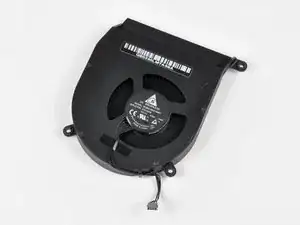
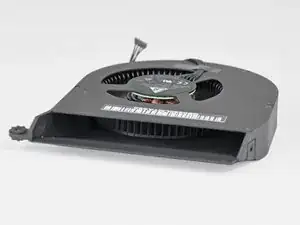
    • Like previous generations, the new Mini is cooled by a single brushless fan.

    • The extremely high blade density of the blower pushes a good amount of air while keeping noise at a minimum.

  10. TbBE3qH2KUVdOYES
    TbBE3qH2KUVdOYES
    EHTuCEhZhMtA6gfU
    • The Wi-Fi antenna plate is held in place by four screws.

    • After a good deal of wiggling, the antenna plate can be slid out from under the lip of the outer case.

    I found that a T9 was needed for two of the screws, not T8

    Kirk Carver -

  11. fcBLyZuxIbDF5YwW
    • The top Wi-Fi antenna connector is hidden underneath the antenna plate near the hard drive connector.

  12. vDcTdnSFBSbfV1eU
    vDcTdnSFBSbfV1eU
    dfpJTrwGPPc5kTBm
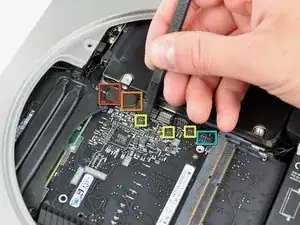
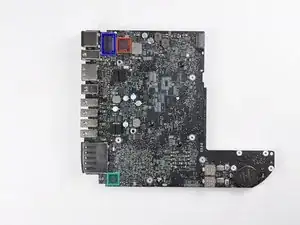
    • Removing the cowling gives access to various connectors on the logic board:

    • Hard drive flex cable

    • Optical drive flex cable (in the server model, this is where the second hard drive flex cable is)

    • Thermal sensor cables

    • Infrared board cable

    If you are planning on removing the 'logic board' - disconnect all the indicated (colored square) connectors on the logic board. Note: The hard drive and DVD drive do not slide out with 'logic board' assembly. You will break a connector like I did if you do not disconnect all the connectors.

    chaz -

    Second, the optical drive connector ripped right off the PCB, no fixing that...

    Alexandre Hamel -

    As stated in the intro, "Teardowns provide a look inside a device and should not be used as disassembly instructions." Repair guides for this device can be found here.

    Andrew Bookholt -

  13. efFO5MZ1LpGsvUkl
    efFO5MZ1LpGsvUkl
    3mcW146s2F5yjJZ3
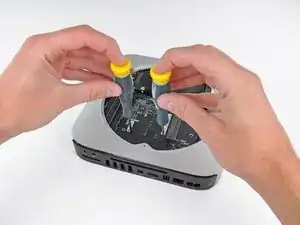
    • Behold, iFixit's specialized Mac Mini Mid 2010 logic board removal tool!

    • There are two blind holes in the case of the Mini that are meant for the ends of Apple's u-shaped logic board removal tool.

    • Being the shadetree mechanics that we are, we decided to circumvent the special Apple tool in favor of something that works just fine while keeping extra dollars out of Mr. Jobs' pockets.

    • We now carry our own Mac Mini Logic Board Removal Tools (shown in the second picture) designed with a rubberized high-torque handle to the exact specifications needed to remove the logic board without the risk of inserting abrasive tools into a delicate logic board.

    You just show two screwdrivers in two holes but don't say what you're doing. Are you simply dragging the board out? What about the spring clips on the edges of the front panel? Does the "tool" press something that disengages these clips? (Step 15 shows the clips better.)

    plink53 -

    Hmmm... would a a little bending of a spare wire coat hanger work for this? Sounds like the same type locking mechanism that was used on Ford head units during the 90s.

    Andrew -

    Yeah, but what are you actually doing with the holes? Pressing? Pushing? Twiggling? Pulling?

    Viktor -

    There is a black torque screw to the left of the left side blind hole. It is removed in the photo but no reference to this in the guide. This has to be removed or the board won't slide forward.

    Todd -

    As stated in the introduction, "Teardowns provide a look inside a device and should not be used as disassembly instructions." Keep an eye out for a full set of repair guides that will be released shortly.

    Andrew Bookholt -

    The holes simply give anchor point for whatever tool you use to push/pull the logic board from the case. There is nothing released inside of them. Once again if you didn't remove the small black torx to the left of the blind hole, the board won't move.

    Todd -

    'black torque screw'... should that be 'black torx screw'? If so, what size Torx driver is needed? It looks pretty small.

    Doug B -

  14. 3JFARoEWSI2oDu6K
    3JFARoEWSI2oDu6K
    UrpcLd3XDQORsIaH
    lfGVpFhLwQ2LWueB
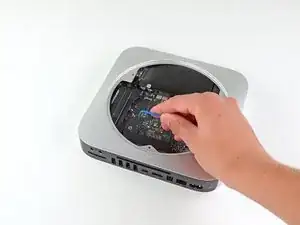
    • Before completely sliding out the logic board assembly, the power supply connector must be disconnected.

    • After disconnecting the power cable, the logic board assembly slides right out.

  15. JcJsOZs1vnEpCVWb
    JcJsOZs1vnEpCVWb
    5oqyuqNb6PfGYpqM
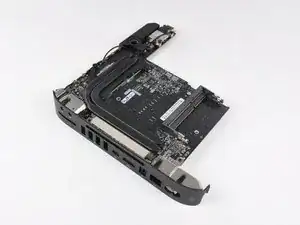
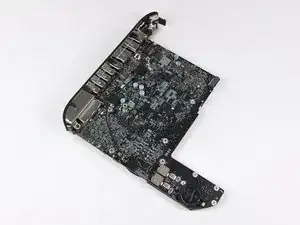
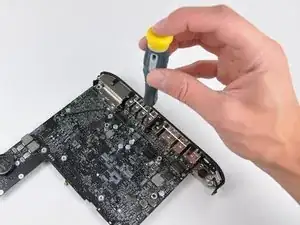
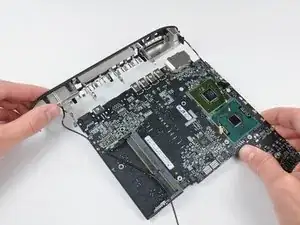
    • The top and bottom of the logic board and I/O frame assembly.

    • In using unibody construction, Apple had to get creative with the placement of the antennas. Two auxiliary antennas are the square steel components seen at both ends of the I/O frame.

  16. 2y1omOxJbOFREQYC
    2y1omOxJbOFREQYC
    b2KXs6DgTv2stGoU
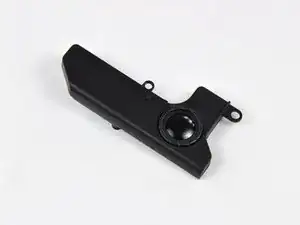
    • Two screws secure the speaker assembly to the logic board.

    • The Mini's 3/8" woofer dome won't be popping ear drums anytime soon.

  17. pTgq5NnfVUQbJEu4
    pTgq5NnfVUQbJEu4
    WtppX6kLtpsVKGvH
    E24yAt5hs2xYRZdc
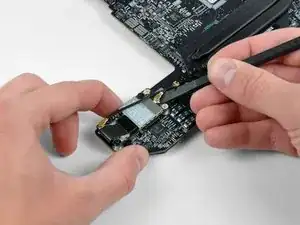
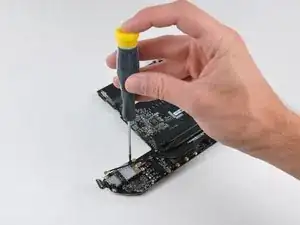
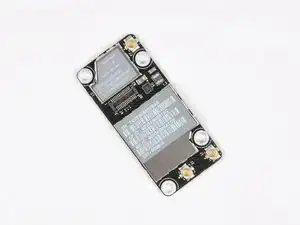
    • Next to where the speaker was located, we find the AirPort Extreme card.

    • The Mac Mini Mid 2010 has 802.11n Wi-Fi wireless networking, as well as Bluetooth 2.1 with Enhanced Data Rate technology.

    • After disconnecting the remaining two antenna connectors and its data cable, the AirPort card can be easily removed from the logic board.

    Great teardown - thanks for the info!

    Has anyone had any success in upgrading the airport card?

    In search of better Bluetooth range I'm considering retrofitting the Bluetooth 4.0 card that's in the late 2012 Mac mini, but the connectors for the FFC cable look to be in a different place.

    Are the two cards interchangeable and would I need a new cable?

    Thanks

    Greg -

  18. 3MN6bhGfIQmUX3ZK
    3MN6bhGfIQmUX3ZK
    bEFB2hcpgoRDN6W3
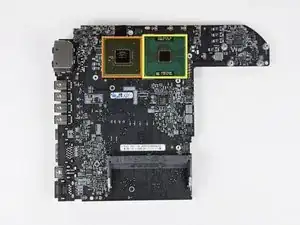
    • A couple of spring-loaded T8 Torx screws secure the oddly shaped heat sink to the processors.

    • In keeping with its space saving design, the fins directing air toward the vent hole are slanted to allow for better fan placement.

  19. UxI2l2RFicv2n3PC
    UxI2l2RFicv2n3PC
    jZ1TiLibVTiPvqRI
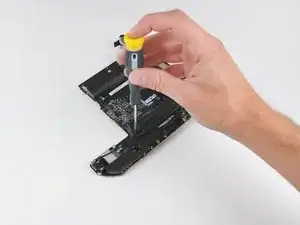
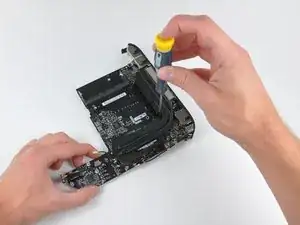
    • The I/O frame is held to the logic board by a few T6 Torx screws.

    • The two I/O bezel antennas are more visible in this picture. The long antenna wires are grounded periodically along their length, presumably for better signal transmission to the important part - the antennas themselves.

  20. lDYQCkBEfXwDQSw4
    lDYQCkBEfXwDQSw4
    eBGMrGURJuJjcmlh

    Hi, David!

    Congratulations, very Nice Tear Down!

    I wish to hear something about the "Light Peak". So, let's wait for the new release of the Mac PRO. I hope we could see some "new" hardware.

    Apple is just refreshing the "old decade" style CPU + GPU.

    I was wondering for Intel Core i5 and NVidia GTX 480M.

    May be in the new refresh of the iMac 27". But without the Light Peak, no chance! I will keep waiting for next years long!!!

    Any way, thanks for your great collaboration!

    I could learn that the new "Mac mini" is more for a MacBook than ever!!! It could follow the steps of the MacBook Pro as well, if Apple give some more minimal "space"

    Vrumm -

    Is the CPU soldered onto the logic board? It looks like it may be glued based on the Macminicolo teardown. Is it upgradable? If so what socket does it use?

    halo1982 -

    The processor is soldered to the logic board and is non-upgradable.

    Andrew Bookholt -

  21. U6LJprEONwgBNkDX
    U6LJprEONwgBNkDX
    IPlmLqMQGX6jnpfC
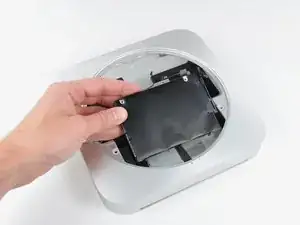
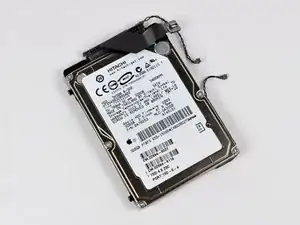
    • The Mac Mini comes with either a 320GB or 500GB SATA hard drive.

    • Sadly, there's only one hard drive in our non-server model.

    • Need more storage? Only time will tell if this Mac Mini is as easily modified as its predecessor. For now, we recommend just getting the server edition.

    Such a complicated harness! what are the various cables here?

    cromas -

    The main ribbon cable coming from the hard drive connector is the SATA to logic board cable. The other two small cables are thermal sensors. There is one thermal sensor attached to the hard drive cable and the other is attached to the other end of the hard drive.

    Andrew Bookholt -

    What drive height room is there? Wondering if it will take 1TB 12.5mm drives like the current MacBook Pro does.

    darwiniandude -

    In the process of trying to take mine apart, i accidentally broke the thermal sensor attached to he side of the hard drive. Is this a hard part to replace?

    Gerardo -

  22. DOMwGbuw6XhdXsDG
    DOMwGbuw6XhdXsDG
    fWWkf2oJmhbNgeEI
    WBLZJVM3uEyc6sJ2
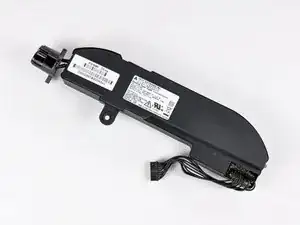
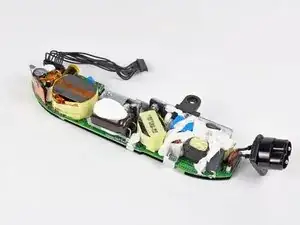
    • The new Mini's power supply churns out a minuscule 7 Amps at 12V. Compare that to the 25.8 Amps at 12V cranked out by the iMac Intel 27".

    • Like its iMac cousin, the Mac Mini finally says goodbye to external AC adapters.

    • Holy capacitors! Fingertips beware.

    That keeps the components from moving around and weakening the solder joints.

    Walker Quine -

  23. cmb12oAwEEsYxTqk
    cmb12oAwEEsYxTqk
    14InY6khhjbR6xYu
    pmcoeebNFwJ4h43M
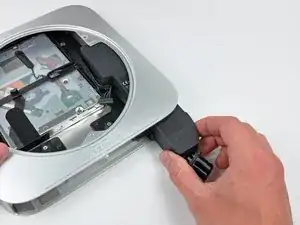
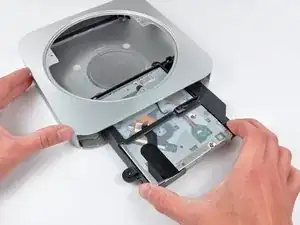
    • The optical drive bay drive simply slides out of the aluminum unibody housing.

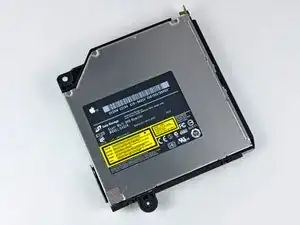
    • Well what do we have here? Is this a new optical drive? Why yes it is!

    • Hitachi-LG Data Storage (HLDS) Super Multi DVD Rewriter model GA32N

    • The optical drive is 12.5 mm thick, giving everyone a glimmer of hope for a sweet Blu Ray installation...

  24. vtbtxJ2TiycFasfl
    vtbtxJ2TiycFasfl
    wqqyEtLDkkbhiYTE
    G2AZ3DJjaYSYrbd2
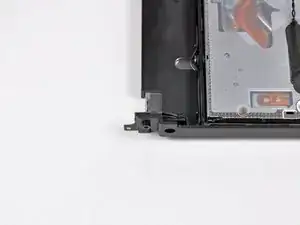
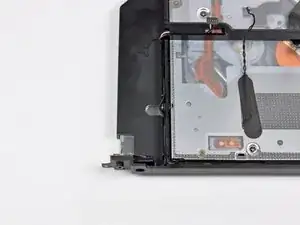
    • Due to popular demand, we've added photos of the IR sensor/receiver.

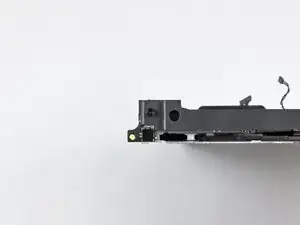
    • The IR sensor/receiver is located on the optical drive near the top right edge.

  25. InV6ANGofOU4huCi
    • The remainders of the Mac Mini Mid 2010.

    • Macminicolo took apart the server version of the new Mini. Check it out if you want to see how Apple stashed the second hard drive.

    • Thanks for following iFixit during this historic moment. Until next time!

Walter Galan

685540 Reputation

5 Kommentare

It seems the advantage of going with the server edition is the higher storage space and faster CPU. however you miss out on the DVD player. How easily do you anticipate it would be to upgrade the CPU on the non-server edition?

Diver Dave -

About Step 7, did you notice if the screw to the left of the RAM module has factory damage ?

There is a guy that claims that on different models he found stripped screws and that such stripped screw could eventually invalidate the warranty.

Michael Steel -

I didn't notice anything unusual when we were taking it apart - the screws seemed fine to me. The only time I've seen damaged screws is when we've disassembled a few random certified Apple Refurbished devices.

Andrew Bookholt -

Do you need a CDs drive ?

Lovable Lee -

The CD drive is not necessary. You can replace it with a HDD / SSD with an adapter.
Manuel Jesús Flores Jiménez -