Einleitung

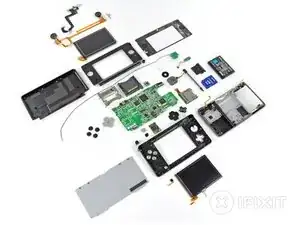
Although not released in the United States until the 27th of March, Nintendo's 3DS was released in Japan on the 26th of February. We pulled some strings to acquire this Japanese model, and cannot wait to see what makes the 3DS tick. Join us today as we tear down Nintendo's newest and most radical handheld device yet.

  1. kIdasThA5Uc3dKEZ
    kIdasThA5Uc3dKEZ
    IT5fmQpIhs2TcEs1
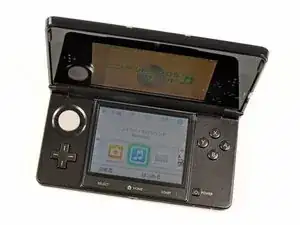
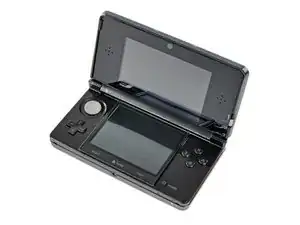
    • Fresh from the Land of the Rising Sun comes the long-awaited Nintendo 3DS! It's a great little device, and it feels high-quality when you get your hands on it.

    • New additions to the exterior of the latest unit in the DS line include:

    • 3D top screen (duh)

    • Dual cameras for 3D pictures/gaming

    • "Circle Pad" joystick

    • IR port

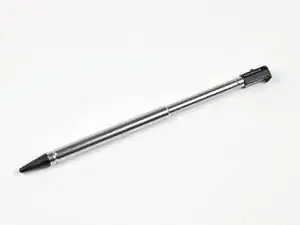
    • Metal stylus

    • Revised Start/Select buttons and a new Home button

  2. RACIKUTqHLSDi6tn
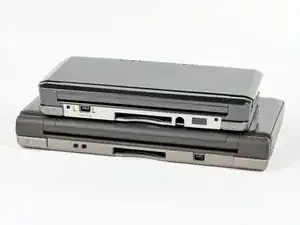
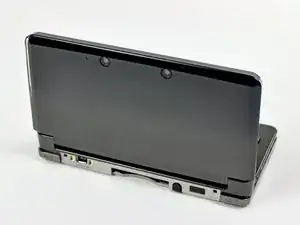
    • Here's how it stacks up to the Nintendo DSi XL. Note that it trades a smaller footprint for a bit of a thicker casing.

    • Nintendo has changed up the layout on the top side of the 3DS when compared to the DSi XL.

    • The charging port has been moved to the right side and contacts have been added presumably for the charging cradle, the stylus hole is now next to the game cartridge slot, an IR sensor window has been added, and holes for a strap have been nixed.

  3. eFByWckqSmYdcnm3
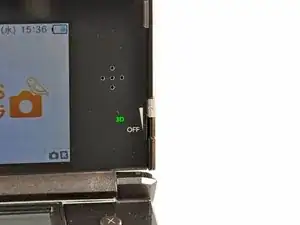
    • The 3D-adjustometer. You can select how deep of a 3D field of view you'd like by adjusting this slider up or down.

    • The top display of the 3DS reportedly produces 3D images through the use of parallax. A layer in the top LCD responds to adjustments in the 3D slider and changes the image slightly between each of your two eyes. When it is viewed from the recommended distance, the image appears to be 3D.

    • Nintendo is no stranger to 3D gaming, considering its past experience with the ridiculously cool and underrated Virtual Boy that uses slightly different means to achieve a similar 3D effect.

    • The 3D view *should* work for most people, but one iFixit employee (out of about 10 that tried it) had trouble viewing it. To him the screen looked different, but not "3D" like.

  4. IoKvdLAkHsuDMXxL
    IoKvdLAkHsuDMXxL
    pnGYr6PWWBKXhGYK
    hXJMBGsqPULThOul
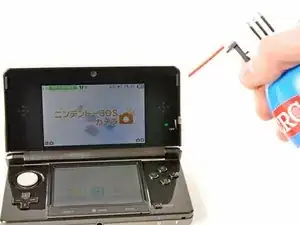
    • We found an interesting little feature of the 3DS by accident while blowing away some dust with canned air.

    • External mics on the 3DS pick up the characteristic noise of wind blowing by the device and spin the live icons in the background of each menu as if they were in a tornado.

    Any noise will trigger this, though. Even coughing.

    neonnero -

  5. RFH4US3X66fXYKCY
    RFH4US3X66fXYKCY
    OrjGYvYotn3wCULi
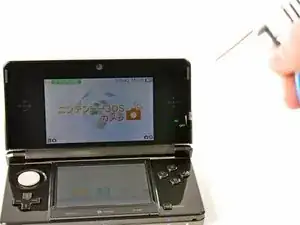
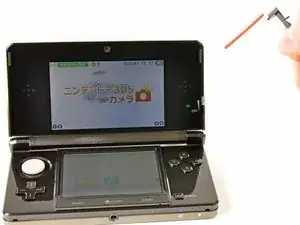
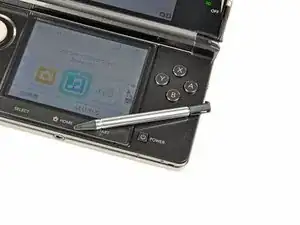
    • It turns out 3D doesn't show up very well when you try to take a picture of it. You can still get a good view of the touch-sensitive lower screen and the newly designed metal stylus, though.

    • Since none of us in the office are fluent in Japanese, we'll have to wait until later this month to get a 3DS that we can fully enjoy.

  6. l31DElbHEobKBQpD
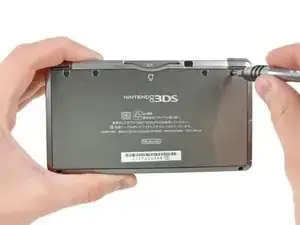
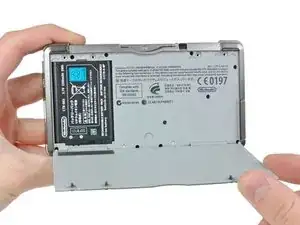
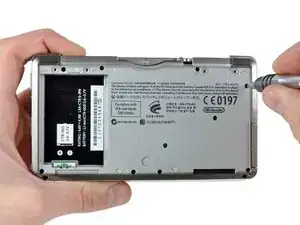
    • A couple of Phillips screws are all that stand in the way of us and the precious.

    • Unlike previous DS consoles, the entire back cover of the 3DS comes off as one piece rather than having a small door to access the battery. This makes for a cleaner look, but also means that replacing the battery will take a little longer.

  7. E2xSKjqUVqUOLaDY
    E2xSKjqUVqUOLaDY
    6MLkEKNK12PONaZr
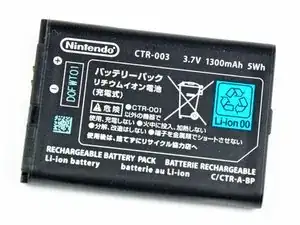
    • The 3.7V 1300mAh 5Wh Li-Ion battery provides a measly 3-5 hours of battery life. The sweet 3D action comes at a price. Even when playing original DS games, the 3DS lasts only 5-8 hours on a single charge.

    • The battery life is most likely diminished by the reported faster processor, dual LCD elements in the top display (to control the parallax effect), and more hardware intensive programs.

    • With the short battery life in mind, Nintendo ships the 3DS with a charging cradle for convenient charging. According to them, a full charge takes 3.5 hours.

    What is up with Nintendo and the number 3.5?

    Joe Drew -

    I cannot find replacements for this backplate anywhere! Does anyone know?

    CORED3SIGN -

  8. EnGbwxdvbXWvwmdi
    EnGbwxdvbXWvwmdi
    E1PmuMLM2uYnku5P
    vyeXeG2SZJjZwpxC
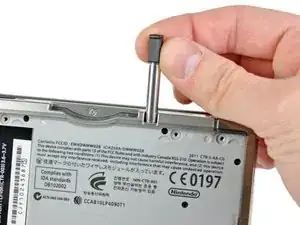
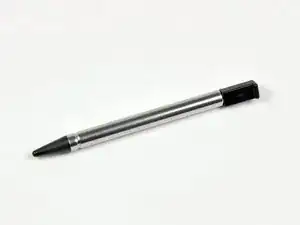
    • A cool telescoping stylus is stored in a slot to the left of the game cartridge slot.

    • Its metal construction makes it feel higher quality than the single piece injection molded stylus found on earlier DS revisions.

  9. SnDgIacVLJv5kkNE
    SnDgIacVLJv5kkNE
    IkjXAUHUgmdZch6A
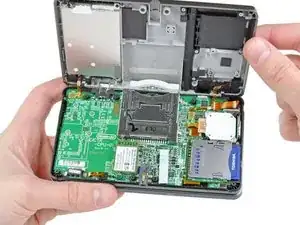
    • A few Phillips screws are removed with our trusty 54-piece bit kit, and the lower case lifts right off.

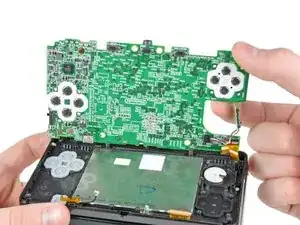
    • With the lower case off, we get a good look at the motherboard and its many attached components. Having items like the joystick and SD card reader on separate boards makes their replacement less costly if they are to break in the future.

    A PH00 is too big for these screws, and a PH000 seems to also be unable to snag it

    3dsuser -

    These screws strip INCREDIBLY easily. PH00 works, but you need to press down fairly hard and sorta jerk the screwdriver around a few degrees at a time. Even after working this out (by stripping the first one) I accidentally stripped the next-to-last screw I was removing, requiring me to cut the screw well.

    Tai -

    Another vote for using a PH000 bit for the smaller internal screws, it is a much better fit. Apply downward pressure to the bit as you turn.

    Matt Cooke -

    what are each ribbon cables on this bottom? the one behind the battery broke and i dont know if its worth replacing, ds works fine without

    sonic sega -

  10. 2lmCAgEK6rydGfPb
    2lmCAgEK6rydGfPb
    ErOT5MRuuBXISQRW
    WOssAmilZH1RKQcm
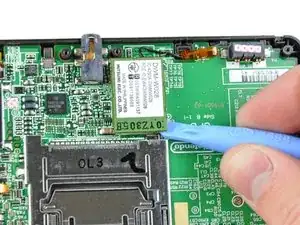
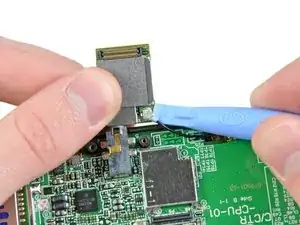
    • The Wi-Fi board can easily be removed from the motherboard with a plastic opening tool.

    • After disconnecting its singular antenna, it is free from the 3DS.

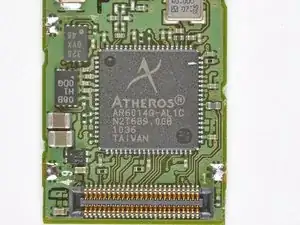
    • The back of the board has a sticker labeled Mitsumi DWM-W028, but at its heart lies an Atheros AR6014 IC for 802.11 b/g connectivity.

  11. RRZgnVoDCrIujZKu
    RRZgnVoDCrIujZKu
    PvE1aYykjWsRBApn
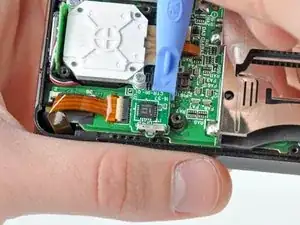
    • Moving on, the miniscule IR board can be pried off the board next.

    • Nobody is really certain what the infrared port on the 3DS will do just yet, but we're thinking it's for some 3DS to 3DS line-of-sight communication.

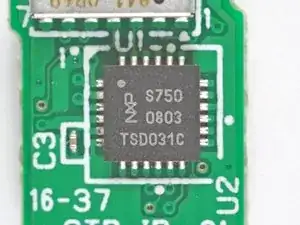
    • The IR controller IC is manufactured by NXP and has the markings:

    • S750 0803 TSD031C

    So far, atleast one thing uses the IR port.

    there is available a addon for the 3ds that gives you a extra pair of shoulder buttons and a second circlepad to the right.

    It uses the IR port.

    So supposedly the ir port allows for device to 3ds connection.

    mahonen -

    The guide skims over this part - though it's one of the most important.

    -

    The speaker ribbon cable (first picture, lower left, topmost cable/smallest of the 3 ribbons in this area) connects to the mobo goldteeth facing away from keyboard (damage/improper assembly will result in a non-bootable 3ds that has the power LED flash for less than a second before turning off). The white line shows where a fold should be.

    -

    The camera cable (directly underneath speaker cable, largest of the 3 ribbon cables) connects with goldteeth facing the mobo.

    The top LCD (non-touchscreen) cable (opposite side of mobo, medium in width) connects with goldteeth away from mobo. This should be the last cable removed in disassembly, and the first reattached.

    -

    If you plan on removing the top part of the 3ds, note of how the 3 cables are oriented (what direction goldteeth face) and layered (which cable is on top of which cable). Doing this incorrectly will likely result in cables not reaching where they need to go (see step 18).

    Tai -

    Removing the cables must come after step 13 (step 12 if you fudge things) - but the pictures in step 11 are better suited to showing cable order.

    Tai -

  12. lkGtpyCuwkMCeNS4
    lkGtpyCuwkMCeNS4
    U3yGUisxlAMDabDn
    kNC3kHgJAxOFXYXi
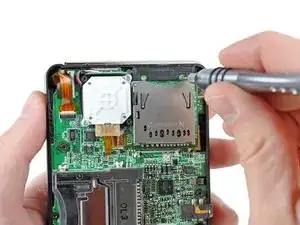
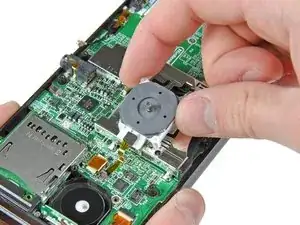
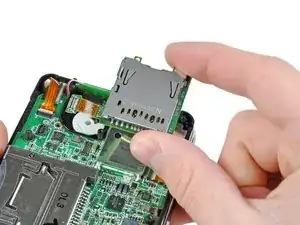
    • The bottom of the Circle Pad and SD card slot sit side-by-side and come out with little effort.

    • This is the first time a Nintendo handheld console has had directional buttons other than the D-pad, whereas the Sony PSP has featured an analog joystick since its debut in late 2004.

    • A 2 GB SD card comes standard with the 3DS, and can easily be upgraded to a larger capacity SD or SDHC card, an important option if you plan on snapping lots of 3D photos and purchasing games from the Nintendo eShop.

    All the screws here mount the mobo to the case. And even though you can remove the mobo with the circle pad ribboned in, the cable may break as it flops around if you're not careful.

    Tai -

    on some models i think the sd slot is soldered on to the mother board so be careful

    DA REAL DUCK -

    Be careful removing the SD card reader Mine has some strong adhesive holding it to the plate which resulted in me breaking one of the connections and having to resolder. Use IPA 90% (min) to weaken it before prying the ready off to save yourself the extra work!

    Kittysoba -

  13. CMyvFq3H6EJWqGHZ
    CMyvFq3H6EJWqGHZ
    BUSghgRLYJyRNZab
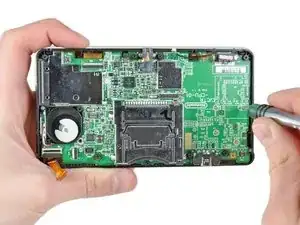
    • Removing the remaining pesky screws securing the motherboard to the lower case.

    • Motherboard almost out...this looks kinda familiar...

    Once the motherboard is out, all the buttons and button membranes in the bottom part of the plastic shell are free to move. Turning or jostling the shell will result in a lot of plastic pieces everywhere.

    Tai -

  14. ZNLWCfUYPgGCdpbA
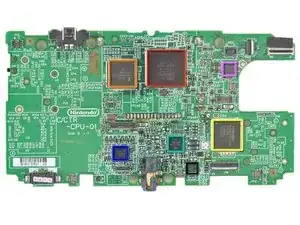
    • Chips we've found inside the 3DS motherboard (click here for high-res version):

    • Nintendo 1048 0H ARM CPU

    • Fujitsu MB82M8080-07L 128MB FC-RAM

    • Toshiba THGBM2G3P1FBAI8 2 GB NAND Flash

    • Texas Instruments PAIC3010B 0AA37DW

    • UC CTR 041KM73 KG10

    • Invensense ITG-3270 MEMS Gyroscope

    • ST Micro 2048 33DH X1MAQ Accelerometer Model LIS331DH

    The card reader pad to the bottom right of the red chip. Can that be jumper wired to the trace line, if that pad was ripped off when removing the card reader??

    glowstick21 -

  15. n1CKAdbPrHyNPNuW
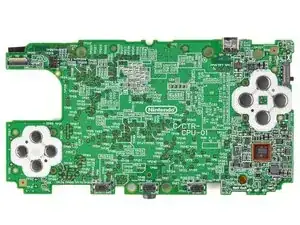
    • The back of the motherboard is a little less exciting:

    • TI 93045A4 OAAH86W

  16. NTAjH1fPWq5TUdgS
    NTAjH1fPWq5TUdgS
    gBvSNRjQtMBTRHAV
    gYOThjT6MNSqVsm6
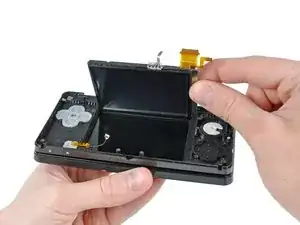
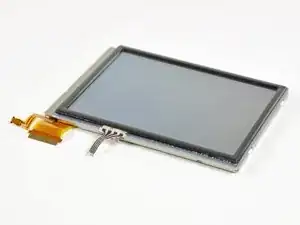
    • The lower LCD assembly lifts out without any trouble.

    • The 2.42" x 1.81" LCD with 320 x 240 pixel resolution is capable of displaying 16.77 million colors.

    • The digitizer on the bottom display is much thicker than those found on most cellphones, most likely due to the fact that the touch display is used with a stylus, rather than a fingertip.

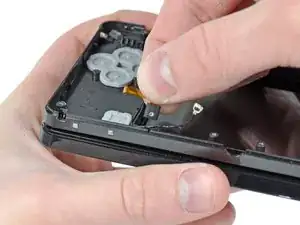
    • Also, the lower microphone can be pulled out of the case at this point.

  17. 4gfZYgGog2eHHBiX
    4gfZYgGog2eHHBiX
    ZYbHdeFTFmqqxIvQ
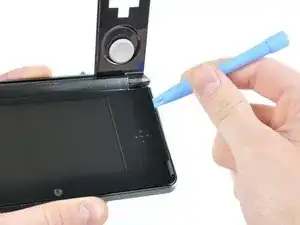
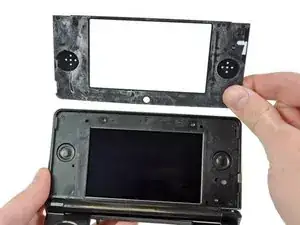
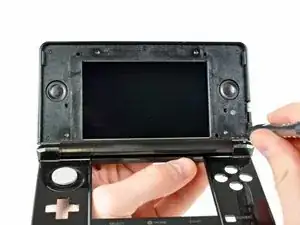
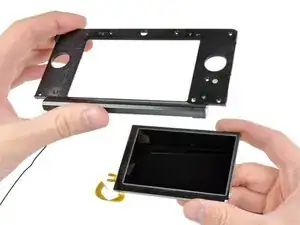
    • Whereas older versions of the DS had four rubber screw covers on the front display bezel, Nintendo opted for a sleeker approach for their new system by adhering a front panel to the bezel to hide the screws.

    • A little bit of help from a heat gun and a plastic opening tool gives us fairly easy access to the upper display.

    While you can replace the same front panel if you're careful, it will likely be bent (and a small eyesore) from the force required to remove it.

    Tai -

    i looked all over ebay for the front panel replacement and cant seem to find it, do you know of any sources?

    BHayes82 -

    Be careful when heating the panel, if you overheat the panel you can ruin the screen underneath and have to replace it!

    Joe Drew -

  18. ONDBDBqwLJCmcJVR
    ONDBDBqwLJCmcJVR
    YhXnxXcwOlRSkQvt
    FuuSaBZmOypiFxwd
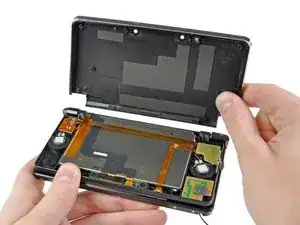
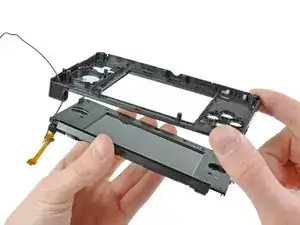
    • The rear bezel lifts off the display after removing six Phillips screws to reveal the speakers, Wi-Fi antenna, and upper LCD.

    • To continue the disassembly, we have to separate the hinges and do a bunch of cringe-inducing threading of ribbon cables through the hollow hinges.

    • Threading the upper display and camera cables through the tiny hinge tube is something that Nintendo undoubtedly accomplishes by the use of robotic machinery.

    This is not shown well - but to separate the top part of the 3DS from the bottom (sorta as shown in step 21 but not done in step 18) - refer to step 18's picture of the circuitry, LCD, and speakers. Be careful, damaging a cable here = potentially dead 3DS.

    -

    First, the 3 ribbon cables from step 11 must fed through a plastic slot in the bottom part (where the cutouts of the d-pad + buttons are), then GENTLY coiled sideways like an ice cream cone through small hollow silver cylinder (that's narrower than the cables are wide) and through a cylinder on the top part (where the non-touchscreen is), pictured in step 18 near where the brown/black ribbon cables intersect.

    -

    On the opposite side, left of the notification LED, there is a removable silver dowel (solid cylinder). With a T-pin (or a sturdy needle), pry the dowel to the left, "toward" the LCD. There is a little notch on the dowel that will help. Once the dowel is fully to the left, the two halves of the 3DS can be separated, and the dowel removed.

    Tai -

  19. tF3EFNBICBFqlwCo
    tF3EFNBICBFqlwCo
    L2UbS1othjQxVjGp
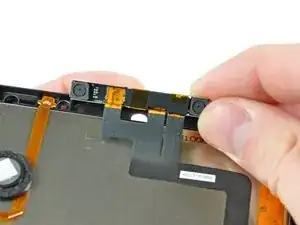
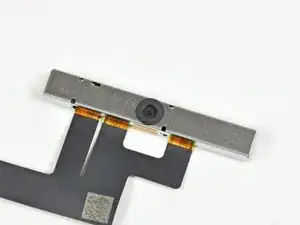
    • All three cameras are connected together via one ribbon cable. We're finding this to be a trend amongst the smaller multiple-camera devices, and it makes sense -- the info needs to go to the same place to be processed.

    • It's official -- this is the most camera-laden device we've ever taken apart.

  20. sNIU6xxDNPEn2SjQ
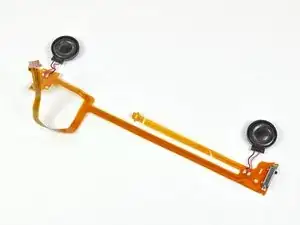
    • The stereo speaker assembly provides the tight bass and crisp highs adequate, tinny sounds people have come to expect from portable devices.

    • These speakers play more than just game sounds; the Nintendo 3DS is compatible with both MP3 and AAC files, but we doubt it will be replacing anyone's iPod in the foreseeable future.

    • The speaker assembly ribbon cable also contains the 3D field of view adjustment slider and the dual camera status LED.

    Whaere can i get this my 3D slider is broken but I wol dbuy from here but ifixet dos not have it?

    AppleTopic -

  21. BRGA4BYUDoYnR3DV
    BRGA4BYUDoYnR3DV
    j25jUOI6Or4WG4gj
    • After removing the speakers, the top LCD module comes right out.

    • There's three cable connectors for this LCD -- to display the image, as well as for the parallax barrier that gives the "3D" effect in the 3DS' games.

    • Our friends over at Nikkei Electronics' Tech-On disassembled the LCD panel a little bit further than we did, finding six discrete optical elements.

  22. v1Ie3BkpBYkCOeaP
    v1Ie3BkpBYkCOeaP
    YCgFsmN1OX5ATYYw
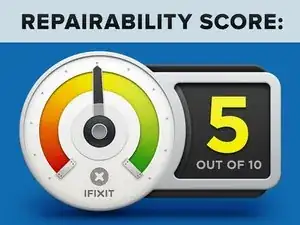
    • Nintendo 3DS Repairability Score: 5 out of 10 (10 is easiest to repair)

    • The battery is easily swappable by removing the back cover.

    • No proprietary Tri-Wing screws were used, just Phillips #00.

    • The top display's cables are routed in such a way that it makes them quite frustrating to remove without ripping them off, and just as difficult to re-seat properly during device reassembly.

    • There's tons of little components inside the 3DS, which may potentially cause problems if you happen to lose one while performing a repair.

    • The majority of connectors are ZIF, and it's difficult to ensure each one is connected properly without reassembling the whole thing and starting up the device.

    • The headphone jack and charging connector are soldered to the motherboard, meaning you need to take out your soldering iron if you accidentally break them.

Walter Galan

685541 Reputation

18 Kommentare

Lack of details : "Removing the remaining pesky screws securing the motherboard to the lower case." (where and how many?)

jpfroud -

********Note: If your top or bottom screen was working before disassembly and doesn't work after reassembly, then it's likely that the connector is loose or dirty or damaged or not clipped or PLACED UPSIDE-DOWN. I had this issue with my Super3DS XL(2015 New3DS XL) and it turns out that the reason why my top screen wasn't working after put together, was because I had the top LCD connector upside-down. After I correctly put the connector in, It worked again! :) ********

justjustintuber -

Thanks for great guide - I could'nt find the access to the screws on the top screen until I read your guide.

Only problem I had was that I rounded out 2 of the screws in Step 9 and had to carefully drill the heads off and remove the shanks later. So I strongly recommend using the correct and good quality screwdriver as these are very tight

PaulM -

********Note: If your top or bottom screen was working before disassembly and doesn't work after reassembly, then it's likely that the connector is loose or dirty or damaged or not clipped or PLACED UPSIDE-DOWN. I had this issue with my Super3DS XL(2015 New3DS XL) and it turns out that the reason why my top screen wasn't working after put together, was because I had the top LCD connector upside-down. After I correctly put the connector in, It worked again! :) *********
justjustintuber -

Where does that black plastic piece directly above the blue SD card go? I can't seem to find a picture of it in place

SAJnabeshin -

This is a great tutorial. Do you have one for removing and replacing the cartridge reader?

Jay -

Hey there! This is a teardown, not a real repair guide, you should check out the 3DS repair manual! We don't have a guide for replacing the reader itself, as that requires some very specialized soldering, but you can follow the motherboard replacement guide, and if you are a microsolderer, you can replace the reader itself! Best of luck!

Sam Goldheart -

Is there a similar guide for the 3DS XL? I am replacing the middle part of the case after the hinge broke, and it seems that I have to pull the whole thing to pieces just to replace it...

Wii Console -

Hey there! This is a teardown, not a real repair guide. I'm not sure which middle piece you're looking to replace, but we have lots of 3DS XL repair manuals on its device page!

Sam Goldheart -

@sam I've tried several of these manuals, and as helpful as they are, none of them separate the hinge from the 3DS XL, what I need to do to replace the top-part of the lower half of the case, where it has split from the notification (StreetPass/SpotPass) light to the Wifi connection light, and every time the 3DS XL is closed, the crack gets bigger.

Wii Console -

Hi, I'm going to have to take out the cable from the battery placement that leads to the board to remove static buildup. Is there any way I can do that, like is there any cables that connect to it? I haven't taken the 3DS apart yet.

hinkley.boy.robert.l -

UPDATE: there was no static, had it looked at by a repair guy. I’ve been looking at the board components, and I’m starting to wonder if the power cable connector is loose or out, if not, the board or other components. While I am at it, figuring out (this may be for a year or so, don’t have a job yet :( ) why my Nintendo is not turning on (replaced the battery, nothing happens), I’m almost considering upgrading the speakers to a higher-quality speaker, if not, at least louder and more efficient. Anyone toyed around upgrading components, and have any advice how to and how not to do it? I would greatly appreciate it, as Nintendo no longer performs repairs on my model (original CTR type)

hinkley.boy.robert.l -

The stupid screw right below where the battery goes is totally jammed in there and none of my screwdrivers fit it. What do I do I'm so lost

musicalwhovian25 -

Does anyone know the manufacture and type of the zif connector that is used for the bottom lcd.

NOT the digitiser and power.

Dennis Peters -

For the old 3ds(first)

Dennis Peters -

Is it possible to do a simple teardown to get just the casing that is showing externally? I'm looking to do a custom paint job on my n3ds(not xl) from the chromatic red I got it as into a dark chromatic purple and would like to tear down just enough to get only the outer shell off.

Sledvick -

so my volume slider is broken and the actual slider inside works its just the plastic pice you slide that is in the outside, where can i buy one. now if i need to adjust the volume i have to open it and slide the volume with twisers.

AppleTopic -

I give up on my 3ds, when trying to repair it more components got broken than before.

The power adapter didnt worked, so when exchanging it the replacement broke into half when I put the cover on it. Then when lifting up the cover the conection from curcuit board to sholder button ripped. And then when exchaning the next power adapter and shoulder button. Well both got destroyed, the adapter broke into two parts, and the wire of the button ripped.

ZockerCo -