Einleitung

Wenn dein Asus ROG G752V keine Ladung mehr hält, ist der Akku höchstwahrscheinlich defekt und muss ersetzt werden.

Ein funktionsfähiger Akku versorgt den Laptop mit Strom. Nach einer bestimmten Anzahl von Ladezyklen wird sich der Akku des Laptops jedoch schnell entladen. Wenn du merkst, dass sich der aufgeladene Akku schneller als gewöhnlich entlädt, solltest du ihn zunächst neukalibrieren, um die genaue Ladekapazität zu ermitteln. Wenn du weiterhin einen deutlichen Leistungsverlust des Akkus feststellst, solltest du ihn ersetzen.

Ein beschädigter Akku kann einen gefährlichen Brand verursachen. Wenn der Akku aufgebläht ist, triff geeignete Vorsichtsmaßnahmen.

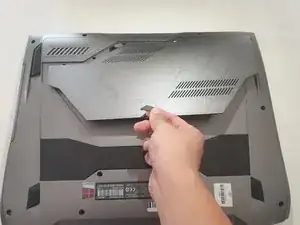
Schalte deinen Asus ROG G752V vor Reparaturbeginn vollständig aus und trenne ihn von allen externen Stromquellen ab.

  1. Nr2ZkpjyGuHThD5K
    Nr2ZkpjyGuHThD5K
    JIWNW6fIIIBkM6lw
    • Kontrolliere nochmals, ob alle externen Stromquellen abgetrennt sind.

    • Entferne alle elf Gummistopfen mit einer Pinzette von der Rückseite.

  2. 5LbQjtWldVfM5oQV
    5LbQjtWldVfM5oQV
    Y2OO4pWiyQNVTEWx
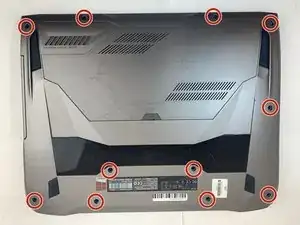
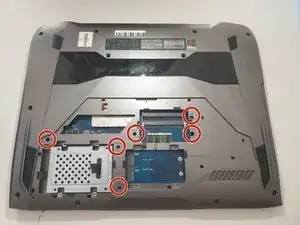
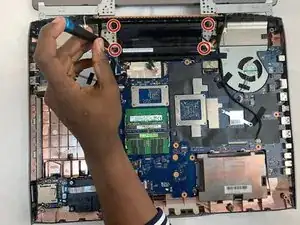
    • Drehe die zwölf 5,2 mm langen Kreuzschlitzschrauben #0 auf der Rückseite des Laptops heraus.

    • Eine der Schrauben befindet sich unter dem Gummistopfen in der Mitte.

    In my case, the 4 screws alongside the touchpad are smaller than the others.

    Jonathan Deeb -

  3. dJnqnWcbklmXXCEm
    • Ziehe die Gummidichtung hoch, bis die Serviceklappe aufgeht.

  4. Bs6NqVhlhUC6uAFc
    • Entferne die sechs 5,2 mm langen Kreuzschlitzschrauben #0 unter der Serviceklappe.

    The bottom red circle should be 1/2” to the right.

    y2l2 -

  5. xEa3sWcKW42EgfZW
    • Ziehe das optische Laufwerk mit der Hand heraus.

    You will need a small safety pin or similar to release the CD drive tray so it can open. Look for a small hole and insert the pin into the hole and push, it should normally open the tray.

    Once open, look for 3 small screws that are attached to the cover. These have to be removed so the cover can come off.

    Build It -

  6. yILVlNr5nclFfqNw
    yILVlNr5nclFfqNw
    QQk4BDq4CeHSvO6k
    • Heble die Bodenplatte mit einem Öffnungswerkzeug vom Hauptgerät ab.

    • Es geht leichter, wenn du an der Vorderseite anfängst und dann an den Seiten weiterarbeitest.

  7. IGPGkuUm6xuIbPgy
    IGPGkuUm6xuIbPgy
    mNtCEYrZEACELUod
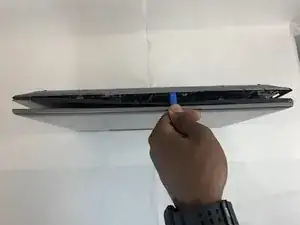
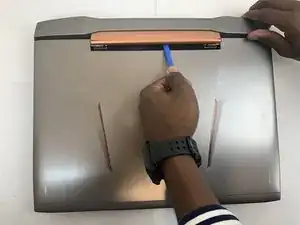
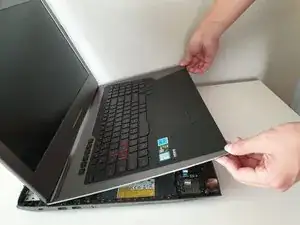
    • Entferne das Scharnier an der Rückseite der Laptopabdeckung mit einem Öffnungswerkzeug. Das Teil sollte abspringen.

    • Behandle die Abdeckung vorsichtig, ein Lautsprecherkabel ist noch angeschlossen.

  8. rERBjj5KGCGNdvJh
    rERBjj5KGCGNdvJh
    lqP2oBpioPUhCLMp
    • Trenne das Lautsprecherkabel ab.

  9. t1gRTHAICM1aGLqx
    t1gRTHAICM1aGLqx
    ToX5gljPADAYrWJu
    • Hebe die Tastatur etwas 3 cm hoch und ziehe sie langsam heraus.

    • Es gibt noch Kabel zwischen der Tastatur und der Hauptplatine. Hebe die Tastatur nicht höher als 5 cm.

  10. NHdEXSQwiC1DhRE3
    NHdEXSQwiC1DhRE3
    xUeEGDC4hKOe24Ts
    RmpdvAhOhWXknGFu
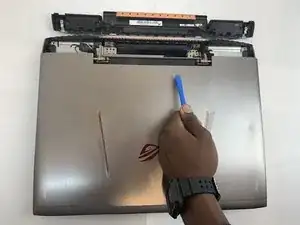
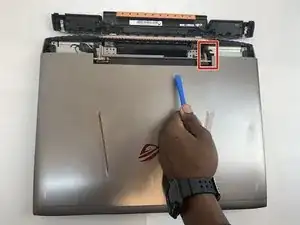
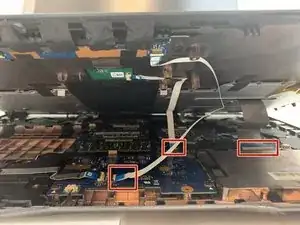
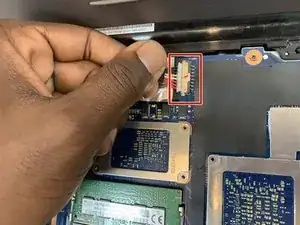
    • Nimm ein ESD-sicheres Werkzeug und löse alle drei Flachbandkabel, die den Laptop mit der Tastatur verbinden.

    • Klappe den kleinen scharnierartigen Sicherungsbügel am ZIF-Anschluss mit der Spudgerspitze oder deinem Fingernagel noch, um das Kabel zu entriegeln.

    Do you do the same thing in Reverse lift the flap up place the ribbon down and then it's snaps?

    Reaper Grimm -

    I didn't need to disconnect the ribbons, just slide the keyboard forward a few inches for the following steps

    Jason B -

  11. uIakqLG5ZZ5kpWXC
    uIakqLG5ZZ5kpWXC
    BXrHVoiWOVS4uRyF
    • Hebe die Tastatur etwas 5 cm nach oben und entferne sie vom Gerät.

    • Achte darauf, dass das Display so wie im Foto geöffnet ist. Dadurch ist sichergestellt, dass keines der Bauteile im Inneren verbogen wird.

  12. QnIQyPfFCHwr3mGg
    QnIQyPfFCHwr3mGg
    i2vCYdvxfBRFykID
    ICTqBl1bYTekXOxS
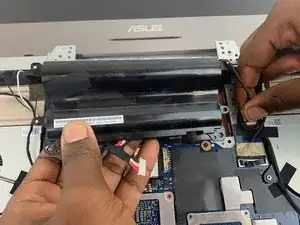
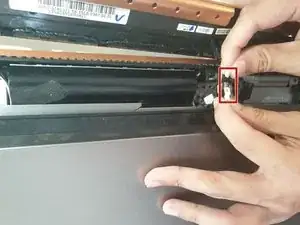
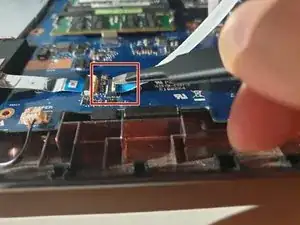
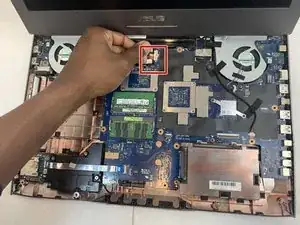
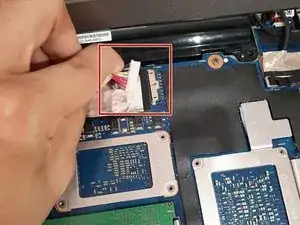
    • Ziehe das Akkukabel vom Anschluss auf der Hauptplatine vorsichtig nach links und trenne es ab.

    • Ziehe parallel zur Hauptplatine, nicht nach oben.

  13. JGEITOIC42BHMESO
    JGEITOIC42BHMESO
    oqID6WYpjou5XttI
    BkZhKaiDtyYdXCTn
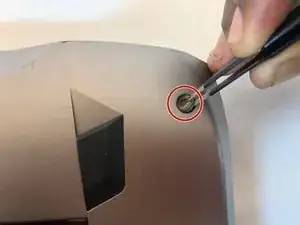
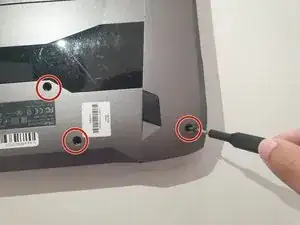
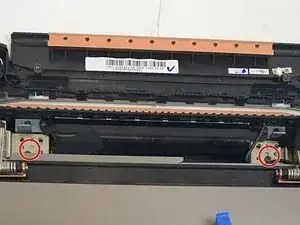
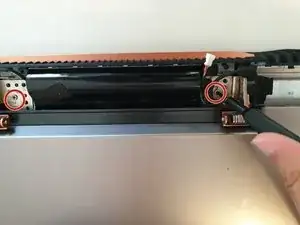
    • Entferne die beiden 5,8 mm langen Schrauben am Scharnier, mit denen das Display und das Laptop befestigt sind.

    • Dadurch löst sich das Display ganz vom Gerät.

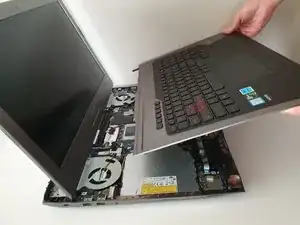
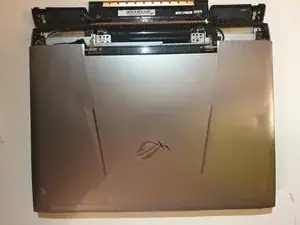
    • Entferne das Display.

    In my case, 6 x M2.4x9,6mm screws near the center - indicated with X stamp - and 2 x M1,9x6,6mm screws, 1 on the left hand side and the other on the right hand side.

    Jonathan Deeb -

    Mine same as Jonathan’s. Total of 8 screws to remove the screen

    Don Dunlop -

    Same here, 8 screws. Also… must disconnect screen!

    venturello -

  14. njcWLRybPLAcdUJ2
    • Entferne die vier 5,8 mm lange Schrauben, mit denen der Akku am Laptop befestigt ist.

    There are two different lengths of screw holding the battery. When putting it back together, the longer screws go to the rear of the computer.

    Greg S. -

  15. DLvDR3bXWRtEySEZ
    • Entferne den Akku mit der Hand.

    • Wenn es schwer geht, drücke den schwarzen Kunststoff an der Displayseite des Akkus nach unten. Dadurch sollte sich der Akku lösen.

    The second set of wires going to the battery (shown on the right side between the tech's thumb and forefinger) are attached to a strip glued to the back of the battery. I believe it is a temperature sensor of some kind. Carefully peel it off the old battery, being careful not to bend it and press it to onto the new battery. There are two holes in the sensor strip, on at the right in the corner, another at the left end in the center. On the battery, there are two very small, hard to see alignment points to fit into those holes.

    Greg S. -

Abschluss

Arbeite die Schritte in umgekehrter Reihenfolge ab, um dein Gerät wieder zusammenzubauen.

Für eine optimale Leistung, kalibriere deinen neuen Akku nach Abschluss dieser Anleitung.

Entsorge deinen Elektroschrott fachgerecht.

Hat die Reparatur nicht ganz geklappt? Versuche es mit ein paar grundständigen Lösungen, ansonsten findest du in unserem Forum Hilfe bei der Fehlersuche.

Jeong

Mitglied seit: 16/09/19

1212 Reputation

10 Kommentare

There is 2 connection. What is the smaller connection for? Thanks.

Micky Max -

The second set of wires going to the battery (shown on the right side between the tech's thumb and forefinger in the picture at the step where you remove the battery) are attached to a strip glued to the back of the battery. I believe it is a temperature sensor of some kind. Carefully peel it off the old battery, being careful not to bend it and press it to onto the new battery. There are two holes in the sensor strip, on at the right in the corner, another at the left end in the center. On the battery, there are two very small, hard to see alignment points to fit into those holes.

I see where Rich C says it's part of an LED strip. I didn't look at it closely.

Greg S. -

God, alot of people looked at my team’s project. Sorry it’s a piece of crap.

I had to do it for my tech writing class, got a solid B on it.

Jeong -

Thanks for this write up, excellent job. As Mickey mentioned, there is a second connection, from the side of the existing battery. This is actually part of an LED strip that is secured to the battery with an adhesive strip. Some models have this glowing back panel. I used a filet knife to pop the LED panel off the old battery and then tack it on the new one.

Rich C -

My lap top bears no relation to this but it is a UK spec laptop so may differ. I will need to purchase a kit from iFixit before I embark on replacing the battery in my laptop

Gerald Talbot -

This was a lot easier than I anticipated. I want to thank you for your excellent writeup which was a lot better than the videos I have seen on YouTube.

Nemo Blades -

Thanks to the Asus ROG G752V Battery Replacement tutorial, I have successfully replaced

batterie dell -

you forgot one important detail betwen step 5 and step 6 - there are three screws beneath the optical drive, when you slide it out they need to be removed first before popping the case (you can see where they go on the left side of the image in step 14, along the outer edge of the empty optical drive bay)

otherwise, fantastic, very helpful

Mike Strickland -

Amazing directions,

If I feel uneasy doing it myself, where would be a qualified place to have someone do it

caldens11 -

My wifi connection quit working after I replaced the battery.

Before you put everything back together, check the antenna wires are connected to the wifi card. If you look at picture 14 in these instructions, the wifi card is located roughly under the guys thumb. There is a white and a black wire with snap on connectors about the size of a pinhead.

If you still aren't sure, Jeong has another excellent article at Asus ROG G752V Drahtloskarte tauschen.

Greg S. -