Einleitung
In dieser Anleitung werden häufige Probleme mit Kunststoff-Profilreißverschlüssen (Vislon®) beschrieben und allgemeine Informationen zur Reparatur gegeben, insbesondere, ob der Austausch des Schiebers genügt oder ein Komplettaustausch notwendig ist.
Eine genaue Diagnose ist der zweite Schritt bei der Reparatur eines Reißverschlusses. Ersatzteile von Patagonia sind beim Patagonia Kundenservice erhältlich.
Die drei Stufen der Reparatur
- Reißverschlusstyp bestimmen
- Diagnose
- Diagnose bei Spiral-Reißverschlüssen
- Diagnose bei Reißverschlüssen mit Kunststoff Zähnchen
- Reparatur
-
-
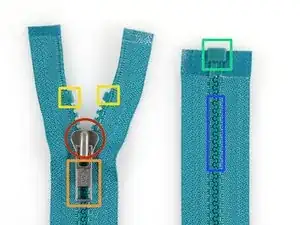
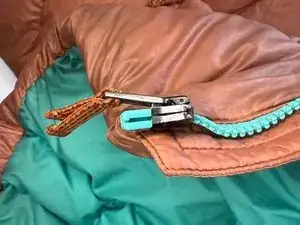
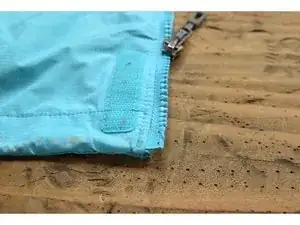
Wenn der Schieber lose sitzt, kommen die Zähne nicht nahe genug zusammen. Der Reißverschluss öffnet sich wieder, wenn der Schieber nach oben gezogen worden ist. (Bild 1)
-
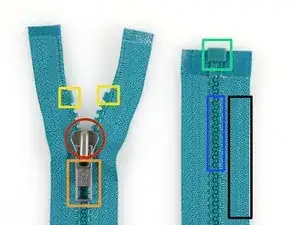
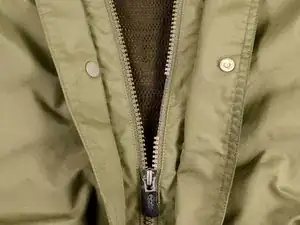
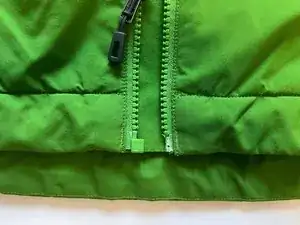
Ein zusammengedrückter Schieber sitzt zu fest und lässt sich nur schwer bewegen. (Bild 2).
-
In diesen beiden Fällen oder wenn der Schieber ganz verschwunden ist, muss wahrscheinlich der Schieber ausgetauscht werden.
-
-
-
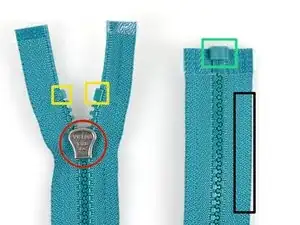
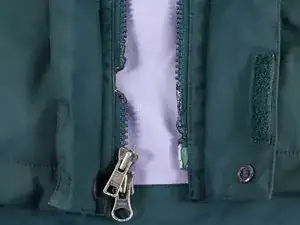
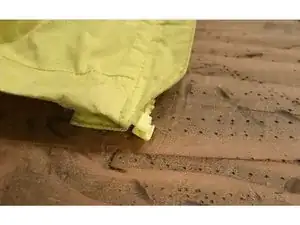
Beim Reißverschluss im ersten Bild fehlen Zähne. Beim Reißverschluss im zweiten Bild sind Zähne geschmolzen. In diesem Fall muss der gesamte Reißverschluss ausgetauscht werden.
-
Schaue in unsere Anleitung für eine schnelle nähfreie Reparatur. (Nur vorläufig).
-


7 Kommentare
The link in Step 5 for the slider replacement guide is incorrect. It points to a Powerbook HD replacement guide. TG.
tgarrity -
What if there's no reason other than one side of the slider came off?
You can replace just the slider / retrack the one you have!
If the slider is missing, you will need to identify which type of zipper it is (size, is it molded plastic / coil / metal, and what "generation" because some are not compatible with each other). Once you have the right slider, then:
- for a jacket zipper, you take the top stop off the side of the zipper that has the box at the bottom (which is the side the slider lives on). You then put the slider on that side, test it by zipping the jacket up, and then add a new top stop where you took the old one off. You can find these easily online or at a sewing store.
- for a zipper that's sewn in or has a stop over both sides on the bottom, you will open up the bottom of the zipper and guide it onto both sides. You can find tips and tutorials to put a slider onto a zipper on youtube, etc... You'll then need to sew the bottom back together or use a bottom stop to close it. These can be found at a variety of places online and at most sewing stores.
Hope it helps!
What about if the zipper zips up but the teeth do not keep closed. I.e. zip up the jacket, part of the teeth stay interlocked but from one point on the teeth become undone and do not lock.
That's an issue with the zipper slider itself and I have experience fixing it. It's difficult to maneuver the tool because of fabric in the way and it's in a generally awkward spot but possible. Take needle pliers and squeeze down *a little bit* on the back of the zipper slider itself. Doesn't need too much of an adjustment, so squeeze a little and check, and squeeze a little and check. It's the small end of the zipper slider.
Malm -
Repaired zipper pull with pliers.Yaah!
Would like to see a link to new Zipper pull.
john peterson -
Not sure about replacing the metal pull but if you call Patagonia they will definitely send you a paracord pull, and there's are some guides on installing them! Quick Fix: Replacing a Zipper Pull and Zipper Pull Replacement
Clara Redwood -