Introduction

This guide will show you how to repair the Game Boy Color's power LED. The power led glows red when the device is turned on indicating that it is receiving power.

  1. c3LIxTjWvUGxcYZu
    c3LIxTjWvUGxcYZu
    oYIXQjPFhQsYx4cb
    • Locate the battery compartment on the back of the Game Boy Color.

    • Push down on the tab and hinge the cover downwards and outwards to remove the battery cover.

  2. uFQGYmIMX2PCiLaG
    • Remove the batteries from the battery compartment.

  3. DsXcimKolb1pBNXH
    • Using a Y1 screwdriver, remove the six screws on the back of the device as pictured. The bottom two screws are located inside of the battery compartment.

    I did this with a Y0 bit. It works if you are careful. I wouldn't recommend it on other consoles but for this tiny thing, it works.

    phnome -

  4. RrHNVnA1jYSYLAMJ
    RrHNVnA1jYSYLAMJ
    aFVfBIhWWKMpEAKh
    • Gently lift and separate the back housing from the rest of the device. Now you've got the back housing out!

  5. SryC5LT6oTGaKeaU
    SryC5LT6oTGaKeaU
    RDTrtinAhjCcqaRW
    • Using the Phillips #1 screwdriver, remove the 3 screws shown in the picture.

    It’s not mentioned here, but be sure to unplug the LCD flex cable at the top of the motherboard before removing the motherboard. To do so, gently press the clips on either side of the receptacle toward the top of the Game Boy. When they are both pressed up, the orange cable will slide freely out

    Ben Perkins -

    Thanks Ben. That's a very good point. Just ripping it out will cost you a couple bucks, not to mention your Gameboy will not work until you replace that ribbon cable.

    Chris Pavlik -

  6. GjDQ5jUVNGkkCCaj
    • Gently lift the motherboard from the front housing.

  7. W6aWCfMIYCPpdSyC
    W6aWCfMIYCPpdSyC
    T5cUtlPUDMaPgPHF
  8. AUHOZmseSjBnIUMq
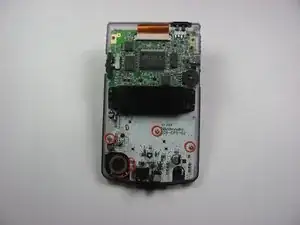
    • Insert new LED into the circuit board.

    • Make sure that the LED is in the correct orientation. The longer leg of the LED is the positive end, while the shorter leg is the negative end.

    • The positive lead should go through the hole closest to the edge of the circuit board.

  9. Omgc31uxpVnGXPsy
    • Solder the leads of the new LED to the circuit board.

  10. lVkHgv6AOGfk6GfT
    • Cut the excess ends of the LED legs using the wire cutters.

Conclusion

To reassemble your device, follow these instructions in reverse order.

Alex Wu

Member since: 11/01/13

1356 Reputation

4 comments

what is the brass color looking thing under the soldering iron in step 7?

Soul Divide -

That's called 'Desoldering Braid', it sucks up solder like a wick

John Smith -

and what kind of LED are you using to replace?

Soul Divide -

This was great! Exactly what I needed with this. My GBC is looking good as new now!

Erick -