
Introduction
This repair guide was authored by the iFixit staff and hasn’t been endorsed by Google. Learn more about our repair guides here.
Follow this guide to remove and replace a display assembly on the Pixel 3. This procedure is for replacement screens that are not pre-mounted onto a frame. Due to the Pixel’s design, this requires removing the motherboard in order to access to the screen connectors.
This procedure will destructively remove the Pixel 3’s screen. OLEDs cease to work when exposed to oxygen or moisture, and are thus sealed in an airtight encapsulation (this is also why OLED panels turn black underneath a screen crack). It is very difficult to replace the front glass alone— the Pixel’s OLED layers are laminated to the glass.
-
-
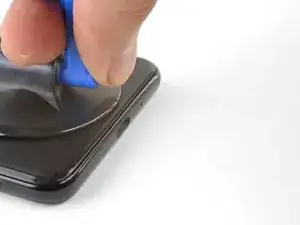
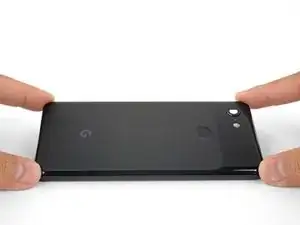
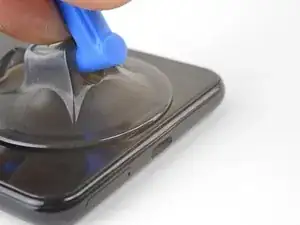
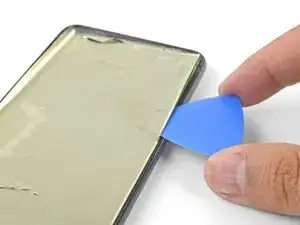
Apply a suction cup to the heated bottom edge of the back cover.
-
Lift on the suction cup with strong, steady force to create a gap.
-
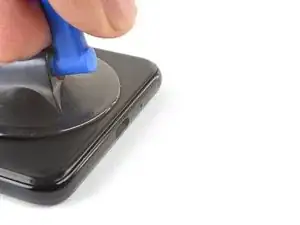
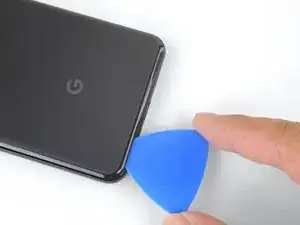
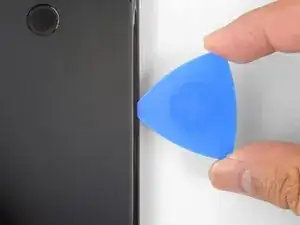
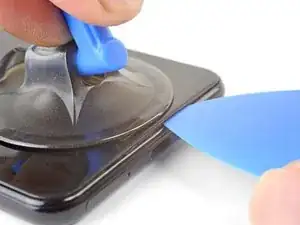
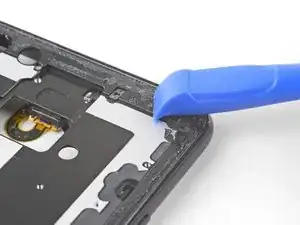
Insert an opening pick into the gap.
-
-
-
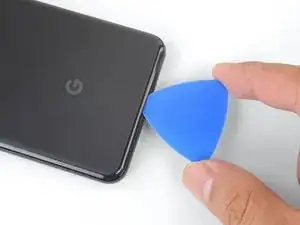
Slice the adhesive along the bottom edge of the phone and around the right corner.
-
Leave a pick in the bottom edge to prevent the adhesive from re-sealing.
-
-
-
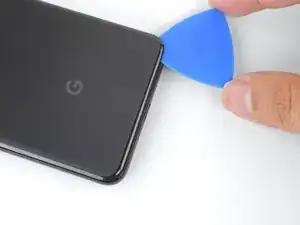
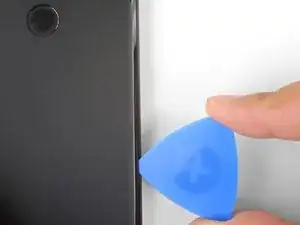
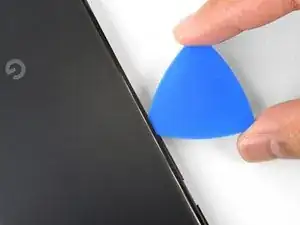
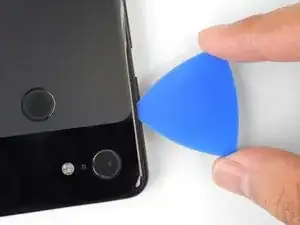
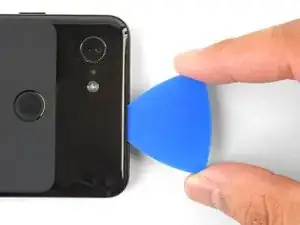
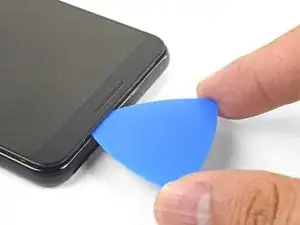
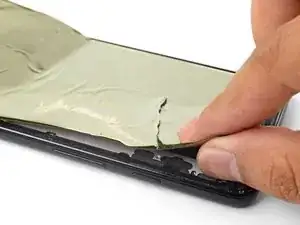
Continue heating and slicing through the rest of the phone perimeter. Leave a pick in each edge to prevent the adhesive from resealing.
-
-
-
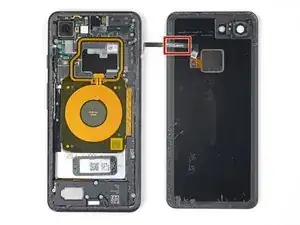
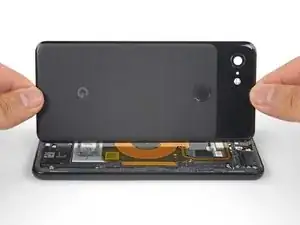
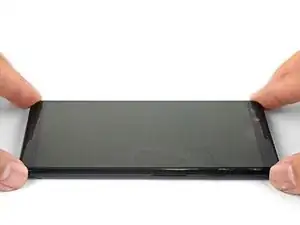
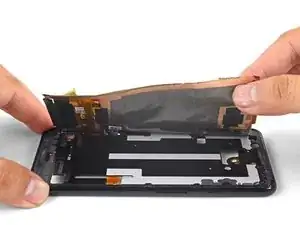
Once you have sliced around the perimeter of the phone, carefully lift the left edge of the back cover.
-
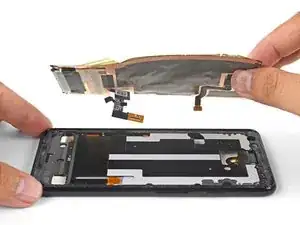
Flip the back cover along its long axis and rest it so that the fingerprint sensor cable is not strained.
-
-
-
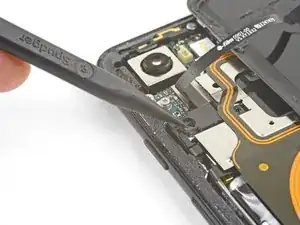
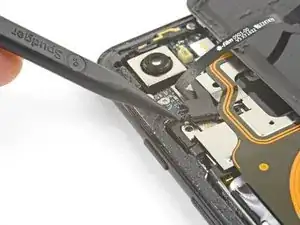
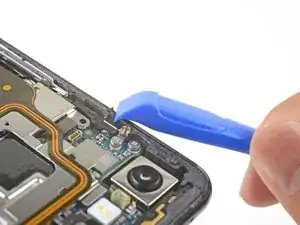
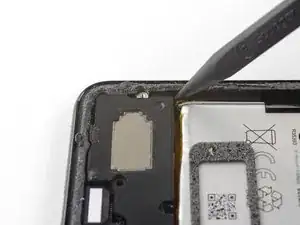
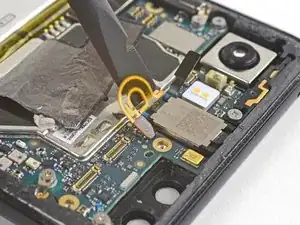
Use the point of a spudger to slide the fingerprint connector bracket out from under the NFC coil.
-
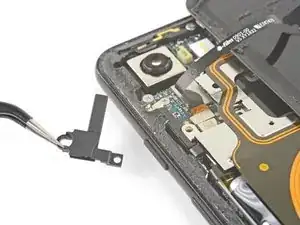
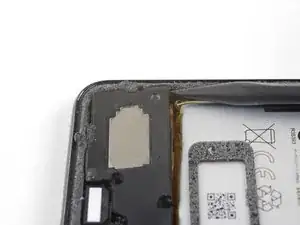
Remove the fingerprint connector bracket.
-
-
-
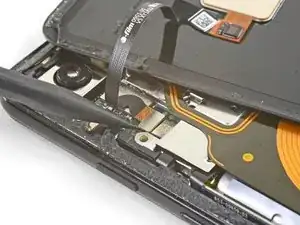
Use the point of a spudger to pry up and disconnect the fingerprint connector from its socket.
-
-
-
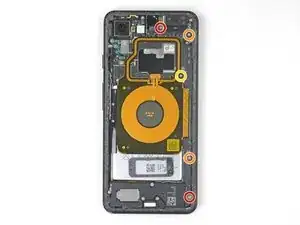
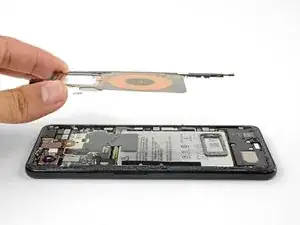
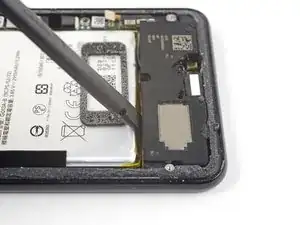
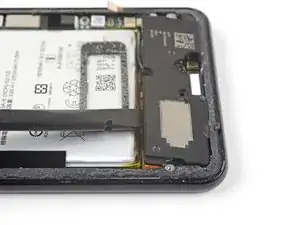
Remove the five Phillips screws securing the wireless charging coil:
-
Two 1.9 mm screws
-
Two 4.2 mm screws
-
One 4.3 mm screw
-
-
-
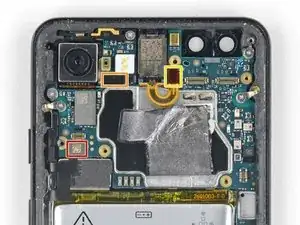
Use the point of a spudger to pry up and disconnect the battery press connector from its socket near the right edge of the phone.
-
-
-
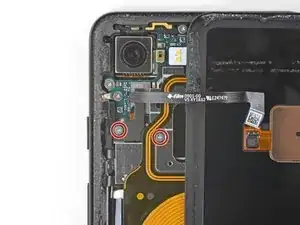
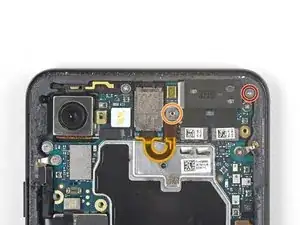
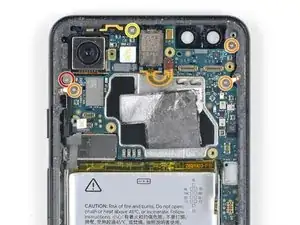
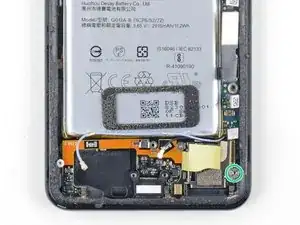
Remove the two screws securing the camera bracket:
-
One 4.1 mm Phillips screw
-
One 4 mm standoff screw
-
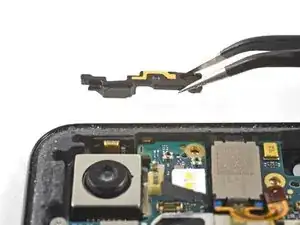
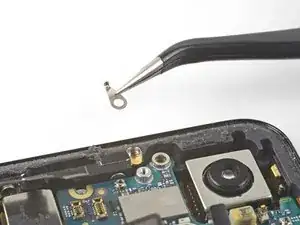
Remove the camera bracket.
-
-
-
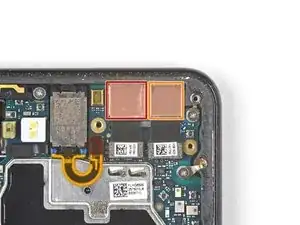
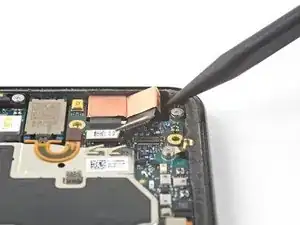
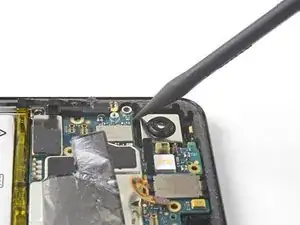
Use the point of a spudger to pry up and disconnect the connector for the camera(s) you are replacing.
-
-
-
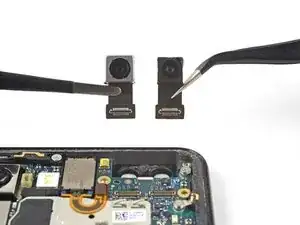
Insert the point of a spudger behind the edge of the camera module and pry up to loosen it from the frame.
-
-
-
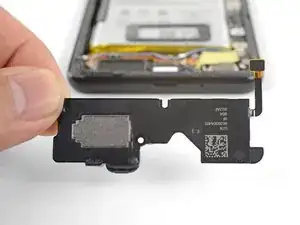
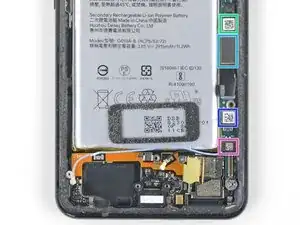
Use the point of a spudger to pry up and disconnect the loudspeaker connector from its motherboard socket near the right edge of the phone.
-
-
-
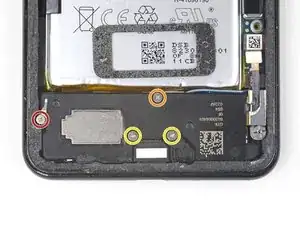
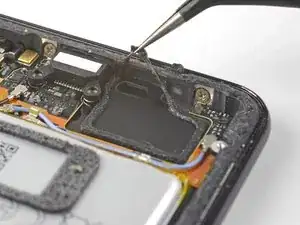
Remove the following four Phillips screws:
-
One 1.9 mm screw
-
One 4.3 mm screw
-
Two 4.3 mm screws with thinner shanks
-
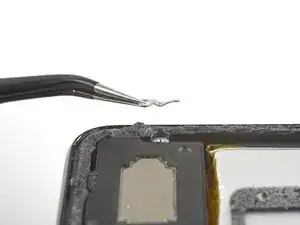
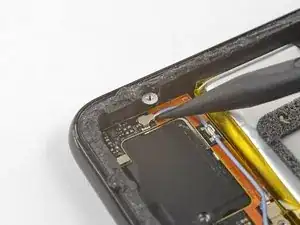
Remove the tiny grounding clip from the left screw hole. Be careful not to lose it.
-
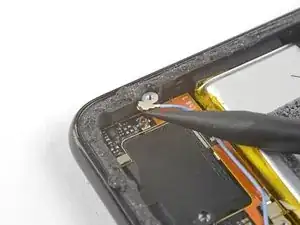
Remove the small plastic insert from the right side of the USB-C port.
-
-
-
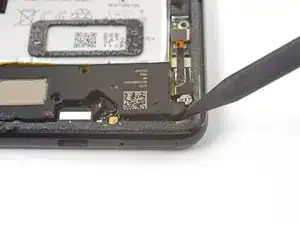
Insert the point of a spudger under the bottom right corner of the loudspeaker.
-
Pry up to loosen the loudspeaker from the phone.
-
-
-
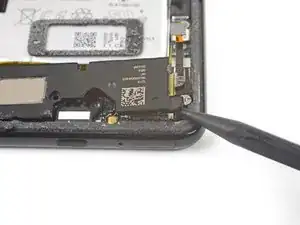
Insert the point of a spudger under the top left corner of the loudspeaker.
-
Pry up to loosen the loudspeaker.
-
-
-
Insert the flat end of the spudger under the top edge of the loudspeaker, towards the left edge.
-
Pry up to loosen the loudspeaker.
-
-
-
Remove the loudspeaker.
-
If it is in good condition, you can re-use the gasket. Make sure that the gasket does not cover the exit hole.
-
If the gasket is pulled out of place, remove it and replace the adhesive with a pre-cut strip or Tesa tape.
-
-
-
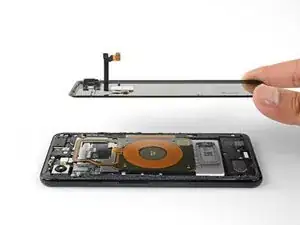
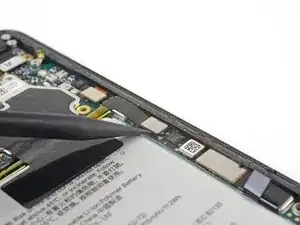
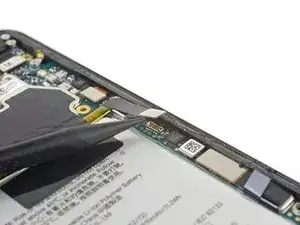
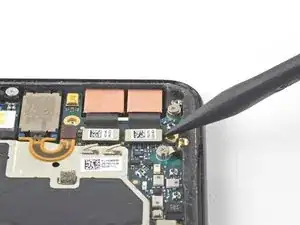
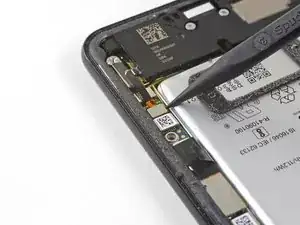
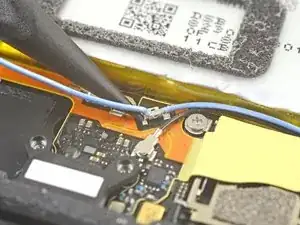
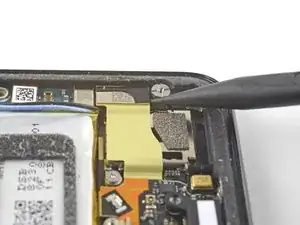
Use the point of a spudger to pry up and disconnect the blue antenna cable from its socket on the charging assembly.
-
-
-
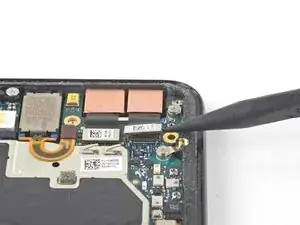
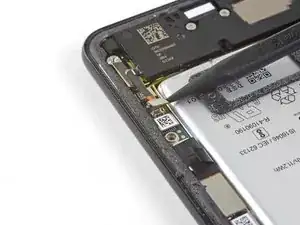
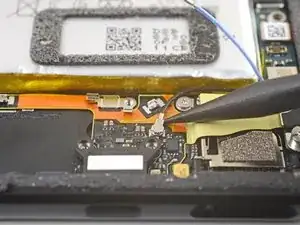
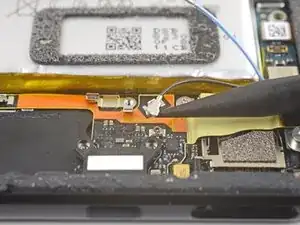
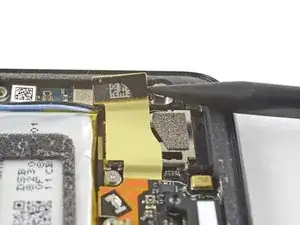
Use the point of a spudger to carefully pry up and release the blue antenna cable from its grounding clips.
-
-
-
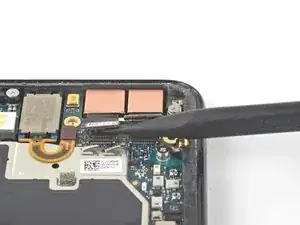
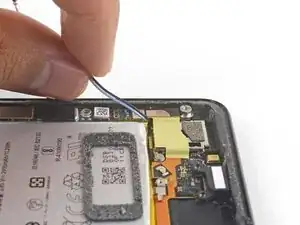
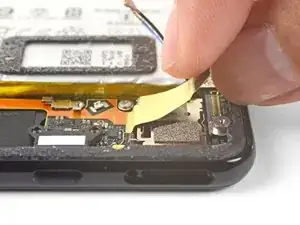
Use the point of a spudger to pry up and disconnect the black antenna cable from its socket near the USB-C port.
-
-
-
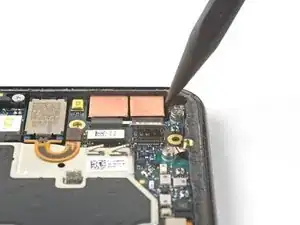
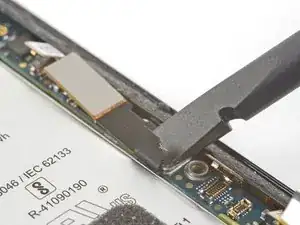
Use the point of a spudger to pry up and disconnect the charging assembly's connector from its motherboard socket, near the right edge of the phone.
-
Carefully peel the flex cable from the top of the SIM card reader.
-
-
-
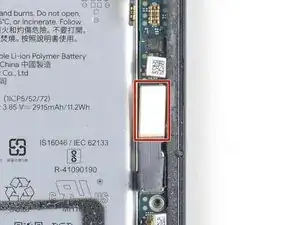
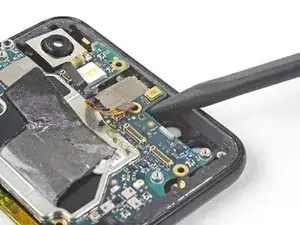
Use the flat end of a spudger to carefully pry up the black tape holding the display flex cable in place, near the right edge of the phone.
-
Use the flat end of a spudger to pry up and disconnect the display connector from the motherboard.
-
-
-
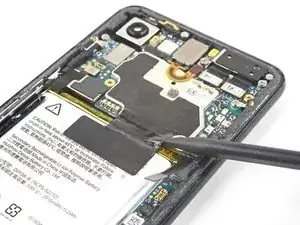
Slide the point of a spudger in the crevice underneath the black tape bridging across the battery and the motherboard.
-
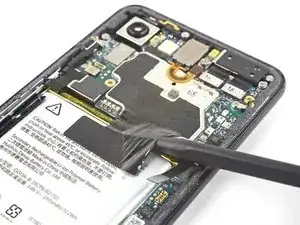
Slide the spudger along the crevice to pry up the tape from the battery side.
-
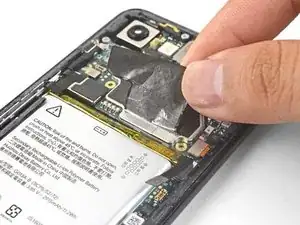
Carefully peel the tape from the battery and fold it out of the way.
-
-
-
Use a spudger to pry up and disconnect the following seven press-fit connectors from their motherboard sockets:
-
External buttons connector
-
Top microphone connector
-
Earpiece connector
-
Left squeeze sensor connector
-
Screen connector
-
Right squeeze sensor connector
-
SIM tray connector
-
-
-
Use the flat of a spudger to carefully pry up and bend the earpiece speaker's flex cable upwards, out of the way of the motherboard.
-
-
-
Remove the six screws securing the motherboard in place:
-
One 4.2 mm Phillips screw
-
Three 1.9 mm Phillips screws
-
One 4.3 mm Phillips screw
-
One 3.83 mm standoff screw
-
Remove and retain the three small metal grounding clips.
-
-
-
Carefully remove the antenna bracket from the top left edge of the phone.
-
Orient the clips such that the silver side is facing upwards.
-
The teardrop shaped clips should have their points facing towards the phone edge.
-
The double-holed clip dips downwards towards the frame's top-right screw hole.
-
-
-
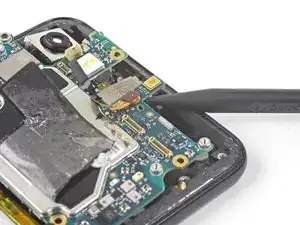
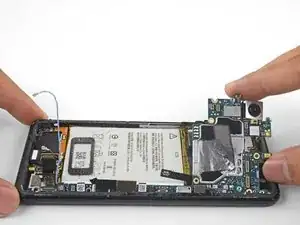
Insert the point of a spudger near the top left corner of the motherboard, right below the rear-facing camera.
-
Pry up gently to loosen the motherboard, bending all flex cables away to accommodate for the movement.
-
If the motherboard feels firmly seated, check for any flex cables or screws that may still be connected.
-
-
-
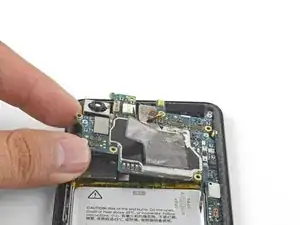
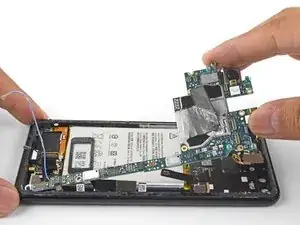
Insert the spudger underneath the top edge of the motherboard and carefully pry up to loosen the motherboard.
-
-
-
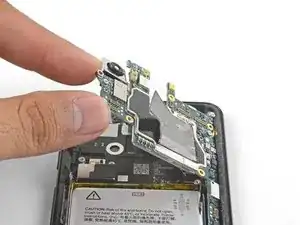
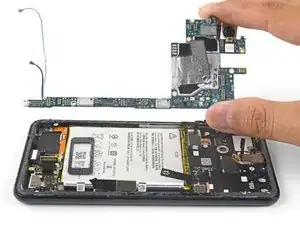
Lift the left edge of the motherboard and carefully swing upwards it towards the right. Carefully push any press connectors snagging the motherboard out of the way.
-
-
-
Apply a heated iOpener to the bottom edge of the screen for a minute.
-
Place a suction cup near the bottom edge of the screen, near the USB-C port.
-
Lift on the suction cup with strong, steady force to create a gap.
-
You can also try heating and pulling up a long edge of the phone to gain access.
-
Insert an opening pick into the gap.
-
-
-
Continue heating edges with an iOpener and slicing the adhesive with an opening pick, until you've sliced through all of the adhesive.
-
-
-
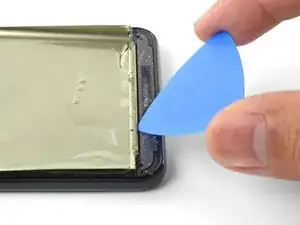
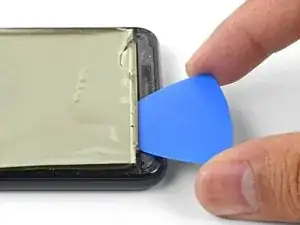
Insert an opening pick into the seam between the phone frame and the bottom edge of the screen remains.
-
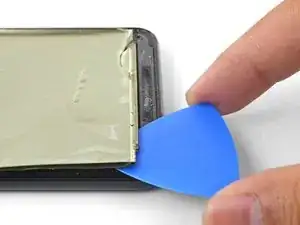
Pry along the edge to loosen the screen from the frame.
-
-
-
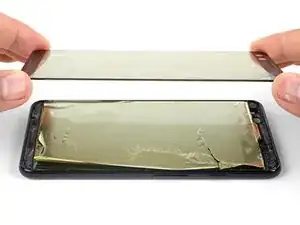
Continue applying heat and slicing along a screen edge until you've loosened enough material to be grasped with your fingers.
-
Grasp the edge with your fingers and slowly pull the screen remains away from the phone frame.
-
-
-
Thread the screen cable and digitizer cable out of their cutouts, then remove the display.
-
Clean all adhesive residue from the phone frame. Adhesive that's left behind may apply uneven pressure against the replacement screen and potentially damage it.
-
Apply a pre-cut adhesive, or double-sided tape to the phone frame's perimeter.
-
Peel all plastic liners from the back of the replacement screen to expose the adhesive.
-
Carefully thread the screen cable and the digitizer cable through the phone frame's cutouts.
-
Lay the screen onto the frame and place some books on top for an hour to help the screen adhesive bond to the frame.
-


To reassemble your device, follow these instructions in reverse order.
Take your e-waste to an R2 or e-Stewards certified recycler.
Repair didn’t go as planned? Check out our Google Pixel 3 Answers community for troubleshooting help.

29 comments
To change only the screen glass… Do you have to disassemble the whole phone or just steps 39 to 42?
Thanks
Hi Adrián,
The OLED is bonded to the screen glass. Unlike LCDs, trying to remove the glass only will most likely destroy the OLED screen.
How to differentiate between a pre-mounted and a non pre-mounted display? I don’t want to order the wrong part, hence the question.
The pre-mounted part will come with the frame, which is the majority of the phone body. The screen is already stuck affixed to the frame, but you would have to transfer everything else onto it. The display only part looks like a thin panel with adhesive on the back. It would look like this part.
When buying a replacement screen do I need to buy it with a frame?
This guide is meant to be used with replacement screens without frames. If you buy a screen with a frame, you will have to transfer many components from your existing frame onto the new one.
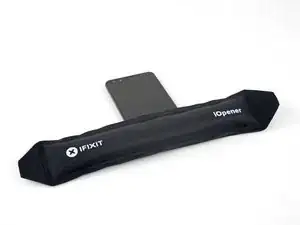
Older devices may require 2 or more minutes with a very hot iOpener. Also note, the photo shows the opener on the FRONT of the phone. The heat needs to be applied to the back of the device!
Rick Johnson -
I just realized that I was trying to pry apart the front of my Pixel 3… and have separated the class from the display. ??♂️ Even though the rest of the directions show the back, it would be nice for the first picture to also show the back, just to be safe.
JR Raith -
Agreed, I’ve done exactly the same and completely broken my display. I probably should’ve paid more attention to the initial steps before diving in but the step could do with a new picture for sure.
Daniel Fryer -
Thanks for the comments! I’ll add a note in the step warning people to make sure to pry the back cover, not the screen.
Arthur Shi -
I prefer my favorite opening method with something like this. Dental floss. So thin it can slide in the gap. A little sawing to get it far enough past the edge to lift and get the first pick in.
John Hoffstetter -
I found another wonderful tool. I used something like medicine packaging which is aluminum foil with plastic. It’s thin and strong enough!
Christie Lin -
I also went for the hairdryer, dental floss, and then the provided picks and this worked. Not easy to get that initial seal broken but once that's done the rest is pretty easy.
James -
I needed 20 nerve wracking minutes with a hairdryer
Amy schneider -
My battery had bulged and opened the case for me!
Warmed it up a bit with hairdryer
Floss helped also.
David Lincer -