Introduction
This repair guide was authored by the iFixit staff and hasn’t been endorsed by Google. Learn more about our repair guides here.
This is a prerequisite guide! This guide is part of another procedure and is not meant to be used alone.
Use this guide to disconnect the battery in the Google Pixel 6 Pro.
-
-
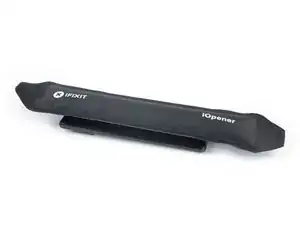
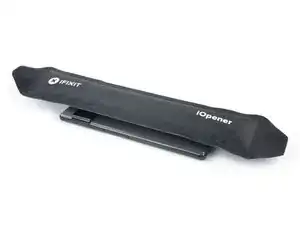
Apply a heated iOpener to the screen to loosen the adhesive underneath. Apply the iOpener for at least 3 minutes.
-
-
-
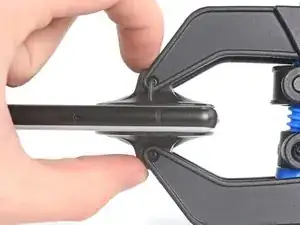
Pull the blue handle towards the hinge to disengage opening mode.
-
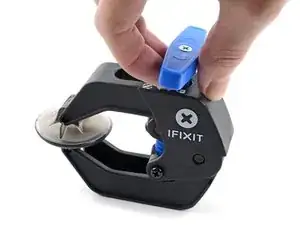
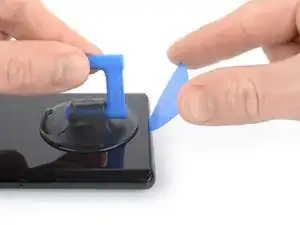
Position the suction cups near the bottom edge of the phone—one on the front, and one on the back.
-
Push down on the cups to apply suction to the desired area.
-
-
-
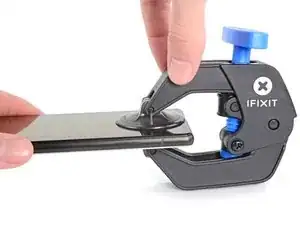
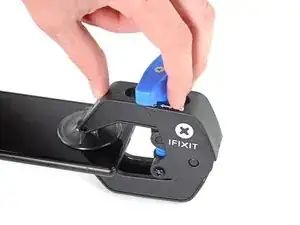
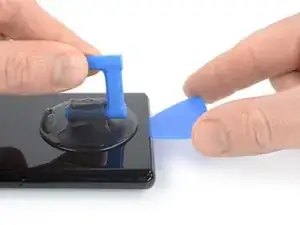
Push the blue handle away from the hinge to engage opening mode.
-
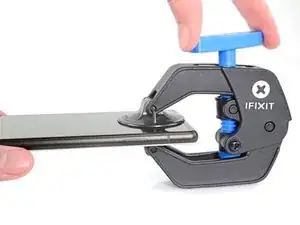
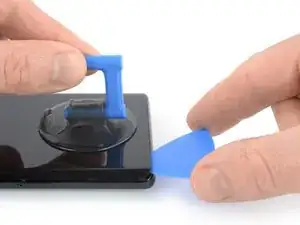
Turn the handle clockwise until you see the cups start to stretch.
-
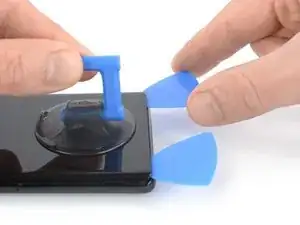
Wait one minute to give the adhesive a chance to release and present an opening gap.
-
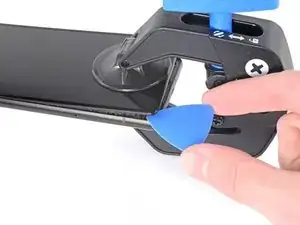
Insert an opening pick under the screen frame when the Anti-Clamp creates a large enough gap.
-
Skip the next two steps.
-
-
-
Once the screen is warm to the touch, apply a suction handle to the bottom edge of the screen.
-
Lift the screen including its safety frame with the suction handle to create a small gap between the screen and the phone assembly.
-
Insert an opening pick into the gap between the screen frame and the phone assembly.
-
Slide the opening pick to the bottom left corner of the screen to slice its adhesive.
-
Leave the opening pick in place to prevent the adhesive from resealing.
-
-
-
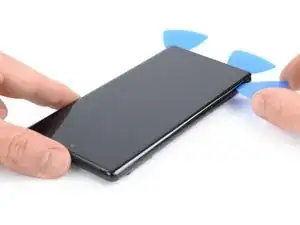
Insert a second opening pick at the bottom edge and slide it to the bottom right corner of the screen to slice the adhesive.
-
Leave the opening pick in place to prevent the adhesive from resealing.
-
-
-
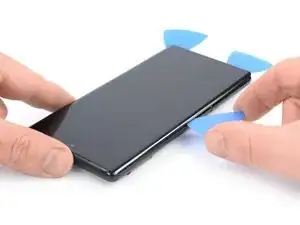
Insert a third opening pick underneath the bottom left corner of the screen.
-
Slide the opening pick along the left edge of the screen to slice the adhesive.
-
Leave the opening pick in the top left corner to prevent the adhesive from resealing.
-
-
-
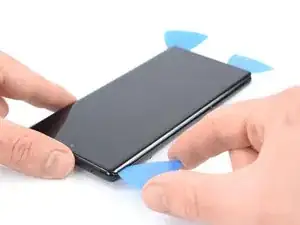
Insert a fourth opening pick at the top left corner of the screen.
-
Slide the opening pick along the top edge of the phone to slice the adhesive.
-
Leave the opening pick in the top right corner to prevent the adhesive from resealing.
-
-
-
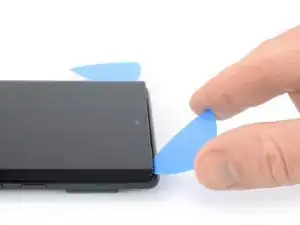
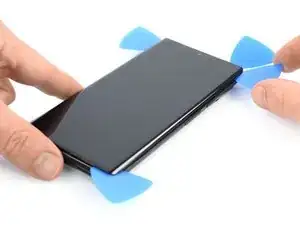
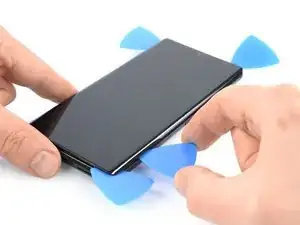
Insert a fifth opening pick and slide it along the right edge of the phone to slice the remaining adhesive.
-
-
-
Carefully fold the screen to the left side of the phone assembly like you would open the front cover of a book.
-
-
-
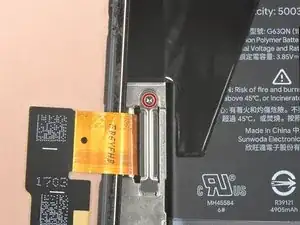
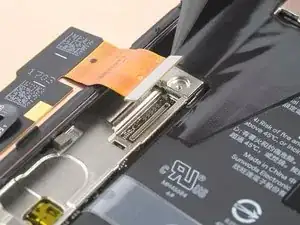
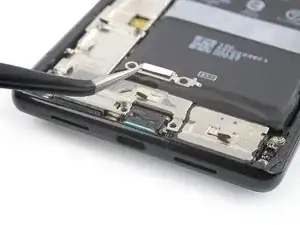
Use a Torx T3 screwdriver to remove the 2.0 mm-long screw securing the display cable metal bracket.
-
-
-
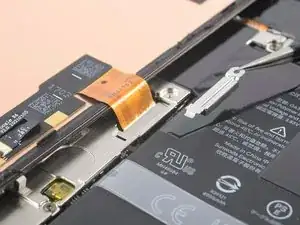
Use a pair of tweezers to remove the metal bracket sitting on top of the display cable connector.
-
-
-
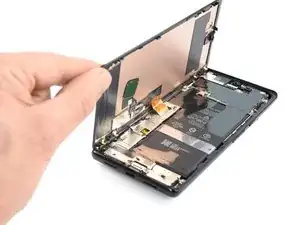
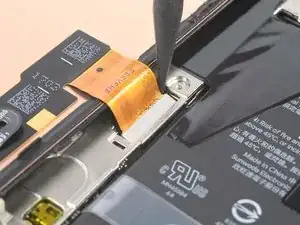
Use a spudger to disconnect the display flex cable by prying the connector straight up from its socket.
-
-
-
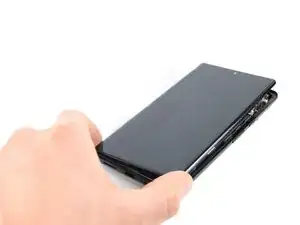
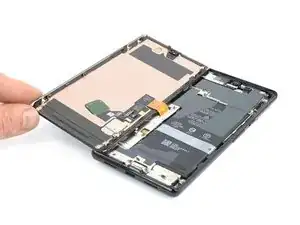
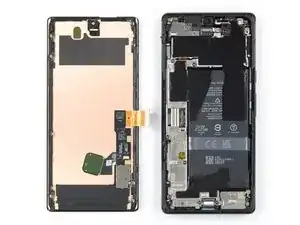
Remove the screen.
-
Follow this guide if you're using custom-cut adhesives for your device.
-
Follow this guide in case you're using a pre-cut adhesive card.
-
-
-
Apply a heated iOpener or a heat gun to the rear glass to loosen the adhesive underneath the graphite films on top of the battery. Apply the iOpener for at least two minutes.
-
-
-
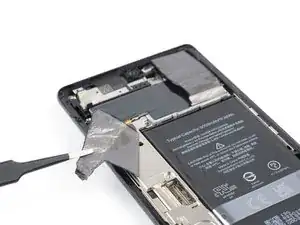
Use a pair of blunt nose tweezers or a clean fingernail to carefully peel the black graphite film off the bottom edge of the battery and the motherboard shield.
-
Remove the graphite film.
-
-
-
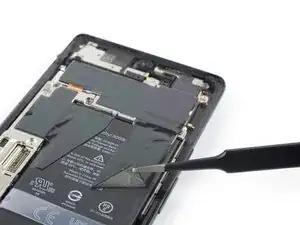
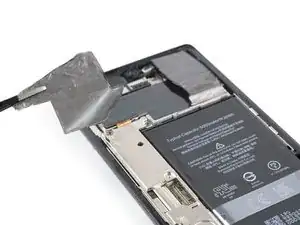
Use a pair of blunt nose tweezers or a clean fingernail to carefully peel the black graphite film off the top right corner of the battery.
-
Fold the graphite film in direction of the selfie camera to get free access to the battery.
-
-
-
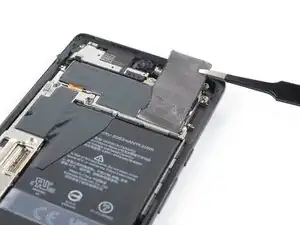
Use a pair of blunt nose tweezers or a clean fingernail to carefully peel the black graphite film off the left edge of the battery and the motherboard shield.
-
-
-
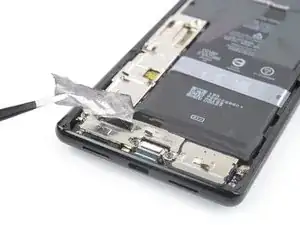
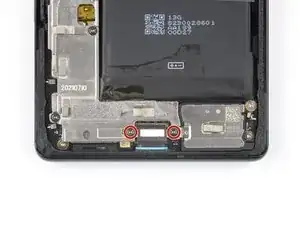
Use a Torx T3 screwdriver to remove the two 5.1 mm-long screws securing the charging port metal bracket.
-
-
-
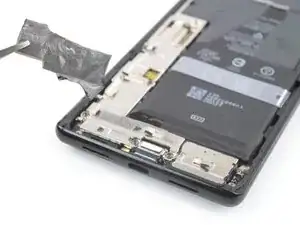
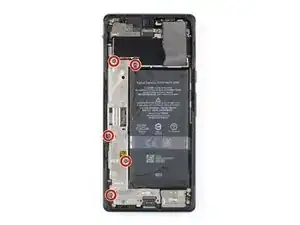
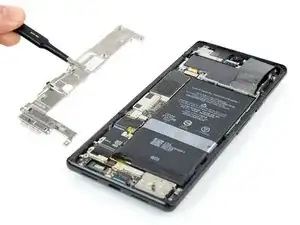
Use a Torx T3 screwdriver to remove the five 5.1 mm-long screws securing the motherboard cover.
-
-
-
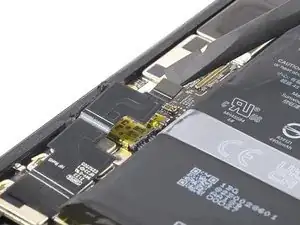
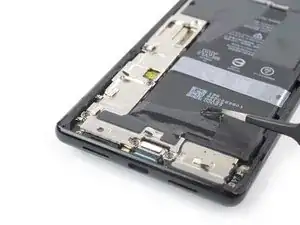
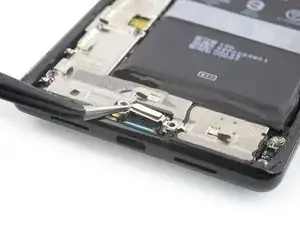
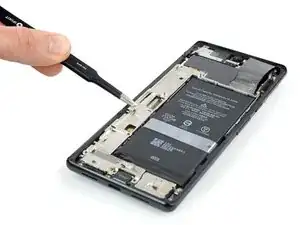
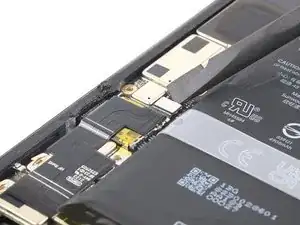
Use a spudger to disconnect the battery cable by prying the connector straight up from its socket.
-


To reassemble your device, follow these instructions in reverse order.

Do you think that removing the SIM card, also will be a wise step? I'm pretty sure that heating the SIM card is not a good idea.
Emil Teofanov -
The SIM is probably no more sensitive than the rest of the phone.
ScottMcNay -
What does "be sure to have replacement adhesives for both the rear glass and the screen." I only had one it didn't mention another one?
alberte -
I didn't have the replacement adhesive for rear glass nor the 2 sided tape they talk about when putting it back together. It's Sunday, so I don't expect an answer. I decided to go ahead and work up until that point
StlrFan -