
Introduction
There are many benefits to adding a second hard drive to your laptop such as improved speeds, greater storage space, and less heartache when installing new software. Use this guide to install one using our optical bay hard drive enclosure.
-
-
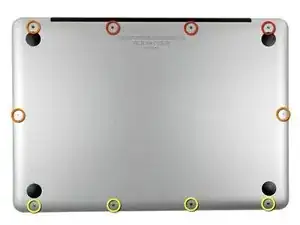
Remove the following ten screws:
-
Three 14.4 mm Phillips #00 screws
-
Three 3.5 mm Phillips #00 screws
-
Four 3.5 mm shouldered Phillips #00 screws
-
-
-
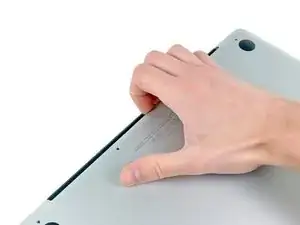
Use your fingers to pry the lower case away from the body of the MacBook near the vent.
-
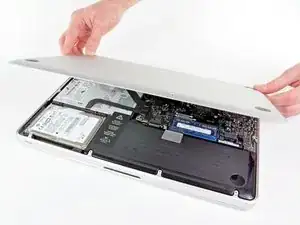
Remove the lower case.
-
-
-
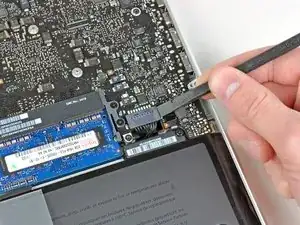
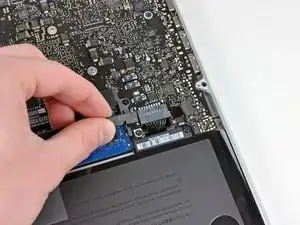
Use the edge of a spudger to pry the battery connector upwards from its socket on the logic board.
-
-
-
Bend the battery cable slightly away from its socket on the logic board so it does not accidentally connect itself while you work.
-
-
-
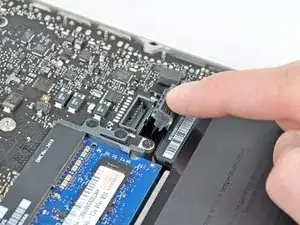
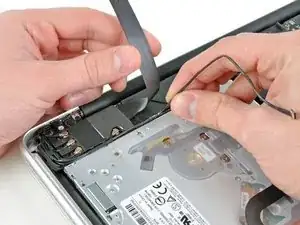
Use the flat end of a spudger to pry the AirPort/Bluetooth ribbon cable connector up from its socket on the logic board.
-
-
-
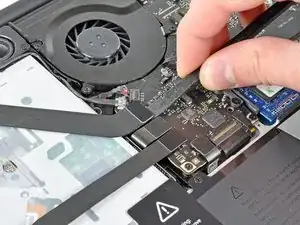
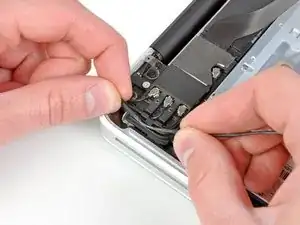
Carefully move the AirPort/Bluetooth ribbon cable out of the way as you peel the camera cable off the adhesive securing it to the subwoofer and the AirPort/Bluetooth bracket.
-
De-route the camera cable out from under the retaining finger molded into the AirPort/Bluetooth bracket.
-
-
-
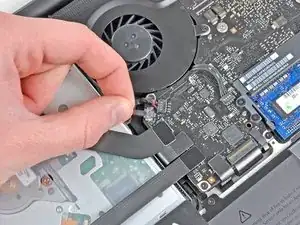
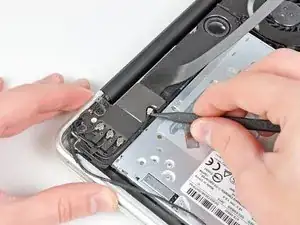
Use the tip of a spudger to pry the antenna connector closest to the logic board up from its socket on the AirPort/Bluetooth board.
-
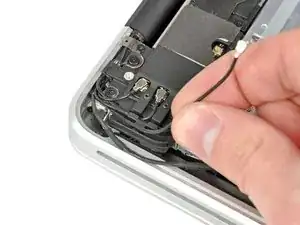
De-route the antenna cable from under the finger molded into the AirPort/Bluetooth bracket.
-
-
-
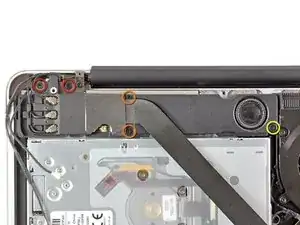
Remove the following five screws:
-
Two 10.3 mm Phillips screws
-
Two 3.1 mm Phillips screws
-
One 5 mm Phillips screw
-
-
-
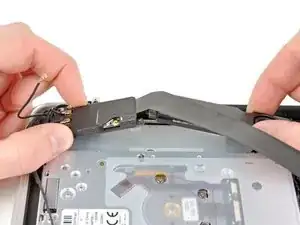
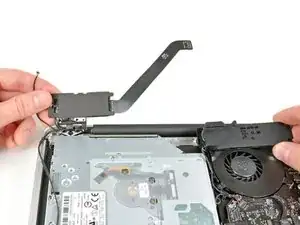
Pull the AirPort/Bluetooth assembly and the Subwoofer upward near the center of the side of the optical drive until they clear each other.
-
Move the AirPort/Bluetooth assembly and the subwoofer away from the top of the optical drive.
-
-
-
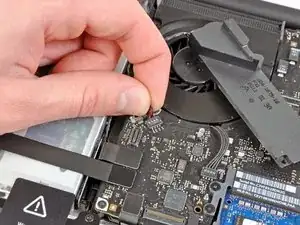
Pull the right speaker/subwoofer cable out from under the retaining finger near the side of the optical drive.
-
Pull the right speaker/subwoofer cable upward to disconnect it from the logic board.
-
-
-
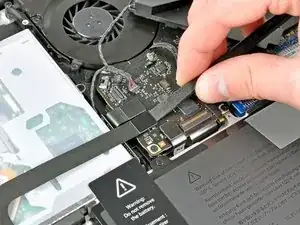
Use the flat end of a spudger to pry the hard drive cable connector up from its socket on the logic board.
-
Bend the hard drive cable away from the optical drive.
-
-
-
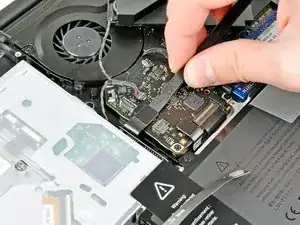
Use the flat end of a spudger to pry the optical drive connector up from its socket on the logic board.
-
-
-
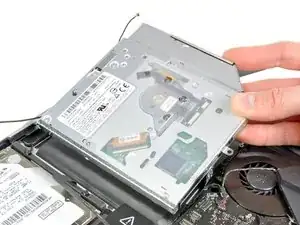
Pull the optical drive upward from its edge closest to the display and remove it from the upper case.
-
-
-
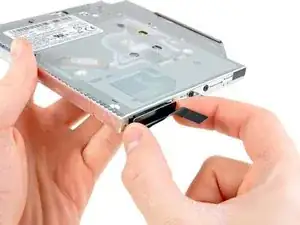
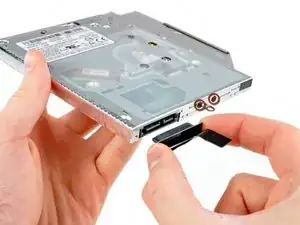
Pull the optical drive cable away from the optical drive.
-
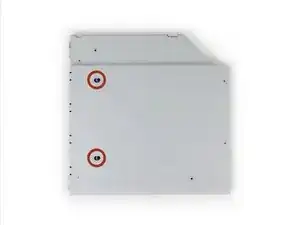
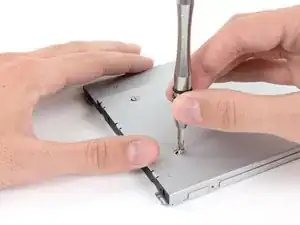
Remove the two black Phillips #0 screws securing the small metal mounting bracket. Transfer this bracket to your new optical drive or hard drive enclosure.
-
-
-
Remove the plastic spacer from the optical bay hard drive enclosure by pressing in on one of the clips on either side and lifting it up and out of the enclosure.
-
-
-
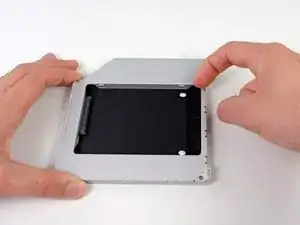
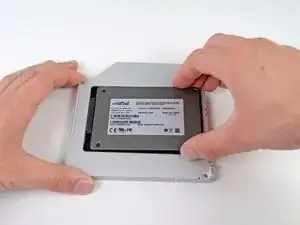
Make sure that the hard drive connectors are facing down before placing it into the enclosure.
-
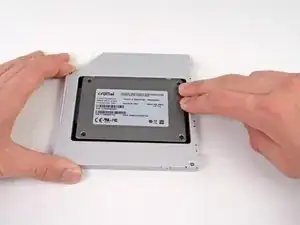
Gently place the hard drive into the enclosure's hard drive slot.
-
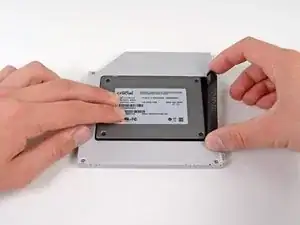
While firmly holding the enclosure in place with one hand, use your other hand to press the hard drive into the enclosure connectors.
-
-
-
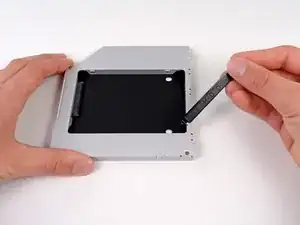
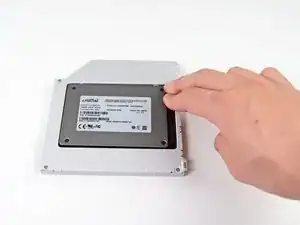
Once the hard drive is snug, reinsert the plastic spacer while holding the hard drive against the bottom of the enclosure.
-
-
-
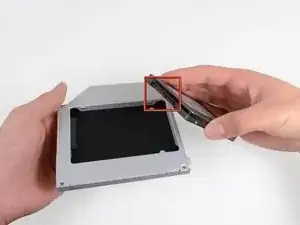
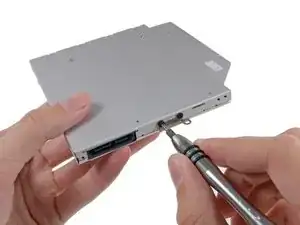
Attach the optical drive bracket to the new enclosure with two Phillips #0 screws.
-
Reconnect any cables you have removed from the original optical drive onto the optical bay enclosure.
-
-
-
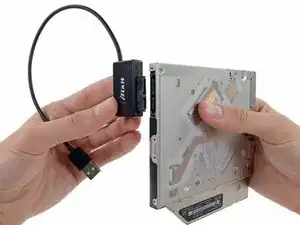
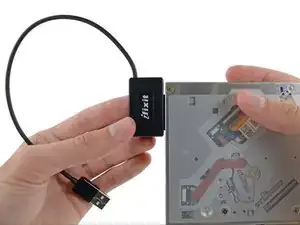
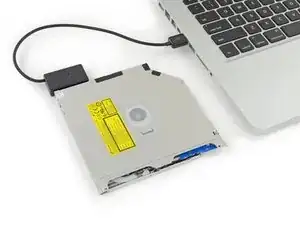
Align the cable's SATA connector with the drive's port and plug in securely.
-
Plug the USB connector into your laptop and your optical drive is ready for use.
-


To reassemble your device, follow these instructions in reverse order.
54 comments
Has anyone else noticed their Macbook booting and responding slightly slower with this duel-hard drive setup? I first swapped out my main hard drive for a SSD and the computer felt amazingly quick. I then replaced the optical drive with another SSD for additional storage and backup and ever since then the computer has felt slightly more sluggish in general. I suppose the CPU now has to constantly communicate to the second SSD where it could mostly ignore the optical drive before. Has anyone else noticed this?
Just fixed that issue:
Put the new SSD where the old HD used to be. Put the old HD where the optical drive used to be.
I found that the ports in the motherboard inside the mac have different speeds. The HD port is 6mb/s and the optical drive is 3mb/s.
chicle -
Are you sure its MB/S that would be horribly slow.
Zarkex -
I am seriously considering replacing my old HDD with a SSD instead of using a dual drive. Would you recommend still adding a dual drive with new SSD/ old HDD or just replacing the HDD with an SSD. I like having an optic drive, although not necessary. I am looking from the point of utility and practicality. Cheers!
nshourds -
Zarkex is correct. The transfer speed for SATA 3 is not 6MB/s it is 6GB/s.
Successfully did this.
Didn't unplug camera, battery or speaker. Didn't remove orange screws from airport/bluetooth and didn't unplug antenna. I was just careful with the cables. One of the screws at the top left of the optical drive was sticky but just used a little contact cleaner and it came away fine. Everything is working as it should.
Will this work with 2 SSDs? I replaced my HDD earlier with a 500GB SSD and if I wanted to add a second SSD in the old optical drive site, would that slow down the computer or require tinkering with the OS to get it to accommodate two SSDs? Or if I did this, should I get a new HDD and put it in the optical port site (I prefer the SSDs because I "throw" my computer around a bit, keeping it in my backpack as I'm a uni student and I know that jostling a spinning HDD can cause problems)?
Kicking your mac around shouldn't have any noticeable effect on the hard drives - if you drop it from 1m every once in a while then yes, otherwise not really - remember iPods had hard drives for quite a while. Your computer sees hard drives and ssds the same way, you can have as many of either as you can fit
Darie H -
How much weight can I save by removing the optical drive?
gunes314 -
You can save a lot of weight if lets say your installing a solid state drive or putting in a second hard drive but if you know that you use the CD/DVD disc drive a lot then you might just want to leave the drive alone.
Marshall WahlstromHelgren -
Tip: Use one of those weekday pill holders to have a cheep way to store screws you remove and each day of the week can be for different sizes or parts. It has been handy to have (much less expensive than the magnetic mat.
Robert Wacker -
Hello, where can I buy the screws I need in case I lose one of them?
taylornya -
iFixit sells a kit: MacBook Pro Unibody Lower Case Screw Set
Darrell Johnson -
I have one stripped screw... How opening without drill it?! Any suggestions please?
rodrigosady -
I also stripped a couple screws. I wasn’t able to open it up without drilling. After drilling the heads and removing the cover it was easy to hacksaw the tip and unscrew with a standard driver.
Michael Wilkens -
We have a guide for that!
How to Remove a Stripped Screw
Sam Omiotek -
My top tip - make sure you buy good quality Phillips screwdrivers and a magnetic holder. Cheap screwdrivers won’t get the screws undone safely. Without a magnetic holder you have no chance of getting the tiny crews in and out safely.
jeremyyoung -
A good Phillips 00 is your friend here. Also, when reinserting the screws, gently start anticlockwise and you wil feel a click at the start of the thread. This tells you you’re in the right place and less likely to cross-thread through force in the wrong place.
Iain Boyd -
I feel like these are 000 screws. Amazon sales describe them as such and my 000 screwdriver fits better
cam2000deluxe -
Before ordering a new Trackpad remove the existing battery and try clicking the Trackpad. If it clicks OK with the battery out the source of problem is likely a swollen battery, which should to be replaced even if it still works to some degree. From the side of the battery you will likely see the soft part of the battery bulging beyond the hard case.
Patrick Langvardt -
That’s absolutely correct as I can testify. With the battery removed I also adjusted the T6 set screw that adjusts the sensitivity of the trackpad click, evidently someone had cranked mine down tighter than the factory setting.
Gary Register -
Le quatrième paragraphe dans les instructions en français n’est pas correct : ce ne sont pas les 2 petites vis, mais les 7 petites vis qui sont inclinées. Et les 3 grandes sont bien verticales.
Degeorges -
Bonjour ! Merci de votre observation. J’ai corrigé la traduction. iFixit étant un wiki, n’hésitez pas à modifiez si vous remarquez une erreur :) Encore merci de votre attention et à bientôt !
Claire Miesch -
Tip: if you have a magnetic screw mat or similar, lay the macbook over the mat to make sure it catches any screws that may decide to fall of and hide under your table
Moritz -
Funny, it's not her hands that are doing the close ups. :)
Cinemated Man -