Introduction
Internal Prereq.
-
-
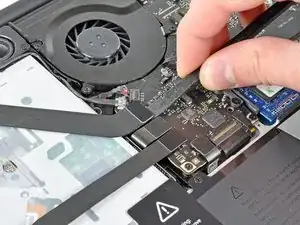
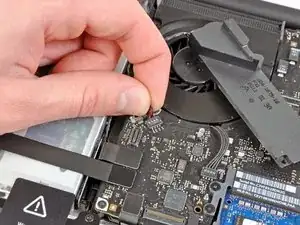
Use the flat end of a spudger to pry the AirPort/Bluetooth ribbon cable connector up from its socket on the logic board.
-
-
-
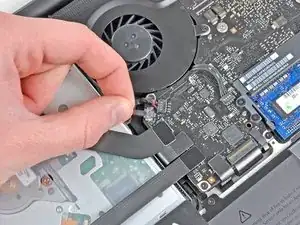
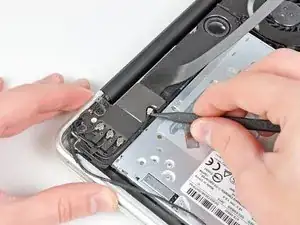
Carefully move the AirPort/Bluetooth ribbon cable out of the way as you peel the camera cable off the adhesive securing it to the subwoofer and the AirPort/Bluetooth bracket.
-
De-route the camera cable out from under the retaining finger molded into the AirPort/Bluetooth bracket.
-
-
-
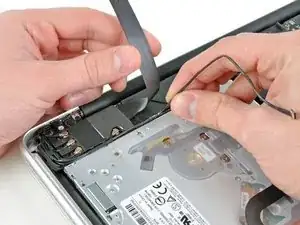
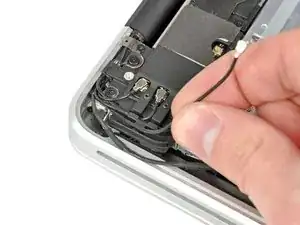
Use the tip of a spudger to pry the antenna connector closest to the logic board up from its socket on the AirPort/Bluetooth board.
-
De-route the antenna cable from under the finger molded into the AirPort/Bluetooth bracket.
-
-
-
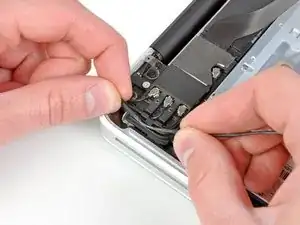
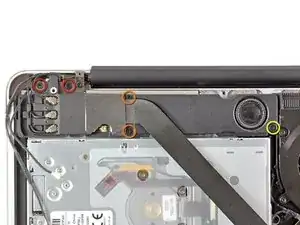
Remove the following five screws:
-
Two 10.3 mm Phillips screws
-
Two 3.1 mm Phillips screws
-
One 5 mm Phillips screw
-
-
-
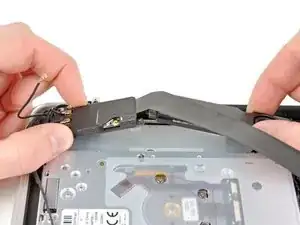
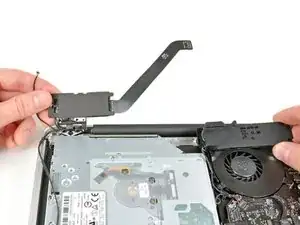
Pull the AirPort/Bluetooth assembly and the Subwoofer upward near the center of the side of the optical drive until they clear each other.
-
Move the AirPort/Bluetooth assembly and the subwoofer away from the top of the optical drive.
-
-
-
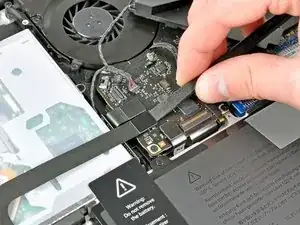
Pull the right speaker/subwoofer cable out from under the retaining finger near the side of the optical drive.
-
Pull the right speaker/subwoofer cable upward to disconnect it from the logic board.
-
-
-
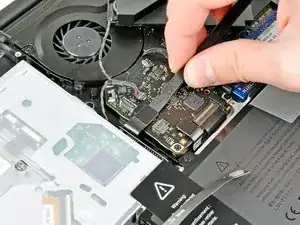
Use the flat end of a spudger to pry the hard drive cable connector up from its socket on the logic board.
-
Bend the hard drive cable away from the optical drive.
-
-
-
Use the flat end of a spudger to pry the optical drive connector up from its socket on the logic board.
-
-
-
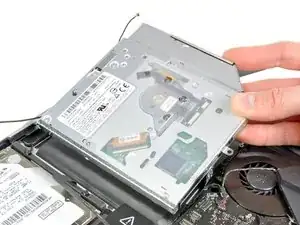
Pull the optical drive upward from its edge closest to the display and remove it from the upper case.
-


To reassemble your device, follow these instructions in reverse order.

N.B! Thank you very much all you here on iFixit! Some IMPORTANT notes. Be very careful BEFORE prying the connectors up and down. They are very fragile and the picture could actually be seen as showing a bending loading in their weakest direction, AROUND its slender axis. The connector is slender and inserted on the logic board, so the gentle "walking" up and down should be done ALONG their slender direction and WITHOUT touching the adjacent connectors. If bending is done around its axis the soldering comes apart and the cable is done and gone. Just happened. These flat cables are one of the weakest design spots in my experience. They are a major time, money and geist consuming reason for malfunction like Wi-Fi connection problems, HDD, SSD not found internally but externally from USB issues et al being found on different forums. Thanks again and again.
Greg -