
Introduction
Follow this guide to remove and replace the battery for the Moto E4 Plus. Getting to the battery is not very difficult, but the battery itself is held onto the frame with strong adhesive. You will need to use high concentration (over 90%) isopropyl alcohol in order to loosen the battery from the phone.
If your battery is swollen, take appropriate precautions.
For your safety, discharge your battery below 25% before disassembling your phone. This reduces the risk of a dangerous thermal event if the battery is accidentally damaged during the repair.
-
-
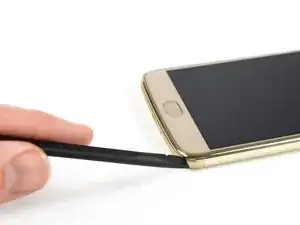
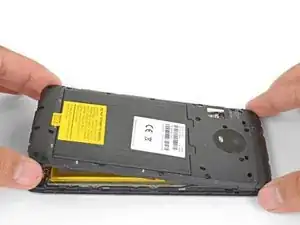
Insert the edge of the spudger into the notch on the bottom right corner of the phone.
-
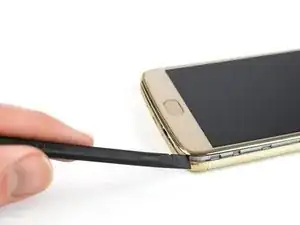
Twist the spudger to start releasing the back cover from the phone.
-
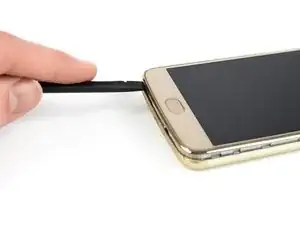
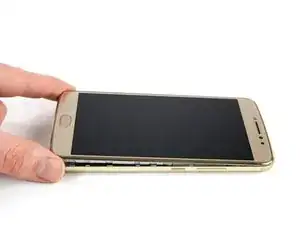
Slide the spudger along the bottom edge to separate the back cover from the phone.
-
-
-
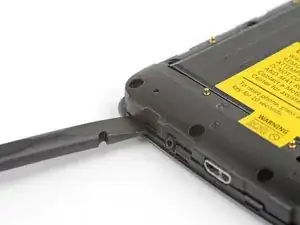
Insert the flat end of a spudger into the midframe seam at the bottom left corner of the phone (near the microphone hole).
-
Twist the spudger to release the plastic clip.
-
Repeat the process for the clip near the top right corner of the phone.
-
-
-
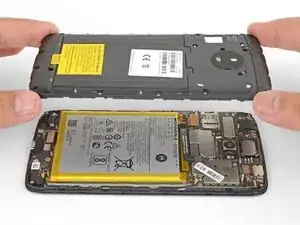
Lift the bottom edge of the plastic midframe upwards until the clips along the top edge release.
-
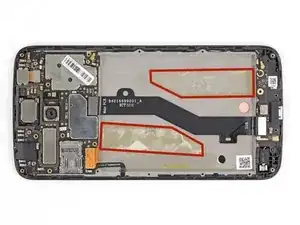
Remove the plastic midframe.
-
-
-
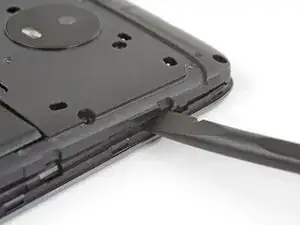
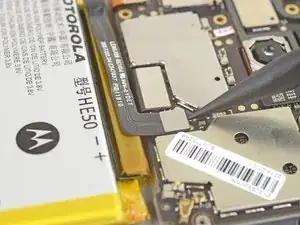
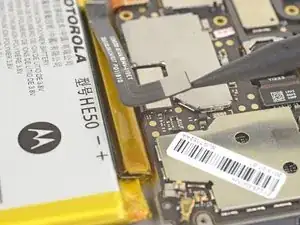
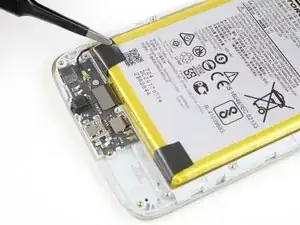
Use the point of a spudger to pry up and disconnect the battery connector from its motherboard socket.
-
-
-
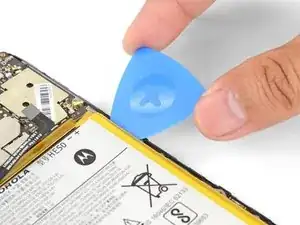
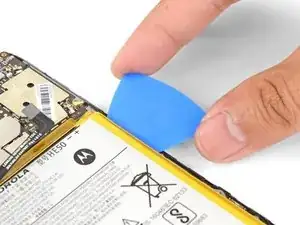
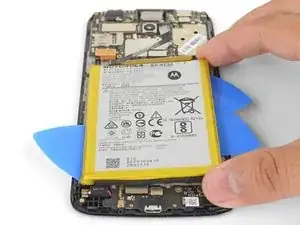
Insert an opening pick into the top right edge of the battery.
-
Push the opening pick in carefully until half of the pick is under the battery.
-
-
-
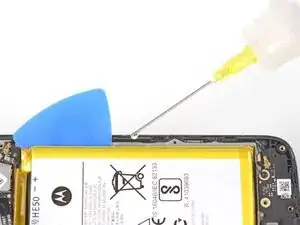
Fill a plastic dropper or syringe with high concentration isopropyl alcohol and apply a few drops of alcohol along the right edge of the battery.
-
Tilt the edge up slightly for a minute to allow the isopropyl alcohol to soften the adhesive.
-
-
-
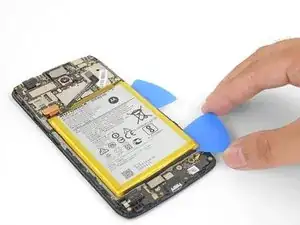
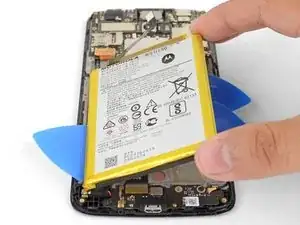
Insert another opening pick into the right edge, near the first opening pick.
-
Slide the opening pick down along the right edge to loosen the right adhesive strip.
-
If the slicing feels difficult, apply a few more drops of isopropyl alcohol into the edge, wait a minute for it to seep in, and try again.
-
-
-
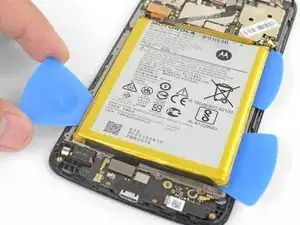
Insert an opening pick into the bottom left edge of the battery.
-
Push the opening pick until it is halfway under the battery.
-
Apply isopropyl alcohol along the left edge and let it sit for a minute to weaken the adhesive.
-
-
-
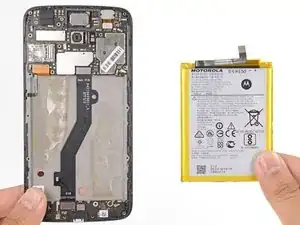
Remove the battery.
-
Remove the old adhesive from the phone frame.
-
Apply new adhesive in the same general area as the old adhesive.
-
Lay the battery lightly in place. Check that the battery connector is properly aligned with its motherboard socket.
-
Press the battery firmly into the phone for thirty seconds.
-

To reassemble your device, follow these instructions in reverse order.
For optimal performance, calibrate your newly installed battery: Charge it to 100% and keep charging it for at least 2 more hours. Then use your device until it shuts off due to low battery. Finally, charge it uninterrupted to 100%.
Take your e-waste to an R2 or e-Stewards certified recycler.
Repair didn’t go as planned? Try some basic troubleshooting, or ask our Moto E4 Plus Answers community for help.

One comment
You are a star. Spot on. I very much appreciate your contribution in breaking the monopoly of the bastards. They sold me the mobile without telling me the battery is fixed. I was about to send it for repair on their lab which could have cost me at least £200 if not more. £25 DHL . £45 just for looking into it . This is even before replacing the battery and the cost of labor. Take off my hat for you. Keep up the good work.
best regards
Sburgess