
Introduction
This guide will walk you through the process of replacing a faulty LCD screen and digitizer assembly in a Motorola Moto G4 Plus phone.
This guide is for replacing a complete display assembly, which includes the display frame. Your replacement part should look like this. If you purchased a bare display, you must complete additional disassembly steps, which are not covered by this guide.
For your safety, discharge your battery below 25% before disassembling your phone. This reduces the risk of a dangerous thermal event if the battery is accidentally damaged during the repair.
-
-
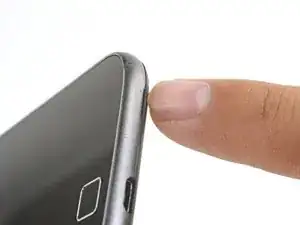
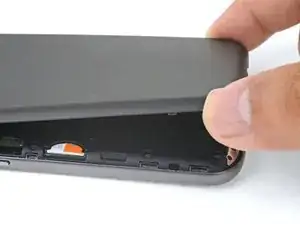
Insert a fingernail or a spudger into the notch on bottom edge of the phone near the charging port.
-
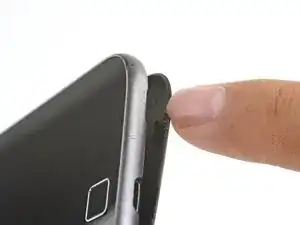
Pry the back cover away from the body of the phone.
-
-
-
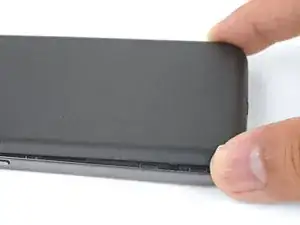
Continue to gently lift the back cover until all plastic clips have been released.
-
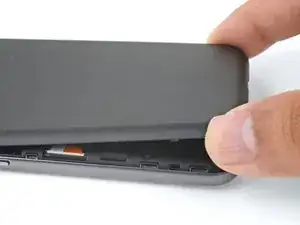
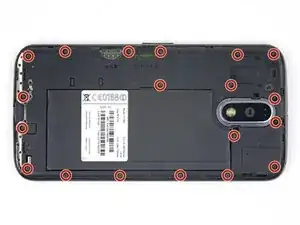
Remove the back cover.
-
-
-
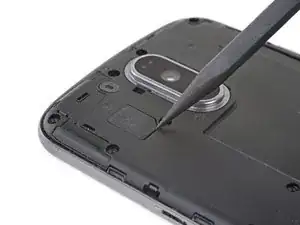
Use the point of a spudger to pry up the rubber cover over the camera flash connector.
-
Remove the rubber cover.
-
-
-
Peel up and remove the tape securing the battery wires.
-
Peel up and remove the black tape that bridges the battery and the phone.
-
-
-
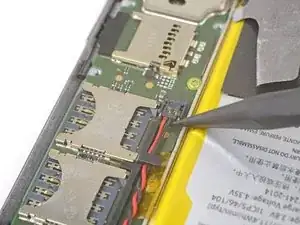
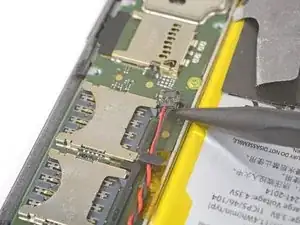
Slip the point of a spudger underneath the red and black battery wires and gently pry straight up.
-
-
-
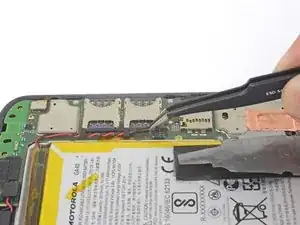
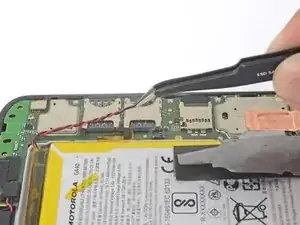
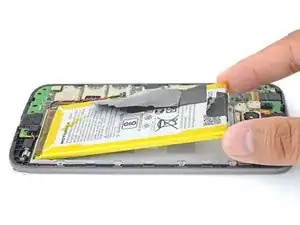
Peel the black pull tab from battery and pull slowly but firmly to separate the battery from the frame.
-
-
-
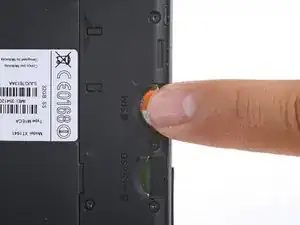
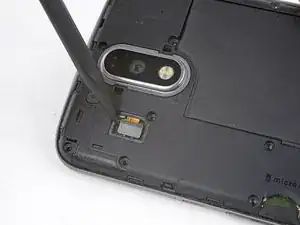
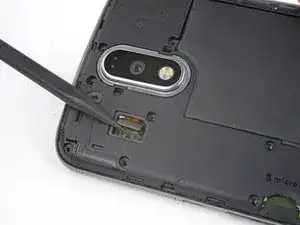
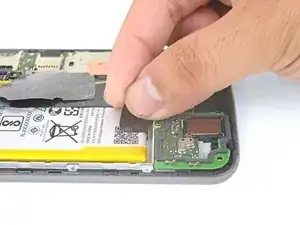
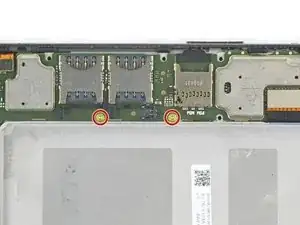
Peel away the yellow tape over the T3 screw next to the SIM card slot.
-
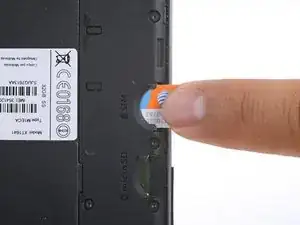
Peel away the copper tape covering the display connector.
-
-
-
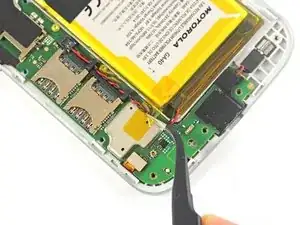
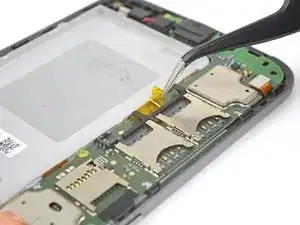
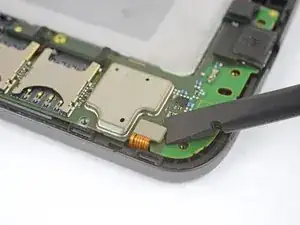
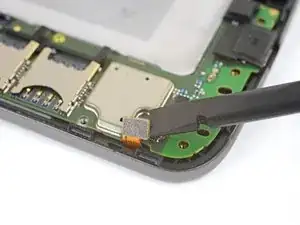
Slide the point of a spudger underneath the vibration motor's wires.
-
Gently pry up to free the vibration motor from its recess.
-
-
-
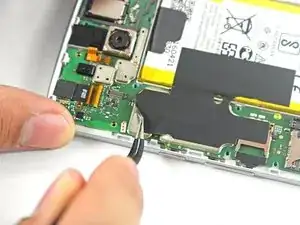
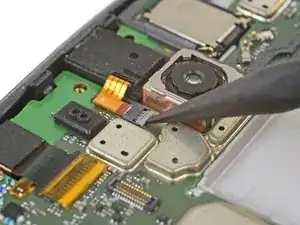
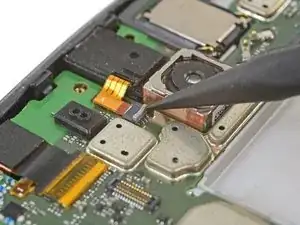
Use a spudger to pry up and disconnect the home button cable connector from the motherboard.
-
-
-
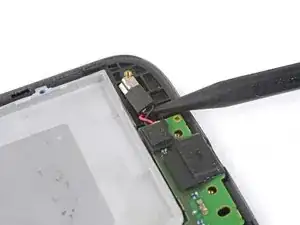
Use tweezers to remove the yellow tape protecting the headphone jack's connector.
-
Use the point of a spudger to carefully flip up the headphone jack's grey ZIF connector lock.
-
-
-
Use tweezers or the point of a spudger to carefully walk the ribbon out of the ZIF connector.
-
-
-
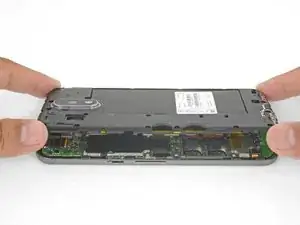
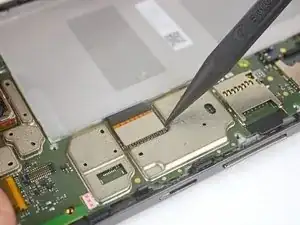
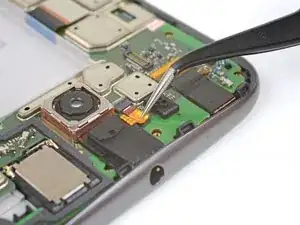
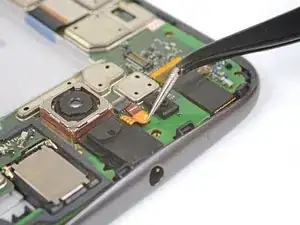
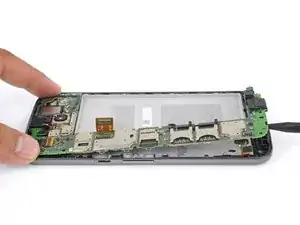
Insert the point of a spudger into a groove at the bottom of the motherboard.
-
Gently pry up to loosen the motherboard from the frame and from the edge clips.
-
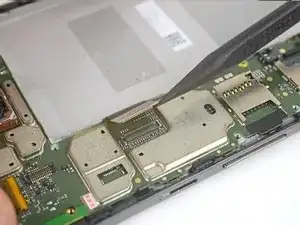
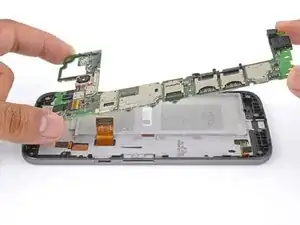
Use a spudger to move any flex cables out of the way, as well as making sure that any modules attached to the motherboard (such as the front-facing camera) are loose from the frame.
-
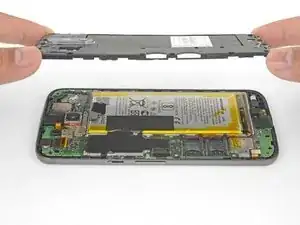
Lift the motherboard up from the frame and remove it.
-
-
-
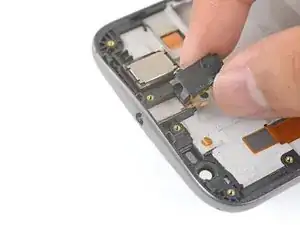
To remove the headphone jack to transfer it to the new frame, insert the point of a spudger into the headphone port, and twist downwards to pop the jack out of the frame.
-
Remove the headphone jack.
-
-
-
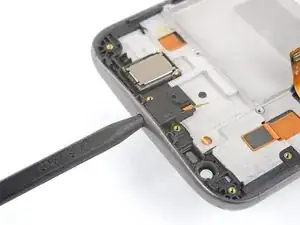
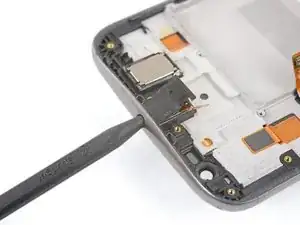
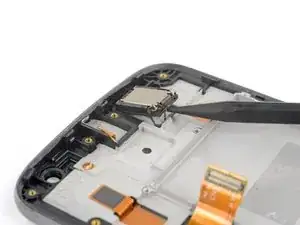
To remove the earpiece speaker to transfer it onto the new frame, insert the point of a spudger at the bottom of the speaker.
-
Pry upwards to separate the earpiece speaker from the frame.
-
-
-
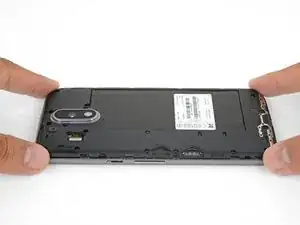
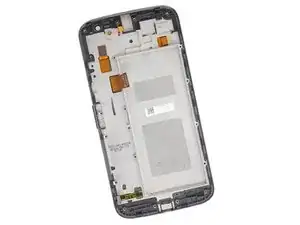
Only the LCD screen and digitizer assembly (with frame) remains.
-
Compare your new replacement part to the original part. You may need to transfer remaining components or remove adhesive backings from the new part before installing.
-


To reassemble your device, follow these instructions in reverse order.
Take your e-waste to an R2 or e-Stewards certified recycler.
Repair didn’t go as planned? Check out our Motorola Moto G4 Plus Answers community for troubleshooting help.

One comment
Why are the display/ LCD screen of any smartphone damaged?