
Introduction
If the battery on your phone doesn’t seem to hold a charge like it used to, it might be time to replace it. Follow this guide to replace your battery. If your battery is swollen, take appropriate precautions.
Warning: Because of the strong adhesive securing the display, minimal clearance for inserting your tools, and high heat required, there's a good chance of accidentally damaging the display during this procedure. If you're replacing the display anyway, then you don't have to worry—but for all other repairs, work very carefully, and be prepared to replace the display afterward if necessary.
-
-
If possible, drain the battery before disassembly. When the battery is charged, there's increased risk of a dangerous thermal event if the battery is overheated or damaged during repairs.
-
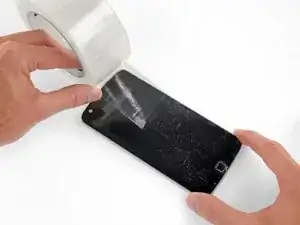
If your display is cracked, completely cover it with packing tape to contain the glass shards and avoid injury.
-
-
-
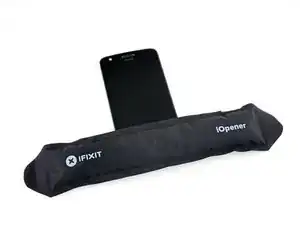
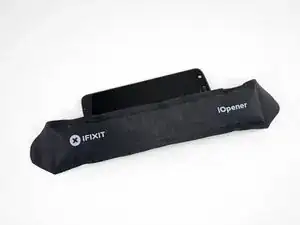
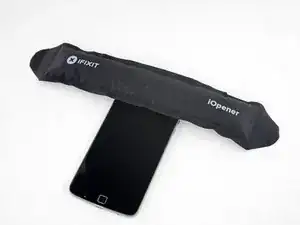
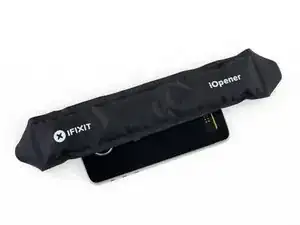
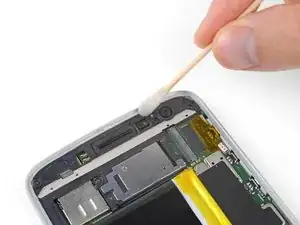
Prepare an iOpener and heat the front of the phone along its left edge for about two minutes, or until it's slightly too hot to touch. This will help soften the adhesive securing the display.
-
-
-
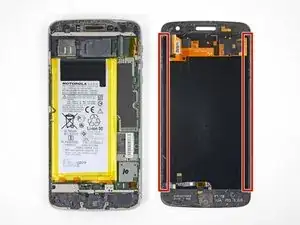
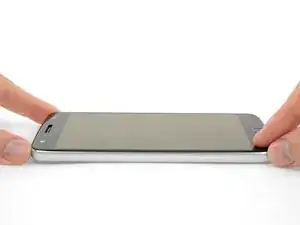
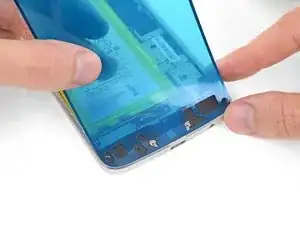
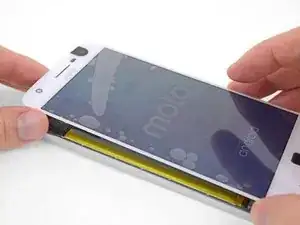
For reference, refer to the first image, showing the back of the display assembly (right) after it has been removed from the phone (left).
-
If you plan to re-use the display assembly, pay particular attention to the side edges. When slicing through the glue in this area, you must be careful to insert your tool less than 2 mm, or your tool will come in contact with the display panel and damage it.
-
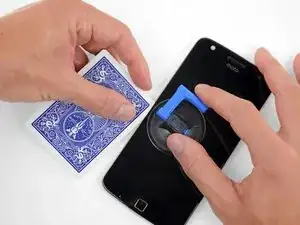
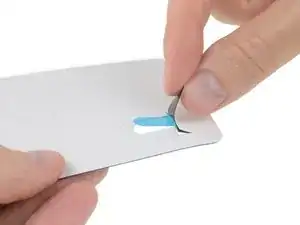
Playing cards are a safer, but much slower, prying tool. The soft paper cards are less likely to damage the display panel, which is good news if you plan to reuse it.
-
-
-
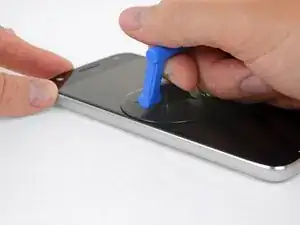
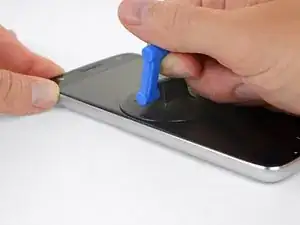
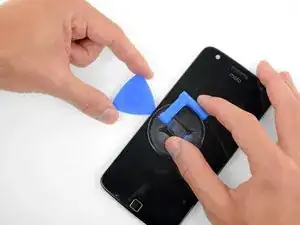
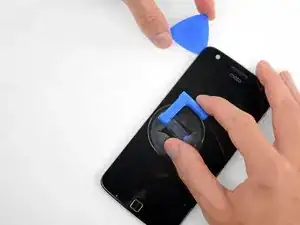
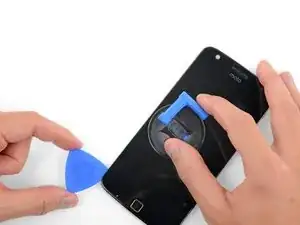
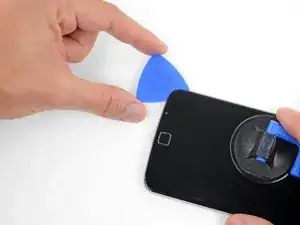
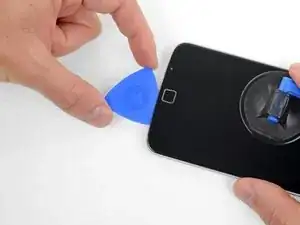
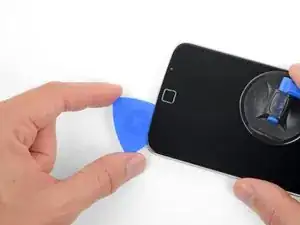
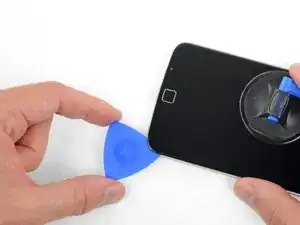
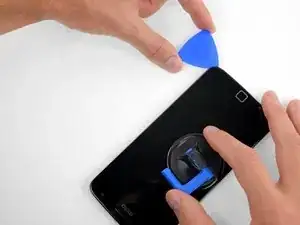
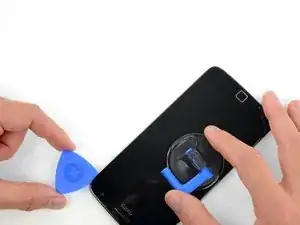
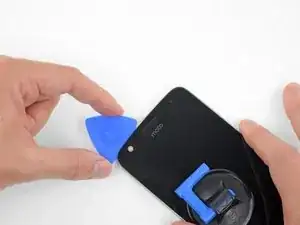
Apply a suction cup to the display, near the middle of the left edge.
-
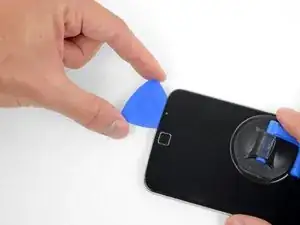
Pull up on the suction cup with firm, constant pressure to create a slight gap between the front panel and rear case.
-
This may require a significant amount of force, but you only need to open a very slight gap with the suction cup to insert your tool.
-
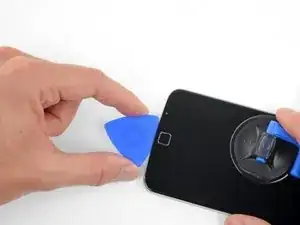
If you have trouble, apply more heat to further soften the adhesive, and try again. The adhesive cools very fast, so you may need to heat it repeatedly.
-
-
-
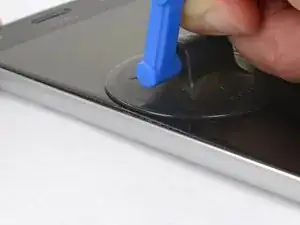
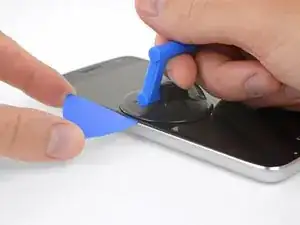
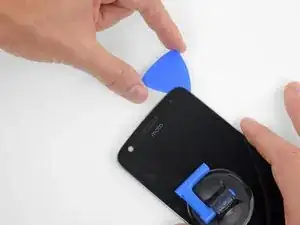
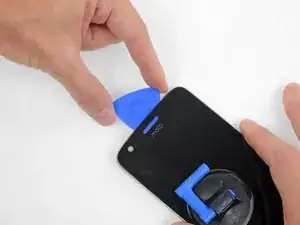
Slide the tool all along the left edge of the phone to slice through the adhesive securing the display.
-
-
-
Heat the front of the phone between the display and the lower edge to soften the adhesive underneath.
-
-
-
Slice through the glue under the lower bezel, being careful not to damage the fingerprint sensor.
-
Slide or roll your tool past the lower edge of the fingerprint sensor and continue to the other side. Do not pry directly underneath the sensor.
-
-
-
Heat the right edge of the phone to soften the adhesive securing the right edge of the display.
-
-
-
Slide your tool along the right edge of the phone to separate the glue securing the display.
-
-
-
Insert your tool at the top right corner of the phone, and begin to slide it underneath the top bezel to separate the glue.
-
When your tool just passes the left edge of the earpiece speaker, stop.
-
Slide or roll your tool over the top of the flash module for the selfie camera to avoid damaging it.
-
-
-
If the display remains stuck, re-heat and slice the adhesive repeatedly as needed.
-
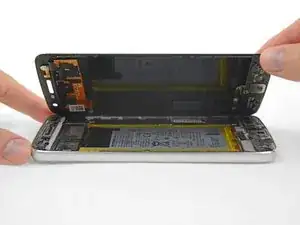
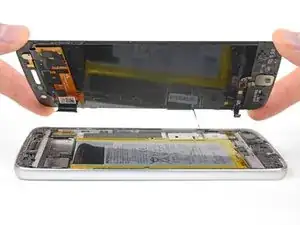
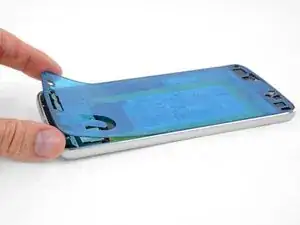
Lift the display from the left edge and swing it open, away from the phone.
-
-
-
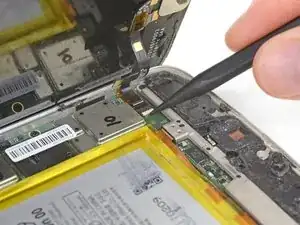
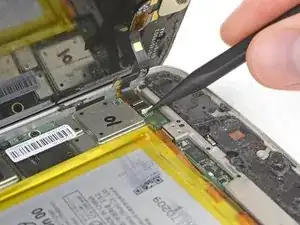
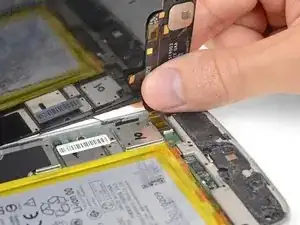
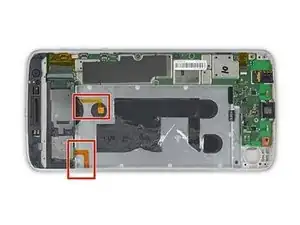
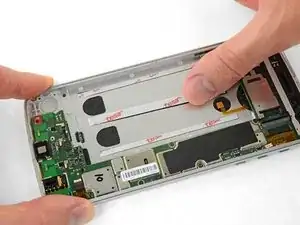
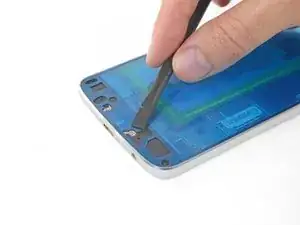
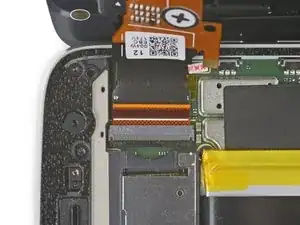
While holding the display open, use the point of a spudger to pry up the locking tab on the fingerprint sensor cable's ZIF connector.
-
-
-
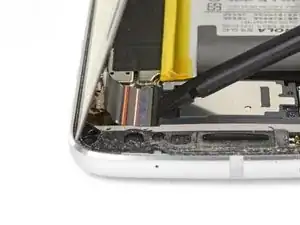
At the opposite end of the phone, use your spudger to flip open the locking tab on the display cable connector.
-
-
-
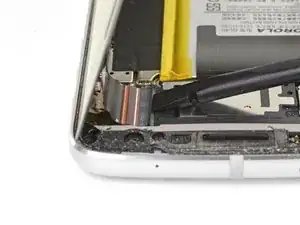
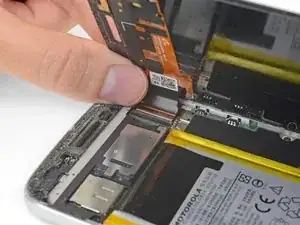
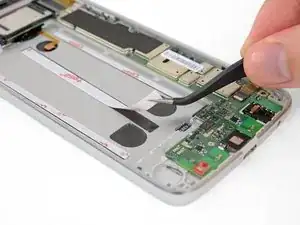
Gently pull the fingerprint sensor cable to slide it out of its socket, disconnecting it from the motherboard.
-
-
-
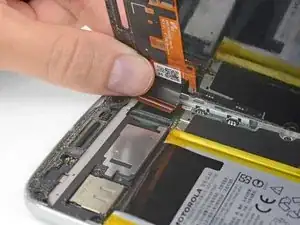
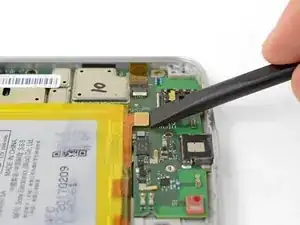
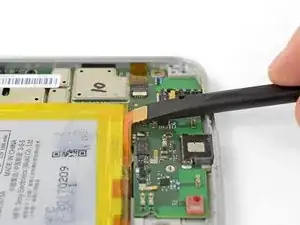
Use a spudger to disconnect the battery by prying its connector straight up from the motherboard.
-
-
-
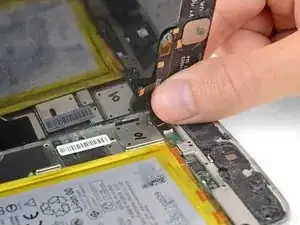
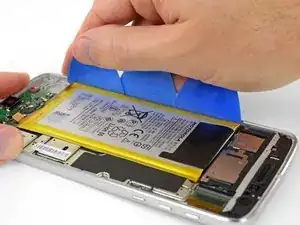
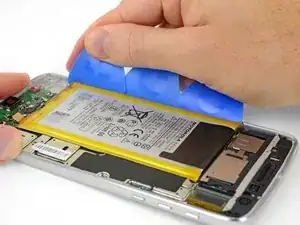
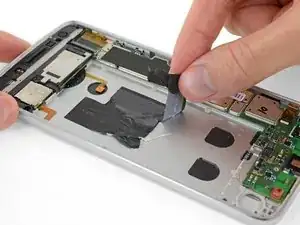
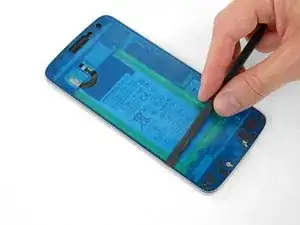
Peel up the black pull tab at the top edge of the battery, and slowly pull it away from the battery at about a 45-degree angle to release the command strips (a.k.a. stretch-release adhesive) underneath.
-
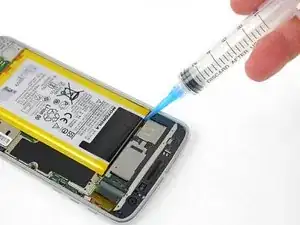
Apply some high concentration (>90%) isopropyl alcohol under each corner of the battery and allow it to penetrate for several minutes to help weaken the adhesive.
-
Alternatively, apply a freshly heated iOpener to the back of the phone directly behind the battery for two minutes to help soften the adhesive. Re-heat and reapply the iOpener as necessary.
-
-
-
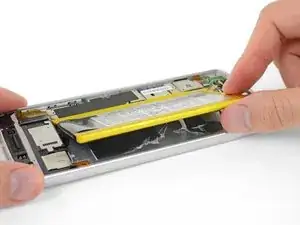
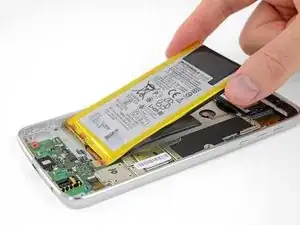
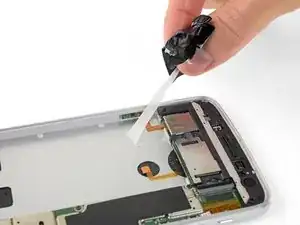
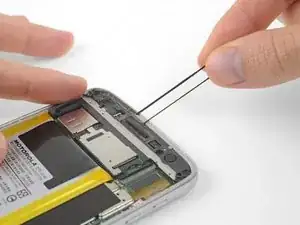
Insert several opening picks or a plastic card along the outer edge of the battery.
-
Apply steady, even pressure to slowly lever the battery up and out of the phone.
-
-
-
Before installing your new battery, peel up all the old adhesive and remove it from the phone.
-
For best results, clean the area underneath the battery with isopropyl alcohol and a lint-free cloth or coffee filter. This helps prep the surface so the new battery will adhere more strongly.
-
-
-
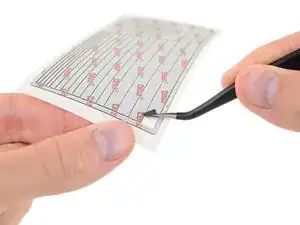
Place stretch-release adhesive strips or several strips of thin double-sided adhesive tape, either from a pre-cut adhesive card or from a roll of Tesa 61395, into the battery well, and press them firmly into place.
-
-
-
Peel off the remaining film liners to expose the adhesive before pressing your new battery into place.
-
Carefully position the battery and press it firmly and evenly into the phone.
-
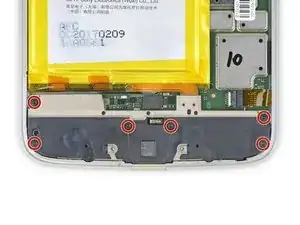
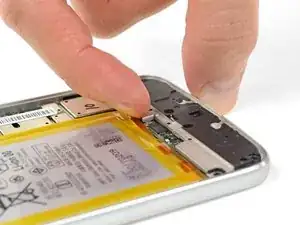
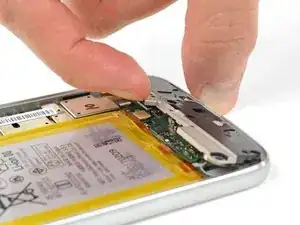
Connect the battery to the motherboard, and install the lower cover, including its six T3 Torx screws.
-
-
-
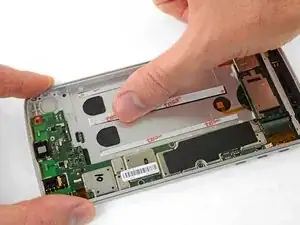
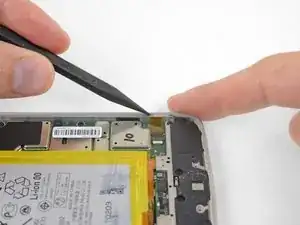
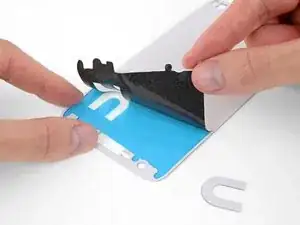
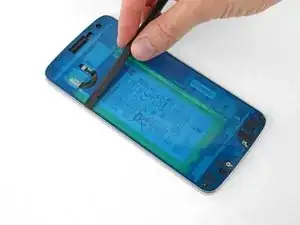
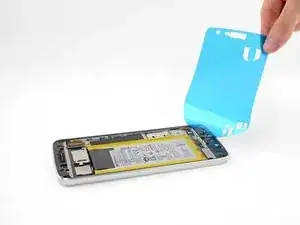
Peel away and remove all the old display adhesive from the body of your phone.
-
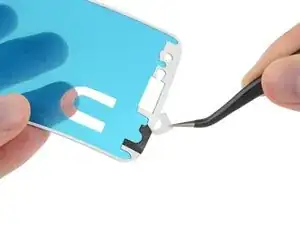
Use the point of your spudger to scour away and remove any smaller bits of adhesive that remain stuck.
-
For best results, clean the area underneath the removed adhesive with isopropyl alcohol to help prep the surface so the new adhesive bonds more strongly.
-
-
-
Hold the adhesive sheet with the exposed adhesive facing down, and carefully align it into the lower edge of the phone.
-
When it's correctly aligned, lower the rest of the adhesive sheet into the phone.
-
-
-
Firmly press the adhesive into place.
-
Use the flat edge of your spudger to press along the edges and hard-to-reach areas.
-
-
-
Before sealing the display in place, connect the flex cables for the display and fingerprint sensor, and then power your phone on.
-
Test all functions to make sure your repair was successful before sealing up the display.
-
-
-
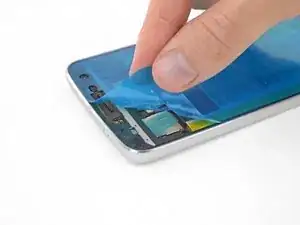
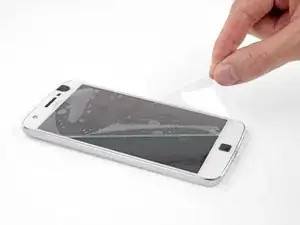
When your repair is tested and complete, press the display firmly into place and remove any plastic liners from the screen.
-


Compare your new replacement part to the original part. You may need to transfer remaining components or remove adhesive backings from the new part before installing.
Take your e-waste to an R2 or e-Stewards certified recycler.
After completing this guide, calibrate your newly-installed battery.
Repair didn’t go as planned? Check out our Answers community for troubleshooting help.

13 comments
Good instructions. 2 things to add. Be careful how much heat you apply, I damaged my screen. A real heat gun needed about 30 seconds. Second is you can get custom cut stickers for the Z play to reinstall the battery and screen they are from that big online company, you know the one.
One of the best guides ever: clear and precise, with a REAL step by step process. Thank you very much.
I only want to add something: on my model (EU) the battery is attached to the body by two striped along the short sides of the battery. It can be hard to work on those stripes so pur extra attention on that.
just.mro -
Excellent guide. The biggest pain by far was removing the old battery. I didn’t have a heat gun so just used a hair dryer for the multiple rounds of heating and prying. I did end up deforming the old one quite a bit getting it out, but luckily nothing happened. Also, on my adhesive, the U-shaped cutout was *not* at the top left. Just make sure the speaker holes line up.