Introduction
This guide shows how to remove and replace the battery for the Samsung Galaxy S20 Ultra.
The battery is held in place with strong adhesive. High concentration (over 90%) isopropyl alcohol is necessary to loosen and release this adhesive.
If your battery is swollen, take appropriate precautions and do not heat your phone.
For your safety, discharge your battery below 25% before disassembling your phone. This reduces the risk of a dangerous thermal event if the battery is accidentally damaged during the repair.
You'll need replacement adhesive in order to complete this repair.
-
-
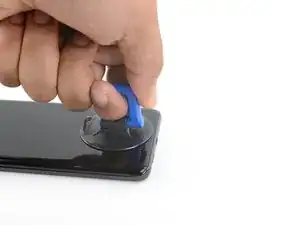
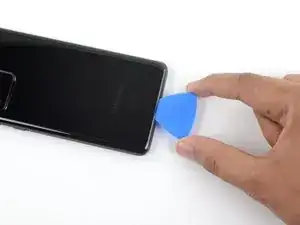
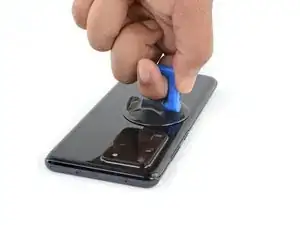
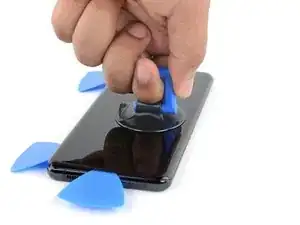
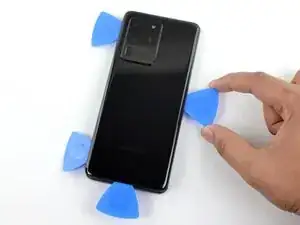
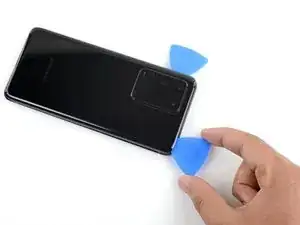
Apply a suction cup to the back of the phone, as close to the center of the bottom edge as possible.
-
Pull on the suction cup with strong, steady force to create a gap between the back cover and the frame.
-
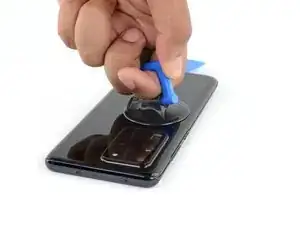
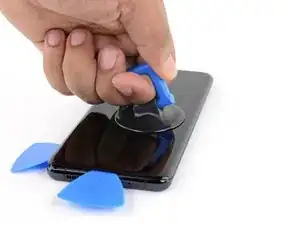
Insert the point of an opening pick into the gap.
-
-
-
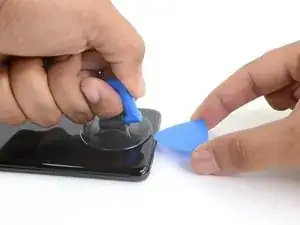
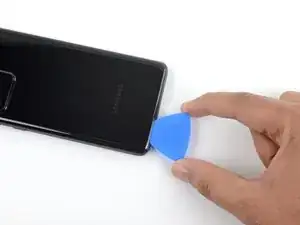
Slide the pick back and forth along the bottom edge to slice through the adhesive.
-
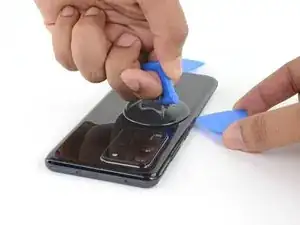
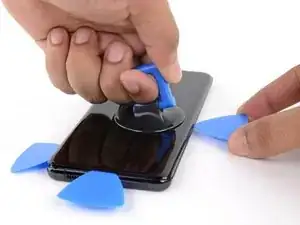
Leave your opening pick in the seam to prevent the adhesive from resealing.
-
-
-
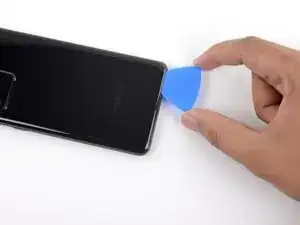
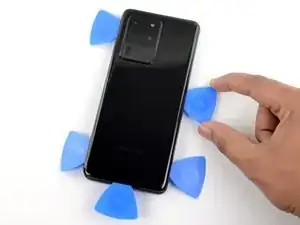
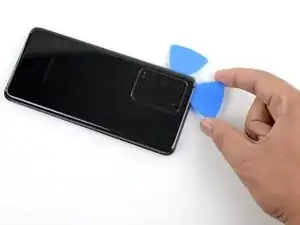
Apply a suction cup to the back of the phone, as close to the center of the left edge as possible.
-
Pull on the suction cup with strong, steady force to create a gap between the back cover and the frame.
-
Insert the point of an opening pick into the gap.
-
You can try also applying a few drops of high concentration (over 90%) isopropyl alcohol into the seam to help loosen the adhesive.
-
-
-
Once the pick is underneath the glass's edge, tilt it downward and insert it further to fully separate the back cover's adhesive.
-
-
-
Slide the pick towards the bottom edge of the phone to separate the back cover's adhesive.
-
Leave your pick under the left edge of the glass near the bottom of the device to prevent the adhesive from resealing.
-
-
-
Insert another pick under the center of the left edge of the back cover.
-
Gradually slide the pick towards the top of the device to separate the back cover's adhesive.
-
Leave your pick under the left edge of the glass near the top of the device to prevent the adhesive from resealing.
-
-
-
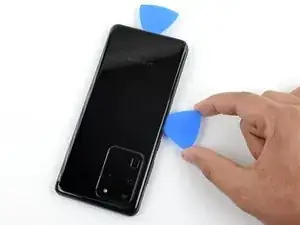
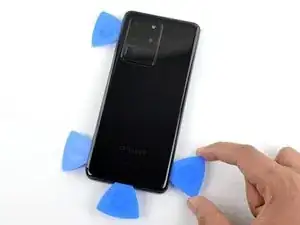
Apply a suction cup to the back of the phone, as close to the center of the right edge as possible.
-
Pull on the suction cup with strong, steady force to create a gap between the back cover and the frame.
-
Insert the point of an opening pick into the gap.
-
-
-
Slide the pick towards the bottom edge of the phone to separate the back cover's adhesive.
-
Leave your pick under the right edge of the glass near the bottom of the device to prevent the adhesive from resealing.
-
-
-
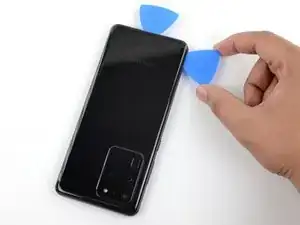
Insert another pick underneath the center of the right edge of the back cover.
-
Gradually slide the pick towards the top of the device to separate the back cover's adhesive.
-
-
-
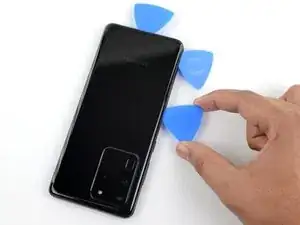
Gradually slide the pick from the right edge of the device around the top right corner.
-
Continue slicing along the top edge to fully separate the back cover adhesive.
-
-
-
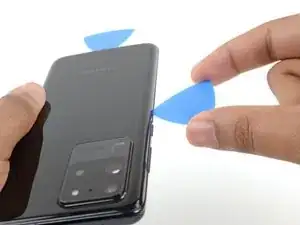
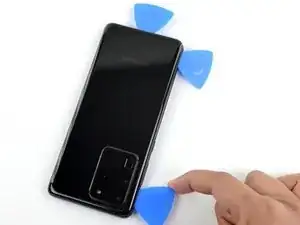
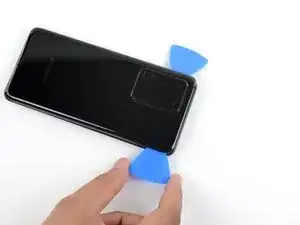
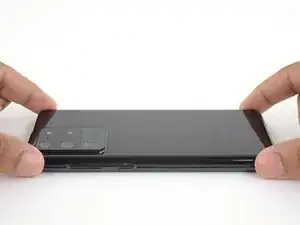
Lift the back cover slowly. Use opening picks to slice any remaining adhesive.
-
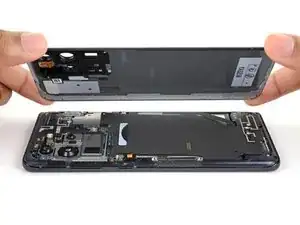
Remove the back cover.
-
This is a good point to power on your phone and test all functions before sealing it up.
-
Remove any adhesive chunks with a pair of tweezers or your fingers. Apply heat if you're having trouble separating the adhesive.
-
If you're using Samsung custom-cut adhesives, follow this guide.
-
If you're using double-sided tape, follow this guide.
-
-
-
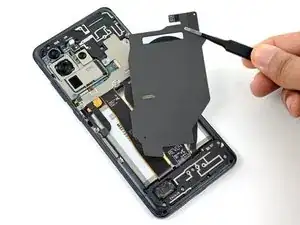
Use a pair of tweezers to gently peel the wireless charging coil away from the device.
-
Remove the wireless charging coil.
-
-
-
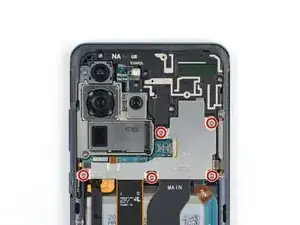
Use a Phillips #00 screwdriver to remove the five 3.9 mm-long screws securing the motherboard bracket.
-
-
-
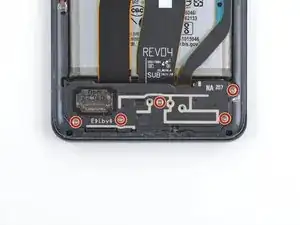
Use a Phillips #00 screwdriver to remove the five 3.9 mm-long screws securing the loudspeaker and lower midframe.
-
-
-
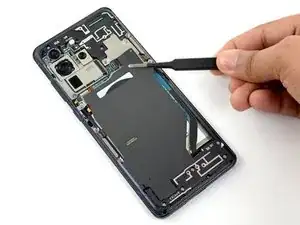
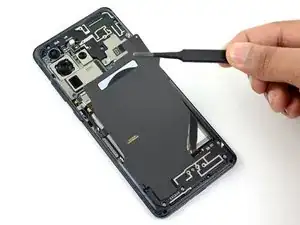
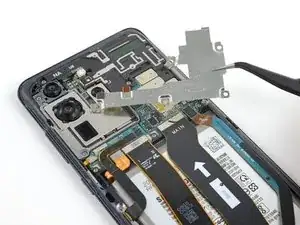
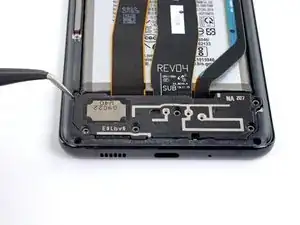
Insert the point of a spudger or a pair of tweezers into the notch in the top left corner of the midframe and pry up to release the clips holding it in place.
-
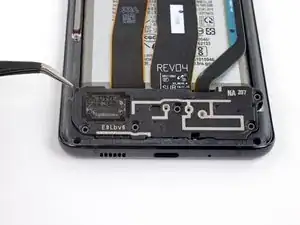
Remove the loudspeaker and lower midframe.
-
-
-
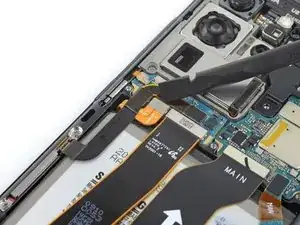
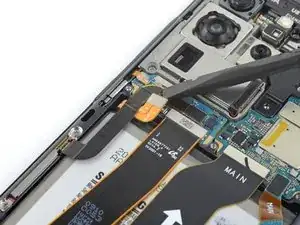
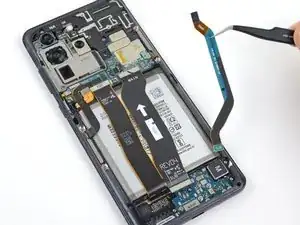
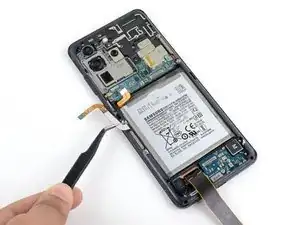
Use a spudger to pry up and disconnect the main and auxiliary flex cables from the daughterboard near the bottom of the device.
-
-
-
Use a spudger to pry up and disconnect the main and auxiliary flex cables from the motherboard.
-
-
-
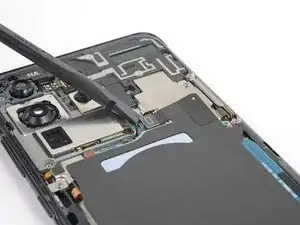
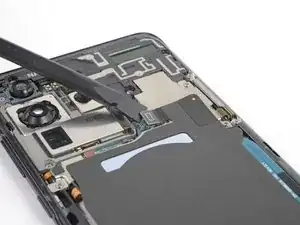
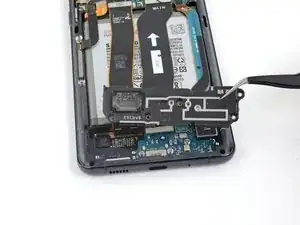
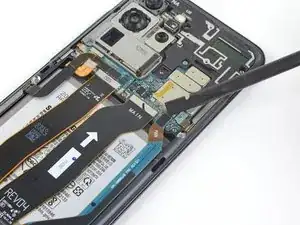
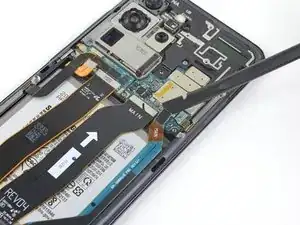
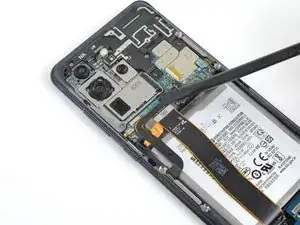
Gently peel up and bend the display and left 5G antenna flex cables out of the way of the motherboard and battery.
-
-
-
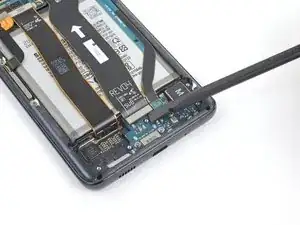
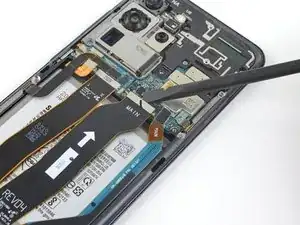
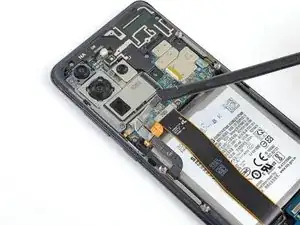
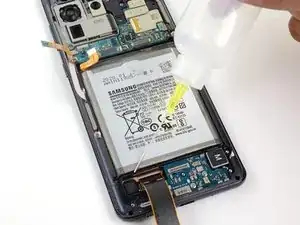
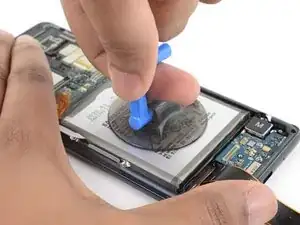
Apply high concentration (over 90%) isopropyl alcohol to the gaps in between the frame and the edges of the battery.
-
Tilt the device as you apply the alcohol help it penetrate the adhesive underneath the battery.
-
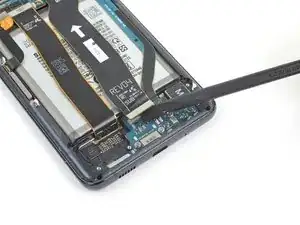
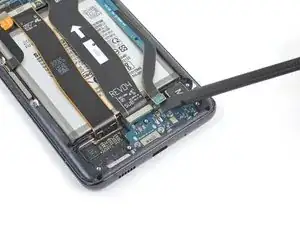
After you apply the alcohol, continue tilting the phone in all directions for two to three minutes to help the alcohol penetrate further.
-
-
-
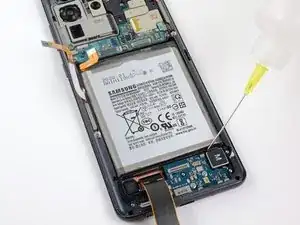
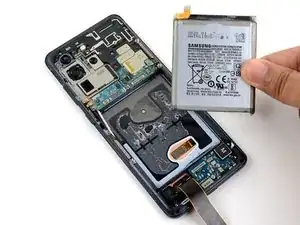
Apply a suction handle to the center of the battery.
-
Brace the top and bottom of the device against your work surface with one hand and firmly pull up on the suction handle with the other.
-
Continue lifting until the battery separates from the phone.
-
-
-
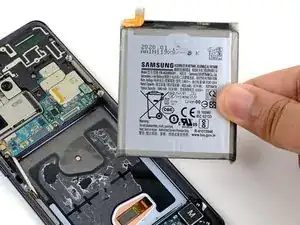
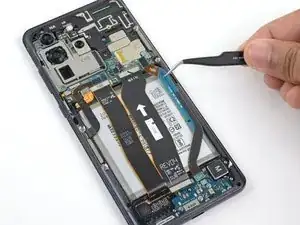
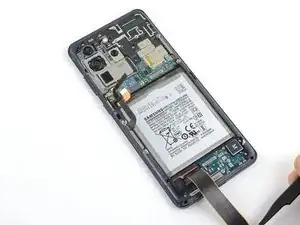
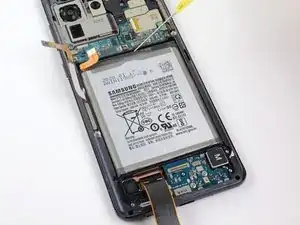
Remove the battery.
-
Peel up and/or scrape away any remaining battery adhesive before cleaning the battery well surface with isopropyl alcohol and a lint free cloth.
-


Compare your new replacement part to the original part—you may need to transfer remaining components or remove adhesive backings from the new part before installing.
To reassemble your device, follow the above steps in reverse order.
Follow this guide to perform a battery cycle reset, and calibrate your newly-installed battery.
Take your e-waste to an R2 or e-Stewards certified recycler.
Repair didn’t go as planned? Check out our Answers community for troubleshooting help.

3 comments
The new battery stays at zero percent when it’s charging
But it charges or not?
Where did you buy this battery, avoid ebay only buy from trusted sources with warranty like ifixit
I bought a galaxy s7 battery on eBay claiming to be original quality it swelled up badly in 2 days