Introduction

If your Xbox One Elite Controller is not vibrating, your rumble motors might be disconnected or defective. Here are instructions to help you replace your rumble motors. Use the Soldering Iron Guide to attach the wires of the new rumble motor to the motherboard.

  1. UbJ5YFYSZtYgMJBM
    • Turn over the controller so that the buttons face down.

    • Be gentle when removing the cover so you do not break the small plastic tabs holding the cover to the controller.

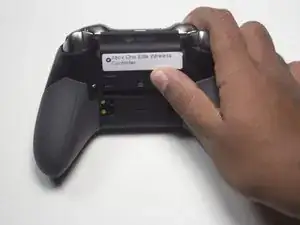
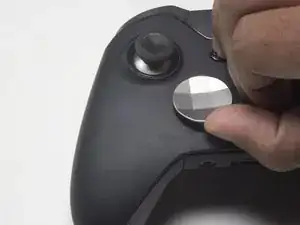
    • Remove the battery cover carefully by sliding the cover up in the direction of the arrow.

  2. iQcpjnWmGLWNRKCC
    iQcpjnWmGLWNRKCC
    TOPHjRv35Y2vqDBG
    • Remove the two batteries AA batteries by lifting them from one end and pulling them out.

  3. rkVI1tdlfHStpGmE
    rkVI1tdlfHStpGmE
    QIBZSINMFW2UGdQC
    QFbDkNXQoDsJMwTr
    • Be careful not to break the plastic tabs, that hold each grip cover to the back of the controller.

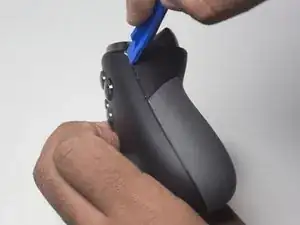
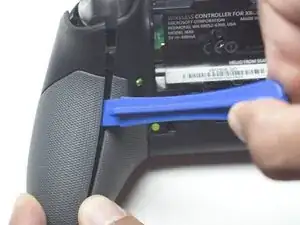
    • Remove each grip by inserting the plastic opening tool near the top of the controller.

    • Guide the plastic opening tool along the entire seam and gently separate the grip from the controller in a prying motion as you go.

    Had difficulty removing the grips. Found that both grips had a piece of double sided tape from the factory securing them as well.

    Aaron Wood -

  4. nvUsLdXDYuKCbRPM
    nvUsLdXDYuKCbRPM
    oxVsjhZfVG3WgEJi
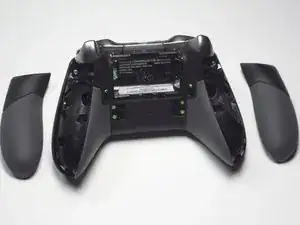
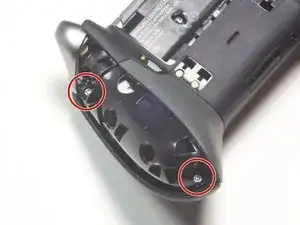
    • Remove the five 2.3 mm screws with the T8 Torx screwdriver.

    • Four of the screws are located at the bottom tip of each grip and at the top of each grip, near the triggers of the controller.

    • The last screw is located in the center of the battery tray beneath a sticker.

    • Use a T8 Torx Screwdriver to puncture the sticker and remove the final screw.

    Well, you actually need a T8 Torx screwdriver with a hole in the middle…

    Jannik Peichl -

    A TR8 is what you are referring to

    EasyAsABC123 -

  5. RPJWhsOIBq1Faumm
    RPJWhsOIBq1Faumm
    iLiXMVpCNIIXBwJY
    cJSfoJvFTU5GYXfc
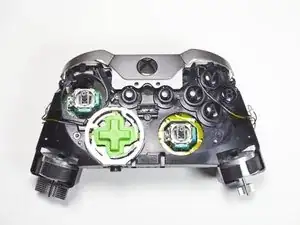
    • Flip the controller so that the buttons are face up to prevent the vibration motors from falling out of the controller.

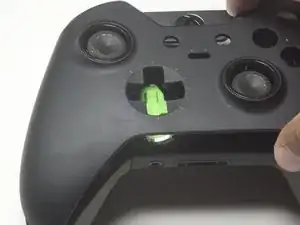
    • Remove the D-pad by lifting the bottom and pulling it up.

    • Remove the entire plastic faceplate by pulling it up gently.

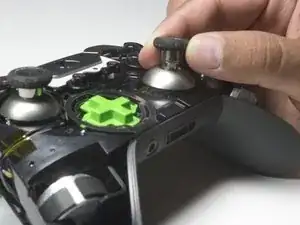
    • Remove the thumbsticks by pulling them off from the top.

    There’s a fifth screw behind the information sticker in battery compartment. This needs to be removed in order for the face plate to be separated from the controller.

    jimmy hvac from bensonhurst -

  6. FtMQabFPA25bCxHD
    FtMQabFPA25bCxHD
    RXTFncGydUX233SL
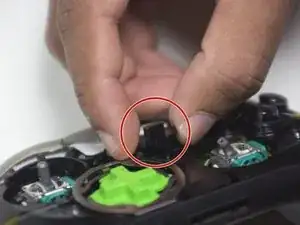
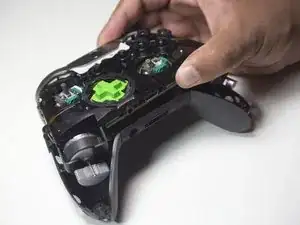
    • Remove the small black mode switch from the front of the controller.

    • The backplate gets a little stuck on the port at the bottom so you may have to use a prying motion to remove.

    • Be careful in the next step when pulling the main assembly apart from the backplate. There is a ribbon cable that connects the two parts that must stay in tact.

    • Remove the backplate from the main assembly by pulling them apart.

  7. HuaNGRGRdsdd6vC5
    • The small ribbon cable connects the back cover to the internals of the controller. To remove the cable, lift the black lever on the opposite side of the connector from the cable.

    • Use tweezers to unplug the ribbon cable on the side closest to the back cover by pulling the cable parallel to the surface of the circuit board.

    Be sure to lift the black lever to release the cable!

    I didn't do this when I removed it, luckily nothing bad happened. But I nearly ruined the pins as I tried to repeatedly shove the cable back into the slot. Then I tested the black piece to see if it was a lever and behold it was! Went in perfectly, but I wish this guide made it clear for amateurs like me.

    Jon LaRiviere -

    Updated the guide to include:

    To remove the cable, lift the black lever on the opposite side of the connector from the cable.

    EasyAsABC123 -

  8. jeoOBBcY4uybmWt4
    jeoOBBcY4uybmWt4
    hHZgPN45PooGRt4o
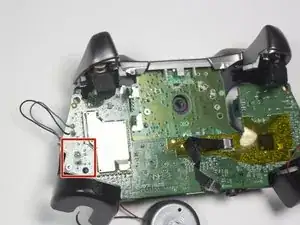
    • Mark each motor according to where it attaches. The rumble motors are different so they will not work if you switch them.

    • Take note of where the red and black motor wires attach because they should be reattached in the same order.

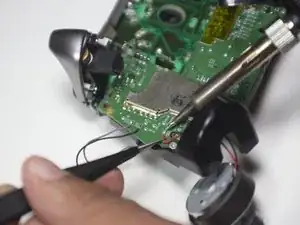
    • Turn over the controller so that the thumbsticks are facing down.

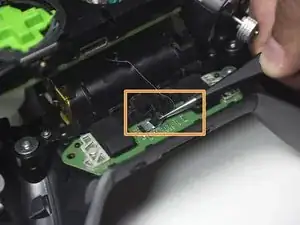
    • Use tweezers and a soldering iron (Soldering Iron Guide) to remove the black and red wires from the motherboard.

    • This will release the rumble motor from the controller assembly.

    Is desoldering the rumble motors actually necessary?

    Gtt -

    For the soldering station,what should the soldering iron temperature be set at?

    Rodney Brookshire -

    I was able to remove the buttons without removing any of the wires. No soldering needed.

    Chris -

Conclusion

To reassemble your device, follow these instructions in reverse order.

Cara Steinke

Member since: 25/09/17

1498 Reputation

0 comments