Introduction
Use this guide to replace or upgrade the CPU in your 21.5" Retina 4K 2017 iMac.
Some images in this guide use a 2015 iMac, which has minor visual differences. These differences do not affect the repair procedure.
This guide is marked "potentially dangerous" because it requires you to handle a power supply that contains large capacitors. Unplug the iMac and hold the power button down for at least 10 seconds to help discharge the capacitors. Handle the board by the edges and do not touch surface components.
Tools
-
-
Before beginning any work on your iMac: Unplug the computer and press and hold the power button for ten seconds to discharge the power supply's capacitors.
-
-
-
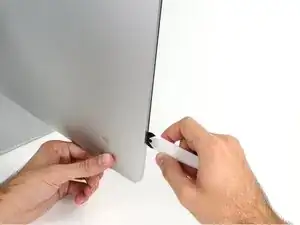
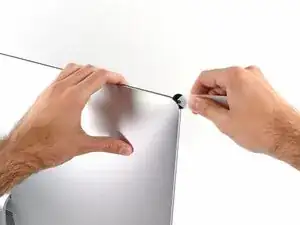
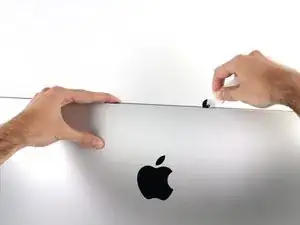
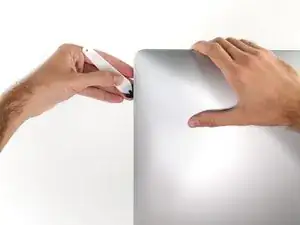
Starting on the left of the display, near the power button, insert the iMac Opening Tool into the gap between the glass panel and the rear enclosure.
-
-
-
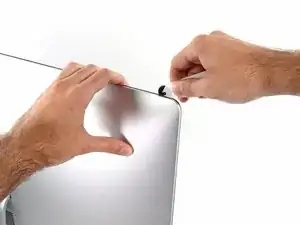
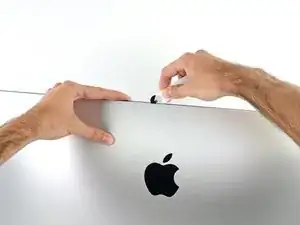
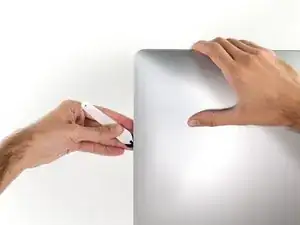
Use the tool like a pizza cutter—roll it along through the gap, and it will cut the foam adhesive through the center.
-
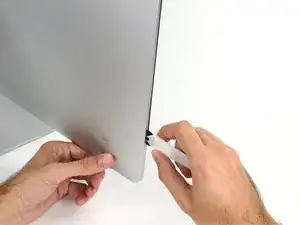
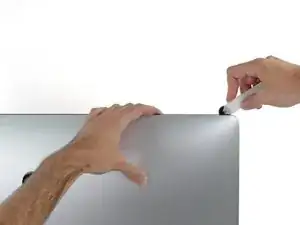
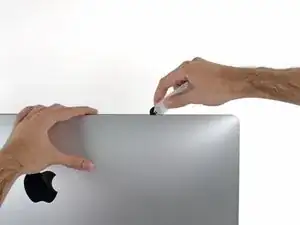
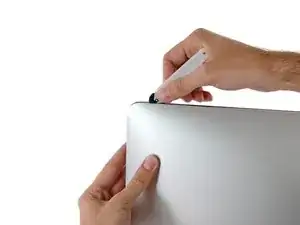
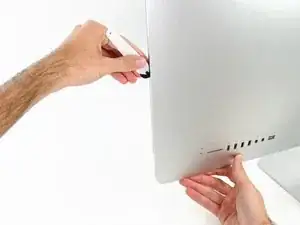
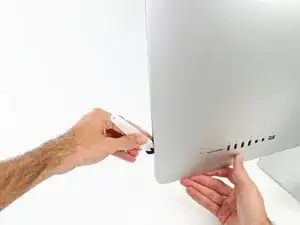
Run the tool up along the left side of the display.
-
-
-
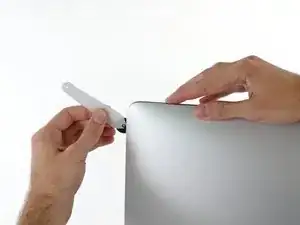
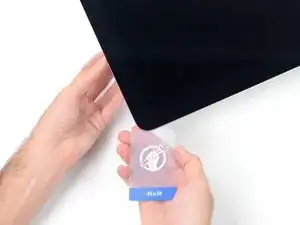
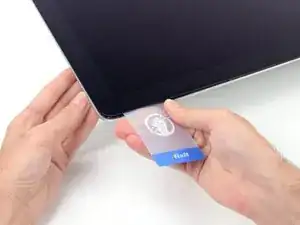
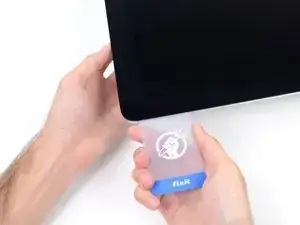
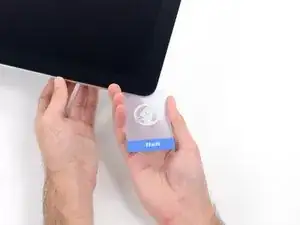
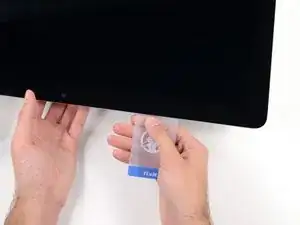
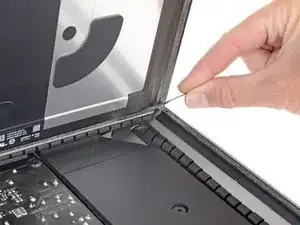
Starting from the top right corner of the iMac, wedge a plastic card between the display and frame.
-
-
-
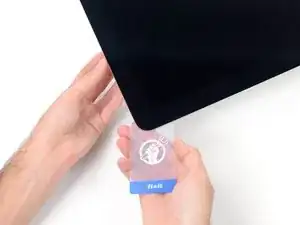
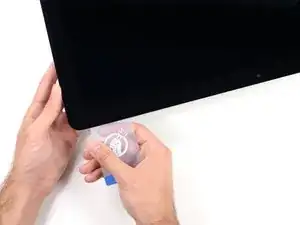
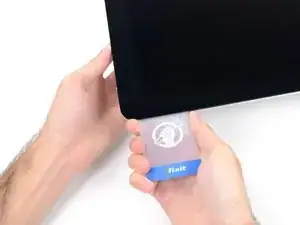
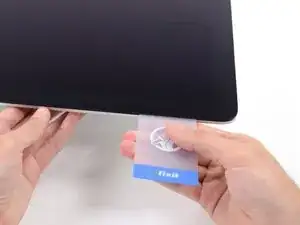
Gently twist the plastic card sideways to create a gap between the display and frame.
-
Move slowly and be careful not to stress the display glass too much—you only need to make a gap of about 1/4".
-
-
-
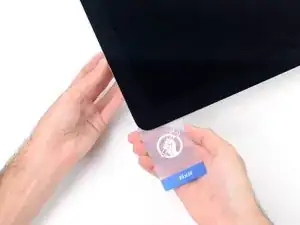
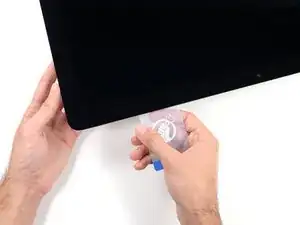
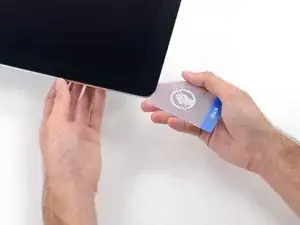
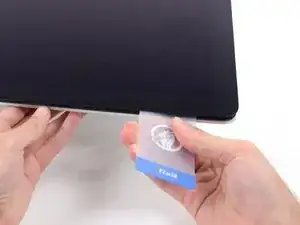
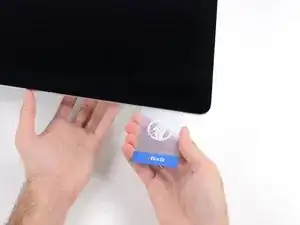
Slide the card toward the center of the display to cut any of the remaining adhesive along the top right corner of the iMac.
-
-
-
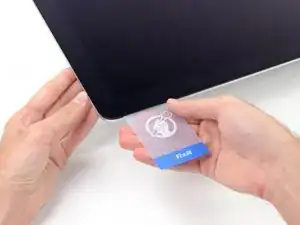
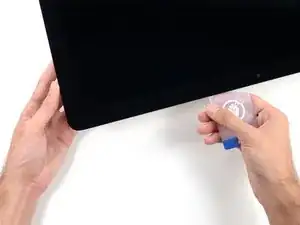
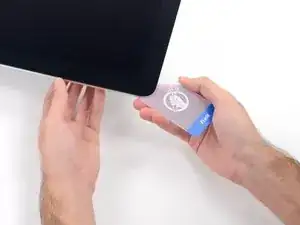
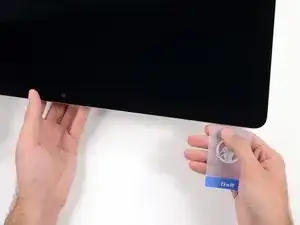
Wedge the plastic card into the top right corner once again, and leave it there to prevent the adhesive from resticking.
-
-
-
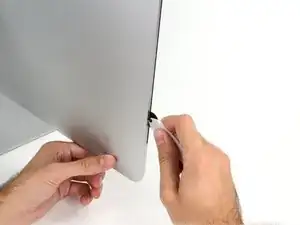
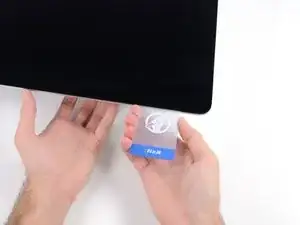
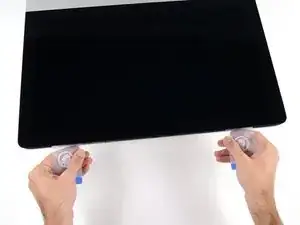
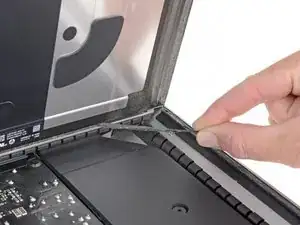
Insert a second plastic card into the gap between the display and frame near the top left corner of the iMac.
-
-
-
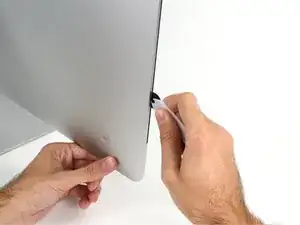
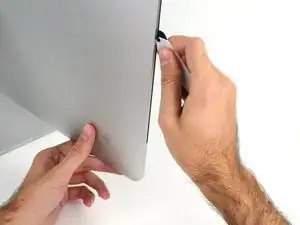
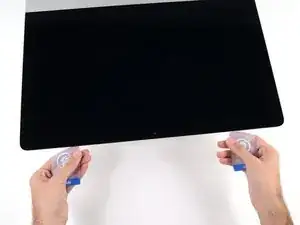
With both plastic cards inserted as shown near the corners, gently twist the cards sideways to increase the gap between display and case.
-
Begin to lift the top of the display up from the frame.
-
-
-
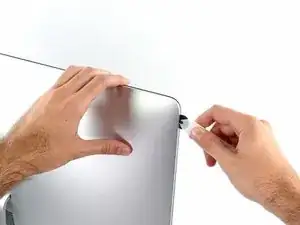
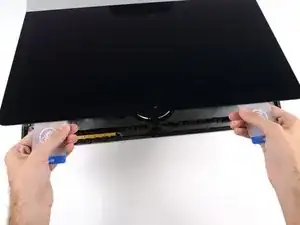
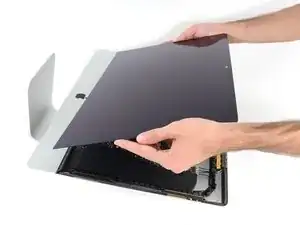
Hold the display with one hand while using your other hand to unplug the display power cable.
-
-
-
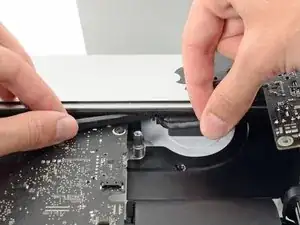
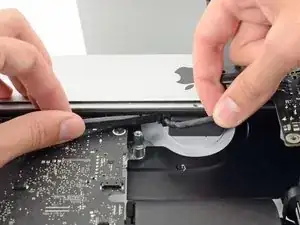
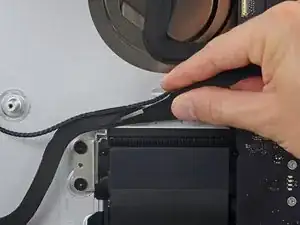
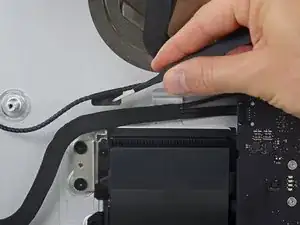
Continuing to support the display with one hand, flip up the metal retaining bracket on the display data cable.
-
Carefully pull the display data cable from its socket on the logic board.
-
-
-
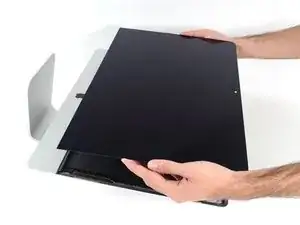
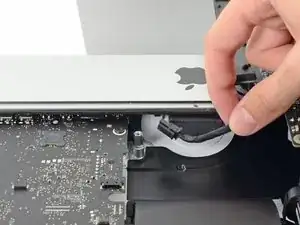
Grasp the small tab at the end of one of the bottom edge display adhesive strips and pull the adhesive toward the top of the iMac to remove it.
-
Repeat this step with the other adhesive strip and remove it.
-
-
-
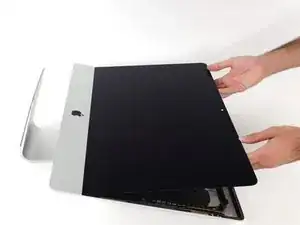
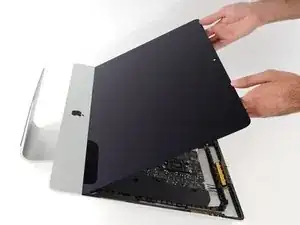
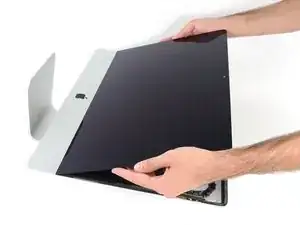
Lift the display up from the frame and remove it from the iMac.
-
It may be necessary to slowly lift from one side to peel against the remaining adhesive.
-
-
-
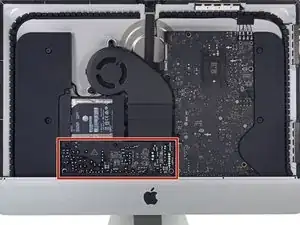
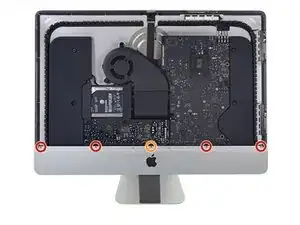
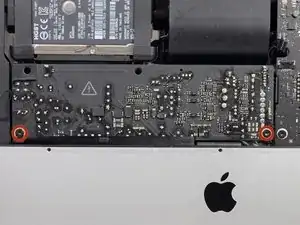
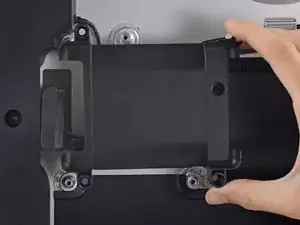
Remove the following five Phillips screws holding the lower support bracket in place:
-
Four 3.2 mm screws
-
One 1.7 mm screw
-
-
-
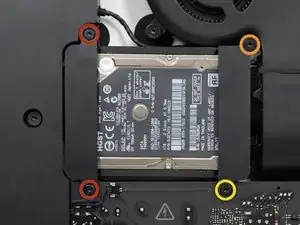
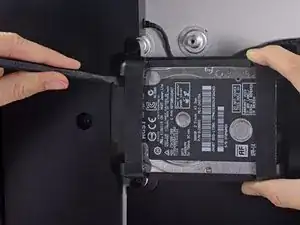
Remove the following T10 Torx screws securing the hard drive brackets to the iMac:
-
Two 21 mm screws
-
One 9 mm screw
-
One 27 mm screw
-
-
-
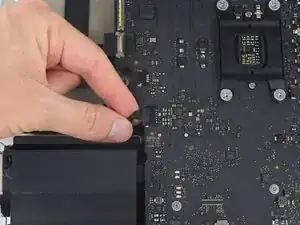
Use the tip of a spudger to push each side of the power button cable connector and gently walk it out of its socket.
-
-
-
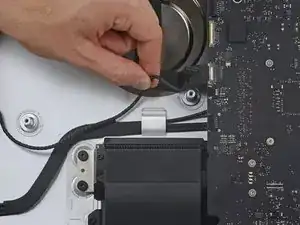
Use the tip of a spudger to push each side of the power supply control cable connector and gently walk it out of its socket.
-
-
-
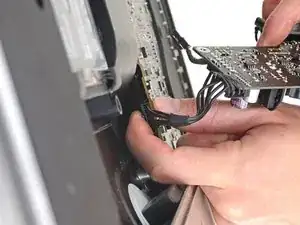
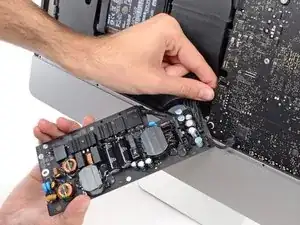
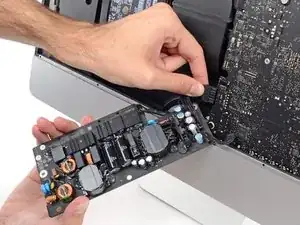
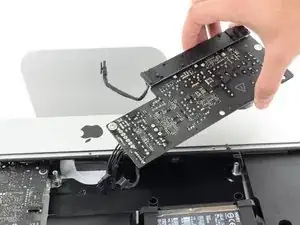
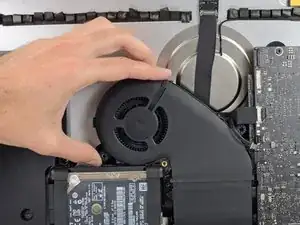
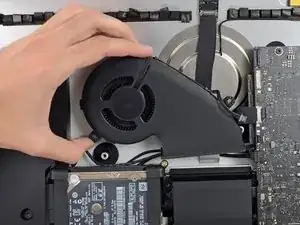
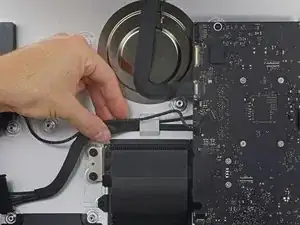
Pull the power supply slightly up and out from the rear enclosure.
-
Rotate the power supply counterclockwise, lifting the right side up about an inch higher than the left.
-
-
-
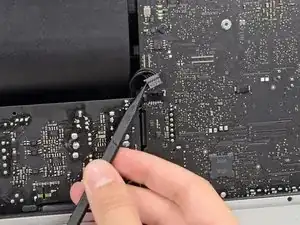
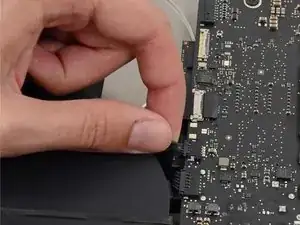
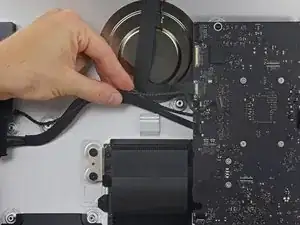
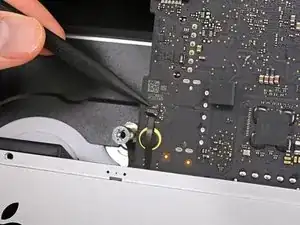
To disconnect the cable, squeeze the release clip on the back side of the connector, behind the logic board, and pull the connector straight out.
-
-
-
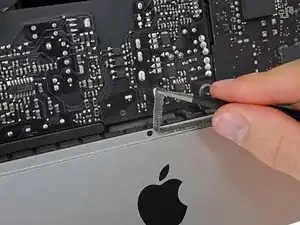
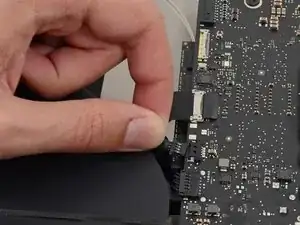
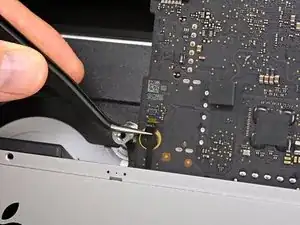
Use the flat end of a spudger to press the release clip on the side of the AC inlet cable connector inward.
-
While pressing on the release clip with the spudger, grasp the AC inlet cable, and pull the connector straight out of its socket.
-
-
-
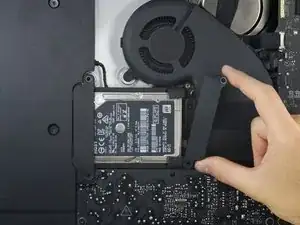
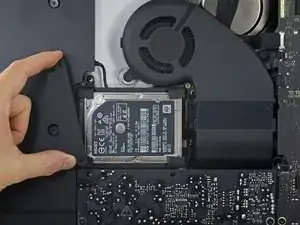
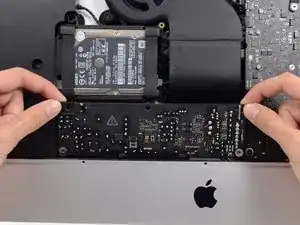
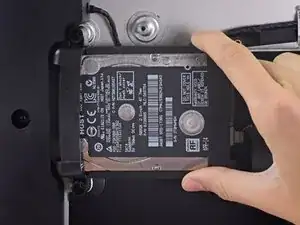
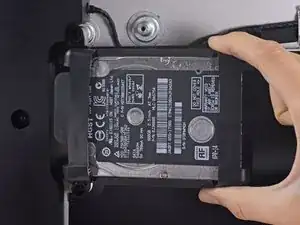
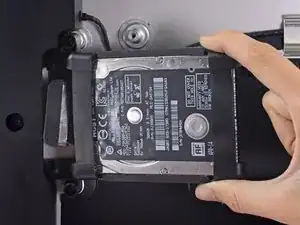
Lift the hard drive from the edge nearest the logic board and pull it slightly out of its recess.
-
-
-
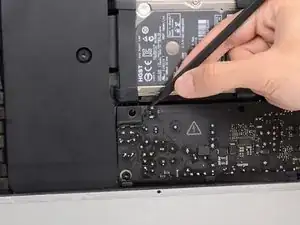
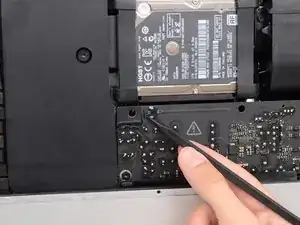
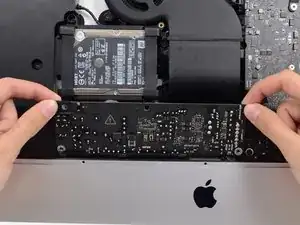
Use a spudger to disconnect the single SATA power and data combo cable by gently prying its large plastic connector away from the hard drive.
-
-
-
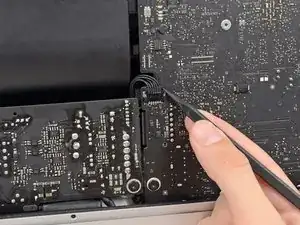
De-route the left speaker cable by pulling it straight up out of the retaining clip in the back of the rear enclosure.
-
-
-
Similarly to the previous step, de-route the SATA and power cables by pulling the braid straight up out of the retaining clip.
-
-
-
Peel up the piece of tape connecting the left speaker connector to the SATA power and data cables.
-
-
-
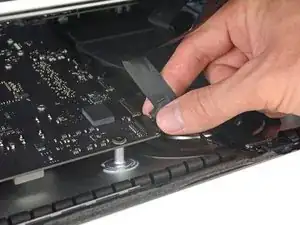
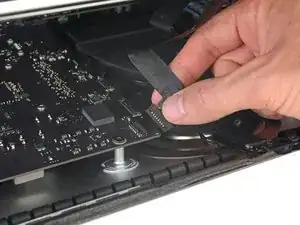
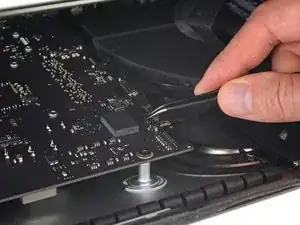
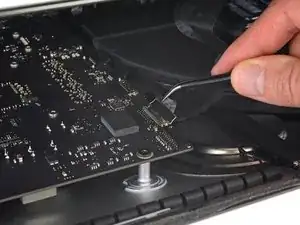
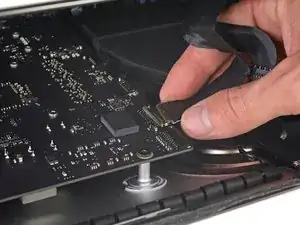
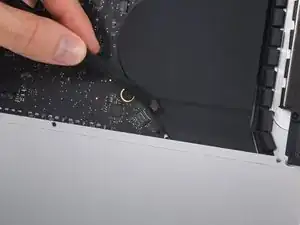
Flip up the metal retaining bracket on the FaceTime camera cable connector.
-
Pull the FaceTime camera cable straight out of its socket on the logic board.
-
-
-
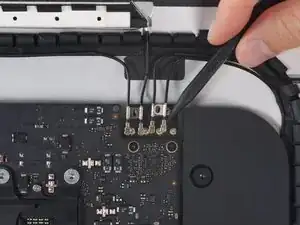
Remove the two 4.0 mm T5 Torx screws securing the four antenna connectors to the AirPort/Bluetooth card.
-
-
-
Disconnect all four antenna connectors by prying them straight up from their sockets on the AirPort/Bluetooth card.
-
-
-
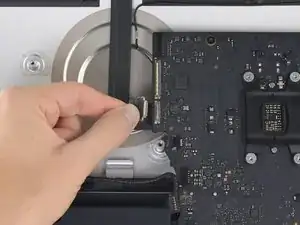
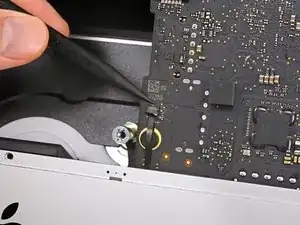
Gently pull the right speaker cable connector straight down and out of its socket on the logic board.
-
-
-
Use the flat edge of a spudger to pry the headphone jack cable connector from its socket on the logic board.
-
-
-
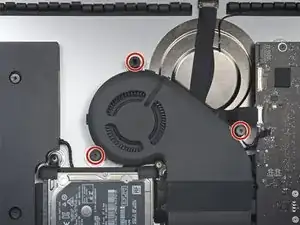
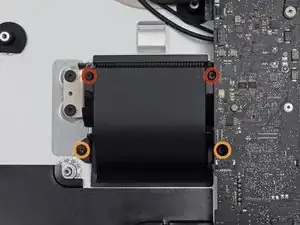
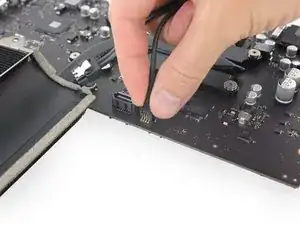
Remove the following T8 Torx screws securing the exhaust duct to the rear enclosure:
-
Two 6.2 mm screws
-
Two 4.7 mm screws
-
-
-
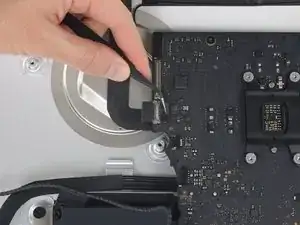
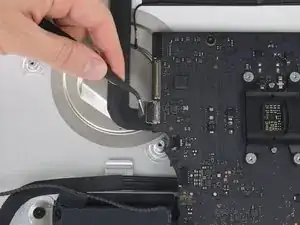
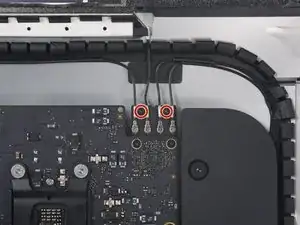
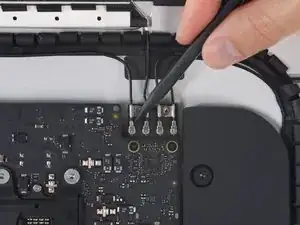
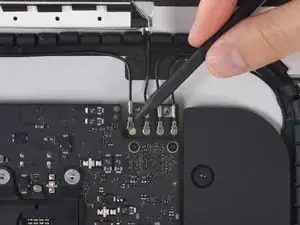
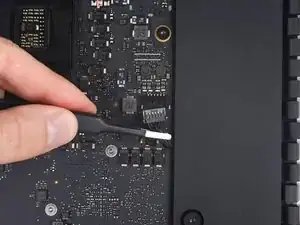
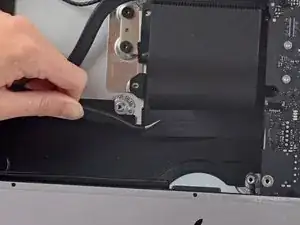
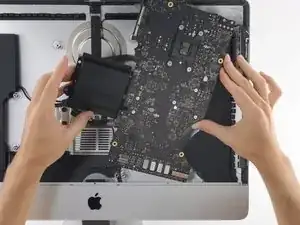
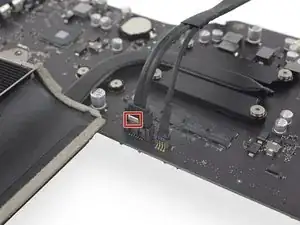
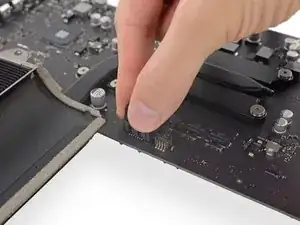
Use the tip of a spudger to flip open the retaining flap on the microphone ribbon cable ZIF socket.
-
Gently pull the microphone ribbon cable straight out of its socket.
-
-
-
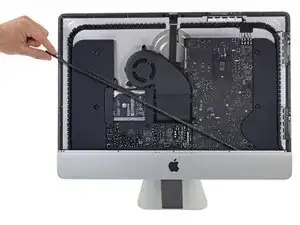
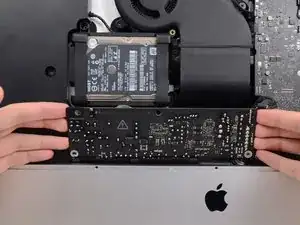
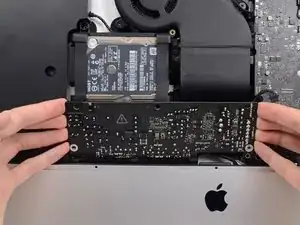
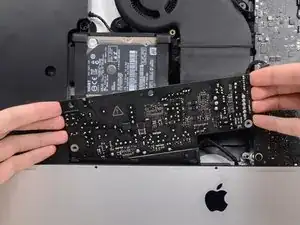
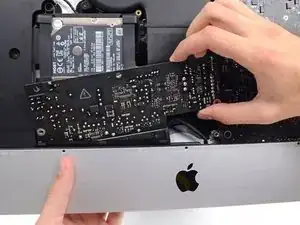
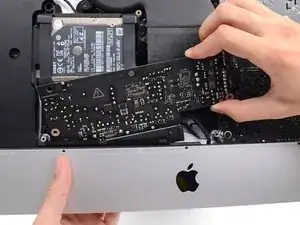
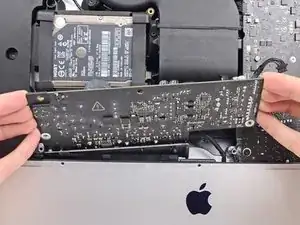
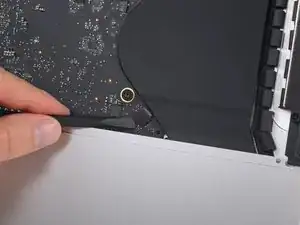
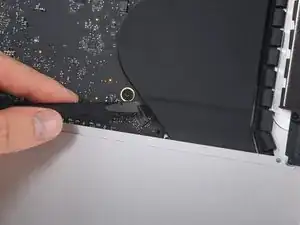
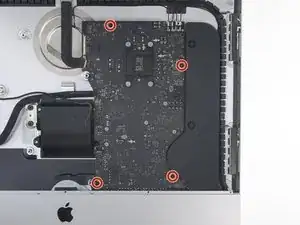
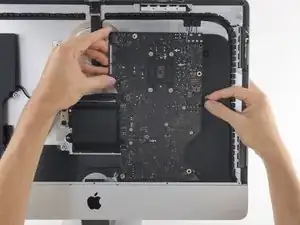
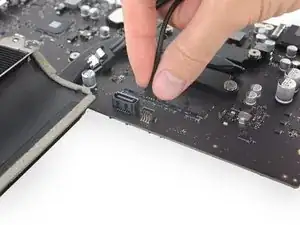
Tilt the top of the logic board away from the rear enclosure.
-
As you tilt the logic board, pull the right speaker connector to the right and out of the way of the board.
-
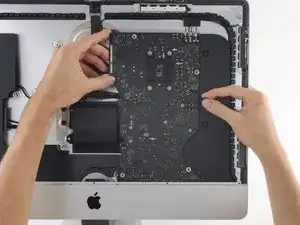
Lift the logic board straight up and out of the iMac.
-
-
-
Use a USB flash drive and/or ethernet cable to keep the logic board seated correctly while you tighten the screws.
-
-
-
While pressing on the clip with your thumb, lift and disconnect the SATA data connector from its socket on the logic board.
-
-
-
Grasp the hard drive power connector and gently pull it out of its socket on the logic board.
-
-
-
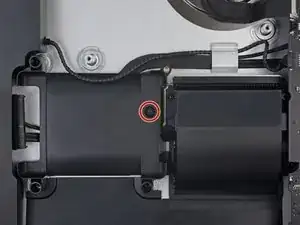
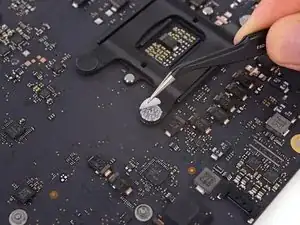
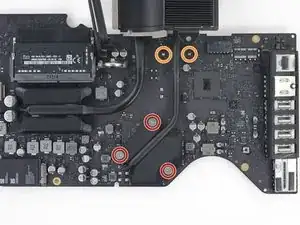
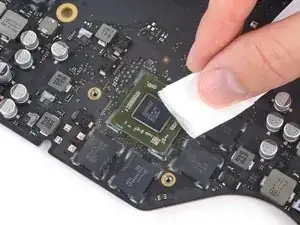
Peel off the four black tamper-evident stickers covering the heat sink mounting screws.
-
Remove the four T10 screws that secure the heat sink from the backside of the logic board.
-
-
-
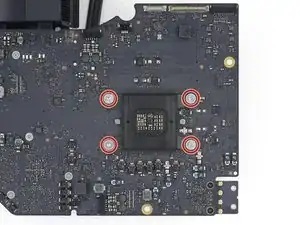
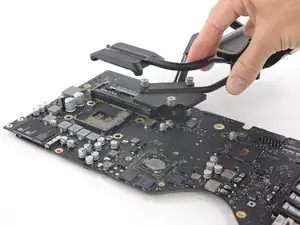
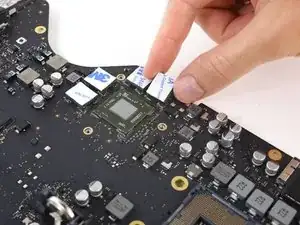
Fully loosen the three captive T8 screws securing the heat sink over the GPU.
-
Remove the two 5.4 mm T8 screws securing the heat pipe to the logic board.
-
-
-
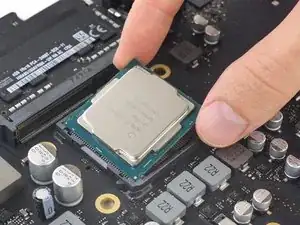
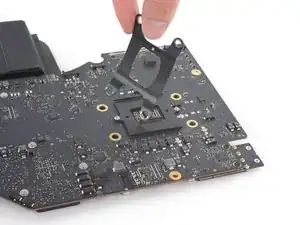
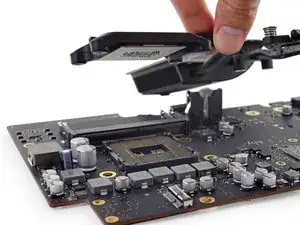
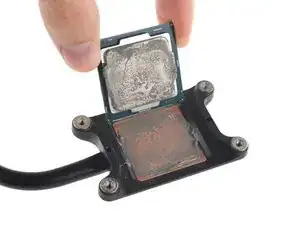
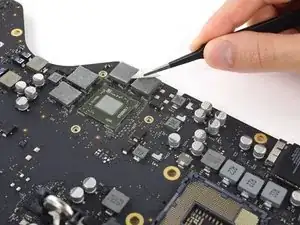
Flip the heat sink over and use your spudger to pry out the CPU, being careful not to drop it.
-
-
-
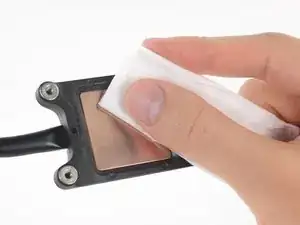
Use a lint-free cloth (or coffee filter) with either isopropyl alcohol or ArctiClean Thermal Material Remover to thoroughly clean the thermal paste residue from both the CPU and GPU arms of the heat sink.
-
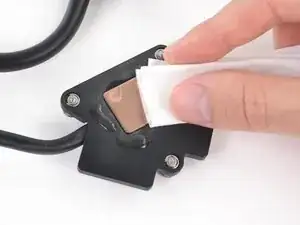
Once the heat sink surfaces are completely clean, use a fresh lint-free cloth or coffee filter to apply a drop of ArctiClean Thermal Surface Purifier to remove any oils and prepare the copper heat sink surfaces.
-
Allow the heat sink to dry completely while you continue working.
-
-
-
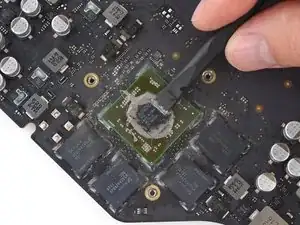
Use a spudger to gently lift the excess thermal paste residue off of the GPU.
-
As before, use a lint-free cloth or coffee filter and the appropriate fluids to clean and prep the GPU surface.
-
Clean the thermal paste from the four VRAM chips around the GPU as well.
-
-
-
Apply thermal pads to the four VRAM modules around the GPU.
-
Use tweezers to peel the liner from the tops of the thermal pads.
-
-
-
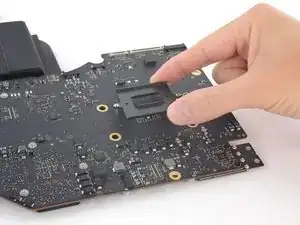
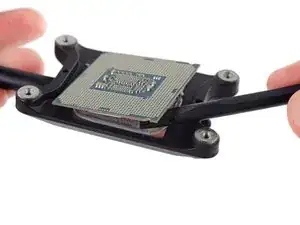
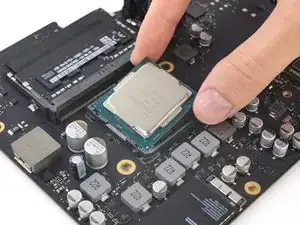
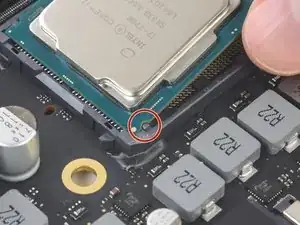
Small cutouts on the edges of the CPU align with notches on the sides of the socket.
-
Carefully align your new CPU into its socket on the motherboard, and lay it into position.
-
-
-
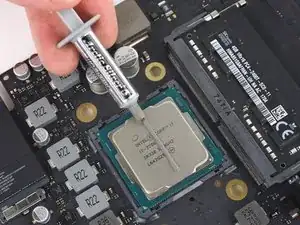
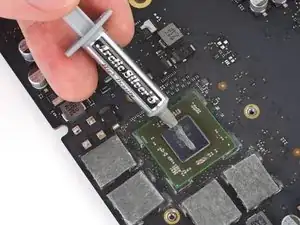
Follow the instructions specific to your CPU type to apply fresh thermal paste to the surface of your CPU.
-


To reassemble your device, follow these instructions in reverse order.

36 comments
Can I upgrade to i7 7700K on iMac 2017 21.5inch ?
looking at the compare on intel’s website:
https://ark.intel.com/compare/97128,9712...
the 7700k being a 130w vs any Apple installed CPU being 65W, I’d think the the likelihood to overheat or draw too much power would be high but I don’t have enough experience to know for certain.
Benjamin -
Can I upgrade to Intel Core i7 8700K?? It’s LGA 1151… so? iMac 2017, 21,5inch
Mikkser -
Hey Mikkser, 8-series (Coffee Lake) CPUs require the Z370 chipset, which to my knowledge isn’t on the 2017 iMac logic boards. The socket is the same as the last generation so you’d be able to plug an 8700K in, but it wouldn’t work.
Intel Core i7-8700K Desktop Processor 6 Cores up to 4.7GHz Turbo Unlocked LGA1151 300 Series 95W BX80684i78700K would that work with it
johnm -
8th Gen isn’t compatible with chipset. see previous comments.
Benjamin -
The Intel Core i7 8700K is an eighth generation Intel CPU. 8th gen Intel CPU’s aren’t compatible with Socket LGA 1151 revision 1 which is what iMac’s use. 6th and 7th gen Intel Core i3/i5/i7 are compatible, but again not 8th gen.
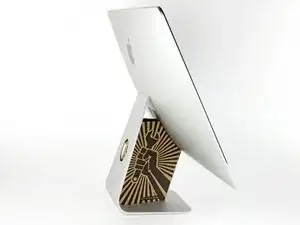
The wedge is an extremely tight fit for this model. I was worried that the amount of force needed to use it as shown might damage the stand, so I used it with the long side down instead. It worked fine that way and didn’t need anywhere near as much force to insert.
roberttrevellyan -
Here’s a good YouTube vid on upgrading the RAM: Can a Normal Person Upgrade the RAM in the 2017 21.5" iMac?
Dan -
Here are a couple tips from me:
1) Expose the adhesive to extreme temperatures. I did this by transporting my iMac in my car, screen-down on a piece of cardboard on a cold February morning (in Chicago). When I went to pick up the iMac, the screen practically fell off the chassis. I would have been distraught by this if I hadn’t already planned this replacement. So it was a happy accident.
2) Remember to expell the residual power from the power supply by pushing the power button while the iMac is unplugged. This does NOT guarantee it’s safe to touch, but when I accidentally brushed the solder and exposed capacitors, I didn’t get shocked.
jerrid_foiles -
Instead of using the wedge, I placed the iMac faced up with the top side (web cam) facing me while I ran the pizza roller around. It worked out great!
Sam Fung -
“All iMacs also come with a traditional hard drive” mine doesn’t!! it’s HDD bay is completely empty, no SATA cable or anything. I guess I’ll have to upgrade the PCIe SSD instead.
Chris Hughes -
There is no replacement glass for this model, it is part of the LCD and impossible to remove or replace- the entire LCD has to be replaced unfortunately if the glass is cracked or damaged. You will have to Google search for a replacement. Also be careful with some of the lock tight tork screws as I broke one of my screw mounts taking one out.
Phil Tesone -
I used this service wedge but also found it a very tight fit. The same stabilization can be achieved by using a big rolled up towel.
Ernst -
While this is a good instruction guide, I recommend to also look at OWC’s instruction video about drive installation, before starting the exercise. Those install videos are very detailed and useful.
Ernst -
Main advice: TAKE YOUR TIME with the pizza roller.
Make several passes, until you really feel like there's no more sticker in the way. Stay away from the camera though (approx. 1inch / 2.5cm on both sides). This will reduce the work left with the plastic card. Adhesive is really on the edge of the screen so there is absolutely no need to go any further than the recommended 1cm / 3/8inch depth.
Where are the sensitive parts?
Facing your iMac, imagine you're looking at a watch. There are antennas on 1, 2 and 4 o'clock. Do not insert any metal piece there (nor anywhere else, btw). Other than that AND the screen cables underneath the camera, not much danger.
Froggy Manny -