-
-
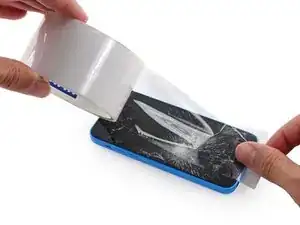
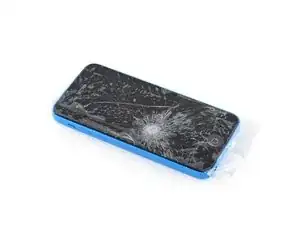
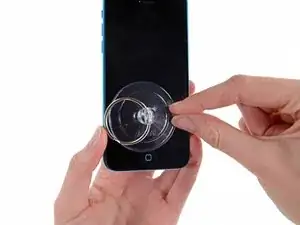
If your display glass is cracked, keep further breakage contained and prevent bodily harm during your repair by taping the glass.
-
Lay overlapping strips of clear packing tape over the iPhone's display until the whole face is covered.
-
-
-
Power off your iPhone before beginning disassembly.
-
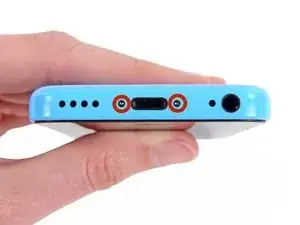
Remove the two 3.8 mm P2 Pentalobe screws on either side of the Lightning connector.
-
-
-
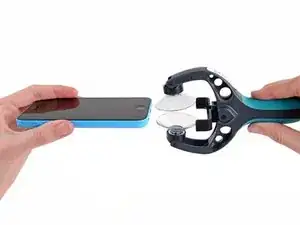
Close the handle on the iSclack, opening the suction-cup jaws.
-
Place the bottom of your iPhone in between the suction cups, against the plastic depth gauge.
-
The top suction cup should rest just above the home button.
-
Open the handles to close the jaws of the iSclack. Center the suction cups and press them firmly onto the top and bottom of the iPhone.
-
-
-
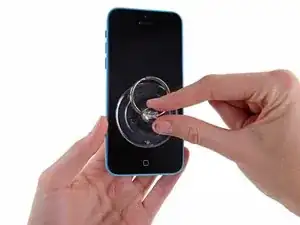
Hold onto your iPhone securely and close the handle of the iSclack to separate the suction cups, pulling the front panel up from the rear case.
-
The iSclack is designed to safely open your iPhone just enough to separate the pieces, but not enough to damage any cables.
-
Skip the next three steps and continue on to Step 8.
-
-
-
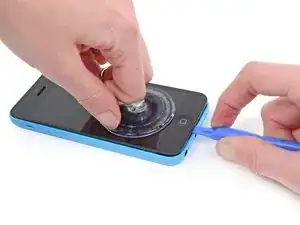
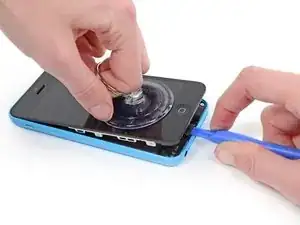
While holding the iPhone down with one hand, pull up on the suction cup to slightly separate the front panel assembly from the rear case.
-
With a plastic opening tool, begin to gently pry the rear case down, away from the display assembly, while you pull up with the suction cup.
-
-
-
Pull the plastic nub to release the vacuum seal on the suction cup.
-
Remove the suction cup from the display assembly.
-
-
-
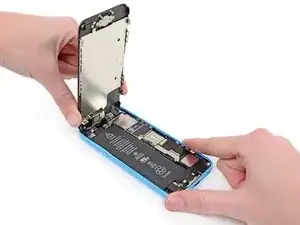
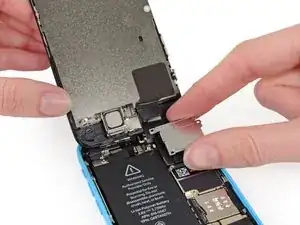
Lift the home button end of the front panel up to gain access to the connectors near the top of the phone.
-
Open the display to about a 90º angle, and lean it against something to keep it propped up while you're working on the phone.
-
In a pinch, you can use an unopened canned beverage to hold the display.
-
Add a rubber band to keep the display securely in place while you work. This prevents undue strain on the display cables.
-
-
-
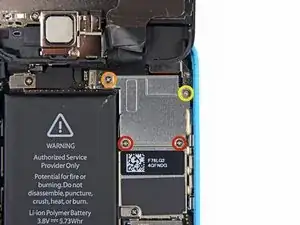
Remove the two 1.6 mm Phillips #000 screws securing the metal battery connector bracket to the logic board.
-
-
-
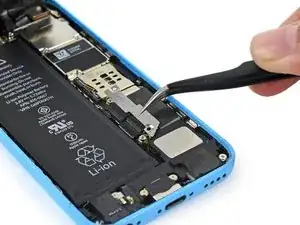
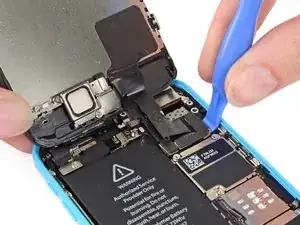
Use a spudger or a clean fingernail to gently pry the battery connector up from its socket on the logic board.
-
-
-
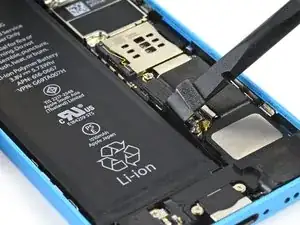
Remove the following Phillips #000 screws securing the front panel assembly cable bracket to the logic board:
-
Two 1.3 mm screws
-
One 1.7 mm screw
-
One 3.25 mm screw
-
-
-
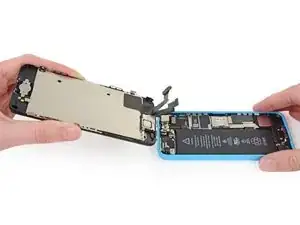
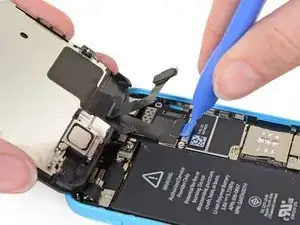
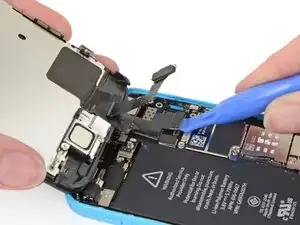
Use a plastic opening tool or a fingernail to disconnect the front-facing camera and sensor cable connector.
-


To reassemble your device, follow these instructions in reverse order.

29 comments
don't forget the 3 smaller of the 4 screws are different sizes on the silver panel!
djranoia -
Yeah, I learned that one the hard way when I dropped the 1.6 mm screw onto my carpet. But, thank God, I found the screw after several minutes of searching for it. The entire display replacement from a cracked screen went nice and smooth. It actually tool me less than 20-minutes to complete the process. Thanks iFixit!!!
ebibbs -
How do I know if I'm ordering a white or black front screen? Also what's the difference between the 35$ from amazon or the 95$ from here?
Nicholas -
The top and bottom on the back of the white iPhone 5 is made out of ceramic glass. The top and bottom on the back of the black iPhone 5 is made out of pigmented glass. Hope that helps! I use ReVampWholesales for parts, decently priced, just bought a black 5C full assembly (buttons and everything) for $44.50 with $8 shipping (pretty quick too). Amazon is very good too.
Andrew -
This guide misses a few things: after removing the old display, you will need to remove the silver backing/shield, the home button and the camera (be very careful when pulling the copper tape from the silver panel so not to tear it.) You will then need to place these in the new display. This is another 9? screws or so. I think the iPhone 5 page has this guide (it's pretty much the same thing.)
-
I always order the cheapest displays from Amazon (about $30 right now with free shipping for Prime members.) They always work just fine for me -- none of these parts is "officially from Apple" (they're all Chinese knockoffs.)
-
On a further note, be VERY careful when plugging the new screen to the mainboard - the FPC connector pins can BEND and BREAK if you force the connector. Broken pins require very careful hot air/reflow soldering of the mainboard and a new FPC connector: not recommended for novices!
Joshua -
It depends on where you buy the replacement part. The display assembly iFixit sells for the 5c comes pre-assembled with the home button, front camera, earpiece speaker, and the LCD shield plate already in place, which makes for an easier repair. You're absolutely correct in that if your main concern is getting the cheapest price on the part, you'll need to spend some additional time transferring those bits from the old display to the new one. And—ta-da!—we've got a guide for that.