Einleitung
Diese Anleitung wurde von iFixit-Mitarbeiter:innen verfasst und ist keine offizielle Reparaturanleitung von Google. Hier erfährst du mehr über unsere Qualitätsstandards.
Diese Anleitung zeigt dir, wie du die Rückkamera austauschen kannst. Diese Reparatur ist umfangreich und erfordert den kompletten Ausbau der Hauptplatine.
Hinweis: Einige Bilder in der Anleitung zeigen das Smartphone mit bereits ausgebautem Akku. Für diese Reparatur ist dies allerdings nicht nötig.
Werkzeuge
Ersatzteile
-
-
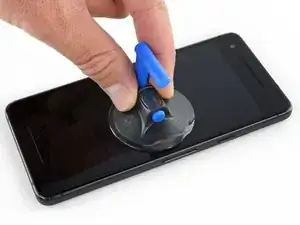
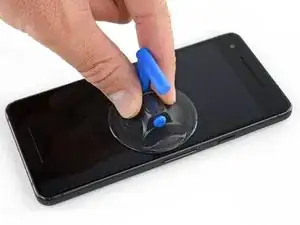
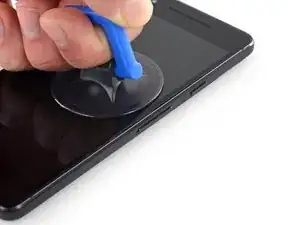
Wenn dein Displayglas zerbrochen ist, dann klebe es mit Klebeband ab. Dadurch werden die Glassplitter zusammengehalten und du vermeidest Verletzungen. Außerdem haftet der Saugheber besser an einer glatten Oberfläche.
-
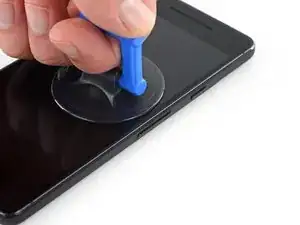
Bringe den Saugheber so nahe wie möglich an der Kante nahe den Lautstärketasten an, vermeide aber den abgerundeten Bereich.
-
-
-
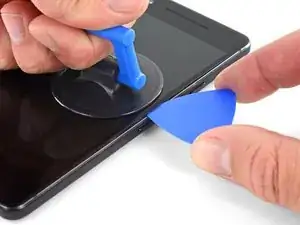
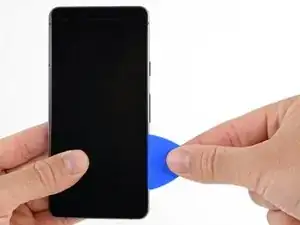
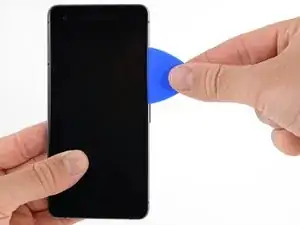
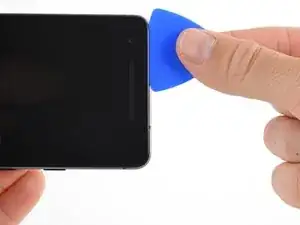
Ziehe den Saugheber gleichmäßig und fest hoch und setze ein Plektrum zwischen Frontscheibe und Rückgehäuse ein.
-
-
-
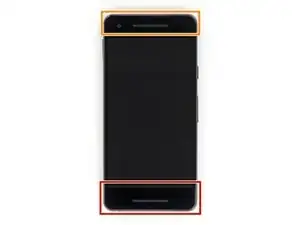
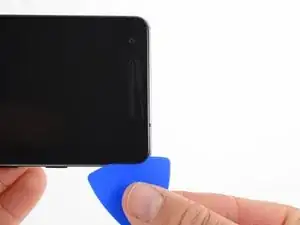
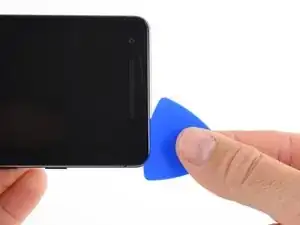
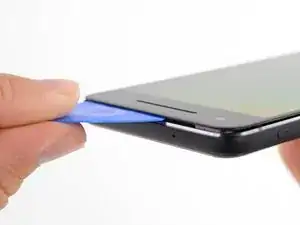
Setze das Plektrum nicht tiefer als 9 mm an der Unterkante des Smartphones ein. Wenn das Plektrum den gebogenen Bereich des OLED Panels berührt, kann dieses beschädigt werden.
-
In der oberen linken Ecke darfst du nur sehr knappe Schnitte führen, wenn du tiefer hineinkommst, kann die Frontkamera beschädigt werden.
-
-
-
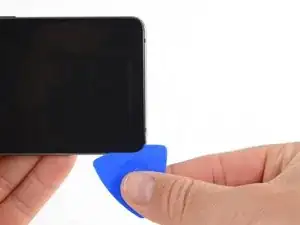
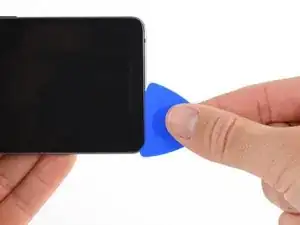
Ziehe das Plektrum an der rechte Seite des Smartphones nach oben, um den Displayklebstoff aufzutrennen.
-
-
-
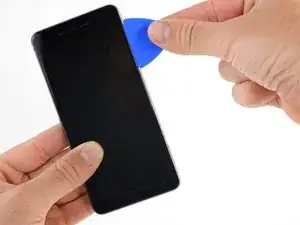
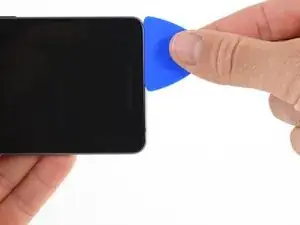
Ziehe nun das Plektrum um die rechte obere Ecke und weiter entlang der oberen Kante des Smartphones.
-
-
-
Ziehe das Plektrum um die linke obere Ecke und weiter an der linken Kante des Smartphones nach unten.
-
-
-
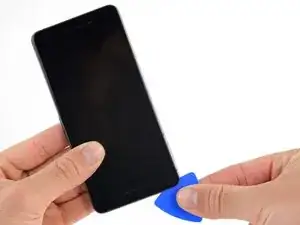
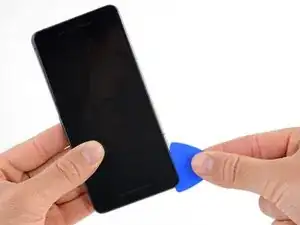
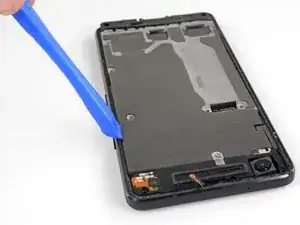
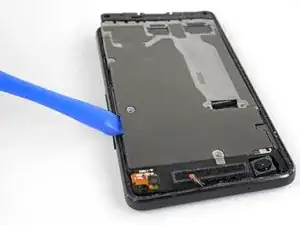
Ziehe nun das Plektrum weiter um die untere linke Ecke und weiter entlang der unteren Kante. Halte das Plektrum leicht schräg zum Display, um Schäden an den Ecken des OLEDs zu vermeiden.
-
-
-
Setze das Plektrum nun erneut an der oberen Kante ein und heble vorsichtig das Display hoch.
-
-
-
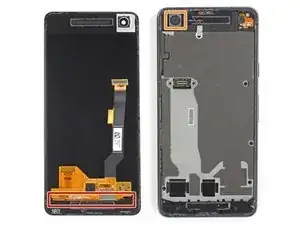
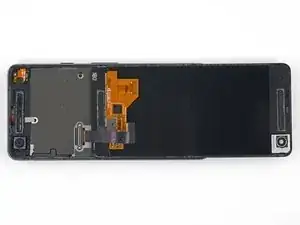
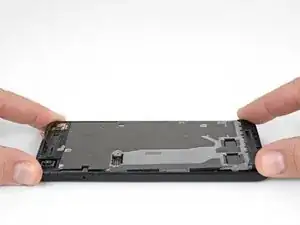
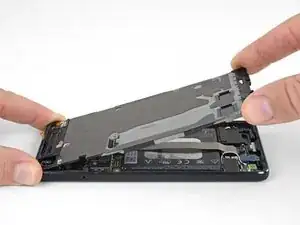
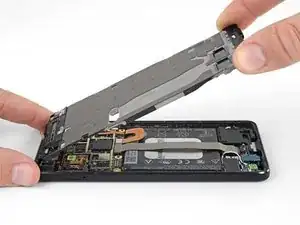
Lege das Display nun vorsichtig wie abgebildet auf das Rückgehäuse und achte darauf, dass das Displayflachbandkabel nicht geknickt oder abgerissen wird.
-
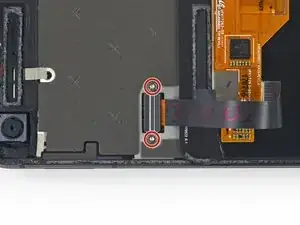
Entferne die zwei 4,0 mm T5 Torx-Schrauben, mit denen die Displaykabelhalterung befestigt ist.
-
-
-
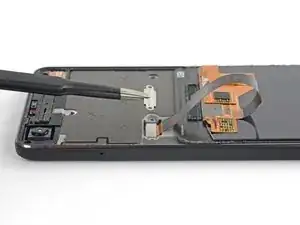
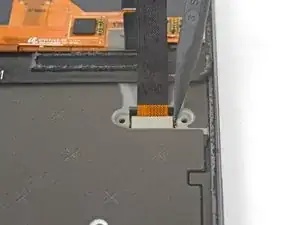
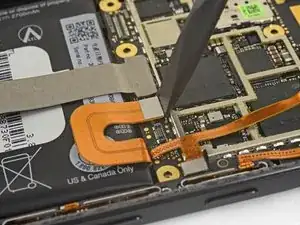
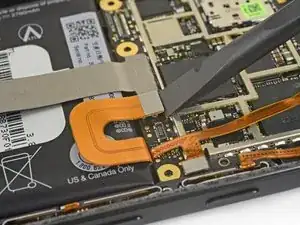
Verwende die Spitze eines Spudgers, um den Displaykabelstecker nach oben zu klappen und aus seinem Anschluss auf der Hauptplatine zu ziehen.
-
-
-
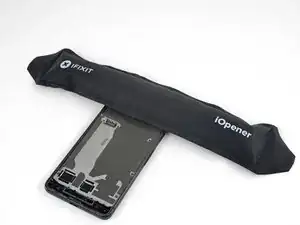
Lege zwei Minuten lang einen erwärmten iOpener auf den Näherungssensor an der Oberkante des Mittelrahmens, so dass seine Klebeverbindung aufgeweicht wird.
-
-
-
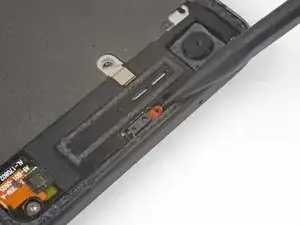
Schiebe die Spudgerspitze unter das Kabel des Näherungssensors, fange damit an der Seite in der Nähe der Frontkamera an.
-
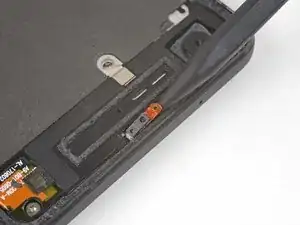
Hebe das Sensorkabel vorsichtig an der Kante an, bis der Sensor rechtwinklig zum Mittelrahmen steht.
-
-
-
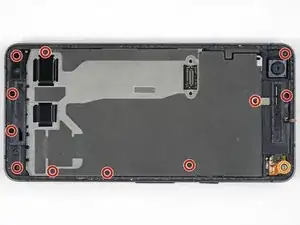
Ziehe das kleine Stückchen Klebeband zurück, welches die Schraube unter dem Ohrhörer-Lautsprecher verdeckt. Wenn andere Schrauben auch beklebt sind, dann ziehe auch hier das Klebeband zurück.
-
Entferne folgende Schrauben, mit denen der Mittelrahmen befestigt ist:
-
Elf 3,7 mm Kreuzschlitzschrauben
-
Eine 4 mm Torx T5 Schraube
-
-
-
Setze ein Öffnungswerkzeug in die Einkerbung im Mittelrahmen in der Nähe der Halte-Taste ein.
-
Heble den Mittelrahmen so hoch, dass ein Spalt zwischen ihm und dem Gehäuse des Smartphones entsteht. Der Mittelrahmen kann noch nicht ganz ausgebaut werden.
-
-
-
Beginne an der Unterkante den Mittelrahmen hochzuheben.
-
Wenn der Mittelrahmen zum restlichen Smartphone einen Winkel von 45° erreicht hat, dann hebe ihn gerade nach oben weg.
-
Führe beim Hochheben des Mittelrahmens den Näherungssensor durch den kleinen Schlitz im Mittelrahmen.
-
-
-
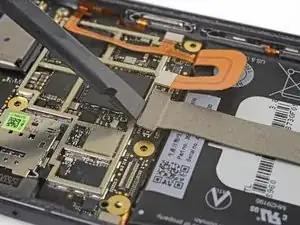
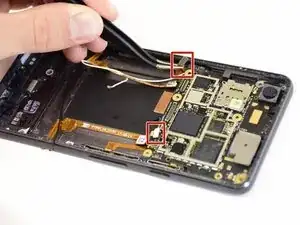
Trenne den Stecker der Ladeeinheit mit dem flachen Ende des Spudgers von der Hauptplatine ab.
-
-
-
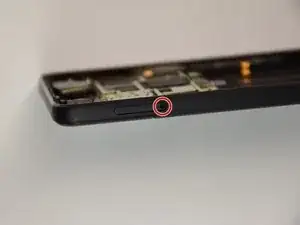
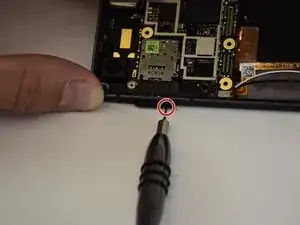
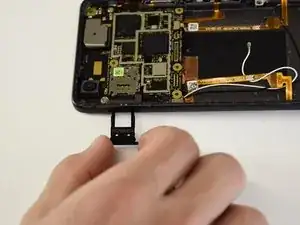
Setze ein geeignetes Werkzeug (z.B. eine aufgebogene Büroklammer oder das SIM Auswurfwerkzeug) in das kleine Loch im SIM Einschub auf der linken Seite ein und drücke darauf, bis der SIM Einschub herausspringt.
-
Entferne den SIM Einschub.
-
-
-
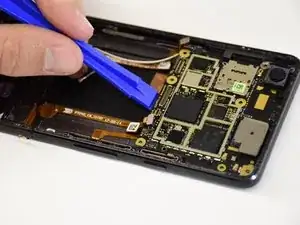
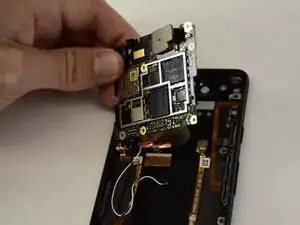
Heble die Hauptplatine mit einem Plastiköffnungswerkzeug hoch.
-
Entferne die Hauptplatine.
-
-
-
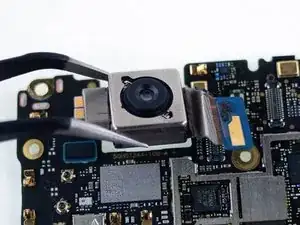
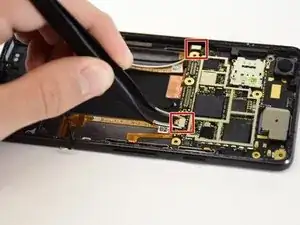
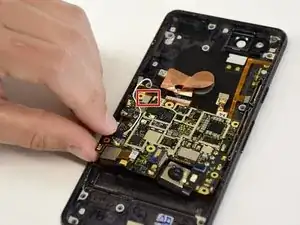
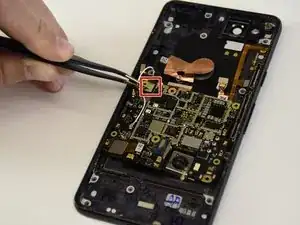
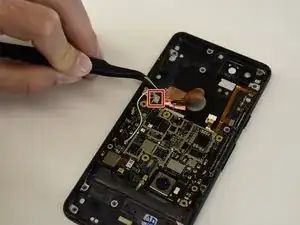
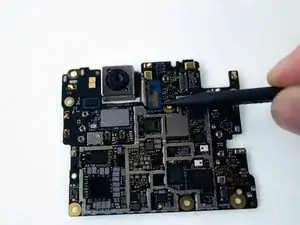
Hebe den Press-fit Verbinder der Rückkamera mit der Spudgerspitze hoch und löse ihn ab.
-
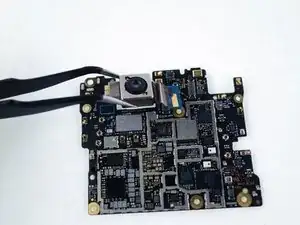
Entferne die Rückkamera von der Hauptplatine.
-
Vergleiche dein Ersatzteil mit dem Originalteil. Du musst vielleicht fehlende Teile vom alten auf das neue Teil übertragen oder Schutzfolien vom Neuteil abziehen, bevor du es einbauen kannst.
Um dein Gerät wieder zusammenzusetzen, folge den Schritten in umgekehrter Reihenfolge.
Entsorge deinen Elektromüll sachgerecht.
Hat die Reparatur nicht ganz geklappt? In unserem Forum findest du Hilfe bei der Fehlersuche.
17 Kommentare
Does anyone know if replacing the camera unit fixes the problem with the camera’s ‘fatal error’ issue? I’m trying to figure out if it’s just the camera unit that’s bad, or if there are other parts involved.
I just replaced my rear camera on pixel 2 and I can confirm YES it does fix it!
Well, I completed the repair on the camera but cannot confirm that it worked because I messed up my display which costs too much to replace :( That thing is super delicate I guess. I’m thoroughly upset.
Yes. This fixed my Pixel 2 camera crashing issue. My original symptom was that the autofocus stopped working properly. Then a month or so later the rear camera would crash 49 out of 50 times I opened it (completely unusable). Many people online swear this is a software issue caused by an android update but because I had that focus issue crop up first I suspected my issue was physical damage. I’m generally pretty careful with my phone, it lives in an official case. The only potentially damaging behaviour my phone is exposed to is my placing it in a windscreen mounted phone holder. Perhaps the repeated vibration can break something. Now my camera is fixed I will continue to place it in the phone holder and report back if it breaks again. For science. BE VERY CAREFUL REMOVING THE SCREEN. The guide is not being overly cautious about the screen removal. I broke my screen removing it and turned my $50 camera job into a $200 job with a new screen. Still worth it but I wish I’d heeded the warnings and cautions.
Alex, you may be onto something! There have been many reports of motorcycle riders breaking their smartphone cameras after they’ve mounted their smartphones for prolonged periods. The optical stabilization hardware on these camera modules is pretty fragile. I suspect repeated vibration can definitely result in breaking some very delicate wires in the OIS or flex cables.
NO...Did not work for me :( I am a semi experienced with smartphone repair, and I was able to put my pixel 2 all back together (tested the camera replacement several times before so) with all features working sans camera. Appears to be a motherboard issue. Or maybe it's the front camera…. Either way it's a software issue, because the Google Camera app should tell you what's wrong, and let you use that camera that does work. This repair, if you do attempt, is made easier with a heat gun (a 20 dollar one will do) of course and several picks (guitar picks are handy) to keep the screen from reattaching. Just heat until it's sorta hot to touch…not too much! Also note the instructions on how far to put the picks in to not damage the screen(don't go past the bezels).
I am going to phone into a debugger and figure out the error code next… but also might just buy a samsung (this is my second google phone to have motherboard problems).
Austen -
Is the battery removal really necessary to get the motherboard out? I’m not seeing any reason it should be.
jkenny23 -
If you get any answer for this please inform
You’re correct! I’ve updated the guide to reflect this.
Definitely not needed. And considering how tough the adhesive is under the battery, I’d say it’s best not to remove it.
Can you comment more on why a new battery is needed? My battery is working fine, I'd rather not b a new one.
Hi Erin! I updated the guide to skip over the battery replacement section, as it is not needed for the rear camera.
Yeah, I skipped the battery removal/replacement.






My screen is severly cracked. I would recommend clear packaging tape as it is wide enough to accomodate the suction cup. Thinner cellophane tape won’t seal properly.
John Tippitt -
Does the Google Pixel 2 have be powered off before removing the digitizer screen? Its not mentioned in this article...
Will the phone be damaged if the power is still on when disconnecting the broken screen?
Alex -
Replacing the battery in my Pixel 2 was successful because I read the comments. They are invaluable in this endeavor.
David Castro -
Suggest procedure revision:
Step 1: Read all steps and associated comments before proceeding.
Step 2: Ensure they supplied you with the right F$%^ING TOOLS in the kit before proceeding.
I'm F$%^ED because any store around me that might have this T4 Torx bit is already closed and my screen is already off. My kit came with a T2 Torx bit which is not used anywhere in this entire process.
Jens Davidsen -
I bought one of the kits and it had everything needed to change the battery except the alcohol, including spudgers, screwdriver, torx (2 sizes), tweezer, alcohol dispenser, glue strips and die-cut glue card that fit the phone case perfectly. I followed these instructions and read the comments. Applied alcohol and patience, took my time and got the job done without any damage to the phone. Thank you ifixit!
Jeffrey Price -