Einleitung

Diese Anleitung wurde von iFixit-Mitarbeiter:innen verfasst und ist keine offizielle Reparaturanleitung von Google. Hier erfährst du mehr über unsere Qualitätsstandards.

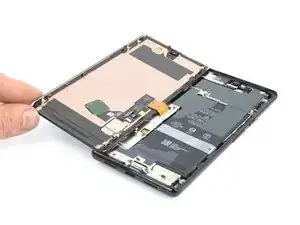
Verwende diese Anleitung, um ein gesprungenes oder kaputtes Display an deinem Google Pixel 6 Pro zu ersetzen.

Dein Ersatzdisplay ist mit einem Fingerabdrucksensor ausgestattet. Wenn er nicht vorhanden ist, musst du den bisherigen Fingerabdrucksensor auf das neue Display übertragen. Wenn du einen neuen einbaust, musst du ihn danach

neu kalibrieren, damit er richtig funktioniert.

Wenn der Rahmen verbogen ist, muss er ausgetauscht werden. Das neue Display kann sonst nicht richtig montiert und durch ungleichmäßigen Druck beschädigt werden.

Ist der Akku aufgebläht, ergreife entsprechende Vorsichtsmaßnahmen . Bevor du dein Gerät zerlegst, entlade den Akku auf unter 25 %. Dadurch wird das Risiko eines gefährlichen thermischen Ereignisses verringert, falls der Akku während der Reparatur versehentlich beschädigt wird.

Hinweis: In dieser Anleitung wird nur der Austausch des Displays einschließlich seines Schutzrahmens aus Kunststoff beschrieben. Einige Ersatzbildschirme für dieses Smartphone werden jedoch ohne den vorinstallierten Rahmen (auch bekannt als Chassis) geliefert, was ein anderes Ausbauverfahren erfordert. Vergewissere dich, dass du das richtige Teil hast, bevor du mit dieser Anleitung beginnst.

Achtung: Das Pixel 6 enthält Laser der Klasse 1. Wenn du es auseinandernimmst, könntest du unsichtbarer Infrarotstrahlung ausgesetzt sein.

Ob dein Gerät nach der Reparatur noch wasserdicht ist, hängt davon ab, wie gut du es beim Zusammenbau versiegelst. Die IP-Zertifizierung wirst jedoch verlieren.

Bevor du mit der Reparatur beginnst, stelle sicher, dass du einen Satz an neuem Klebstoff sowohl für die Glas-Rückseite als auch für das Display hast.

  1. AJglnb3TZlAVMd2O
    • Bevor du beginnst, schalte dein Gerät ab. Drücke und halte die Tasten zum Einschalten und für die Erhöhung der Lautstärke gleichzeitig für einige Sekunden. Dann tippe auf deinem Bildschirm auf Gerät ausschalten.

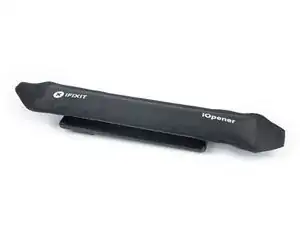
    • Erwärme das Display mit einem erwärmten iOpener mindestens 3 Minuten lang, um den Klebstoff darunter zu aufzuweichen.

    • Du kannst stattdessen auch einen Haartrockner, eine Heißluftpistole oder eine Heizplatte nutzen, achte jedoch darauf, das Gerät nicht zu überhitzen.

    Do you think that removing the SIM card, also will be a wise step? I'm pretty sure that heating the SIM card is not a good idea.

    Emil Teofanov -

    The SIM is probably no more sensitive than the rest of the phone.

    ScottMcNay -

    What does "be sure to have replacement adhesives for both the rear glass and the screen." I only had one it didn't mention another one?

    alberte -

    I didn't have the replacement adhesive for rear glass nor the 2 sided tape they talk about when putting it back together. It's Sunday, so I don't expect an answer. I decided to go ahead and work up until that point

    StlrFan -

  2. pYtLJZEF5B2LvWeB
    pYtLJZEF5B2LvWeB
    f5mSlIZsRCZpfB3b
    cCKQKbXroK5BDbLE
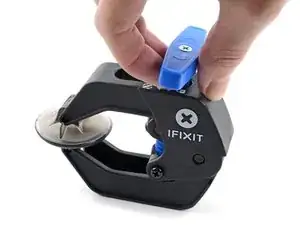
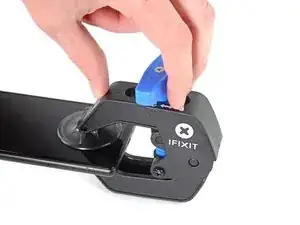
    • Wir haben die Anti-Clamp entwickelt, um Geräte sicher zu öffnen. Die nächsten beiden Schritte zeigen die Benutzung der Anti-Clamp. Wenn du sie nicht verwenden willst, überspringe die nächsten zwei Schritte und folge einer anderen Methode.

    • Genaue Anweisungen, wie die Anti-Clamp benutzt wird, findest du hier.

    • Drücke den blauen Griff zum Scharnier hin, um den Öffnungsmodus zu beenden.

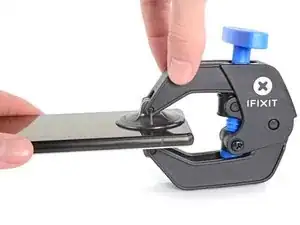
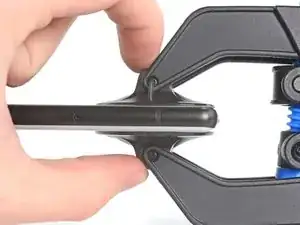
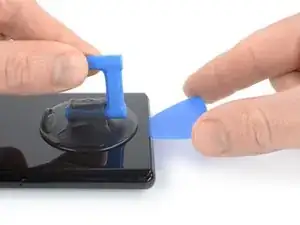
    • Bringe die Saugheber direkt an der Unterkante des Smartphones an, einen auf der Vorderseite, den anderen auf der Rückseite.

    • Drücke die Saugheber auf den Oberflächen fest.

    • Wenn die Saugheber nicht gut auf den Flächen haften, dann klebe Paketband darüber.

  3. YJqTCUlpDDspdIu2
    YJqTCUlpDDspdIu2
    NL1GxvPnIrqBJIFP
    DJNLaSYoMdcxJgRa
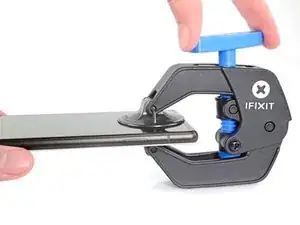
    • Drücke den blauen Griff vom Scharnier weg in die Stellung für den Öffnungsmodus.

    • Drehe den Griff im Uhrzeigersinn, bis du merkst, dass sich die Saugheber dehnen.

    • Achte darauf, dass sich die Saugheber weiterhin gegenüber stehen. Wenn sie sich nicht mehr gegenüber stehen, dann löse die Saugheber ein wenig ab und schiebe sie in die richtige Position.

    • Warte eine Minute, damit sich der Kleber allmählich ablösen und ein Spalt entstehen kann.

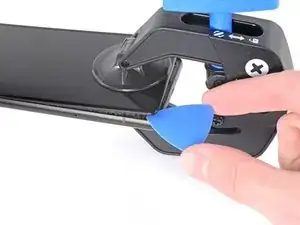
    • Wenn der Spalt groß genug ist, dann setze ein Plektrum unter den Displayrahmen ein.

    • Wenn es nicht gelingt, mit der Anti-Clamp einen ausreichenden Spalt zu erzeugen, dann erwärme die Stelle nochmals und drehe den Griff eine halbe Umdrehung im Uhrzeigersinn weiter.

    • Drehe den Griff jeweils nicht mehr als eine halbe Umdrehung weiter und warte jedes Mal eine Minute lang. Gib der Anti-Clamp Zeit, ihre Arbeit zu erledigen.

    • Überspringe die nächsten drei Schritte .

  4. 5qT1kECvRkyOwMdj
    5qT1kECvRkyOwMdj
    yNlUPqlWLhUnqwEa
    622Y1IVXYBVVFD2s
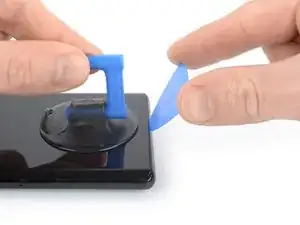
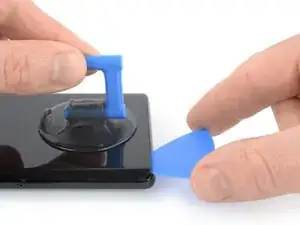
    • Sobald sich das Display warm anfühlt, setze den Saugheber an der Unterkante des Displays an.

    • Wenn dein Display stark gesprungen ist, kannst du es mit durchsichtigem Klebeband abkleben, damit der Saugheber haften bleibt. Alternativ kann anstelle des Saughebers auch ein sehr starkes Klebeband verwendet werden. Wenn alles andere fehlschlägt, kannst du den Saugheber mit Sekundenkleber am Bildschirm befestigen.

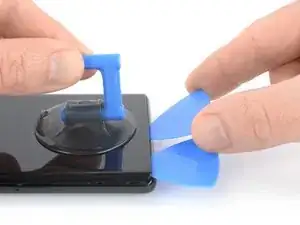
    • Hebe das Display inklusive seines Sicherheitsrahmens mit dem Saugheber an, um einen kleinen Spalt zwischen dem Display und dem restlichen Gerät zu schaffen.

    • Nimm ein Plektrum und setze es in den Spalt ein.

    • Stelle sicher, dass du das Plektrum in der richtigen Position einsetzt, um zu verhindern, dass du das Display von seinem Sicherheitsrahmens abtrennst.

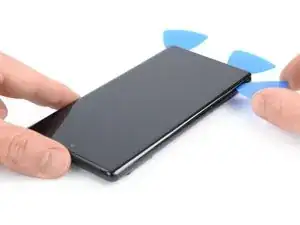
    • Ziehe das Plektrum in die untere linke Ecke des Displays, um den Klebstoff durchzuschneiden.

    • Lasse das Plektrum stecken, um zu verhindern, dass sich der Kleber wieder verbinden kann.

  5. 3iBpMQeeYQZd1N6W
    3iBpMQeeYQZd1N6W
    EF4cafwMyVbQyFeA
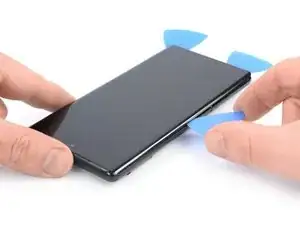
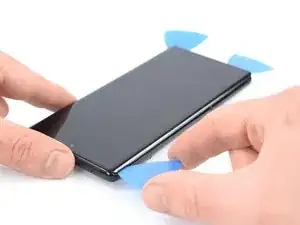
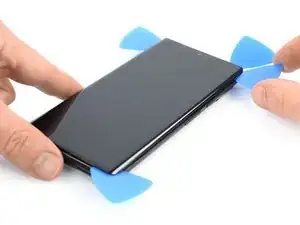
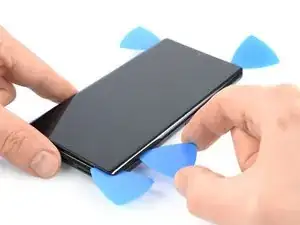
    • Setze ein zweites Plektrum an der unteren Kante ein und schiebe es zur rechten unteren Ecke der Displays, um den Klebstoff durchzutrennen.

    • Lasse das Plektrum stecken, um zu verhindern, dass sich der Klebstoff wieder verbindet.

  6. H2V6FPgYSgyNiaXT
    H2V6FPgYSgyNiaXT
    3kcnIWolap1s53OI
    15PB5ccyfLlKWefn
    • Das Display wird, zusätzlich zum Klebstoff, auch durch kleine Plastikstifte gehalten. Wenn das Plektrum während der Entfernung des Displays stockt, bedeutet dies, dass du dein Werkzeug zu tief unter das Display eingeführt hast. Setze nur die Spitze des Plektrums (~3-4 mm) ein, wenn du den Displaykleber durchtrennst.

    • Schiebe ein drittes Plektrum unter die untere linke Ecke des Displays ein.

    • Ziehe nun das Plektrum entlang der linken Kante des Displays, um den Klebstoff zu durchtrennen.

    • Lass das Plektrum in der oberen linken Ecke stecken, um zu verhindern, dass sich der Klebstoff wieder verbindet.

  7. qWybciuriiWRatwM
    qWybciuriiWRatwM
    jIYEmbfvICMX6LXF
    • Wenn es schwierig wird, den Kleber zu durchtrennen, ist er höchstwahrscheinlich abgekühlt. Benutze deinen iOpener oder eine Heißluftpistole, um den Klebstoff erneut 1-2 Minuten lang zu erhitzen.

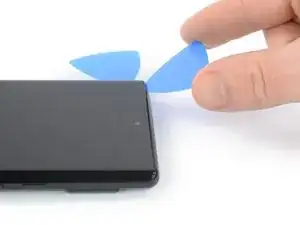
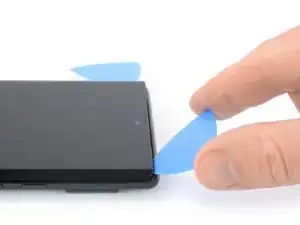
    • Wenn du den Klebstoff nahe der Frontkamera durchtrennst, setze nur die Spitze des Plektrums (~2-3mm) ein, um zu verhindern, dass die Kamera beschädigt oder verschmiert wird.

    • Setze ein viertes Plektrum an der oberen linken Ecke des Displays ein.

    • Ziehe das Plektrum entlang der oberen Kante des Displays, um den Klebstoff zu durchtrennen.

    • Lasse das Plektrum in der oberen rechten Ecke des Bildschirms, um zu verhindern, dass sich der Klebstoff wieder verbindet.

  8. 3u2GucwUJXcX36ik
    3u2GucwUJXcX36ik
    WSpdGRMJq215fHVl
    • Setze ein fünftes Plektrum ein und schiebe es an der rechten Seite entlang, um den restlichen Klebstoff zu durchtrennen.

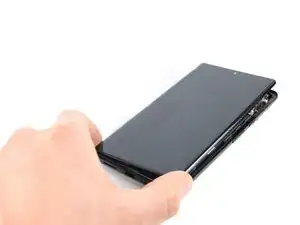
    • Versuche noch nicht, das Display ganz abzunehmen, es ist noch mit dem restlichen Smartphone verbunden.

  9. kRiqlurRKwtCBmRE
    kRiqlurRKwtCBmRE
    PtmBApHIHu6ANKT3
    fJXI1KaKDwVhdnnH
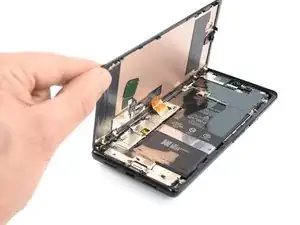
    • Vermeide es, das Displaykabel während des folgenden Schritts zu sehr zu belasten.

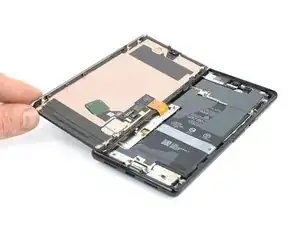
    • Klappe das Display vorsichtig zur linken Seite des Smartphones, so wie du ein Buch öffnen würdest.

    I don't know if it's an earlier or later design, but I am combining 2 phones (1 crushed glass but operational into the casing of one that quit functioning but has good glass) and on both, the ribbon cable for the LCD is a tiny bit too short to fold out flat like this. If you are working on one like mine, extreme care must be taken while holding the LCD up while simultaneously trying to plug the cable back into that very small recessed socket. Almost like you need 3 hands or robot fingers...

    Stephen P. Thurman -

  10. aDmeySbuHVHuNPqR
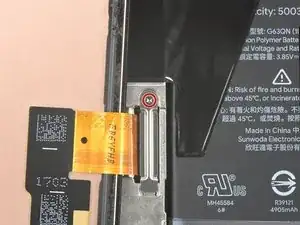
    • Benutze einen Torx T3 Schraubendreher, um die 2 mm lange Schraube zu entfernen, mit der die Metallhalterung des Displaykabels befestigt ist.

    • Halte während der gesamten Reparatur die Schrauben gut geordnet und achte darauf, dass jede an ihren ursprünglichen Platz zurück kommt.

    I don't know if it's an earlier or later design, but I am combining 2 phones (1 crushed glass but operational into the casing of one that quit functioning but has good glass), and on both, the metal holder plate shown here is simply spring connected and that 2mm screw is instead slightly off to the side as part of the aluminum bracket's screws.

    Stephen P. Thurman -

  11. TXCDyVZdVyVArY4w
    TXCDyVZdVyVArY4w
    Wfb1v1Wns3GQc6eP
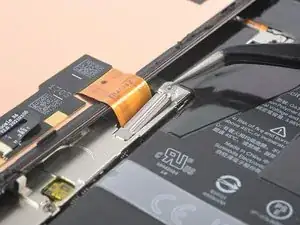
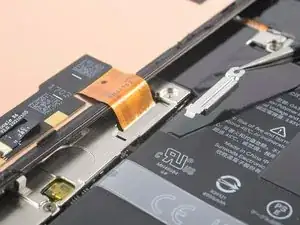
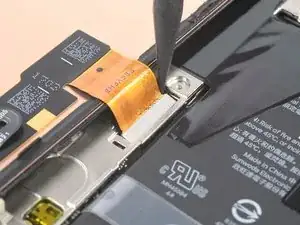
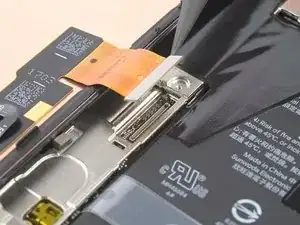
    • Benutze eine Pinzette, um die Metallhalterung zu entfernen, die sich über dem Displaykabelstecker befindet.

    • Bewahre dieses Bauteil gut auf, du benötigst es beim Zusammenbau.

  12. XAfcloCj3jgvnZXD
    XAfcloCj3jgvnZXD
    KmYqCLHysrBxjLya
    • Benutze einen Spudger, um das Flexkabel des Displays abzutrennen, indem du den Stecker gerade nach oben aus seinem Anschluss hebelst.

  13. EuFbD1VbsDijAW6O
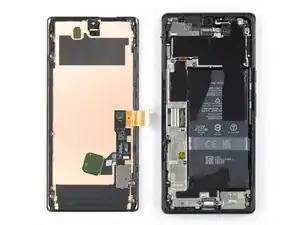
    • Entferne das Display.

    • Reinige beim Zusammenbau die notwendigen Stellen mit hochprozentigem Isopropylalkohol (mindestens 90%ig) und bringe dort neue Klebestreifen an. Stelle sicher, dass alle Schutzfolien vom Ersatzdisplay und von der Selfie-Kamera-Aussparung entfernt sind.

    • Wenn du beim Zusammenbau fertig zugeschnittene Klebestreifen benutzt, folge dieser Anleitung.

    • Wenn du beim Zusammenbau eine vorgestanzte Klebefolie benutzt, folge dieser Anleitung.

    • Wenn das Kabel deines Ersatzdisplays mit Klebeband befestigt ist, musst du das Klebeband vor dem Einbau entfernen.

    • Beachte, dass du alle Schutzfolien von deinem Ersatzdisplay und der Selfie-Kamera-Aussparung entfernst.

    • Beim ersten Bootvorgang nach der Reparatur wird das Display eine Kalibriersequenz durchlaufen. Berühre es dabei nicht, es könnte sonst falsch kalibriert werden, was zu Problemen mit dem Touchscreen führen kann.

    • Wenn du einen neuen Fingerabdruckleser eingebaut hast, musst du ihn danach neu kalibrieren, damit er richtig funktioniert.

    Before reassembly, clean around the edge of where the screen was, to remove any debris that may have been captured.

    ScottMcNay -

    After reassembly, the fingerprint sensor appears to be a common issue with new screens:

    * Go to https://pixelrepair.withgoogle.com/udfps on a computer.

    * If using Windows, click the help link to install the USB software. After installing, restart the computer and return to https://pixelrepair.withgoogle.com/udfps.

    * Follow the steps given to install the fingerprint calibration software.

    * Restart the phone.

    ScottMcNay -

    "Be sure to remove all adhesive liners from your replacement screen. Check the selfie camera recess and make sure you've removed the liner there."

    A photo with blue highlight square would've been helpful here...also it's very easy to miss this instruction as you'd be on the adhesive page...

    alberte -

    I did take the selfie camera liner this is a bad problem

    Austin Curtis -

Abschluss

Wenn möglich, schalte dein Gerät ein und teste die Reparatur, bevor du neuen Klebstoff aufträgst und das Gerät wieder verschließt.

Befolge diese Anweisungen in umgekehrter Reihenfolge, um dein Gerät wieder zusammenzubauen.

Am besten befestigst du das neue Display mit einem speziell zugeschnittenen doppelseitigen Klebeband auf der Rückseite des Displays.

Entsorge deinen Elektromüll fachgerecht.

Die Reparatur hat nicht wie geplant geklappt? Versuche es mit der grundlegenden Fehlersuche oder bitte in unserem Forum um Hilfe.

Dominik Schnabelrauch

Mitglied seit: 23/11/16

167866 Reputation

34 Kommentare

Est-ce possible de changer que e verre brisé

Leroy -

Really wish this had instructions on how to put the screen back on. "reverse order" is not accurate.

Ed Word -

The fingerprint scanner doesn't work. I get a message that I need to visit, but the website doesn't exist. Google has a fingerprint repair tool where you connect your phone and boot into rescue mode, but the program says I can't use it as my phone's firmware is newer than the tool's firmware.


Do a google search to see, there are many others with this issue and a few Google support threads where google acknowledged the issue for over two years but doesn't address the issue other than to say it should be fixed in the future firmware update.


So, now I'm stuck without a fingerprint scanner that I used for all security and banking apps.

kimsballs -

Did you transfer your existing fingerprint scanner from your original screen to the new one ?

Alan Sears -

See my note below; I found a solution for this.
Matt Montero -

These instructions neglect a key point: there is a protective cover over the holepunch camera opening (with the OEM part), and if you don't remove that before installing the screen, you will not be able to take selfies. Some people will consider that a positive, but I'd prefer it not be there.

I was having the same problem that kimsballs mentioned above, but I've solved this for my Pixel 6 Pro, so here's a quick guide... or links to other people's solutions, really.

First, you need to go here, and download the Google USB driver: https://developer.android.com/studio/run...; just get the Zip file and extract it.

CRITICAL: do not use Device Manager to install the file. Locate the .inf file within the extracted folder (mine was titled android_winusb.inf), then right click and select Install. If the Install option is not listed (Win11 doesn't show it at first), click More Options at the bottom of the menu.

Then, go here (MUST use Chrome browser) and follow instructions: https://pixelrepair.withgoogle.com/udfps

Matt Montero -

I tried your method but the but the finger print repair tool doesn't connect to my phone when i enter fast boot mode. I have the USB driver installed, even downloaded Android Studio to make sure I had it, but still no luck.

Cyril Chen -

I also didn't get the finger print repair tool to connect with my phone in fast boot mode. I followed the trouble shooting guild and ended up at this link. I guess I didn't install the driver correctly.

https://developer.android.com/studio/run...

Thomas Elliott -

friends I need help, I bought the original screen that includes the fingerprint reader but when I try to see if it works I get a message saying that: The registration was not completed, the fingerprint sensor cannot be used, consult a repair provider

Diego Rueda -

Diego, I just did this repair. You'll have to download the Android USB driver to a computer https://developer.android.com/studio/run...

CRITICAL: do not use Device Manager to install the file. Locate the .inf file within the extracted folder (mine was titled android_winusb.inf), then right click and select Install. If the Install option is not listed (Win11 doesn't show it at first), click More Options at the bottom of the menu.

Then, go here (MUST use Chrome browser) and follow instructions: https://pixelrepair.withgoogle.com/udfps

I had to reboot my phone twice.

Hope this helps!

Ted Ostrowski -

(1/2) Hello everyone:

The instructions are great until they stop.

1st hurdle: Applying the adhesive. It is simply a thin ring around the entire device. Not patches. I placed it on the phone (not the screen and then carefully peeled back the plastic using the tweezers and then used the spudger to reapproximate any adhesive that got stretched or moved. I then reattached the screen via the cable and replaced the metal piece and screw, then folded the screen over the phone and ran something firm along the entire edge of the phone. I thought I was messing it up, but it all worked out...

Second hurdle: As discussed the fingerprint reader does not work when you first boot up the phone. However, as others mentioned there is a fix. At first I was worried as I only read about this after purchasing the replacement screen, but it was actually very painless. I am not saying anything new that was not mentioned by Matt Montero and Ted Ostrowski. Just confirming that this works.

Bryan Roller -

(2/2)

Download ZIP: https://developer.android.com/studio/run...

Extract All

locate the android_winusb.inf file

Right click --> Install

Then proceed to https://pixelrepair.withgoogle.com/udfps in chrome.

Follow instructions (very clear and fast).

And you will have to reboot the phone (not computer) twice.

The entire process was ~ 75 minutes.

Seems to be working great!

Bryan Roller -

I also want to add - I think my fingerprint reader is working better than originally. It may be a bias from sub-par operation while living with a very damaged screen for 2 weeks, but my biggest overall complaint with the pixel 6 pro is the fingerprint reader failing. I am not sure if it is the hardware, the calibration, or a combination, but I think it works better than it used to.

Bryan Roller -

Hi Everyone I just wanted to give my experience with the finger print sensor recalibration. I just replaced my screen. I was having zero luck on my windows computer even after installing USB driver and then tried on my old Macbook. Neither detected my phone. I then used the USB-C to USB-C cable (that came with my pixel 6 Pro) and connected to my wife's newer macbook (using Chrome - https://pixelrepair.withgoogle.com/udfps ) and it worked immediately, took like 10 seconds and no fussing with drivers. I spent like an hour before I thought to try using another device. If this is an option for you and you are having issues, i'd definitely recommend using a legit cable and attempting the process on an IOS device (using Chrome).

Best of luck.

arialz -

This one worked a treat! Thanks for posting :)

alberte -

A quick extra note about the adhesive. The precut adhesive was a bit of a confusing experience for me, i'd personally recommend ordering an extra or a small tube of adhesive in case you need to patch a spot. I found it was best to place the adhesive down on the phone itself before connecting the screen. I had a few spots where the adhesive didn't line up so I used the spudger to push it into place... So far no problems and everything is working fine now. I placed some books on it for about an hour with the phone off just to try to avoid any separation issues in the future. Overall the process was pretty easy and definitely worth the approx. $120 i saved not taking it into a ubreakifix.

arialz -

Followed these exact instructions with iFixit OEM screen replacement, and the front facing camera no longer works. @mattmontero explained the reason (above):

"These instructions neglect a key point: there is a protective cover over the holepunch camera opening (with the OEM part), and if you don't remove that before installing the screen, you will not be able to take selfies."

It sure would've been nice to have that detail included in the instructions. Now I've got a Pixel 6 Pro with no front-facing camera.

Capt@inKrunk -

I had the same issue...a photo with blue box highlight would be helpful - I have to order another adhesive and do it over :|

alberte -

I followed these instructions and now my phone will not even turn on.

Cheryl -

if I do the fingerprint sensor calibration I will lose my data??

ADEL -

Thank you Diego!!! Your instructions saved me hours of frustration. I would have never figured out the below step as I went right into device manager. Appreciate your help!!!

CRITICAL: do not use Device Manager to install the file. Locate the .inf file within the extracted folder (mine was titled android_winusb.inf), then right click and select Install.

I agree the install instructions should be included. If I didn't read the comments from users, I would be tearing the phone down to remove the cover on the selfie camera and would have wasted the cut out adhesive I paid for.

Jay -

The repair went quite well. Take your time and read the instructions a couple of times before you start AND most importantly the comments. The comments were most helpful in restoring the fingerprint sensor. Thank you @bryanroller

Make sure you take off the protective cover over the front facing camera hole! My kit did have a note on the screen to do that now thankfully.

I used a heat gun to heat up the adhesive. Seemed to work very well. Getting the first opening pick in is a bit tricky - I ended up cracking the screen even further. Once you get that first one started though it goes quite well.

The pre cut adhesive was intimidating at first. It's actually quite easy and forgiving. Set it in place on the phone and use your spudger to move it around and it's all good.

This is the first time I've attempted a repair like this and I must say the kit was well put together and the instructions were pretty good. Someone else mentioned that it would be nice to see the steps on how to put everything back together.

Thanks!

Benjaman Walter -

What do you do if the new screen doesn't turn on?

I can fell the phone vibrating when the power button is pressed, but the screen remains blank.

Christopher Turner -

same thing happened to me, and I had to reseat the cable connecting the screen to the phone. The first time, the phone vibrated but the screen stayed black.

The cover and screw went back in even though the cable was not fully seated in the socket, or was possibly off to the side. I was concerned b/c instructions said not to touch screen during first power on, and I thought the screen might turn on when the cable was reconnected, but it did not - maybe the phone turned itself back off since no screen was attached?

Once I reseated the cable the screen turned on when the phone vibrated, then I turned it off and sealed it back up. If you already closed up the phone, you might be able to warm it up, slice the adhesive, and pull the screen back off to get to the cable and reseat it. Not sure if the adhesive would restick, but it is pretty sticky, so worth a shot, or maybe someone can suggest something else besides ordering another OEM adhesive.

John Kalas -

I had the same problem. I then disconnected the battery and reconnected and the phone started.

danielbauer -

I was able to successfully change my screen, but I would not have been able to complete without reading others' comments.

The ribbon cable bounced out of the socket as soon as I removed the torx screw, so be careful not to lose the screw in the process. Be sure to snap the cable back into the socket securely before screwing the cover back on with the torx screw - I thought I had it in place the first time, and the cover and screw went back together, but the screen did not work until I reseated the cable.

I am sure my phone is no longer water resistant b/c I had issues with the adhesive stretching, sticking off center, the plastic getting underneath it, etc, but I still got enough of it in close enough to the right places to keep the screen on, and it looks fine.

Definitely remove the cover on the inside of the screen over the selfie camera before installing the screen. Install the driver to be able to complete the fingerprint calibration, then restart the phone a couple of times for it to start working.

John Kalas -

Thanks everyone for their comments! I've implemented your experiences with the selfie camera cover into the guide.

Arthur Shi -

help i downloaded the google zip file and extracted the usb driver but the android inf file isnt showing up what am i doing wrong

Alexandra Mayoral -

when you have trouble with your fingerprint reader use this https://piunikaweb.com/2022/10/04/pixel-... I spent 3 hours trying to figure this out and it is the only way that I was able to get my fingerprint sensor to work. also, you do not need to reset your phone if you do it this way just restart after installing the software.

David Hedoesit -

Any idea where to get the OEM parts for a reasonable price in EU? The replacemant parts havent been available for a long time here

Cagri Ürkmez -

Ok. So if I were to purchase only the actual screen for my 6 Pro, how do I remove the parts attached to the inner side of the screen? I'm guessing they are one or more of the following... Integrated Fingerprint Reader, Amoled Display, OLED Digitizer, and Display something- looks like I wrote dunes. Because I can buy the screen only, without anything attached to to it, like just a piece of curved glass that is the correct fit, but have zero idea how to remove all that from the old broken piece of glass that is my screen and then reattach all that to a new beautiful uncracked all the heck screen. Thanks!

Karen Holcomb -

After failing to do a battery replacement on my samsung s10+ from ifixit I was worried about trying again but I just did the screen from this guide as well as a battery while I was in there and it seems to have worked great! Thanks so much! The fingerprint reader worked by clicking the link in the last step in this article -- just realize that you have to restart the phone a couple times for it to work.

Sean Roth -

Btw, it sounds like my loadspeaker is malfunctioning after the repair. Has anyone else had this issue? I wonder if it's just some rubbing alcohol that needs to dry up.

Sean Roth -

I have just fixed my phone! I'm so excited about that! I always thought that phone fixing is extremely difficult and I won't manage this before. Well here I am. I'm just having problems with fingerprint scanner calibrating/ In the fast boot mode my phone is locked. Can it be the issue?

Ekaterina Astafeva -