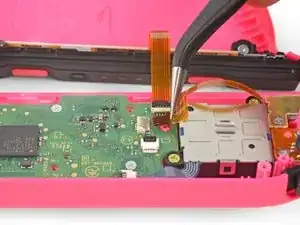
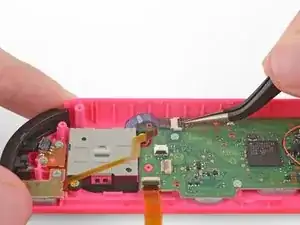
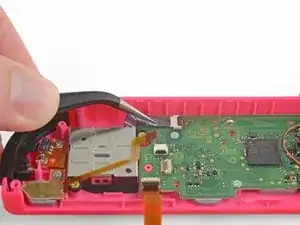
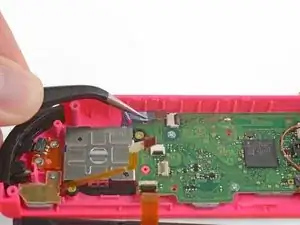
Einleitung

Die Nintendo Switch verfügt über zwei Joy-Con Controller. Diese Anleitung zeigt, wie du den Joystick am linken Joy-Con der Nintendo Switch austauschen kannst. Beachte, dass der Austausch des rechten Joysticks zwar ähnlich, aber nicht gleich und etwas schwieriger ist. Wenn du den rechten Joystick austauschen willst, folge dieser Anleitung.

  1. 3Bvx41PUKLSvBBWd
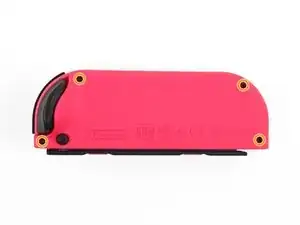
    • Entferne die vier Tri-Point Y00 Schrauben, mit denen die Rückabdeckung befestigt ist.

    • Pass auf deine Schrauben auf. Diese sind zwar alle 6,2 mm lang, aber es wäre besser, sie auf einer Magnetmatte oder in einer Box aufzubewahren, damit beim Zusammenbauen wieder alles an die richtige Stelle kommt.

    Try-Point screws are not magnetic

    Ramon Sanchez -

    Si vous avez des difficultés à dévisser les 4 vis, vous pouvez chauffer les 4 vis avec un sèche-cheveux pendant 1 à 2 minutes.

    olivier pepito -

    une des vis me résiste, et le sèche cheveux n’y change rien. avez vous une autre solution ?

    quentin.roehn -

    These tri-point screws are very easy to strip—be careful!

    Jared Cook -

    Si tienes cuidado no hay que desconectar nada. Sólo el cable del joystick, evidentemente, todos los demás se pueden dejar conectados, sobre todo el de la batería para que te ayude a probar si todo funciona antes de cerrar y atornillar todo de nuevo.

    Te ahorras 15 minutos y muchas posibilidades de romper cosas.

    Víctor SLB -

    No es recomendable trabajar en electrónicos que tengan corriente/voltaje através de los componentes. Como mínimo deben desconectar la batería.

    John Penaranda -

    Die 4. Schraube lässt sich nicht rausdrehen. Den Föhntipp hab ich versucht. Gibt‘s weitere Lösungsvorschläge bitte?

    gudrun_oberleitner -

    I can't get the last screw out either, stripped it...

    Valentine Briese -

  2. jeFnTOukwhPVEJc5
    jeFnTOukwhPVEJc5
    UPZviLXqCNkMITep
    jWNd3b5g6FTqCsZC
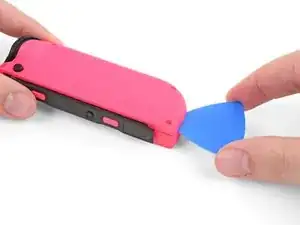
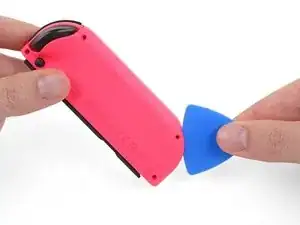
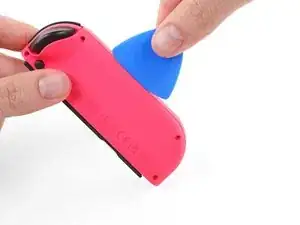
    • Setze ein Plektrum in die Spalte an der unteren Kante des Controllers. (Die Seite gegenüber des L und ZL Buttons.)

    • Schiebe die flache Kante des Picks langsam die Seite des Joy-Cons hoch.

    • Achte darauf, dass du das Plektrum nicht zu tief in den Spalt schiebst. Dadurch könntest du die sehr dünnen Kabel und die Elektronik beschädigen. Die Rückabdeckung braucht nicht viel Druck, sie löst sich sehr schnell.

  3. mmee2RMhPHOpquMA
    mmee2RMhPHOpquMA
    aCVGtmScSy5LndpA
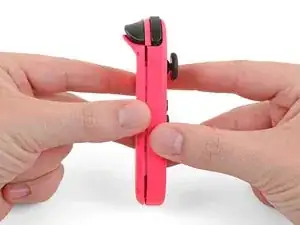
    • Achte darauf, dass die Ladekontakte von dir weg zeigen. Nun kannst du den Joy-Con wie ein Buch öffnen.

    • Entferne die Rückabdeckung noch nicht ganz. Zwei Kabel verbinden die Ladekontakte mit dem Motherboard.

  4. TUOe2M2AAAlMd2mU
    TUOe2M2AAAlMd2mU
    bOFJfsG3ZfMYEWRn
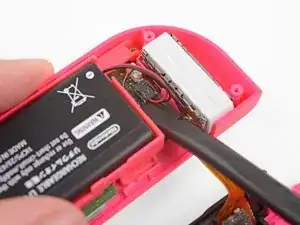
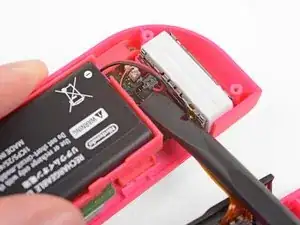
    • Benutze einen Spudger, um den Akkustecker aus seinem Anschluss auf dem Motherboard zu lösen. Dies verhindert das Einschalten des Joy-Con während der Reparatur.

    • Sei sehr vorsichtig beim Hochhebeln des Akkusteckers. Wenn er sich nicht mithilfe des Spudgers lösen lässt, versuche, ihn durch vorsichtiges senkrechtes Hochziehen an den Kabeln von der Platine abzutrennen.

    • Drücke beim Zusammenbau den Stecker senkrecht nach unten in seinen Anschluss, um den Akku wieder an der Platine anzuschließen.

    These connectors are very tight in their plugs. It is better to leave the battery in place unless it is really necessary to remove it. I damaged the connector even though I tried to remove it very carefully.

    peter -

    Agreed, the connector looks far too small and delicate to risk removing and the battery wires have enough slack in them to simply take the battery out of its housing and put to the side.

    Lee Hodges -

    When reassembling, remember to just press it down into place. I spent a lot of time trying to slide it in.

    Todd Dukart -

    I’ve spend too much time and almost broke the connector trying to slide it in. Push it down is the way or even don’t disconnect.

    Ralf de Kleine -

    I had break the connector of the battery. Does somebody know the name of this conector to try to find a replacement? Thk

    Carlos fernández -

    Be careful not to damage the wires when doing this! Try to get the edge of the spudger underneath the plastic housing, rather than simply pushing up on the wires. Use it like a pry-bar. (Pushing up on the wires can damage the connection.)

    When pushing the connector back in, I found it easiest to use tweezers to set it in place, then I would keep one tip of the tweezers holding on one side while moving the other tip to a corner of the connector, then move the first tip to the other corner. Push down gently with with both tips on both corners. (I probably didn’t describe that too well, but basically I just set the connector mostly in place, then walked the tweezers across into a position to press the connector down into place.)

    Mr. Porter -

    This battery was even VERY tight. I tried the suggestion someone else made about leaving it plugged in and just being careful - it worked for me.

    G Chan -

    I replaced my stick following this guide successfully replaced it with all ribbons intact. (I struggled with this part until I found out I could pull the cables for the battery lightly. I didn't see any damage on the red and black cables. Now may controller wont turn on… the lights wont come on. I can connect to my switch but it wont charge or come on wirelessly. Please help.

    James -

    I chose to leave the battery connected and it worked out fine. Just be very careful not to put tension on the wires.

    Paul -

    I recommend just pulling on these cables using twesers, because it’s easy to damage insolation on them bu trying to pry it up

    furtak_dominik -

    Remember: it is highly recommended to revive any voltage across electrical components. The reason for removing the battery, specially if using the tweezers, is because they're metallic and can short a connection. Work with a battery plugged in at your own risk. Is rather lose 10 minutes rather than 20$ or more.

    John Penaranda -

    I have the same problem as Carlos: My connector broke while is was trying to unplug it. The crimp contacts of the battery broke from the crimp housing. Does anybody know which crimp housing is used here (manufacturer, series)?

    Sascha -

    I think I found it: Its a Molex Pico EZmate series crimp housing, part no. would be 781720002

    Sascha -

    My left Joy-Con's battery connector was so tight in the housing that it got ripped off the solder pads - not sure if it's repairable at my skill level. Right Joy-Con was much smoother and wasn't in as tight.

    Sen -

  5. 6cTHHygYU6cOTdCa
    6cTHHygYU6cOTdCa
    oSwESqQBxCK6DaET
    3oaAkL6JKc161WPO
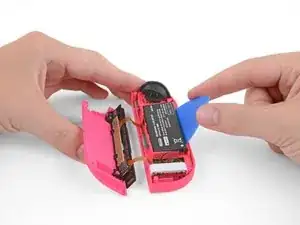
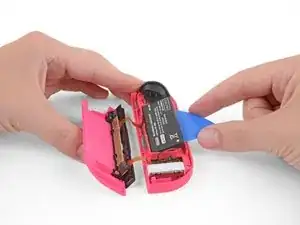
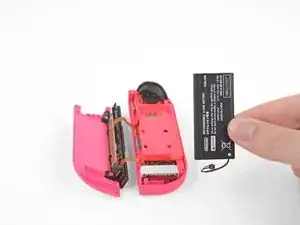
    • Schiebe ein Plektrum zwischen den Akku und das Joy-Con Gehäuse.

    • Hebe den Akku aus dem Gehäuse. Er ist nur leicht festgeklebt.

    • Pass auf, dass du den Akku nicht verformst oder ihn beschädigst. Er könnte sonst Feuer fangen oder explodieren.

    Do not remove the battery connector. The chance of damaging the connector is quite substantial. Better leave it in place and be a little more careful when further disassembling the controller

    Peter van Nes -

    One important comment is that the kit iFixit sells to replace your joycon does NOT come with the blue “guitar pick” spudger so I had to make due with the long black nylon tool instead but it DOES change how one should do step 5, the removal of the battery. Instead of sliding in and prying up from the right side, one should go in from the left if using only a black spudger. there is a cutout in the plastic in the midframe perfectly sized to push the flat part of the spudger under the battery and just “pop” it up. I suggest the author make a note of this in the guide just in case others like me don’t get all the tools shown in this guide when ordering the kit. Again, not the fault of the author at all, just working around what iFixit sent me. I hope this comment gets through as I am new to actually leaving comments on these guides and only just noticed that there is a per step commenting system.

    Brandon Baumia -

    When putting everything back together, is it necessary to glue the battery pack back again in someway?

    Or do I just put it back without glueing it?

    Rene Hamacher -

    Rene, usually the double-sided tape that originally held the battery in place is still sticky enough to keep it down after removal. If yours isn’t, you can apply a new strip of double-sided tape to keep it from moving around!

    Taylor Dixon -

    IMPORTANT: Do not remove the battery connector if you can avoid it. You can carefully pry up the battery and place it aside while it is still connected. During removal or replacement of the battery connector, if you inadvertently touch a very small, grey “fuse” right beside the connector with anything metallic, it can short out, resulting in the JoyCon’s battery becoming disconnected from the mainboard and no longer able to power it. The JoyCon will still work when docked but ONLY when docked.

    Sheldon Carpenter -

    Even aside from the other warnings, there are two main reasons not to disconnect the battery:

    1. If you’re super careful, putting back in the battery cable isn’t going to damage anything. But it’s still an enormous pain in the rear end, and was easily the most time consuming step in the whole process for me. The fact that it’s not needed makes it extra pointless.

    2. At some point you’re going to want to test that your buttons all work, but you can’t do this without power. If you’re like me, then after getting all the cables reconnected you want to be sure they are properly in place and thus actually work. You can’t do that if the battery is disconnected.

    Chris McElligott Park -

    Try this cleaning of the joy con, no complex tools, I just blow with my mouth under the plastic cover under the joy-con

    https://www.youtube.com/watch?v=cX6lCQxR...

    Mauricio Gracia Gutierrez -

  6. xM2ElyvfxyI1CF6o
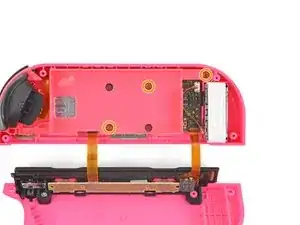
    • Entferne die drei goldenen 3,5 mm Kreuzschlitzschrauben #00 vom Mittelrahmen.

    • Entferne das Mittelgehäuse noch nicht! Dort ist noch ein empfindliches Kabel, das den ZL Button auf dem Mittelrahmen mit dem Motherboard darunter verbindet.

    My iFixit toolkit PH00 did not fit the screws. Neither did the PH000, so I used my 1mm flatblade to get them loose.

    Steve Bonds -

    There are actually four screws in the center, which is confusing. However, you only have to take out the two shown. The other two are not holding the battery casing in place; they go through and hold the motherboard in place. If you take out the extra two screws it’s not a crisis, but things will flop around more.

    The included screwdriver worked fine for me.

    Chris McElligott Park -

    JIS000 worked much better for me than PH00 for these screws

    dave -

    Those are JIS screws not phillips so use a J000 or you may strip the screws

    Richard Aguirre -

    The ZL button disappeared. You forgot something.

    Forum Help -

  7. XOy5mmYknWb4BXXs
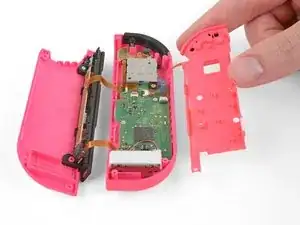
    • Klappe den Mittelrahmen vorsichtig vom Motherboard weg, so als würdest du eine Buchseite umblättern.

    • Vermeide es nach Möglichkeit, das dünne Kabel am ZL Button zu belasten.

    Quand vous retournez le chassis interne, le bouton L peut sortir de son logement avec le ressort. Il faudra le remettre le replacer pendant le remontage, au moment ou vous remettez le chassis interne à son emplacement.

    olivier pepito -

    translating above to English

    “When you flip the internal chassis, the L button can come out of its housing with the spring. It will have to be replaced during reassembly, as you return the internal chassis to its location.”

    Gina Karasek -

    Echoing Olivier’s and Gina’s comment. The spring underneath the L button is under tension and will shoot across the room if you are unlucky. (The same danger exists when disassembling the right control stick). I’d suggest adding a step for mitigating this — either proactively removing the L button and spring at this stage, or else taping it down or otherwise securing it.

    danbalzer -

    I had to tug a little bit more than I expected for flipping a page. I first thought I had forgotten a screw but after a while it came off.

    Markus Mohr -

  8. a4DRNatST2yeadLX
    a4DRNatST2yeadLX
    tUc2fNMTKq6VBdNJ
    oeyDGMDMjEhfRPII
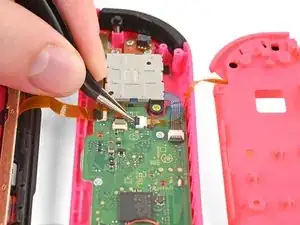
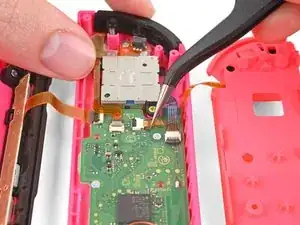
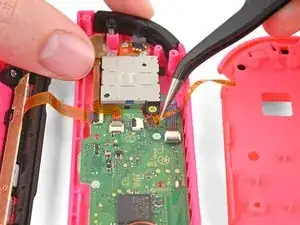
    • Das Kabel des ZL Buttons ist mit einem kleinen ZIF-Verbinder am Motherboard befestigt. Nimm eine Pinzette oder einen Spudger, um die Verriegelung des ZIF-Verbinders gegenüber des Kabels hochzuklappen.

    • Ziehe mit einer Pinzette das Kabel sanft aus dem ZIF-Verbinder. Jetzt ist der Mittelrahmen abgelöst und kann entfernt werden.

    This is 10x easier to reconnect than the right joy con replacement!

    Bethany Shillet -

    There is a small spring underneath the L bumper that can easily pop off during this step. You can see it compressed at the top of this image:

    https://d3nevzfk7ii3be.cloudfront.net/ig....

    It requires a little finesse to compress the spring and put back in place. Just something to be on the look out for.

    Daniel Dunevant -

    For the reassemble: the ZL button’s connector is inserted with the connectors up, while the other cables are connectors down. The wire can get a little twisted and be confusing.

    Jacob Goldman -

    This was a great tip! Thanks Jacob.

    During re-assembly this step too me the longest both because I had the connector upside down, and I couldn’t get the angle right to re-insert it because I had everything laying on a flat surface. I ended up having my son hold the joycon slightly upright at an angle and it was a lot easier.

    G Chan -

    Thank you so much. I forgot to check which direction it was inserted

    Anup Upasani -

    Mine had connectors down.

    JP Moral -

    any clue how to get that black lock on this ribbon cable to go back on. When i unlocked it the black lock popped off, I cant seem to figure out how it goes back.

    David Wynne -

  9. XmgqLaxxTGcXZSxw
    XmgqLaxxTGcXZSxw
    rBcKnrVXjBSBvWcP
    SMFZehKMDDqiRJbE
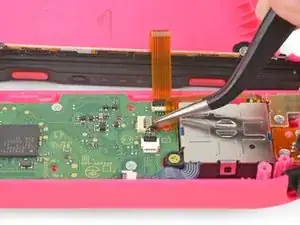
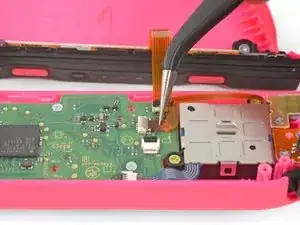
    • Das Flachbandkabel, das den Minus Button des Joy-Cons mit dem Motherboard verbindet, verläuft über die Rückseite des Joysticks. Du kannst den Joystick zwar ausbauen, ohne das Kabel zu lösen, aber es ist viel einfacher, wenn es entfernt ist und nicht stört.

    • Entriegle den ZIF-Verbinder des Minus Buttons und ziehe das Kabel ab.

    I suggest to leave the connector in place, too easy to damage it

    Stefano Dell'Orto -

    I can’t see how to get to the screw if leaving this cable attached, unless unscrewing the minus button board is possible? But when I try and lift that out it seems as if it’s still attached somewhere - possibly the board for the L button.

    N Carter -

    Yeah . That's exactly what I did.

    NIXON DEJESUS JR -

    My joycon matches the picture; there is no way to unscrew the joystick without removing the minus button ribbon cable first. It’s the easiest ribbon cable to manipulate in this repair by far, so I don’t recommend skipping this.

    Charlie Lewis -

    Agree the connector is very fragile and despite being gentle, it broke when I flipped it over and I couldn’t reconnect.

    Tony Arnold -

    Agreed, this is impossible to do on the model I have without taking the cable off. The ribbon runs right over it.

    Chris McElligott Park -

    I actually broke the tiny grey ZIF connector’s lock right off during this process. I re-inserted the ribbon cable without being able to lock it down. I’ll just hope for the best. It’s all working in the end, and if my minus button stops working, I’ll know why.

    Paul -

    This cable also seem to be connecting to the L button. I did as a couple of others here and broke the clamp which led to the ribbon no longer connecting. Solved it by pushing it downwards with a tiny bit of tape in replacement of the clamp.

    Robert Karlsson -

    Ive replaced the joystick and my lights come on. Just when i close it all my lights no come on. Is there a connection i dont have all the way inserted?

    Christian Denis -

  10. AjLFattLUEBeL26Z
    AjLFattLUEBeL26Z
    HANFaA1SXNRJycIX
    ZXpV4SIvQowanvu5
    • Der Joystick wird nur noch von einem letzten ZIF-Stecker gehalten. Klappe die ZIF-Verriegelung vorsichtig nach oben und ziehe das Kabel ab.

    Getting the new cable back in was an exercise in frustration. It doesn’t seem like it goes very far in, and it’s hard to know if it’s in at all. Part of that is how long it is. My experience was that it actually was in, but looked like it was not. To test how far in it has gone, get your tweezers right near the point where it is in, and then pull it back out, and you’ll be able to tell what was in. It’s not a whole lot, but doesn’t have to be, turns out.

    This was the point I started wishing that I still had the battery connected so that I could test that the cable was in, though.

    Chris McElligott Park -

    That thing was a pain to get back in!

    Jason Rivera -

    be careful with the left button : if you move it you will see the spring poping out of the button. It’s pretty easy to put back but you may lose time to find it as it pops quite strongly

    Fabrice -

    Das Flachbandkabel des neuen Sticks war an der Anschlussseite fast doppelt so dick wie das Kabel des alten Sticks. Beim Versuch, das Kabel mit einer Zange in den geöffneten ZIF-Stecker zu pressen bin ich leider abgerutscht und habe das Kabel zerstört - also Vorsicht! Zum Glück hatte ich zwei Sticks bestellt. Beim zweiten Stick hat es dann geklappt.

    Zusammenfassend kann man sagen, das größte Problem bei der Reparatur war, das Flachbandkabel des neuen Sticks in den ZIF-Stecker zu bekommen. Zumal auch nicht erkennbar ist, wie tief das Kabel eingeschoben werden muss/kann.

    dname -

    My replacement joystick never worked properly. Ifixit sent me another joystick and this second replacement worked like a charm. When you insert the ribbon into the ZIF connector, you barely have to insert it. As soon as you get resistance, stop. It will not slide in as far as the other 2 ribbons which you disconnect/connect as shown in Steps 8 and 9.

    Joey -

  11. WAyC3vZgEJobqDoX
    • Entferne die beiden 3,5 mm Kreuzschlitzschrauben #00 vom Joystick.

    Anyone know the exact measurements of these screws? I lost mine and the replacement kit I bought didn’t come with any.

    Viktor Fasth -

  12. 2qMFspLQyLLh1KdE
    2qMFspLQyLLh1KdE
    kIJTFtp1Wr25pQJC
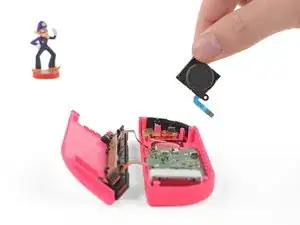
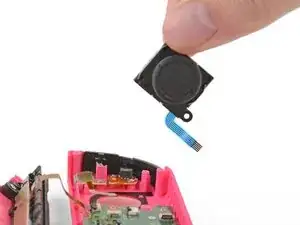
    • Nimm den Joystick vorsichtig aus der Halterung.

    • Um das Loch des Joysticks verläuft eine dünne schwarze Dichtung. Passe auf, dass du diese beim Herausnehmen des Joysticks nicht bewegst oder beschädigst.

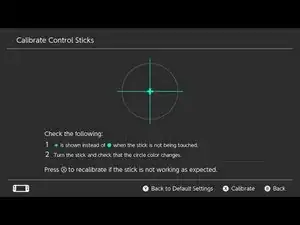
    • Sobald der Joy-Con wieder vollständig zusammengebaut ist, verbinde ihn mit deiner Nintendo Switch und kalibriere den neuen Joystick. Möglicherweise musst du deine Switch zusätzlich aus- und wieder anschalten: halte die Einschalttaste 10-15 Sekunden lang gedrückt, bis sie ausgeht, schalte sie dann wieder ein.

    I followed this for two devices. Quite helpful, thank you! Recommend adding a reminder (or maybe I missed it) that you should re-calibrate after reconnecting the switch.

    Bo Sanders -

    Bo, that is a great idea! I’ll add that reminder.

    Taylor Dixon -

    success! thank you.

    Jason Waddle -

    Do I need the spudger, or can I just use tweezers?

    Zero123 Alpha -

    First time doing something like this. It looks like there’s a small sticker protector thing covering my replacement ZIF connector. It would be helpful to include removing that sticker as part of the instructions. It feels obvious, but it’s helpful for a novice to know this.

    Tyler Stamm -

    Hmmm… looks like it’s not a protective sticker back. Although it is difficult to perceive just how far in you have to go with the joystick ZIF connector for it to be secure. I see the fold in the original I took out, but it still feels like I have to push it further in. I suppose we’ll find out once i put it all together.

    Tyler Stamm -

    We had to power cycle the switch for the new calibration to take hold. After replacing, we recalibrated and still experienced the drift. Then we held down power button on console for 10 seconds. After booting back up, we checked calibration and the drift problem went away.

    Tonberry King -

    PLEASE, put this on the guide, I spent like 30 min calibrating until i read this. Now they are perfect.

    v5tge -

    Good tip! Added to the final step.

    Jeff Suovanen -

    Just want to add that during my disassembly the small spring which is part of the left bumper came out, and was quite finicky to get back in and almost missed that it fell out in the first place. Might be worth adding to watch out for this

    Ollie -

    Anyone else notice a sticker on the replacement joycon? Do you remove it?

    Pepsolman -

    Perhaps worth adding that removing the rubber cap from the joystick before starting disassembly makes it easier to remove the joystick without disturbing the thin gasket.

    Allan Edwards -

    I used this guide and the pro toolkit to apply the fix from https://youtu.be/Vid8lIXmZwE?t=355

    Things I’ve noted:

    The battery connector needs to be levered from the wired-end

    Pay attention to where the ZL-button cable rests in before unscrewing the inner plate so you’ll know where to spudge it back into place.

    huwp -

    Fantastic and useful guide. Thank you!

    Antonio -

Abschluss

Um dein Gerät wieder zusammenzusetzen, folge den Schritten in umgekehrter Reihenfolge.

Bitte entsorge deinen Elektroschrott fachgerecht.

Deine Reparatur klappte nicht, wie geplant? In unserem Antwortenforum findest du Hilfe bei der Fehlersuche.

Taylor Dixon

Mitglied seit: 26/06/18

63211 Reputation

136 Kommentare

Thx This really helped

Stev Steve -

Thanks Kyler - I just replaced 4 joysticks and they’re all working perfectly.

One final step to remember to go in and calibrate the controller.

David K -

You're welcome I'm glad I could assist you in your repairs!

Kyler Saunders -

Thanks. This was just the right amount of info and now my left stick drift is gone….for now.

Jason Hoover -

I would recommend at least once a month take a can of compressed air and spray the joystick internals to clear it of any dust or debris.
Nick Mensch -

I’m having serious drift issues with the left Joy Con but, do I need to replace the joystick to relieve that issue due to “wear and tear” or, can I open it up and clean it (or something of that nature) to make it work properly again?

junkbox83 -

Drift can be cause by a few different things. Dirt and dust gets stuck under the small rubber cap on the base of the joystick and can cause sticking or drift. If that's the case you can take a q-tip and clean it out. Takes two minutes and requires no disassembly. I'd try that first and if that doesn't work a replacement should fix it!

Kyler Saunders -

I'm suffering from the same issue and unfortunately cleaning the analogue sticks only temporarily alleviates the problem. I've used WD40 contact cleaner and it helped for the first week or so, but after a month of doing the procedure the sticks functionality is completely broken. Just invest about 12 euros/pounds/dollars and get yourself a replacement pair of analogue sticks.

Rodrigo Alves -

Replace them. Cleaning is very difficult because the problem is with the graphite inside the block and replacement parts are cheap

Gregory Woolfrey -

Hello! It seems that the reason for the joycon drift is because certain metal contact pads are actually getting “scratched off” by the joystick. Therefore, cleaning it would not be of much use. However, Nintendo has come out and said that if you send them your drifting joycons, they’ll fix it for free. Completely replacing the joycon joysticks is a great alternative method to fixing this single issue though.

Alex Otto -

First, try recalibrating the Joystick to see if that fixes the issue: https://en-americas-support.nintendo.com...

Second, used compressed air to make sure there is no debris that is causing the issue.

After that, it may be best to replace the Joystick.

Cooper -

Try compressed air around the joystick before opening it up. If that doesn’t work, this repair might assist.

Cooper -

I just followed this guide above. It is easier to change out the joy-con controller (KNOB SET), than to repair the one in place. After following this guide I took apart the old one. There are metal tabs that break easily, and the pieces are very finicky to keep together (under the knob). It appears that there are two sliders that are indirectly connected, and they sit on a small paper like chipboard. I could not visualize any wear with a magnifier glass on the pads that they touch. So I’m not sure cleaning it and putting it back is very good. Furthermore, you would need to pay extra attention to the way they are connected to the knob. When I took mine apart there was not any indication wear that was repairable (dust/damage), maybe all that needed was a re-calibration, or something else was wrong. Essentially, it is easier to change out the whole knob assembly (like this guide) than to “repair” the existing one. I found a set of two knob sets, screwdrivers, and replacement screws on Amazon for 20.00 Canadian.

Zedducus -

I made an account just to say thank you you have saved me alot of money and now it wont

adam vaughan -

I have 2 controllers and both of them drifting on left side. Just used the instructions to install new joystick. A little on the difficult side,but it will by e easier with the second one. Hope it works now.

Bought replacement on Amazon for 10.99

Get the tools with it too.

Sandra Plante -

Thank you, it was really easy to do this following your steps.

Pablo Perla -

Hi,

i bought replacement joysticks on Amazon and followed all the instructions. However on testing I am getting no input at all from the joysticks. The buttons work however.

My procedure seems good because when I refit the old joysticks everything works albeit with the drift back again.

It looks like the ribbon cable is harder to insert on the amazon ones any ideas?

Younik 2-Pack 3D Replacement Joystick Analog Thumb Stick for Nintendo Switch Joy-Con Controller with 4 Thumbstick Caps,Tri-Wing & Cross Screwdriver and Fixing Tools https://www.amazon.co.uk/dp/B07QNW75S8/r...

thanks

alex

Alex -

I purchased the same parts off amazon and I'm having the same problem. The wiring in the replacement is green and it looks like the end of the connector is slightly thicker which is stopping it from going in. I've broken one replacement part trying to get it in.

Are there different generations of analog sticks?

Scott Nieman -

My dog recently got a hold of my left Joy-con and really banged up the lower plastics. I was able to get a color matched shell and thanks to this guide was able to swap over the internals and complete the repair.

I will note that my dog clamped the vibration unit quite a bit, it surprisingly still works!

Huge thank you for providing this service! Love you guys

InCahoots -

I'm so glad that I was able to help you!

Kyler Saunders -

Is the replacement stick the same for left/right joycons or are they different?

andi calman -

It is the same part!

Kyler Saunders -

The part is the same but the installation process does differ slightly.

Cooper -

Thank you for making this guide. This was very helpful to me, and saved a me about 60 USD.

I found that the screws securing the thumbstick to the plastic joy con shell were excessively difficult to remove. With a lot of steady pressure and an equally steady but slow turning, they eventually came off.

PS - my drift issue gradually became noticeable after about 1.5 years of owning a switch, then suddenly got so bad that the system was unplayable!

zle896 -

Can you please post a super-close-up of the two 3.5 mm Phillips #00 screws in step 11 (preferably while they are outside of the joycon)? I am having an absolutely horrible time getting them back in and have a feeling that I got some screws mixed up. It is absolutely the most frustrating thing I’ve had to deal with all year.

Actually a side-by-side of all the screws in the device with clear labels on where they go would be godlike. I am begging you; I can’t reassemble anything at all at this rate and have about a trillion loose parts scattered around my workstation.

Parker Holley -

Disregard my last comment, I figured it out thankfully.

To anybody else with my issue: There are only 3 types of screws total in the device. There are the tri-wings on the back, short silver screws inside, and long silver screws inside. The joystick uses the long silver screws, and the preview images for this product have a diagram showing what screws go where (note their “long black screw” is originally the tri-wings): https://www.gamingcobra.com/products/18p...

Parker Holley -

I have opened my left joycon controller and replaced the ghosting joystick with a new one. When i reassembled the device, it turned out that the control stick worked fine moving up, down, left and right, but the push (click) function did not work, so i could not calibrate it. When i pulled out the cable from the ZIF connector to release the joystick finally, the ribbon seemed to be very deep inside the zif connector. The ribbon of the new joystick only goes in a milimeter and does not move any deeper. Is this the reason why the click function does not work? So before i take the second joystick from the set and try it with this one again i would like to have your answer. Thank you very much.

DJ Skippy -

I am sorry you have having issues. It appears that the newer joycons are using a different part. A user posted this on my other guide for the Right Joy-Con…

“Caution: it appears the new joycon have a revised analog stick and the older replacement sticks will Not work. This is from an evening of research and taking apart 5 controllers. Nothing official.

New joycon have an analog stick with an “H" pattern pressed into the metal back of the stick. Older replacement sticks have an “X" imprinted and older joycon look like they have an “#".

It looks like the “#" and the “X" are interchangeable but the cable on the “H" are thinner. So the motherboard won't accept the older thicker style.

I've spent a few hours on this and have broken two replacement sticks finding this out. I haven't found anything official about Nintendo changing the sticks but I guess they eventually would to prevent the drift issue.”

Thank you Scott for finding this out!

Kyler Saunders -

In that person’s post I commented how his findings aren’t conclusive due to not being the same as what I found, so be aware of that.

N Carter -

Hi, I have installed a new joystick in my son's left joy-con. It is screwed down in place, but try as I might, I simply cannot get the ribbon cable inserted into the slot. Does anyone have any tips with this, as all the videos I have watched on line skip over this part. All the ribbon cables in videos simply slide right in. If only this were the case. So frustrating as I am almost there.

Nick Webb -

Hi Nick, people have been reporting that the newer joycons have a different sized fitter and the older replacement parts do not fit properly unfortunately.

Kyler Saunders -

I could never have done this without this information. Realy great help and in fact it’s fool proof even for non technicians. Just follow the instructions and you will end up with a big smile.

Hein Timmerman -

For anyone concerned with the comments stating that newer joycons will not accept the older joystick replacements - I have successfully (thanks to ifixit’s wonderful guide!) replaced the joystick in two of my left joycons, one older (‘#’ sign on the back of the original joystick) and one newer (‘H’ symbol on the back).

The replacement joysticks we’re both from the same package I ordered from Amazon (E.Durable 3D Replacement Joystick).

The fit of the ribbon cable WAS tighter on the newer joycon, but it DOES fit.

Just note that the ribbon cable only just needs to be inserted then clamped - it does not need to be pushed into the receptor as far as you would think.

spurlz -

a comment I posted in reply to someone else’s about the shape on the back: “sorry, but this doesn’t seem to be the case in my experience. I have just removed a stick from a UK switch that I got on launch day, and this had the H shape on the back. I replaced it with a stick bought the other day off amazon that claims to be ‘new’ design and has a # shape on the back. This is my 1st time doing this but the connectors seem to fit and everything seems to be working. So I don’t know how you can conclusively say H is new and H and # don’t interchange, because in my case that’s not true.”

What I’m confirming is that my oldest joycons have an H and my supposed newer ones had a #, so I don’t think anything on the shapes seems conclusive as to the age yet. The newer one only lasted about 3 months anyway as the left is now drifting, so they could well be old batches despite the seller claiming they were new.

N Carter -

Thank you! Quality parts and quality diagrams/explanations. Kids are happy (and so am I!) that the Switch control finally works reliably again. Another reason I keep coming back to iFixit.

BJ Miller -

Just completed this repair without tweezers. While I didn’t break anything, I’d highly recommend everyone to use those angled tweezers since it makes unplugging and plugging the ribbon cables back in a lot easier.

Jochem W. -

I tried to repair my Joycon, but now my battery is dead. Then I replaced that as well but still not working. The joycon itself works when using the switch in handheld mode.

theBreadCompany -

I have this same issue when I replaced mine. I can't figure out how to fix this. Any advice???

James -

Would a Y000 bit work? I have a Y2.0 and a Y3.0, and there is a kit on amazon that sells a Y000 but not a Y00 from the ifixit store(I can’t buy it from this website because my payment is not accepted).

fede -

The bit I used said Y 2.0mm and it worked fine.

Christopher Martin -

Followed instructions- replaced the analogue stick, solved the problem, didn’t break anything. 10/10

lewistyrer -

This sadly destroyed my JoyCon partly as its not connecting wirelessly anymore, also the status leds are dead.. Can anyone tell me what I could try. I already tried reseting my switch.

theBreadCompany -

Dang it, that’s a bummer! You say it doesn’t connect wirelessly, does it work when it’s attached to the Switch? I would try re-seating the battery connector, or replacing the battery entirely if you haven’t done that already.

edit: I just saw your comment above about replacing the battery. That is a very strange predicament! You might try buying a new board for the broken joy-con, you may have accidentally damaged yours during your first repair (or maybe it just crapped out on its own).

Taylor Dixon -

I had similar too with my right joycon, the existing ribbon cable that connects the leds,SL+SR button board has a fold in by default, but that fold now seems damaged as the connection works when it’s unfolded but not when it needs to fold back down to fit in the joycon. It does still connect wirelessly though, I just can’t use the SL SR buttons, nor do the leds illuminate.

N Carter -

Clear and concise directions. The tool kit is all you need. I was skeptical at purchase, but it was fun swapping the parts out and seeing how stoked my kids were to have a pair of no drifting joy -cons!

Daniel Coleman -

Thanks for the guide, beats sending this into nintendo especially during these times or buying a whole new joycon

Nicholas V -

One important comment is that the kit iFixit sells to replace your joycon does NOT come with the blue “guitar pick” spudger so I had to make due with the long black nylon tool instead but it DOES change how one should do step 5, the removal of the battery. Instead of sliding in and prying up from the right side, one should go in from the left if using only a black spudger. there is a cutout in the plastic in the midframe perfectly sized to push the flat part of the spudger under the battery and just “pop” it up. I suggest the author make a note of this in the guide just in case others like me don’t get all the tools shown in this guide when ordering the kit. Again, not the fault of the author at all, just working around what iFixit sent me.

Brandon Baumia -

Fantastic Guide, and my first one at that! Thank you.

Andrew Davis -

This procedure worked well for me. I had trouble at the “remove battery connector” stage though; the connector did not lift out easily and I was really afraid of breaking the wires there. I went through the rest of the procedure with the battery still connected and everything seems fine now.

Christopher Martin -

Thank you for this guide and the for kit! It took me about 30 min to swap out the joy stick and it works fine now! No drifting! The only challenge I have seen is that when I tried to re calibrate the controller, the + won’t center itself. I have tried a number of times to get it centered but alas… it won’t do it. I don’t feel any problems when I play games so I am not sure if it being off a bit will be a challenge in the future or not.

Thanks again for the guide, part and tools!

Chris O -

Aside from the L button falling out once or twice, everything went perfect. Had got this Switch Used and the backup Joycon was drifting. Now it’s not! Easy!

Brian Kurtz -

Thank you for this guide. It told all the key steps and was easy to follow. New stick is working great after 2-3 calibrations and saved a bunch of money!

Stephen -

I just had three left Joy Cons start drifting wildly within a week of each other after 2-3 years of medium use (then heavy use after Animal Crossing came out!) I was wringing my hands trying to decide whether to wait for Nintendo’s repair shops to open back up or do the repair myself. I finally just decided it wasn’t worth the wait and frustration, bit the bullet, and bought parts from the store here.

I shouldn’t have been worried. Get yourself a good light source, a clean surface to work on, and the proper tools. The ZIF connectors are definitely fiddly, so you really do need a good pair of needle-nose tweezers. This repair can be done by someone without repair experience if they take their time and work carefully. Expect to spend 30-40 minutes for your first fix, and 20-30 for each additional controller once you’ve got the hang of it.

Thanks so much to the folks at iFixit!

Ben Etherington -

10 Minutes to fix it. Thank You !

DavLeMag -

Ordered the repair kit and it came quickly, had everything I needed, and the guide was complete and extremely helpful.

Nicholas Sluka -

Hi, thank you for this guide! It was very helpful in replacing my joystick. Unfortunately, even though I followed the instructions to the letter, I'm still getting fairly significant stick drift. I calibrated my left joycon a few times and the drift is still there. I don't understand why a brand new joystick would have drifting issues. Do you have any suggestions on how I should move forward?

I know I can reach out to Nintendo for a replacement joycon but I'd like to pursue other methods first.

Ryan Carter -

Hey Ryan! Did you order your replacement joystick from us? If so, you can reach out to our customer service team and they may be able to get you a replacement. If not, you may be out of luck. :/ I have heard a couple people mention that their replacement joysticks from Amazon drifted out of the box, just like yours. Good luck, let me know if if you’ve got any more questions!

Taylor Dixon -

This is the first time I had to fix any kind of electronics and your guide was all I needed! My controller drift was very bad and some games were unplayable. Very detailed and easy to follow instructions. Thanks so much.

Gwen Sanchez -

Hopefully you take care of your controllers enough, but I have kids that don’t always wash their hands before playing games…. So, I found it beneficial to keep cotton swabs and isopropyl alcohol nearby for cleaning near the dust covers and buttons while working on this repair. It wasn’t necessary, but it feels better knowing some hard-to-reach areas are cleaner and gunk- and dust-free.

Mr. Porter -

Be aware the alcohol will start to melt the joycon casing finish. I used some to try and clean dirt from where the 2 parts meet and realized the end of the cotton bud was starting to turn bright yellow after only a few seconds.

N Carter -

Hello everyone I have had one successful attempt at repairing the joystick on my joy-con but after replacing a joystick on a different joy-con i couldn’t get it to calibrate just right and the result was a slightly worse drift than before I started. I ordered a new joystick from ifixit this time rather than amazon. I just did the replacement and I’m having the same issue, when i try and calibrate after the repair it wont calibrate perfectly and there is a little drift. The first time it was a drift down and the second time it drifts up. I’m not sure what to do now has anybody else had this problem? Any help or suggestions would be greatly appreciated!

ericsajedi -

Hi Eric! I’m so sorry you’ve gone through two bad joysticks now! If you’re not already calibrating with the joy-con connected to the Switch I would try that. If you can’t get it to calibrate correctly, you can contact our customer support team and they’ll get you a replacement. Good luck, and sorry again!

Taylor Dixon -

Did this and was great. Works just fine now. Thank you so much !!

Bobby Cook -

Hi, I replaced the left joystick two days ago with the help of this guide, and while the drift is gone, there are times the joy con suddenly vibrates a bit and disconnects (the prompt comes up to hit the L and R buttons). It’s only happened a few times, and it fixes itself when I detach the joy con and slide it back on to the console, but I’m wondering if I could have messed something up while replacing the joystick? Any help or advice would be appreciated!

Kate Strack -

I had an issue where the board along the rail that has the LEDs, SL and SR buttons on doesn’t now work and found that the long folded ribbon cable that attaches this board seems damaged where the fold is. When I open the controller and this cable is unfolded, the lights etc work, but when I put the joycon back together and the cable needs folding it stops working. The connectors that connect the joycon directly to the switch when it’s attached are also on this board (on an unopened joycon they’re hidden under an overlapping bit on the rail, below the section where there’s 3 down arrows.) Maybe this cable is damaged on yours? When you have it wirelessly, do the leds light up, and can you use the SL/SR buttons?

I can use mine attached so the issue isn’t a big deal for me at the moment, but if I wanted to play multiplayer games the joycon may not be suitable if the SL/SR buttons are needed.

I don’t have an answer though, just helping with a diagnosis.

N Carter -

I’ve mainly been playing Animal Crossing with the joy cons attached, but when I tried testing Mario Kart with separate joy cons I saw you were right - the SL/SR buttons don’t work on that one. I tried connecting as player 2 and the lights work but nothing happens when I press those buttons. So I guess the ribbon is damaged. Wonder if that can be fixed?

Kate Strack -

I’ve just opened mine up to remove some sticks that are drifting and I’ve seen there’s 2 ribbon cables connected to the bit I was on about - The one that connects to the SL/SR/LEDs that I’ve got an issue with, and another cable connected to the area that I mentioned that connects with the switch when joycons are attached. Maybe on your one part of this cable has become damaged so it becomes erratic.

N Carter -

I just finished replacing the stick, but now it thinks it's just always full tilt to the left. I can't even calibrate it because it won't register me trying to move it to the right. Is it possible I damaged something or is it a faulty part?

David Burt -

I switched back to the other stick and it works fine for now. So either I got them mixed up or maybe something was just loose before. Not really sure what I did right or wrong.

David Burt -

I bought this kit but the left joy con is still not working. it recognizes all of the other buttons except the joy con.

javier ortiz -

Javier, it sounds like there may be an issue with the Joy-Con ribbon cable (the one from step 10). Try disconnecting and reconnecting that cable, and if it’s still not working you can reach out to our customer service team and they’ll get you set up with a new replacement part!

Taylor Dixon -

&&^& this $@$*, this is near to impossible

I screwed up three of four screws at first stage and broke a motherboard

11/10

Banana Moon -

Does this Left Stick have the NFC touch point on it? I have amiibos that I would want to use.

ArrowSwift -

It does not! The Right Joy-Con is the one with the NFC touch point. You can see it in this step of the right Joy-Con guide.

Taylor Dixon -

Great guide! Ordered a repair kit off of Amazon. Although all those delicate ribbon cables made me nervous, I was actually shocked at how easy it was to complete.

Scott T -

I did this and now the drift on my controller is worse

Andrew Gonye -

Replacing the joystick only made the drift worse

Andrew Gonye -

Hello, I just follow the guide exactly to replace my left analog stick in my joycon. The lights were working fine while assembling it. When I finally did the replacement and put it back together, I found it to not turn on... I quadruple checked all the ribbons and wires and nothing is put of place or upside down. I can connect to my switch and it all works but the battery indicator shows a low batter red and no charge symbols when connected to AC. It was fully charged before... I can't figure out what happened. I know I did have trouble lifting out the battery connector following the guide but there is no damage or scorching to the connectors that would indicate a short circuit... has anyone experienced this before? If so how did you fix it?

James -

Thanks so much for this fantastic guide as well as supplying everything necessary to complete it. I was able to fix both mine and my mom’s left sticks with zero issues in under 30 minutes, it is beyond appreciated!

Luke Nabors -

I would removed the battery from the case first then disconnect it’s connector, its much easier to do and has less chance of damage.

Aaron Shackelford -

Thanks, It worked:)

Chifsmoothskillz -

Simple and efficient! The joycon parts I ordered are no different from the Nintendo stock ones. Perfect match and it works flawless so far.

Ricardo Saramago -

Good guide and video!

The most difficult bits were getting the ribbon cables back in the ZIF sockets, and making sure the cable from the midframe board wasn’t reversed before reinserting it (it’s so thin that it easily flips back and forth).

Tim Lesher -

Just finished replacing the joystick. It was kinda difficult to work with such small things, but very doable. The instructions are straightforward and easy to follow. Thanks!

Octavio Bernal -

Thank you this helped me replace mine

Isa G -

This guide was super helpful, and overall really easy. Only took a small amount of time to repair, and saved me a bunch of money and time by not sending it in to nintendo. Definitely about to fix all my joycons with this

Casey Pultorak -

Easy to follow guide, good pictures and easy read. I was able to fix my two joy cons. Thank you! 5/5

sierraflavio29 -

Finally got my left joycon fixed. I know it'll be back at some point but I'm so glad the the instructions detailed here were easy to follow. The parts and tools were of good quality and I'm glad I decided to purchase from this site.

John Arnold Pragados -

Steps were easy to follow and the pictures were very helpful. Thanks for a great guide!

Christopher Hall -

The repair kit came very quickly. It said it would take 5 days but it arrived in 2! Very easy repair. I have shaky hands but I still had no issues. Following this guide it took me about 45 minutes to complete the repair and reassemble and calibrate the controller. The L button kept popping out of place but it was easy to put back. The joystick works perfectly now. The old one was very defective.

Thomas Haynie -

I changed the joystick out and it works perfectly, but the other buttons do not work at all. What have I done wrong?

janbaker03 -

I fix with this guide, thank you so much

But another joy con (right one) have MOVE SENSOR PROBLEM. I can’t play to “1-2 switch” for example.

There is a way to fix? Where is the sensor of movement ?

Thank you

Roberto -

Thank you for the guide! It works perfectly now!

Anthony Mendoza -

habe keine Erfahrung mit sollchen Sachen, aber es war mit dem iFixit Kit super einfach, die Anleitung auch sehr Hilfreich :)

romi3660 -

Thanks alot, my left stick drift problem is fixed… next one is my brother who has the same problem ; )

Rene Hadler -

Just completed replacing the stick; the kit was complete, the process was straightforward, and the instructions were great. However, when calibrating the stick, the ‘normal‘ range of motion of the stick does not quite touch the outer ring of the calibration grid in the up and left directions. If I press firmly, I can active the outer ring, but on my 3 stock sticks this can be done effortlessly. I don’t expect it to be a major issue, and it’s certainly an improvement over the drift, however I’m curious if this is normal or if there’s a defect in the part I received.

Jordan Clark -

Jordan, I’ve never heard of that issue before! Certainly not expected behavior, at least based on my experience. If it doesn’t affect the way you play, great! If it ever does though, reach out to customer service and they’ll get you a new one. Sounds like it could be slightly defective.

Taylor Dixon -

Thank you soooo much! Works perfectly! I didn’t break anything and I’m very happy :D

Right stick’s still horribly drifting though - time to fix that tomorrow!

Guthix -

Does opening the joycon void the warranty?

Jeremy Robledo -

Perfect guide. Start to finish was only about 15min too!

Anthony Laskowski -

Best bit about this guide isn’t the guide. It’s the Waluigi amiibo in Step 12.

Dr Weegee -

Great guide! One thing I noticed; I think the ribbon cable on the ifixit replacement joysticks is a tiny bit longer so it can seem quite buckled even when it’s fully inserted into the connector!

stjohnmccloskey -

Very helpful, i replaced the drifting stick without any problems.

Elisabeth Heine -

Well that was a lot easier than i thought. With the step by step instructions and the right tools this little project turned out pretty painless.

Christian Denis -

I dont have a repair kit so, how do i get the screws out without the repair kit?

Keaton Davis -

Hey, silly question. I'm probably missing something. Followed this slowly but surely (I didn't want to mess something up), but now my joycon won't dock / recognise when it's connected to the switch.

I don't think I touched anything relating to that. I've unpaired, repaired ect. Even gone in and checked that nothing relating to the charging / docking was impacted.

Thanks for the great guide btw!!

Bug Berrycloth -

Fixed the problem for about 2 weeks…. then the drift came back. The second Stick only took one week to get back to drifting… Just bought a pair of new ones in the end.

f.kiesau@googlemail.com -

Despite my fine motor disorder geschaft super instructions. I'm really convinced that everyone can repair many things themselves.

Thanks for this guide Keep it up.

Marcel Fischer -

Es funktioniert! ich bin froh das ich wieder vernünftig zocken kann.

Ich würde aber gerne vorschlagen zu beginn der Anleitung darauf aufmerksam zumachen, dass es eine Kalibrierung Funktionen für die Joy Cons gibt. Bevor man den ganzen Joy Con auseinander nimmt, sollte man doch testen, ob das Problem dadurch bereits behoben werden kann. ^^”

Ich beispielsweise wusste nicht (mehr) von dieser Funktion, und hab demnach erst im letzten Schritt davon erfahren xD

Ansonsten Anleitung hat funktioniert selbst für mich dem das gar nicht so gut liegt :) hab mir nur sorgen gemacht um den L-Button, da sich der bei mir ziemlich leicht gelöst hat. Aber da er immer noch geh, gehe ich von aus, dass das so muss! :D

loler1999 -

unfourtunatly i killed my joycon :( i broke the battery connector of the pcb so its useless now i guess, altough i tried my best to do it carefully its hard

bram verhulst -

If I have a JIS Driver set like this one :

JIS Schraubendreher-Set

(I bought it via the link in another Nintendo Switch repair guide on iFixit)

Which size of the screwdriver should I use when the guide specify a Phillips screwdriver?

Is Phillips #00 = JIS #00

PAWIT SOMMAI -

You’re correct, the numbered size of a Phillips screw corresponds to the same numbered size of a JIS driver. So a JIS #00 driver fits a Phillips #00 screw.

Adam O'Camb -

So I have two left joy-cons that have the drift issue. I ordered the IFIXIT kit and 3 extra joysticks (as backup in case any of my other controllers start malfunctioning). On both of the controllers, trying 3 of the 4 joysticks, they are constantly pulling to the left. I’ve tried updating the controllers and restarting the Switch, but the problem continues. I haven’t been able to get past the first step of calibration because the stick doesn’t seem to register any right direction movement. All other buttons on the controller work fine. Any idea of what could be going wrong?

Alexander Clifford -

Unfortunately the Switch not registering input during calibration seems to be a thing. Others (not me) have had success getting it to work by waiting a couple of minutes and/or touching the screen.

JP Moral -

P.A.R.F.A.I.T !!! J’ai réussi deux fois. Les outils et le tuto aident BEAUCOUP. Je suis vraiment fier de moi d’avoir réussi.

ch.guillamo -

Great guide. If it’s not clear at 2:12 in the video how to unlock the cable see Step 10. Replaced joysticks on two Joy-Cons. One is working perfectly but the other’s vertical neutral is off-centre.

JP Moral -

Thanks for the guide. This was just what I needed.

Bryson J Harrington -

Bought a joycon repair kit. It's coming in today. Gonna be my first time ever attempting a repair. Hoping that my 2 sets of joycons will work like new again!

devilz_girl_02_21_93 -

Very helpful!

Brian -

I successfully replaced the left joy con stick. However, while the joy con works wirelessly, the switch does not recognize when the joycon is attached to the system. What may I have done inadvertently?

Not Albert Einstein -

worked like a charm! Pluggin back in the cables was a little challenging for me because my hands are a little shaky :D

Now everything works perfect again! Thanks!!

Stefanie -

I fixed my joycon but now it won’t stop vibrating

Deerobyte -

Great guide, Taylor, thanks! I do want to mention that once you are inside the Joy-Con the fasteners are actually JIS #000, not Phillips #00. A Phillips #00 will work in a pinch, but it doesn’t fit well and can easily strip out the head of the screw. Thanks again!

Andrew Purkeypile -

So easy, thx ;)

Max Y -

It's my first IFIXIT repair and this tutorial is really good!

Thank you very much! (and thanks to the translators too, I followed it in french)

Kevin Robatel -

Just finished replacing my stick.

Really helpful, also I feel so satisfied ahahaha

Francesco Maria Poerio -

Hi, TY for the Manual great work ! I love you !

Joerg Schloemp -

Thank you for the step tutorial, it was easy to complete (with the right toolkit)!

Etienne Carton -

Question: what are the dimensions (in mm to 0.1 resolution preferably) of the plastic disc and shaft that the thumb pad wraps around? Diameter and thickness of the disc, and diameter of the shaft.

Brandon Piereder -

I broke the ZIF connector lock mechanism of minus button when reassembling the Joy-Con. The Joy-Con works fine and the minus ribbon seems to be sturdy enough without the lock. Do you think it's safe to continue using this Joy-Con? I'm worried that it could lead to short circuit that cause damage to the Switch console itself. I don't know if it's possible.

PAWIT SOMMAI -

Tutorial was great! Fixed up my joycon nice and quick-

Renzo -

Fantastic walk through, I was so worried about trying to find a replacement left joycon for my animal crossing console. Figured why not give this ago first and now I feel very accomplished. Thank you

Cait Hosking -

Watch out the spring under the shoulder botton. I suggest removing the shoulder botton with the spring manually before removing the stick, the spring may fly away during fixing.

Tar Seq -

It's amazing how a 6 dollar part and 20 minutes of effort can save so much money. Thanks for this excellent guide!

Travis Moore -

This probably would have been great if I got past disconnecting the battery. The socket popped right off. That ended that.

CedarTree -

For those out there on the older side. I used a desk magnifying glass for the ribbon and battery cable.

Rob -