Einleitung

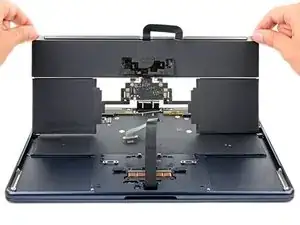
Use this guide to replace the battery in your MacBook Air 2022 (M2).

This repair requires replacement adhesive.

  1. lquDimvZWHVcGkIF
    lquDimvZWHVcGkIF
    MrBPlfJiyDeCh3Xy
    OCFESWwSM6pujQaM
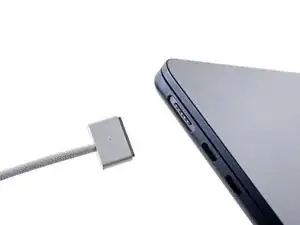
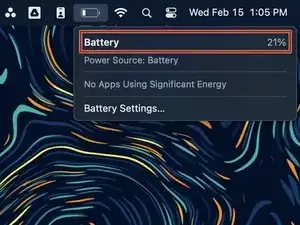
    • Before you begin, discharge your battery below 25%, as a charged lithium-ion battery can be dangerous if accidentally punctured.

    • Power off your MacBook Air and unplug all cables.

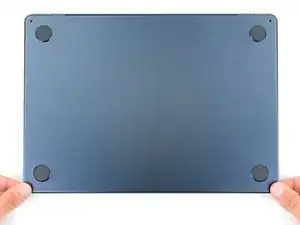
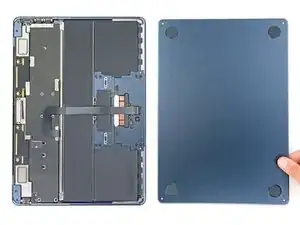
    • Close the display and flip the laptop upside down. Keep the lid closed until you've physically disconnected the battery.

  2. UU3OByKvXHdj5Y2H
    UU3OByKvXHdj5Y2H
    IiKX3lhcjAkhlYAf
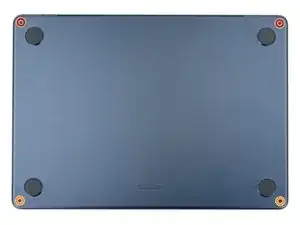
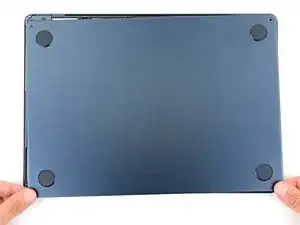
    • Use a P5 Pentalobe driver to remove the four 6.4 mm screws securing the lower case:

    • Two screws with a short threaded portion near the hinges

    • Two screws with a long threaded portion near the front of the MacBook

    • Throughout this repair, keep track of each screw and make sure it goes back exactly where it came from.

  3. dokINhbATeVrKXtr
    dokINhbATeVrKXtr
    TjUylLnpiHfWk2sV
    m6fVPUBtNhtoYYHl
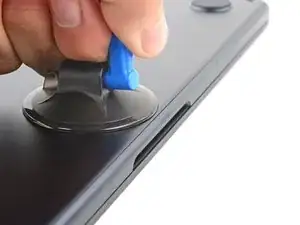
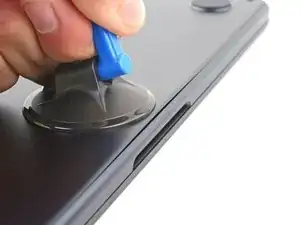
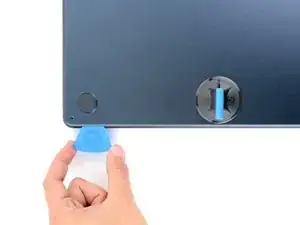
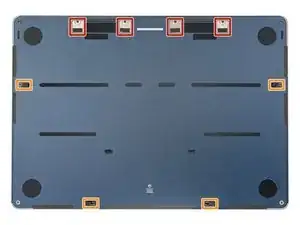
    • Apply a suction handle to the center of the lower case's front edge.

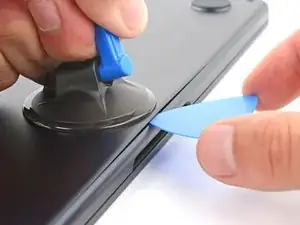
    • Pull up on the suction handle with strong, steady force to create a small gap between the lower case and the frame.

    • Insert an opening pick into the gap.

  4. r1PnvK4dFMUcPiZ6
    r1PnvK4dFMUcPiZ6
    UN3KWFRyx5POUqii
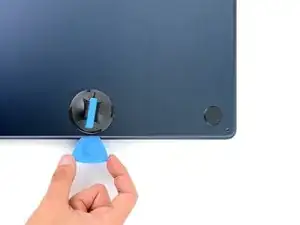
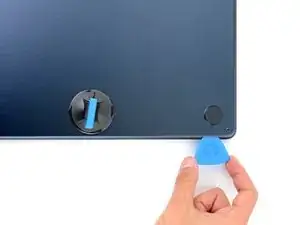
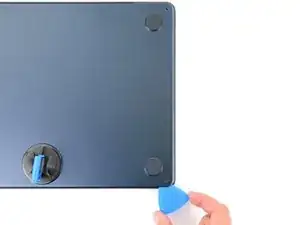
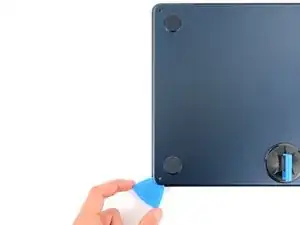
    • During each of the next four steps, you should feel and hear one of four clips pop free. If you don't, insert your pick farther and try again.

    • Slide the opening pick to the bottom right corner to release the first clip.

  5. KMrlRCsbYnMvsCqN
    KMrlRCsbYnMvsCqN
    Dg1ll1M2bPNmSLkK
    An5h56yp4uJiaFdl
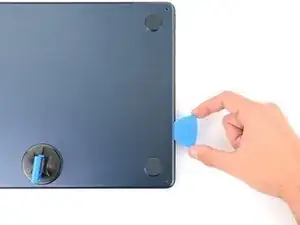
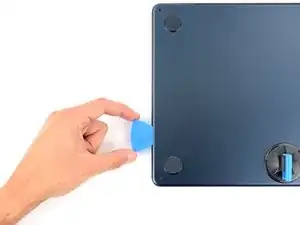
    • Slide the opening pick around the bottom right corner and three quarters of the way up the right edge to release the second clip.

  6. MRa4fHfEoRr5JYMB
    MRa4fHfEoRr5JYMB
    XwX31uUFXvSVQAYu
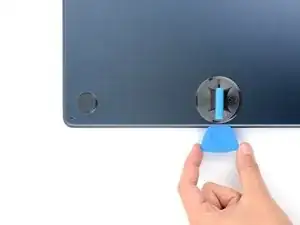
    • Insert the opening pick in the original gap created in the middle of the front edge.

    • Slide the opening pick to the bottom left corner to release the third clip.

  7. BZcYxSnwP3LMtOMu
    BZcYxSnwP3LMtOMu
    ToKEaQbPAPCvXQKB
    kNvutCH2F4W6dDSA
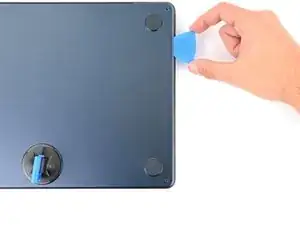
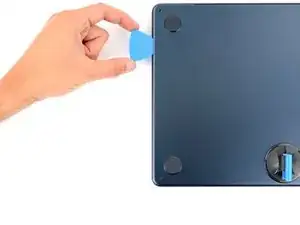
    • Slide the opening pick around the bottom left corner and three quarters of the way up the left edge to release the fourth clip.

  8. JxjCoOqbtL6riXKd
    JxjCoOqbtL6riXKd
    bXZHWpvubTHOOBVP
    AuNBkdMIobCVlYIC
    • Firmly pull the lower case away from the hinges one corner at a time to separate the four locking tabs.

    • Slide the cover—don't pull up.

    • This may require significant force. You should feel the tabs release as they unlock.

  9. FWeRBd2w3tTYyDWB
    FWeRBd2w3tTYyDWB
    dQ1idM13kbRF6NQC
    xiQGlvxvkRYsPqmh
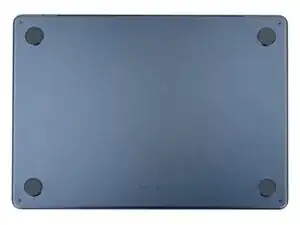
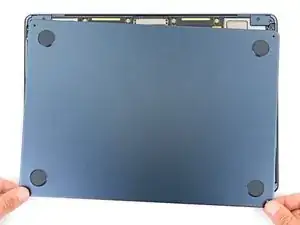
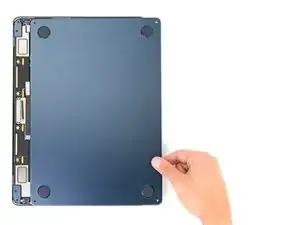
    • Remove the lower case.

    • To reinstall the lower case:

    • Set it in place and align the sliding tabs near the display hinge. Press down and slide the cover toward the hinge. It should stop sliding as the tabs engage.

    • You can see if the tabs engaged by looking under the lower case.

    • When the sliding tabs are fully engaged and the lower case looks correctly aligned, press down firmly to engage the hidden clips underneath. You should hear and feel four distinct clicks as they snap back into place.

  10. DP2BQNffNgdKM1dp
    DP2BQNffNgdKM1dp
    ZNVTusG4UytALFiu
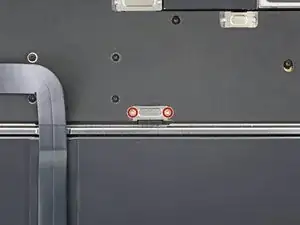
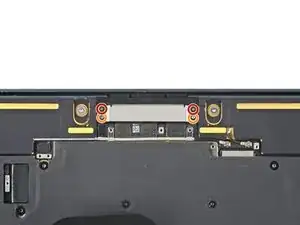
    • Use a T3 Torx driver to remove the two 1.5 mm screws securing the battery connector cover.

    • Due to screw variances, you may need to use a T4 Torx instead. Keep this in mind whenever you encounter T3 Torx screws during this repair.

  11. 2UVCE1lqOt3ViR3I
    2UVCE1lqOt3ViR3I
    JCSnLNLOpWoUBEM2
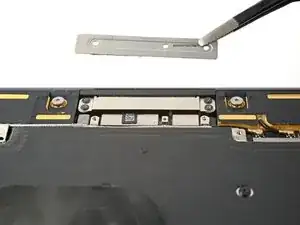
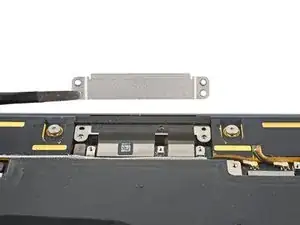
    • Remove the battery connector cover.

  12. TLUsv2wJrhFsJtLN
    TLUsv2wJrhFsJtLN
    TnjVCuugvheTD3RO
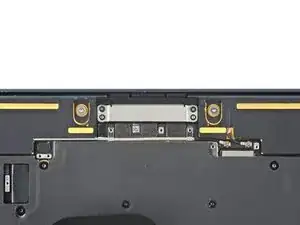
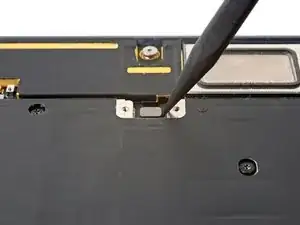
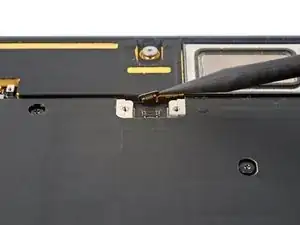
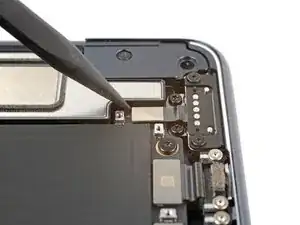
    • Use an opening pick to pry up and disconnect the battery connector.

  13. NSPxdeqtO1JUvbxB
    NSPxdeqtO1JUvbxB
    g41WQtMp5dLLJlDa
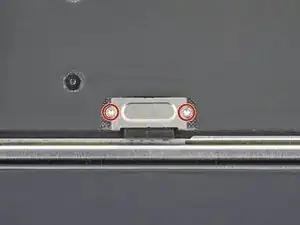
    • Use a T3 Torx driver to remove the two 1.5 mm screws securing the trackpad cable cover.

  14. tc4JdLh4FQjJvLAv
    tc4JdLh4FQjJvLAv
    IkHGQ2jCQ34fLaRM
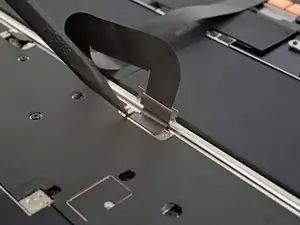
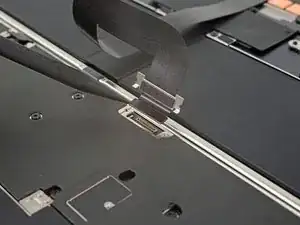
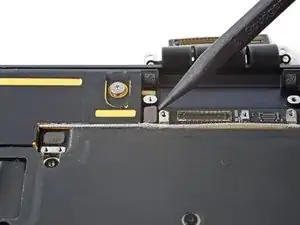
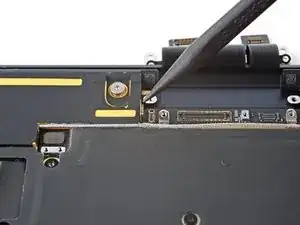
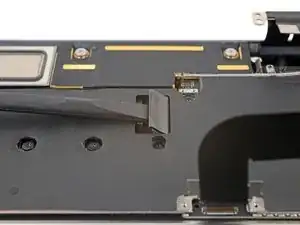
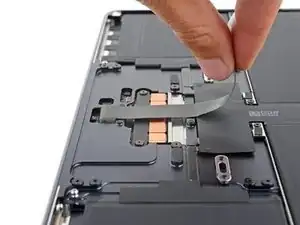
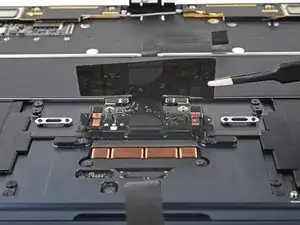
    • Use a spudger or your fingers to move the trackpad cable cover out of the way so you can access the press connector underneath.

  15. kDYIrfrnwEkqPsXa
    kDYIrfrnwEkqPsXa
    6CEOTmQeUPpoBYgX
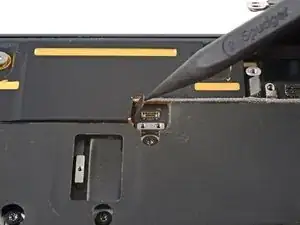
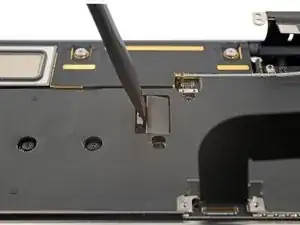
    • Use the pointed end of a spudger to pry up and disconnect the trackpad cable press connector.

    • To re-attach press connectors like this one, carefully align and press down on one side until it clicks into place, then repeat on the other side. Do not press down in the middle. If the connector is misaligned, the pins can bend and cause permanent damage.

  16. kebHJh5MREfKeChO
    kebHJh5MREfKeChO
    yXHTMYe5o5TVlUuK
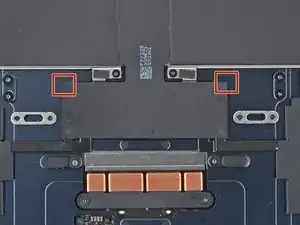
    • Peel up and remove the foam pad from the lower display cable cover to reveal a hidden screw.

  17. GhFFLpSVpKU1GbHZ
    GhFFLpSVpKU1GbHZ
    vbkVhjEc6TCmdgAB
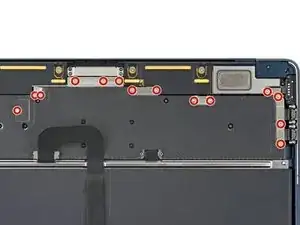
    • Use a T3 Torx driver to remove the fourteen 1.5 mm screws securing the various cable covers.

  18. tDoRqVthgyBwLuH3
    tDoRqVthgyBwLuH3
    oHIUcWZjosMSaTVL
    HqNZAhumpdONQSyj
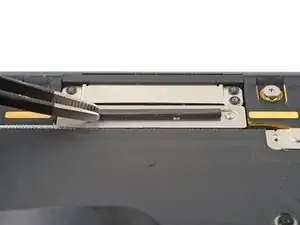
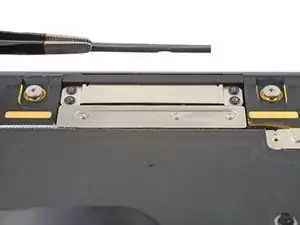
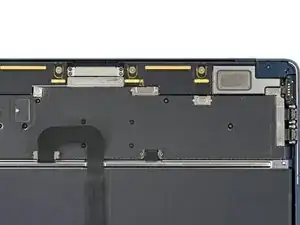
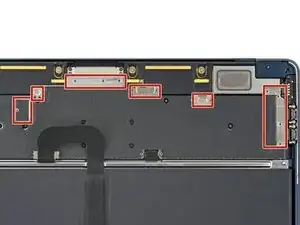
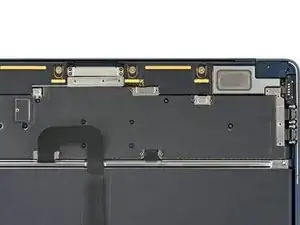
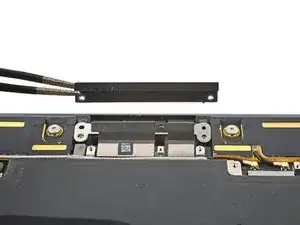
    • Use tweezers or your fingers to remove the six cable covers.

  19. Z6XJOeLQvSEoY6Ud
    Z6XJOeLQvSEoY6Ud
    OGUwoZfW3uyRNoFV
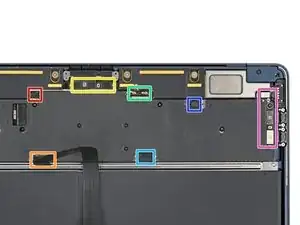
    • Remove the four screws securing the upper display cable cover:

    • Two 2.5 mm P2 Pentalobe screws

    • Two 2.5 mm T3 Torx screws

    • During reassembly, the Pentalobe screws must thread into their holes on the plastic securing bracket.

  20. yHBGcU5mdXnAjils
    yHBGcU5mdXnAjils
    vgZuC11qRkrJAUYZ
    • Remove the upper display cable cover and plastic securing bracket.

    • During reassembly, make sure that the upper lip of the metal cable cover slots into the plastic bracket.

  21. 2toVgNqvDjmp3LAX
    2toVgNqvDjmp3LAX
    uOGQURX1qQxBARDv
    4l1XKrQUMwR4N5cf
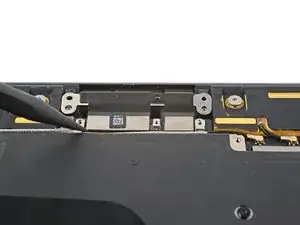
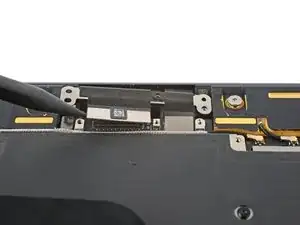
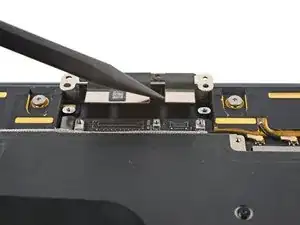
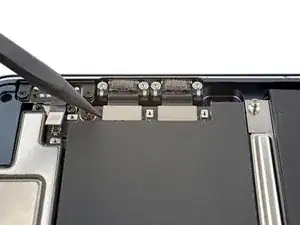
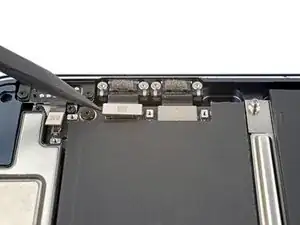
    • Use the pointed end of a spudger to pry up and disconnect both display cable press connectors.

  22. b2RpNaD1nCBYql1I
    b2RpNaD1nCBYql1I
    ZEA4KfDbu4ivGO4u
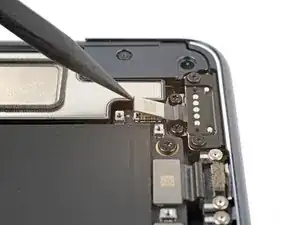
    • Disconnect the press connector directly to the left of the display cable.

    Does anybody know what this connects too?
    Is it part of the Holy Display Trinity (LCD LVDS, Backlight & Camera) or is this something else?

    OmeletteBaguette -

  23. ymENyfvnv5AZPwbg
    ymENyfvnv5AZPwbg
    ZOKpDPooXKV5tOCD
    B1dEUpq3UQEKtixJ
    • Disconnect the left and right speaker press connectors.

  24. rEFdiOaWA6wwqG4U
    rEFdiOaWA6wwqG4U
    voBjG5XYdgaORVuG
    • Insert the flat end of a spudger between the the interconnect cable and the screw post.

    • Pry up and disconnect the interconnect cable.

  25. vamcEeLCRiWvMHiq
    vamcEeLCRiWvMHiq
    WWEeHRitHGqKKQwF
    • Disconnect the MagSafe port press connector.

  26. SZqOLGRsDkkEBCeP
    SZqOLGRsDkkEBCeP
    TPZaqnAkKAanTQSP
    qXirh6KhTqPM5M6l
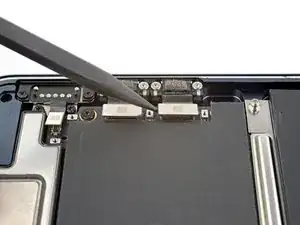
    • Disconnect both Thunderbolt port press connectors.

  27. WeItlAGWcdnimZFn
    WeItlAGWcdnimZFn
    IAMRqiVgPt1dyL2w
    SuGQA2tqHgPLTyE6
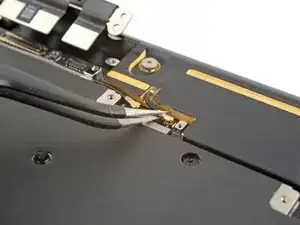
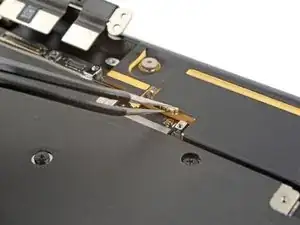
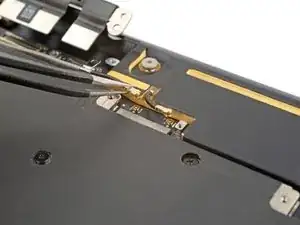
    • Use a pair of tweezers to grip the first antenna connector, as close to its base as possible.

    • Lift straight up to disconnect the cable.

    • The antenna connectors on the logic board are very fragile. When disconnecting the cables, pull straight up—don’t bend them to the side.

    • Repeat for the second antenna cable.

    • To reattach antenna connectors like these, align the connector over its socket and press down with the flat end of a spudger. The connector should snap into place. This can be tricky and may take a few tries.

  28. coVEVuHYQZMsRrpo
    coVEVuHYQZMsRrpo
    WYM1CHZKNjV3Jsos
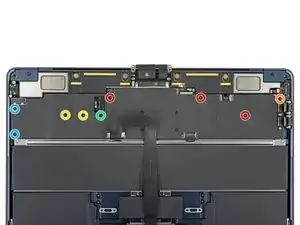
    • Remove the nine screws securing the logic board:

    • Three 3.8 mm T5 Torx screws

    • One 3.6 mm T5 Torx screw

    • Two 3.4 mm T5 Torx screws

    • One 3.1 mm T5 Torx screw

    • Two 2.7 mm T3 Torx screws

  29. uT2EkY2svYxs3igN
    uT2EkY2svYxs3igN
    uJsLXWNrEM5eDIJp
    xosit6DTBFMSEdJG
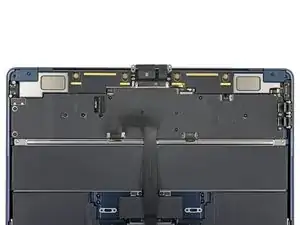
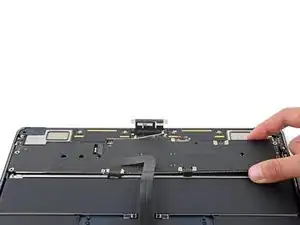
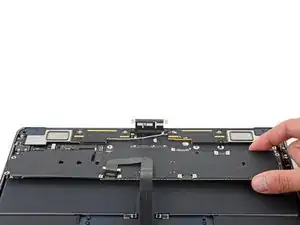
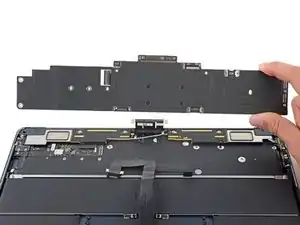
    • The logic board and its cover are connected and remove as one assembly.

    • The cover extends out from the logic board's left edge and bends easily. Don't pull the board up from this side.

    • Grip the right side of the logic board and slide it towards the trackpad until it clears the overhangs near the speakers.

    • Remove the logic board.

  30. R6bKkQ5A3tGPGDtd
    • When you reinstall the logic board, verify that no cables get trapped under the board as you lower it into place. Check each of the seven locations carefully:

    • Right speaker cable

    • Trackpad cable

    • Display cable

    • Antenna cables

    • Battery cable

    • Left speaker cable

    • USB-C and MagSafe cables

  31. 6K6NAaGuXfrWJsdD
    6K6NAaGuXfrWJsdD
    f6C1SNCcKtsusxnT
    i1jLAa2uWQ63LYVS
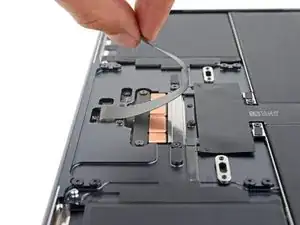
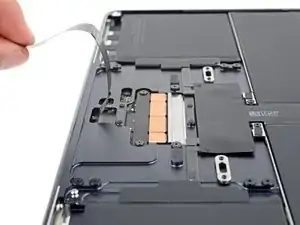
    • Small bits of mild adhesive secure the trackpad cable to the frame.

    • Gently pull up to detach the trackpad cable from the frame.

    • During reassembly, you may need to apply new adhesive if the old adhesive is no longer sticky.

  32. vECeeRHFn1m6TFyg
    vECeeRHFn1m6TFyg
    oPlwwZPXWHG2LEOu
    • A small amount of adhesive secures the right side of the battery cable to the frame.

    • Lift and detach the battery cable from the frame.

  33. hXmBcskyNwgvQdx2
    hXmBcskyNwgvQdx2
    rRAEBrnLFkP2Ppdy
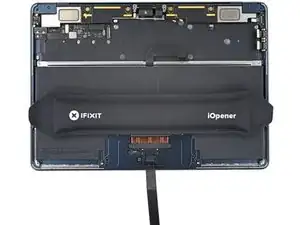
    • Heat an iOpener and apply it to the battery board plastic cover for two minutes.

    • You can also use a hair dryer or heat gun—but extreme heat can damage the battery, so proceed with care.

  34. hSXe2ruYFl3XdWJE
    hSXe2ruYFl3XdWJE
    4wBuIeJSGd4ggS5y
    cfnMiCjcpUhshefx
    • When using pointed or sharp tools near the battery, be careful not to slice or poke it. A punctured battery can leak dangerous chemicals or catch fire.

    • Use a pair of blunt nose tweezers or your fingers to gently lift the plastic battery board cover by one of its top corners until it completely peels away from the battery board.

    • Make sure you grip the plastic cover itself, and not any cables or the board itself underneath.

    • Fold the plastic cover up and away from the battery board—you don't need to remove it completely.

  35. K52y2KcSvUAhQGur
    K52y2KcSvUAhQGur
    d2GsLOhKO2vFcYtp
    ZXZAlVQAwMRWvD6p
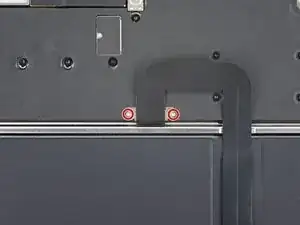
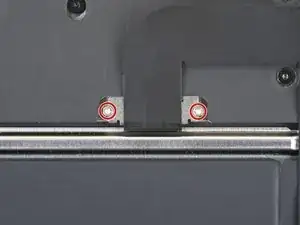
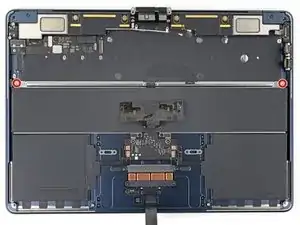
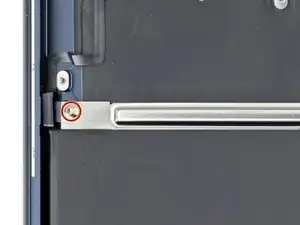
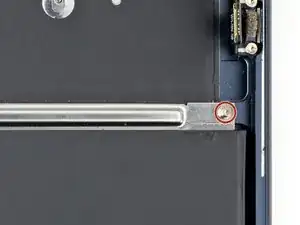
    • Use a T5 Torx driver to remove the two 4.5 mm screws securing the metal battery tray, one on each edge.

  36. XeXDArLcvxlLsJ1k
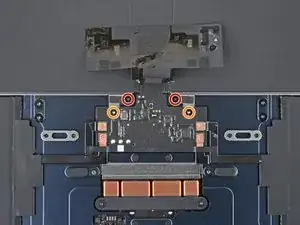
    • Use a T3 Torx driver to remove the four screws securing the battery board:

    • Two 2.5 mm screws

    • Two 1.4 mm screws

  37. i1tR4HbhHEGiubkg
    i1tR4HbhHEGiubkg
    HWZxCsNLoinovIGQ
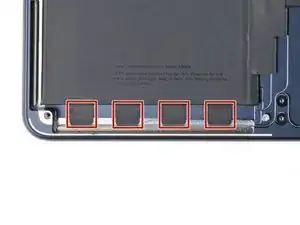
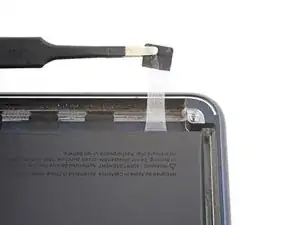
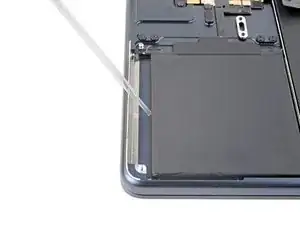
    • The MacBook's battery cells are attached to a metal tray as a complete assembly. This tray is secured to the frame by eight stretch-release adhesive strips:

    • Four on the bottom left corner

    • Four on the bottom right corner

  38. 4KmGATUUbOjZs4PP
    4KmGATUUbOjZs4PP
    xVLiIIvQVbSUPUUt
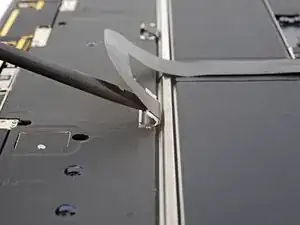
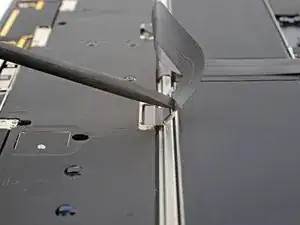
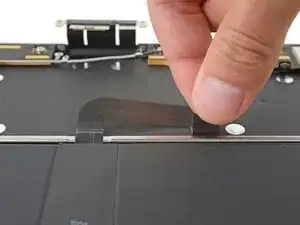
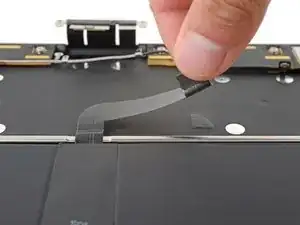
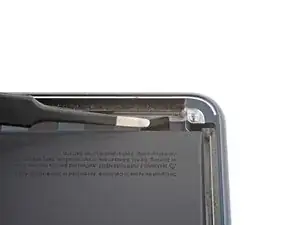
    • Use a pair of tweezers to peel up the black pull tab on one of the stretch-release adhesive strips until you can grip it with your fingers.

    • Pull the strip out from under the battery at a shallow angle. Go very slow and use steady force, giving the strip plenty of time to stretch and unstick itself from under the battery tray.

    • You may have to re-grip the adhesive closer to the laptop and continue pulling multiple times—the adhesive will stretch a lot.

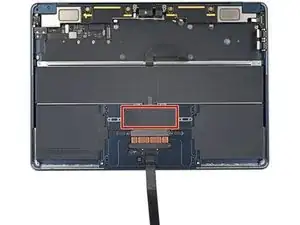
    • Pull the adhesive strip until it’s completely freed from underneath the battery tray.

    • Repeat for the seven remaining adhesive strips.

  39. BsOEjiAopNfClDSi
    • If you removed all the stretch-release adhesive, congratulations! You can skip the next two steps. If any strips broke and the battery is still stuck in place, follow the next two steps to remove the remaining adhesive.

    • Apply a few drops of high concentration (greater than 90%) isopropyl alcohol between the edge of the frame and the battery where any adhesive strips remain.

    • Wait one minute for the isopropyl alcohol to soften the adhesive.

  40. YVFV2vMGqBGCGIBx
    YVFV2vMGqBGCGIBx
    dpEPIYglivin1jrP
    51thJukjmXEnkTGo
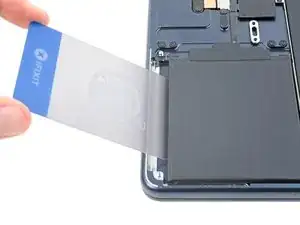
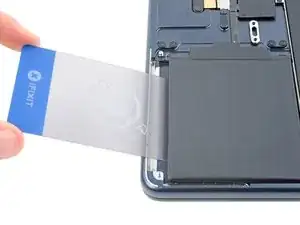
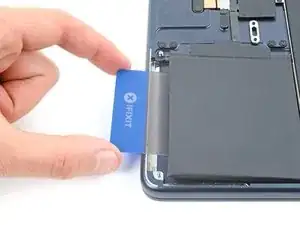
    • Make sure your plastic card is underneath the battery tray, and not between the battery and the tray. Don’t attempt to remove the battery cells from the metal tray.

    • Insert a plastic card underneath the battery's metal tray.

    • Push the plastic card underneath the metal tray and slide it back and forth to slice the remaining adhesive. You may need to lift the battery cell to reach the adhesive.

    • If you're struggling remove the remaining adhesive, apply more isopropyl alcohol and try again.

  41. BGU1SVFTbajFImuO
    BGU1SVFTbajFImuO
    GOsWPwbpGI23rJPp
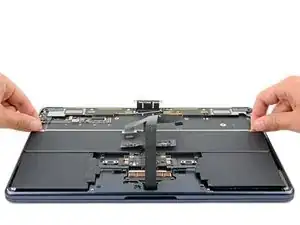
    • Remove the battery assembly.

    • During reassembly:

    • Clean up any remaining adhesive residue with a few drops of isopropyl alcohol and a clean cloth.

    • Before removing any adhesive liners from the replacement battery, place it in its recess to make sure it fits. Then, remove the adhesive liners and firmly press each cell into place.

    • If your replacement battery doesn't come with pre-installed adhesive, secure it with double‑sided adhesive such as Tesa Tape. Alternatively, you can cut and adapt stretch‑release adhesive strips to fit.

Abschluss

Compare your new replacement part to the original part—you may need to transfer remaining components or remove adhesive backings from the new part before you install it.

To reassemble your device, follow these instructions in reverse order.

If you're installing a new battery, follow the calibration procedure.

If you notice any unusual behavior or problems after installing your new battery, you may need to reset your MacBook's SMC.

Take your e-waste to an R2 or e-Stewards certified recycler.

Repair didn’t go as planned? Try some basic troubleshooting or check out our Answers community for help.
Spencer Day

Mitglied seit: 14/09/22

17445 Reputation

0 Kommentare