Einleitung

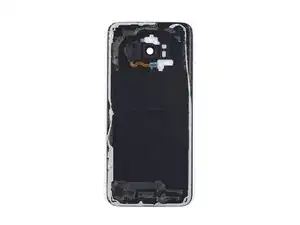
Diese Anleitung zeigt dir, wie du die rückseitige Kameraeinfassung und das Linsenschutzglas im Samsung Galaxy S8 Plus austauschen kannst.

Wenn dein Ersatzteil nicht mit Klebestreifen versehen ist, musst du welche für die Kameraeinfassung kaufen. Du kannst vorgestanzte Streifen oder starkes Klebeband verwenden.

  1. duTdVEZBbUxEgWTJ
    • Durch das Öffnen des Smartphones wird der Feuchtigkeitsschutz beeinträchtigt. Halte bei der Reparatur Ersatzklebestreifen bereit, oder achte in Zukunft darauf, dass das Smartphone keinen Kontakt mit Flüssigkeiten hat, wenn du die Klebestreifen nicht austauschst.

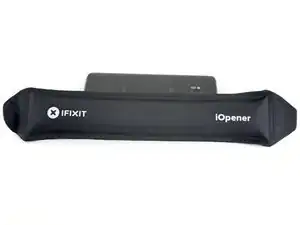
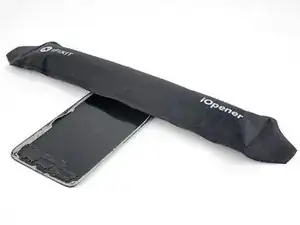
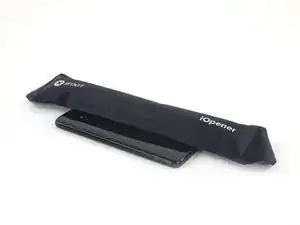
    • Lege einen erwärmten iOpener für etwa 2 min auf eine lange Kante des S8.

    • Möglicherweise musst du das mehrfach wiederholen, um das Handy warm genug zu bekommen. Schaue dir die iOpener Anleitung genau an, um nicht zu überhitzen!

    • Du kannst auch ein Heißluftgebläse oder eine Erwärmungsplatte benutzen. Achte aber darauf, dass das Smartphone nicht zu heiß wird. Das OLED Display und der Akku sind beide sehr hitzeempfindlich.

    • Während du darauf wartest, dass der Kleber aufweicht, lies den nächsten Schritt durch, um eine Idee davon zu bekommen, wo du das Werkzeug zum Hebeln ansetzen musst.

    What type of adhesive should be used to seal? Or better said, what would you recommend.

    Ion Ion -

    I’d recommend precut adhesive designed for the rear cover. If that’s not available, thin, hi-bond double sided tape like 1 mm wide Tesa 61395 tape will work well.

    Adam O'Camb -

    Yes, different microwaves have different power levels (e.g., wattage) so one microwave may explode the iOpener after 31 seconds of heating whereas another microwave will barely warm it. It would be helpful to have a more precise target temperature. My microwave is fairly weak so I’m heating it for seven seconds for every two minutes against the phone. In theory, this should slowly add more heat than is dissipated into the phone and surrounding atmosphere.

    Brett Stime -

  2. 5eQKL1LDDUEWN5JH
    5eQKL1LDDUEWN5JH
    Wn66wqWcB1PZWeQV
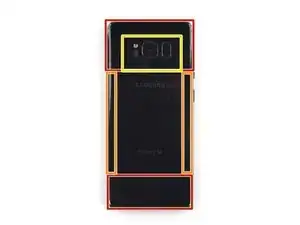
    • In den folgenden Schritten wirst du durch den Kleber um die Kante des Rückscheibe schneiden.

    • Im ersten Bild siehst du, wo genau der Klebstoff auf der Rückseite aufgebracht ist.

    • Der Klebstoff ist, von der Aussenseite des Handys aus gesehen, folgendermassen aufgebracht:

    • Dicke Schichten von Klebstoff

    • Dünnere Schichten von Klebstoff

    • Hier nicht hebeln, um den Fingerabdrucksensor zu schützen.

    Go clockwise (or counter-clockwise) around the border to avoid causing extra stress on the back. The bottom has a lot more adhesive than you think, towards the top-center.

    Michael M -

    Failing completely at this step. I’ve heated the opener like 5 times and the phone is hot to the touch, but I can’t get even the tip of the pick into the opening.

    r torrance andrews -

    Added a hair dryer to the effort and stil making no headway at all.

    r torrance andrews -

    Be careful. Insanely careful. If you think you are careful enough, this means you need to be even more careful. If you think it is not possible to be more careful, then be a little more careful and you might be able to remove the back cover without breaking it. Especially the bottom of the phone.

    pio -

  3. vQVjSJBeUsAvFFRY
    vQVjSJBeUsAvFFRY
    OSXJiDeoZlQkpUhv
    UHDguIARQ1sqnZdt
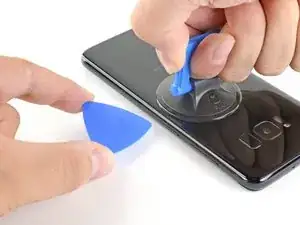
    • Wenn sich Rückseite warm anfühlt, setze einen Saugnapf so nahe wie möglich an der erwärmten Kante auf, ohne der abgerundeten Kante zu nahe zu kommen.

    • An der abgerundeten Kante kann der Saugnapf nicht gut fassen.

    • Wenn die Glasscheibe zerbrochen ist, haftet der Saugheber wahrscheinlich nicht so gut. Versuche sie mit starkem Klebeband anzuheben, oder klebe den Saugheber mit Sekundenkleber gut fest, bevor du weiterarbeitest.

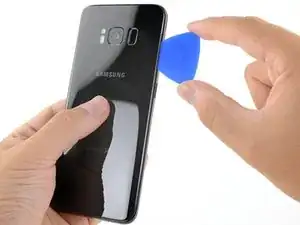
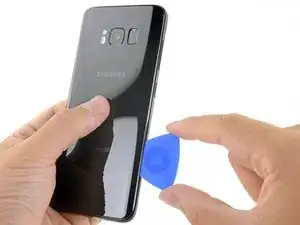
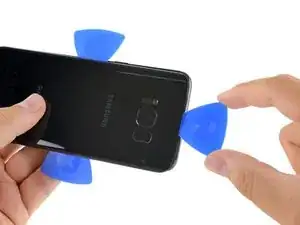
    • Ziehe am Sauger und schiebe ein Plektrum unter die rückwärtige Scheibe.

    • Da die Scheibe abgerundet ist, musst du das Werkzeug eher nach oben drücken, als parallel zur Scheibe einzuschieben.

    We can't seem to get anything between the edges even after heating the back panel. Any tips?

    Megan Kennington -

    Hi Megan, unfortunately the adhesive is super tough on this one. I’d recommend carefully continuing to apply heat, very gradually so that you don’t accidentally overheat the battery. Eventually you should be able to get a little gap with the suction handle.

    Adam O'Camb -

    I’ve been attempting to get the adhesive to loosen for four hours now. Exactly how much time is this supposed to take? The pictures makes it look like it should be easy. The adhesive still hasn’t budged and I’m beyond frustrated.

    Lori Lucas -

    Hi Lori, sorry to hear the adhesive is being extra stubborn! If reheating and reapplying the iOpener isn’t working, you can try heating the edge with a hairdryer or heat gun. That way you can get more heat onto the edge faster, but be very careful not to overheat the battery inside.

    Adam O'Camb -

    I used a stanley knife - very carefully, after trying for several hours to get the adhesive to loosen. I bought another back cover with adhesive for the assmbley, which is the best option in my opinion. Just be careful not the scratch the case of the phone, and be prepared for the back glass cover to break when removing it.

    James wright -

    The manufacturers really want to make this impossible, huh… I’ve gone 3 years without ever cracking this phone and end up cracking the corner of the back trying to prise it open. Probably should’ve gotten a heat gun too. This is super tight.

    Benjamin Chaim -

    I am currently working on this. I have heated the phone to just barely to hot to hold. No matter how many times I've done this and pulled up with a suction cup I cannot get an edge to lift.

    Being that this is my second phone repair does anyone have advice on this? I've watched several YouTube videos and it looks so easy.

    DAVID LAWRENCE -

    I suggest you try to lift on the middle of an edge using the thinnest spudger you have. also as the edge is curved remember to insert it so to follow the curve. Hopes it helps

    Cajuteq -

    Our issue was that a small gap would open when using the iOpener, but not large enough to get spudger or opening picks in there (also tried hair dryer but same result). Luckily as a guitar player I had some very thin nylon picks that we were able to get in there, which opened up a large enough gap to get the spudger and opening picks in. From there, we were able to heat the other sides and guide the spudger around the entire edge to get the back glass off.

    First we used a Dunlop nylon .38 mm guitar pick, then a .60 mm pick, and that allowed us to get the spudger in.

    Dan Coleman -

    This is by far the hardest part of any tutorial that requires you to open the Samsung. The iOpener is totally useless on my opinion (it doesn’t get warm enough). What I did instead is use a hairdryer but it took me time before I could get the adhesive soft enough. Especially since I was not able to measure the temperature of the phone will warming it. Also I think that the halberd is not thin enough so I used a radiology sheet (don’t know the right word in English) to get into the phone and it was much more effective and time saving. Thank you for the tutorial and good luck !

    Thomas Alliot -

    Use a utility knife blade to work around the edges. Careful not to pry on the blade since you risk cracking the back

    Derek Gibson -

    I bought a back glass replacement kit with the battery kit since mine was cracked already. I used both iOpeners to uniformly heat the whole back along both long edges. I microwaved each pack twice over 10 mins. 5 mins apply, microwave, 5 minutes apply. That worked!

    William Mellema -

    Similar to other posts, this appeared simpler. I have a couple of tube socks filled with rice that we use a lot for a sore back. Put in microwave for 5 minutes and an amazing heat pack. So I thought I would try this instead of the iOpener as it just was not getting the phone warm enough. Wrapped the phone in the riced-filled-tube sock for a couple of minutes, to the point where I could at least pick it up and hold it. Also, I have the full IFIXIT kit, so I pulled out the jimmy. Viola. Got right in and then allowed me to use the halberd and picks to finish it off.

    kendrickcc -

    I was able to do this with the iOpener warming pad by microwaving for the suggested 30secs then leaving it on for 10 mins. repeated this process 2 more times for a total of 3 times @ 30 mins and used the suction tool and the picks to get it open. There is a considerable amount of adhesive on the tops and bottoms of the phone. So consider warming the whole phone before doing it.

    Note: if you already have a cracked back panel (like me) prior to starting the process, consider getting the replacement as the already cracked panel will crack even more as you are cutting away at the adhesive. Goodluck!

    Harry Williams -

    After over an hour of trying to use heat and the suction tool loosen the adhesive and try to get an opening on one of the edges, I used the blue spudger to see if it would slip thru the edge and it did. I was able to loosen the majority of the back glass but ended up getting excited and rushing and cracked the top corner. I was able to complete the battery replacement and use the cracked back glass. I’m going to order a replacement for that and that should be easier. Lesson to be learned, if any part of the back glass is getting a little tougher to loosen, hit it with heat again just to be safe. The rest of the replacement we pretty straight forward.

    MJH -

    The spudger provided in ifixit repair tool kit is not the same as the one used in this guide and can not be used in the same way as the spudger used in this guide. So I am pretty much winging it on the most critical point of this disassembly. This is extremely frustrating.

    Brent Neilson -

    I’ve repaired many iphones but this was my first attempt on a Samsung. I made no headway at all on opening the case and I’ve decided to just live with the battery being kind of weak. Even with a short life, I would much rather use this phone than an Iphone.

    r torrance andrews -

    I've tried 5 times in over the course of 4 hours to loosen the adhesive on this phone, and it won't budge. Unfortunately this kit is useless to me

    Emily Reese -

  4. PNGgVsAfoHFKoGAW
    • Wenn das Werkzeug gut unter der Scheibe eingeschoben ist, erhitze den iOpener wieder und lege ihn auf um den Klebstoff aufzuweichen.

    svmesung is onoff and

    moo rayner -

  5. Ra1HfyL4GLKUMNiv
    Ra1HfyL4GLKUMNiv
    YqA1NY5ZQjWZxjhq
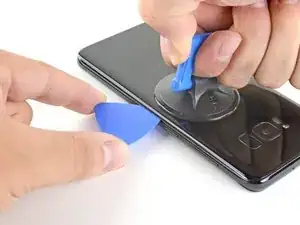
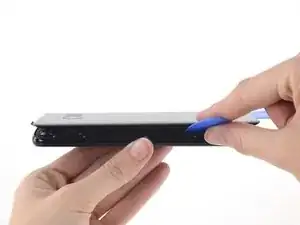
    • Schiebe das Plektrum an der Seite des Smartphones herunter, um so den Klebstoff zu lösen.

    • Arbeite langsam und sorgfältig, damit das Werkzeug nicht aus dem Spalt herausrutscht. Wenn es schwierig wird, musst du den iOpener nochmals erwärmen und wieder auflegen.

    Cracked my glass multiple times, do this very slowly and with more heat to each new area.

    Gary Mirams -

    Second on cracking the back glass. Go slow and apply heat to each side before trying to pry it open.

    Adam Huber -

  6. OkWBOCRUFBMDlSOt
    OkWBOCRUFBMDlSOt
    UEWtmZmdPuMkc2Ys
    NFji3IRvGGDBQGw1
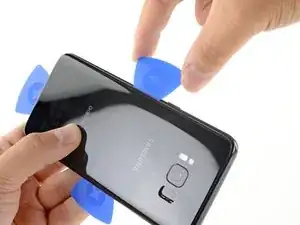
    • Wiederhole das ganze Verfahren (Erhitzten und Lösen für die restlichen drei Seiten des Smartphones.

    • Lasse jeweils ein Plektrum auf jeder Seite während du mit der nächsten weitermachst, um zu verhindern, dass der Klebstoff wieder alles zusammenklebt.

    Petite erreur: le guide dit iPhone au lieu de S7 :)

    Nicolas Duthilleul -

    Bonjour Nicolas ! Merci pour la remarque ;-) Nous l’avons prise en compte et corrigé la traduction. La prochaine fois, n’hésitez pas à corriger directement en cliquant sur le bouton Traduire en haut à droite de l’étape.

    Claire Miesch -

  7. hUxsLOovT41ViJfH
    hUxsLOovT41ViJfH
    Dqamr2XLMUMVtgvs
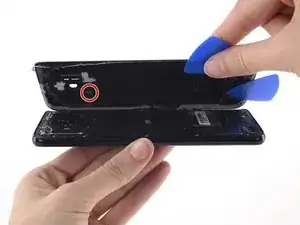
    • Das Kabel des Fingerabdrucksensors verbindet das Handy mit der Rückscheibe in der Nähe der Kamera. Das Kabel ist sehr kurz und löst sich beim Entfernen der Rückscheibe.

    • Wenn du die Scheibe anhebst, schaue unter der Scheibe nach, ob das orangene Kabel mit dem blauen Stecker wirklich gelöst ist.

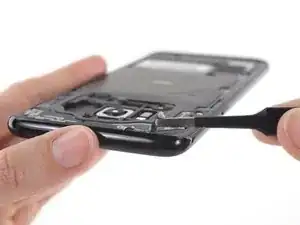
    • Mit dem Plastiköffner kannst du durch eventuelle noch vorhandene Klebstoffreste fahren und das Handy leicht öffnen.

    • Falls das Fingerabdrucksensorkabel festklemmt oder gespannt ist, öffne das Handy nicht weiter. Löse zuerst mit der Spitze eines Spudgers den Anschluss bevor du weitermachst!

    • Wenn du beim Zusammenbau das Kabel des Fingerabdrucksensors wieder anschließen willst, musst du erst die Rückabdeckung so in Position legen, dass der Stecker genau in den Anschluss passt. Drücke ihn dann mit dem flachen Ende des Spudgers fest nach unten, bis er einrastet.

    • Entferne die Scheibe vom Handy.

    For reassembly, if the fingerprint scanner is removed from the back cover: it’s much easier to place the fingerprint scanner in the small compartment on the back of the phone, connect it and then finally put the replacement back cover on. The adhesive on the inside of the back cover will get connect to the fingerprint scanner and hold it tightly.

    Brian Hoffmann -

    I wish I saw this comment earlier because it's absolutely correct. I hope iFixit remedies this because it is incredibly difficult to connect the sensor when it's already adhered to the glass. It took me a good while and I ended up using some tape to keep the back glass aligned while I used the spudger to push blindly until it snapped into place. The only way I knew it worked was because I tested the sensor before fully sealing the glass.

    Preston Steimel -

    The NFC antenna and coil assembly might get stick to the back cover due to adhesive spreads while trying to pry the back cover to open the phone. Take a look inside to ensure the assebly has not got sticked. If so, try using a credit card like plastic to get it peeled of from back cover without breaking the assembly always paying attention to the fingerprint sensor as well.

    dcode -

    Reconnecting this cable seems like it would be very tricky: how can you get the pieces close enough together to make the connection without having the perimeter adhesive start to connect the front and back? It seems like that adhesive could easily get messed up at this point.

    r torrance andrews -

    To remove the akku, high temperature was NOT constructive!! I used ethanol (cc.) instead and it worked in between 2 minutes. I think it´s also better to open the coverage in this way. Instead of heating it.

    Franz Gassner -

  8. litWaKDHCNVRXhyM
    • So wird die neue Rückscheibe eingebaut:

    • Ziehe alle Klebstoffreste mit einer Pinzette vom Rahmen des Smartphones ab. Reinige dann alle Klebeflächen mit hochkenzentriertem Isopropylalkohol (mindestens 90%ig) und einem fusselfreien Tuch, so dass sie gut für den neuen Kleber vorbereitet sind.

    • Ziehe die Schutzfolie von der neuen Rückscheibe ab, richte eine Kante der Scheibe sorgfältig am Rahmen aus und drücke die Scheibe am Smartphone fest.

    • Wenn du die alte Rückscheibe wieder befestigen, oder eine Rückscheibe ohne vorinstallierte Klebestreifen einbauen willst, dann folge dieser Anleitung.

    • Bevor du die neuen Klebestreifen befestigst und festklebst, solltest du dein Smartphone einschalten und alle Funktionen testen.

    • Wenn du willst, kannst du die Rückscheibe auch befestigen, ohne den Kleber zu erneuern. Entferne größere Klebstoffansammlungen, die verhindern, dass die Scheibe gut aufliegt. Nach dem Einbau der Scheibe solltest du sie erwärmen und festdrücken, damit sie gut festklebt. Sie wird nicht mehr wasserdicht sein, aber normalerweise hält der Kleber gut.

    • Vielleicht musst du auch die Kameraeinfassung auf dein Neuteil übertragen. Folge in diesem Fall unserer Anleitung zum Tausch der Kameraeinfassung.

    Bonjour,

    Vous parlez d’ajouter de l’adhésif, comment et où le trouve-t-on cet adhésif ?

    Difficile à appliquer ?

    Cordialement,

    Stéphane

    Steph D -

    Mille excuses, je viens de voir les “adhesive strips” :)

    Steph D -

    I broke the rear glass trying to get all the adhesive off! Be very careful!!

    jimhunz -

    Be careful with the NFC Antenna/Charging Coil Assembly. It’s covered in a black wrapping that can look like adhesive. Don’t scratch too hard with the spudger, the wrapping will come off!

    Michael M -

    Hello, I appreciate that tuto, very detailed for a somewhat subtle job . Is it possible to use one of the 7000 or 8000 glues in place of the adhesive Stickers ? Thanks

    Isaac OLEG -

  9. QWqWcMXBaYPWRqZM
    • Erwärme einen iOpener und lege ihn mindestens zwei Minuten lang auf die Kameraeinfassung oben auf der Glasrückseite.

    • Möglicherweise musst du den iOpener mehrmals erwärmen und auflegen, damit das Smartphone heiß genug wird. Folge der Anleitung für den iOpener, um eine Überhitzung zu vermeiden.

    • Du kannst auch eine Wärmeplatte, ein Heißluftgebläse oder einen Haartrockner benutzen. Achte aber darauf, dass das Gerät nicht zu heiß wird und irgendwelche Plastikteile schmelzen.

  10. rk3MtUj3MWkYUAlI
    rk3MtUj3MWkYUAlI
    6jGBQ6nOwuvDWwgr
    e56YFGKF3ZnLtiuD
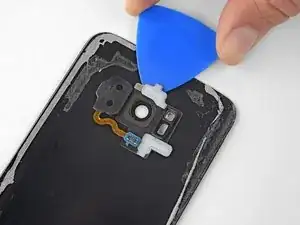
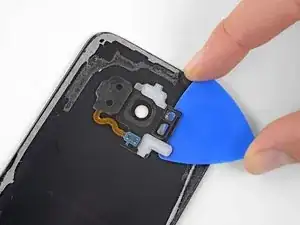
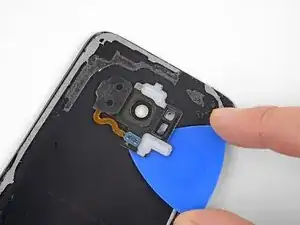
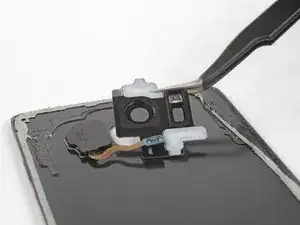
    • Setze ein Plektrum unter die Oberkante der rückwärtigen Kameraeinfassung ein.

    • Schiebe das Plektrum um die Kanten der rückwärtigen Kameraeinfassung herum und trenne den Kleber auf, mit dem es an der Glasrückseite befestigt ist.

    • Heble nicht an der Seite, die sich am Fingerabdrucksensor befindet.

  11. KIqVUEmQ52QRuoUB
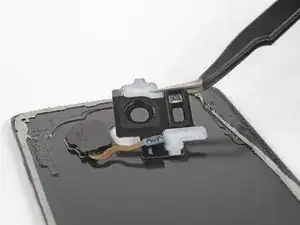
    • Hebe die Kameraeinfassung mit einem Plektrum oder einer Pinzette von der Glasrückseite weg.

    • Achte darauf, dass sich die Kameraeinfassung beim Entfernen nicht am Kabel des Fingerabdrucksensors verfängt.

    • Wenn du noch Widerstand verspürst, dann schneide eventuelle Kleberreste mit einem Plektrum auf.

  12. SKMsyIyFUbDLyKBS
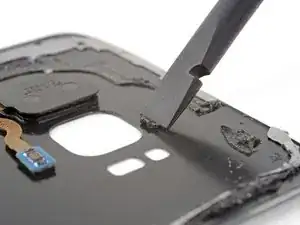
    • Schabe mit dem Spudger alle Klebstoffreste, die noch von der Kameraeinfassung verblieben sind, von der Glasrückseite ab.

    • Reinige die Klebeflächen mit hochkonzentriertem Isopropylalkohol (mindestens 90%ig) und einem fusselfreien Tuch. Wische in eine Richtung, nicht hin und her. So bereitest du die Klebeflächen für den neuen Kleber vor.

  13. mJONbY2ZUIAYjABJ
    mJONbY2ZUIAYjABJ
    KdlyEcfbsKOB2pVK
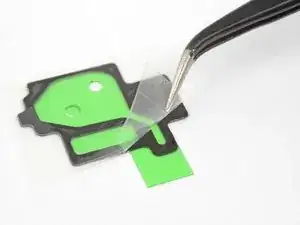
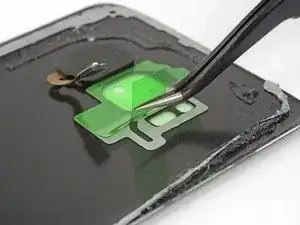
    • Ziehe die durchsichtige Schutzfolie vom Klebestreifen der Kameraeinfassung ab, so dass die Klebefläche auf einer Seite freigelegt wird.

    • Richte sehr sorgfältig die Ausschnitte für die Rückkamera und den Blitz auf der Innenseite der Glasrückseite mit den entsprechenden Ausschnitten im Klebestreifen aus.

    • Setze den Klebestreifen auf die Glasrückseite ab, er darf auf keinen Fall über die Kanten der Ausschnitte für die Kamera und den Blitz herausragen.

    • Drücke den Klebestreifen mit dem Finger oder dem Spudger fest, so dass er gut am Glas haftet.

    • Wenn dein Ersatzteil nicht mit vorgeschnittenem Klebeband versehen war, dann benutze starkes doppelseitiges Klebeband, wie z.B. Tesa 61395, oder Stücke einer vorgestanzten Klebefolie, um die Kameraeinfassung zu befestigen.

  14. jeNFWL4WmuSLKQok
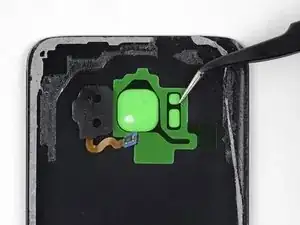
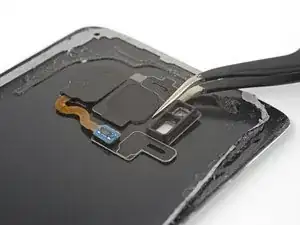
    • Ziehe die grüne Schutzfolie vom Klebestreifen ab. Der Klebestreifen darf sich dabei nicht vom Glas ablösen.

  15. YPu4F6W255ul5TsM
    YPu4F6W255ul5TsM
    IElDZKUyiG3FKiIY
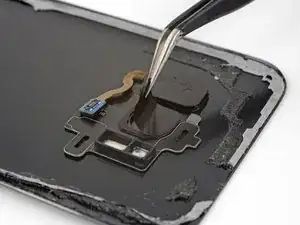
    • Richte sorgfältig die rückwärtige Kameraeinfassung im Ausschnitt in der Glasrückseite aus und setze sie auf der Klebefläche. Achte darauf, dass die Seite mit der überstehenden Linsenabdeckung zur Glasrückseite zeigt.

    • Achte darauf, dass die Linsenabdeckung ganz in ihrem Ausschnitt in der Glasrückseite sitzt, so dass die Kameraeinfassung flach auf dem Glas aufliegt.

    • Drücke mit dem Finger die Kameraeinfassung 30 Sekunden lang gleichmäßig fest, so dass der Kleber gut haftet.

    • Bevor du die Glasrückseite wieder einbaust und das Smartphone zuklebst, musst du die schwarze Schutzfolie von der gläsernen Linsenabdeckung abziehen.

Abschluss

Um dein Gerät wieder zusammenbauen folge den Schritten in umgekehrter Reihenfolge.

Bringe deinen Elektroabfall zu einem zugelassenen Entsorger.

Hat deine Reparatur nicht den gewünschten Erfolg gebracht? Auf unserem Antwortenforum kannst du Hilfe bei der Fehlersuche finden.
Adam O'Camb

Mitglied seit: 11/04/15

178852 Reputation

0 Kommentare