Einleitung
This replacement guide will instruct you how to replace a burnt out surge fuse within your speaker, which is located on the motherboard. Before doing anything, be sure to safely discharge the capacitor using this guide.
Werkzeuge
Ersatzteile
-
-
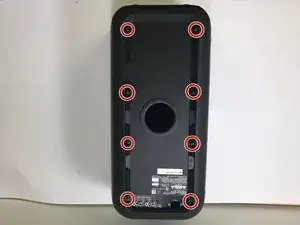
First, remove the eight screws on the speaker's back panel. These screws should be located on the top and bottom corners of the back, as well as along the sides.
-
Remove the 7.5 mm Phillips-head screws using a Phillips #1 screwdriver with a J sized head.
-
-
-
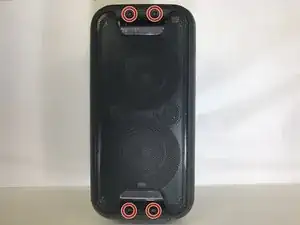
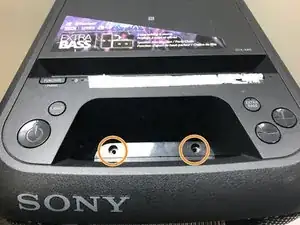
Next, remove 4 more 7.5 mm Phillips-head screws on the top part of the speaker (where the power buttons and extra BASS buttons are located). Two of the screws are located on the underside of the handle and are hidden beneath black rubber covers. Remove the covers and use a Phillips #1 screwdriver to unscrew the screws.
-
The remaining two 7.5 mm Phillips-head screws are located on the base of the indented section of the speaker, pictured here. They are also hidden beneath black rubber covers. Repeat same process in removing the screws.
-
-
-
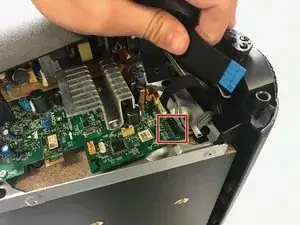
Gently lift up the entire top plastic section of the speaker. Do so slowly, the section is still connected to the circuitboard by a belt.
-
Gently remove the belt from its junction on the board, and after doing so the top plastic casing of the speaker will be fully detached.
-
-
-
Additionally, the sides need to be taken apart. You will need to take out 4 additional 7.5 mm Phillips-head screws on either side. These screws are located beneath larger grey pads with adhesive on them at the side corners of your speaker.
-
Remove the pads slowly, as the adhesive makes them tougher to remove and you do not want to rip them.
-
Use an opening tool to help take out the side shell from the rest of the speaker.
-
-
-
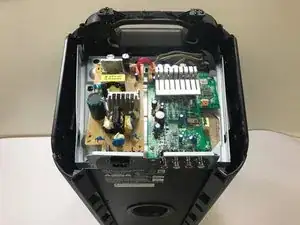
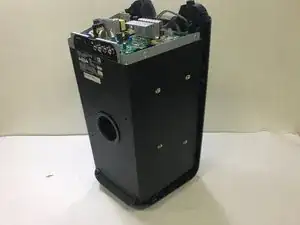
The speaker should now be stripped of its basic shell except for the bottom and front panels.
-
You have now disassembled the top casing of your speaker and you are prepared to make replacements of components!
-
-
-
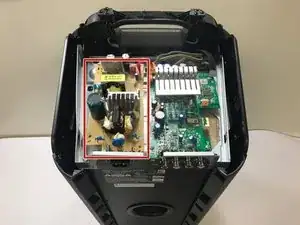
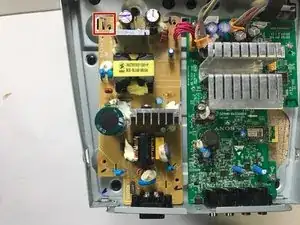
Find the gold-yellow daughterboard, located underneath the top plastic housing of the speaker.
-
-
-
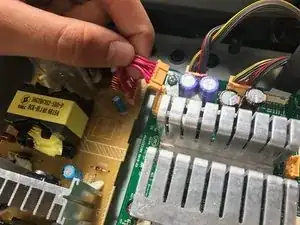
Remove the belt connecting the daughterboard to the motherboard by gently removing the yellow clip from its housing on the motherboard.
-
-
-
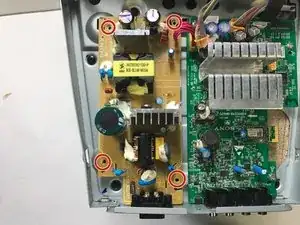
Remove the four 6.4mm phillips head screws located at each corner of the daughterboard with a Phillips head screwdriver.
-
-
-
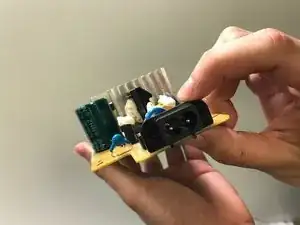
Gently slide the entire daughterboard towards the frontside of the speaker, unhooking it from the prong that keeps it in place.
-
The daughterboard is free to be fully removed. You are now prepared to replace or make replacements components on the daughterboard!
-
-
-
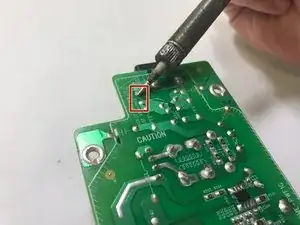
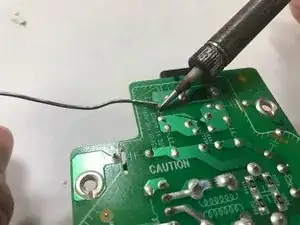
Flip the daughterboard over and desolder the fuse from it's position on the circuit. If you would like more information on the technique to soldering, refer to this link.
-
You are now prepared to replace the surge fuse in your speaker!
-
To reassemble your device, follow these instructions in reverse order.

