Einleitung

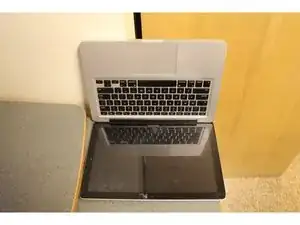
Diese Anleitung zeigt dir, wie du die Glasscheibe deines Displays am MacBook Pro austauschen kannst.

  1. 2PFIb2wpvehTetlH
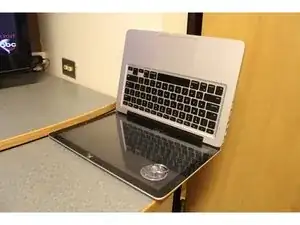
    • Richte dir einen Arbeitsplatz mit allem Nötigen ein. Natürlich brauchst du das MacBook Pro, die neue Scheibe, einen Haartrockner, ein Mikrofasertuch für Glasreinigung und einen Saugnapf.

  2. pxrhaKB5Rt6tQFaF
    pxrhaKB5Rt6tQFaF
    e3bfYwyPDSiqg2Q3
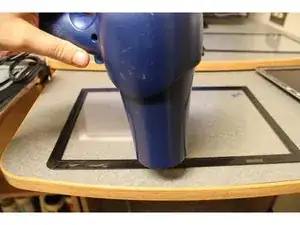
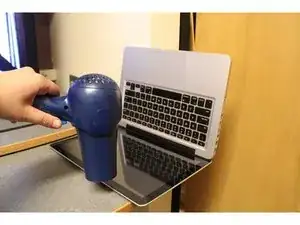
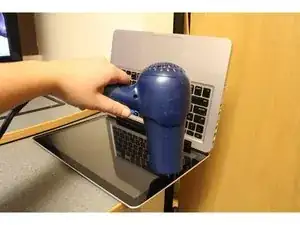
    • Erwärme die Klebeverbindung rings um den Rand des Displays mit einem Haartrockner.

    It would be very helpful if someone gave us a hint as to how hot to get the glass before the adhesive releases fairly easily. I didn't get it quite hot enough, I think, as it was a bear to get it started to release. My glass was pretty badly smashed around the iSight camera, and that part was a b*tch to get off. I was worried about damaging the LCD or some other component in the lid by getting it too hot.

    Can anyone give us some further tips on this point?

    jiclark -

    I agree with jiclark. How hot should you get this? This instruction set is poorly written. I heated mine up beyond being able to touch the housing and the adhesive would not release. It melted the rubber surround though… THANKS ifitit.com You just BROKE IT!

    Nunov Urbiznes -

    You have to read the tutorial before doing it. If it doesn't fit with your problem, you are the only person responsible.

    Kevin Bonvin -

    Nunov is correct, this tutorial makes this repair look a lot simpler than it really is. A hair dryer is not the correct tool, as Nunov stated, it will melt the rubber before the glue releases the screen. Check out this video to see how difficult this repair can actually be. You’ll have to ignore the language and the bird (really annoying). https://www.youtube.com/watch?v=_cbvZ2id...

    Ransom Valley -

    I just melted the rubber inside the Mac Screen And broke my LCD. My glass, ironically, is still very intact.

    I cannot in good faith recommend that anyone try the steps.

    I feel like this guide was written so that they could say that they've made a guide.

    Kevin McCartney -

    I am here to help. First, this is advanced procedure and requires very steady hands and patience - most people don’t have that and will make a small error that ruins the entire job. I’ve installed cat stereos and worked on computer stuff for many years. Okay, so let’s talk tools. You will need a hair dryer. It is best to have one with a blower attachment. This funnels the hot air into a long horizontal funnel that is about 4 inches wide and 1 inch tall. Perfect for heating a specific small area. The next tool you’ll need is a set of car stereo installation wedges. These are plastic wedges designed for jobs just like this one. The plastic does not damage or scratch and is sharp enough to lift and cut through adhesive (I had to use a Dremel sander to make mine sharper because it was used for other projects). Now, the top is extremely difficult. I recommend starting on the top left corner. Your goal is to get the corner lifter and wedge under……..(continued)

    Dustin Curtis -

    (under)…the glass AND the glue ribbon. If this is achieved, begin going down the left side from top to bottom. Go across the bottom. I went all the way across but that was is easy to damage the lcd by touching it with the plastic wedge. Be mindful of the wedge and lcd. Work is small areas of 4 inches long when heating and lifting. The top area around the camera is a challenge. There is a metal plate covering the camera and mic. If you succeed in keeping the glass mostly whole and intact, this will help. Mine was shattered to !&&* around the camera - very challenging. As I worked I used a handheld vacuum with a brush attachment. The glass shards will scratch the screen underneath. Be careful! Use a static free cloth to get excess fish and glass off before the reinstall. Hope this helps.

    Dustin Curtis -

  3. Vm3UiKFROMw26tWP
    Vm3UiKFROMw26tWP
    ucIkBMDPboQCsxi1
    3dXt2IpgPKcOcGDD
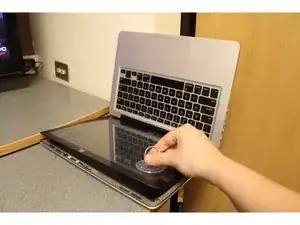
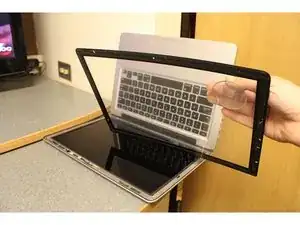
    • Im Repair Kit von iFixit findest du einen Saugnapf. Drücke diesen in der Ecke deiner Scheibe vorsichtig an, bis er sich festsaugt. Ziehe dann die Ecke nach oben.

    Another GARBAGE step. If you are having to replace a broken screen how on earth will a suction cup work. The screen is cracked so it can’t make suction. Way to go ifixit.com replacing a good screen with another good screen to show how to do something. You are a joke!

    Nunov Urbiznes -

    Omg, changing a glass is not that easy. This tutorial is mage by a member of the community, it's not an official iFixit one. So please, be smart and read more about your problem next time.

    MacBook Pro (13 Zoll, Mitte 2010, Unibody) Displayglas tauschen

    Kevin Bonvin -

    The only way I was able to get through this step was to take a syringe And inject acetone In between been the now obliterated rubber gasket.

    I cannot in good faith recommend that anyone try the steps.

    I feel like this guide was written so that they could say that they've made a guide.

    Kevin McCartney -

    Absolute cobblers - anyone who has done this repair knows it doesn’t come out that easy!!!!

    Chris Hadley -

  4. k3PySZuZFGriTWGH
    k3PySZuZFGriTWGH
    DZRGrDeFCWqlYiRP
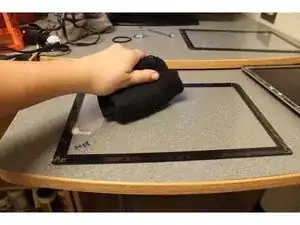
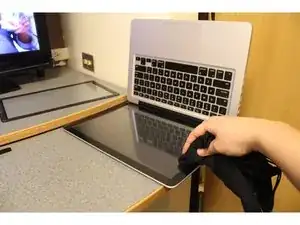
    • Reinige die neue Scheibe gründlich mit dem Mikrofasertuch bis keinerlei Spuren darauf zu sehen sind.

    • Reinige insbesondere auch die Innenseite der Glasscheibe, sie ist ja später nicht mehr zugänglich.

  5. RKeHqBwf2AW1RmfH
    RKeHqBwf2AW1RmfH
    UtdwsF2YKIaYbDOr
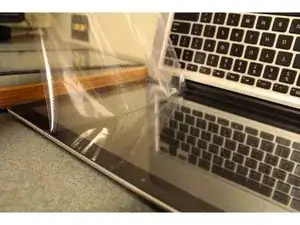
    • Ziehe die Schutzstreifen über dem Kleber am Rand der neuen Scheibe ab.

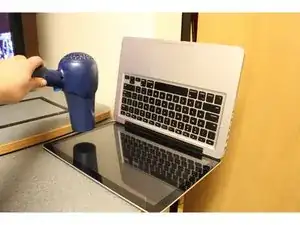
    • Erwärme den Kleber gleichmäßig mit dem Haartrockner.

  6. HuCWe4uIYq3W2FaP
    HuCWe4uIYq3W2FaP
    euKFmmGY5iUeXyg6
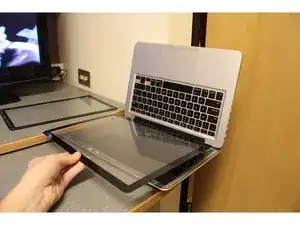
    • Setze die neue Scheibe vorsichtig an ihren Platz. Achte genau darauf, dass sie parallel zu den Kanten des MacBook Pro ausgerichtet ist.

  7. SUKR5AHlZDpFAgPg
    SUKR5AHlZDpFAgPg
    Y1tOAJKVkJEMDoeY
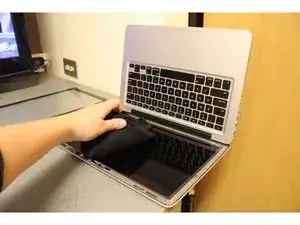
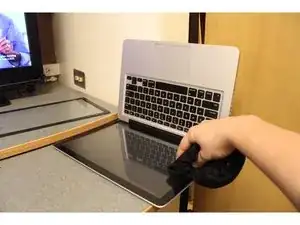
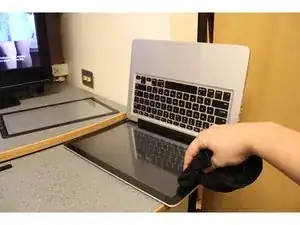
    • Drücke die Ränder der neuen Scheibe sorgfältig mit dem Mikrofasertuch ringsum fest.

  8. Y4BgGYDxGNA3PnM4
    • Ziehe die Schutzfolie von der Scheibe ab.

  9. uNjXr1oCBqKMHuGH
    uNjXr1oCBqKMHuGH
    bELi5NTqTQUYsPpP
    wYkF6Xl1jelhOFMv
    • Damit der Kleber sicher festhält musst du nochmals ringsum die Ränder mit dem Haartrockner erwärmen.

  10. RSiZQX4gGixuDfdv
    • Drücke dann nochmals ringsum mit dem Mikrofasertuch die Ränder sorgfältig fest.

  11. ngRvsrLPmvO5yYCc
    • Und nun kannst du dich an deiner neuen Scheibe erfreuen!

    comment faire pour ajuster la can après le changement d’écran, quand on l’ouvre l’image est toute flou ?

    Sylvain Cyr -

Abschluss

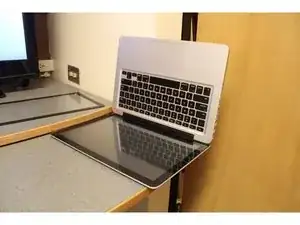
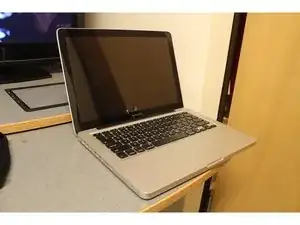
Das Displayglas deines MacBook Pro ist nun wieder nagelneu!

Akh1913

Mitglied seit: 16/10/15

1261 Reputation

19 Kommentare

How did you know the correct part number for your specific MacBook? Where did you source the glass?

frightanic.com -

I sourced my glass this eBay seller: http://www.ebay.com/usr/beetstech?_trksi...

To find the correct part, I followed iFixit's "ID your Mac" prompts in the parts store, then selected the glass panel from the list of compatible parts.

Hope this helps!

Noah Smith -

Is it useful for internal crack

tiffanyts -

FYI, OWC (Other World Computing, aka macsales.com) has the 15-inch glass for $25, and the 13-inch for $24:

https://eshop.macsales.com/item/Apple/MB... (15-inch)

https://eshop.macsales.com/item/Apple/MB... (13-inch)

…and I just discovered they even have the 17-inch:

https://eshop.macsales.com/item/Apple/MB...

One last comment: get the glass as hot as you can!

jiclark -
Does this work for the Late-2013 Retina MacBook Pro (15-inch)?

Brian Shiau -

There’s a rubber seal, or bumper around the outside of the glass, does the new screen get pressed under that rubber or does it just sort of fit within it? Anyone have unexpected difficulties with this?

johnocarney -

looks like it stays behind if you check the close-ups on step 6

Adam Tolley -

hello where can i find a new Screen Glass for my MacBook Pro Retina 15-inch Mid 2014 ?? can anyone help me please ??

sebastian.buchheit -

you can find it for about 15 bucks on amazon

David bellows -

Just to confirm, replacing the glass will fix the issue with the delaminated screen that is a known issue for this model of macbook pro

David Emerson -

Does this work for mid-2010 13” MBP unibody?

Edward Meyer -

Whatever you do, check the camera wiring is safe inside it’s groove. I just broke a glass because the wire wasn’t inside the groove when I pressed down. I’m a dumbass!

Dave Watkin -

Just replaced glass on a 15” unibody mid-2012 MBP. Great tutorial! Shattered glass (like mine was) seemed much trickier to remove (can’t get a good suction on cracked glass, and it keeps cracking during removal). Also, it would have been helpful to know about how long to use the hair dryer for those steps.

Paul Keew -

Before proceeding, readers really need to check the comments, and also get a 2nd opinion - such as from YouTube videos of other users, and the actualy article created by iFixit Staff Writers: MacBook Pro (13 Zoll, Mitte 2009, Unibody) Displayglas tauschen

The title of this article is unfortunately vague enough so that it attracts a lot of views from search engine results - even though it only applies just to the MacBook Pro 13-inch Unibody A1286 model - and not other models like the MacBook Pro Retina or (shudder) Touchbar. The actual iFixit staff-written guide is also limited to show under the replacement guides of the 2009 & 2010 variants of the A1286 MacBook Pro 13-inch Unibody even though the screen and front glass are constructed the same as each other for the subsequent years (2011 - 2012). Finally - this process is actually tricky enough to challenge experienced glaziers & repairers - so it needs a panel of writers & technicians to collaborate with a proper guide.

Jon T. -

WARNING: Do not melt your function keys with the hair dryer… Yup, you’re welcome.

Simon Holmes -

I was spraying windex on the screen rather than on a towel and wiping and some of the windex must have trickled down to some screen electrical component. Now I just have a grey screen. This is probably not the type of screen replacement I need.

Timothy Holmes -

Does this work for a MacBook Pro Retina 13”, early 2015? I cannot find the glass replacement for this model so i assume it is not.

Xabier -

I can’t manage to find the glass for the 13 inches 2015 early either ….

bogdanel1000 -

I have an Apple MacBook Pro 15 inch Mid-2015 MacBookPro11,4 A1398 MJLQ2LL/A. I think it’s a Retina Unibody model. The display glass isn’t broken but the glue has come off. Can I re-glue the glass this way? Do I have to remove it as illustrated above? Or can I just re-glue it by warming it up? I’m afraid the adhesive is on the whole display surface.

Toni Catany -