Einleitung

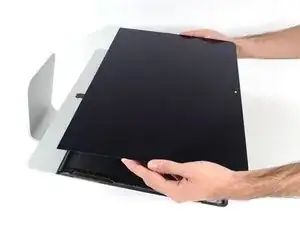
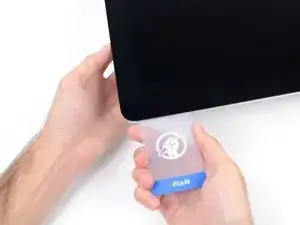
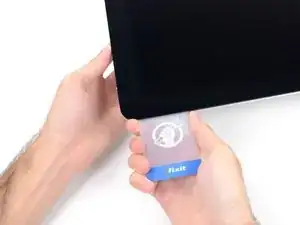
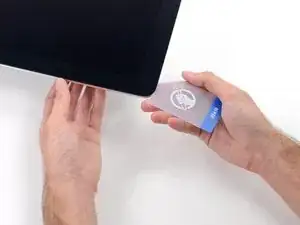
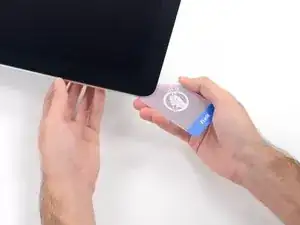
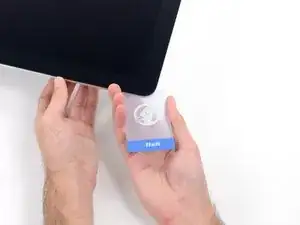
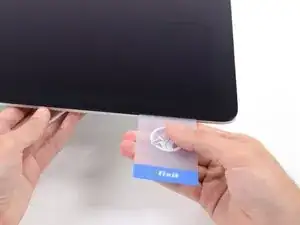
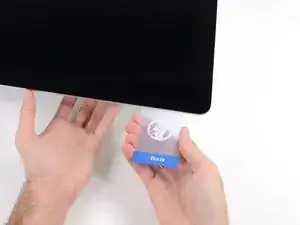
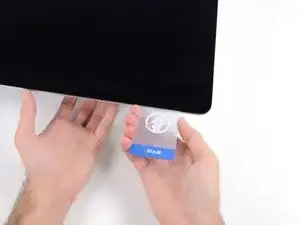
Diese Anleitung zeigt dir, wie du das Display austauschen kannst.

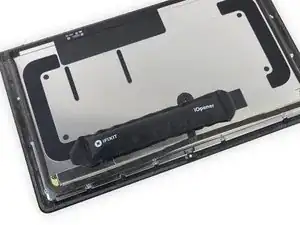
Bei dieser Reparatur wird zunächst das defekte/kaputte Display ausgebaut und dann das Displaydatenkabel und der Thermosensor auf das neue Display übertragen.

  1. SrDNTSYqyhGMRNDC
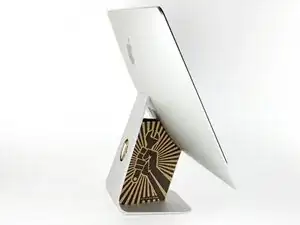
    • Mit einem frei beweglichen Gelenk kann der iMac unkontrolliert pendeln, das macht es schwer an ihm zu arbeiten. Es geht leichter mit einem iMac Service Keil, es kann aber auch ohne ihn durchgeführt werden.

    • Wenn du die iFixit-Reparaturhilfe aus Karton verwendest, dann baue sie zuerst mit Hilfe dieser Anleitung zusammen.

    • Bevor du beginnst an deinem iMac zu arbeiten: Ziehe den Netzstecker, drücke und halte den Ausschaltknopf für mindestens zehn Sekunden. Dadurch werden die Kondensatoren im Netzteil entladen.

    • Sei sehr vorsichtig und berühre nicht die Leitungen oder Lötstellen an den Kondensatoren auf der Rückseite der Platine des Netzteils. Fasse diese nur an den Kanten an.

    The wedge is an extremely tight fit for this model. I was worried that the amount of force needed to use it as shown might damage the stand, so I used it with the long side down instead. It worked fine that way and didn’t need anywhere near as much force to insert.

    roberttrevellyan -
    Here’s a good YouTube vid on upgrading the RAM: Can a Normal Person Upgrade the RAM in the 2017 21.5" iMac?

    Dan -
    Here are a couple tips from me:

    1) Expose the adhesive to extreme temperatures. I did this by transporting my iMac in my car, screen-down on a piece of cardboard on a cold February morning (in Chicago). When I went to pick up the iMac, the screen practically fell off the chassis. I would have been distraught by this if I hadn’t already planned this replacement. So it was a happy accident.

    2) Remember to expell the residual power from the power supply by pushing the power button while the iMac is unplugged. This does NOT guarantee it’s safe to touch, but when I accidentally brushed the solder and exposed capacitors, I didn’t get shocked.

    jerrid_foiles -
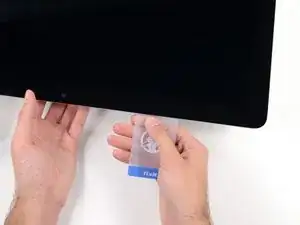
    Instead of using the wedge, I placed the iMac faced up with the top side (web cam) facing me while I ran the pizza roller around. It worked out great!

    Sam Fung -
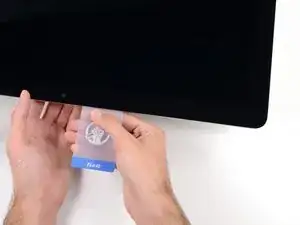
    “All iMacs also come with a traditional hard drive” mine doesn’t!! it’s HDD bay is completely empty, no SATA cable or anything. I guess I’ll have to upgrade the PCIe SSD instead.

    Chris Hughes -

    There is no replacement glass for this model, it is part of the LCD and impossible to remove or replace- the entire LCD has to be replaced unfortunately if the glass is cracked or damaged. You will have to Google search for a replacement. Also be careful with some of the lock tight tork screws as I broke one of my screw mounts taking one out.

    Phil Tesone -

    I used this service wedge but also found it a very tight fit. The same stabilization can be achieved by using a big rolled up towel.

    Ernst -

    While this is a good instruction guide, I recommend to also look at OWC’s instruction video about drive installation, before starting the exercise. Those install videos are very detailed and useful.

    Ernst -

    Main advice: TAKE YOUR TIME with the pizza roller.

    Make several passes, until you really feel like there's no more sticker in the way. Stay away from the camera though (approx. 1inch / 2.5cm on both sides). This will reduce the work left with the plastic card. Adhesive is really on the edge of the screen so there is absolutely no need to go any further than the recommended 1cm / 3/8inch depth.

    Where are the sensitive parts?

    Facing your iMac, imagine you're looking at a watch. There are antennas on 1, 2 and 4 o'clock. Do not insert any metal piece there (nor anywhere else, btw). Other than that AND the screen cables underneath the camera, not much danger.

    Froggy Manny -

  2. QPZ14vf5mNSObPx1
    QPZ14vf5mNSObPx1
    1KAQXZNy65Y1ferW
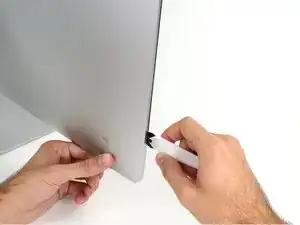
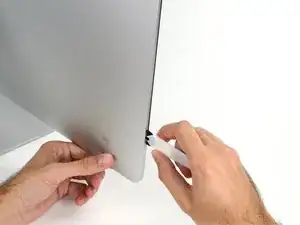
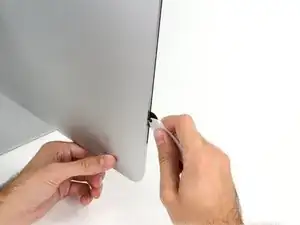
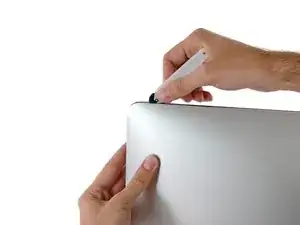
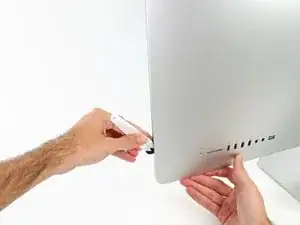
    • Setze das iMac Opening Tool an der linken Seite des Displays, in der Nähe des An/Aus Schalters beginnend, in die Spalte zwischen Glaspanel und Rückgehäuse ein.

    • Die Achse am iMac Opening Tool verhindert, dass du es zu tief einschieben kannst. Wenn du ein anderes Werkzeug verwendest, musst du aufpassen, dass du es nicht tiefer als 9 mm in das Display einschiebst.Sonst riskierst du ein Durchschneiden der Antennenkabel, was zu ernsthaften Schaden führen kann.

    Don’t get too worried about starting exactly where the picture says. The glue is stronger in some parts so just start wherever is easier and then work slowly and patiently around in the direction shown.

    Richard Cook -

    As this guide doesn’t cover replacing the adhesive strips, I found referring to the following was useful (noting that it’s not for the same model of iMac, so the modification they mention wasn’t necessary): IMac Intel 21.5 "EMC 2544 Klebestreifen ersetzen

    Alan Digby -

    It is very easy to crack the glass in front of the LCD during this step. I used the guitar pick, maybe it was too thick… crack is just on the frame but anyway it is disappointing :(

    Nikolay -

    This part of the exercise should be done with extreme patience. I took my sweet time with the opening tool, rolling it through the entire panel and enclosure gap over and over again, until I was very sure no parts were sticking together anymore. And when I thought I was I done, I decided to do it over again.

    Ernst -

    You can "warm up" the adhesive before try to cut it with the tool using a hair dryer. Heat the edges for about a minute, keep moving it so you don't cause stress in the glass. Also the above note.. use the tool and then the cards. Do not use a guitar pick or other objects as the thickness will cause you to break the front glass, which is a bonded part of the display (expensive).

    Carl Schultz -

  3. SdaoaCo1EmiD4NqV
    SdaoaCo1EmiD4NqV
    eOsvYmvle2iDrZvZ
    LS2Bi6uDXDmSSIOJ
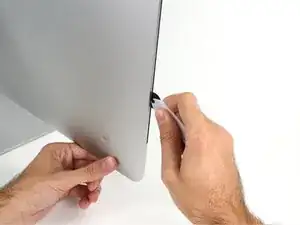
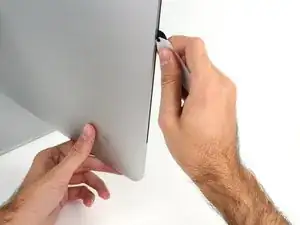
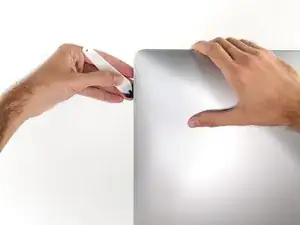
    • Benutze es wie einen Pizzaschneider - Rolle es entlang des Spalts und trenne dabei den Klebeschaum in der Mitte.

    • Achte darauf, dass du es immer mit dem Handgriff hinter dem Schneidrad führst. Wenn du ziehst, kann sich das Rad aus dem Griff lösen.

    • Lasse das Werkzeug die linke Seite des Displays entlang laufen.

    Erreur de traduction: "de bas en haut" et non de" haut en bas" sur le côté gauche de l'écran

    Moreau -

    If re-opening a screen that was opened and re-attached using iFixit’s adhesive strips, I would strongly recommend heating it first with an iOpener, heat gun or hair dryer. 20 minutes after attaching with the iFixit adhesive I tried to open it again with the pizza slicer to fix something and cracked the screen on the left-hand side.

    plasticpool -

  4. r1eMkSSjJdpmWr1B
    r1eMkSSjJdpmWr1B
    d6iAMVdqVUdnvYnD
    PsnDnjYNWucTLycx
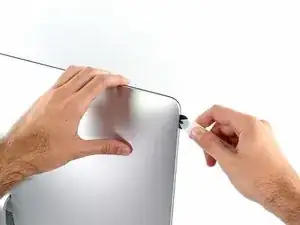
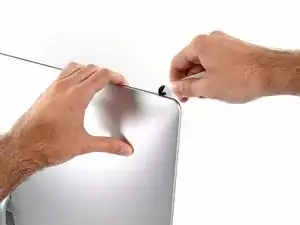
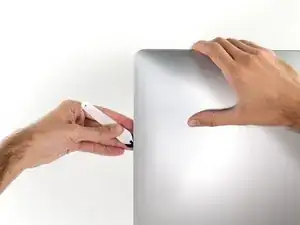
    • Fahre fort und lasse das Werkzeug um die obere linke Ecke laufen.

    Ne pincez pas l’écran avec l’autre main. Vous exercez une pression inutile sur le verre et empêchez la roulette de couper le joint.

    phfoglia -

  5. sZNVaGR3f2vruyLS
    sZNVaGR3f2vruyLS
    HDO3QbYuc4krqwHX
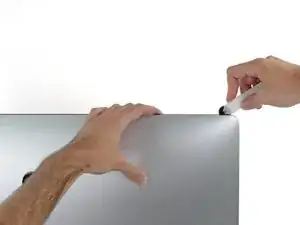
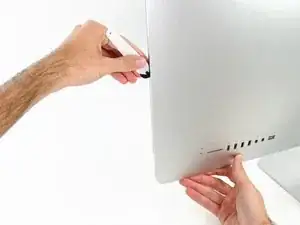
    • Schneide die Klebeverbindung entlang der oberen linken Seite des Displays auf.

  6. vSKcLcMFSZoPp6Gp
    vSKcLcMFSZoPp6Gp
    uiuQPD3lViaQODlB
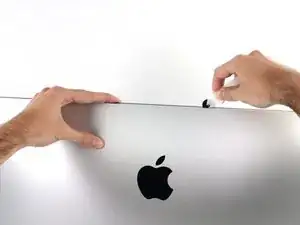
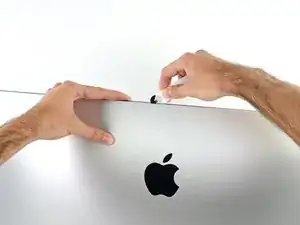
    • Fahre an der Oberseite des Displays fort.

    • Du kannst das Werkzeug mehrmals hin und her schieben. So trennst du so viel wie möglich von der Klebeverbindung auf.

    In this step can I cut along the display without make any damage to the front camera?

    arisnordico -

    Hi! Actually - there is no need to cut the tape around the camera area - there is no tape to cut at all! And so, the way go is easy - just pass 10 mm to the left and to the right from camera and start cutting!

    P.S. Just did the whole procedure to replace a RAM and to add SSD on PSIe an hour ago! Seems to be different reading the instructions... you know - 2/10 and so on. But it's really not that hard, trust me. I'll give it 5/10.

    P.P.S. By the way there is one trick to pass the difficult steps. Any action which requires pulling smth (motherboard, speaker, power supply unit) from the narrow crack (or should i say - slit?) at the bottom of your Imac is really not so easy.

    And the trick is to first remove a thin metal stripe with some kind of insulation on it which held by 5 small (very small!!) screws at the bottom of your Imac. After you done it - it's easy to pull everything! Pay attention to the fact that one of this 5 screws at the center are more shortly than others.

    dv1977 -

    I did all steps like this manuell but now the Display wont work only some colered strips are to see! Whats happend??

    Can anybody help me ? Maybe the connector cable is broken?

    djfanta -

    Check both connectors, probably one of them not seated well

    pzhivulin -

    You can add a SATA SSD if you already have a PCIe SSD Factory?

    kaserlik -

    If you're changing cracked EMC 2638 display to new assembly, there's two more steps:

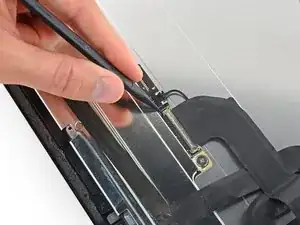
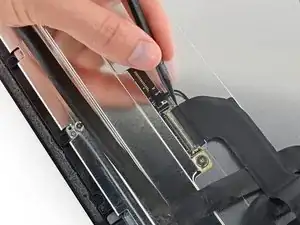
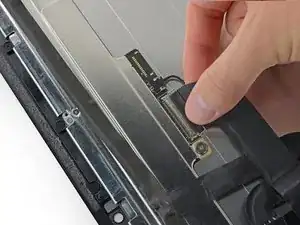
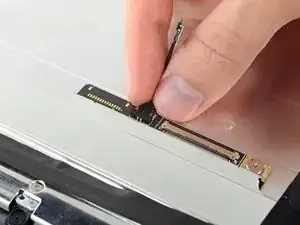
    Step 24: Use the tip of a spudger to flip up the metal retaining bracket on the display data cable.

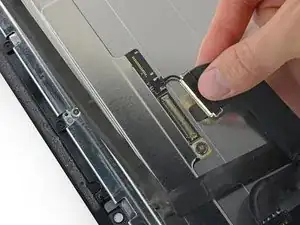
    Carefully pull the display data cable from its socket on the display assembly.

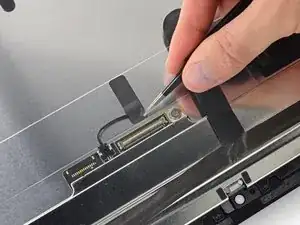
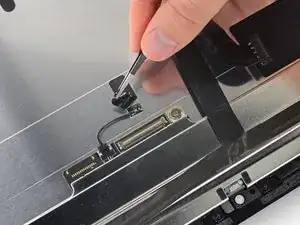
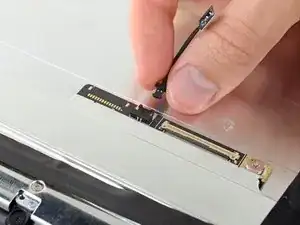
    Step 25: Use the tip of a spudger to unplug bracket of the thermal sensor small cable near display data cable.

    Carefully remove scotch tape covering thermal sensor. Using iSesamo or flat tip of the spudger carefully peel the thermal sensor away.

    pzhivulin -

    omg - forgot to switch the termal sensor from the old display...

    now fan runs like crazy...

    Andrei Balotescu -

    The key thing is to never put any force on the opening tool when working through the tape. Just roll it back and forth with ease.

    Ernst -

  7. eDPbRqQfKjS4oUnZ
    eDPbRqQfKjS4oUnZ
    qm5g46NqRXJjxaVm
    krs4wdofACqDD6Ju
    • Schiebe das Werkzeug um die obere rechte Ecke des Displays.

  8. 3c3b2XusJDWQekW6
    3c3b2XusJDWQekW6
    NGOHPeVZ52OQCRWQ
    • Rolle das Werkzeug die rechte Seite des Displays nach unten.

  9. SAgRGwk3lGGO3ZCH
    SAgRGwk3lGGO3ZCH
    1DLPSpBELT2mxJok
    • Beende das Schneiden mit dem iMac Opening Tool unten auf der rechten Seite des Displays.

    • An dieser Stelle solltest du noch einmal das Werkzeug um das ganze Display laufen lassen, um wirklich soviel von der Klebeverbindung wie möglich aufzutrennen.

    Yes, do it many times to loosen the adhesive.

    Noah Ralston -

    Would be good data to show the 3 areas (wifi antennas where the "tape" is larger and covers them. The rest of the "tape" is 1.4" and easy. Also after removing the display, be sure to remove the old "tape" from both the display and the rubber parts of the case. Use the spudger to start an end and it should pull off easily. Careful on the baackside of the display as you can scratch off the black paint/covering.

    Carl Schultz -

  10. HVK2HNgts1D53wOs
    HVK2HNgts1D53wOs
    QrZMXcap4the5yXk
    hZXQgXJhIoKTxBwH
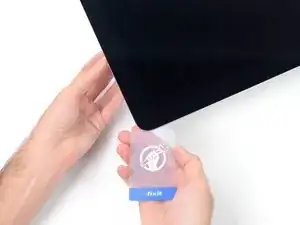
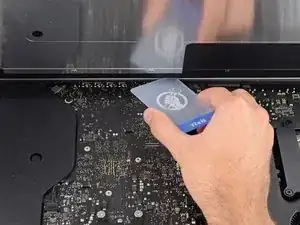
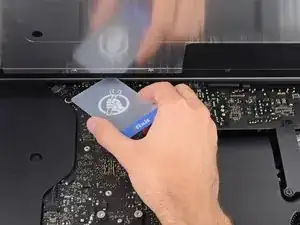
    • Das Werkzeug hat den größten Teil der Klebeverbindung aufgeschnitten., aber das Display ist immer noch ein wenig mit dem Gehäuse verklebt. Den letzten Rest musst du mit einer Plastikkarte lösen.

    • Lege den iMac mit der Scheibe nach oben auf den Tisch.

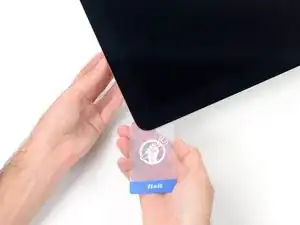
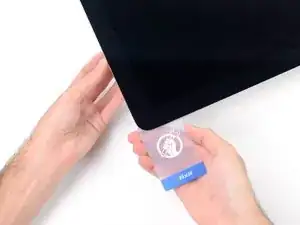
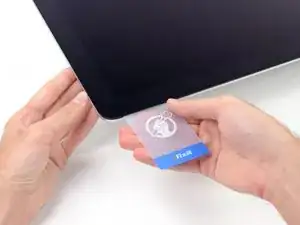
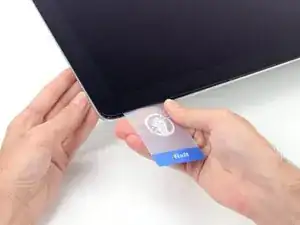
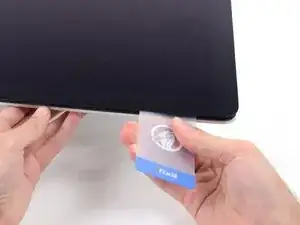
    • Beginne in der oberen rechten Ecke und zwänge eine Plastikkarte zwischen Display und Rahmen.

    • Achte darauf, die Karte nicht tiefer als 9 mm einzuschieben. Du könntest sonst Bauteile im Inneren beschädigen.

    this step is extremely important NOT to stick in the cards too far….. doing so, you risk a 600 euro replacement as I experienced………

    Edgar Broekema -

    I drew a 3/8” line on my cards with a marker first.

    Max Romano -

    I’m reading this on the EU store, please change all measurements to cm/mm.

    Morgana Devina -

    @ifixit The next batch of cards you create should have a line printed on the card 3/8” in from the edges. Would make a nice reference.

    Richard Giratd -

    Here’s where OWC provides glass removal suction cups, which is a better solution than plastic cards.

    The suction cups help to easily lift the glass panel, without risking the damaging of any internal wiring that the plastic cards could cause.

    Ernst -

    Better to remove stand wedge at this point? Can’t see from pics

    derekrobinson -

  11. wUjiMGtv2IpkNB5p
    wUjiMGtv2IpkNB5p
    LncJQeQQOAvg3CMA
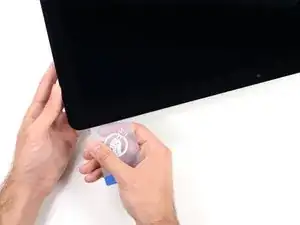
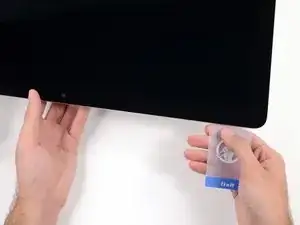
    • Verdrehe die Plastikkarte seitlich und vergrößere so den Spalt zwischen Display und Rahmen.

    • Bewege die Karte vorsichtig und langsam, damit das Displayglas nicht zu stark belastet wird - du brauchst nur einen Spalt von etwa 6 mm Breite zu öffnen.

    This part must be done very carefully or you can damage the flat cable from display, despite it was under a iron cover.

    Cassio Machado -

  12. qmVJHqIxctiuCbE5
    qmVJHqIxctiuCbE5
    6PF3COgq44osRMSX
    1nZLqZWsCa1xRTOR
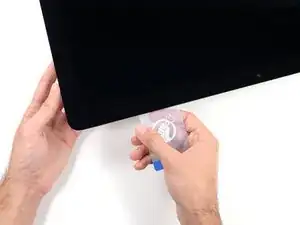
    • Schiebe die Karte zur Mitte des Displays hin und schneide so allen Kleber an der rechten oberen Ecke des iMac auf.

    • Halte unbedingt vor der iSight Kamera an, damit sie nicht beschädigt wird.

    You don't need to do it like this, simply open the iMac bendidng the LCD completely and use the pizza cutter to remove the adhesive.

    Felix -

    Using glass removal suction cups will avoid running this risk of damaging the camera (or any wiring).

    Ernst -

  13. pwG3JFqqfxxQXLID
    pwG3JFqqfxxQXLID
    wKv4nNrdklsj61AD
    • Zwänge die Plastikkarte erneut in die obere rechte Ecke ein und lasse sie dort stecken. Damit verhinderst du, dass sich die Teile wieder verkleben.

  14. B1l4C4H1WK3CwfsH
    B1l4C4H1WK3CwfsH
    5gnKwfWW1K2gnkAY
    dU3V1S5PiPpZoiRX
    • Setze eine zweite Plastikkarte an der oberen linken Ecke des iMac in den Spalt zwischen Rahmen und Display ein.

  15. 1eeYyLOXUgoVdMcU
    1eeYyLOXUgoVdMcU
    XNwnBG1I3otkGVaj
    • Verdrehe die Karte nach oben, vergrößerte so den Spalt zwischen Rahmen und Display ein wenig.

    • Drehe, genau wie an der anderen Seite, langsam und lasse dem Klebstoff Zeit beim Auftrennen. Achte drauf, das Displayglas nicht zu stark zu belasten.

  16. 1AtMSKY35dfSoyov
    1AtMSKY35dfSoyov
    eYI56QJhkhMLdtyx
    oVDneBvJQXNCvQpC
    • Fahre mit der Karte zur Mitte hin, halte auch hier wieder vor der iSight Kamera an

  17. KlhOFUANthUfPZrW
    KlhOFUANthUfPZrW
    KGDDBwLWXguRGlso
    • Zwänge die Karte wieder bei der linken oberen Ecke ein.

  18. xXVPepFcNBfFlYLm
    xXVPepFcNBfFlYLm
    mJWDXXcMCnL6OwqX
    lGcKi3n1DVFdANJw
    • Verdrehe nun beide Karten seitlich, wie im Bild zu sehen an den Ecken eingesetzt, und vergrößere den Spalt zwischen Gehäuse und Display.

    • Wenn manche Stellen noch verklebt erscheinen und sich nicht trennen lassen, dann musst du aufhören zu verdrehen und mit einer der Karten die Klebestelle auftrennen.

    • Fange an, die Oberkante des Displays vom Rahmen weg zu heben.

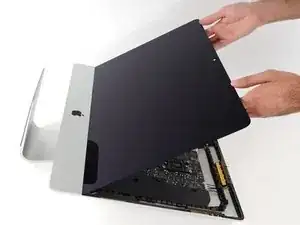
    • Hebe es nur ein paar Zentimeter an - die Datenkabel und Versorgungskabel des Displays sind immer noch am Logic Board angeschlossen.

  19. 2CYaRvZMKD1MHJWF
    2CYaRvZMKD1MHJWF
    fHCLPYQIpP4EVOLZ
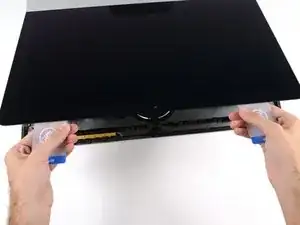
    • Hebe das Display soweit hoch, um leichten Zugang zum Verbinder zu haben. Hebe es aber nicht zu hoch (höchstens 20 cm), damit die Kabel nicht zu sehr angespannt und die Verbinder nicht zu sehr belastet werden.

    • Halte das Display mit einer Hand fest und löse mit der anderen Hand das Kabel der Stromversorgung des Displays.

    It was difficult to remove this connection. I ended up having to gently pull-up vertically a little on the wire side to unsnap it about 1mm and then horizontally wiggle it out.

    delacrj2 -

    I had a difficult time removing this connection. I had to lift the wire-side about 1mm before it unsnapped and then carefully wiggle it out horizontally.

    delacrj2 -

    Can this cable be replaced? I am worried mine is damaged. I have no display after the screen fell and stressed the display flex cables following an SSD upgrade.

    Jeremy Brainard -

    This step should be done with extreme caution and care, as this step 19 is not described in great detail (sorry, author).

    The first (most outward) cable will slide out by gently pulling it by its tabs. The second (inner) cable is more tricky, as the locking lever must be moved backward first, before gently pulling backward on the cable connector. The angled tweezers are useful here, to help lift that locking lever, because fingers are too big for this.

    Ernst -

    be VERY careful and SLOW...take your time. These displays crack VERY easily when removing and they'll spider web on you. I've done probably 20 or so of these and cracked 3 being super careful.....ugh.

    Faslane -

    I found the best way to unplug this display power cable was to use my right hand, and the fingernails of my index finger and thumb to grab the ends of the tabs on either side of the connector, squeeze, and pull the connector out gently.

    Phil McInnis -

  20. Zh56FQPLtH1qJkBF
    Zh56FQPLtH1qJkBF
    RuoSZ5iXxQqvKfcF
    MuEuntgC4FjFNuDJ
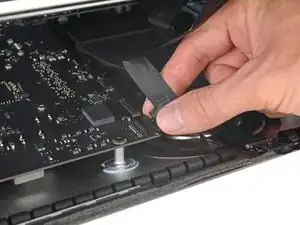
    • Halte das Display weiterhin mit einer Hand fest und klappe den metallenen Sicherungsbügel am Displaydatenkabel hoch.

    • Ziehe das Displaydatenkabel vorsichtig aus seinem Sockel auf dem Logic Board.

    • Achte darauf, dass du den Verbinder des Displaydatenkabels gerade aus seinem Sockel ziehst. Halte ihn dabei parallel zur Platine, damit er nicht beschädigt wird.

    Cannot seem to find a replacement cable for this, as I suspect mine is damaged. Can’t even find a part number. Anyone know what it might be?

    Jeremy Brainard -

    https://www.amazon.com/gp/product/B08TTL...

    That's the part I ordered for mine and it seems to work ok. I did make a point of contacting the seller and advising them of my requirement and they ensured I got the right part and it matches the description of the link. Bear in mind I bear no responsibility if yours does not work since I am just sharing what I did and what I ordered. Thanks.

    Jim Stanford -

    I also need that cable.

    cameronjpu -

    It's a little difficult to tell... but looking at the connection to the logic board on the video data cable, are the pins faced up or down?

    On the display, same question since it appears you have to "twist" the cable during the reconnection step.

    Jim Stanford -

    For this particular cable, take a good look before pulling on anything. Plug is locked on its socket with a bracket. You can lift this bracket by holding the small, flat black plastic handle that is attached to it. If you're struggling to grab it, use the end of the pizza roller handle to lift it, or the tweezers. Cable then comes off by pulling parallel to the main board.

    Froggy Manny -

  21. faYLZCcUqNgfLImh
    faYLZCcUqNgfLImh
    fTsCL5NUphoD5vbV
    • Hebe das Display an, bis es fast senkrecht steht.

    • Es gibt immer noch einen Klebestreifen am unteren Rand des Displays, der wie eine Art Scharnier wirkt. Du kannst ihn lösen, indem du das Display ein paar Mal auf- und zuklappst.

    The adhesive strip along the bottom is designed with a pull tab on each outer end. Rather than lever and pull the screen simply carefully pull the tab which removes that half of the lower adhesive strip and frees up the screen.

    Andrew Stephens -

    Yes, use the tabs as Andrew indicates. Super easy.

    Michael Adams -

  22. JPTg4NhGasMGYSuQ
    JPTg4NhGasMGYSuQ
    Y5FlxocLLXGaRWmi
    • Trenne, wenn nötig, die letzten Reste der Verklebung am unteren Rand mit einer Plastikkarte auf.

  23. W11PURO2LYnqVMEL
    W11PURO2LYnqVMEL
    4x45fNhvlBjfqU3f
    WstuEbNDdOlFKIns
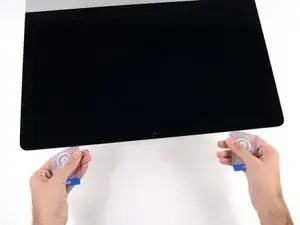
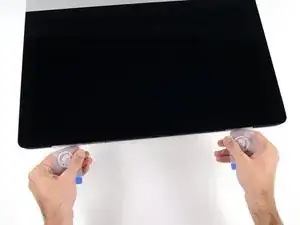
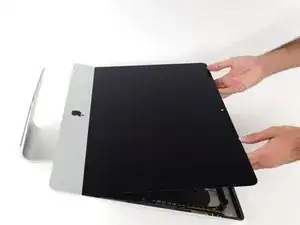
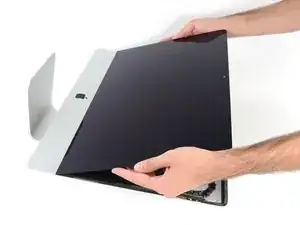
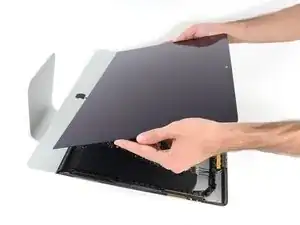
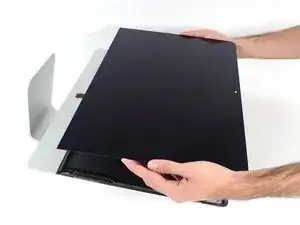
    • Hebe das Display aus dem Rahmen und entferne es vom iMac.

    • Es ist vielleicht notwendig, es erst langsam an einer Seite hochzuheben, um es aus der Klebeverbindung zu lösen.

    • Sei sehr vorsichtig beim Hantieren des Displays - es ist groß, schwer und aus Glas.

    • Nachdem der Klebestreifen durchgeschnitten ist, kann er nicht mehr verwendet werden. Folge dieser Anleitung, um die Klebestreifen, die das Display befestigen, wieder anzubringen..

    The adhesive strip along the bottom is designed with a pull tab on each outer end. Rather than lever and pull the screen simply carefully pull the tab which removes that half of the lower adhesive strip and frees up the screen.

    Andrew Stephens -

    Andrew, FTW! This worked perfectly

    Megan O'Leary -

  24. yPq6xPFCr4oolbrL
    yPq6xPFCr4oolbrL
    eUKHWkKD5cZM6gaJ
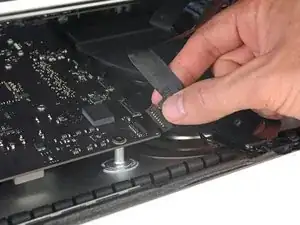
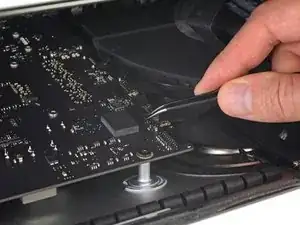
    • Lege das Display vorsichtig mit der Rückseite nach oben auf eine stabile, flache Oberfläche. Schütze die Frontglasscheibe mit einem Tuch vor Kratzern, Schmutz und Verunreinigungen.

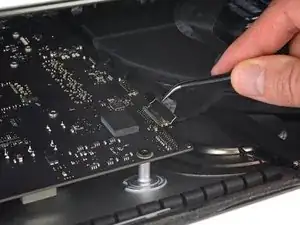
    • Klappe den Sicherungsbügel am Stecker des Displaydatenkabels mit der Spudgerspitze oder dem Fingernagel hoch.

  25. NdmZWBrPZHCRuCdT
    NdmZWBrPZHCRuCdT
    smeCU3OqVRuf2Hft
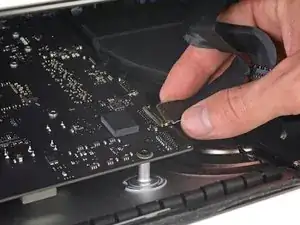
    • Ziehe den Stecker des Displaydatenkabels gerade aus seinem Anschluss auf der Rückseite des Displays.

  26. UMxIraY4pf6RaPwv
    • Lege einen iOpener nahe der Oberkante der Displayeinheit auf und weiche so den Kleber am Stückchen Klebeband auf, welches den Thermosensor befestigt.

    • Eine Anleitung wie man den iOpener richtig anwendet, findest du hier.

  27. 1pAH4FRhxCCFqA2N
    1pAH4FRhxCCFqA2N
    vcwWASXPqHQBATq6
    • Löse das Stückchen Klebeband ab, welches den Thermosensor auf der Rückseite der Displayeinheit befestigt.

    • Der Thermosensor kann je nach Modell des iMacs verschieden positioniert sein.

  28. 1P4DndMQp4e1d2Ou
    1P4DndMQp4e1d2Ou
    aYC2SpVgQL1AfnY4
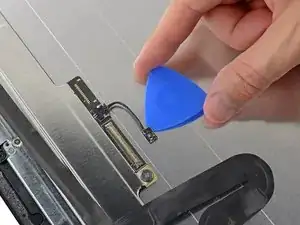
    • Trenne die Klebeverbindung des Thermosensors zur Rückseite des iMac Displays mit einem Plektrum auf.

  29. le1JYG6JDSvhBjv3
    le1JYG6JDSvhBjv3
    IIwQsKXqTloPn2TW
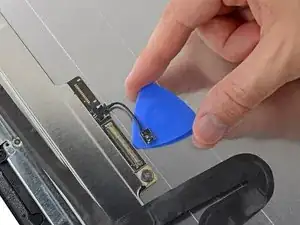
    • Löse den Thermosensor aus seinem Anschluss auf der Rückseite des Displays.

    • Entferne den Thermosensor und bringe ihn an der neuen Displayeinheit an.

Abschluss

Um dein Gerät wieder zusammenzusetzen, folge den Schritten in umgekehrter Reihenfolge. Benutze unsere Anleitung für Klebestreifen, um die Displayscheibe wieder zu befestigen.

Jeff Suovanen

Mitglied seit: 06/08/13

407156 Reputation

4 Kommentare

how can one fix it without the actual display/screen itself…? You do not sell it — does anyone know who does?

Chris -

Can this be done on a late 2015 27” Imac (model MK482LL/A) ? I asked two repair shops and both said that 2015 and later models need the whole front replaced for big bucks.

claudia -

Hi Claudia! In this case and in the 2015 5K case, the display of the iMac is the “whole front.” The display and glass are all one unit and can be fairly pricey to replace, but the procedure isn’t too difficult. The most challenging part is cleaning the old adhesive off and applying new adhesive, to prevent the display from falling back off. Here’s the display replacement guide for your 2015 5K iMac!

Sam Goldheart -

Does not say how to transfer the thermal sensor to the new display

Yuan -