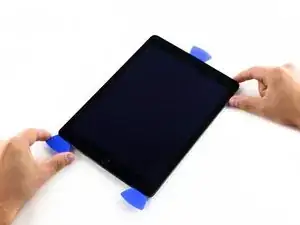
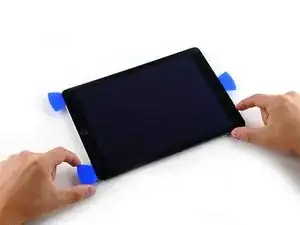
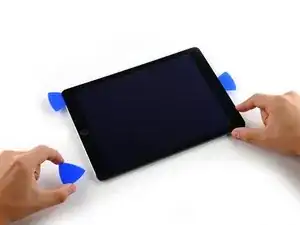
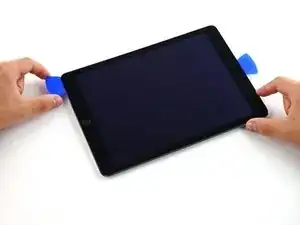
Einleitung

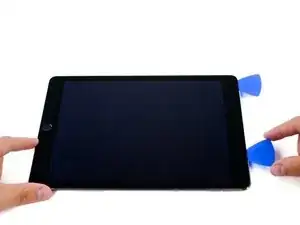
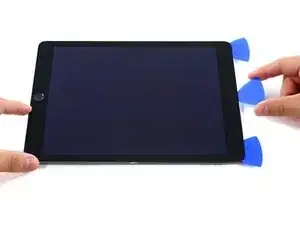
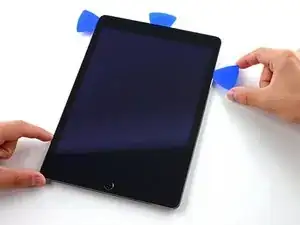
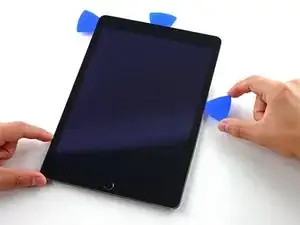
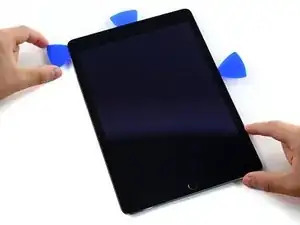
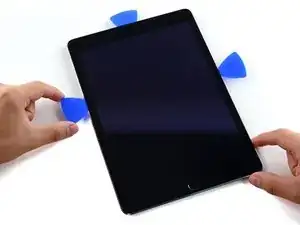
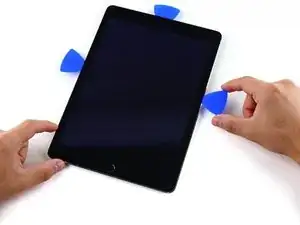
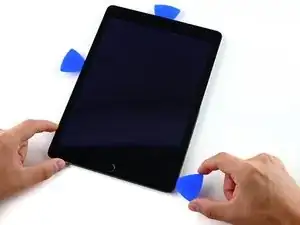
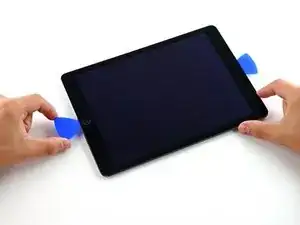
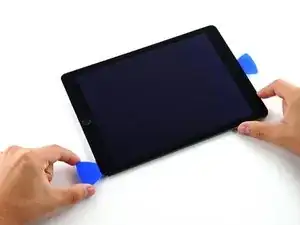
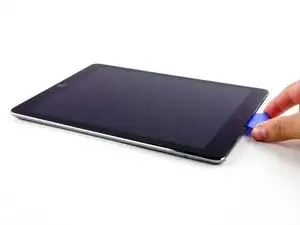
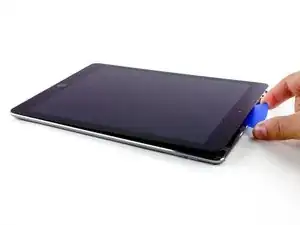
Diese Anleitung zeigt dir, wie du den rechten Lautsprecher austauschen kannst.

  1. PFpjwVSYrnq3JQap
    PFpjwVSYrnq3JQap
    RFsyoneYVYQDPSht
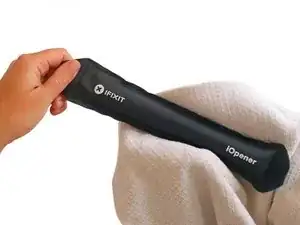
    • Wir empfehlen die Mikrowelle vor dem Gebrauch zu reinigen, da sonst Essensreste oder Ähnliches am iOpener hängenbleiben können.

    • Lege den iOpener in die Mitte der Mikrowelle.

    • Für sich drehende Mikrowellen: Stelle sicher, dass der Teller sich drehen kann. Wenn der iOpener hängenbleibt kann er überhitzen und sogar Feuer fangen.

    I didn't find this to be as hard as I had built it up in my mind to be; HOWEVER, saying that I need to say years ago I was the local Nokia service center in my town. But many years ago right after they got rid of analog times. Yeah. A classic installer/repairer mistake when starting something they haven't fixed or installed before is picking up the instructions, flipping through them; maybe even reading a section that is new-then tossing the instructions over the shoulder. "I got this." This usually comes right before something major gets broke. And I can tell you when you try to do it yourself and then mess it up horribly then take it to the repair shop. Well we called that "I can do it myself" syndrome and charged extra to put back together what they brought in in the box. Now knowing all this - I can't stress this enough because I am stupid, stupid, stupid. COVER YOUR SCREEN IN CLEAR BOXING TAPE AND READ ALL THE INSTRUCTION BELOW THROUGH TO THE END BEFORE EVEN ATTEMPTING THIS FIX. Take my advise.

    windizy -

    I didn't have an iOpener, so I used a wheat type heat bag. If you do this though, make sure you put a layer of plastic between your Mac and the bag, or you'll get condensation in places you don't want it.

    Martin Gray -

    I started out using the iOpener but switched to my wife's hairdryer. A heat gun or hair dryer proved to be much more convenient and is a time saviour. You can heat more and the glue becomes more fluid make the next steps with the opening picks much easier

    Jan Van Puymbroeck -

    I know this is obvious, but backup your iPad with iTunes before you start. I'd also turn off your passcode if you have one.

    Laurie Higgins -

    Ther first time you heat up the iOpener for this repair when its room temperature I had to heat it up for more than 30 seconds. I remember I had to heat it up for around 45 seconds. However, after that when you need to reheat it again during the repair 30 seconds will be enough.

    Yousef Ghalib -

    I used the wheat bag in a sensor microwave heating up to 65-70 deg C (155 def F).

    ian cheong -

    Get yourself a cherry pit bean bag the size of your iPad. Heat it, put the iPad on it for 3 to 5 minutes or so, reheat the cherry pit bean bag, again put your iPad on it. Then heat the iOpener and start working. The cherry pit bean bag will have to be reheated several times, but it will soften the adhesive so you have less problems with the iOpener

    Tim Feyaerts -

    The heating can be done very effectively (and quickly) with 3d printer heated bed. Make sure the bed is clean. Set the temperature to 60c, (130f ) and put the ipad face down for +/- 10 minutes. Repeat as needed throughout the “gentle prying” stages.

    polleyphony -

    The iOpener did not work at all for me.

    I had to use a heat gun and bring the edges of the case up to ~200 degrees (used an infrared thermometer to measure) before the glue would weaken. This obviously superheated the metal frame, so I also had to wear gloves to handle the phone while prying the back off with the included picks.

    Mike Jeanette -

    Repair instructions worked like a charm. Had to be patient with the iOpener and getting the screen off. I tried repeatedly without success until shifting the suction cup a bit to the left side where perhaps the glue had loosened up a bit more.

    Kyle -

    The iOpener, in my opinion, is of no help. Many warnings to say “don’t warm it too much”, but the glue doesn’t melt if not warm enough. As a result, a complete waste of time and energy. In addition, too much liquid in it, so it doesn’t lay on the device on a sufficient surface. I took a hairdryer and it worked much much better.

    laurentvidu -

    I used an immersion bath to heat this to 180F and applied it to the device until the outside temperature of the opener read 150F with an IR thermometer. Removing the screen took very little force with this method.

    breadandbits -

    My experience. I was replacing the screen which had been cracked and a little shattered in some places. The iopener is pretty much useless, so was the suction cup. The suction cup would probably be more useful if I was doing something besides the screen. Also you probably want the clean the screen before using it so it can get good suction. I used a hair dryer on high for a couple of minutes at a time (someone on this tread suggested that). I used my exacto knife and a razor blade to get into the adhesive. First the exacto to get the initial cut, then the razor blade to go a little deeper. Could have probably just used the razor blade, but the exacto has a little more finesse. I got the razor blade in and a little under the glass then I used the picks to wedge in. I didn’t want to risk anything using the razor blade too much. Used tape to keep the shattered glass together.

    trebor65 -

    My experience pt2

    Fortunately the shattering was mostly on the edges and most of it had adhesive on the back so it stuck together. Just take your time and work your way around following the guide to get the screen off. Have some goof off or goo be gone to clean the frame when putting the new glass on or putting the existing one back. (someone suggested that also, very good idea). Be careful of the LCD (you should know that). The cable on my LCD was pretty tight, so I propped it up while taking the cable cover off and when I put it back on I did the same thing. I just put a bottle on the battery and leaned the back of the LCD on that while attaching the cables and putting the screws back on the cover. Also be careful with the home button and the bracket on the back of it. I had enough old adhesive on left on the bracket that it stuck back to the new glass fine. So far only 12 hours in, so we will see how that holds up when the kids get at it.

    trebor65 -

    Another alternative if you do not have the iopener is to use a bed time hotwater bottle. Do not over fill it though. Just put enough hot water in to support the phone while you work around the adhesive.

    I use both the hot water bottle and iopener together on Samsung's. It makes life easier

    gazza667 -

    I followed the directions and heated my iOpener for 30 seconds in a 1000 watt microwave, and it came out at 160 degrees F, as verified by a infrared thermometer. This allowed me to separate the last bit of the back of my Samsung S8, which was already coming off due to a swollen battery (hence the reason for the repair).

    Dennis -

    Hallo,habe den Akku erfolgreich getauscht.Doch seitdem gibt es bei Telefonaten eine Rückkopplung für den anrufenden.Bei mir ist alles normal.Woran liegt das?Mfg

    Manu R -

    If you follow these instructions, you will crack your screen like I did. Heating the iOpener for 30 seconds, using it to melt glue, then waiting 10 minutes to reheat is useless. The iOpener can be used to maybe warm the glue on whatever side you aren’t working on. You need a hairdryer and/or a heat gun to melt the glue and separate the glass from the iPad.

    Anyone want to buy an old iPad with broken glass and a dead battery?

    mpulliam -

    Not everybody has a microwave. You should provide a target temperature for the iOpener and instructions for a conventional oven, or pot of warm water, or whatever. Although I will probably use a heat gun …

    Esmond Pitt -

    Three times heating opener and no luck. Tried pressing down gently on opener with a towel, and the opener broke. Wondering if I now replace table mats, fancy table cloth, etc. or will this stuff wash out.

    Not impressed so far. Maybe the hair dryer next.

    doug -

    I support the comments about the iOpener. Everyone has a hair drier, FHS, so get a cheap IR thermometer (£18) and blow heat until the area is 60+ deg C. Still takes w while, and getting the screen off is v scary, but just add more heat if you feel resistance.

    The rest of the kit is good, esp the magnetic screwdrivers.

    Richard O'Brien -

    No, everyone does not have a hairdryer. Some of us don’t even have hair. Thank goodness I already had an IR thermometer, though.

    nin10doh -

    #### WARNUNG WENN MINIMALSTER SPRUNG IM DISPLAY IST FUNKTIONERT DAS NICHT!!! ######

    Hatte einen winzigen, minimalen Sprung im Display. Ich dachte es könnte gehen, weil der Sprung “abgeschlossen” war. Er hat in einer Ecke ein winzige Glasteil rausgeschnitten. NEIN! Geht nicht. Habe alles mit viel Geduld dem iOpener und einem Föhn erhitzt. Es ist trotzdem sofort über das komplette Display zersprungen…

    T z -

    I’ve started with iOpener but changed very quickly to a heatgun. That was more efficient.

    Mizzoo, s.r.o. -

    I could not get the iOpener hot enough to melt the glue on my ipad 6. I heated for 45 seconds once and it was boiling and it still never worked. Thank goodness contributors mentioned using a hair dryer. Using an 1700w hair dryer on high did the trick to get the screen off. Still took some time and the case got pretty hot but be patient. It took twice as long and a lot more patience to get the battery out.

    Randal Haufler -

    I have an Ipad with touch screen issue, if i replace this part it should be Ok?

    janderson martin -

    WARNING - DO NOT MICROWAVE ON A METAL MICROWAVE RACK

    The metal microwave rack can heat up and melt through the iOpener cover letting the contents leak out.

    Not a big issue for me as I have a heat gun and used that instead.

    Run Up A Tree -

    I opened my iPad with the iOpener. Be patient! It may take quite a bit longer to it the iOpener in the microwave than it says in the guide. My microwave can only do 800W and I had to put the iOpener in several times (maybe a total of 90-120 seconds). I recommend that you have the transparent side up an watch the bag carefully. As long a the bag doesn't bloat up and the liquid doesn't start bubbling you should be fine. But I recommend to take the iO out from time to time to check it. (More comments in Step 6.)

    marcelflueeler -

    I gave upon the I opener and used a hairdryer. (Fixed an iPad 6)

    Tom Weber -

    iPad mini gen5. I used the iOpener. My microwave is 1200w with carousel. 30 sec got the iOpener to 155ºF. For the 2nd heating, after 10 minutes sitting, the temp was still around 125º so I only cooked it for 15 sec. Not enough increase so +5 sec more which me to 165-170ºF. This should be considered ballpark info because who knows the real output of the various microwaves and the quality of the IR tool used to determine temp.

    To successfully open my iPad mini I applied the iOpener twice to the left edge and twice to bottom. & once to R edge. Using the suction cup was difficult for me (I'm in my 70's so my hands don't work too well anymore). I had trouble holding the guitar pick and slipping them in (at an downward angle). In the end, sliding my thumbnail along the edge opened it very slightly and allowed the pick to get into the gap. I marked the ends of all my picks with a sharpie pen for the recommended 2mm insertion to avoid going in too deep. To get the screen open it took me approx 1 hour.

    jharrison -

  2. ylYXoFMbBeXNAIyj
    • Erhitze den iOpener für dreißig Sekunden.

    • Im Verlauf der Reparatur kühlt sich der iOpener wieder ab. Erhitze ihn dann noch einmal für dreißig Sekunden.

    • Achte darauf, den iOpener während der Reparatur nicht zu überhitzen. Eine Überhitzung bringt den iOpener möglicherweise zum Platzen.

    • Berühre niemals den iOpener, falls er aufgeschwollen aussieht.

    • Falls der iOpener in der Mitte immer noch zu heiß ist, um ihn anzufassen, dann benutze ihn weiter, bis er ein wenig herunter gekühlt ist, bevor du ihn erneut erhitzt. Ein ordnungsgemäß erhitzter iOpener sollte für bis zu 10 Minuten warm bleiben.

    I had to heat mine up for more than 30 seconds. After 30 seconds on high it was only warm. It had to keep trying different times and checking it until it got hot. I think the initial time that I put it in for was over a minute.

    whale13 -

    DO NOT USE IN NON ROTATING MICROWAVE! It will pop a hole. I had it in for 45 seconds the first time. It wasn't very hot inside and I saw it started to leak on the paper towel I put under it. Just a fair bit of advice. I think I will just stick with the heat gun. Loud but useful.

    Alex Jackson -

    I heated mine up for 30 seconds, tested, then again for 30 seconds. It felt adequately hot. Leaving it on the left side, per the instruction, for a minute did not loosen the adhesive. I ended up pulling the suction cup hard enough to shadder the old screen. Moral of the story, I don't think it gets hot enough safely to have an affect.

    Travis Dixon -

    There is a clear problem here with the heating part using the iopener things....no details are given. Whoever is testing them needs to make it clear - What temperature does it need to be? And for which phone models, because they differ in what's needed. It's only £10-15 for a laser guided temp sensor unit, and the designers/repairers should have one of those already for doing these kinds of repairs. Explaining half a repair, is worse than not explaining at all :-(

    assortedrubbish -

    All phones/devices differ it’s unrealistic and unsafe to put a exact time/temperature needed to soften the adhesive. It’s really quite simple you warm the device evenly and in a controlled manner just enough to enable pry tools and picks to begin separating. Best tool in my opinion but again this is because I have experience is a hot plate and heat gun both of which are used at nearly the lowest settings and I can handle flat palming the plate for almost 10 seconds I leave the device to conduct heat until approx it’s about 110 at most 120 ish this will be plenty to soften all the adhesive if any problem areas I use heat gun while prying. Again you need go slowly and learn with a throw away phone

    Greg Latta -

    I used a hot water bottle, works well as it covers the whole screen and stays hot for longer.

    dave -

    If I may suggest include your microwave wattage so people can get an idea on time for there own

    Patrick Storey -

    I agree with this.

    Jarl Friis -

    I ended up using a hair dryer. That iOpener thing took forever.

    mark fitzgerald -

    30 seconds sure isn’t cutting it… 45 didn’t get the screen of my iPad air 2 to budge either… even after resting on the ipad for 4 minutes.

    60 seconds in the microwave, the iOpener burst.

    I’ll get a new one and try once more with heating it 45 seconds and repeat that for 30 minutes like others have said here. If that doesn’t work it’ll have to be the heat gun.

    K

    Karl Marble -

    I can’t recommend the microwave. If the the iOpener becomes too hot, it bursts. Better put the opener in cooking water. Dry it and use it. Instead of an iOpener you can use hot/cool packs as well.

    Bernhard Keim -

    Great idea with using the heat packs. I will try that next time. Thank you

    Collins -

    Trust the directions! I forgot and left it in the Microwave too long and after 1 minute I had Mt Vesuvius - the iOpener burst and spewed the goodies out. The problem is, the Digitizer can be damaged by a hot air gun, so I had to tough out and remove the glue the hard way. I made it … with lots of patience! Tough lesson.

    Larry Bennett -

    I also used a hairdryer. I used it on the low setting and I cut a piece of carboard to protect the rest of the screen. The iFixit tool and method is vert tedious and very time consuming in comparison. With the hairdryer method you can literally have the display apart in a few minutes. Using your other hand nearby the area you are heating it should be very hot but not enough to burn your hand. You only have to heat metal part of case near glass edge. If you have a cellular model then you need to be very careful because the black antenna area is plastic. So less heat and work your way up in adding heat just enough to separate around the area but not so much you melt the plastic!

    Fixrights -

    iOpener was the worst part of the kit. Followed directions for :30 in microwave and took 4 trips to the microwave to loosen adhesive on left side of home button. I thought I was figuring it out and it was working well… even set a timer to wait 10 minutes between heating it up. Was on the right side and was on my 12th heat up when it exploded in the microwave. My only tip is that if you set it clear side up, as soon as you see any bubbles or boiling in the liquid, STOP! If you put a pot holder over the iOpener and press slightly to make good surface contact, that seemed to help. I finished heating with a “Corn Sack” that held heat better than the provided iOpener.

    digital_only -

    Mon iopener n'a pas tenu une réparation. Je ne vous conseille pas ce produit

    Berard Romain -

    Bonjour,

    Nous sommes désolés que votre réparation ne se soit pas déroulée comme prévu. Il se peut que le produit était défectueux. Veuillez contacter notre service client support@ifixit.com (boutique américaine) ou eustore@ifixit.com (boutique européenne) en décrivant ce qui s’est passé.

    Claire Miesch -

    Readers looking for temperature advice might check the comments of the previous instruction, as there are more there. I used an immersion bath to heat this to 180F and applied it to the device until the outside temperature of the opener read 150F with an IR thermometer. Removing the screen took very little force with this method.

    breadandbits -

    Thank you for posting some actual temperatures. I have a heat gun with a very fine self-temperature regulation setting capability.

    I will set it for 150-180 F, and use that to soften the adhesive.

    G Trieste -

    Get a heat gun.

    alesha adamson -

    I followed the directions and heated my iOpener for 30 seconds in a 1000 watt microwave, and it came out at 160 degrees F, as verified by a infrared thermometer. A second heating about 15 minutes later in the micro and it came out at 190 degrees F. Plenty hot enough to soften the adhesive for removing the back on my S8. Based on the comments above I think people just need to use more patience.

    Dennis -

    I used various time settings. It got very hot. It would soften the glue but not a whole lot. If my screen had been intact and I was replacing something that was not a digitizer, it may have worked. A broken screen makes the process significantly more difficult. I ended up breaking the home button cable. Good bye TouchID…

    cvela90 -

    After reading previous comments I didn't even use the i-opener. Used the heatgun ( hairdryer ) which works great for me. Maybe I was lucky as this is my first attempt at replacing a cellphone battery. Motoz 3

    Collins -

    It appeared 30 seconds were not enough, so I heated it more, by 5 seconds at a time until I got the right temperature about 70 degrees Celsius (measured with infrared pistol) to get the screen heated up to 60 C, the best for softening the glue. But the heat was quickly dissipating by the big aluminum back cover, so the best I got in 2 minutes of applying iOpener was around 45 C, which made the procedure difficult and having risk of breaking the screen. So I eventually abandoned iOpener and user a hot air gun with precise temperature setup. I set it to 90 C, which allowed me to open my iPad quickly and safely.

    Sergey Kofanov -

    I, too, ended up using a hot air gun. I’ve done earlier versions of iPad before but the adhesive used on this IPad 5 A1822 was particularly difficult to remove.

    Also, while the suction cup worked great when the glass is in tact, any cracks in the glass make the suction cup useless.

    manningrl -

    You need to remember here are different sizes of microwaves. I had the same issue.

    Heating on a smaller unit I used 45-60 seconds. That worked but was time comsuming

    William Draheim -

  3. Q3OPkaQyxV6cdnx3
    • Halte den iOpener an einem der flachen Enden und vermeide die heiße Mitte, während du ihn aus der Mikrowelle nimmst.

    • Der Beutel wird sehr heiß, sei vorsichtig beim Gebrauch. Lege dir am besten einen Topflappen bereit.

    I did this repair. I used a hair dryer, I think it works better: gets very hot fast.

    Cobus de Beer -

    I did too, you get far more control and no expense on fancy equipment.

    Billinski -

    Readers looking for temperature advice might check the comments of the previous instruction, as there are more there. I used an immersion bath to heat this to 180F and applied it to the device until the outside temperature of the opener read 150F with an IR thermometer. Removing the screen took very little force with this method. I don’t know how much microwaves vary in heating consistency with these pads, but knowing how inconsistent the temperature of a bowl of plain rice gets in my microwave, I wasn’t interested in even trying to use it for this.

    breadandbits -

    I used an electric griddle set to the lowest setting. It seemed to work very well.

    John -

    I vote for the hair dryer. The other methods work too but if you aren’t having any luck, switch to the hair dryer. While holding the iPad in my hand, I found that I am aiming the dryer at my finger at the same time and it gauges how hot it is. I stop when my finger can’t take it - maybe five seconds up close. Repeat as needed like I did.

    Robin -

    This thing melts when placed up side down in the microwave…

    Mark -

    If the maximum temperature for this iOpener is lower than the gadget glue minimum temperature, this device does not make sense.
    I think the maximum temperature for this iOpener is below 100⁰C and most gadget glue minimum temperature is higher than 100⁰C. So the iOpener is useless for many opening steps in repair guides. But who knows because temperature range is not specified for this iOpener.

    Jarl Friis -

  4. 2Nj3CEcEUHn2EtLQ
    2Nj3CEcEUHn2EtLQ
    lgRIBJjmHo2vTdda
    • Solltest du keine Mikrowelle haben oder benutzen wollen, folge diesem Schritt, um den iOpener in kochendem Wasser zu erhitzen.

    • Fülle einen Topf oder eine tiefe Pfanne mit ausreichend Wasser, um den iOpener komplett damit bedecken zu können.

    • Erhitze das Wasser (ohne den iOpener) bis es kocht. Schalte die Wärmezufuhr (Platte) aus.

    • Lege den iOpener für etwa 2-3 Minuten in das heiße Wasser. Stelle sicher, dass der iOpener komplett mit Wasser bedeckt ist.

    • Nimm den iOpener mit einer Küchenzange aus dem Wasser heraus.

    • Trockne den iOpener gründlich mit einem Küchen- oder Handtuch ab.

    • Der iOpener speichert die Hitze, und ist daher sehr heiß. Sei vorsichtig, und halte den iOpener nur an den Endlaschen, nicht in der Mitte.

    • Der iOpener kann jetzt verwendet werden. Solltest du den iOpener erneut erwärmen müssen, erhitze das Wasser nochmal bis zum Siedepunkt, schalte die Wärmezufuhr aus, und lege den iOpener wieder für 2-3 Minuten vollständig in das Wasser.

    What do I do if I don’t have a iopener?

    alexdelarge103@gmail.com -

    Use a hair dryer

    Edited To the max -

    2 or 3 cups Rice in a sock, heat for about 2 minutes. But, I recommend the iopener.

    Robert Garcia -

    When boiling in water you can put the iopener in a ziplock to keep it dry.

    Robert Garcia -

  5. 4fSrpT12RPOorLqZ
    4fSrpT12RPOorLqZ
    YEXM13x4vxQLEIqa
    CUUZal13vZyLAeHH
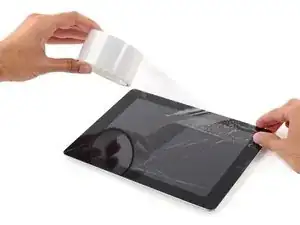
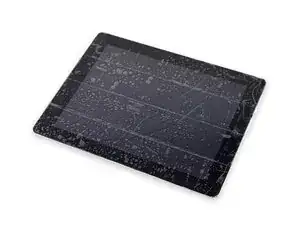
    • Wenn das Glas zerbrochen ist kannst du weiteres Zersplittern und die Verletzungsgefahr verringern, indem du das Glas mit Klebefolien sicherst.

    • Belege das Display ganz mit überlappenden Streifen von festem durchsichtigem Klebeband.

    • Dieses Verfahren hält die Glasscherben zusammen und du kannst das Display leichter an einem Stück hochheben.

    • Gehe diese Anleitung so sorgfältig wie möglich durch. Trotzdem könnte das Glas weiter brechen. Dann musst du eventuelle Teilstücke mit geeignetem Werkzeug heraus zupfen.

    • Schütze deine Augen mit einer Schutzbrille und achte darauf, den LCD Schirm nicht zu beschädigen.

    Why does it says in red letter to be sure not to damage the LCD screen? I thought the whole point of this guide is to replace a broken screen and the new screen comes with a new LCD since apparently they cannot be separated

    Stranger Danger -

    Because some people are opening the ipad to replace the battery! Like me~

    stephenwithph -

    The picture is a picture of an ipad 4 lol

    iCare Electronic Repair -

    The opening procedure is the same on many iPad models, so some photos are reused for all models.

    Daniele Carminati -

  6. r4amr5F6MjBUIQnt
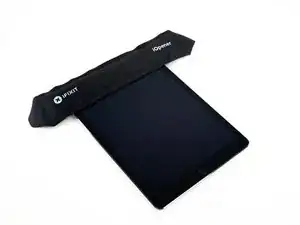
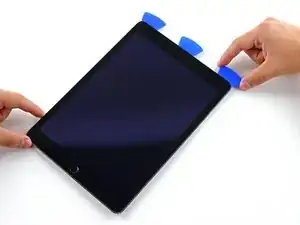
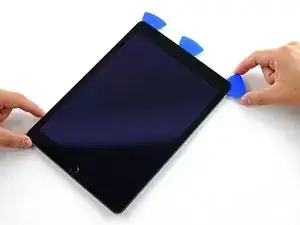
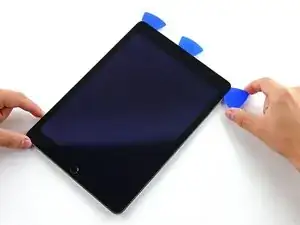
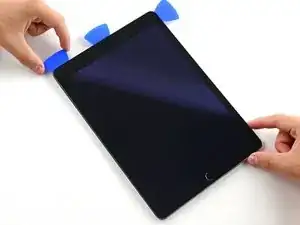
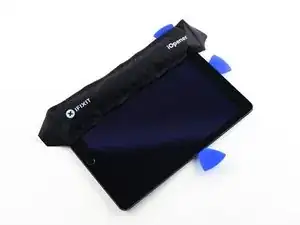
    • In den folgenden Schritten wird ein iOpener benutzt, um den Kleber der Displayeinheit aufzuweichen. Erhitze den iOpener nicht mehr als 30 Sekunden in der Mikrowelle.

    • Fasse ihn nur an den beiden Laschen am Ende an und lege den erhitzten iOpener auf die obere Kante des iPad.

    • Lasse ihn dort zwei Minuten liegen, um den Klebstoff zu lösen, der das Frontpanel am Rest des iPads festhält.

    Yeah, this part took longer than written. Over 30 minutes and had to reheat the iOpenner since it got cool enough to only feel warm.

    Christopher Lowder -

    So true, the adhesive is really strong.

    Benjamin Black -

    I would recommend using a hair dryer on high instead. Heat a certain area 60 seconds at a time and keep the hair dyer moving at a slow but constant speed.

    Alexander Chrisman -

    Hi!

    Is the quality of the iOpener so different, that for some people this guide works. but for most people including me, this 30 sec do not hotten the iOpener enough..

    Couldn't anybody do a new guideline with proper info, how many sec on which watt, etc. Pretty please!

    BUT, with that said, I would like thank You people on ifixit.com, for make all this tools. I f. love it! But plz make a new guide for at least iPad Air 2, screen replacement!

    Big love from Sweden and me Magni =) <3

    Magnifika Mole -

    Hello Magni!

    Microwave power can be vary, so you may need to microwave your iOpener longer in order to get it hot enough. The iOpener should be hot to the touch, about 80-100°C.

    Arthur Shi -

    Why do these instructions say to heat the top of the iPad for 2 minutes, but then prior open the bottom? The instruction below seem to indicate heating the side that you are about to pry open.

    mpulliam -

    I saw in some “How To”videos, the repair shop had expensive heating pads to assist in screen removal. If I ever find myself making a similar repair to an iPad of iPhone, I’m going to try using a heating pad I have for my back. Set it to high and let the iPad/iPhone set on it screen down for 15 minutes or so. Should do the trick.

    Charles Meitin -

    결국 히팅건을 사용했습니다. Bosch GHG 500-2 패드 알루미늄이 뜨거워질 때까지 가볍게 가열하십시오. 손가락으로 만지면 견딜 수 없을 정도로 뜨거워질 때까지 천천히 가열했습니다. iopener는 시간이 많이 걸리고 성공하지 못했습니다.

    jinwoo KIM -

    I used a heat gun from about 3 feet away with my hand right next to the iPad to gauge how hot it was. In the end you need the edge of the screen almost but not too hot to touch

    Rich Pepp -

    Did it with the IOppener! Just be patient. It seems the les harmfull way of doing it. I just had to reheat it few times.

    Lucarelli Dorian -

    Wish I'd have known alk these tools were here before I tried replacing the battery on my iPad Air 2 only to mess up the digitizer or the LCD screen one. Since they come together in replacement guess doesn't really matter which one is messed up. Or does it? Hmmm.

    Darlene -

  7. vbug1VOBMObXrrNJ
    vbug1VOBMObXrrNJ
    lM2svovREMXARVPx
    QQCvcb1RJlUkbUQW
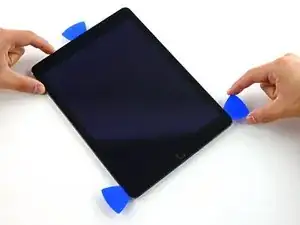
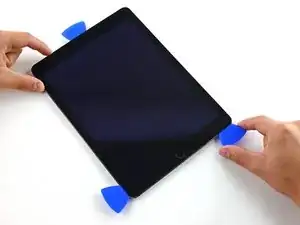
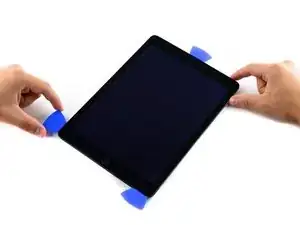
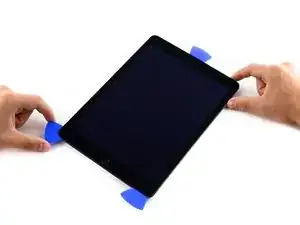
    • Von außen sieht das iPad gleichförmig aus, aber unter der Glasoberfläche gibt es an verschiedenen Stellen empfindliche Bauteile. Um Schäden zu vermeiden, darfst du nur die in jedem Schritt beschriebenen Stellen erwärmen und an ihnen arbeiten.

    • Passe bei den folgenden Schritten besonders auf und vermeide es dort zu hebeln:

    • Am Home Button

    • An der Frontkamera

    • An der Hauptkamera

    you should be careful with the screen connector on the bottom right when opening

    Elyazee Eble Altenawe -

    I accidentally cut the volume cable as when I tried to gently pry that corner area with the iFixit triangular plastic openers, one needed to be pushed quite hard to open the screen and slipped, the cable was stuck to both the screen digitiser glue and the case, so when I pried the screen off, the cable tore. iPad still works but annoying the glue is so strong.

    Mork Olimorph -

    Well, there is actually only 2mm at the bottom just around the home button. Be careful! I broke mine since iFixit didn’t point that out!

    Konzentrat -

  8. Q5FtuQZL3oOjHQa5
    Q5FtuQZL3oOjHQa5
    DAMCYJfrKmf3Mq4s
    yWnWSu3TVTEBXDuV
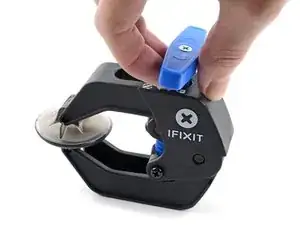
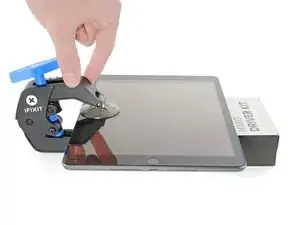
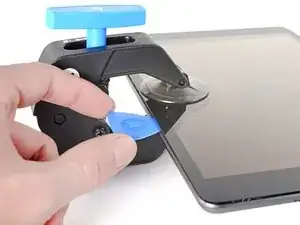
    • Wir haben die Anti-Clamp entwickelt, um das Öffnen von Geräten zu erleichtern. Die nächsten beiden Schritte zeigen, wie sie verwendet wird. Wenn du sie nicht benutzen willst, überspringe die nächsten zwei Schritte und folge einer anderen Methode.

    • Genaue Anweisungen für die Anti-Clamp findest du hier.

    • Hebe die Anti-Clamp so hoch, dass ihre Arme über und unter dem Display befestigt werden können.

    • Drücke den blauen Griff zum Scharnier hin, um den Öffnungsmodus zu deaktivieren.

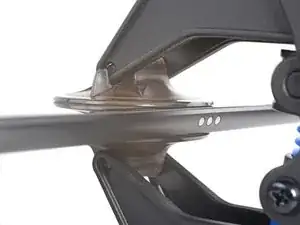
    • Setze die beiden Saugnäpfe nahe an der Oberkante des iPads auf, einen auf der Vorder-, den anderen auf der Rückseite.

    • Drücke die Saugheber auf den Oberflächen fest.

    • Wenn die Saugheber nicht gut auf den Flächen haften, dann klebe Paketband darüber.

  9. OEGqbTUaOHP6nJa3
    OEGqbTUaOHP6nJa3
    OJHmdJnLMOLLYIma
    tAncPpcqfOpGiEDW
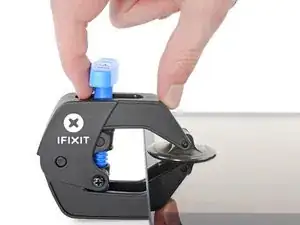
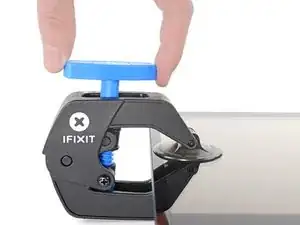
    • Drücke den blauen Griff vom Scharnier weg in die Stellung für den Öffnungsmodus.

    • Drehe den Griff im Uhrzeigersinn, bis du merkst, dass sich die Saugheber dehnen.

    • Achte darauf, dass sich die Saugheber weiterhin gegenüber stehen. Wenn sie sich nicht mehr gegenüber stehen, dann löse die Saugheber ein wenig ab und schiebe sie in die richtige Position.

    • Warte eine Minute, damit sich der Kleber allmählich ablösen kann und ein Spalt zum Öffnen entsteht.

    • Wenn die Anti-Camp einen Spalt geschaffen hat, der breit genug ist, dann schiebe ein Plektrum unter das Display ein.

    • Wenn es nicht gelingt, mit der Anti-Clamp einen ausreichend großen Spalt zu erzeugen, dann erwärme die Stelle nochmals und drehe den Griff eine halbe Umdrehung im Uhrzeigersinn weiter.

    • Drehe den Griff jeweils nicht mehr als eine halbe Umdrehung weiter und warte jedes Mal eine Minute lang. Gib der Anti-Clamp Zeit, ihre Arbeit zu erledigen.

    • Überspringe die nächsten zwei Schritte .

  10. rpaBWg5X1LUnivHt
    rpaBWg5X1LUnivHt
    NXKEJYkJ5HpXf5cV
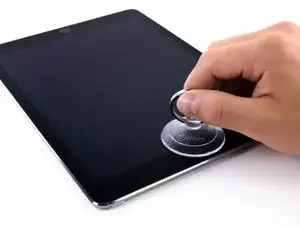
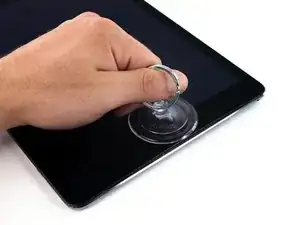
    • Setze einen Saugnapf über die Frontkamera des iPads und drücke ihn fest, damit er sich festsaugt.

    • Um die größte Hebelwirkung zu erzielen, setze den Saugnapf so nahe wie möglich an der Kante an, gehe aber nicht über den Rand des Displays.

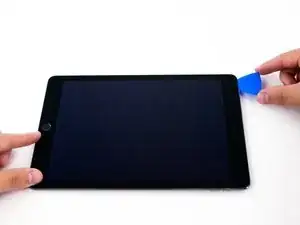
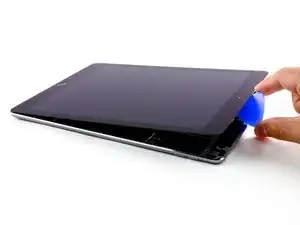
    This is the trickiest and scariest part of the procedure. (read all of the comments in Steps 1 and 2 and at the end of the guide). The iOpener also did not work for me - it simply would not soften the glue enough. I used a blowdryer. Have lots of patience and be gentle! I did not pull up on the suction cup very much. I softened the glue enough that I could get my fingernail under the glass, then I was able to wedge the pick in beside it. The rest of the screen removal went easy with the blowdryer and blue picks.

    Nancy Hansen -

    It helps to know that the adhesive is v narrow (2-3 mm) tapes, not great globs of bitumen. Once the seal is broken, you’ve won. Also, the shiny bezel is part of the metal body, not the screen, so get your widget between the glass and the bezel. And be patient. Even with a heat gun and IR thermometer it still took me 30 mins to get the screen off.

    Richard O'Brien -

    The screen glass can only be pulled up a fraction of a millimetre, just enough to insert the mere tip of an opening pick.

    The glue then gives way very slowly. Give it time to release before moving the pick slowly further in. If you pull the pick out without wedging the gap open with another pick the glue will re bind and you are back where you started.

    I used a very cheap Aldi laser thermometer to check temperatures. The glue seems to loosen at 41C+, although the heat takes time to penetrate.

    David Kennedy -

    When I purchased a new replacement battery, it came with a suction cup. That cheap cup wasn’t able to hold on the screen. luckily I had a set of heavy duty suction cups when I made a repair on my iMac. I recommend investing in the heavy duty cups.

    Heavy Duty Saugheber

    These provide an excellent vacuum seal and leverage to lift the screen. Be careful and make sure you soften up the adhesive or you will crack the screen.

    Charles Meitin -

    I agree with Charles, the suction cup from the kit just kept slipping off the screen. I too, have the heavy -duty cups from a Mac repair

    William Draheim -

  11. mJCqfjEDtJeihiXC
    mJCqfjEDtJeihiXC
    LhCLCjtgwcD4eQVo
    nZkUghUs1xfKEWTf
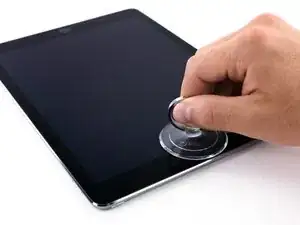
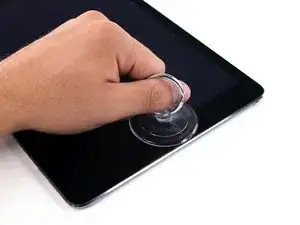
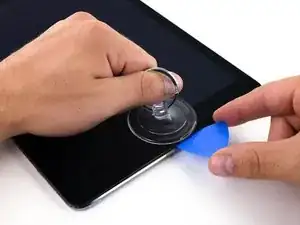
    • Ziehe kräftig am Saugnapf, um einen kleinen Spalt zwischen der Vorderscheibe und dem Rückgehäuse zu schaffen.

    • Ziehe aber auch nicht zu stark sonst könnte die Scheibe splittern.

    • Wenn der Spalt groß genug ist, kannst du ein Plektrum hinein schieben, so bleibt die Klebestelle offen.

    Even using a heat gun in an effort to soften the remarkably tenacious adhesive, I found it impossible to use the suction cup to lift the edge of the screen sufficiently high to insert a pick. I ended up using an exacto knife and a single-edge razor blade to make the initial opening, after which I was able to insert and use picks per the instructions.

    James Steffy -

    If you have the screen hot enough then it does lift and leave a small gap. I was really surprised. I was using the stronger suction cup that you can buy separately though

    Rich Pepp -

    Indeed, heat and apply time matter. I took the shattered glass off from my LTE iPad Air 2 more easily than on the donor wifi iPad Air 2, I couldn't seem to separate it on the donor device. I decided to increase heating and apply time: heated the iOpener 1 minute, and applied the heat for 5 minutes (doubled everything) and yes, it now moved just enough and I could get the picks in!

    fbr -

  12. UBZTHwdRqbwRLJAl
    UBZTHwdRqbwRLJAl
    RTJrYjnQCiMxQGEw
    4TraNDygnvQCXDJV
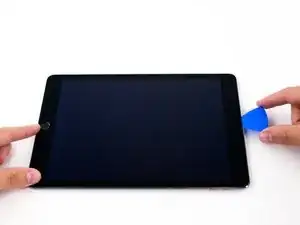
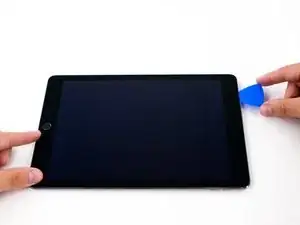
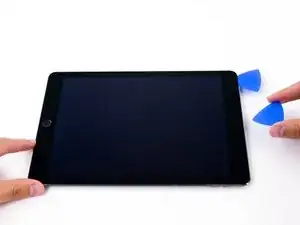
    • Fahre mit dem Plektrum an der Kante des Displays in Richtung der Ohrhörerbuchse entlang.

    • Wenn doch noch ein stärkerer Widerstand dabei zu spüren ist, wiederhole die Erwärmprozedur mit dem iOpener.

    • Achte sehr darauf mit dem Plektrum nicht in die Verbindung zwischen Frontglas und LCD Schirm zu geraten, das könnte das Display irreparabel schädigen.

    • Als gute Faustregel gilt, das Plektrum nie mehr als 6 mm in das iPad einzusetzen.

    I think I accidently slid my tool into the fused lcd and front panel and now the entire screen is doing weird lines and different colors and just is not natural its not even usable. I was gonna replace the battery because the batter was popping the entire front panel and lcd off of the base of the device and then when i was openingit up the rest of the way I slipped and it hit something and now its all glitchy. what should i do?? is it even worth fixing anymore? it;s too old for apple care and I already voided the warranty and displays are expensive what should I do? email me @ andrew.heidorn1@gmail.com thanks :)

    Andrew Heidorn -

    “a quarter of an inch” might be OK for the US/UK… what about pretty much the rest of the world using the metric system? When giving measurements, please always include them also in mm/cm

    Denis Hay -

    A quick google search will give you the answer

    Stranger Danger -

    Metric is for engineers. Last place on earth to use inches is US car industry. NASA uses metric. You know it makes sense.

    Peter Goodall -

    I shattered the glass on my iPad during this step.

    To melt the adhesive, you have to heat the glass A LOT, to at least 80°C. I was using a portable infrared thermometer while doing this. Heating the iOpener in my microwave for 60 seconds only raised its temperature to about 90°C, and leaving it on the glass for a few minutes didn’t raise the temperature of the glass to more than about 40°C. I switched to a hair dryer and heated the glass to about 70°C, which was barely enough to be able to insert one pick. As soon as I tried to slide it across, the glass broke.

    I recommend having a reliable way to measure the temperature, and finding something that can heat more effectively than the iOpener. Also take caution to heat all along the top, not just the point where you’re inserting the pick. In theory the iOpener is designed for this, but it doesn’t get hot enough.

    I wish the iOpener came with a specific heat rating. It has many warnings against overheating it but it’s not clear exactly how much is too much.

    Daniel Corks -

    6mm is far too much at the side. There is only 4mm from edge of glass to the display unit . I guess I damages my display because the pledge had gone between glass and display.

    tobiasscholand -

    The picks should have a 5mm indent on them so you can’t push them in to far, at least on one of the tips

    mpulliam -

    warning! The gap just below the home button is 2mm. Be very careful. It is the thinnest space!

    jinwoo KIM -

    Yep, this is the single most important instruction and where I like others screwed up. You really can't insert the pick more that 4mm otherwise it risks going between the screen and the digitiser. There is almost no resistance so it is very easy to do. It is almost worth marking a 4 mm depth on each pick before starting. Getting the adhesive to lift was really easy it the screen is hot enough, sticking the pick in too far is also too easy :(

    Rich Pepp -

    Purchase an electric griddle for pancakes, etc. Set the temp control until the hotplate measures 100 deg C, using a cheap IR thermometer to check the surface temp. Lay the display face down.

    Leave the device (iPad, smartphone, whatever) directly of the plate for about 2 minutes. Use heatproof gloves or thick cotton gloves to lift the device off the plate, placing it on a flattened towel, face up, to begin the prying process. Heating the entire device allows you to continue all the way around the outer edge without reheating, but work quickly.

    Plastic picks should be trimmed to 2mm or 4mm, tapering the edge down with sandpaper until it can slip between the display and the frame. Use a very thin knife blade, single edge razor blade, or thin stainless steel spudging blade to start the lifting process. Do NOT cause any bending distortion of the very thin LCD glass - it will break instantly! You must be below the front glass AND the LCD screen. Be absolutely sure!

    PATIENCE! Go no faster than the adhesive will release.

    Dan Smith -

    I was unable to use the pick provided to get my first opening or separation. I use the knife from the upgrade parts kit. Being a former bench tech. That was the tool I used most often to crack open laptop cases. After I had separation I did use the plastic pick as suggested.

    William Draheim -

  13. y34OmvNZddjUsgJf
    y34OmvNZddjUsgJf
    dKyTUwZlqudvsrwS
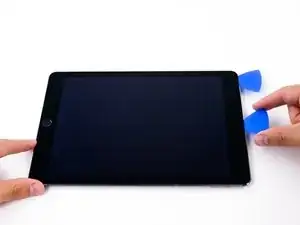
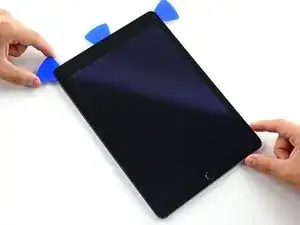
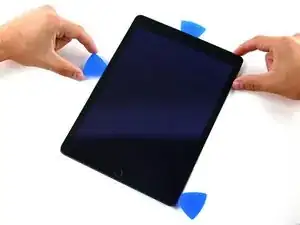
    • Setze ein zweites Plektrum in der Nähe der Frontkamera ein.

  14. VlouIlKDBobp21ht
    VlouIlKDBobp21ht
    4D3HnAB5lW6NWtQP
    usBnHAdBOnUhgKgZ
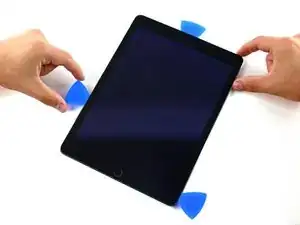
    • Fahre mit dem zweiten Plektrum an der Oberkante des iPad entlang in Richtung des Aufweckknopfes.

  15. QItKpaRbXb1UvjCF
    QItKpaRbXb1UvjCF
    GWdnFUu2a2WqNBRk
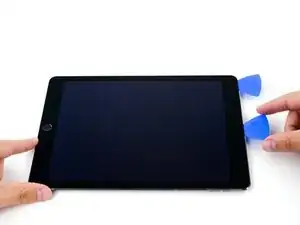
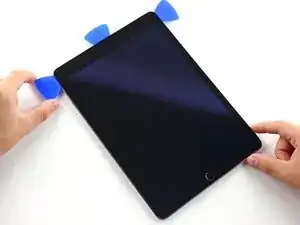
    • Setze ein drittes Plektrum bei der Frontkamera ein.

  16. SB6QxHsLajVvHKLF
    SB6QxHsLajVvHKLF
    6jAjQvNWJtPA1icQ
    bfWiL6JjqPuCHktD
    • Fahre mit dem rechten Plektrum herunter und um die rechte obere Ecke des iPads.

  17. iEwCprM5hUbjMa5M
    iEwCprM5hUbjMa5M
    btBkuNsD1BGWdmNi
    ZeLYciNptnjMD5sN
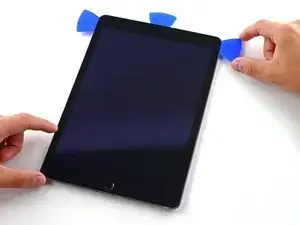
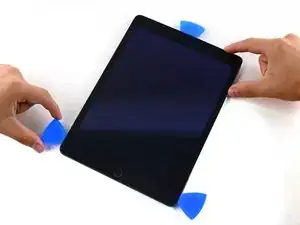
    • Fahre mit dem linken Plektrum um die linke obere Ecke des iPad.

  18. fpXSlsGA4PuXZwtC
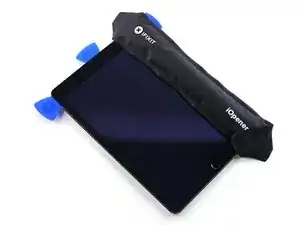
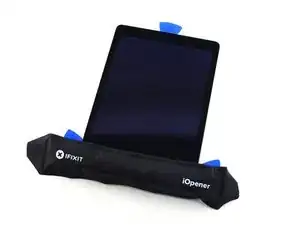
    • Erwärme den iOpener wieder und lege ihn auf die rechte Kante des Displays, um den darunterliegenden Kleber auszuweichen.

  19. bYJQLgFB46cU2pVJ
    bYJQLgFB46cU2pVJ
    bZDFr4X45b4DahBn
    s1wTnCHfVesRTpQu
    • Schiebe das rechte Plektrum bis etwa zur Mitte der rechten Seite.

    take care not to insert more than 4mm!

    tobiasscholand -

    100% agree with the above comment - this wrecked my screen

    Nicholas Giles -

    Difficult when glass is shattered. Any tips for that?

    fbr -

  20. JMuZWuybr3UclCyZ
    • Erwärmen den iOpener wieder und lege ihn auf die linke Seite des iPad.

  21. IQRxoNTBSGtLM3i2
    IQRxoNTBSGtLM3i2
    ETnV2UuToukcU3om
    jJatPsp4QkC3AahX
    • Schiebe das linke Plektrum bis etwa zur Mitte der Kante des Displays.

  22. GReHqx2PqZURrOmS
    GReHqx2PqZURrOmS
    EKxY1RGlSXtPGpwj
    QoZPMgkyQQwPXR6j
    • Schiebe das gegenüberliegende Plektrum bis an die rechte untere Ecke des iPad.

    • Erwärme falls nötig wieder den Kleber an der rechten Kante um die Displayeinheit zu lösen.

    This is it. This was the step where I cracked the screen and ruined the device. Things had been going so well up to this point. Like many others I struggled with the iOpener, so I used a heat gun along with a temperature sensor and very carefully and slowly went back and forth along the edges keeping the temperature at exactly 200 degrees F. I got the pick in, went around the top corners, down the sides to the middle. But on this step where you finish sliding the pick to the bottom right corner, I got 3/4ths of the way down and CRACK. The glass shattered pretty badly in the corner, and there’s a crack running diagonally along the entire device. I put clear packing tape on top to keep it from cracking further, but sections of the screen are non-responsive. I can’t tell you how upset my 5 year old is going to be when he wakes up tomorrow and I have to tell him daddy wrecked his iPad. :( I believe strongly in the Right to Repair and this kit is fine. But GO SLOWLY, and BE CAREFUL.

    George Mann -

    I also cracked the screen at this same point. The glue has to be heated well, and the sliding should be smooth and easy, not too tight. Go slow, and heat frequently.

    arunpgi -

  23. wwPbdKhkSwI5hQMG
    wwPbdKhkSwI5hQMG
    LaZr2wpWCByppuVW
    UIXuRBEr3LiC3Bhm
    • Fahre das linke Plektrum die Kante des Displays herunter bis zur Ecke.

    I made it one step farther than the person above me. Made it about 1 inch from the bottom left corner and the screen shattered. I probably let it cool too much as I think I was getting a little impatient by now. The kit is great though. I successfully removed the rest of the screen even after it broke with no damage to anything else. I continued on to replace the battery and bought a new LCD (This was a roughly $130 mistake). I stress, go slowly, heat often. Kit worked great otherwise.

    Joseph Eichinger -

  24. UsPELiDHRgD5GTqy
    • Erwärme nun mit dem iOpener auch die untere Kante des iPad.

  25. wygPNSUXUUeMhjok
    wygPNSUXUUeMhjok
    YmJCAGY5oke2TUDU
    IlKVDslEYyMPKjBL
    • Fahre mit dem rechten Plektrum um die rechte untere Ecke.

  26. xfVKIvrVyEGfeDkD
    xfVKIvrVyEGfeDkD
    3RsbTJPXwtVsrU5J
    2yL1bOTG6QjYfuw1
    • Wiederhole für das linke Plektrum.

    • Falls nötig musst du den iOpener wieder anwenden. Warte zwischen den Anwendungen mindestens 10 min!

  27. IUNdFVqTQHS6UKiG
    IUNdFVqTQHS6UKiG
    h1UtPwFlqFxDEvCB
    • Entferne das rechte Plektrum unten am iPad.

    F…ing cracked the glass. This repair is a waste of time and money. The iOpener is b.s. You need to use a heat gun and/or a blow dryer. I had used the heat gun and a blow dryer to successfully separated the glass from the body until I reached the bottom. This is becuase I had left the heated iOpener on the bottom for at least 20 minutes. I used the blow dryer for the top and sides and it worked. When I turned the corner on the bottom, the glass shattered. The tip of pick was not in very far, maybe 2mm. Guess my only option now is a new iPad.

    mpulliam -

    same here, and I’m not using their $2 dinky microwave palm rest, I have a head gun and I’ve been heating this thing for 20 mintues side by side. Still cracked the class. Don’t attempt this, to do this successfully you should’ve had cracked 10 screens.

    Hussam Almuayad -

  28. XSUmMZChFquPbMVK
    XSUmMZChFquPbMVK
    BRuNiWvEDx3xpiaU
    G4mFOROitEkXfpcQ
    • Schiebe das linke Plektrum an der Unterkante des Displays entlang und entferne es dann von der rechten unteren Ecke des iPads.

    • Sei am Home Button besonders vorsichtig und schiebe das Plektrum nicht tiefer als 2 mm unter ihn ein, um Schäden am Home Button zu vermeiden.

    • Sei links und rechts seitlich vom Home Button besonders vorsichtig und setze das Plektrum nicht tiefer als 6 mm hinein, um Schäden an den Displaykabeln darunter zu vermeiden.

    warning! The gap just below the home button is 2mm. Be very careful. It is the thinnest space!

    jinwoo KIM -

    Well, there is actually only 2mm at the bottom just around the home button. Be careful! I broke mine since iFixit didn’t point that out!

    Konzentrat -

    Thanks for the comments! I’ll add the warning into the step.

    Arthur Shi -

  29. nXVJJRDnIVIEyZPZ
    nXVJJRDnIVIEyZPZ
    n5cKmgNVTKxCCPV6
    1gRV3YKWs5skeaP1
    • Drehe das letzte verbliebene Plektrum an der Frontkamera hin und her, um das obere Teil des Displays vom hinteren Gehäuse zu lösen.

  30. QWKcSeh1aCYKYnXa
    QWKcSeh1aCYKYnXa
    S4FnZwQ64CJtQSG3
    BtggnUOZ4jctidXP
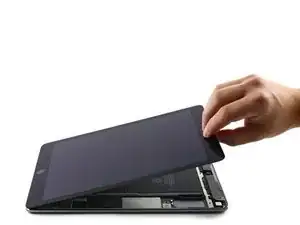
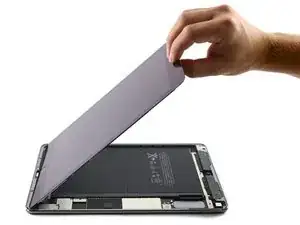
    • Fahre fort die Displayeinheit von der Frontkamera-Seite aus anzuheben.

    • Ziehe sie leicht von der Unterkante weg um sie ganz vom rückwärtigen Gehäuse zu lösen.

    • Hebe weiter an, bis die Displayeinheit fast rechtwinklig zum Gehäuse des iPad steht.

    • Versuche noch nicht das Display ganz zu entfernen, es ist noch mit drei empfindlichen Flachbandkabeln mit dem hinteren Gehäuse verbunden.

  31. XYMMKOF1oTMisLOB
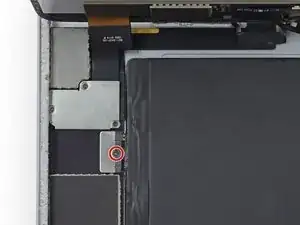
    • Eine einzelne 1,8 mm Kreuzschlitzschraube sichert die Batterieanschlüsse auf der Hauptplatine. Drehe sie heraus.

    Be very careful when replacing the screws not to lose them. They are micro small. I would even think about ordering a couple extra of each size just in case.

    David Christoff -

    What I did was, initially using a magnetic screwdriver bit, after removing putting them on a magnetic mat, then after removing cables I screwed them back into the original holes to hold them in safe place while completing the repair.

    Yes, those screws are some of the tiniest screws I have seen, on par with mechanical watch mechanism screws.

    Drop one of them, and you are screwed.

    G Trieste -

    I have damge this battery terminals to their contacts on the logic board when I remove the battery. So how to fix this? Can buy that hardware to make replacement? Urgent! Need Help!

    jackwong.123 -

    Hi jackwong,

    If you are talking about the small springs that contact the battery, there is no easy way to replace them. You can try removing the board, applying a lump of solder on the contact with the broken spring, and see if that will be sufficient to connect to the battery contact when the board is screwed down.

    Arthur Shi -

    If the LTE version being worked on, ensure the sim tray is removed before attempting to isolate the battery.

    Brendon Gould -

    Is the logic board on the iFixit battery replacement thicker than the Apple battery? I can’t screw in this 1.8mm screw.

    Taylor Kosiba -

  32. pcoFBimLUsdJnAMu
    pcoFBimLUsdJnAMu
    5RGt6YVwytjGGjJm
    FKW3xQTYYPhSVGFI
    • Die Bilder zeigen, wie der Akkuanschluss unter dem Logic Board aussieht. Schaue sie dir gut an, bevor du den Akku sicher abtrennst.

    • Beachte, dass der Akkuanschluss durch Federn auf dem Logic Board nach unten gegen die Kontakte gedrückt wird. Zum Abtrennen musst du ein dünnes und flexibles Werkzeug zwischen die Kontakte einschieben.

  33. yX6hroVZgWwj5lJU
    yX6hroVZgWwj5lJU
    O43jcOLGlWZntPDQ
    • Du kannst das Risiko eines Kurzschlusses verringern, wenn du ein spezielles Plektrum, das "battery isolation pick" (deutsch Akkublocker) verwendest, um den Akku abzuklemmen.

    • Wenn du den Akku mit einem Akkublocker abtrennst, musst du sehr vorsichtig sein. Die Akkukontakte sind sehr empfindlich und können leicht verbogen und dauerhaft beschädigt werden.

    • Schiebe den Akkublocker unter den Akkuanschluss auf dem Logic Board und lasse ihn dort, solange du arbeitet.

    • Du kannst auch mit Hilfe dieser Anleitung einen Akkublocker aus einer Spielkarte herstellen. Schiebe sie dann zum Abtrennen des Akkus unter den Anschluss unter dem Logic Board.

    Where am I supposed to get this part? I got the ifixit pro toolkit and didn't get this isolation pick

    Raid One -

    Since the battery blocker is a specialized tool used only for iPad repairs, we do not include it in the toolkit. You can purchase one here, or you can make one yourself by cutting a notch out of an opening pick.

    Arthur Shi -

    Can’t you just disconnect the battery?

    Pontus Sennerstam -

    So if this method is outdated, what is the current method to disconnecting the battery?

    Orochi -

    Orochi: right?? Come on guys, don’t tell us the method is outdated and then not explain what the better method is

    Subtle Hyperbole -

    A couple points: 1) You have piqued my interest! I’m now looking for the new, improved way to isolate the battery before embarking on the repair. 2) I have an iPad Air 2 with LTE, the area on ifixit.com for the LTE variant of the model does not have all the procedures that this WIFI only variant page has.

    bentley -

    Hey bentley,

    If you find a way to safely isolate the battery without the risk of damaging the connector pins, keep us posted!

    Arthur Shi -

    I did not do this part and had no problems. Just don’t bridge any metal parts with the screwdriver. (at least I assume this is what would cause a short)

    Nancy Hansen -

    Actually you can cause some shorts with your fingers too. You can skip this step, but you must bee very carefull going on.

    Daniele Carminati -

    Heat motherboard then use plastic stick or guitar pick to gently unstick motherboard enough to insert peace of paper where battery contacts are.

    Thank me later.

    Popka Durak -

    I took a business card and notched it like the shown pick. Just wide enough to fit and notched to clear the screw post. Worked like a champ.

    Charles Meitin -

    마더보드는 바닥판에 접착되어 있습니다. 이것은 배터리 접점에서 들어 올려져야(약간 구부러져야) 합니다. 사진을 자세히 보시면 터미널의 좌우 기판도 보입니다.

    jinwoo KIM -

    jinwoo KIM’s comment translated:

    The motherboard is glued to the bottom plate. This must be lifted (slightly bent) from the battery contacts. If you look closely at the photos, you will also see the left and right boards of the terminal.

    G Trieste -

    I recently successfully replaced a battery on this unit.

    I did not see why the warning at the top of this repair guide is necessary, as the battery is connected via several contacts surrounding the screw hole, and the insulating pick they show, or something similarly shaped, should work at isolating the battery. Of course this is only my observation, so take it as you may, I make no assurances of anything.

    Removing/replacing the battery is whole ‘nother ballgame however.

    The ipad’s contacts are pressed down on the battery contacts, around the hole, that screw hole has an elevated bump which the battery connections have to be slid up and over that bump, requiring the lifting of the ipad connector and possibly part of the motherboard — which is also thermal glued to the case; you may have to heat up the bottom of the case to release that enough to lift.

    I am going to post this info also on the battery replacement repair section for this model.

    G Trieste -

    I broke a pin here. My kit came with a tool that resembles a pick with a cutout, so I used it, rather than modify a pick. It would not stay in as pictured and would not go in as far. So I kept pushing it in and expecting it to go further. There is an opportunity for more detailed explanation here. I was able to bend back one of the small pins, but the other bent one broke while I attempted to bend it back. So, there were 3 little pins, now there are two. I put it back together, anyway, and am happy it all works. I am hoping it is a redundant system, and will not overheat the battery right away and explode. If anyone knows the tale of the three little pins, I would like to know.

    Bruce Irla -

    Although I put it together anyway with the broken battery connector pin and it worked, it would not charge. iFixit is out of replacement motherboards. It may be that the thumbprint button is keyed to your original motherboard, so changing either without the other will lose that capability? It cost the same as a motherboard to ship it out for micro soldering a new battery connector. The connector is like $2. I ordered one and will take my chances microdesoldering the old battery connector off and micro soldering the new one on.

    Bruce Irla -

  34. RELW2JOPllmB1aFx
    RELW2JOPllmB1aFx
    ugee1oRiSGIOptx2
    Dgn1M2GeHxhZdnai
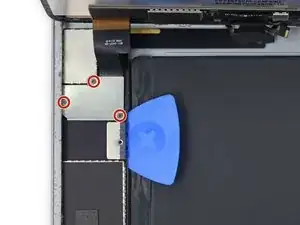
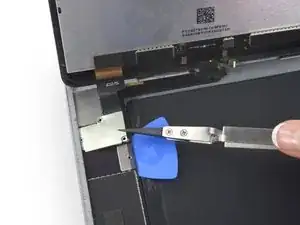
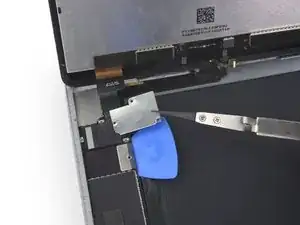
    • Entferne die drei 1,3 mm Kreuzschlitzschrauben von der Halterung des Displaykabels.

    • Entferne die Halterung.

    Re-assembly tip: when I took the screws out, they showed residu of Loctite. Remember to put a tiny bit of Loctite on them before re-assembly.

    fbr -

  35. CTwg34oOHr163CSZ
    CTwg34oOHr163CSZ
    5GADFWQ2NIqJDxG6
    • Entferne den Verbinder des Displaykabels aus seinem Anschluss auf der Hauptplatine.

  36. pOqSqJMekhiJLXXO
    pOqSqJMekhiJLXXO
    bYGGeHEmRGQE5bsF
    rPkjs6UvQuRseySW
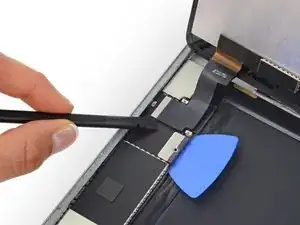
    • Unter diesem Displaydatenkabel sind noch zwei weitere Digitizerkabel. Löse sie.

    I don’t know where this repair guide is going at this point.

    It is supposed to be a guide to replace the battery, but goes on to a complete disassembly of the iPad. You don’t have to disassemble the whole iPad to replace the battery.

    The battery is inserted underneath the motherboard’s power connection slot. There is a screw that secures it, which is removed during battery replacement. The screw hole is on an elevated bump which the battery contacts have to be slid up and over, requiring the partial lifting of the motherboard at the battery connection — if necessary heat up the bottom of the case there to lift it up.

    When secured, the insert contacts sit around the hole. The tricky part is lifting that part high enough so that the battery connector can get over the bump, and the holes line up.

    I have found a hack that makes this a lot easier. Simply snip a small slot at the front of the hole of the battery connector. This way it does not have to lift over the bump, but can slide around it on both sides.

    G Trieste -

    I would love to see a guide on how to replace the charging/data connector.

    There was a comment under the part-page that mentioned it was tricky to replace due to the soldering involved.

    Do i need a hot-air station or will my fine tipped iron be enough?

    Mark Hoekman -

    I agree with G Trieste, there is no reason for complete disassembly to replace the battery. I placed a pick on the battery side of the battery connector underneath the new battery, gently pried up on the motherboard next to the battery connector and was able to slip the battery connection right into place.

    mswink1 -

  37. sdnDxOhZkyInRRv1
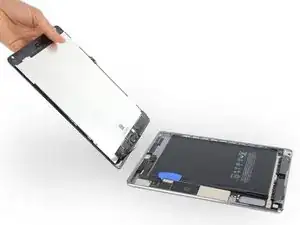
    • Entferne die Front Panel Einheit vom hinteren Gehäuseteil.

    • Wenn du vorhast, deine Displayeinheit wiederzuverwenden, musst du die Display-Klebestreifen ersetzen. Folge unserer Anleitung für iPad Klebestreifen, um die Display-Klebestreifen einzusetzen und dein Gerät wieder zu verschließen.

    Note on my iPad Air there was a little plastic cover around the front facing camera. Take that off an put it to one side as you will need it later for reassembly.

    John McDonnell -

    At this stage I found you do not need to do most of the rest of this guide although it does come with a warning. The battery is tethered to a metal ring which is the base of the retention screw in step 29. After Step 33, you can separate out the batteries from its adhesive now with a blow dryer or the iOpener (step 56). You will then find the battery free but hooked onto the ring. Take the blue opening tool (see step 55 for which tool this is) and wedge it where the battery is to make a gap. You can then lift the battery contact from its hook. After removing the battery, insert the new one into the small gap created by the wedge. The caveat is that you are bending the logic board a bit with the wedge so use this technique at your discretion.

    Raza Toosy -

    Thanks a lot! For my Celluar version (A1567 Air 2 Wi-Fi + Cellular), I followed the instructions to step 45 to remove all cables and connectors around the battery. Then I also jumped to step 56. To remove the middle part of the battery, I used a longer tool, a ruler, in addition to the enclosed "Plastic Cards". The glued battery could be removed by using the iOpener several times. In the end, the battery was only hanging on the clamp.

    Only now I understood that the battery was hanging on an eyelet on the back. The lever with the "iPad Battery Isolation Pick" was not enough. Therefore I cut an additional credit card with a small slot. The clamping point slipped out of the eyelet. The clamping point of the new battery could be plugged in again immediately.

    Josef Emmer -

    Thank you Raza for this shortcut. I used it as you explained and made a slight change. I noticed that the eye on the battery’s contact is not really locking the battery in place. It is the powerful glue that does. In addition, the screw in step 29 secures the contact assembly. So, to facilitate the positioning of the replacement battery, I cut the eye to make it a U, so that I could slide the eye around the holding ring without risking to bend the logic board.

    Richard Jacquot -

    I understand the process and reasoning for snipping the ring of the new battery to get it around that post, but how are you removing the old one without bending the logic board? You still have to get the ring of the old one up and over that raised post portion?

    Jason McCOy -

    2022-02-27 update: Manage to skip step 35 onward. I can change the battery without removing the logic board for my iPad Air 2 . It’s similar to the steps in iPad Air LTE Akku austauschen. Thanks Raza for the tips.

    Wex -

  38. 3PlFDHhTOYwjrK6Z
    3PlFDHhTOYwjrK6Z
    yZXnYRRAeHXuLEQ4
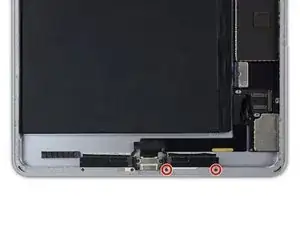
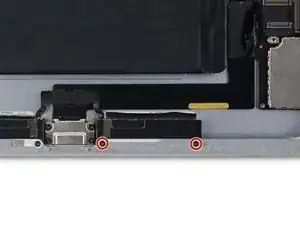
    • Entferne die beiden 1,5 mm Kreuzschlitzschrauben #00 rechts vom Lightning Anschluss.

  39. pZ5A53oaNeJDVE3K
    pZ5A53oaNeJDVE3K
    u5XTWTMdPY1D1G1q
    iLADaixdnvjIesiV
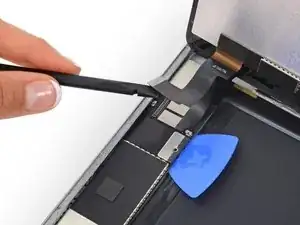
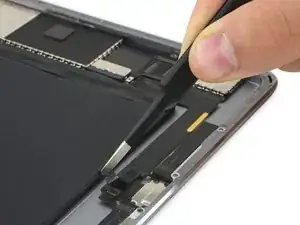
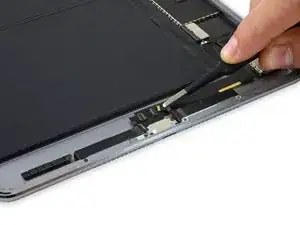
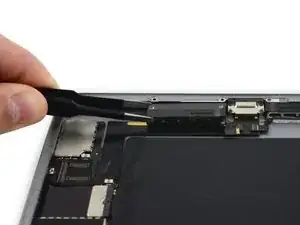
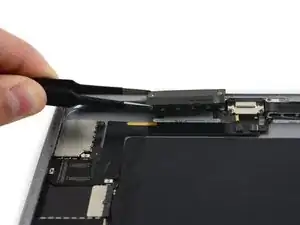
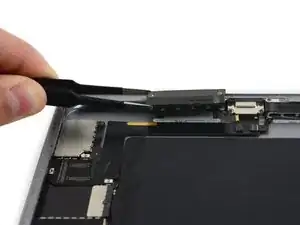
    • Entferne das Klebeband vom ZIF Verbinder des Lautsprechers.

  40. pK4kSdVD1vjTTFZP
    pK4kSdVD1vjTTFZP
    nlTmEUUyKBuQRqZY
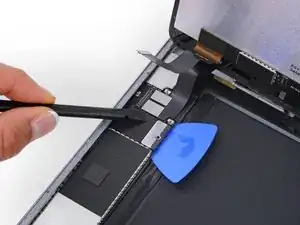
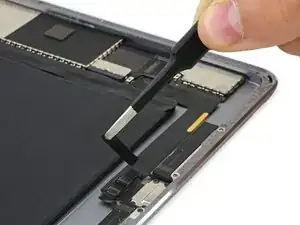
    • Klappe den Sicherungsbügel am ZIF Verbinder des rechten Lautsprechers mit dem flachen Ende des Spudgers hoch.

  41. HJRUHsWKkdi5AV1M
    HJRUHsWKkdi5AV1M
    jEXOmCJHCVgJIDQ1
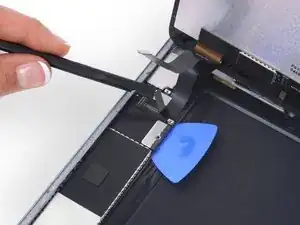
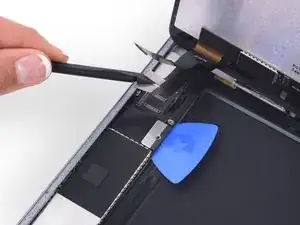
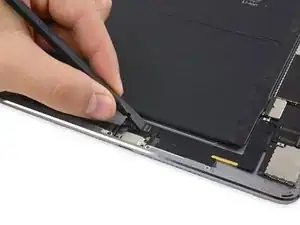
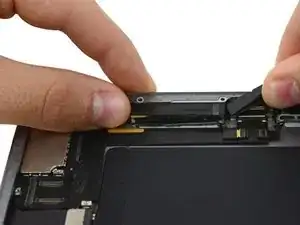
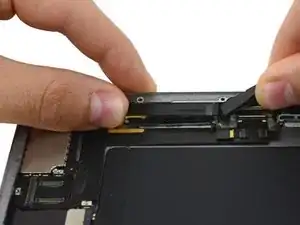
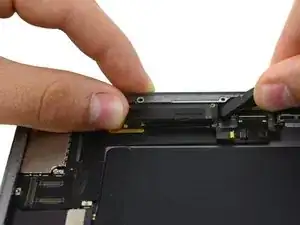
    • Schiebe das Lautsprecherkabel aus seinem ZIF Verbinder heraus.

  42. fQHmJUBZHMZUGgbq
    fQHmJUBZHMZUGgbq
    SkvdPoDhZwqHDk1N
    gC2RPTILHiQJVmGB
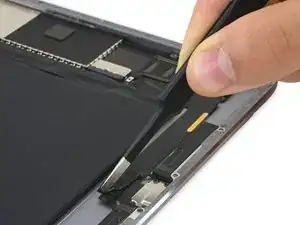
    • Setze den Spudger an der Seite des Lautsprechers nahe am Lightning Connector an und deinen Daumen auf die andere Seite.

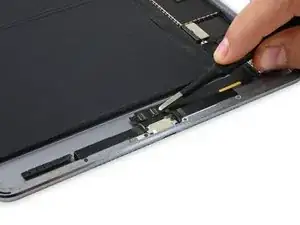
    • Drücke den Lautsprecher mit dem Spudger unter der Kante des Rückgehäuses hervor.

    • Der Lautsprecher ist sehr fest verklebt. Am Besten kannst du ihn langsam ablösen, wenn du mit dem Spudger sanft und gleichmäßig drückst.

  43. WpZUAXqvrAOsFOPZ
    WpZUAXqvrAOsFOPZ
    1jMPsKw3XRAd31MX
    • Entferne den rechten Lautsprecher vom iPad.

Abschluss

Um dein Gerät wieder zusammenzusetzen, folge den Schritten in umgekehrter Reihenfolge.

Evan Noronha

Mitglied seit: 06/02/15

219164 Reputation

3 Kommentare

"This is a microwave "

No $@$* I thought it was a dog

Arturo Fernandez -

May i know that left and right speaker is built in microphone? because after replacement the lcd& digitizer my voice is very very very very soft.

WKENT -

No, the speakers do not contain the microphone. If the procedure was a little rough/picks too far inserted, it could’ve damaged the mic(s)

also so the microphones are right beside the camera and just above the volume buttons on iPad Air 2
FRESH MEMES FOR FRESH PEOPLE -