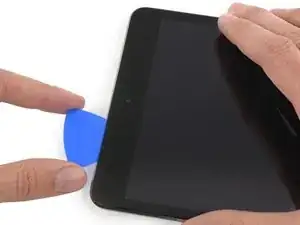
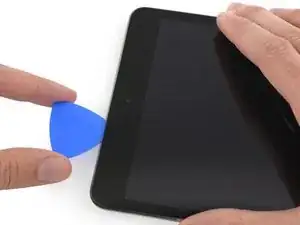
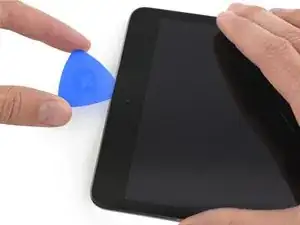
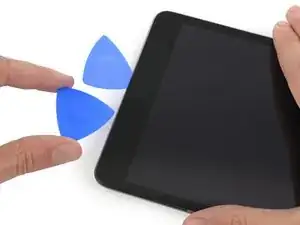
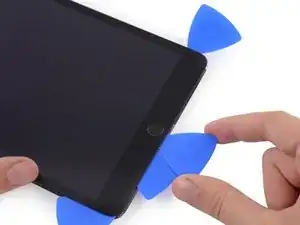
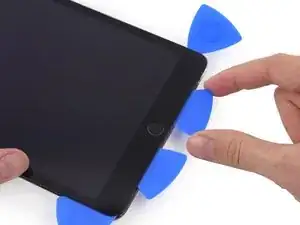
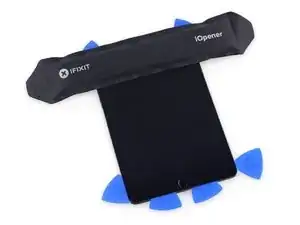
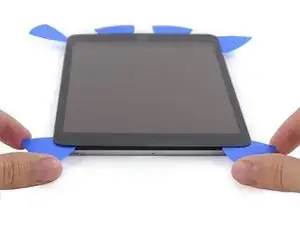
Einleitung

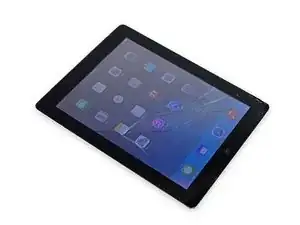
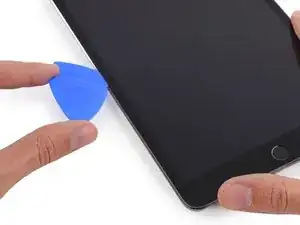
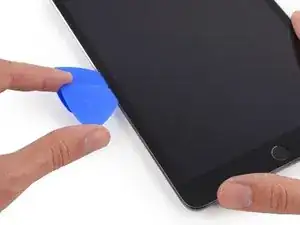
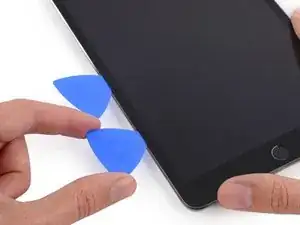
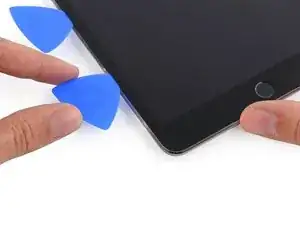
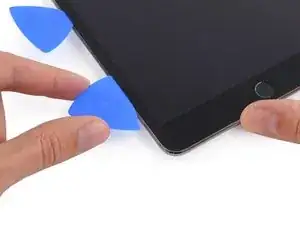
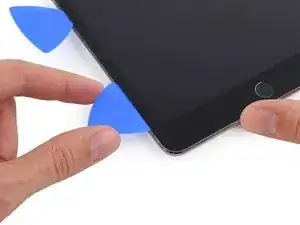
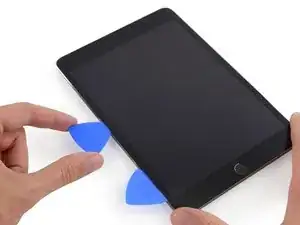
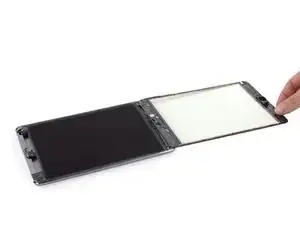
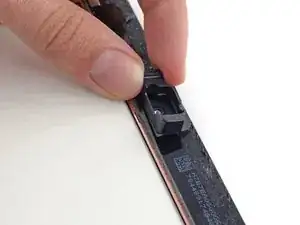
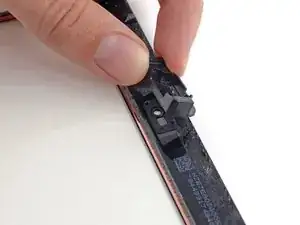
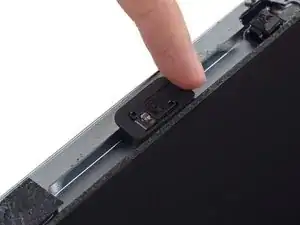
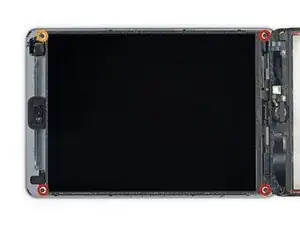
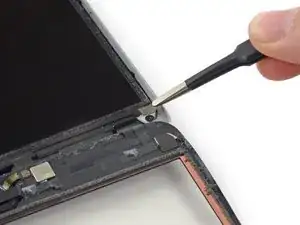
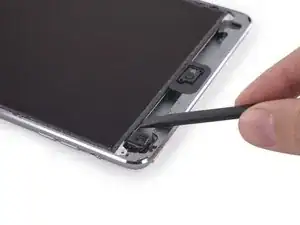
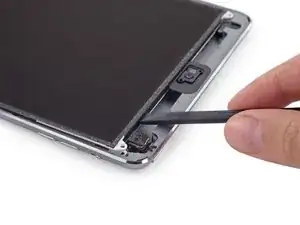
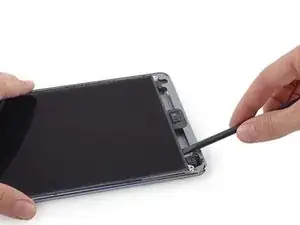
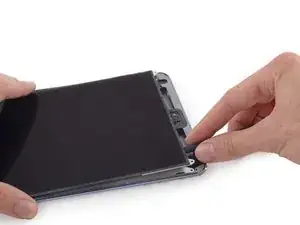
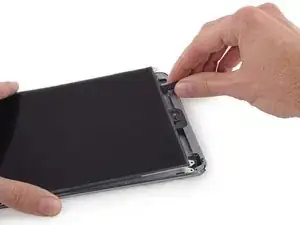
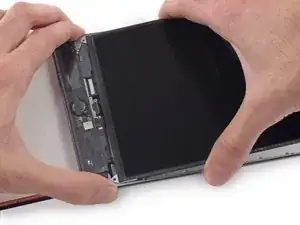
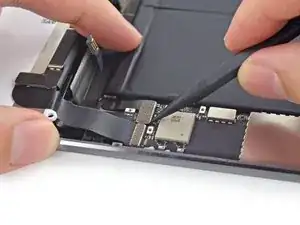
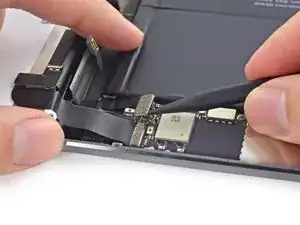
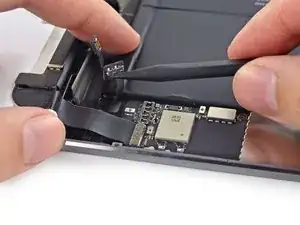
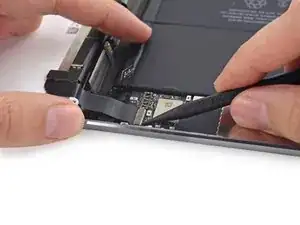
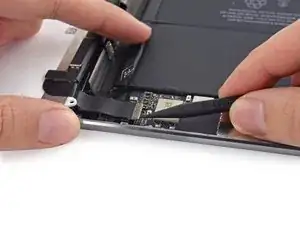
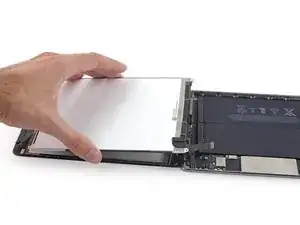
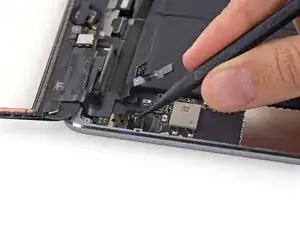
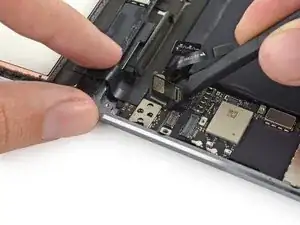
Diese Anleitung zeigt dir, wie du die rechte Antenne austauschen kannst.

  1. PFpjwVSYrnq3JQap
    PFpjwVSYrnq3JQap
    RFsyoneYVYQDPSht
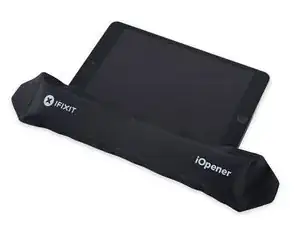
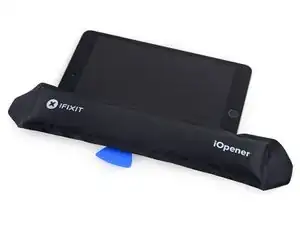
    • Wir empfehlen die Mikrowelle vor dem Gebrauch zu reinigen, da sonst Essensreste oder Ähnliches am iOpener hängenbleiben können.

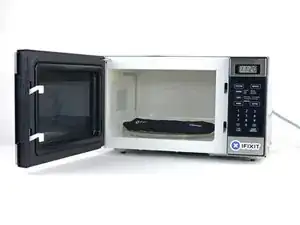
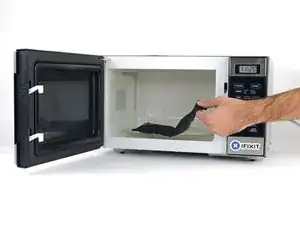
    • Lege den iOpener in die Mitte der Mikrowelle.

    • Für sich drehende Mikrowellen: Stelle sicher, dass der Teller sich drehen kann. Wenn der iOpener hängenbleibt kann er überhitzen und sogar Feuer fangen.

    I didn't find this to be as hard as I had built it up in my mind to be; HOWEVER, saying that I need to say years ago I was the local Nokia service center in my town. But many years ago right after they got rid of analog times. Yeah. A classic installer/repairer mistake when starting something they haven't fixed or installed before is picking up the instructions, flipping through them; maybe even reading a section that is new-then tossing the instructions over the shoulder. "I got this." This usually comes right before something major gets broke. And I can tell you when you try to do it yourself and then mess it up horribly then take it to the repair shop. Well we called that "I can do it myself" syndrome and charged extra to put back together what they brought in in the box. Now knowing all this - I can't stress this enough because I am stupid, stupid, stupid. COVER YOUR SCREEN IN CLEAR BOXING TAPE AND READ ALL THE INSTRUCTION BELOW THROUGH TO THE END BEFORE EVEN ATTEMPTING THIS FIX. Take my advise.

    windizy -

    I didn't have an iOpener, so I used a wheat type heat bag. If you do this though, make sure you put a layer of plastic between your Mac and the bag, or you'll get condensation in places you don't want it.

    Martin Gray -

    I started out using the iOpener but switched to my wife's hairdryer. A heat gun or hair dryer proved to be much more convenient and is a time saviour. You can heat more and the glue becomes more fluid make the next steps with the opening picks much easier

    Jan Van Puymbroeck -

    I know this is obvious, but backup your iPad with iTunes before you start. I'd also turn off your passcode if you have one.

    Laurie Higgins -

    Ther first time you heat up the iOpener for this repair when its room temperature I had to heat it up for more than 30 seconds. I remember I had to heat it up for around 45 seconds. However, after that when you need to reheat it again during the repair 30 seconds will be enough.

    Yousef Ghalib -

    I used the wheat bag in a sensor microwave heating up to 65-70 deg C (155 def F).

    ian cheong -

    Get yourself a cherry pit bean bag the size of your iPad. Heat it, put the iPad on it for 3 to 5 minutes or so, reheat the cherry pit bean bag, again put your iPad on it. Then heat the iOpener and start working. The cherry pit bean bag will have to be reheated several times, but it will soften the adhesive so you have less problems with the iOpener

    Tim Feyaerts -

    The heating can be done very effectively (and quickly) with 3d printer heated bed. Make sure the bed is clean. Set the temperature to 60c, (130f ) and put the ipad face down for +/- 10 minutes. Repeat as needed throughout the “gentle prying” stages.

    polleyphony -

    The iOpener did not work at all for me.

    I had to use a heat gun and bring the edges of the case up to ~200 degrees (used an infrared thermometer to measure) before the glue would weaken. This obviously superheated the metal frame, so I also had to wear gloves to handle the phone while prying the back off with the included picks.

    Mike Jeanette -

    Repair instructions worked like a charm. Had to be patient with the iOpener and getting the screen off. I tried repeatedly without success until shifting the suction cup a bit to the left side where perhaps the glue had loosened up a bit more.

    Kyle -

    The iOpener, in my opinion, is of no help. Many warnings to say “don’t warm it too much”, but the glue doesn’t melt if not warm enough. As a result, a complete waste of time and energy. In addition, too much liquid in it, so it doesn’t lay on the device on a sufficient surface. I took a hairdryer and it worked much much better.

    laurentvidu -

    I used an immersion bath to heat this to 180F and applied it to the device until the outside temperature of the opener read 150F with an IR thermometer. Removing the screen took very little force with this method.

    breadandbits -

    My experience. I was replacing the screen which had been cracked and a little shattered in some places. The iopener is pretty much useless, so was the suction cup. The suction cup would probably be more useful if I was doing something besides the screen. Also you probably want the clean the screen before using it so it can get good suction. I used a hair dryer on high for a couple of minutes at a time (someone on this tread suggested that). I used my exacto knife and a razor blade to get into the adhesive. First the exacto to get the initial cut, then the razor blade to go a little deeper. Could have probably just used the razor blade, but the exacto has a little more finesse. I got the razor blade in and a little under the glass then I used the picks to wedge in. I didn’t want to risk anything using the razor blade too much. Used tape to keep the shattered glass together.

    trebor65 -

    My experience pt2

    Fortunately the shattering was mostly on the edges and most of it had adhesive on the back so it stuck together. Just take your time and work your way around following the guide to get the screen off. Have some goof off or goo be gone to clean the frame when putting the new glass on or putting the existing one back. (someone suggested that also, very good idea). Be careful of the LCD (you should know that). The cable on my LCD was pretty tight, so I propped it up while taking the cable cover off and when I put it back on I did the same thing. I just put a bottle on the battery and leaned the back of the LCD on that while attaching the cables and putting the screws back on the cover. Also be careful with the home button and the bracket on the back of it. I had enough old adhesive on left on the bracket that it stuck back to the new glass fine. So far only 12 hours in, so we will see how that holds up when the kids get at it.

    trebor65 -

    Another alternative if you do not have the iopener is to use a bed time hotwater bottle. Do not over fill it though. Just put enough hot water in to support the phone while you work around the adhesive.

    I use both the hot water bottle and iopener together on Samsung's. It makes life easier

    gazza667 -

    I followed the directions and heated my iOpener for 30 seconds in a 1000 watt microwave, and it came out at 160 degrees F, as verified by a infrared thermometer. This allowed me to separate the last bit of the back of my Samsung S8, which was already coming off due to a swollen battery (hence the reason for the repair).

    Dennis -

    Hallo,habe den Akku erfolgreich getauscht.Doch seitdem gibt es bei Telefonaten eine Rückkopplung für den anrufenden.Bei mir ist alles normal.Woran liegt das?Mfg

    Manu R -

    If you follow these instructions, you will crack your screen like I did. Heating the iOpener for 30 seconds, using it to melt glue, then waiting 10 minutes to reheat is useless. The iOpener can be used to maybe warm the glue on whatever side you aren’t working on. You need a hairdryer and/or a heat gun to melt the glue and separate the glass from the iPad.

    Anyone want to buy an old iPad with broken glass and a dead battery?

    mpulliam -

    Not everybody has a microwave. You should provide a target temperature for the iOpener and instructions for a conventional oven, or pot of warm water, or whatever. Although I will probably use a heat gun …

    Esmond Pitt -

    Three times heating opener and no luck. Tried pressing down gently on opener with a towel, and the opener broke. Wondering if I now replace table mats, fancy table cloth, etc. or will this stuff wash out.

    Not impressed so far. Maybe the hair dryer next.

    doug -

    I support the comments about the iOpener. Everyone has a hair drier, FHS, so get a cheap IR thermometer (£18) and blow heat until the area is 60+ deg C. Still takes w while, and getting the screen off is v scary, but just add more heat if you feel resistance.

    The rest of the kit is good, esp the magnetic screwdrivers.

    Richard O'Brien -

    No, everyone does not have a hairdryer. Some of us don’t even have hair. Thank goodness I already had an IR thermometer, though.

    nin10doh -

    #### WARNUNG WENN MINIMALSTER SPRUNG IM DISPLAY IST FUNKTIONERT DAS NICHT!!! ######

    Hatte einen winzigen, minimalen Sprung im Display. Ich dachte es könnte gehen, weil der Sprung “abgeschlossen” war. Er hat in einer Ecke ein winzige Glasteil rausgeschnitten. NEIN! Geht nicht. Habe alles mit viel Geduld dem iOpener und einem Föhn erhitzt. Es ist trotzdem sofort über das komplette Display zersprungen…

    T z -

    I’ve started with iOpener but changed very quickly to a heatgun. That was more efficient.

    Mizzoo, s.r.o. -

    I could not get the iOpener hot enough to melt the glue on my ipad 6. I heated for 45 seconds once and it was boiling and it still never worked. Thank goodness contributors mentioned using a hair dryer. Using an 1700w hair dryer on high did the trick to get the screen off. Still took some time and the case got pretty hot but be patient. It took twice as long and a lot more patience to get the battery out.

    Randal Haufler -

    I have an Ipad with touch screen issue, if i replace this part it should be Ok?

    janderson martin -

    WARNING - DO NOT MICROWAVE ON A METAL MICROWAVE RACK

    The metal microwave rack can heat up and melt through the iOpener cover letting the contents leak out.

    Not a big issue for me as I have a heat gun and used that instead.

    Run Up A Tree -

    I opened my iPad with the iOpener. Be patient! It may take quite a bit longer to it the iOpener in the microwave than it says in the guide. My microwave can only do 800W and I had to put the iOpener in several times (maybe a total of 90-120 seconds). I recommend that you have the transparent side up an watch the bag carefully. As long a the bag doesn't bloat up and the liquid doesn't start bubbling you should be fine. But I recommend to take the iO out from time to time to check it. (More comments in Step 6.)

    marcelflueeler -

    I gave upon the I opener and used a hairdryer. (Fixed an iPad 6)

    Tom Weber -

    iPad mini gen5. I used the iOpener. My microwave is 1200w with carousel. 30 sec got the iOpener to 155ºF. For the 2nd heating, after 10 minutes sitting, the temp was still around 125º so I only cooked it for 15 sec. Not enough increase so +5 sec more which me to 165-170ºF. This should be considered ballpark info because who knows the real output of the various microwaves and the quality of the IR tool used to determine temp.

    To successfully open my iPad mini I applied the iOpener twice to the left edge and twice to bottom. & once to R edge. Using the suction cup was difficult for me (I'm in my 70's so my hands don't work too well anymore). I had trouble holding the guitar pick and slipping them in (at an downward angle). In the end, sliding my thumbnail along the edge opened it very slightly and allowed the pick to get into the gap. I marked the ends of all my picks with a sharpie pen for the recommended 2mm insertion to avoid going in too deep. To get the screen open it took me approx 1 hour.

    jharrison -

  2. ylYXoFMbBeXNAIyj
    • Erhitze den iOpener für dreißig Sekunden.

    • Im Verlauf der Reparatur kühlt sich der iOpener wieder ab. Erhitze ihn dann noch einmal für dreißig Sekunden.

    • Achte darauf, den iOpener während der Reparatur nicht zu überhitzen. Eine Überhitzung bringt den iOpener möglicherweise zum Platzen.

    • Berühre niemals den iOpener, falls er aufgeschwollen aussieht.

    • Falls der iOpener in der Mitte immer noch zu heiß ist, um ihn anzufassen, dann benutze ihn weiter, bis er ein wenig herunter gekühlt ist, bevor du ihn erneut erhitzt. Ein ordnungsgemäß erhitzter iOpener sollte für bis zu 10 Minuten warm bleiben.

    I had to heat mine up for more than 30 seconds. After 30 seconds on high it was only warm. It had to keep trying different times and checking it until it got hot. I think the initial time that I put it in for was over a minute.

    whale13 -

    DO NOT USE IN NON ROTATING MICROWAVE! It will pop a hole. I had it in for 45 seconds the first time. It wasn't very hot inside and I saw it started to leak on the paper towel I put under it. Just a fair bit of advice. I think I will just stick with the heat gun. Loud but useful.

    Alex Jackson -

    I heated mine up for 30 seconds, tested, then again for 30 seconds. It felt adequately hot. Leaving it on the left side, per the instruction, for a minute did not loosen the adhesive. I ended up pulling the suction cup hard enough to shadder the old screen. Moral of the story, I don't think it gets hot enough safely to have an affect.

    Travis Dixon -

    There is a clear problem here with the heating part using the iopener things....no details are given. Whoever is testing them needs to make it clear - What temperature does it need to be? And for which phone models, because they differ in what's needed. It's only £10-15 for a laser guided temp sensor unit, and the designers/repairers should have one of those already for doing these kinds of repairs. Explaining half a repair, is worse than not explaining at all :-(

    assortedrubbish -

    All phones/devices differ it’s unrealistic and unsafe to put a exact time/temperature needed to soften the adhesive. It’s really quite simple you warm the device evenly and in a controlled manner just enough to enable pry tools and picks to begin separating. Best tool in my opinion but again this is because I have experience is a hot plate and heat gun both of which are used at nearly the lowest settings and I can handle flat palming the plate for almost 10 seconds I leave the device to conduct heat until approx it’s about 110 at most 120 ish this will be plenty to soften all the adhesive if any problem areas I use heat gun while prying. Again you need go slowly and learn with a throw away phone

    Greg Latta -

    I used a hot water bottle, works well as it covers the whole screen and stays hot for longer.

    dave -

    If I may suggest include your microwave wattage so people can get an idea on time for there own

    Patrick Storey -

    I agree with this.

    Jarl Friis -

    I ended up using a hair dryer. That iOpener thing took forever.

    mark fitzgerald -

    30 seconds sure isn’t cutting it… 45 didn’t get the screen of my iPad air 2 to budge either… even after resting on the ipad for 4 minutes.

    60 seconds in the microwave, the iOpener burst.

    I’ll get a new one and try once more with heating it 45 seconds and repeat that for 30 minutes like others have said here. If that doesn’t work it’ll have to be the heat gun.

    K

    Karl Marble -

    I can’t recommend the microwave. If the the iOpener becomes too hot, it bursts. Better put the opener in cooking water. Dry it and use it. Instead of an iOpener you can use hot/cool packs as well.

    Bernhard Keim -

    Great idea with using the heat packs. I will try that next time. Thank you

    Collins -

    Trust the directions! I forgot and left it in the Microwave too long and after 1 minute I had Mt Vesuvius - the iOpener burst and spewed the goodies out. The problem is, the Digitizer can be damaged by a hot air gun, so I had to tough out and remove the glue the hard way. I made it … with lots of patience! Tough lesson.

    Larry Bennett -

    I also used a hairdryer. I used it on the low setting and I cut a piece of carboard to protect the rest of the screen. The iFixit tool and method is vert tedious and very time consuming in comparison. With the hairdryer method you can literally have the display apart in a few minutes. Using your other hand nearby the area you are heating it should be very hot but not enough to burn your hand. You only have to heat metal part of case near glass edge. If you have a cellular model then you need to be very careful because the black antenna area is plastic. So less heat and work your way up in adding heat just enough to separate around the area but not so much you melt the plastic!

    Fixrights -

    iOpener was the worst part of the kit. Followed directions for :30 in microwave and took 4 trips to the microwave to loosen adhesive on left side of home button. I thought I was figuring it out and it was working well… even set a timer to wait 10 minutes between heating it up. Was on the right side and was on my 12th heat up when it exploded in the microwave. My only tip is that if you set it clear side up, as soon as you see any bubbles or boiling in the liquid, STOP! If you put a pot holder over the iOpener and press slightly to make good surface contact, that seemed to help. I finished heating with a “Corn Sack” that held heat better than the provided iOpener.

    digital_only -

    Mon iopener n'a pas tenu une réparation. Je ne vous conseille pas ce produit

    Berard Romain -

    Bonjour,

    Nous sommes désolés que votre réparation ne se soit pas déroulée comme prévu. Il se peut que le produit était défectueux. Veuillez contacter notre service client support@ifixit.com (boutique américaine) ou eustore@ifixit.com (boutique européenne) en décrivant ce qui s’est passé.

    Claire Miesch -

    Readers looking for temperature advice might check the comments of the previous instruction, as there are more there. I used an immersion bath to heat this to 180F and applied it to the device until the outside temperature of the opener read 150F with an IR thermometer. Removing the screen took very little force with this method.

    breadandbits -

    Thank you for posting some actual temperatures. I have a heat gun with a very fine self-temperature regulation setting capability.

    I will set it for 150-180 F, and use that to soften the adhesive.

    G Trieste -

    Get a heat gun.

    alesha adamson -

    I followed the directions and heated my iOpener for 30 seconds in a 1000 watt microwave, and it came out at 160 degrees F, as verified by a infrared thermometer. A second heating about 15 minutes later in the micro and it came out at 190 degrees F. Plenty hot enough to soften the adhesive for removing the back on my S8. Based on the comments above I think people just need to use more patience.

    Dennis -

    I used various time settings. It got very hot. It would soften the glue but not a whole lot. If my screen had been intact and I was replacing something that was not a digitizer, it may have worked. A broken screen makes the process significantly more difficult. I ended up breaking the home button cable. Good bye TouchID…

    cvela90 -

    After reading previous comments I didn't even use the i-opener. Used the heatgun ( hairdryer ) which works great for me. Maybe I was lucky as this is my first attempt at replacing a cellphone battery. Motoz 3

    Collins -

    It appeared 30 seconds were not enough, so I heated it more, by 5 seconds at a time until I got the right temperature about 70 degrees Celsius (measured with infrared pistol) to get the screen heated up to 60 C, the best for softening the glue. But the heat was quickly dissipating by the big aluminum back cover, so the best I got in 2 minutes of applying iOpener was around 45 C, which made the procedure difficult and having risk of breaking the screen. So I eventually abandoned iOpener and user a hot air gun with precise temperature setup. I set it to 90 C, which allowed me to open my iPad quickly and safely.

    Sergey Kofanov -

    I, too, ended up using a hot air gun. I’ve done earlier versions of iPad before but the adhesive used on this IPad 5 A1822 was particularly difficult to remove.

    Also, while the suction cup worked great when the glass is in tact, any cracks in the glass make the suction cup useless.

    manningrl -

    You need to remember here are different sizes of microwaves. I had the same issue.

    Heating on a smaller unit I used 45-60 seconds. That worked but was time comsuming

    William Draheim -

  3. Q3OPkaQyxV6cdnx3
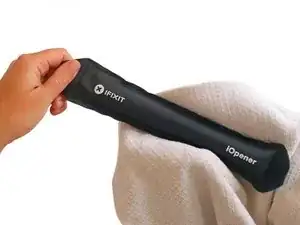
    • Halte den iOpener an einem der flachen Enden und vermeide die heiße Mitte, während du ihn aus der Mikrowelle nimmst.

    • Der Beutel wird sehr heiß, sei vorsichtig beim Gebrauch. Lege dir am besten einen Topflappen bereit.

    I did this repair. I used a hair dryer, I think it works better: gets very hot fast.

    Cobus de Beer -

    I did too, you get far more control and no expense on fancy equipment.

    Billinski -

    Readers looking for temperature advice might check the comments of the previous instruction, as there are more there. I used an immersion bath to heat this to 180F and applied it to the device until the outside temperature of the opener read 150F with an IR thermometer. Removing the screen took very little force with this method. I don’t know how much microwaves vary in heating consistency with these pads, but knowing how inconsistent the temperature of a bowl of plain rice gets in my microwave, I wasn’t interested in even trying to use it for this.

    breadandbits -

    I used an electric griddle set to the lowest setting. It seemed to work very well.

    John -

    I vote for the hair dryer. The other methods work too but if you aren’t having any luck, switch to the hair dryer. While holding the iPad in my hand, I found that I am aiming the dryer at my finger at the same time and it gauges how hot it is. I stop when my finger can’t take it - maybe five seconds up close. Repeat as needed like I did.

    Robin -

    This thing melts when placed up side down in the microwave…

    Mark -

    If the maximum temperature for this iOpener is lower than the gadget glue minimum temperature, this device does not make sense.
    I think the maximum temperature for this iOpener is below 100⁰C and most gadget glue minimum temperature is higher than 100⁰C. So the iOpener is useless for many opening steps in repair guides. But who knows because temperature range is not specified for this iOpener.

    Jarl Friis -

  4. 2Nj3CEcEUHn2EtLQ
    2Nj3CEcEUHn2EtLQ
    lgRIBJjmHo2vTdda
    • Solltest du keine Mikrowelle haben oder benutzen wollen, folge diesem Schritt, um den iOpener in kochendem Wasser zu erhitzen.

    • Fülle einen Topf oder eine tiefe Pfanne mit ausreichend Wasser, um den iOpener komplett damit bedecken zu können.

    • Erhitze das Wasser (ohne den iOpener) bis es kocht. Schalte die Wärmezufuhr (Platte) aus.

    • Lege den iOpener für etwa 2-3 Minuten in das heiße Wasser. Stelle sicher, dass der iOpener komplett mit Wasser bedeckt ist.

    • Nimm den iOpener mit einer Küchenzange aus dem Wasser heraus.

    • Trockne den iOpener gründlich mit einem Küchen- oder Handtuch ab.

    • Der iOpener speichert die Hitze, und ist daher sehr heiß. Sei vorsichtig, und halte den iOpener nur an den Endlaschen, nicht in der Mitte.

    • Der iOpener kann jetzt verwendet werden. Solltest du den iOpener erneut erwärmen müssen, erhitze das Wasser nochmal bis zum Siedepunkt, schalte die Wärmezufuhr aus, und lege den iOpener wieder für 2-3 Minuten vollständig in das Wasser.

    What do I do if I don’t have a iopener?

    alexdelarge103@gmail.com -

    Use a hair dryer

    Edited To the max -

    2 or 3 cups Rice in a sock, heat for about 2 minutes. But, I recommend the iopener.

    Robert Garcia -

    When boiling in water you can put the iopener in a ziplock to keep it dry.

    Robert Garcia -

  5. tTb1dDKSaGoKfuyF
    tTb1dDKSaGoKfuyF
    Dps1mvmo2P52bwQL
    u5lPtG2MA1hNMwKc
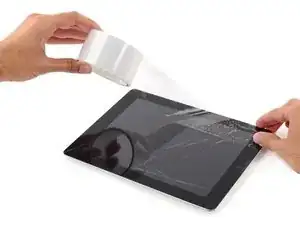
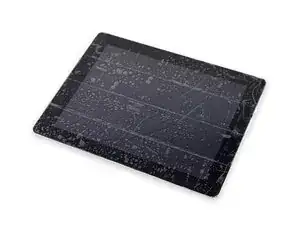
    • Wenn dein Display Glas gebrochen ist, dann halte dich von den Bruchstellen fern und klebe sie vorsichtshalber ab.

    • Lege sich überlappende Streifen von durchsichtigem Klebeband über das Display des iPads, bis der gesamte Bildschirm bedeckt ist.

    • Dies beugt Glasscherben vor und hilft dabei, das Display später in einem vom iPad zu entfernen.

    • Gib dir Mühe dem Rest der Anleitung wie beschrieben zu folgen. Denn sobald das Glas einmal gebrochen ist, wird es weiterhin brechen, solange du daran arbeitest und dann benötigst du möglicherweise einen Metallspatel, um das Glas herauszuheben.

    • Trage eine Sicherheitsbrille, um deine Augen zu schützen und sei vorsichtig, damit du den LCD Bildschirm nicht beschädigst.

    Need some extra instruction on how to handle a truly shattered glass. There was only one spot that the suction cup would even hold on the whole screen - top right, and even with tape there is very little structure to drive a pick under. how do you handle that?

    Greg Crawford -

  6. tQHKoioft2C2Cbsy
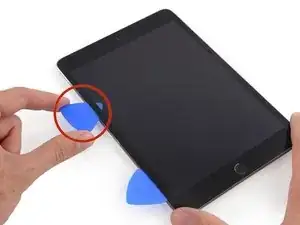
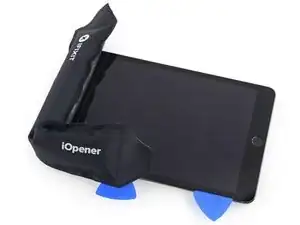
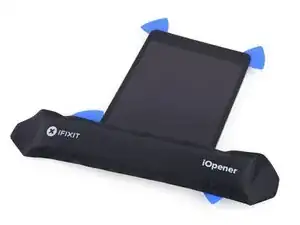
    • Platziere den erhitzten iOpener auf der iPad-Seite links vom Home Button.

    • Lass den iOpener für ca. 5 min auf dieser Seite liegen, um den Kleber zwischen Glas und Gerät zu erhitzen.

    Can you explain how using the iOpener ? That's can be great !

    Matthieu Nasri -

    The iOpener used is essentially a bag of gel, which you put in the microwave for 30 seconds. You lay this against the screen edges to transfer heat and loosen up the glue.

    You could also use a hot-air blower with a re-work station but that's up to you. Mine worked well up to 150°C

    Sam Attwood -

    what about heating a cloth bag filled with rice in the microwave? Would that work?

    SkipR -

    That might work! Rice is less likely to get, and stay, hot enough. But it can't hurt to try! Just be sure you're being patient and letting it really warm up before you pry. People have had luck double bagging a washcloth dipped in very hot water, too.

    Sam Goldheart -

  7. aywS5BDp3KKcuCLn
    aywS5BDp3KKcuCLn
    VxMnbCa2doisSOdB
    FjRhAp3MYbwZmbMU
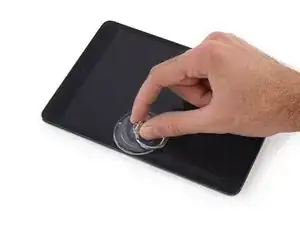
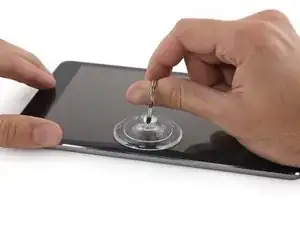
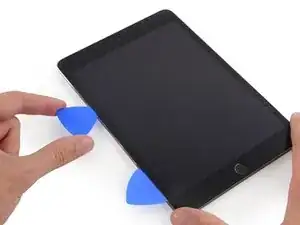
    • Platziere vorsichtig einen Saugnapf etwa auf der Hälfte der erwärmten Seite.

    • Achte darauf, dass der Saugnapf komplett flach auf dem Bildschirm aufliegt, damit du die gesamte Kraft des Saugnapfes nutzen kannst.

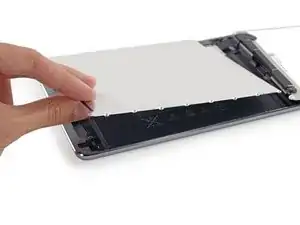
    • Während du das iPad mit der einen Hand nach unten drückst und festhältst, ziehe den Saugnapf mit der anderen Hand ganz vorsichtig nach oben, um das Front Panel Glas vom Rahmen zu lösen.

    • Achte darauf, dass du das Glas nur so weit anhebst, dass du ein Plektrum dazwischen positionieren kannst – umso mehr du das Glas anhebst, desto mehr riskierst du eine Beschädigung des Glases.

    I'm having trouble getting the suction cup to stay connected to the screen to pull it. It just isn't creating a seal no matter how flat I make it. I thought maybe the crack was causing it, so I tried tape. I originally didn't put tape on it because it wasn't losing glass. The tape made it worse of creating a seal. Any advice?

    William -

    After following instructions to cover cracked glass with packing tape, the suction cup won’t adhere at all. Not even a little bit. Any suggestions?

    Brian Tate -

    I had that exact problem when I fixed an Iphone 8. What I did was that I put some ducktape where the suction cup would be placed. That worked for me. That’s of course is if you where doing to replace the glass anyway.

    Pontus Sennerstam -

    I had a screen on an iPad 4 that was so shattered that I literally had to spend 2.5 hours picking every single piece of glass out with tweezers after pulling the few larger pieces off with tape on them. Sometimes you need a lot of patience to be successful. The final cleaning out of the sticky tape along the sides is also very important once the glass is removed. Or the new screen will stick out an/or not go in neatly.

    Michael Burger -

  8. U3MksSSyeCJkofMc
    U3MksSSyeCJkofMc
    igKtd6N3KoQCFkOO
    FOZxGfKuC13KBNrk
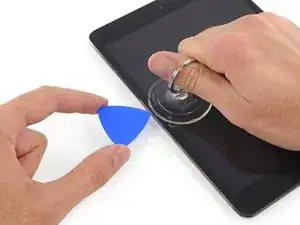
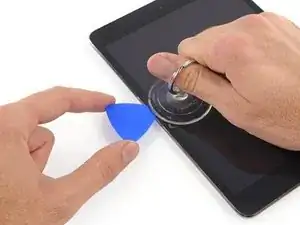
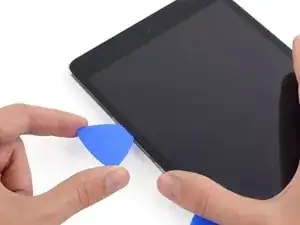
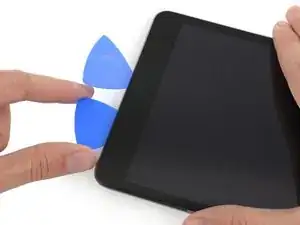
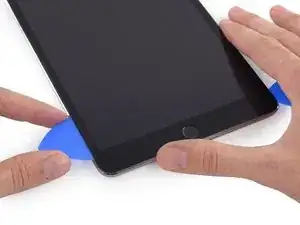
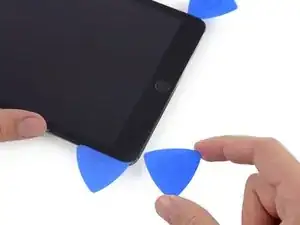
    • Während du das Glas mit dem Saugnapf oben hältst, positioniere ein Plektrum in die Lücke zwischen Glas und Rahmen des iPad.

    • Schiebe das Plektrum nicht weiter, als der schwarze Rand des iPads bereits ist. Wenn du das Plektrum zu weit hineinschiebst riskierst du eine Beschädigung des LCD.

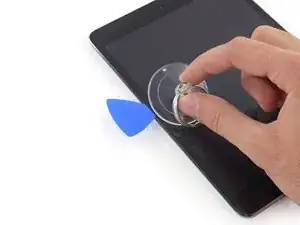
    • Ziehe nun an der Plastiknoppe des Saugnapfes, um das Vakuum aufzulösen und löse den Saugnapf vorsichtig vom Display.

    Could I use some guitar picks? If so, what gauge (thickness) of a picks should I get?

    SkipR -

    I'm not sure what the correct balance of thickness to strength you'd need, maybe try a couple different types. The idea is to be thin and fit into the smallest gap, but if it gets bogged down in adhesive, it needs to be strong enough to push through. Be sure to use heat and be patient!

    Sam Goldheart -

    i have to use a blow dryer and pack that came with the replacement is there anything i could do to make the adhesive more hot?

    Ace of Spades -

  9. bTCAqT5WBc4HR31i
    • Erhitze den iOpener erneut und lege ihn an die selbe Stelle wie zuvor.

    • Gib acht darauf, dass du den iOpener während des Reparatur Prozesses nicht überhitzt. Warte immer mindestens 2 Minuten, bevor du den iOpener erneut erhitzt.

    • Lass den iOpener eine Weile ruhen, um die linke Seite des iPad erneut zu erhitzen.

    Well if you want to save some time and your screen is shattered just pry up one corner either left or right side at the top and tear the whole screen off going down towards the home button but do not completely remove the screen there is a wire connecting the digitizer to the board inside but tearing off the screen will skip you down to step 29 :-) i seen this in a video and saved me about an hour after the fact because my screen was cracking as i was inserting the blue picks so i ripped the whole screen off and used some adhesive remover to get off all the extra goo leftover

    Chris Grayden -

  10. niZrKXuwZfjKEWUs
    niZrKXuwZfjKEWUs
    jvOxRqxLOsPUDvQj
    xJoYJWVPviY4pCAA
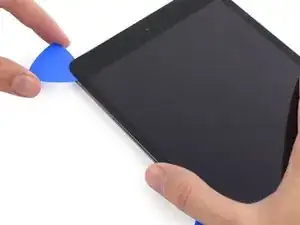
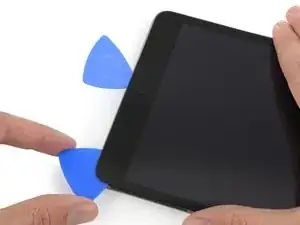
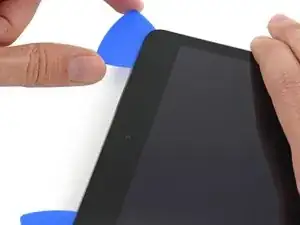
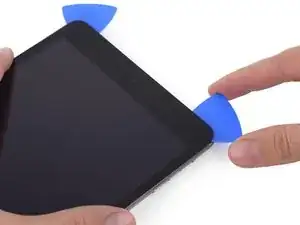
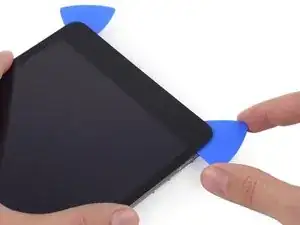
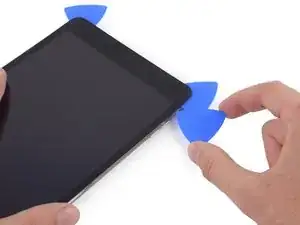
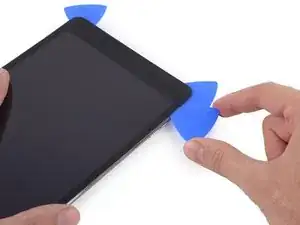
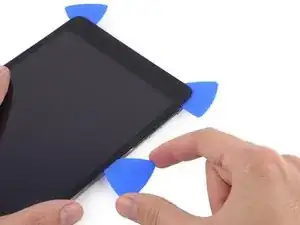
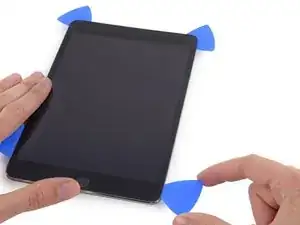
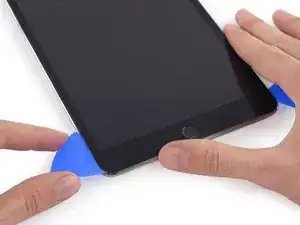
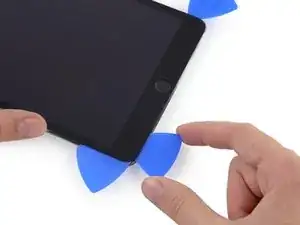
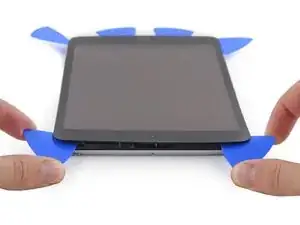
    • Platziere ein zweites Plektrum neben dem Ersten und ziehe ihn vorsichtig bis zur Ecke des iPad. Dabei löst du den Kleber.

    • Wenn du während der Prozedur auf starken Widerstand triffst die Plektren zwischen dem Glas zu bewegen, dann stoppe und erhitze den Bereich erneut, an dem du arbeitest. Die Plektren mit Gewalt zu verschieben führt ggf. zu einem Glasbruch.

    I found that all the following step were much easier for me using a heat gun while keeping the pull on the screen with the suction cup. Basically heat up a section, put the suction cup on, keep pulling the screen upwards on that side, while using the heat gun to continuously heat along the side. It came nicely off, one or two inches at a time. Once I had a whole side up, I just put some of the picks in to keep it up and continued along the side, heating, pulling, heating pulling. This obviously only works if the screen is not totally shattered. Mine only had two cracks.

    Michael Burger -

  11. lDdhmi6N6RVCGtbH
    lDdhmi6N6RVCGtbH
    EtOCI4WYxyqgFEGZ
    qTKUcQgYRA2WjEmi
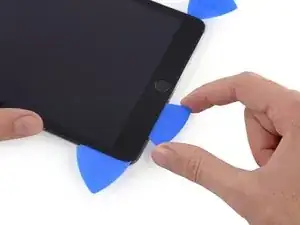
    • Fahre fort mit dem Bewegen der Plektren, bis hin zur unteren Seite des Displays, um den Kleber zu lösen.

    • Falls das Plektrum am Kleber hängen bleibt, bewege das Plektrum noch einmal zurück und beginne erneut damit, das Plektrum vorsichtig zum unteren Rand des iPads zu bewegen.

  12. Ur3MeCd6PXDyOoWY
    Ur3MeCd6PXDyOoWY
    yVWsrEhSRCr6RowV
    4MsxmGKjtR6urGV6
    • Nimm nun das erste Plektrum, welches du eingeschoben hast und ziehe es an den oberen Rand des iPad.

    • Verfalle nicht in Panik, falls du ein Teil des Plektrum unter dem Frontglas siehst – ziehe es einfach ein wenig heraus. Im Normalfall ist dann alles in Ordnung, aber versuche es zu vermeiden, da es vorkommen kann, dass du so Kleber an den LCD bringst, welcher schwer zu entfernen ist.

  13. pZYokiUWii14phQR
    • Erhitze den iOpener erneut und platziere ihn am oberen Ende des iPad, über der Frontkamera.

    • Achte darauf, den iOpener während der Prozedur nicht zu überhitzen. Warte immer mindestens 2 Minuten, bevor du den iOpener erneut erhitzt.

    • Falls du einen beweglichen iOpener besitzt, kannst du ihn biegen und gleichzeitig die obere linke Seite und die Oberseite des iPad erhitzen.

  14. bUYa2Px1AiNusqHH
    bUYa2Px1AiNusqHH
    YolMsuDCrRP5AFYx
    HJGUTTguNADvU4fS
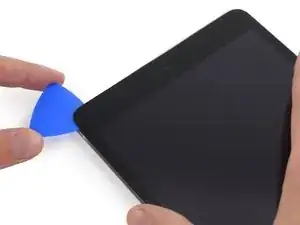
    • Ziehe das Plektrum um die linke Ecke des iPad, um dort den Kleber zu entfernen.

  15. HMtdN13wYFITJcCE
    HMtdN13wYFITJcCE
    yNDIj2kOdQ2ZNel5
    BfL2iBmADVKOZKED
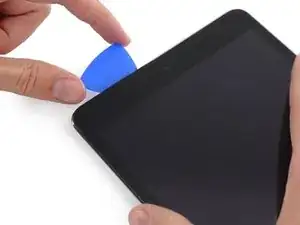
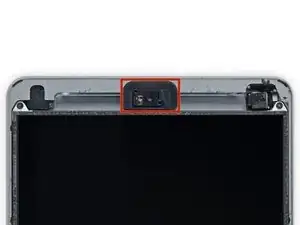
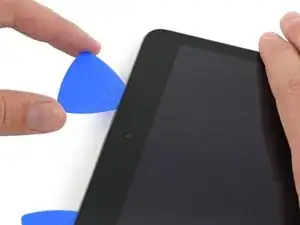
    • Ziehe das Plektrum weiter an der oberen Seite des iPads, aber stoppe, bevor du die Frontkamera des iPads erreichst.

    • Das dritte Bild zeigt, wo sich die Frontkamera und ihr Gehäuse im iPad befinden.

    • Vermeide es das Plektrum über die Frontkamera zu ziehen, da dabei möglicherweise Kleberückstände auf die Linse der Kamera kommen könnten, oder du sie beschädigst. Die folgenden Schritte zeigen dir, wie du es am besten vermeidest mit der Frontkamera in Berührung zu kommen.

  16. lvRRok4HUOZAkvHk
    lvRRok4HUOZAkvHk
    rnNUv3ayj2FotMBC
    rCBmEYNMcyImPSQ6
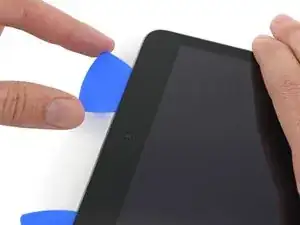
    • Ziehe das Plektrum etwas heraus und bewege die Spitze des Plektrums vorsichtig am oberen Ende des Bereiches der Frontkamera vorbei.

  17. njvWSIkflJEe4oJI
    njvWSIkflJEe4oJI
    PBdJXJl2QNjE3DbZ
    6ELDwnfHGneRUWaP
    • Lasse das Plektrum nun kurz hinter der Frontkamera.

    • Nimm dir ein zweites Plektrum und schiebe es links von der Frontkamera zwischen Gehäuse und Bildschirm, wo sich das andere Plektrum zuvor befand.

    • Lasse das zweite Plektrum wo es ist, damit der Kleber während des Abkühlens nicht erneut Glas und Gehäuse verbindet.

  18. 1Ay2doECHTIuLCPo
    1Ay2doECHTIuLCPo
    3HAocCfA32DOZB1J
    cAdFdqTldCyxFJhj
    • Schiebe nun das vorherige Plektrum weiter in die Lücke zwischen Glas und Gehäuse und ziehe es weg von der Kamera, hin zur rechten oberen Ecke des iPad.

    If you have the LTE there is a cable on the right upper side! There’s no mention of this in this guide even though it’s for the LTE. I found out after the fact when I saw I cut the cable with the pick.

    Will Lyon -

    Will Lyon, you may want to look again. This is the guide for the WiFi version.

    mcr4u2 -

  19. JSlirTxaDc5XQ3lX
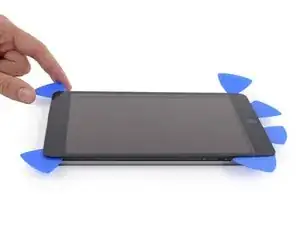
    • Belasse die drei Plektren in den Ecken des iPad, um zu verhindern, dass die Ecken erneut verkleben.

    • Erhitze den iOpener erneut und platziere ihn auf der übrig gebliebenen rechten Seite des iPad – über der Power- und den Lautstärketasten.

  20. 4sAF6IwncXYqQ2yr
    4sAF6IwncXYqQ2yr
    PSWn2W6JGQLIBcYI
    • Bewege das Plektrum, welches sich in der oberen rechten Ecke befindet, um die Ecke, um Gehäuse und Glas dort komplett voneinander zu trennen.

    • Belasse dieses Plektrum an seinem Platz, um das erneute Verkleben zu verhindern, und nimm dir ein neues Plektrum für den nächsten Schritt.

  21. D3jHHxya4ZIYTJKs
    D3jHHxya4ZIYTJKs
    pIKOrVuTTHFvnhGY
    RSE3mqsOkmJEc4Px
    • Führe nun ein neues Plektrum ein und schiebe es in die Mitte der rechten Seite des iPad, dabei löst du den Kleber.

    This is not an LTE ipad mini 3, it is a wifi ipad mini 3

    lordofmordor -

  22. 3RfwFHFvIIqW5AkN
    3RfwFHFvIIqW5AkN
    sXdm1xIKxJbGPe5q
    FjUAOPyUPCIuEKIU
    • Fahre damit fort, dass du das Plektrum nach unten in die rechte Ecke des iPad ziehst, dabei löst du den Kleber.

  23. 2XkPAlUxl3yLYvFA
    • Belasse die Plektren an ihrer Stelle und erhitze den iOpener erneut.

    • Denke daran den iOpener nicht zu überhitzen – erwärme ihn nicht öfter als höchstens einmal in zehn Minuten.

    • Lege den erneut erhitzten iOpener an die Seite mit dem Home Button und belasse ihn dort für ein paar Minuten, um den Kleber unter dem Glas zu lösen.

    For those who are replacing a severely shattered front panel, be aware that there are two smart cover magnets attached to the interior side of the front panel that you will need later. Keep an eye out for them (see steps 49 and 50 below for pictures of what these tiny magnets look like) so that you don't have to go digging through the debris later.

    Jeff G -

  24. IDDKtZaXDg6OZleY
    IDDKtZaXDg6OZleY
    2APsCFLfDaSFYShO
    iYABwZHGDPCGVHYd
    • Ziehe das linke Plektrum um die untere linke Ecke, um auch dort den Kleber zu lösen.

    • Belasse das Plektrum an dieser Ecke. Bewege es nicht weiter und ziehe des Plektrum nicht heraus.

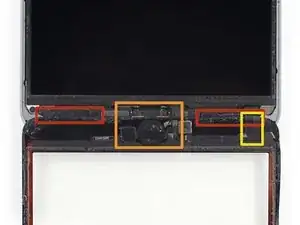
    • Dort gibt es einige Dinge am unteren Glasrand zu meiden, also sieh dir das dritte Bild genau an:

    • Antennen

    • Home Button Einfassung

    • Kabel des Front Panels

    • Die folgenden Schritte werden dir zeigen, wo du vorsichtig sein musst, um eine Beschädigung der Komponenten zu vermeiden. Wende Hitze und das Anheben des Glases nur dort an, wo du dazu aufgefordert wirst.

  25. ZSGVNvsibO1nYx25
    ZSGVNvsibO1nYx25
    mS6QEbtVc5AmVrPJ
    u34rkMoqLBLTuU6B
    • Belasse das Plektrum des vorherigen Schrittes dort wo es ist, um das erneute Verkleben der Teile zu verhindern.

    • Ziehe ein neues Plektrum vorsichtig über die linksseitige Antenne und stoppe vor dem Home Button.

    • Ziehe das Plektrum nur von der äußeren Ecke in Richtung Mitte des iPad. Ziehe es nicht zurück in Richtung des äußeren Rands, da du ansonsten die Antenne beschädigen könntest.

    • Falls du das Plektrum mehrmals durch den unteren Bereich ziehen muss, dann ziehe es heraus, führe es erneut an der äußeren Ecke ein und schiebe es nach innen.

    • Belasse das Plektrum dort bevor du weitermachst.

  26. gwDYrXpgXXHTCD1M
    gwDYrXpgXXHTCD1M
    ZqTFknvgvjovgxDd
    3ZRlYCDHbNJPqZjC
    • Schiebe die Spitze eines letzen Plektrums neben das Plektrum, dass du zuvor eingeführt hast und ziehe es unter den Home Button.

    • Stoppe etwa ca. 2,5 cm vor der rechten Seite, um das Beschädigen des Kabels vom FrontPanel zu vermeiden.

    • Führe das Plektrum nun vorsichtig etwas weiter hinein und arbeite dich zurück in Richtung Home Button.

    • Achte darauf das Plektrum nur dann in Richtung Mitte des iPads zu schieben, wenn es vollkommen eingeführt ist; Ansonsten beschädigst du möglicherweise die Antenne unter dem Glas.

    Do NOT insert the pick much deeper to the right of the home button, you can easily damage the fingerprint ID chip.

    kimhoover -

    There is no fingerprint id chip in an iPad mini 2 (retina)

    blakebest -

    Be very careful in the vicinity and to the right of the home button. Only insert the very tip of the pick (similar to the instructions earlier for by the camera). Do not try to go beneath the home but as suggested here, just along the glass edge. I damaged the small metal clip under the button and detached the IC tape from the button, meaning I had to replace the glass touch screen with digitiser and home button.

    PeterB -

  27. BlnxFPSeQUlAruKU
    • Erhitze den iOpener erneut und lege ihn auf den oberen Glasrand des iPads.

  28. Ig1DIEr25SjulBWQ
    Ig1DIEr25SjulBWQ
    Wx5bfiLMbg2I6Ou6
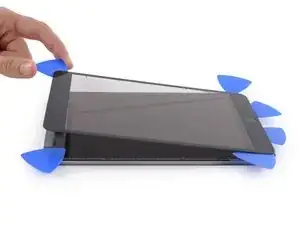
    • Sei besonders vorsichtig bei diesem Schritt. Nimm dir Zeit und stelle sicher, dass der Kleber heiß und aufgeweicht ist. Achte außerdem darauf, dass du überall mit dem Plektrum lang gegangen bist, um den Kleber zu lösen. Hab keine Angst davor, hier zu stoppen und alles erneut zu erhitzen.

    • Am oberen Rand des iPad, gegenüber des Home Buttons, solltest du ein Plektrum an jeder Ecke befestigt haben. Drehe die Plektren um das Glas vorsichtig anzuheben; dabei löst du den letzten Rest des Klebers an allen vier Ecken.

    • Falls du einen starken Widerstand spürst, höre auf die Plektren zu drehen. Belasse sie wo sie sind, erhitze den iOpener erneut und lege ihn erneut auf die Problemzonen. Nun kannst du die Plektren durch die vorher schwierigen Bereiche ziehen.

  29. QqUXZZWsJEWetEBc
    QqUXZZWsJEWetEBc
    xyDL2XRYqMktntZf
    • Hebe es weiterhin vorsichtig und langsam an, um den Kleber an der unteren Seite zu lösen.

  30. A6nVinsoPqipEgAu
    A6nVinsoPqipEgAu
    YOhEQlxuLKVEnFcW
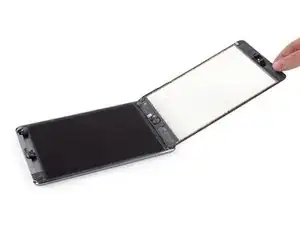
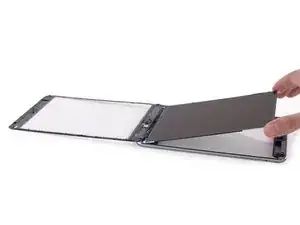
    • Sobald der gesamte Kleber entfernt ist, öffne das Frontglas wie eine Seite in einem Buch und lege es auf deinen Arbeitsplatz.

    • Wenn du das Frontglas später wieder einbauen willst, musst du den Displaykleber ersetzen. Unsere Anleitung zum Anbringen des Displayklebers zeigt, wie er befestigt wird und das Gerät wieder verklebt werden kann.

    This picture and several others that follow are not for the "LTE" model.

    Tim Osborn -

    Some of the steps, including the comments, are replicated between guides.  Be aware! This can render them somewhat generic, and possibly non-optimal.  For instance, this step is replicated between at least the mini 2 LTE, mini 2 Wi-Fi, mini 3 LTE, & mini 3 Wi-Fi.

    ciradrak -

    Maybe that’s because this is for the WiFi model.

    mcr4u2 -

    Remember to remove the old black adhesive from the digitizer and iPad frame. Some can be pulled out and some needs a sharp blade to remove. This will give you room to apply your new adhesive strips when reassembling.

    Yousef Ghalib -

  31. xyT2PDmuXFcxobum
    xyT2PDmuXFcxobum
    FWKPU2EwNN3AlH6n
    6V5XYse2TnHRtNQO
    • Das Gehäuse der Frontkamera kann am Front Panel kleben, löse es ab und lege es wieder über die Kamera, um diese zu schützen.

    • Bewege das Kameragehäuse an einer Kante hin und her, um es vom Kleber zu lösen, und entferne es dann vom Front Panel.

    • Lege das Kameragehäuse zurück in seinen Sitz im rückseitigen Gehäuse.

  32. Vh6SyyqrcNyTyuPO
    Vh6SyyqrcNyTyuPO
    BggRIsCSIWShCAKa
    • Entferne folgende Kreuzschlitzschrauben #00, die das LCD befestigen:

    • Drei 3,3 mm Schrauben

    • Eine 4,5 mm Schraube

    • Falls die LCD Schrauben mit Klebeband bedeckt sind, musst du dieses erst mit einer Pinzette ablösen.

    This is VERY IMPORTANT please be sure to put the screws EXACTLY how they were when you removed them otherwise your screen will not rotate when you put the new digitizer on. i closed my ipad thinking everything was ok but now the screen does not automatically rotate, but lucky i jailbroke my ipad first and have an activator gesture to rotate for me :-)

    Chris Grayden -

    stripped the screws at the home button side of the ipad and the precision screw extractor set is too big to work. help?! paramedic064@gmail.com

    paramedic064 -

    We have some great posts on Answers about getting stripped screws out, you can refer to What are your tips/tricks for removing or extracting stripped screws? for advice, or ask a new one and see if someone can come up with new ideas. We also have a stripped screw removal guide for you to check out. Good luck!

    Sam Goldheart -

    I found that Phillips #000 work better then the Phillips #00 for this entire product. I'll be recommending a change to the fix kit as well.

    William -

    This is a tip:

    I have a terrible time cleaning the lcd because no matter how hard I try not to touch it, I always get smudges! So take my advice…remove the front film from the new digitizer and place it over the lcd. It is bigger so you can cut it down or just lift it to get to the screws. Now no fingerprints and also less chance for scratches. The front side is easy to clean once it’s installed so need to have that covered while working-the insides are what needs protecting.

    mamashannon4u -

  33. SbvJPrwW6vq4I3Oq
    SbvJPrwW6vq4I3Oq
    31QmLJAHSViHxeGT
    • Versuche nicht das LCD ganz zu entfernen. Es ist weiterhin mit dem iPad verklebt und durch verschiedene Kabel am Ende mit dem Home Button verbunden. Hebe es nur am Ende mit der Frontkamera an.

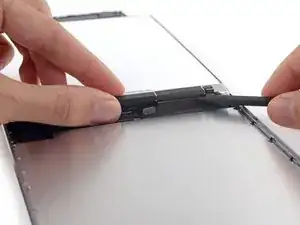
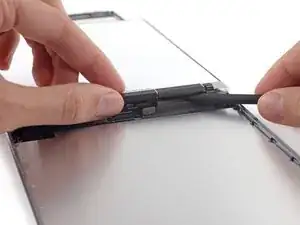
    • Schiebe das flache Ende des Spudgers unter das LCD zwischen LCD und Abschirmblech, und hebe es vorsichtig an.

    • Achte beim Einsetzen des Spudgers darauf, dass du nicht unter das Abschirmblech gerätst. Der Spudger muss zwischen LCD und Abschirmblech hineingehen.

    • Das LCD kann schon durch leichtes Verbiegen beschädigt werden, sei also beim Hochheben besonders vorsichtig.

    • Du kannst auch andere Methoden versuchen, um die Bruchgefahr für das LCD beim Entfernen zu verringern:

    • Führe einen dünnen Faden (z.B. Zahnseide oder eine Angelschnur) unter dem Display entlang, beginne oben und arbeite dich nach unten durch.

    • Schneide mit einer dünnen biegsamen Karte oder einem Geldschein aus Kunststoff von oben beginnend durch den Kleber.

    Be very careful not to get the spudger under the shield plate, but between the LCD and the shield. Also, not that on the LTE models, the antennas are at this end and there is a bit of adhesive holding this end of the LCD down.

    Tim Osborn -

    This bit of adhesive is located beneath the foam, and runs the entire length of the antennas. You must lift the foam and detach the tape before you're able to get the top to come out the chassis

    James -

    This is not present in this tutorial and is very frustrating. I fix it must look into this

    James -

    I have seen countless comments about the LCD breaking when trying to remove it from the LCD shield with adhesive. I have found a simple solution. Once the 4 screws have been removed take a piece of fishing line (longer than the iPad) and simply run it beneath the top of the LCD from one side to the other. Once it's in place, gently pull it down applying equal pressure from both sides. The fishing line will break the adhesive in the process, freeing the LCD. It has worked for me every time.

    bababooey -

    Thanks for the fishing line suggestion. It certainly worked for me (used 6lb test line). With using the fishing line, one is a lot less likely to break the LCD compared to using a spudger.

    rgstout -

    awesome tip thanks

    Pa Du -

    The tutorial procedure should be edited once and for all to instruct to detach the adhesive strip from the top of the LCD prior to attempting to lift it. Failure to do so will invariably result in a broken LCD!!!

    The simplest way to do that is to first gently remove the foam strip running around the top of the LCD with a pair of tweezers. Only then will the shiny metallic adhesive tape be visible and accessible.

    lorenzocangiano -

    I found that if you take two flat plastic spurgers and run one down each side together it works fairly well. Just take your time.

    Abbot -

    The LCD is extremely fragile, DO NOT allow it to bend or you will break it. The adhesive near the speakers that connect to the LCD are a danger spot and if you pull wrong you could break the LCD. Be careful.

    Timothy McEvoy -

    Yeah, I broke my LCD because the guide did not specify the glue on the top portion if you have an LTE model. I didn’t even try hard at all. I tried to lift it with the plastic spudger and saw that it did not move. Came to check the comments and when I looked back the top corner was already broken.

    Thanks iFixit! Awesome guide

    Jorge Tamez -

    Another LCD broken victim. Getting it loose from the adhesive was easy. However, it would not fold over like a book. Something had it bound at the bottom. Heard the dreaded crack. First iFixit fail for me.

    Vince Kowaleski -

  34. YgjIyBiWxPcC1NqB
    YgjIyBiWxPcC1NqB
    oqUSFNHoiwl4YCMV
    SAaNA2MfQYl3HgNS
    • Das LCD ist durch eine recht schwache Klebeverbindung befestigt. Diese musst du zuerst auftrennen, bevor du das LCD von der Abschirmung wegklappen kannst.

    • Setze den Spudger zwischen LCD und Abschirmung und schiebe ihn bis zur entfernteren Ecke des iPad.

    Hi. I noticed that the tutorial is for an LTE iPad mini 2. However, these pictures do not show and LTE device. I'm having issues removing the LCD from the iPad due to the antenna. Any suggestions? (How to remove antenna?)

    Kevin Rodriguez -

    This step needs extra detail on how the LCD adhesive should be loosened. I've now got stress marks on the LCD which show up when solid backgrounds are displayed on screen as the LCD flexed when trying to pry it out.

    Cool_Breeze -

    I have seen countless comments about the LCD breaking when trying to remove it from the LCD shield with adhesive. I have found a simple solution. Once the 4 screws have been removed take a piece of fishing line (longer than the iPad) and simply run it beneath the top of the LCD from one side to the other. Once it's in place, gently pull it down applying equal pressure from both sides. The fishing line will break the adhesive in the process, freeing the LCD. It has worked for me every time.

    bababooey -

    Great tip about the fishing wire because you will most certainly crack the LCD just yanking it out. Thank you and hit em with the hein

    Curtis Jordan Lenox -

    I found that if you take two flat plastic spurgers and run one down each side together it works fairly well. Just take your time.

    Abbot -

    The LCD is extremely fragile, DO NOT allow it to bend or you will break it. The adhesive near the speakers that connect to the LCD are a danger spot and if you pull wrong you could break the LCD. Be careful.

    Timothy McEvoy -

    "mild adhesive" is really an understatement.
    The LCD is firmly attached to the metal plate below it.
    Especially if you try to repair an older ipad, the adhesive gets hard.
    Do not attempt to lift the LCD with spudgers in an attempt to get it out.
    You will break it.
    Use fishing line or some other strong wire to cut loose this adhesive.
    Even a strong sewing wire will do (it will take 5~6 wires because sharp edges of the housing will cut the wire easily).

    Sjaak Spoiler -

  35. OCPenEKcMqRXxTNq
    OCPenEKcMqRXxTNq
    WOUh15qx3VNj6JhA
    • Zwei breite Klebestreifen befestigen das LCD an den Lautsprechern.

    • Halte das LCD mit einer Hand und das Gehäuse mit der anderen.

    • Versuche nicht das LCD ganz vom iPad abzutrennen.

    • Ziehe das LCD vorsichtig von den Lautsprechern weg, um das Klebeband zu lösen, achte aber darauf nicht am Digitizerkabel zu ziehen.

    this was a pain to remove but the two pieces of tape should be separated using your spudger so that you can remove the lcd.

    Chris Grayden -

    absolutely. lift the screen 45 degrees before pulling it too

    Billinski -

    The screen was a tight fit in the recess. Whilst maneouvering it out, it flexed a little. Once reassembled, there are now feint stress marks visible when the screen displays a uniform background. With photos it's not noticeable, but on solid backgrounds, it is very noticeable. :-(

    Be careful when pulling the LCD out. Any hints for pulling it out safely should be added to this step.

    Cool_Breeze -

    This step is bad advise. Once you get the LCD unglued top and sides, drop those plastic tools behind it to keep it up and apply heat to the front bottom of the LCD where the tape is applied on either side, use your spudger to push the tape away before you attempt to pull or flip the LCD over. It is very easy to break if you don't get the tape loose enough, so do yourself a favor and free the LCD from the tape before you attempt to maneuver it.

    brentschwartz -

    I have seen countless comments about the LCD breaking when trying to remove it from the LCD shield with adhesive. I have found a simple solution. Once the 4 screws have been removed take a piece of fishing line (longer than the iPad) and simply run it beneath the top of the LCD from one side to the other. Once it's in place, gently pull it down applying equal pressure from both sides. The fishing line will break the adhesive in the process, freeing the LCD. It has worked for me every time.

    bababooey -

    As others have said this step is rather problematic and following the tuturial instructions will most definitely lead to damaging the LCD. One problem is that the two adhesive tapes are not indicated in the photo: they are large and black and they are partly covered by long strips of thicker material that looks like padding. To remove them it helps to heat a little with the opener and then one can slowly peel them away by alternating the sharp and flat tips of the spudger.

    lorenzocangiano -

    This must be the most difficult part. I took the advice of using fishing line and it worked a treat. However, due to lack of knowledge - I managed to slice straight through the LCD ribbons (all of them). I figure it was glue so kept going! Please take not that fishing line is only good for the sides, not the top where the LCD is attached! New LCD on order for round 2.

    Mike -

    Well. I cracked the LCD during this process, so another $100. But, it’s the journey that counts, right? There is adhesive keeping the LCD attached to the aluminum shield. As I was prying the LCD up (I didn't know about the adhesive), I did hear feint cracking. Also it is too tight to try to flip the LCD over as shown. I did heat the bottom strips, but still tried to do it as shown, more cracking. It seems best to heat it and push the adhesive strips back and separate them prior to lifting. As well as the sides of the LCD for lifting!!

    William Dailey -

    I separated the small tape in the middle (5mm), and the large upper tape (20mm), but left the lower tape at the connector in place. That way, the LCD was much easier to pull away gently and to tilt over.

    peterhebbinckuys -

    I used a needle nosed tweezers to remove the tape on the bottom left and right. I then used the plastic spudger and went between the LCD and the metal piece. I gently went down the left side about half way and then the right and slowly and gently worked both sides until they separated.

    Abbot -

    This step is unclear and should be revised, but Abbot’s comment has the right idea.  The tape holding the LCD in place should be highlighted in the image. This tape wraps around the lower edge of the panel and extends onto the front face, then a piece of cushion is attached on top.  Heat that tape to soften the adhesive then peal it up.  The connector for the LCD is on the back side of the panel in the lower right hand corner, it is not near the tape you are pealing away from the panel. Once the tape is separated very little force is required to shift the panel toward the top of the device as depicted. If you attempt to ‘pull the LCD away from the speakers’ with two hands as shown, it will almost certainly be broken.  Also, all the youtube explanations (at least the ones I could find) of how to remove the LCD make it look like you lift up on the top which would only cause the LCD to break.  So youtube failed this step as well.  It’s not easy, be careful.

    P.S. as these steps are replicated between more than one device –– I’m working on an iPad mini 3 LTE, the tape may be in different places on other devices?

    ciradrak -

    The LCD is extremely fragile, DO NOT allow it to bend or you will break it. The adhesive near the speakers that connect to the LCD are a danger spot and if you pull wrong you could break the LCD. Be careful.

    Timothy McEvoy -

    The three tapes is best removed with tweezers! Then the LCD is easily flipped over. Extremely odd it’s not explained in this way.

    trnilsson -

    It is MANDATORY to loosen the 3 tapes as well (step 36), don’t even try to lift it without loosening them first!!!! After you did it you can turn the screen without any resistance! Should be added in this guide!!!!

    Ishino Akatawa -

  36. MHTmDifM512fcEv3
    MHTmDifM512fcEv3
    I5Z2OGAMmDnjXSvi
    • Versuche nicht das LCD ganz zu entfernen. Es ist immer noch über verschiedene Kabel mit dem iPad am Ende mit dem Home Button verbunden. Hebe nur am Ende mit der Frontkamera an.

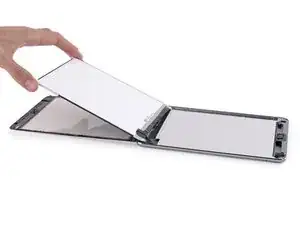
    • Klappe das LCD wie die Seiten eines Buches auf, wobei du an der Kameraseite hochhebst und es über das Home Button Ende des Gehäuses klappst.

    • Sei sehr vorsichtig und habe dabei ein Auge auf die LCD Kabel.

    • Lege das LCD auf das Glas des Front Panels, um so an die Displaykabel zu gelangen.

  37. AnUN4QhiwUdyKrJr
    AnUN4QhiwUdyKrJr
    YqBpHEytgSBRnrRC
    1FbKP1SLPmTYLrl2
    • Schiebe die Spitze eines Spudgers zwischen LCD und den Klebelaschen um so das Diplay zu befreien.

    • Drücke dabei sehr vorsichtig zwischen jeder der beiden Laschen, passe auf dass keine nahegelegenen Kabel beschädigt werden.

    This was harder than it looks. The adhesive tape covers a lot of area and has stuck to it tiny wires that go to the speaker. I had to use the tweezers to very carefully separate the wire from the adhesive, and to then pull the adhesive off the circuit board area in one spot before it would finally come away.

    Ray Everett -

    Be careful that it does not pull up all the foam strips, that was my issue.

    Shane -

  38. QnCiykDiAbNok3FQ
    • Entferne die sieben 1,8 mm Kreuzschlitzschrauben #00 von der LCD Abschirmung.

    My LCD shield plate had many more screws than this. You have to remove them all.

    David Rowthorn -

    My plate had 8 on the upper line, 6 + 2 at bottom. 16 total.

    There are strong magnets on the sides and they keep catching the screws as you take them out. Tweezers are helpful to fish them.

    Gina Romo -

    At the assembly stage I found it is easier to use Philips PH000 screw driver bit than PH00. It helped me to get these minuscule screws in place, catch the head holes and drive them into their tight position. While using PH00 the driver would not catch the holes in their head and I was risking scratching the display since the screws refused to settle in the openings.

    mxmbulat -

  39. CxMgoBiaS4lKn5Bv
    CxMgoBiaS4lKn5Bv
    LhBRvNJILxQpIqPM
    dLOHLlbctEIWGLtY
    • Hebe die LCD Abschirmung mit dem flachen Ende eines Spudgers hoch und aus dem iPad.

    • Entferne die LCD Abschirmung.

    You can also just slide it back to expose the cable bracket.

    Will -

  40. dXD6lCUIg6QKleFR
    • Entferne folgende #00 Kreuzschlitz Schrauben von der Displaykabel-Abdeckung:

    • Eine 2,8 mm Schraube

    • Drei 1,4 mm Schrauben

  41. CiAQPWBhbGCAKRUq
    CiAQPWBhbGCAKRUq
    IcrK5XXqCk4qEgrD
    fbeWZQeTI1St3tNs
    • Entferne die Displaykabel-Abdeckung vom iPad.

  42. EisWLMGKKBjNlVqH
    EisWLMGKKBjNlVqH
    iwdqgCceVICofb5N
    vTjpKTBAaNtUTCtX
    • Nutze die Spitze eines Spudgers, um das Home Button Kabel aus seiner Fassung am Logicboard zu heben.

    • Bewege das Home Button Kabel aus dem Weg.

    maybe disconnect the battery before touch the home button cable

    cli168 -

    On a iPad mini 3 you MUST remove the home button cable connector, before you have access to the battery connector

    phigsmith -

    The wider end allows better leverage and no slippage

    Billinski -

  43. HlndnvmbwtlCQede
    HlndnvmbwtlCQede
    MugNdHqMeWMyjxPA
    5VjJlTvJLyRYCaFD
    • Benutze die Spitze eines Spudgers, um den Stecker der Batterie vorsichtig aus seiner Fassung am Logicboard zu heben.

    • Achte darauf, nur den Stecker anzuheben und nicht den gesamten Anschluss. Falls du den Anschluss vom Logicboard anhebst, kannst du ihn irreparabel beschädigen.

    The wider end allows better leverage and no slippage

    Billinski -

  44. q6oB2ZUpFXDktTWR
    q6oB2ZUpFXDktTWR
    undIcoQMhWlfHXNc
    • Nutze die Spitze eines Spudgers, um den Stecker des LCD vom Anschluss am Logicboard zu heben.

    • Hebe nicht den großen Schaltkreis neben dem Anschluss an, da du ihn dabei demolieren kannst. Hebe den Anschluss vorsichtig von der Seite an, wie auf den Bildern dargestellt.

    The wider end allows better leverage and no slippage

    Billinski -

  45. ede1dbpAbBWCm5va
    • Hebe nun das LCD des iPad Mini 3 heraus.

  46. oSiLHQYHcHr2fllo
    oSiLHQYHcHr2fllo
    DTXU1MYL5FlhhAeh
    • Hebe den Verbinder am Digitizerkabel mit der Spudgerspitze gerade aus seinem Sockel.

    The wider end allows better leverage and no slippage

    Billinski -

  47. 2SwSCPriXca6RMdQ
    2SwSCPriXca6RMdQ
    ai1OtZNYJuQhH6Xs
    • Beginne damit, die Platine des Digitizers vom Rückgehäuse zu trennen. Schiebe dazu das flache Ende des Spudgers auf der Seite mit dem Akku unter die Platine.

  48. qLPcmsNWaDicNkPB
    qLPcmsNWaDicNkPB
    NKGSMJnHTJRJXCiB
    • Hebe die Digitizerplatine hoch und löse den letzten Rest des Klebers.

    It’s quite stiff, the board is secured by adhesive, so don’t worry about using gentle force.

    Continue to pry off the flexicables, also secured with adhesive.

    Billinski -

  49. 2OcZ1iWEFONJgV3a
    • Hebe die Front Panel Einheit hoch und entferne sie vom iPad.

  50. UWNAdAkM42sCGyDD
    UWNAdAkM42sCGyDD
    AZ4HAkRIxHjENLhk
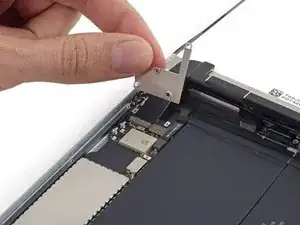
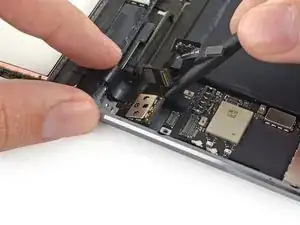
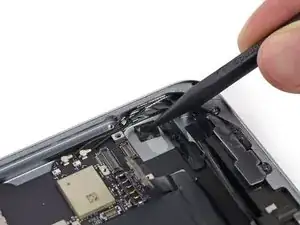
    • Löse mit der Spudgerspitze das Klebeband auf den Antennenkabeln nahe am Logic Board ab.

  51. CjTjfaK5sIdFM1kN
    CjTjfaK5sIdFM1kN
    AjP1xRJXelpu5F3G
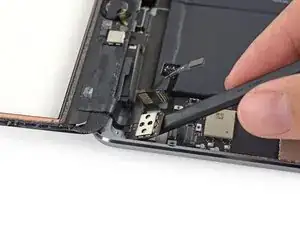
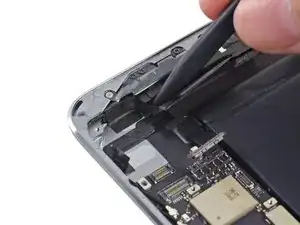
    • Löse mit der Spudgerspitze die Antennen aus der Klebeverbindung zum rechten Lautsprecher.

  52. WBOUKfykOMXfexEt
    WBOUKfykOMXfexEt
    Qrlxt2UO3LnqJJVA
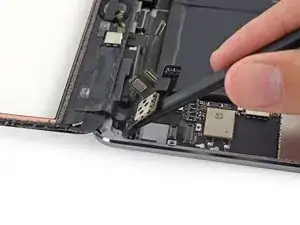
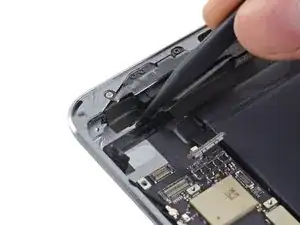
    • Löse den Kleber am Antennenkabel mit der Spudgerspitze aus dem Gehäuserückteil.

  53. XW2ty3hOfN1nRBnH
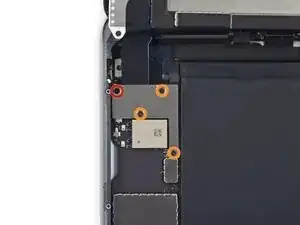
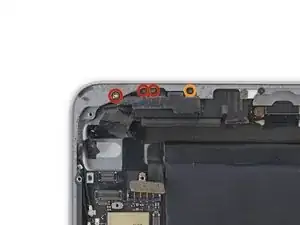
    • Entferne folgende Kreuzschlitzschrauben #00 von der rechten Antenne:

    • Drei 1,5 mm Schrauben

    • Eine 2,6 mm Schraube

    Doesn't the “2.6 mm” screw go on the far left?

    Benjamin De La Paz -

  54. Mys5BIdZqXnFUokT
    Mys5BIdZqXnFUokT
    njEhTty2gWLqNQXm
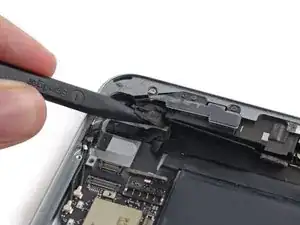
    • Durchtrenne mit dem flachen Ende des Spudgers den Klebeschaumstoff, mit dem die Antenne am rechten Lautsprecher befestigt ist.

  55. viEYBP6pd4RGadKg
    viEYBP6pd4RGadKg
    Rn6IqZqZfQchXPHU
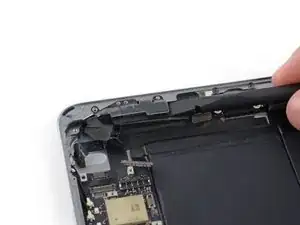
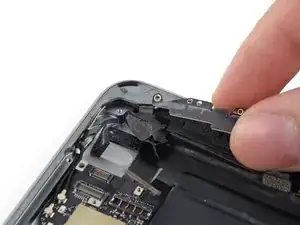
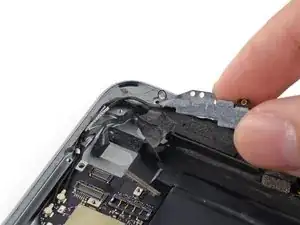
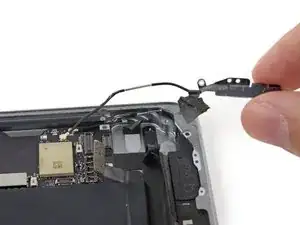
    • Ziehe die Biegung des Antennenkabels aus der Ecke des Gehäuses heraus.

  56. xNBisWBvSMNitiWZ
    xNBisWBvSMNitiWZ
    QgW5WOUg2jEQqb3B
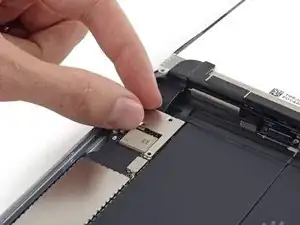
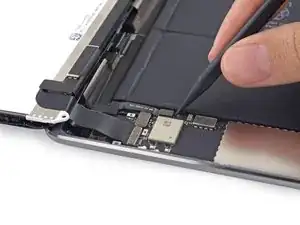
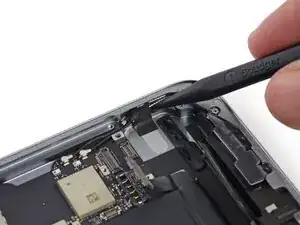
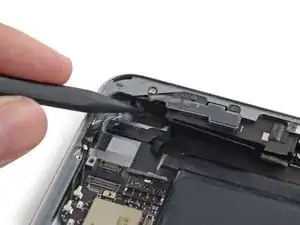
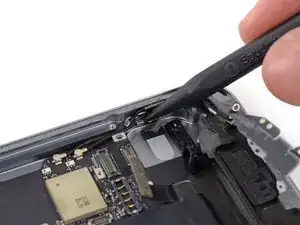
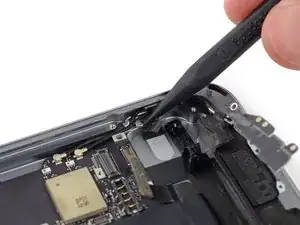
    • Heble die kleine Metallklammer mit der Spudgerspitze vom Antennenkabel weg.

  57. MjIVwMbGvNFbRsNM
    MjIVwMbGvNFbRsNM
    PmOLftrsiRuoXWKO
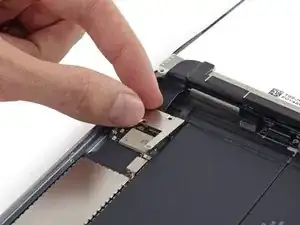
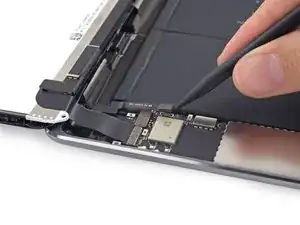
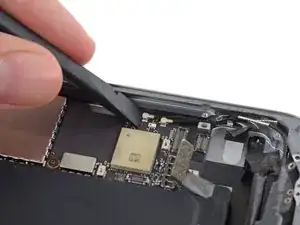
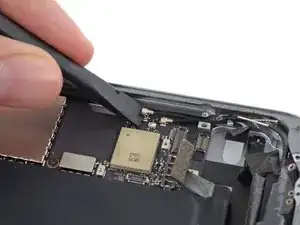
    • Heble den Stecker der Antenne mit dem flachen Ende des Spudgers aus seinem Anschluss auf dem Logic Board hoch.

  58. cBhp2km16qKVMn4I
    cBhp2km16qKVMn4I
    ufBFp1RmdRkR6nMx
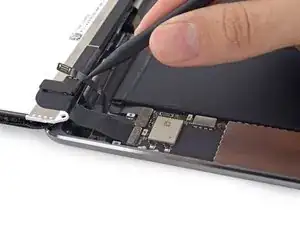
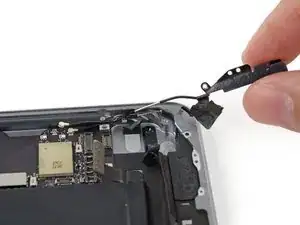
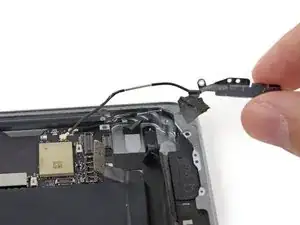
    • Fädle das Antennenkabel aus der Klammer heraus.

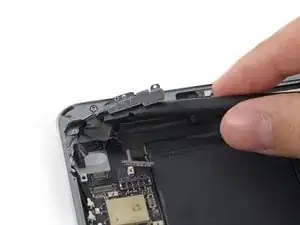
    • Entferne die rechte Antenne vom iPad.

Abschluss

Um dein Gerät wieder zusammenzusetzen, folge den Schritten in umgekehrter Reihenfolge.
Sam Goldheart

Mitglied seit: 19/10/12

457712 Reputation

0 Kommentare