Einleitung

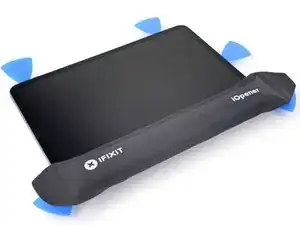
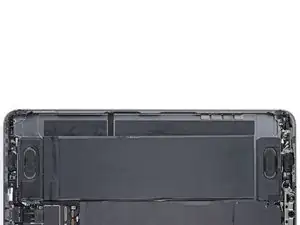
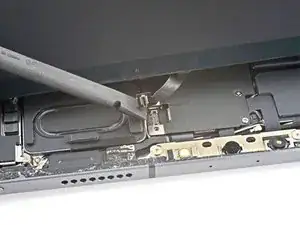
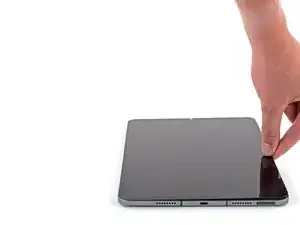
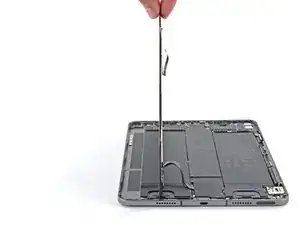
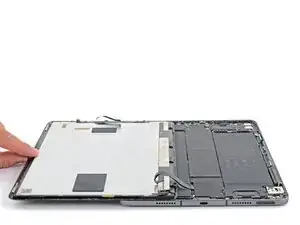
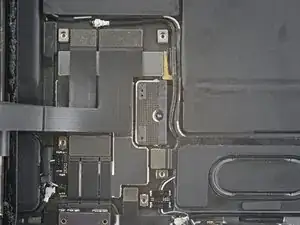
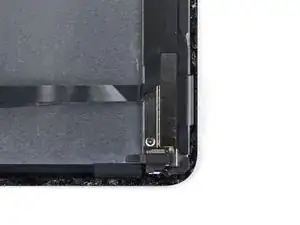
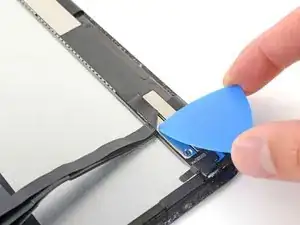
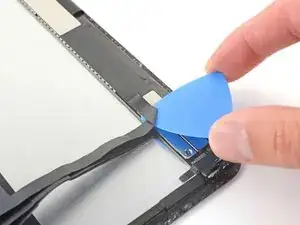
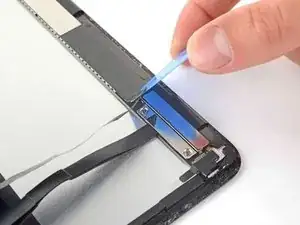
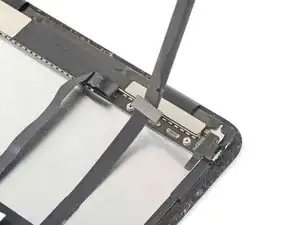
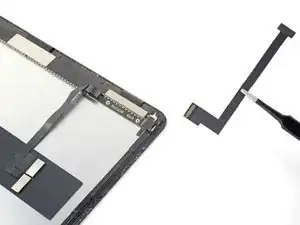
Follow this guide to replace the screen on your iPad Pro 11" 3rd gen.

If your battery is swollen, take appropriate precautions.

The LiDAR sensor assembly attached to the screen is paired with the Face ID hardware. You'll need to transfer it to your new screen to keep Face ID functionality.

  1. YWVxO1movQWwpRq4
    • Allow your iPad's battery to fully drain before starting this repair. A charged battery may catch fire if damaged during the repair.

    • Unplug any cables and fully shut down your iPad.

  2. mKOasAAg4XtXLWAN
    mKOasAAg4XtXLWAN
    fCaUOHOS6UuxTxGG
    dQyhpmNcUFRZGTyl
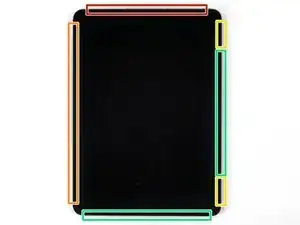
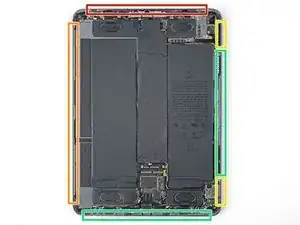
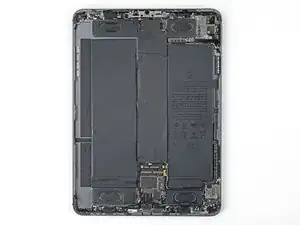
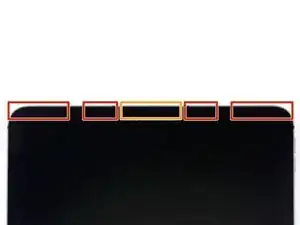
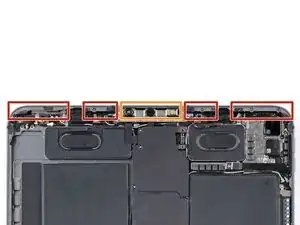
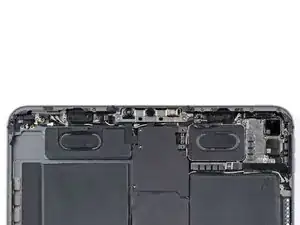
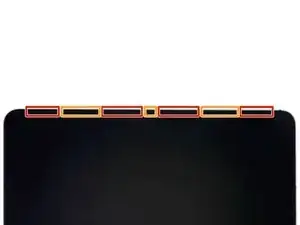
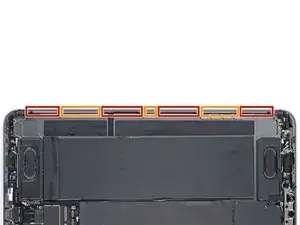
    • While your iPad looks uniform from the outside, there are delicate components under portions of the screen. To avoid damage, follow instructions exactly as written and note the following areas as you open your iPad:

    • Camera module and ambient light sensors

    • Display cables

    • Screen magnets

    • LCD edges

  3. SWfJNvV3tpPHfafG
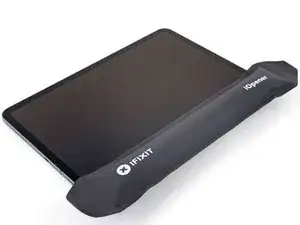
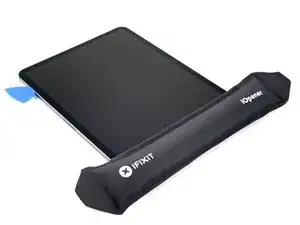
    • Apply a heated iOpener to the right edge of the screen for two minutes.

    • You can also use a hair dryer, heat gun, or hot plate—but extreme heat can damage the screen and/or internal battery, so proceed with care.

  4. PPuOSHSXPsGqUfKY
    PPuOSHSXPsGqUfKY
    OfG3iuJl2cZPUEW3
    SJquXDd2yvg4QmZs
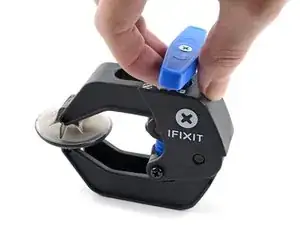
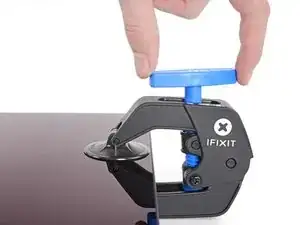
    • The next two steps demonstrate the Anti-Clamp, a tool we designed to make the opening procedure easier. If you aren't using the Anti-Clamp, skip down two steps for an alternate method.

    • For complete instructions on how to use the Anti-Clamp, check out this guide.

    • Pull the blue handle towards the hinge to disengage opening mode.

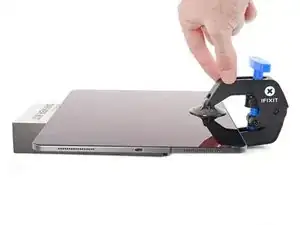
    • Elevate the iPad enough for the Anti-Clamp's arms to rest above and below the screen.

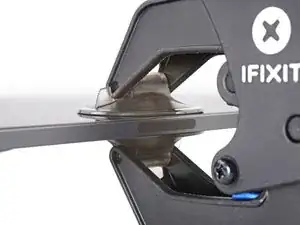
    • Position the suction cups near the right edge of the iPad—one on the front, and one on the back.

    • Push down on the cups to apply suction to the desired area.

    • If you find that the surface of your device is too slippery for the Anti-Clamp to hold onto, you can use packing tape to create a grippier surface.

  5. B146pgKQfDLrMkP2
    B146pgKQfDLrMkP2
    FKIZLEZsGTkSbT2Z
    vOVZU2YdZUfXnLfF
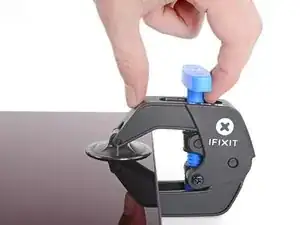
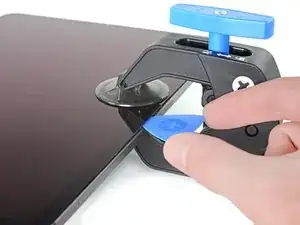
    • Push the blue handle away from the hinge to engage opening mode.

    • Turn the handle clockwise until you see the cups start to stretch.

    • Make sure the suction cups remain aligned to each other. If they begin to slip out of alignment, loosen the suction cups slightly and realign the arms.

    • Wait one minute to give the adhesive a chance to release and present an opening gap.

    • Insert an opening pick under the screen when the Anti-Clamp creates a large enough gap.

    • If the Anti-Clamp doesn't create a sufficient gap, apply more heat to the area and rotate the handle clockwise half a turn.

    • Don't crank more than a half a turn at a time, and wait one minute between turns. Let the Anti-Clamp and time do the work for you.

    • Skip the next step.

  6. UudD4HWgdf6lDhBA
    UudD4HWgdf6lDhBA
    tpVS1HUCPF3rsvFs
    y5AHt5ojeGJ5sKMG
    • If your screen is badly cracked, covering it with a layer of clear packing tape may allow the suction cup to adhere. Alternatively, very strong tape may be used instead of the suction cup. If all else fails, you can superglue the suction cup to the broken screen.

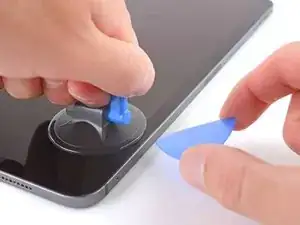
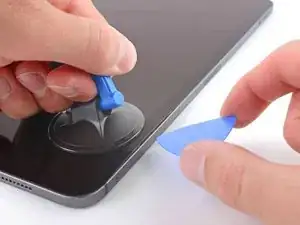
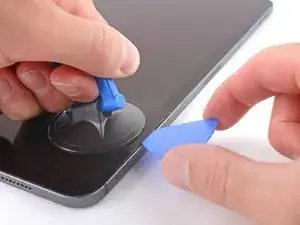
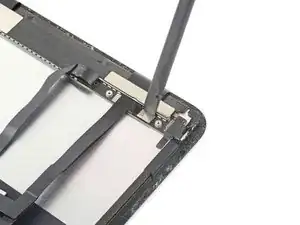
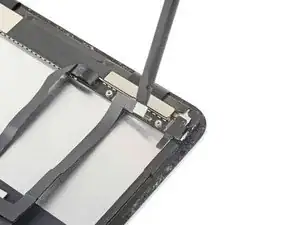
    • Apply a suction handle to the right edge of the screen, about 5 cm from the bottom edge.

    • Pull up on the suction handle with firm, constant pressure to create a gap just small enough to insert an opening pick.

    • Only create a gap small enough to insert an opening pick. Overbending the screen will damage it.

    • Insert the tip of an opening pick into the gap.

    • Don't insert the opening pick more than 5 mm or you may damage the LCD.

  7. gKQcNDfaXmlg5WJr
    gKQcNDfaXmlg5WJr
    MBpw1FqIkISOBgaF
    PMrdneUcwwTAQbZX
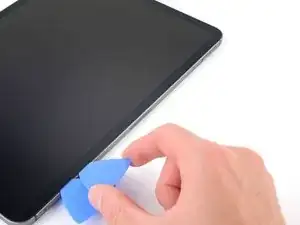
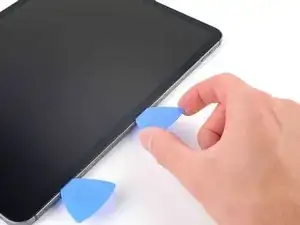
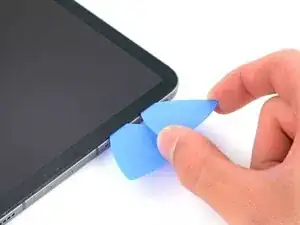
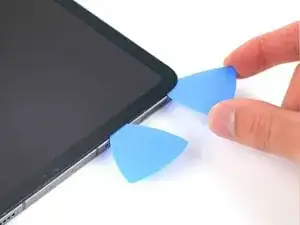
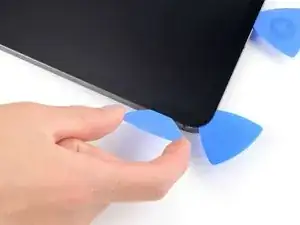
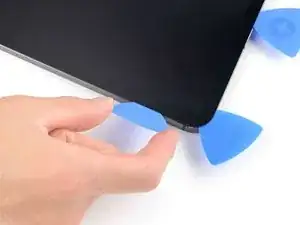
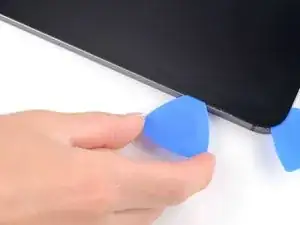
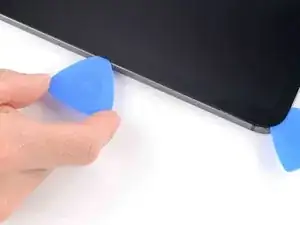
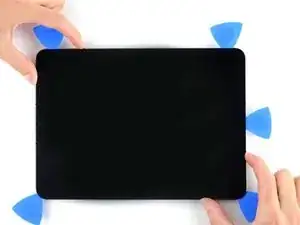
    • Insert a new opening pick in the gap you just created.

    • Slide the pick along the right edge to separate the adhesive.

    • When sliding near the volume buttons, don't insert the pick more than 2 mm or you'll damage the screen magnets.

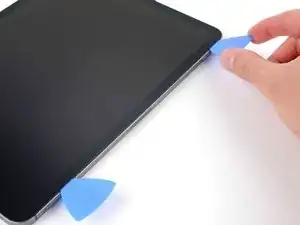
    • Leave the pick in the top right corner to prevent the adhesive from re-sealing.

  8. aSAPlEm3Caw4yTrM
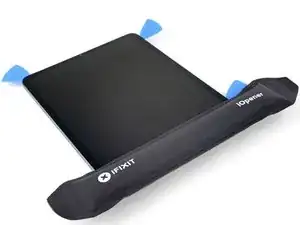
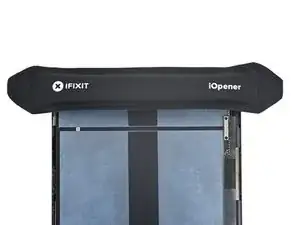
    • Apply a heated iOpener to the top edge of the screen for two minutes.

  9. C6flCETRILfE4YKx
    C6flCETRILfE4YKx
    pmUXDY1bGPfFUrDo
    B3TGr4aIUhDI4P1X
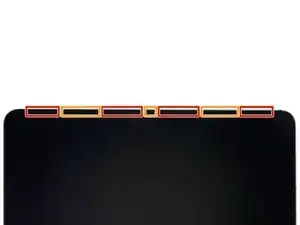
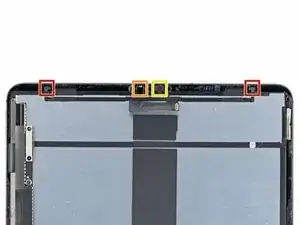
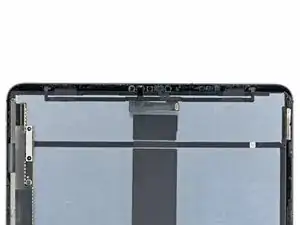
    • The top edge of the iPad contains the camera module and two ambient light sensors. These components are fragile and easily damaged if an opening pick is inserted too far. Only separate the adhesive in the marked locations to avoid damage.

    • The two ambient light sensors can be hard to see and can be located using a flashlight or by placing the iPad under a bright light.

    • Don't insert an opening pick more than 5 mm near the top left and right edges or you'll damage the ambient light sensors.

    • Don't insert an opening pick more than 1 mm near the middle of the top edge or you'll damage the camera module.

  10. X4ERXwlrTnfpPamA
    X4ERXwlrTnfpPamA
    DnQAY3CsT4PdiRdF
    • Insert a new opening pick in the gap you just created.

    • Slide the pick along the top right edge, stopping when you reach the right ambient light sensor.

    • Don't insert the opening pick more than 5 mm.

    • Leave the pick in to prevent the adhesive from re-sealing.

  11. MSlUONmmoqsYWGpG
    MSlUONmmoqsYWGpG
    OqDYIwFnaCmVCN6g
    AswnMuPEcO2JiM5C
    • Insert a new opening pick to the right of the ambient light sensor.

    • Slide the pick along the middle section of the top edge, stopping when you reach the left ambient light sensor.

    • Don't insert the pick more than 1 mm or you'll damage the camera module.

    • Leave the pick in to prevent the adhesive from re-sealing.

  12. oPYYrsL54NpdCwFJ
    oPYYrsL54NpdCwFJ
    nZLYAslhDhm1nvCI
    • Insert a new opening pick to the left of the ambient light sensor.

    • Slide the pick along the top left edge, stopping when you reach the left ambient light sensor.

    • Don't insert the opening pick more than 5 mm.

    • Once the top edge adhesive has been separated, you can remove the two picks near the ambient light sensors.

  13. M4QlliPhG13xJHQW
    • Apply a heated iOpener to the bottom edge of the screen for two minutes.

  14. 45WV5NHKBLSSQjmA
    45WV5NHKBLSSQjmA
    kfyWxXwmTIoaycAR
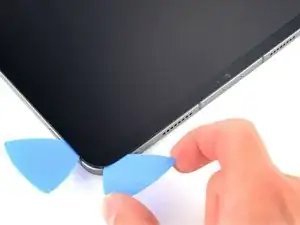
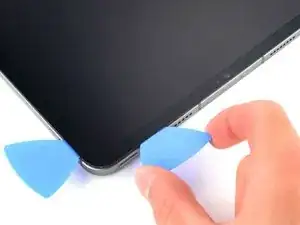
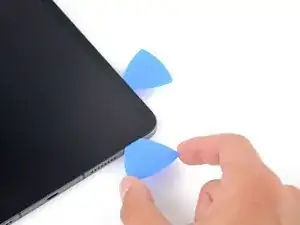
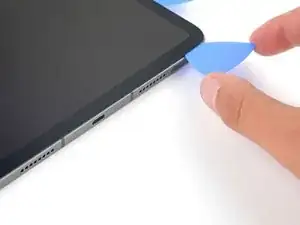
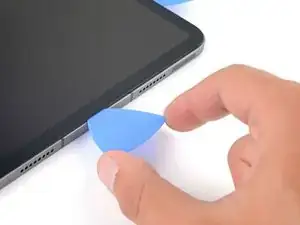
    • Insert a new opening pick in the bottom right corner below the existing pick.

    • Don't insert the opening pick more than 2 mm when sliding on the right edge.

    • Slide the pick around the bottom right corner to separate the adhesive.

  15. ZfcRVWBmGZ2joXtW
    ZfcRVWBmGZ2joXtW
    YpQXhA3yINtV4NLv
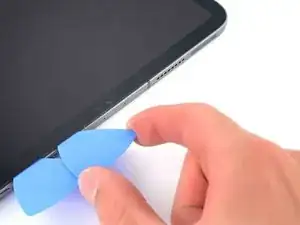
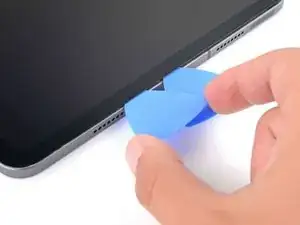
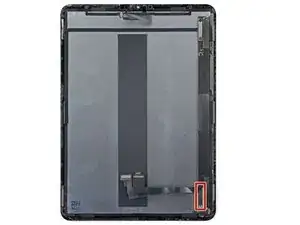
    • Slide the opening pick along the bottom edge, stopping at the USB-C port.

    • Don't insert the opening pick more than 5 mm when separating the bottom edge adhesive.

    • Leave the pick in to prevent the bottom edge adhesive from re-sealing.

  16. SCS1DRKPEyojXcQr
    SCS1DRKPEyojXcQr
    RdHjD4ZJxPPoDoZX
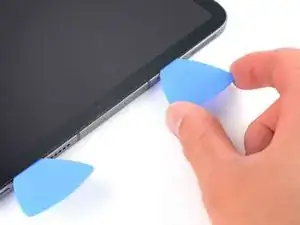
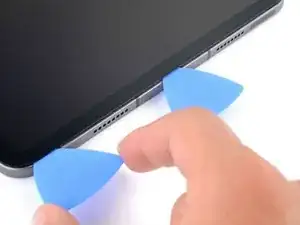
    • Insert a new opening pick to the left of the USB-C port.

    • Separate the remaining bottom edge adhesive.

    • Don't insert the opening pick more than 5 mm when slicing the bottom edge adhesive.

    • Leave the pick in the bottom left corner to prevent the bottom edge adhesive from re-sealing.

  17. BBRHcwn6APDESJMU
    • Apply a heated iOpener to the left edge of the screen for two minutes.

  18. F5n3jEJUogHmRBfj
    F5n3jEJUogHmRBfj
    PZBQpBnJTlbofLVC
    QNWw1FUrnA1IveRa
    • The left edge of the iPad contains several display cables. These cables are extremely fragile and easily damaged if an opening pick is inserted too far or at the wrong angle. Follow the instructions exactly as written to avoid damage.

    • The display cables are located within small indents of the frame and require an opening pick to be inserted at a 45° angle.

    • There are flat sections of the frame which require an opening pick to be inserted horizontally.

  19. fFSKShSGUIXXRGEH
    fFSKShSGUIXXRGEH
    oG4S2tOjoD2XxPXA
    • Insert an opening pick at a 45˚ angle just above the bottom left corner.

    • Don't insert the pick more than 5 mm or you'll damage the display cables.

    • Carefully slide the pick along the left edge, stopping when you reach the flat section of the frame.

  20. sB62OFGs4RLtyKwE
    sB62OFGs4RLtyKwE
    bNHEJkP1QbVBx3Le
    • Lower the opening pick so it is horizontal to the screen.

    • Don't insert the pick more than 5 mm.

    • Continue separating the left edge adhesive until you reach the next indented section of the frame.

  21. 6DCbGkbndP6p6PIv
    • Separate the remaining adhesive, making sure to follow the instructions exactly as written.

    • Slide the pick at a 45˚ downward angle and don't insert the pick more than 5 mm.

    • Slide the pick horizontally and don't insert the pick more than 5 mm.

  22. tcFjW3mSfk3T31YN
    tcFjW3mSfk3T31YN
    v1n2MwlpuNvDlIsY
    gCPwdGt3DlxwSKLQ
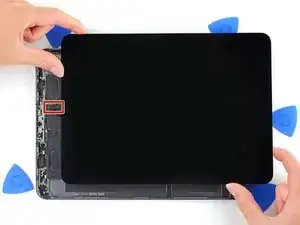
    • At this point, you've separated most of the screen adhesive. Lift the edges of the screen up slightly to check if there is any remaining adhesive.

    • Use an opening pick to remove any remaining adhesive keeping the screen stuck to the frame.

    • Grab the top right and bottom left corners of the screen.

    • Slowly slide the screen towards the bottom right corner to separate it from the frame.

    • Don't fully remove the screen as it is held in place by several ribbon cables underneath.

    • Shift the screen towards the bottom right corner of the frame until the ambient light sensor ribbon cable near the top edge is uncovered.

  23. eV4OvPRVSBIcp1tY
    eV4OvPRVSBIcp1tY
    iVwae1KkhePPfNmY
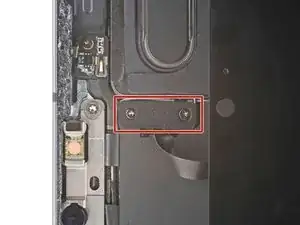
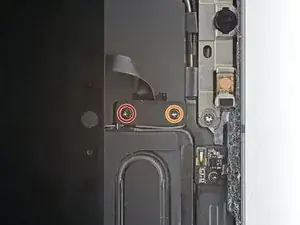
    • Throughout this repair, keep track of each screw and make sure it goes back exactly where it came from.

    • Use a Phillips screwdriver to remove the two screws securing the ambient light sensor cable bracket to the logic board:

    • One 1.3 mm screw

    • One 2.0 mm screw

    • During reassembly, this is a good point to power on your iPad and test all functions before sealing it up. Be sure to power your iPad back down before you continue working.

  24. wg1fGoMjlmJVL5aI
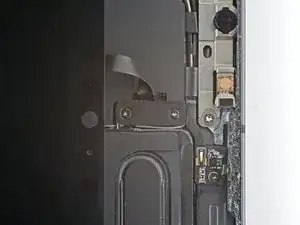
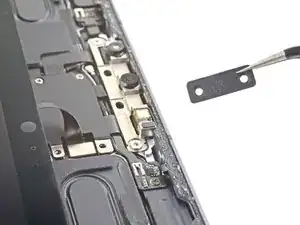
    • Use a pair of tweezers or your fingers to remove the bracket.

  25. 6ZrxyCxJShZWSVbx
    6ZrxyCxJShZWSVbx
    DnnoCmSipQ5uYkJI
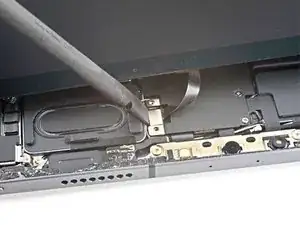
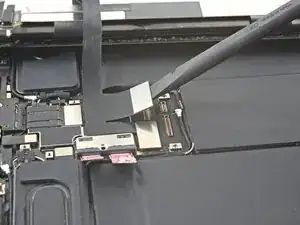
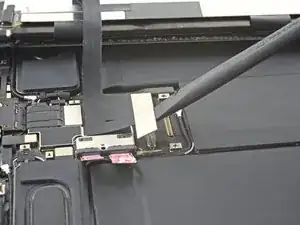
    • Use the flat end of a spudger to disconnect the ambient light sensor cable by lifting straight up on the press connectors.

    • To re-attach press connectors like this one, carefully align and press down on one side until it clicks into place, then repeat on the other side. Do not press down on the middle. If the connector is misaligned, the pins can bend and cause permanent damage.

  26. NejYRMNOxSFxrBuR
    NejYRMNOxSFxrBuR
    5PWXb6IRNv6GQxvu
    jutHpQmBENyNKJAA
    • Don't try to remove the screen yet, as it's still attached by delicate ribbon cables.

    • Grip the right edge of the screen and fold it open like a book.

    • Lay the screen down over the left edge of the iPad.

  27. KrdjGIhaDutm4BLD
    KrdjGIhaDutm4BLD
    rqRXkXVFYNGuMqfN
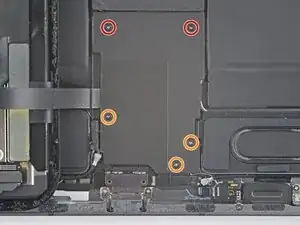
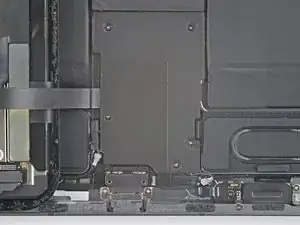
    • Use a Phillips screwdriver to remove the five 1.2 mm screws securing the lower cable shield to the logic board.

    • Two 2.0 mm screws

    • Three 1.3 mm screws

  28. ayiAkOBcA4M3MQZO
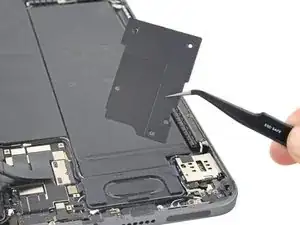
    • Use tweezers or your fingers to grab and remove the lower cable shield.

  29. UwfpTYKfOAnwqQAB
    UwfpTYKfOAnwqQAB
    huDrXWDACcMgCPul
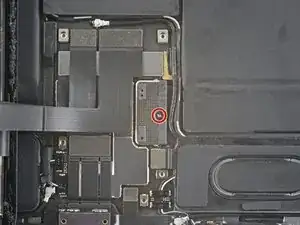
    • Use a Phillips screwdriver to remove the 1.8 mm screw securing the battery connector to the logic board.

  30. wIiYmwpPKiiWBiTd
    wIiYmwpPKiiWBiTd
    NXmwhiFO4bEu2OqI
    OPWiBSyhgUEQWphn
    • These photos show what the battery connector looks like underneath the logic board. Use these photos as a reference while you safely disconnect the battery.

    • Notice that the battery connector has cantilever springs on the logic board that press against the battery contact pads. Since both the logic board and battery are glued down, you'll need to slide something thin and flexible between the contact points to disconnect the battery.

  31. JsPsrZl5TyW2BOOQ
    JsPsrZl5TyW2BOOQ
    tBPo2sCL5r6YLdSA
    CAeXYc2bSyv2peRI
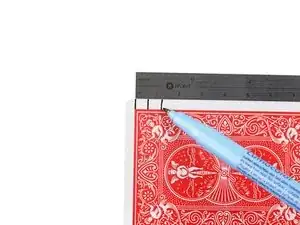
    • Cut two 6 mm wide strips from a playing card or cardstock to use as a battery blocker.

    • The strips should be about 4 cm long so you can easily grip them.

  32. XRyRVLDJXCLMhVmK
    XRyRVLDJXCLMhVmK
    dFDejwOPRcAuPXF3
    XeZ2qFlXwlBZHu66
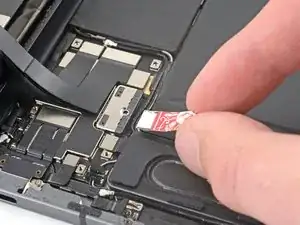
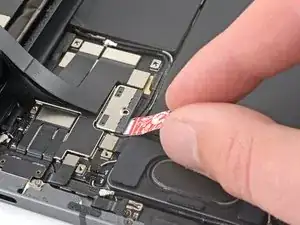
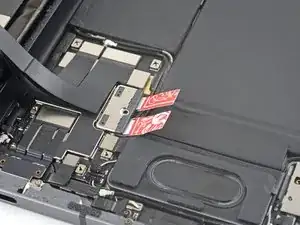
    • Insert the card strips on each side of the battery connector until they stop.

  33. hb4aWKRHCDmmSRVB
    hb4aWKRHCDmmSRVB
    B3Xy2Vxj4eK5lSVE
    cVNQAyeKgZnZyBTC
    • Use the pointed end of a spudger to pry up and disconnect the top two display cables.

  34. ZbHWsCPOofIWHcNt
    ZbHWsCPOofIWHcNt
    tJApCQr5ufqJPfiP
    bsoH3fv41niYEysg
    • Disconnect the two remaining display cables.

  35. dnQviK5MA3rPPWbO
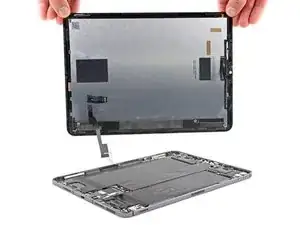
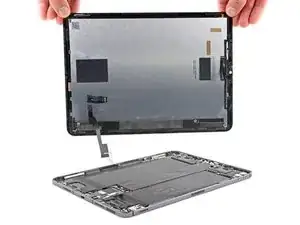
    • Grip the right edge of the screen and lift it away.

    • During reassembly, before installing a screen, remove any remaining adhesive from the frame, and clean the glued areas with high-strength (>90%) isopropyl alcohol and a lint-free cloth. This helps prep the iPad for fresh adhesive and ensures that it will bond properly.

    • If you plan to reinstall your existing screen, remove any remaining adhesive from the back and clean the adhered areas with isopropyl alcohol.

    • Follow this guide to install pre-cut adhesive strips on your iPad before sealing it up.

  36. VqcjPNEaoVZroUUX
    VqcjPNEaoVZroUUX
    oxLlt2g4CMIA12NV
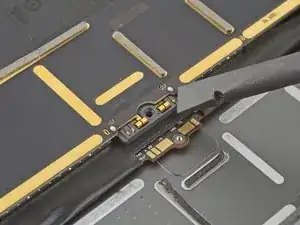
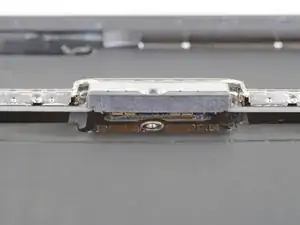
    • The LiDAR sensor assembly is paired to the Face ID hardware. You'll need to transfer it to your replacement screen to keep Face ID functionality. The following steps show how to remove the sensor assembly and install it on your replacement screen.

    • The LiDAR sensor assembly is composed of four total sensors:

    • Two ambient light sensors

    • One proximity sensor

    • One microphone

    • You'll need to separate each sensor from the screen before removing the entire assembly.

  37. u5C3BRJgFnqN3WIw
  38. iGVXOgT1MRNPhKAw
    iGVXOgT1MRNPhKAw
    1JitKLEEdZQCUj1u
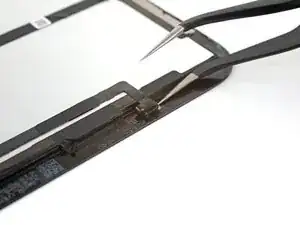
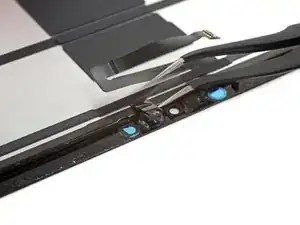
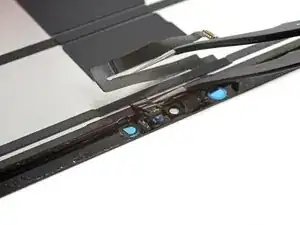
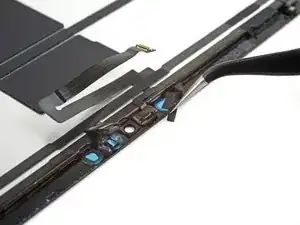
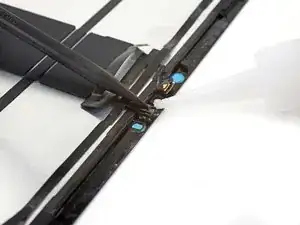
    • Insert one arm of your angled tweezers between the ambient light sensor and the screen.

    • Pry up to separate the sensor from the screen.

    • This might take significant force.

    • Repeat this procedure for the other ambient light sensor.

  39. YiFNYvoSXvayqMsJ
    YiFNYvoSXvayqMsJ
    ZCd6BEIxjdgBc4EA
    WHyfa5NAlEtWyyIL
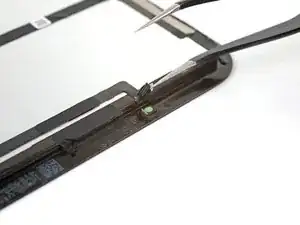
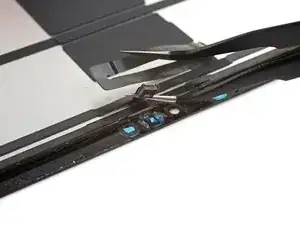
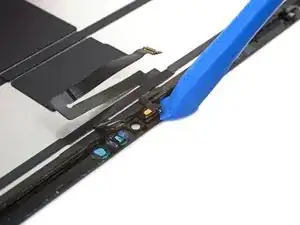
    • Insert one arm of your angled tweezers between the proximity sensor cable and the screen.

    • Slide the tweezers toward the screen while prying to separate the sensor from the screen.

    • This might take significant force and multiple iOpener heating cycles.

  40. 2oRBUiPlMVfj5pKv
    2oRBUiPlMVfj5pKv
    OQNseJyHwbkx4UcV
    • Peel off any tape covering the microphone.

    • Set the tape aside. You'll use it during reassembly.

  41. QviiEs5G2NsIdL2P
    QviiEs5G2NsIdL2P
    q11DmSQAyjsHFiNT
    wO4PD4Q2OyQxsxm4
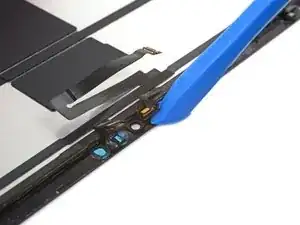
    • Slide an opening tool under the microphone to separate its adhesive.

    • Pry up to separate the microphone from the screen.

  42. jQQQwYT4hL1c2qtu
    jQQQwYT4hL1c2qtu
    PnscDrUADoJ1lriR
    yWIVuaDDxciI4dq4
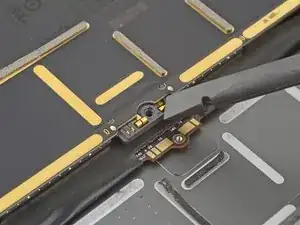
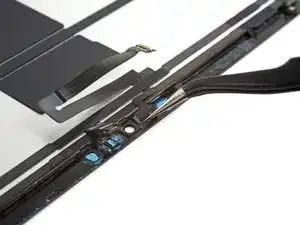
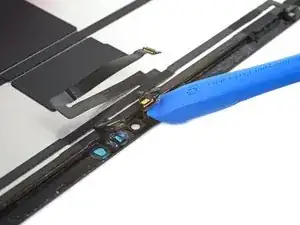
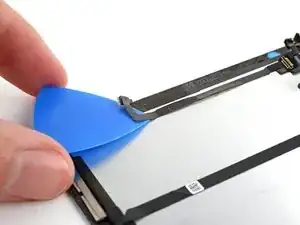
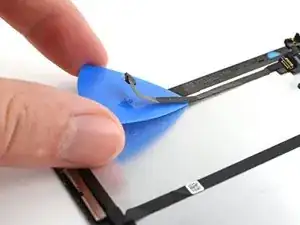
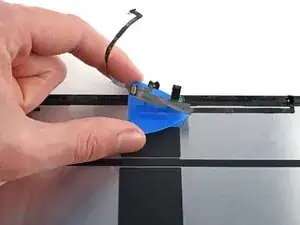
    • Slide an opening pick under the LiDAR sensor assembly cable to separate it from the screen.

  43. FTXEEWMAUgbZNMEW
    FTXEEWMAUgbZNMEW
    UVdJT2xYVUfGoRUR
    T3jBiQcjvcioeDDT
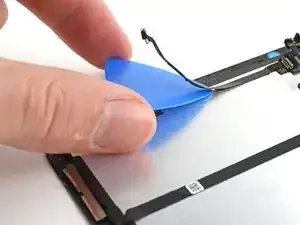
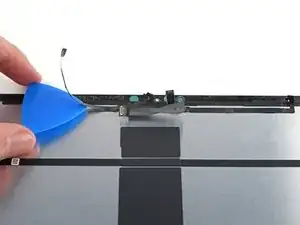
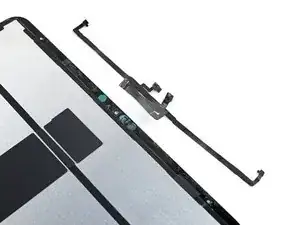
    • Continue sliding your opening pick under the LiDAR sensor assembly until it's completely separated from the screen.

    • Remove the LiDAR sensor assembly.

  44. iXJGhKwaMUsPJxMT
    • During reassembly, you'll have to perform the following:

    • Align the LiDAR sensor assembly on your replacement screen.

    • Use Tesa tape, or similar double-sided tape, to secure the cables to the screen.

    • Use E6000 adhesive, or similar adhesive, to secure the sensors to their cutouts on the screen.

    • Only apply adhesive to the edges of the sensors. Placing adhesive on the front will break them.

  45. FcKSHkbrSSLYQXQQ
    FcKSHkbrSSLYQXQQ
    TIvNwPatIMWVeEVl
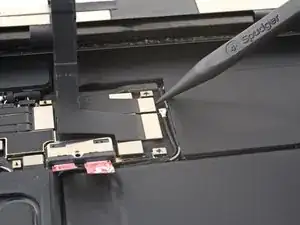
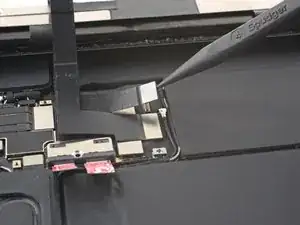
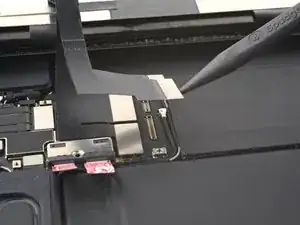
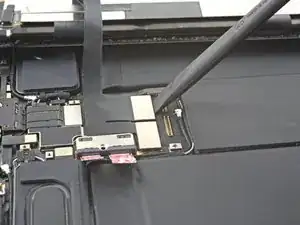
    • If your replacement screen didn't come with the two removable display cables, follow the next six steps to remove and transfer these cables.

    • The display cable connectors are located under a bracket near the bottom right corner of the screen.

  46. oyxdXRXSWUFPaFTL
    oyxdXRXSWUFPaFTL
    v3icFqCoNeWBYloB
    McnDI3iXxdmypdpc
    • Slide an opening pick under the non-removable display cable to loosen it from the bracket.

  47. pS4fG3Fhlyuqi2Fm
    pS4fG3Fhlyuqi2Fm
    RuWSbMKoMPUFUFHc
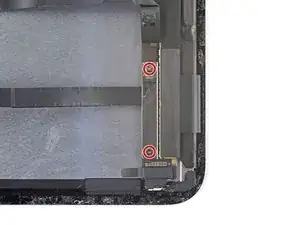
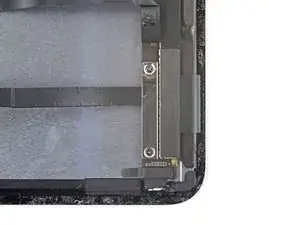
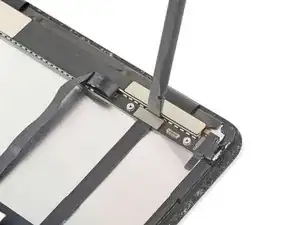
    • Use a Phillips screwdriver to remove the two 1.2 mm screws securing the display cable bracket.

  48. iGisln1eamIwVh16
    iGisln1eamIwVh16
    dy1Gp4EeqoiaMMMe
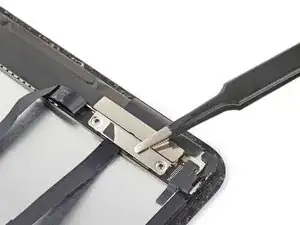
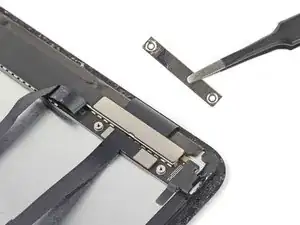
    • Remove the display cable bracket.

  49. RTbnRNGeejDkJ2NI
    RTbnRNGeejDkJ2NI
    bq6FhD6qkR64dESr
    HSnAIQfaHsBFGXQm
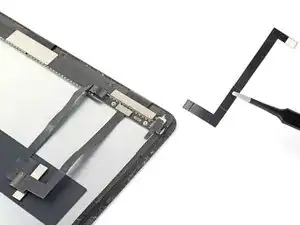
    • Use the flat end of a spudger to pry up and disconnect the narrow display cable.

    • Remove the narrow display cable. Set it aside for reassembly.

  50. n6KgpUAoYEkyfowd
    n6KgpUAoYEkyfowd
    K4USIOsMEKErDhVQ
    VFytVsN12lHZiMPI
    • Disconnect and remove the wide display cable. Set it aside for reassembly.

Abschluss

Compare your new replacement part to the original part—you may need to transfer remaining components or remove adhesive backings from the new part before installing.

To reassemble your device, follow these instructions in reverse order.

Take your e-waste to an R2 or e-Stewards certified recycler.

Repair didn’t go as planned? Try some basic troubleshooting, or ask our iPad Pro 11" 3rd Gen Answers community for help.
Chayton Ritter

Mitglied seit: 21/08/20

12163 Reputation

0 Kommentare