Einleitung
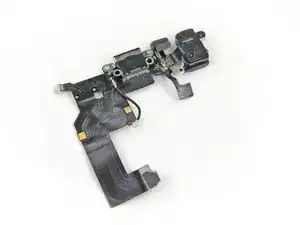
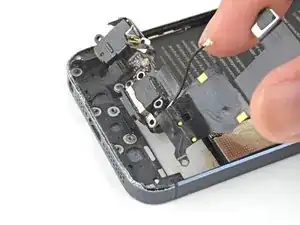
Der Lightning Connector, die Kopfhörerbuchse und die Mobilfunk-Antenne sitzen auf einem einzigen Bauteil und müssen gemeinsam entfernt und ersetzt werden.
Du kannst auch dieser Anleitung folgen, um die Dichtung des Mikrofons auszutauschen.
Werkzeuge
Ersatzteile
-
-
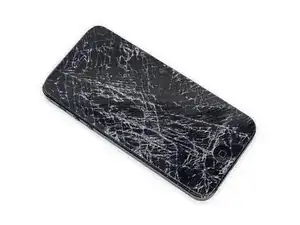
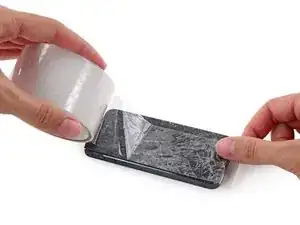
Falls dein Displayglas gesprungen ist, halte die Bruchstelle zusammen und vermeide Verletzungen, indem du das Glas mit Tape versiehst.
-
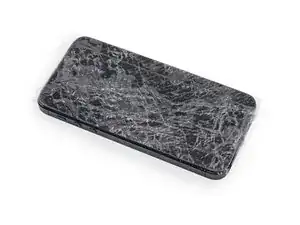
Lege sich überlagernde Streifen von durchsichtigem Paketband über das iPhone Display, bis die gesamte Frontseite bedeckt ist.
-
-
-
Schalte dein iPhone aus, bevor du mit der Demontage beginnst.
-
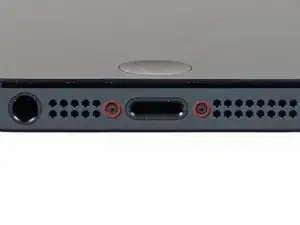
Entferne die zwei 3,6 mm Pentalobe Schrauben neben dem Lightning Connector.
-
-
-
Unabhängig vom verwendeten Werkzeug musst du darauf achten das ganze Display auf einmal abzuheben.
-
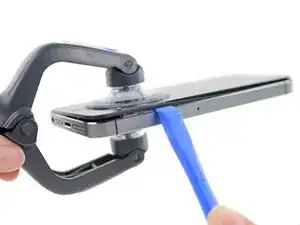
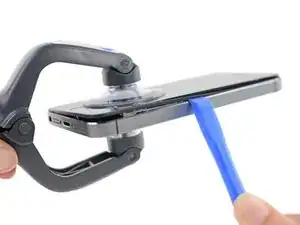
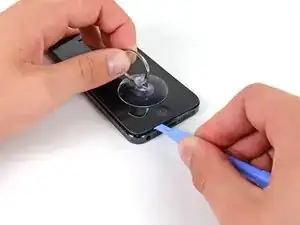
Wenn sich der Bildschirm vom Rahmen löst, wie es im ersten Bild zu erkennen ist, schiebe ein Plastik Opening Tool zwischen den Plastikrahmen und den unteren Teil des Gehäuses, um die Metallklammern zu lösen.
-
-
-
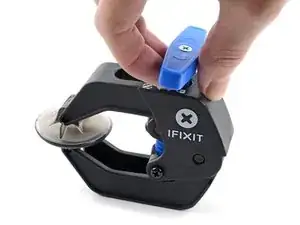
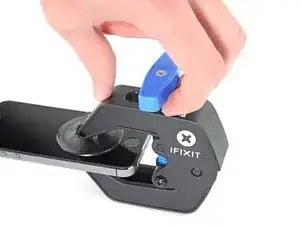
Drücke den blauen Griff zum Scharnier hin, um den Öffnungsmodus zu deaktivieren.
-
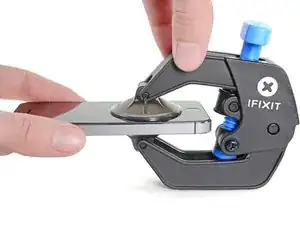
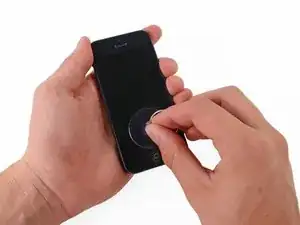
Bringe die Saugheber am unteren Rand des iPhones an, einen auf der Vorderseite, den anderen auf der Rückseite.
-
Drücke die Saugheber auf den Oberflächen fest.
-
-
-
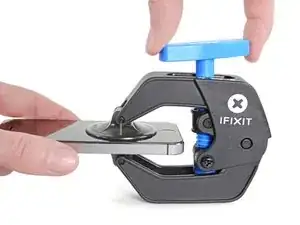
Drücke den blauen Griff vom Scharnier weg in die Stellung für den Öffnungsmodus.
-
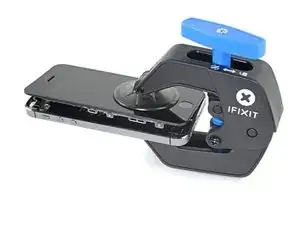
Drehe den Griff im Uhrzeigersinn, bis du merkst, dass sich die Saugheber dehnen.
-
Warte eine Minute, damit sich der Kleber allmählich ablösen kann und sich ein Spalt unten am Display bilden kann.
-
Überspringe die nächsten drei Schritte.
-
-
-
Während du das iPhone mit einer Hand unten hältst, ziehe an dem Saugnapf, um die Displayeinheit etwas von dem hinteren Gehäuse zu entfernen.
-
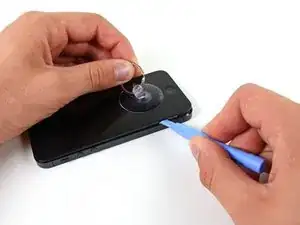
Heble mithilfe eines Plastik Opening Tools die Kanten des hinteren Gehäuses vorsichtig nach unten, weg vom Bildschirm, während du mit dem Saugnapf nach oben ziehst.
-
-
-
Heble weiter an den Seiten der Displayeinheit und löse die Clips entlang der linken und rechten Seite.
-
-
-
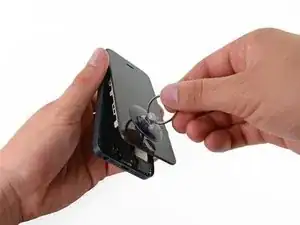
Sobald die Clips unten und an den Seiten der Displayeinheit gelöst sind, ziehe den unteren Teil der Einheit weg vom hinteren Gehäuse.
-
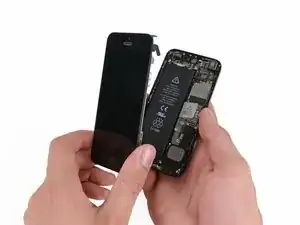
Hebe die Displayeinheit langsam bis zu 90° vom hinteren Gehäuse an, und lehne sie gegen eine Halterung, während du am Telefon arbeitest.
-
Fixiere das Display mit einem Gummiband, um es während dem Arbeiten sicher in Position zu halten und Spannung auf den Displaykabeln zu verhindern.
-
-
-
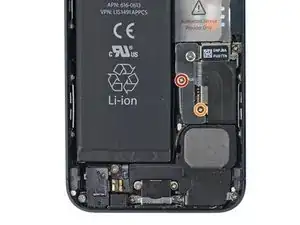
Entferne die beiden folgenden Schrauben, die die Metallabdeckung über dem Akkuanschluss auf dem Logic Board befestigen:
-
Eine 1,8 mm Kreuzschlitz Schraube
-
Eine 1,6 mm Kreuzschlitz Schraube
-
-
-
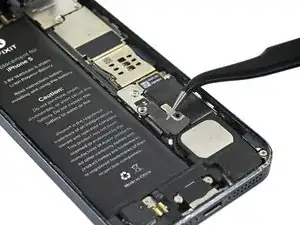
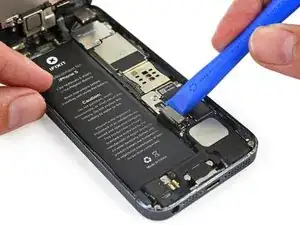
Heble den Akkustecker vorsichtig mit einem Plastik Opening Tool von seinem Anschluss auf dem Logic Board.
-
-
-
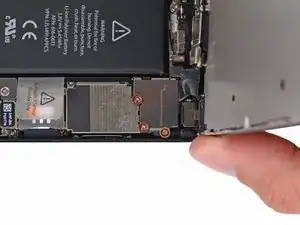
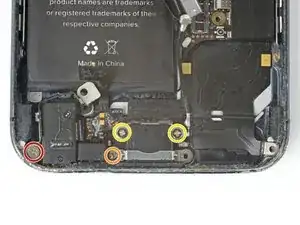
Entferne die folgenden Schrauben, die die Kabelabdeckung der Displayeinheit am Logic Board befestigen:
-
Zwei 1,2 mm Kreuzschlitz Schrauben
-
Eine 1,6 mm Kreuzschlitz Schraube
-
-
-
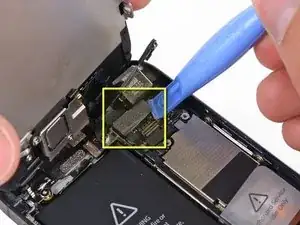
Hebe die Kabelabdeckung der Displayeinheit in Richtung Akku vom Logic Board und entferne sie.
-
-
-
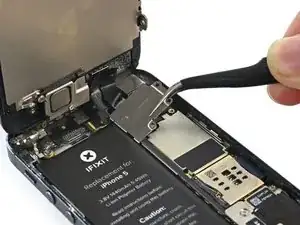
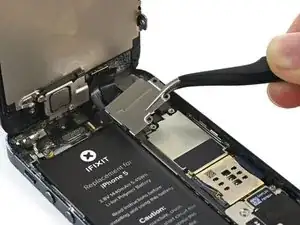
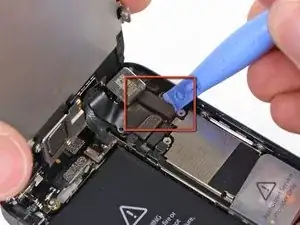
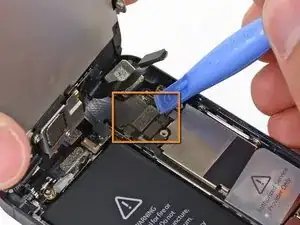
Benutze ein Plastik Opening Tool oder den Fingernagel, um die drei Kabel an der Displayeinheit zu lösen:
-
Frontkamera und Sensorkabel
-
LCD Kabel
-
Digitizer Kabel
-
-
-
Entferne folgende Schrauben, mit denen das Lautsprechergehäuse am Rückgehäuse befestigt ist:
-
Eine 2,5 mm Kreuzschlitzschraube
-
Eine 1,5 mm Kreuzschlitzschraube
-
Eine 2,5 mm Kreuzschlitzschraube
-
Eine 2,7 mm Abstandsschraube
-
-
-
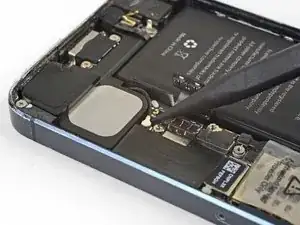
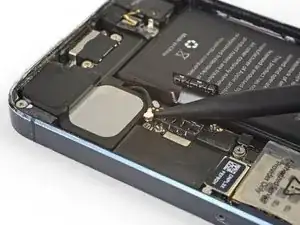
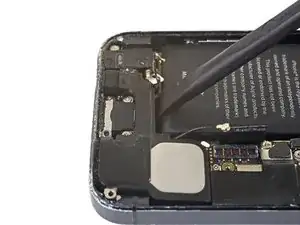
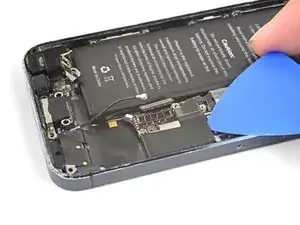
Schiebe die Spudgerspitze unter das Federkontakt-Flachbandkabel unter dem Akku und löse es vorsichtig vom Lautsprechergehäuse.
-
-
-
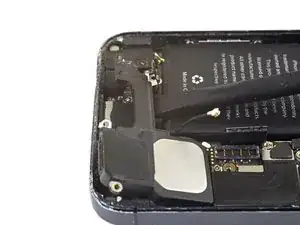
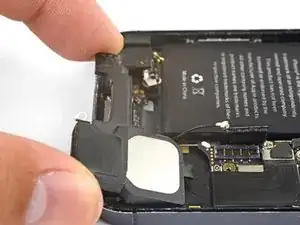
Heble mit dem flachen Ende des Spudgers das Lautsprechergehäuse hoch und löse es vorsichtig vom Rückgehäuse ab.
-
Hole das Lautsprechergehäuse aus seiner Vertiefung heraus.
-
-
-
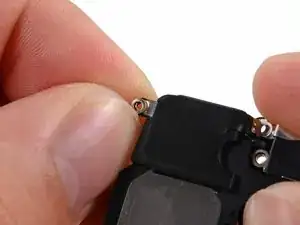
Entferne die kleine doppelte metallene Unterlegscheibe vom Lautsprechergehäuse und übertrage sie auf das Ersatzteil.
-
-
-
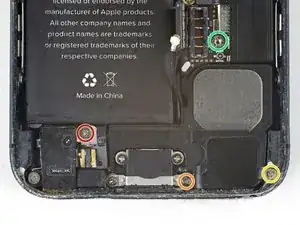
Entferne folgende Schrauben, welche die Lightning Connector Einheit am Rückgehäuse befestigen:
-
Eine 2,9 mm Kreuzschlitzschraube.
-
Eine 1,5 mm Kreuzschlitzschraube
-
Zwei 3,3 mm Kreuzschlitzschrauben
-
-
-
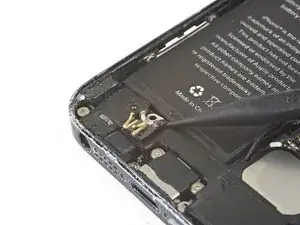
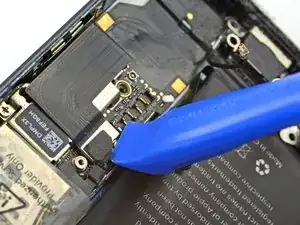
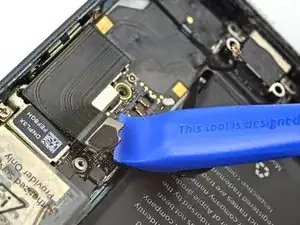
Heble den Stecker am Kabel zum Lightning Connector mit einem Plastiköffnungswerkzeug hoch und löse ihn aus seinem Anschluss auf dem Logic Board.
-
-
-
Drehe das Smartphone mit dem Bildschirm nach oben, erwärme einen iOpener und lege ihn eine Minute lang auf den rechten Rand des iPhones.
-
-
-
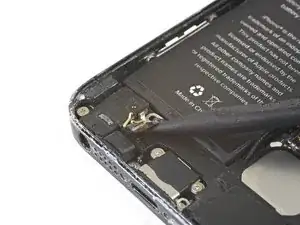
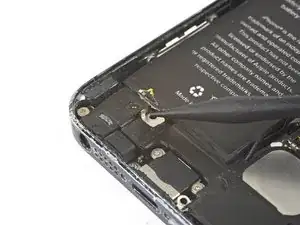
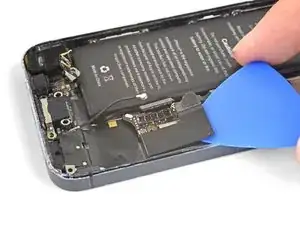
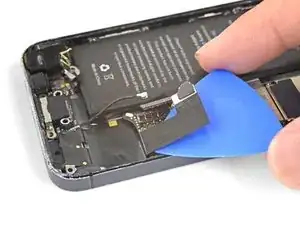
Schiebe ein Plektrum unter das Flachbandkabel zum Lightning Connector und löse es vom Logic Board und vom Rückgehäuse ab.
-
-
-
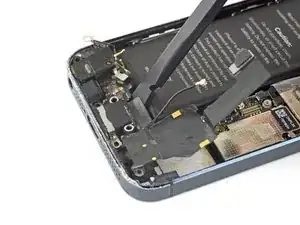
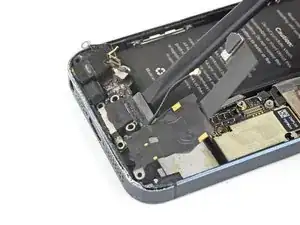
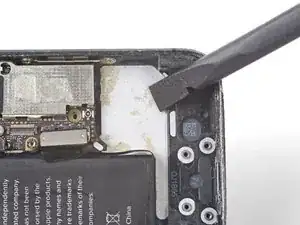
Löse mit dem flachen Ende des Spudgers den Rest der Lightning Connector Einheit vom Rückgehäuse ab.
-
-
-
Kippe die Einheit der Lightningbuchse und hole sie aus ihrer Vertiefung heraus.
-
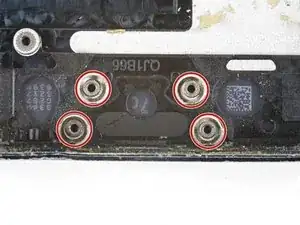
Entferne die vier metallenen Unterlegscheiben und lege sie für den Zusammenbau zur Seite.
-
-
-
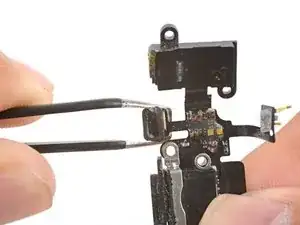
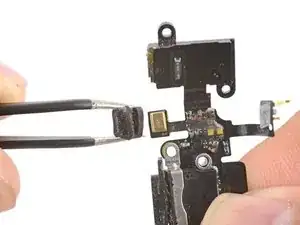
Ziehe vorsichtig mit einer Pinzette die Gummihülle des Mikrofons ab. Übertrage diese Hülle auf das Ersatzteil.
-
Vergleiche das neue Ersatzteil mit dem Originalteil - du musst vielleicht fehlende Teile übertragen oder Schutzfolien vom Neuteil abziehen, bevor du es einbauen kannst.
Um dein Gerät wieder zusammenzusetzen, befolge die Anleitung in umgekehrter Reihenfolge.
Entsorge deinen Elektromüll fachgerecht.
Die Reparatur verlief nicht wie geplant? Schaue in unser Forum, da kann dir geholfen werden.
67 Kommentare
Just a quick note that if you're doing this teardown because your iPhone 5 isn't charging unless you apply some force to the Lightning cable, the problem may simply be some lint or other crud in the Lightning port. Blow some compressed air in there before you disassemble your iPhone and see if it solves the problem - it did for me.
ifixed my i5 by cleaning the port too (was just about to buy the kit!). I found a paper clip done the job perfectly.
Cheers, Adam Engst.
Also found dirt was the only fault with a number of 5's.
Gary -
Well I bought the replacement first and then realized about the dirt. I removed the dirt and it is now working again. I guess after 2 years the thing accumulates quite a bit of dust.
esleep -
THANK YOU for your comment, Adam, and the others that took the time to confirm it worked for them. Thankfully I read it before attempting this repair on my iPhone 5S. It took only 10 seconds with a very skinny (<1 mm) screwdriver, scraping the deep edge of the port, and I pulled out a wad of pocket lint that was about the size of a pea when uncompressed. A paperclip would have done the job. Charger works perfectly now.
Erin S -
Thanks, Adam! I was dreading the thought of pulling my battery again, and risking bending it again and thus rendering it useless again. One pushpin and a minute later, and I had a big (pea sized, as mentioned) wad of lint. Plugged my phone back in and got instant gratification. Cheers!
Thanks!
I couldn't believe how much lint came out of such a small port. I used a toothpick so I wouldn't damage anything important. Saved me time and money.
Dude. Duuuuuuuude. You are a life saver, Adam! Thank you so much for mentioning this. I used a pushpin (like one of the previous commenters) because the crud was so packed in there, I needed to use the sharp (but not too sharp) tip to carve into it and dig it out.
Now it works perfectly!
I was dreading complete disassembly of the phone. But yeah, I've never done this since I got the phone, like 3 years ago.
Thanks again!!!
Dude you truly are a God amongst men
Thanks a lot, Adam Engst! It works well now!
It would help if the demonstrator actually had to open the phone and not rely on a pre-opened one. It can be quite tricky to lift the screen on an iPhone 5 and that video does not do it justice.
Steven -
I replaced the lightning dock...twice. The mic still does not work any help?






Having completed this repair using the rear camera part from Ifixit I have to comment that the camera is noticeably lower quality. Its not huge - You don't notice it looking at the photos scaled down to fit but viewing one for one there is significant detail lost. My staff member has an Iphone 5 bough at exactly the same time as mine so I was able to take a photo side by side on his and mine after my repair and when you view 1 for 1 pixel in product boxes on mine the text was just a colored blur where on his although you couldn't read the text it was more obviously text. Overall though its still better than having a camera that wouldn't focus at all and being that Apple seem to refuse to supply genuine spare parts (Which there has to be a low against??? - Imagine if a car manufacturer did that) its still good buying one from someone who gives good support. At the end of the day its a phone camera not an SLR and its still better than the older Iphone 4 camera.
matt -
The majority of product manufacturers are not required to provide parts, and apple will fix items under the various warranties it offers. Car manufacturers on the other hand are required to make parts available by law. It is part of the regulation of their industry. They get a lot of protection for their business model, but have some obligations too. It's why the EV1 was pulled, they didn't want to have to make the parts, and why there are so many Delorian parts.
William Leeper -
This is a great guide. However, I'm having a hard time popping the screen back into place. Everything works but I'm afraid of putting too much pressure least I crack it again. Any advice?
amciotola -
To avoid broken screens during reassembling:
Put the hooks of the screen in the right place in the housing, then close it loose, don't press it. Turn your phone upside down with the screen on a very flat surface (e.g. table). Now press the housing on the screen -> no more risk for braking the screen because of inhomogeneous force applied on the glass!
mondbewohner -
I hope folks read this comment before proceeding to attempt a Sleep/Wake button repair on the iPhone 5! Apple has an iPhone 5 Sleep/Wake button replacement program, free, for iPhone 5 devices manufactured through March 2013. See program details at https://www.apple.com/support/iphone5-sl.... Don't do this yourself if you don't need to. It's a difficult repair.
Mark Luscher -
I was willing to add the following important remark on top of this guide but, strangely, it has been refused! Here it is:
---
*Check if your Iphone 5 is eligible to the Apple special program for a free battery replacement (devices sold between September 2012 and January 2013, within a limited serial number range).
* If not, watch the video and use this guide [video|https://www.youtube.com/watch?v=6ogE8USs...]
---
And thus, as my Iphone 5 was eligible, I went to the Apple store of Le Louvre in Paris and the battery has been changed for free instead of 65 euros. Thanks to Mark!
revher -
Hi every one i drop my iphone5s 16gb
I replace 10!new screen but cant back to live i see on the "logic board" where u conect the screen i se damage HOW CANT FIX THAT WHITOUT LOST MA DATA ??? Thaks for anny hellp!!!!!
aliroberto01 -
Steps 12-15 seem to be not necessary for battery replacement. They are not required to remove and replace the battery and they at least DOUBLE the amount of work. Most of the time spent on this process involved working with those tiny screws and maneuvering them in place and screwing them down. Steps 12-15 are three of the five screws that you work with inside.
Also, there should be a note at the beginning of Step 2 that if you bought the iFixit kit that you should go directly to Step 6.
Bob Hatcher -
please wear safety helmet too, integral helmet and cover mouth with an N95 facemask underneath, just in case the battery punctures, explodes, you knock your head back to the wall and slam it back forward hitting the screw in your eye and and inhaling toxic fumes! can never be too careful ;-)
ibisiki -