Einleitung

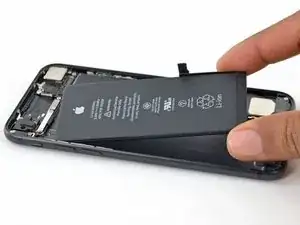
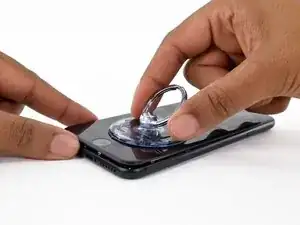
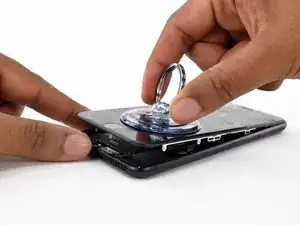
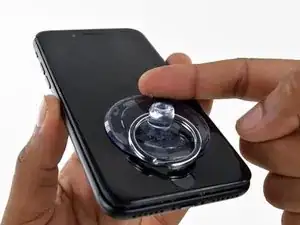
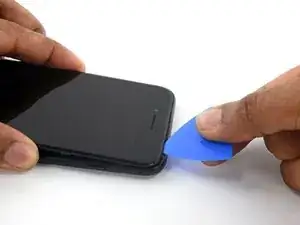
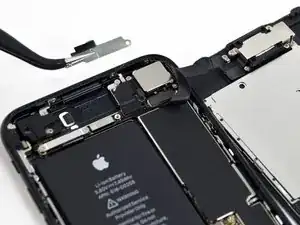
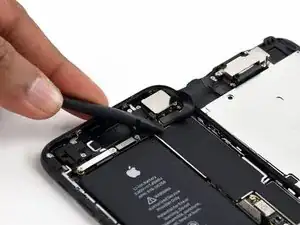
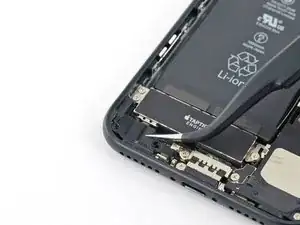
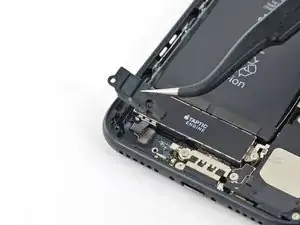
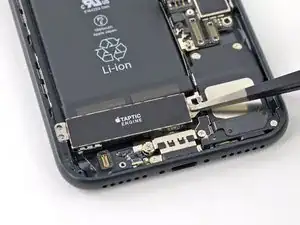
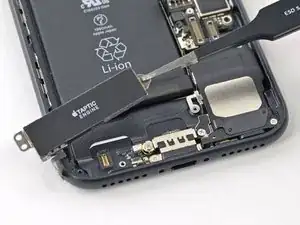
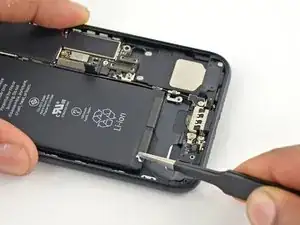
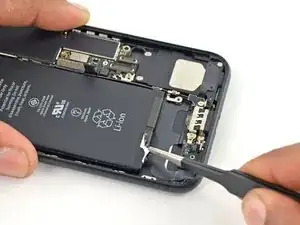
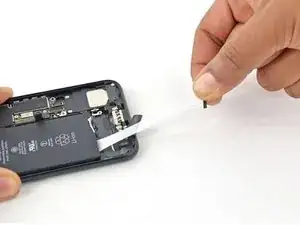
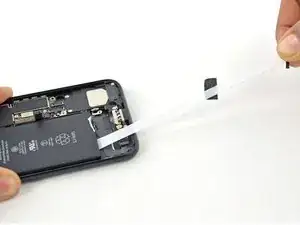
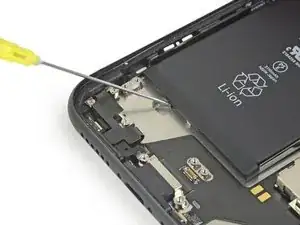
Wechsle den Akku deines iPhone 7 und verlängere somit seine Lebensdauer! Wenn dein Akku aufgebläht ist, musst du entsprechende Vorsichtsmaßnahmen treffen.

Diese Anleitung beinhaltet den kompletten Ausbau der Displayeinheit. Dies soll Schäden an den Displaykabeln verhindern. Wenn du dich sicher genug fühlst, den Akku zu entfernen, ohne die Displaykabel übermäßig zu belasten, kannst du die entsprechenden Schritte überspringen.

Für eine optimale Leistung sollte der neu eingebaute Akku nach Abschluss der Reparatur kalibriert werden : Lade ihn auf 100% auf, und lasse ihn mindesten zwei weitere Stunden laden. Benutze dann dein iPhone bis es sich aufgrund eines leeren Akkus ausschaltet. Lade den Akku dann erneut ohne Unterbrechung auf 100% auf.

  1. ELMlFSUOebPWtXjT
    • Vor dem Beginn sollte der Akkuladestand des iPhones unter 25 % liegen. Ein geladener Lithium-Ionen Akku kann bei Beschädigung Feuer fangen oder explodieren.

    • Schalte das iPhone aus, bevor du es zerlegst.

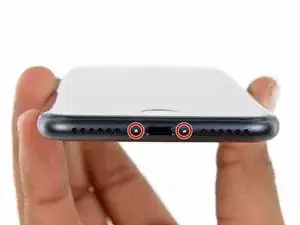
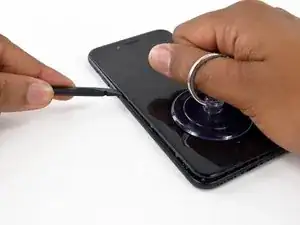
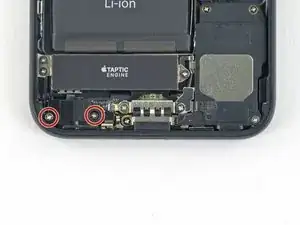
    • Entferne die zwei 3,4 mm Pentalobe Schrauben an der Unterkante des iPhones.

    • Beim Öffnen des Gerätes werden die Dichtungen für den Spritzwasserschutz beschädigt. Halte Ersatzdichtungen bereit, bevor du fortfährst. Wenn du diese nicht ersetzt, ist dein Gerät nach der Reparatur nicht mehr gegen Spritzwasser geschützt.

    Can anyone confirm 7/7P's pentalobe screws have a ring of seal near the screw head?

    Cooper Chase -

    Confirmed, the screws have a black ring seal around the head.

    rcheing -

    Can’t get the display front

    Bernadette Pfeifer -

    From personal experience, I highly recommend before doing this procedure or any other, that you do a backup of your phone (preferably local) in case your procedure goes south.

    ballina5ny -

    I purchased the repair tools with the replacement battery from iFixit. The tools include a screw driver and three heads none were labeled 3.4 mm. I think the one that fit the pentalobe screws was labeled Y000. The guide should identify the screw driver head supplied by the kit not 3.4mm.

    Mark Lieberman -

    in the iphone 7 replacement battery kit from iFixit, the screwdriver that fits the 3.4 mm pentalobe screws is labeled P2 (and not Y000)

    Jan-Tijn Oppermann -

    3.4 mm is the height of the screw and is not related to the screw driver code.

    Ahmad Vaziri -

    the screwdriver PH000 does not work i wasted two screws and now they dont have the 4 cross mark they are now a circle, i buyed it all from Paraguay and it doesnt work, had to assembly back the parts because i got stuck like i mention with some screws, well im just going to send to a professional to install, thanks

    Martin Frutos, Nuñez -

    The bottom screws are Pentalobe, not Phillips.

    Bram Driesen -

    Before starting, I would recommend backing up your Iphone’s data just in case.

    Jon Moylan -

    If you managed to make it to this section, just send the phone into apple for 50 + 6 dollars shipping. The ribbon cables on the screen are designed to break. I can literally twist on the rest of the cable and it won’t fall apart but there is a diagonal section where it snaps. This is the fault of apple and the fault of ifixit for misrepresenting the fragility of the cables.

    Ryan Huebert -

    Had to reheat it a few times for a minute each with a hairdryer to get the seal to break after pulling and rocking the suction

    Cynthia Lamb -

    I’m technically challenged. Is there a premier national service who can professionally install a replacement battery got my 7 +?

    Richard -

    Do the screws come out in total?

    YVES THEUGELS -

    Is it the P2 you should use for the bottom??

    YVES THEUGELS -

    I heated the bottom of the phone with a hairdryer and then used a syringe to put a couple of drops of acetone directly into the bottom two screw holes. I GENTLY pulled on the screen with the suction cup and used the pry tool to GENTLY separate the screen. The sealant is applied around the entire display so be very careful pulling it off so you don’t break the fragile display cables.

    Anthony Scaminaci -

    At first it was very difficult to open, per instructions. I used a heat/ice pack and nuked it for 1 minute. The pry tool wasn’t working so I carefully used my pocket knife to wedge the cover open. The rest of the procedure went well until I cracked the glass while trying to get the top right corner to pop off. Other than that mistake, all went well. Tip: before setting the new battery, attach the battery connector first and leave enough room for the taptic engine, or better yet, place the taptic engine before adhering the replacement battery. This way you’ll have a small gap between the two, whereas mine barely fit. Good job on hosting the video, Gwendyl.

    Klaus Preiss -

    I love the fact that the screw bit and shaft are magnetic! I almost lost a screw and found it attached to the magnet.

    I used a heat/ice pack and nuked it for 1 minute. At first the display cover was very difficult to open with the pry tool, per instructions. The pry tool wasn’t working so I carefully used the blade of my pocket knife to wedge the cover open. The rest of the procedure went well until I cracked the glass while trying to get the top right corner to pop off. Other than that mistake, all went well. Tip: before setting the new battery, attach the battery connector first and leave enough room for the taptic engine, or better yet, see the taptic engine in place before adhering the replacement battery. This way you’ll have a small gap between the two, whereas mine barely fit because I placed it almost too low.

    Good job on hosting the video, Gwendyl.

    Klaus Preiss -

  2. AWjJ5uej3RjES1UB
    • Durch Erwärmen der unteren Kante des iPhones lässt es sich leichter öffnen, weil der Klebstoff darunter weich wird.

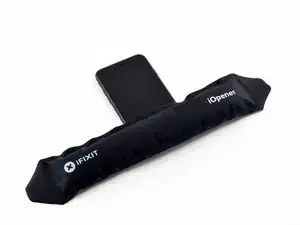
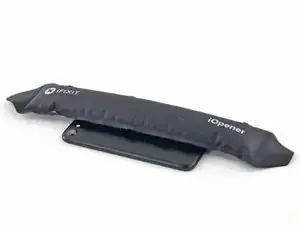
    • Benutze einen Haartrockner oder erwärme einen iOpener und lege ihn etwa eine Minute lang auf die untere Kante des iPhones, um den Kleber darunter aufzuweichen.

    ¿Cuántos segundos son los recomendados?

    joscarlos91 -

    Sesenta segundos

    Krutav Shah -

    It is a process. I heated the lower area of the phone with a hair dryer on and off (1min each) about 3-4 times before I was able to get the provided tool in.

    Dan -

    I suggest using a hairdryer. I used the iOpener for maybe 30 mins to no avail. However, when I used the hairdryer the screen came of much quicker.

    Michael -

    I totally Mr. Myagi’ed it, by rubbing my hands together until they burned, then held the phone un my hot hands. I did this 5-6 times over a couple of minutes. It was a good zen way to get started!

    Ark -

    Can a heat gun be used?

    Lee -

    Absolutely. Just don’t overdo it—the adhesive usually softens up pretty easily. If you are experienced with a heat gun, you’ll have no problem. (If you are inexperienced, it’s easy to cook the display or cause other damage.)

    Jeff Suovanen -

    If i use this process, will iphone 7 still be sealed, water/ splash resist after that?

    Marius Serban -

    Opening the iPhone's display will compromise its waterproof seals. Have replacement seals ready before you proceed past this step, or take care to avoid liquid exposure if you reassemble your iPhone without replacing the seals.

    Angel Hermida -

    Can I use a cpb heating pad to soften the adhesive ? If yes how much time and temperature ?

    davidecongiu -

    Will doing this compromise the screen protector (Zagg) that I have on my phone?

    Eric Nance -

    Hairdryer worked for me but I needed to use a razor to pry it open at the bottom then used the spudger

    Gina Torres -

    Is there a reason why you wouldn’t put the iopener over the entire length of the phone, instead of just the bottom corner?

    BPX -

    The motherboard is extremely sensitive to heat.

    Neal Reasland -

    Hello can the head damage the id touch bottom?

    After heating opening it stoped working.

    Qrizmasex @ gmail . Com

    aratovski -

    It definitely can. That happened to me.

    Steve Naylor -

    mine didnt come with a heat pack do i use a hair dryer

    Shy Rose -

    I just threw a hand towel in hot water, and then stuck it into a plastic bag. Dryers work fine, too.

    hiroo yamagata -

    Thanks for this, the other instructions make it seem SOOOOO simple to open up the case with the suction cup! It actually is hellish. The instruction here about the pre-heating and the required patience really helped!

    hiroo yamagata -

    For those of you who don’t have an iOpener or a girlfriend, I used a ziplock bag with some instant mashed potato inside. It worked perfectly first time and you can fold the bag around the ID button in order to prevent damage to it.

    You also get to celebrate by eating the mash afterwards, HUZZAH!

    Adrian -

    🤣 You made my day Adrian, thank you!

    Jicey -

    I found this to be completely useless. It didn’t help at all. I had to use a heat gun instead. Waste of money.

    David Gordon -

    I’ll experiment with leaving the phone in the sun until the Temperature Warning comes up so the phone tells me when it’s too hot to be safe.

    Maybe it will be hot enough, maybe it won’t—

    edmk5000 -

    I use a rice pack in the microwave. White dry rice in a sock sown or tied, then microwave (1 minute +/-). The dry rice heats and retains heat for a long time. My kids loved them in in bed during cold winter nights.

    Todd Oeftger -

    I have changed now Iphone 5 Battery, IPhone 7 front camera & another iPhone 7 rear camera. The instructions along with the comments are really important. Be patient & read them several times. By using your heated gel pack 3-4 times for 2 mins or so on the bottom end near the touch button you will be able to pry with your razor & then you can use your spudger. Thanks for this great guide.

    Kala -

    I would DEFINITELY recommend to NOT use direct heat (hair drier, etc.) on the phone. I used a hair drier to help heat the phone and ended up damaging the home button (would not work after the replacement and I did not touch or take apart the home button). Note that a damaged home button cannot be replaced so I will end up using the alternative “screen” home button going forward with my phone. Instead I would recommend preheating something else (example - metal / coins / ceramic / beads / glass stones / cookware / etc..) to a warm-to hot (but not burning hot) touch and place the heated items on the IPHONE (or visa versa) to heat and soften the adhesive.

    Ed Scannell -

    I used 1-gallon Ziploc back and poured 1qt of boiling water into it. I placed my iPhone on a corkboard and the bag on top for 120 sec.

    It worked like magic. I just pooled the screen with the suction cup, and it got loose from the case. No heat damage. Everything works.

    it500 -

    I placed the iOpener heat bag over the bottom of the phone, disregarding the home button. Now it doesn’t work. All subsequent procedures went well as I was very careful. I should have read all the posts! Protect the home button from direct heat. Fortunately, now using the Assistive Touch feature is better than buying a new phone or replacing the home button.

    Kurt Bee -

    It’s better to choose an iPhone back case to cover and protect your phone from bumps and scratches. Choosing premium cases is the best option for long-term safety. If you need ***iPhone 7 phone cases*** then you can check them out!

    FLAUNT -

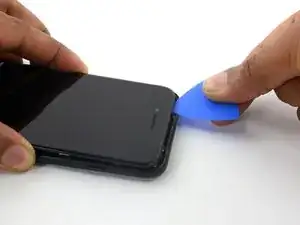
  3. IF2qJWX5ZTGHyFN1
    IF2qJWX5ZTGHyFN1
    xMDRKmeU5dWeTob5
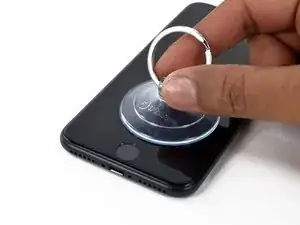
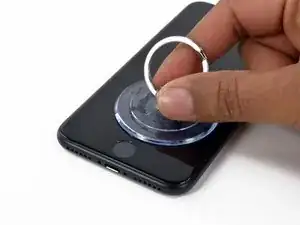
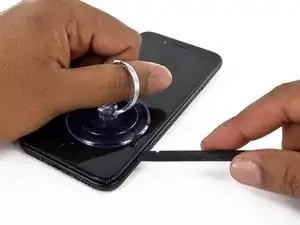
    • Setze einen Saugheber auf die untere Hälfte der Displayeinheit, knapp über dem Home Button.

    • Achte darauf, dass der Saugheber nicht den Home Button überlappt. Das würde verhindern, dass sich ein Vakuum zwischen dem Saugheber und dem Glas bildet.

    • Wenn dein Display stark gesplittert ist, dann haftet der Saugheber vielleicht besser, wenn du das Display-Glas mit durchsichtigem Paketband abdeckst. Du kannst anstelle des Saughebers auch Panzer-Tape benutzen. Wenn das alles nicht hilft, dann klebe den Saugheber mit Sekundenkleber am zerbrochenen Display fest.

    The glass is completely cracked and the suction cup doesn't work because it gets air in between. any tip?

    Display is glued and doesn't come off.

    support -

    A wide, single strip of packing tape, well placed, will solve this for you. :)

    Mimic44444 -

    Last comment works well. Thank you !

    Using packing tape for a cracked screen should be included in the description in Step 3.

    Cracked screen is most probably the reason you are replacing it.

    Arni Benediktsson -

    I agree that using packing tape for a cracked screen should be included in this steps description. I don’t have wide but turned mine horizontal and that worked great.

    Mary Knapp -

    Bekomme die Oberschale einfach nicht runter! Trotz mehrmaligem erwärmen durch den iOpener und seitlichen bewegen! Weiß nicht mehr weiter!

    Stephan Lienhard -

    Wouldn’t that screw up the Touch ID?

    Rexx Havok -

    The suction cup that is. supplied with the essentials kit doesn’t work that well.

    Laurence -

    Agreed, the iFixit suction cup was useless. I borrowed one from the sponge holder in my kitchen sink. It lacked a grip so I held it with needle-nose pliers, resting them on a bit of wood to keep pressure off the phone.

    ephraim -

    I am not getting this open at all! Why an I provided with tools that can't help me ??‍♀️

    Bray Joseph -

    I couldn’t get the bottom to lift first, but the left side did, so I started there and worked my way around the horn.

    selimnairb -

    Hold the suction cup provided in almost boiling water with tongs for about 30 seconds, then it will actually work :-)

    AKA -

  4. nYYkQCYEhWsRQgPY
    nYYkQCYEhWsRQgPY
    2QVpcp5uXY5R1TBA
    qgxSKCOYJSgwPFQm
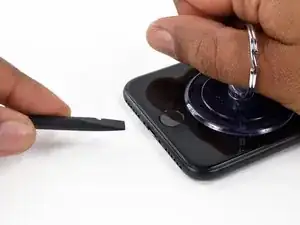
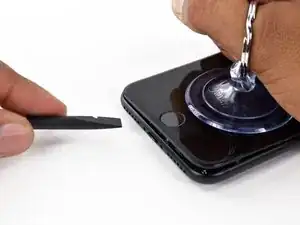
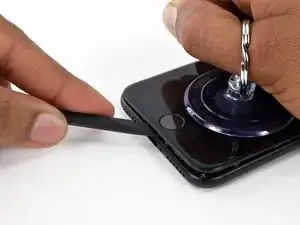
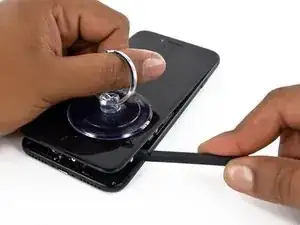
    • Ziehe etwas am Saugnapf, bis sich eine kleine Lücke zwischen der Displayeinheit und dem Rückgehäuse bildet.

    • Führe die flache Seite eines Spudgers in diese Lücke ein.

    • Der wasserdichte Klebestreifen, welcher das Display in Position hält, ist sehr stark. Es kann viel Kraft brauchen, um diese erste kleine Lücke zu schaffen. Solltest du dabei Schwierigkeiten haben, wackle das Display etwas auf und ab, um den Klebestreifen zu schwächen, damit du den Spudger leichter einführen kannst.

    This was SO hard for me to do with the spudger. I couldn’t get a gap to insert it because my phone was so cracked (even though I used tape on the front) to get a solid seal with the suction cup. I ended up taking a VERY thin knife and inserting it straight down to make the initial break that allowed me to insert the spudger.

    jessica harlow -

    I’ve given up using a plastic spudger to try to open any of these phones. I use a metal one with a flat base and a very sharp end…close to a razor. As long as I’m careful, it won’t slip and scratch the base. It’s much easier than using these plastic spudgers.

    mcr4u2 -

    I confirm that the plastic spudger it’s not the best tool for this operation. I suggest to use a larger metal tool like a “Jimmy” or “iSesamo open tool” (I used the first one)

    Cristef -

    Im trying to get the screen off right now and my phone is not cracked and its still a pain

    Jordon Johnson -

    Using a blow dryer was extremely helpful and using the suction cup towards one of the lower edges was also helpful

    Jordon Johnson -

    This is not working for me. How long does the heat need to be applied? Still trying right now…. =/

    Chris Gallego -

    Apply hair dryer for at least 1 minute. I inserted the tip end of a thin mini screwdriver and with some force, pryed it open and inserted my plastic spudger to continue the separation process. It worked, just be patient.

    Please wear protective glasses! My iPhone glass was severely cracked, when separating the glass a corner area of broken glass exploded in my face. Apply transparent tape over the broken glass to contain the shards.

    amberron -

    I second Jessica’s January 8 comment.  I just finished a battery replacement on my iPhone 7 and this step was the most nerve-wracking part.  I ended up using a sharper (but not razor-sharp) metal object to get this done with confidence (tried the spudger and guitar pick but not thin enough).  The tool I used was the exact duplicate of what iFixIt calls “iSesamo Opening Tool” in their tool selection.  I did the heat up with a hair dryer (after attempts with an iOpener hot pad) and the secret (as Jessica also noted)  was to not use the angle of attack shown in the pictures, but to push it in more vertically along the bottom edge while pulling up on the suction cup.  From there you can easily lever the tool to the lower angle-of-attack (as shown in the picture).  I actually used the metal tool for most of the perimeter as well, just don’t go deep (you don’t need to).  Notes: my display was intact, and I was able to pull up fairly hard with a glass screen protector still on it.

    Ted -

    This is frustrating. I heated the lower edge with a hair dryer for 1 min on high about 3-4 times. In between each heat cycle, I rocked the suction cup back and forth. I was eventually able to create significant space for the provided tool. This takes a lot of patience. Once the space was created, it was very easy to remove the screen.

    Dan -

    use a fingernail, then the blue tool, then the spudger

    Therese Peffer -

    The iOpener worked just fine for me. Had to keep it on for a few minutes. I also was able to get the suction cup seal right close to the edge, over top of the home button for added leverage. Used the blue tool and transitioned to the spudger. Slow, steady pressure…and patience. ;)

    johnhall918 -

    Unable to open an iPhone 7 display assembly. Used gell pack at 150 degrees F. The phone wouldn’t budge when I used the iFixit suction cut. Part of the problem is that the cup doesn’t adhere for long before it looses suction. I suspect it would work better on unbroken glass, but that doesn’t help me now. After spending a lot of time at this, I changed heating methods to a hot air heater. I raised the temp of the bottom end of the phone to, ultimately, 175 degrees, and used a variety of tools to try to pry the glass apart enough to get a spudger (or anything) in, but it didn’t even lift enough for a double-edged razor blade to get in. I’ve been trying this for hours now, and about to give up and throw a lot more money at this to have a service perform the work. I figured that 175 was as high as I should need to go to soften the adhesive without damaging the electronics. Should I have gone higher? I see no mention of measured temps in any instructions or comments.

    ted -

    Have you tried applying tape to the broken screen? This will help a lot with keeping the suction cup on it.

    Christian Groothuis -

    It doesn’t need to get very hot; pulling up on the display is mainly what does the trick. Make sure the two pentalobe screws have been removed and then try the tricks in this step. If all else fails, superglue the suction cup to your display and let it cure, and then pull. Keep in mind you only need a tiny gap to insert a plastic pick and start cutting the adhesive. Good luck!

    Jeff Suovanen -

    Just a question. After this operation the impermeability function was compromitted?

    bentek86 -

    The trick I found, was to add packing tape right across the bottom over the home button then use hairdryer on the end, then suction cup on the very bottom and it lifted enough to get a gap. No one mentioned how it would be impossible to handle the phone after the hairdryer ;)

    Andrew Lansdowne -

    Didn’t have an iOpener and 60 seconds on a hairdryer wasn’t doing it for me. Still wouldn’t budge. I had to take a very sharp razor along the seam at the bottom between the speakers. It took about 20 passes for it to separate enough to get the spudger in. Make sure you keep the razor at a 90-45˚ angle and that it goes no more than 1-2mm into the phone. The bottom of the phone is metal, but the casing for the screen is plastic. So if you cut lower than a 45˚ (flat with the phone) you risk cutting into the casing. Apply light pressure when making the passes. I would just do the razor on the flat part on the bottom.

    minimalist -

    I used a hair drier while lifting up at the same time until I could get the too inside. The seal is pretty finicky. Just take your time and you should be fine. Work the hair drier and the tool all the way around before lifting the screen up and off. There will likely be sealant stuck between the screen and phone. You can just break it with the tool.

    Ray Bieze -

    This step was impossible for me despite using a blow dryer and having no cracks on the screen. I finally took it to a local repair place and had them do battery replacements for two iPhone 7’s. The girl let me watch her do it. She used a razor blade (just until she had a small opening that she could hold open with her fingernail) and confirmed that she too would have difficulty opening it with a plastic tool and suction cup. The plastic tool was great for prying the rest of it open once a crack was there, but she said she would never try to use that as the tool to initially open it. The tools provided for initially prying open the screen are inadequate.

    Chad Twedt -

    Hopeless - no chance to get the screen off without any damage. No matter what tools, heat etc.

    Anatole Beams -

    I second what others have said, definitely use a razor blade to break the seal! Heat helps some, but too much direct heat is bad for the screen. Would have been impossible if I hadn’t read the comments, thanks everybody!

    Kit -

    Use extreme caution on this step. I was just replacing my battery and now i’m buying a new screen. The screen was very stuck, I pulled to hard and it popped off suddenly, completely destroying the screen.

    moose -

    When the right heat is reached, the easiest way is to use a metal iFlex to create the initial gap, then insert the Jimmy or iSesamo next to it so the gap gets bigger, at this point you can get in with the flat edge of a plastic spudger and slowly slide it in the borders to cut the adhesive. You will still need to force a bit the upper end to separate the screen by pulling it down while keeping up the screen, and twist to the right. I hope this is clear enough. Never apply too much strength too quickly anyway.

    Stefano Restuccia -

    I used the short blade of my swiss knife to make an initial opening. Using the sharp edge, inserting about 1 mm straight down and twisting down into a 45° angle. Then I was able to insert the spudger.

    John van de Loo -

    This is a difficult step. Fortunately, I had another suction cup from an earlier repair available, so I applied one to each side of the phone. After warming with a hair dryer, I was able to pull the two suction cups far enough away that another person could easily insert the spudger.

    The third hand was essential.

    Mark -

    I found this tactic to be the best solution for us. I used two suction cups, one on each side of the phone, and another set of hands to get a pry tool under the display. We still had to take our time prior while heating the adhesive, but were able to pry the display fairly easily using the two suction cup method.

    Lucas -

    It was a really excruciating process of heating, lifting with the suction cup, trying to slide in the spudger/pick, and repeating the process for 20 times or so. But in the end, my patience paid off!

    hiroo yamagata -

    I used a hair dryer, then used a safety razor blade parallel to the bottom edge to push straight down (from the glass side, towards the back) while lifting with the suction cup. I wiggled the blade (top to bottom) while pressing down gently, until I saw a gap that would accept the spudger. It did not take much force on the blade or much wiggling, just patience.

    Gene Merritt -

    Followed Gene’s approach with heat and a razor blade. I was nervous, but went slow; it was very easy and effective. Great tip. Just be patient and don’t rush yourself.

    Michael J -

    I would skip right to using a single edge razor blade and a hair dryer to create the gap needed for the spudger.

    Logan Brown -

    Think plunging the toilet - it did not work for me for a long time. the suction cup would not stay held on a long pull. I found that tiny push-pull repeated motions, reseating the suction cup with each push slowly overcame the adhesive, and contributed heat :). I had it after about 50-70 cycles

    Andrew Balanda -

    seconding this comment from Ted ~~~ “the secret (as Jessica also noted)  was to not use the angle of attack shown in the pictures, but to push it in more vertically along the bottom edge while pulling up on the suction cup.  From there you can easily lever the tool to the lower angle-of-attack (as shown in the picture).”

    natjpollard -

    I echo what everyone is saying here, the spudger just isn’t good enough for this and neither is a pick. The razor is the best way to go. I tried using a very sharp penknife blade and managed to damage my LCD (somehow!) and the bezel so I ended up having to buy a new screen display as well as a new battery. Think twice before doing this. Be prepared to shell out for a new screen just in case it goes wrong. You’ll also need the heat gun (the iopener was useless). If you do need to buy a new screen, make your life easier and get one with the speaker, forward-facing camera, home button, etc., already attached (you can then replace the home button) or you’ll end up having to transfer all these from your old display.

    David Gordon -

    I finally got the screen up but shattered it in the process. I was replacing it anyway but if the screen is not what you’re replacing, take EXTEME caution. The suction cup and spudger were not working for me to get it started. Thanks to the comments, I used a razor blade and a heating pad and went back and forth, back and forth, between heat and pressure from the blade. Once you get a gap, the spudger works great and the screen comes up easy.

    Nick Nave -

    The suction cups that iFixit sells are crap. They don’t stick at all. Glass on the phone is pristine.

    Nick -

    More feedback on this “guide”:

    “Pull up on the suction cup.” What does this mean? If I just pull up on the suction cup (with a real one that actually sticks) it just lifts the phone off the table. You need a description of what you are pulling against. Do I try to hold the frame of the phone? Do I try to stick something in the lightning port to pull against? Do I try and get something against the edge of the rounded metal on the edge of the phone (this usually just slips off). What am I pulling against???

    Nick -

    I found a combination of iOpener, suction cup and razor blade, all applied at the same time, worked for me and I didn't need to use a hairdryer.

    Peter Gray -

    Dumbly, I thought that with the Spudger I'd had to hold the phone from the charging hole while pulling the screen. .. In the end I inserted the two ends of the tweezers(bends the tweezers and may damage it) in the screwdriver holes and pushed the screen out upwards so that I could insert the sharp side of a knife.

    Claudiu Cezar -

    This was my first iPhone battery replacement and I can say this was the hardest part.

    Be wise, go for a hair dryer and heat up the phone bottom (long enough). iOpener did not work at all for me. Heat up, use the suction cup and push the opening pick under the frame as soon as you see movement along the frame.

    Then use the spudger to wander around the whole frame (leaving the pick where it is). Done!

    Guenter -

    True about sputter i cracked my screen trying to lift it up while using this device back in 2021

    DJSan -

    One little corner at a time. Don't try to do the whole bottom at once. I heated with a hair dryer. Applied the suction cup to one side and worked the corner till it started to give. Took a minute or two. Use a magnifying glass to help see when it's starting to come loose. It's not hard to do.

    Some Idiot -

  5. w14updH4DLqGvKqR
    w14updH4DLqGvKqR
    vuiQTgWBpbxmOHdm
    JWXGXqbFuvDBKIsX
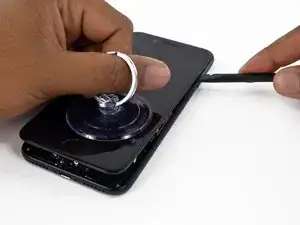
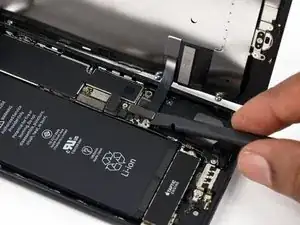
    • Ziehe das Werkzeug nach links, entlang dem unteren Rand des iPhones.

    • Drehe das Werkzeug, um die Lücke zwischen dem Display und dem Rückgehäuse weiter zu vergrößern.

    Didn’t have an iOpener and 60 seconds on a hairdryer wasn’t doing it for me. Still wouldn’t budge. I had to take a very sharp razor along the seam at the bottom between the speakers. It took about 20 passes for it to separate enough to get the spudger in. Make sure you keep the razor at a 90-45˚ angle and that it goes no more than 1-2mm into the phone. The bottom of the phone is metal, but the casing for the screen is plastic. So if you cut lower than a 45˚ (flat with the phone) you risk cutting into the casing. Apply light pressure when making the passes. I would just do the razor on the flat part on the bottom.

    minimalist -

    I used a hairdryer and a razor

    Gina Torres -

    The photos are a con. You cannot get a spudger in unless you can lift the screen. You cannot lift the screen because of the adhesive. Using a anything metal will damage the paintwork or the glass edge.

    Anatole Beams -

    I agree, these guides are half imaginary idealism it seems. A thin metal edge pushed vertically down just a fraction of a mm will cause the adhesive to weaken better than any amount of heat, but affects the final appearance sadly.

    Jesse de Vries -

  6. eGMj41HNdZWr5M4e
    eGMj41HNdZWr5M4e
    MTmDdGUmuVcLsCqR
    SeQbunK6NGTReuWi
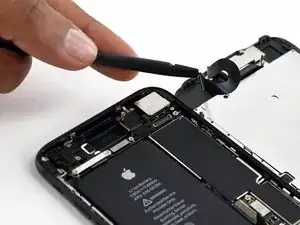
    • Ziehe das Werkzeug von der unteren Ecke die linke Seite hinauf zu den Lautstärketasten und dem Stumm-Schalter.

    • Heble nicht am oberen Rand des iPhones, sonst riskierst du es, die Plastikclips zu beschädigen, mit denen das Display befestigt ist.

    Be VERY careful on this next step going up the right side of the phone. There is a ribbon cable 1/3 of the way up from the bottom that is very close to the edge. Do NOT use the blue triangle!!!! Just lightly rotate the spudger to get separation on the edge.

    Timothy Varvais -

  7. VRLM1rHAJU2xcurG
    VRLM1rHAJU2xcurG
    6SPMeyXsAqif4dVj
    V5iOwSapGYfkPj3P
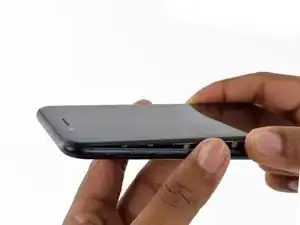
    • Führe das flache Ende eines Spudgers in die rechte untere Ecke des Geräts ein.

    • Drehe den Spudger, um die entstehende Lücke zwischen der Displayeinheit und dem Rückgehäuse zu vergrößern.

    • Ziehe die flache Seite des Spudgers entlang der rechten Seite nach oben, um den Klebestreifen zu lösen, der das Display fixiert.

    • Schiebe den Spudger nicht tiefer als den Klebestreifen ein, damit die empfindlichen Flachbandkabel am rechten Rand unbeschädigt bleiben.

    Shoot. I broke the sensitive ribbon cable because I didn’t quite understand what the instructions meant with not to insert the spudger further than the adhesive. It means depth wise, not up the side. Sigh.

    Leo Hwang -

  8. dZLSFZcIKfWkKTnv
    dZLSFZcIKfWkKTnv
    YslmbTTTPZovLuX6
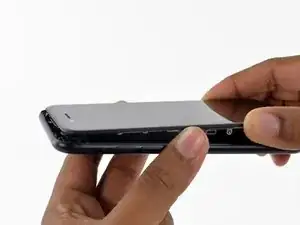
    • Ziehe am Saugnapf, um das Display anzuheben und das iPhone zu öffnen.

    • Hebe das Display nicht höher als bis zu einem 10 Grad Winkel, denn rechts sitzen Flachbandkabel, welche das Display mit dem Logic Board verbinden.

    do not pull up pull sideways it will brake

    Riley Patterson -

    Made this mistake

    rachael.grime -

    Somehow my phone turned itself back on during the opening. Scared me a little, like a patient coming out of anesthesia during the operation. I was able to turn it back off. Gotta be more careful where you grab this thing.

    Bryant Larsen -

  9. ONIoVumIs3Nf5wkE
    • Löse den Saugnapf vom Display-Glas und nimm ihn ab.

    very nice

    iPhone 7 back cover

    http://WHITEWINGS.IN/

    Vikash Kumar -

  10. 5tw1LZVqOQwDWmtx
    5tw1LZVqOQwDWmtx
    dnsUKLGhtAKtvNQu
    • Fahre mit einem Opening Pick am oberen Rand des iPhones, zwischen dem Rückgehäuse und dem Front Panel entlang, um den restlichen Klebstoff, der das Display hält, zu lösen.

    • Achte darauf, nicht die Plastikclips am oberen Rand des iPhones zu beschädigen.

    The plastic clips mentioned are on the top of the screen being replaced… so not sure why it matters not to break them. Trick here was to pull the screen downwards to open a gap at the top and then insert as shown and raise to break the seal.

    Andrew Lansdowne -

    This is relevant for other guides than the display replacement guide.

    jvalaamo -

    プラスチックのクリップという

    表現に混乱しました。

    上部に食い込んでいる

    差し込みのことだったんですね。

    下に引っ張ったら抜けました。

    情報ありがとうございました。

    MARU -

    The opening pick is packaged with the battery, not the tools, so I didn’t find it until I was past this step. Made do with careful use of the spudger and a lot of wiggling the display to break the glue.

    ephraim -

  11. vwYGVPMyP3GJgO4i
    vwYGVPMyP3GJgO4i
    JDP4yDhEj3dIyMHh
    idMKdstsO4fFgyxf
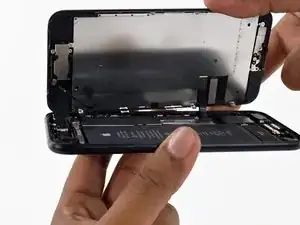
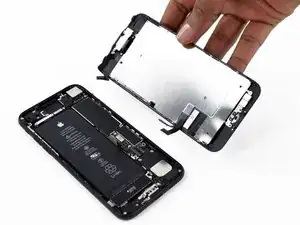
    • Ziehe die Displayeinheit etwas von der oberen Kante des Telefons weg, um die Clips zu lösen, die sie am Rückgehäuse halten.

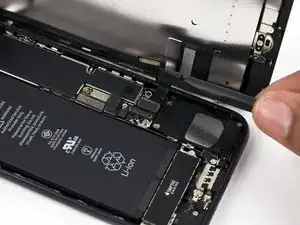
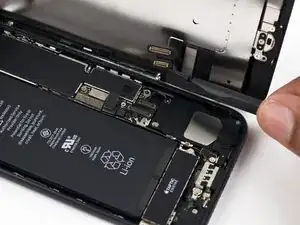
    • Öffne das iPhone, indem du das Display von der linken Seite her aufklappst, wie die Rückseite eines Buches.

    • Versuche nicht, das Display schon komplett zu entfernen, da empfindliche Kabel das Display immer noch mit dem Logic Board verbinden!

    I just broke the cable to the battery!

    No Bama -

    same dude im such a freak lol omg haha

    Aiden Polaski -

    Are there replacements ribbons?

    Blax Bently -

    Has anyone else noticed very small squares of rubber with a circle cut through it (I think they fall off into the phone when dismantling)?

    I just replaced my screen and worked out that these are actually a wee pocket that slips over the pentalobe screw holes on the replacement screen. I’m not sure if it’s an additional water resisting mechanism or if it’s to add additional traction for the screws

    richarddillon -

    Thanks, I was wondering where those were from!

    Albert -

    Same, I only had one fall out and I had no idea if important, and didn’t re-add - because I wasn’t sure where it fell from - but it was definitely from the home screen button….watch it be important. -__-

    Nicole Crome -

    I just broke cable connecting camera and earpiece speaker to logic board. Be careful with it.

    Natan Haładyn -

    This section is missing a critical step - to lay some Post-It notes or something below the right half of the phone when you swing it open, so the ribbon cables don’t get sliced by the sharp edge of the phone case. I broke the Home Button ribbon cable because there was no strain relief when I laid it open.

    neila -

    I also broke the home button cable and now I have to use assistive touch.

    Laurencio Gonzalez -

    Keep the suction cup on the display to keep it propped up while you disconnect the ribbon cables.

    minimalist -

    I broke the short ribbon cable that attaches underneath the lower connector bracket. Be SURE when you lift the display, you do it from left to right. I thought I had the phone oriented correctly in my hand, but I was mistaken.

    John Murray -

    Put the suction cup on the right side of the middle of the screen when you rotate it up and out. It serves as a nice stand to take the pressure off the connectors.

    Ray Bieze -

    no mention of what you do once u open the book. are the ribbons long enough to lie flat  or do we have to keep screen raised while removing screws,, like when we hold screen up 45 degrees while removing 5 screw plat when at top of phone. I only realised how fragile the ribbons are and how important it is to use suction  cup to rest screen on an angle so ribbons don't stretch or cut on frame.

    thanks for the above comments and probably the most important section. I just hope I closed t before I fdid any damage. its lke the fragility of iPhone 3’s all over again.

    scallyteacher -

    I just broke one of the cables… yeah, it is not nice… I’m lucky in the sense the screen is still working, but the button is not.

    Trying a cheap screen on Ebay (that contains the cable) do 20$, after that, it’s a new cellphone…

    Vincent Poirier -

    Be EXTREMELY careful when you lift up the screen. I broke 3D touch cable, and the home button stopped working. Had to replace the whole display.

    Sizun Cho -

    Attention ! J’ai cassé la nappe de la caméra avant !

    arnauldjouanny -

  12. QVGa5KTCal3B6epN
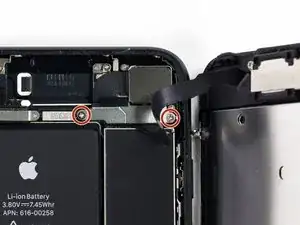
    • Entferne die vier Tri-Point Y000-Schrauben, die die Abdeckung der unteren Anschlüsse befestigen, sie haben folgende Längen:

    • Drei 1,2 mm Schrauben

    • Eine 2,4 mm Schraube

    • Passe während der ganzen Reparatur gut auf die Schrauben auf und sorge dafür, dass sie genau an ihren alten Platz zurück kommen, sonst kann das iPhone beschädigt werden.

    Ahhh shoot! accidentally ordered tri-wing vs tri-point (must have just looked for y000).. It seems they only did this to annoy repair folks because not everything is tri-point on the phone...

    Steve -

    These screws just spin for me. They don't back out, but the heads aren't stripped either. I've tried applying backpressure to help lift the screws, but no luck

    Jeff Hurst -

    The Y000 took out one of the screws but not the other 3. I even tried the PH000 as suggested but nothing.

    dbright -

    What driver do I need to remove these screws i’m stuck

    Nasser Nader -

    i cant use, the Y000 it isnt working.

    joscarlos91 -

    What if I stripped a screw what do I do??

    Jacob Ramos -

    Yep, only the 2.4mm came out, other 3 won’t budge, and worried I’ve stripped the heads. Anyone got any ideas?

    Stephen Babbage -

    It’s the screwdriver bit that is the problem. I had the same issue with 2 Y000 bits not grabbing the screw properly. I fixed it by using a small 3 sided file to slightly grind the groves in the Y000 bit just a bit deeper. Then the bit worked like a charm on these screws.

    Jim Staples -

    Use Y000 on all 4. U have to be very sensitive on the 1.2mm screws. Put the bit in the screw, put the left pointing finger on top of the screwdriver and turn the driver carefully to the right until you feel a “bump”, thats the trick :-), then you are able to screw the screw out.

    Magne Eivindson -

    For me the key here was a LOT of downward pressure to ensure the Y000 bit caught in the screw. Not sure i can describe how much exactly, but is was significant. Otherwise the bit would not catch.

    Erik Fredriksen -

    What do I do if I Stripped one of them?

    Adam Corral -

    Can’t get them removed what to do ?

    cowling_luke -

    Managed to get the central one out. The upper one won't move, the lower one I've popped out with some force. This allows you to rotate the cover enough to unplug the various bits. Not ideal, but works. I've tried applying a lot of pressure, using the tighten/ loosen method, but the heads have just got mashed… no wonder Samsung are now No1, sigh…

    jimpoolio -

    You need to be careful when just rotating the cover as you can accidentally slice through the two black antennas! You only need to nip them…As you can tell I have done this in the past :/

    Kyle Webb -

    The first, longer screw came out fine, but the other three wouldn’t budge, regardless of more/less pressure or a slight angle or anything. I finally filed down the tip of the Y000 bit ever so slightly, and then it worked. Hope this helps someone.

    Harmony -

    Filing down the bit worked for me. The tip about putting an index finger on the end of the screwdriver handles and then turning gently until it clicks into place was very helpful! Using these 2 tips I didn't need much downward pressure. Screws are out in a few turns.

    Chris Bennett -

    If you can’t get the bit to grip the screw properly, you can use a little bit of the water-proof sealing between the bit and the screw. That worked for me. Hope this helps anyone.

    jvalaamo -

    Mine came out easily. I placed the screws in the area where the bit goes in my kit so I can keep track.

    Gina Torres -

    I used a bunch of medicine cups to track my screws. You need like 12 if you want them all in cups. I ran out. There are so many different sizes that literally vary by 1mm. The tolerances on these things are tight.

    Ray Bieze -

    I use a 28 day pill box and keep every screw separate and reburn to exact slot because they all vary in length, width and can really damage u phone if too long and nt secure if to small.  use a magnetised screwdriver,  or make the cheap freebees magnetic for a short period by rubbing it up an a magnet. lol

    scallyteacher -

    Absolutely ridiculous had to go get a different one just stupid

    mark golling -

    I couldn’t get the lowest one out and just turned the metal bracket out of the way and replaced battery.

    qwerty77x -

    Was able to get the outer bracket screws out using fine needle nose pliers 90 degrees straight down for the outer ones by pressing down a little and using medium gripping force. Had to take these out first before i could use tweezers on the middle one, for which I had to use tweezers to hold the screw, then rotating the bracket (not the screw) counter clockwise a few mm many times over to slowly unscrew it 1/32th of a turn at a time, repeat. (this loosened middle screw). Think ‘rotating bracket 3minutes/degrees counterclockwise at a time while holding screw in place.) You are gonna need really small/fine pliers and tweezers for this because the heads are countersunk into the bracket.

    Galen Wollenberg -

    The top screw in the step was much longer than 1.2mm. It has the same head as the 1.2mm, but different than the 2.4mm. It’s good to keep track of where they came from.

    All are so small that I thought I’d lost one, when it was still sitting in the phone.

    Mark -

    To help tell if the screw is turning, put a small dot from a marker on the head of the screws.  This helped me to know I wasn't just stripping the head.

    Darren Thibodaux -

    try heating the iPhone with a hairdryer or a bag of rice or about 60 degrees in an oven for 3 minutes . It has worked for me. If the screws don’t come out while hot the will come out as the iPhone cools.

    David Howard -

  13. G1PuHnw2PiNeAdMC
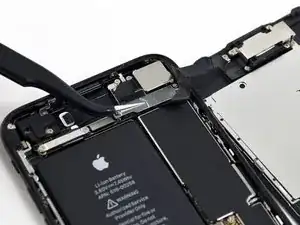
    • Entferne die Abdeckung der unteren Anschlüsse.

    my battery cable connector was stuck to the bottom of this metal bracket plate so be careful when you lift it off

    Josh Martin -

    This may have been intentionally done by Apple to make sure the battery gets disconnected before any other connector is disconnected. So always make sure to disconnect the battery before disconnecting and reconnecting the connectors for the display.

    Oscar Moreno -

    So…I forgot to put this bracket back on when reassembling. Now I’ve adhered the display to the case and don’t have another adhesive strip…so I’m wondering: what purpose does this bracket serve? The phone is powering on and seems to work okay.

    Am I going to run into trouble with this bracket missing?

    Ian Fritz -

    Well, that didn’t last long. The phone shuts down without warning. So I guess that plate is important…

    Ian Fritz -

    I also forgot to put the battery shield in, and adhered the display. I’m tempted to leave it like that. However, your negative experience is a good data point telling me to not be cheap.

    Ordered a new adhesive , under $2 shipped from eBay.

    Yishai Sered -

    Thanks, Josh Martin! Mine was stuck too, so I lifted carefully.

    Cynthia Lamb -

  14. kagyl1qcW4AtoBlf
    kagyl1qcW4AtoBlf
    ewZDHDrtMTUxnlnK
    NUEP2PSRVV54cedx
    • Mit der Spitze eines Spudgers kannst du den Stecker der Batterie vom Anschluss auf dem Logic Board heben.

    • Biege das Kabel leicht nach unten, um zu verhindern, dass es mit dem Anschluss in Berührung kommt und das Telefon mit Strom versorgt.

    Was kann passieren wenn man diesses Kabel vergessen hat zu entfernen `?

    Julian Eltrich -

    Reconnecting the battery poorly can cause the iPhone to appear to be properly powered and functional, but then suffer a reboot loop.

    I had difficulty after a screen replacement, and the Console app on my Mac showed that the ‘thermalmonitord’ process was throwing lots of errors from not getting any sensor readings from the battery. It would never charge past 1% and just kept rebooting.

    The contacts on this conector looked fine so even though I had reseated this connector several times already, I reconnected it very firmly using my thumb and a spudger to really press all the corners and middle and really gave it a good massage and then finally it showed the normal dead battery screen and started properly charging and eventually booted back up to normal functionality.

    It seems the battery has to be able to transmit data to the phone to say it’s not overheating or iOS will not allow any current into the battery to recharge it, and the kernel will panic from the null readings and just reboot over and over again.

    jason -

    In my case, the battery connector was attached to the bracket. We just left it connected bracket when we pryed it up.

    Dave Miller -

    Reconnecting the battery connector was a bit difficult in my case. The cable that comes out of the battery was a tiny bit too long, or that I placed the battery a bit too high (i.e., too close to the top of the phone). It took me several frustrating minutes of fiddling with the connector for it to sit right into the socket. I was not sure if that was connected correctly but, alas, the phone came back to life when it was turned back on.

    Tomoharu Eguchi -

    VERY IMPORTANT NOTE: Please READ the reply here by jason.

    It is very easy to knock off or nudge the little pins near the battery socket, see https://guide-images.cdn.ifixit.com/igi/... and https://guide-images.cdn.ifixit.com/igi/....

    Those pins are the data lines to extract battery info: temperature, charge, etc. If you accidentally nudge/knock off them the phone could appear to work normally, even for a few days. But then you will start getting wrong battery reads and then after that it may suffer a reboot loop. If you enter settings > privacy > analytics & improvements and you scroll down you will find panic errors from thermalmonitord that there are missing sensors (TG0B or TGXXX) and you will have to micro solder them. DO NOT NUDGE THEM and double check the socket connector when reconnecting the battery.

    PJM -

  15. aMorTfedGgH3rI5R
    aMorTfedGgH3rI5R
    j6YutYie6sBNvKB2
    DTNCSTyuPgJxNIkh
    • Bevor du in diesem Schritt ein Kabel ablöst oder wieder verbindest, musst du den Akku abtrennen.

    • Nutze das Flache Ende deines Spudgers oder deinen Fingernagel, um die Anschlüsse des Flachbandkabels am unteren Ende des Displays zu lösen.

    • Um die Stecker wieder zu verbinden musst du diese unbedingt erst an einer Seite, dann an der gegenüberliegenden herunterdrücken. Drücke nicht in der Mitte, da sie sich verbiegen und im schlimmsten Fall funktionsunfähig werden können.

    • Wenn du nach dem Zusammenbau deines Smartphones ein leeres Display, weiße Streifen, teilweisen oder kompletten Ausfall des Touchscreens hast, dann versuche nochmals diese beiden Kabel abzutrennen und sorgfältig wieder anzuschließen. Achte darauf, dass sie wirklich fest sitzen.

    To be honest you don’t really need to disconnect the display cables in step 15 or 16 to get the battery out. Just keep the suction cup on the screen to keep it propped up and to give the cables some slack. The only reason to take these cables off is that it’s a pain to apply the replacement display adhesive with those cables in the way. If you’re not re-waterproofing your phone just leave these attached.

    Austausch der iPhone Display Klebestreifen

    minimalist -

    MAKE SURE you hold the top screen when dislodging the cable connections. I let the screen lie flat down and ended up tearing one of the cable connections, now my touch ID does not work at all! I’m going to have to order a whole new screen.

    Arjun Nagarajan -

    Don’t miss that SECOND CONNECTOR like I did. It will break very easily if not disconnected :(

    garrett peek -

    An earlier comment said to re-apply the suction cup to the right side of the display so that it acts as a stand when the phone is partially opened. That’s a great idea, and helps a lot for this step and the next.

    Mark -

    Hey – I broke one of these flex cables and I cant find them to purchase anywhere. Can somebody help me? It’s the LCD connector first and what is the second flex cable for? Thanks!

    Chan Ty -

    I broke the second (smaller) display connector flex cable.

    1) Is it replaceable or repairable?

    2) Where can I get the replacement?

    Ben Blom -

    Same happened to me. What solution did you find? Could you replace a part to make it work? Thank you!

    Viktoria -

    I replaced the screen and have ended up with a blank screen. Touch control seem to work (touch button works and I can shut down the phone by pressing power button for some seconds and then swipe left to right in the upper part of the screen). But the screen is blank. I’ve tried to disconnect and connect the two connectors in step 16 but with the same result (blank screen). What do I need to do?

    Thanks for advice!

    Bjorn -

    this point is the most important in the whole manual.

    Please pay attention not to strain the flex cables or they will end up breaking

    Jose Joaquín Sanz Iniesta -

    I should have been more careful - the second cable tore off.

    My own fault after having done this replacement about four times previously without any issues, I clearly got cocky and didn’t pay enough attention.

    Be VERY CAREFUL and remember to unplug those cables. Don’t skip steps.

    I’ve now had to order a replacement screen.

    Stuart -

    Echo minimalist’s comment here. Prop the display up and skip to step 19 to save time and remove risk.

    .A. -

    If you replace the screen and there is no display apply io propyl alcohol 99.9 & purse to both connectors on the screen and on the iPhone with a clean toothbrush and let them dry for 45 minutes and then fit the screen and reassemble the iPhone..

    It works for me . when I get a new screen I do t5his before fitting it.

    David Howard -

    I tried to save time by not removing the screen during battery replacement as some comment here, HOWEVER, I ended up having to use a little force to remove the battery and in the process broke the second, lower smaller cable, resulting in loss of home button function and needing to get a new screen. Next time I will follow these steps and completely remove the screen during a battery replacement

    chrislacey -

    I removed the screen and cable still got ripped during reassembling :(

    Viktoria -

    There is a critical fact missing from the steps here, for reassembly: That bottom (underlying) cable is longer than it should be. Loads of people are reporting that the Home button is dead after this repair, but the cables aren't torn. I'm pretty sure this is why. Here is a picture of the problem.

    When reassembling the phone, you must poke this cable back into the body of the phone while you bring the halves together, or you will crush, crimp, and destroy the cable.

    Gavin Stokes -

    I’m only reading your very useful comment now, after the exact thing happened to me and my cable got ripped during reassembling phone. Would you be able helping me naming this part, so I can look for a new one? Thank you very much!

    Viktoria -

    Can somebody help me with the name of the part that these cables belong to? The bottom one got ripped during my battery replacement, I need a new one but unsure what to look for.

    Viktoria -

  16. bmgfPpWHNVhhLV2o
    bmgfPpWHNVhhLV2o
    krsGsMngtAk6HqyE
    XC5yVbnZluTweVIj
    • Entferne die beiden 1,3 mm Kreuzschlitzschrauben #000, mit denen die Abdeckung über dem Stecker der Frontsensoreinheit befestigt ist.

    • Es können auch Y000 Schrauben sein. Apple hat etwa in der Mitte der Produktionszeit auf Y000 umgestellt.

    Has anyone had trouble getting these two screws off? I’ve been working on these for about 10 minutes and the LEFT screw wont spin. It seems like the little PH000 screwdriver bit won’t even grip it. (The one of the right comes off, no problem)

    It looks like I’ll have to pick this project up again with a screwdriver that will actually take off this piece.

    Makana Sylva -

    If you’re having trouble removing these screws;

    the screw on the right goes into a standoff screw that is screwed into the frame.The left one goes into the logicboard.

    If your phone is used most likely it has been repaired in the past and the person that repaired it put the screws in way too tight.

    If your phone is brand new And you know 100% it is then the problem is your screwdriver.Stop before you strip it completely and buy a better screwdriver (EBAY).

    If you already stripped the screw head take the phone to a shop before you break it.

    there are ways to get them out but truthfully it’s extremely dangerous and sometimes your better off quitting while you are ahead.

    Vegeta Barrett -

    The right screw kept spinning, tried different levels of force but didn’t work. I left the screw on and bent the shield to get to the cable.

    s h -

    I used a #1 flat head tip to loosen.

    Peter Pearson -

    I couldn’t get the two screws out either—used the correct screw tip and everything. Stripped the screw. Will now attempt to just keep the cable attached…..

    Therese Peffer -

    Use the PH000 and apply a little more force before spinning, should come right out!

    Sierra Scolaro -

    ^To anyone having trouble, this is the correct answer. Put the phone on a firm surface, align your driver carefully, press down hard, and twist. As long as your driver is approximately the right size, it’ll come out.

    Jeff Suovanen -

    the two screw i have are stripped and i have n way of getting either screws off whats my next bet

    Alexis Marie Colon -

    The PH000 bit is to large. I can’t get the screws out either which really sucks…now I have to put everything back together, find another bit that will work and try this again another day. Not impressed with IFIXIT’s attention to detail so far :-(

    Ryan Welborn -

    Using iFixit’s driver kit, I prefer a PH00 for this, which is larger than the PH000. If you think the PH000 is too big, something is wrong.

    Jeff Suovanen -

    I think part of the issue with the iFixit PH000 is that it is slightly too pointy. The PH00 fits better because the splines engage the slots of the screw before the point bottoms out. The PH000 tip bottoms out in the screw’s center point and the splines don’t engage as well. I have other PH000 tips that are more blunt nose and they work better than the iFixit bit.

    rcarswell -

    Use the J00 bit. Worked perfectly

    efazio588 -

    PH000 screwdriver didn’t work for any of these screws, or the barometric vent, or the taptic engine. It was too big. I had to use a different screwdriver from another kit I had.

    minimalist -

    I’d do this step before removing the ribbon cables by the battery connector. That way you can disconnect all of them at the same time.

    Ray Bieze -

    i used the little +-shape 30 mm screwdriver (not the Y…but the + shape).

    mason -

    the cable tore. is that it i need a new phone?

    patricia loving -

    You don’t need a new phone, but your selfie camera and phone speaker will not work. You can get replacements for that about $10.

    jack jones -

    Reconnecting this cable and coverplate took a good 20 minutes. O_O

    Nicole Crome -

    What can I do to remove the screw (I stripped it)

    Alex Vu -

    I also had issues to loosen up the screws, in two parts the right side up and the left side down, i think the PH000 is to pointy or something or its too hard for the srews of the iphone, i cannot take it off and know im regreting i bought i order all the way from Paraguay in south america and know so angry it doesnt work

    Martin Frutos, Nuñez -

    I skipped this step. Just be really careful not to pull on the screen.

    Takumi Arai -

    The guide says they changed these to the Y000 “at some point in the t middle of the product’s lifecycle”…

    That can’t be true, I have a *day one*, preordered iPhone 7, and mine had, unmistakably, Y000 screws!

    and also, I’m just faithfully following the guide here, but can anyone clarify *why* is is necessary to entirely remove the display AND the Taptic Engine at all? The battery seems accessible just fine… oh well

    PS- I’m doing this on an older backup iPhone 7. My iPhone 12 Pro just went berserk and stopped working completely a little over a year after I got it day one of its release… since the iPhone X I’ve only had easily breakable, overly sensitive phones. I’ve had every numbered iPhone except for the 8 (I got the X released at the same date) and the 11, and man, are these newer iPhones post X fragile!

    Cam F -

  17. uCv2qq5X3dLp5gXA
    uCv2qq5X3dLp5gXA
    3XQvxPR6gZtBBjeL
    • Entferne den Stecker der Display Einheit von seinem Anschluss auf dem Logic Board.

    • Der Stecker sollte nicht mittig festgesteckt werden, um ein Verbiegen zu vermeiden.

    Das ist sehr mutig, das Kabel dort so zu strapazieren.

    Mich würde das Display daneben stellen und mit irgendetwas stützen, dass es nicht umkippen kann um Beschädigungen an dem Kabel zu vermeiden. Das reißt sehr schnell ein.

    Detlef Menninger -

    Is this the connector for the earpiece, as well? I did the screen replacement and everything worked, except now I can’t use my earpiece… I’m afraid I didn’t fully connect this particular portion.

    Victor Bui -

    @victorbui714 Correct, this is also the connector for the earpiece speaker. Check the flex cable carefully and make sure it wasn’t pinched or torn. Make sure the connector socket is clean (give it a blast with some compressed air if needed) and try reseating it. If that doesn’t help, you may want to remove the earpiece speaker and inspect the four springs on the back, and check that they’re intact and making good contact with the four circular pads on the flex cable. Give the pads a wipe with some IPA and try not to leave any skin oils on them. If none of that works, try replacing the entire flex cable/sensor assembly. Good luck!

    Jeff Suovanen -

    This is the only connector that is quite easily possible to put back in the wrong way. If you do so, the phone will just get into a continuous loop where it shows the boot screen, goes blank and then shows the boot screen again and again. If this happens, do not despair-just put it back in the right way.

    Roy Mathew -

    After putting together, I had a continuous loop boot up (as noted above). I saw articles where this (front panel sensor connection) was the reason. I disconnected this connection and the boot up loop stopped. I tried reconnecting several times but had the same problem (boot up loop). However, it turns out that I needed to apply extra pressure when installing until a heard a (faint) second click when pressing down. Note - before I was using the spudger to press the connection together, which didn’t do the job. I ended up using my finger to press harder to get it to click in. Solved that issue.

    Ed Scannell -

    The ribbon cable on this step is torn. Is this something that can be replaced? Is this only to the earpiece?

    John Daily -

    The ribbon cable on this step is torn. Is this something that can be replaced? Is this only to the earpiece?

    Sarah Valencia -

  18. GgLw2SeVMeWxZEj3

    When removing the screen, be aware of the two tiny square black rubber grommets on the Penelope screw brackets that secure the screen. They can fall off very easily and be lost without even knowing it (it happened to me, but was lucky enough to find them).

    Guy Cooley -

    Sorry, I’m so unclear about when to replace the Adhesive tape. Should I put the iPhone 7 Display Assembly Adhesive at this step, or after I’ve replaced the battery?

    Victor Bui -

    @victorbui714 Battery first, then adhesive during reassembly, as it says in the instructions. ;)

    Jeff Suovanen -

    This is the 3rd screen iv put in my phone and everyone them bust at the top by the camera every time iv bought one of these screen idk if it’s the manufactures fault or what?

    trent bost -

    @trentb28922 Ouch! That’s not normal. Is your phone’s frame bent? Are you having to use a lot of force when you install the display?

    Jeff Suovanen -

  19. EANVBZGXJyqVmVFq
    • Entferne die beiden 1,9 mm Kreuzschlitz Schrauben, die die barometrische Entlüftung am hinteren Gehäuse befestigen.

    The barometric vent seems to have some foam cushioning towards the bottom of the case? does this get damaged via removal I wonder?

    Phil -

    I’m stucked with the right screw, can't get it out. Any ideas?

    Racecar -

    Edit: I’ve lifted the taptic engine without unplugging it. Removing the battery stripes didn't cause any issues.

    Racecar -

  20. 4KWmdocYM1eJoNce
    4KWmdocYM1eJoNce
    BPclKUrXSm5WUkRq
    • Entferne die Entlüftung.

  21. OWmPqLT1F1MBogRu
    OWmPqLT1F1MBogRu
    bZJDWjlSURuVJIpc
    • Verwende das flache Ende eines Spudgers, um den Stecker der Taptic Engine vom Anschluss auf dem Logic Board zu trennen.

  22. Myl4kW5JSOANhHPO
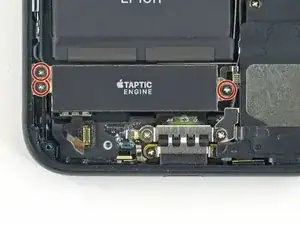
    • Entferne die drei 1,6 mm Kreuzschlitz Schrauben, mit denen die Taptic Engine am hinteren Gehäuse befestigt ist.

    My screws are stripped here. Please help, I don’t know what to do!

    Salva Alcón -

    My screws are also stripped here, but the phone has never been opened before!

    Kyle Webb -

    Hey Salva and Kyle, sorry to hear about all these stripped screws! For help with removing them, check out our guide.

    Adam O'Camb -

    I had a new phone. These screws were missing when I disassembled it. Not sure what QC Apple has, but it ain’t great. If they’re missing it’s not the end of the world. You can just disable taptic touch.

    Ray Bieze -

    I had my 7 battery replaced by an Apple Authorized dealer. Around 2 weeks after the taptic engine started to make a !&&* of a noise when it was activated (sounded as if it was loose)… then 1 month after that… it stopped working completely. fast forward 8-9 months later, the battery they had replaced just wasn’t holding its charge anymore (phone was spending more time plugged in charging and depleting very quickly = full charge lasted about 1-2 hours). Having bought the ifixit battery and have gotten as far as this step, I could see that all three of the 1.6mm screws were just floating around in the compartment and the taptic engine was just being held on via it’s ribbon lead. WTF?! Screws aren’t stripped and I managed to fix it in again. Why would these screws be floating around like this??

    Phil -

    another person checking in here to assure you that, if you find a stripped screw (or more) at this step, you’re not crazy. I have one as well! I’m in dis-effing-belief. This phone has NEVER been serviced by anyone, and was allegedly brand new when purchased.

    To the person suggesting a dremel tool to remedy this…. *blink**Blink*. Are you kidding me right now? *slap*. Vibrating the !&&* out of all those sensitive parts - not to mention what one slip could end in your phone being effectively sawed in half.

    Cunning Stunt -

  23. MOotTqJsMU3PlhtU
    MOotTqJsMU3PlhtU
    pKLKmYAS6gFFWStc
    • Entferne die Taptic Engine.

  24. K4PsVe4WLmdBxgCG
    K4PsVe4WLmdBxgCG
    e2IlUdMOVoEloSpC
    W1IBGIliNsYTarNZ
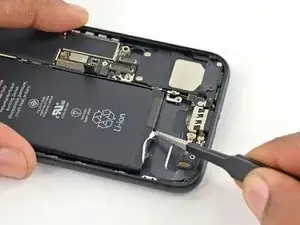
    • Verwende eine Pinzette mit stumpfen Greifern, um einen der Klebestreifen am unteren Rand der Batterie zurückzuziehen.

    I found using the blunt end of a spudger to roll the adhesive strip off worked better than trying to get hold of it with tweezers.

    Peter Gray -

  25. rBKKelsdUfkxXsqM
    rBKKelsdUfkxXsqM
    xLLY1cCDSexXup1e
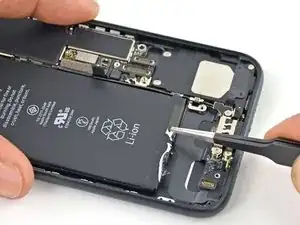
    • Verwende eine Pinzette mit stumpfen Greifern, um den anderen Klebestreifen am unteren Rand der Batterie zurückzuziehen.

    I can recommend preheating - first phone attempted without preheating both strips broke almost instantly, but this time heating the back of phone until battery felt about 40 degrees made for a smooth removal, saving me ages prying it out with cards…

    Jesse de Vries -

    Definitely preheat. Don’t even bother trying to pull out the tabs without preheating the back.

    Josh Baxter -

  26. WdC4FCiSgJQfln4g
    WdC4FCiSgJQfln4g
    ijSLCSKuaoEVlDJX
    Fu6iiGsxXNEfcE1s
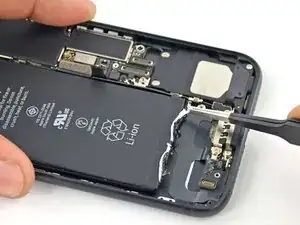
    • Wenn du zum ersten Mal einen iPhone Akku Klebestreifen entfernst, schaue dir bitte erst das Video im nächsten Schritt an, bevor du anfängst.

    • Versuche die Streifen während dieses Vorgangs flach und glatt zu halten, sonst werden sie zusammenkleben und reißen, anstatt sich sauber herausziehen zu lassen.

    • Ziehe langsam eine Akkuklebelasche weg von der Batterie, in Richtung der Unterseite des iPhones.

    • Ziehe stetig und halte eine konstante Spannung auf dem Streifen, bis er zwischen der Batterie und dem hinteren Gehäuse herausrutscht. Das beste Ergebnis erhältst du , wenn du in einem Winkel von 60 ° oder weniger ziehst.

    • Der Streifen dehnt sich um ein Vielfaches seiner ursprünglichen Länge aus. Falls nötig, kannst du beim Weiterziehen näher an der Batterie nachgreifen.

    My adhesive strips tore almost immediately. I ended up using an old membership card as a tool to pry the battery out. I must admit, I did deform the battery - seemed almost unavoidable.

    Dan -

    Same here, I had to work it out with the guitar pic they give you.

    greggammon -

    I GENTLY heated the back case with my heat gun and BOTH strips came out PERFECTLY.

    Mike Gill -

    How do you keep it from wrinkling without tearing

    James Green -

    It always tears for me too. They make it look super easy in the videos ;)

    Anthony -

    Worked for me by setting the phone on a sock with rice (heated for 30 seconds) while I messed with these. Pulled the white part SLOWLY.

    mason -

    After a past experience with the adhesive strips immediately tearing on an iPhone 4, I knew to heat the battery with a hair dryer before pulling on the strip. After heating the battery, I was able to pull the adhesive strip without any problems.

    Mark Lieberman -

    First one worked perfectly as it was seen in the video. The second one teared immediately. I lifted the battery a little by a spudger and used the tweezers to pull out the white part and grabbed with my fingers and gently pulled it slowly, which worked.

    Tomoharu Eguchi -

    A very good way I found when I, as probably many others, made the straps snap; a way I definitely will apply next time if I do this: use a spudger and “spinn” the white tejp out. Working with the hands trying to pull it out was not ideal… So:

    Stick the tejp on/around the spudger and roll it up/out on the tip on the spudger. Once it grips hold on the spudger and you roll it, it almost eats it way out.

    Otherwise it would have taken me ages to get it out but yes, if it snaps (or from start) you can get hold of it under the battery then you definitely have a substitute solution here.

    Johan Nilsson -

    The spinning spudger worked really well! That and heating it first made it a breeze.

    JoeP -

    Easy does it. By pull carefully in a low angel, especially in the beginning, you prevent it from snapping. Do not yank it.

    steinmb -
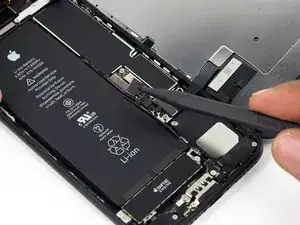
    Gentle heating of the back to soften the adhesive and then I used tweezers to wind the adhesive strip out spudger would probably work well too. When starting, do not pull the strip out more than an inch or two before winding the strip back around the tweezers or spudger and keep the angle low as you pull straight, which is why removing the Taptic Engine is recommended. As you go along, the strips get wider and less likely to snap and you can pull a little further each time before winding it up. This all takes a while since the adhesive stretches a lot, (like a LOT), but slow and easy works best. Prying the battery out is not fun.

    Randall Ottman -

    +1 for hairdryer & rolling on the spudger!

    Pete Stephens -

    I use iso propyl alcohol applied with an eye dropper to the battery at a 10n degree lift and let the alcohol seep through for about 30 to 60 seconds and hen remove the adhesive It works a treat

    David Howard -

    One strip tore rather quickly after pulling, the other survived the whole procedure.

    I then used the tweezers, coming from the side where the strip was removed properly (and also heatened up the phone a bit, and I was able to grab it again. On the second try I pulled it out entirely

    Guenter -

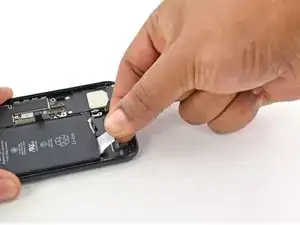
  27. Wiederhole den vorherigen Schritt mit dem zweiten Streifen.
    • Wiederhole den vorherigen Schritt mit dem zweiten Streifen.

    • Halte die Batterie noch nach unten, während du den zweiten Streifen entfernst, sonst könnte der Streifen die Batterie herausschleudern, wenn er sich vom Gehäuse löst.

    • Wenn du beide Klebestreifen erfolgreich entfernt hast, kannst du den nächsten Schritt überspringen.

    • Andernfalls, wenn einer der Klebestreifen unter der Batterie gerissen ist und nicht entfernt werden konnte, fahre mit dem nächsten Schritt fort.

  28. ce43yWjGQOSREoXb
    ce43yWjGQOSREoXb
    2eUksNTsAKyUKyE1
    Cj3hU1KeBPAAHDgL
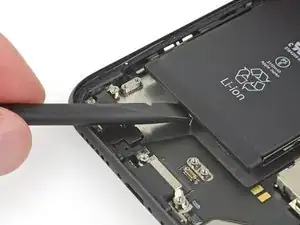
    • Wenn einer der Klebestreifen abgerissen ist und der Akku weiterhin im Gehäuse festklebt, dann gib einige Tropfen von hochkonzentriertem Isopropylalkohol (mehr als 90%ig) an der Stelle, wo der Klebestreifen gerissen ist, unter den Akkus.

    • Warte eine Minute, hebe den Akku dann behutsam hoch.

    • Setze die Karte nicht in den Bereich zwischen der Lautstärke leiser - Taste und der Oberkante des Akkus ein. Das Kabel für die Lautstärkeregelung liegt darunter und könnte beschädigt werden.

    • Heble nicht gegen das Logic Board, das könnte das iPhone beschädigen.

    • Versuche nicht, den Akku mit Gewalt herauszuhebeln. Wenn es nötig ist, tröpfle noch mehr Alkohol unter den Akku, um den Kleber weiter zu schwächen. Verforme niemals den Akku und stich ihn nicht mit dem Werkzeug an.

    • Als Alternative kannst du den Akku auch mit einem Stück Zahnseide vom Gehäuse trennen. Noch kräftiger als Zahnseide ist eine Gitarrensaite, etwa eine 0,009 E Saite aus einem 12 Saiten Set. Ziehe die Saite oder die Zahnseide unter den oberen Ecken des Akkus durch, bringe beide Enden zusammen, wickle sie um ein gefaltetes Tuch und ziehe gleichmäßig.

    • Wenn der Akku immer noch festklebt, dann kannst du auch einen heißen iOpener oder einen Haartrockner benutzen, um damit die Gehäuserückseite direkt hinter dem Akku zu erwärmen. Sie sollte so heiß sein, dass du sie kaum anfassen kannst.

    • Wenn das iPhone zu heiß wird, kann der Akku in Brand geraten.

    As a professional tooth carpenter, I stand by this suggestion

    Anthony -

    Bij mij brak ook een van de kleefstrips , ik heb toen de batterij een heel klein beetje opgelicht en er wat isopropyl (alcohol) laten tussenlopen en dan een halve minuut gewacht . Vervolgens heb ik heel voorzichtig in combinatie van een Plastic card en een iSesamo opening tool (deze zijn beiden hier te koop bij iFixit), de batterij kunnen los wrikken zonder dat deze beschadigd of geplooid was.

    clbr -

    As a person who has previously destroyed an Iphone trying to remove the battery, Why not do the alcohol and/or heat right from the start?

    Paul -

    The dental floss was helpful, but I also used a tongue depressor to gently pry the battery off.

    Kevin A -

    One of mine broke. I was able to raise the battery enough to grab the strip with tweezers.

    NitWit -

  29. jpZvpYWr1P5gookl
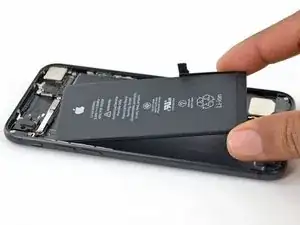
    • Entferne den Akku aus dem Rückgehäuse.

    • Sollte dein Ersatzakku in einer Plastikhülle geliefert werden, dann entferne sie, indem du sie vom Flachbandkabel wegziehst. Setze erst dann den Akku ein.

    • Stecke vor dem Festkleben des neuen Akkus den Akkustecker vorläufig in den Anschluss auf dem Logic Board ein. Dadurch nimmt der Akku die richtige Position in seiner Vertiefung ein.

    • Klebe den Akku fest, löse den Stecker wieder ab und fahre mit dem Zusammenbau fort.

    • Wenn dein neuer Akku noch nicht mit Klebestreifen versehen ist, dann folge dieser Anleitung, um die Klebestreifen korrekt anzubringen.

    • Führe nach dem Austausch einen erzwungenen Neustart durch. Dies verhindert einige Probleme und vereinfacht die Fehlersuche.

    After I replace the battery, should I put on the iPhone 7 Display Assembly Adhesive and then follow the steps in that guide to reassemble?

    Victor Bui -

    Follow this guide for the display adhesive. There should be a link here for it. Austausch der iPhone Display Klebestreifen

    minimalist -

    ==> Step 18 !

    VauWeh -

    There should be directions as to how to locate the new battery in the case! There is enough freedom of movement that the battery could be glued back into the case and not be able to make the battery connection. Some temporary spacers would be a great idea.

    I put the Taptic Engine back in the case first. The battery seems to rest right against it, so it becomes a physical reference point. I cut out a piece of the plastic cover that came on the battery & put it over the battery connector mating point on the circuit board to keep the battery disconnected until necessary.

    Robert Rodenburg -

    I contacted the battery first, using the connector and cable as a reference point. I wanted to make sure the cable from the battery did not put any stress on the battery connector after I glued the battery to the case.

    steinmb -
    There should be a STEP 30 Instructions to refer you to the link for instructions for installing the REPLACEMENT SEALS. Or at least a big note saying to install the seal now before re-assembling

    David Reese -
    Bought kit, followed all the instructions, and now the Touch ID and home button don’t work on my phone, rendering it useless. Connections are fine, no obvious cable tears, I’ve checked and rechecked all connections … not to mention, what component did I even touch to render home button useless since it’s on the display screen? This is going to cost me. What a horrible experience that’s taken up 4 hours and cost me time and money. Can’t recommend just shipping phone back to Apple enough. One of the most disappointing experiences with a product in ages. And all just to replace a freakin’ battery …

    John Cagle -
    I have the same issue :(

    radeise -

    I have the same odd behavior. Is there a solution to this?

    antonioamaddio -

    CAREFULLY connect all cables and test it before putting back together. I reseated the long and short cable connectors a couple of times when it appeared the button wasn't working. I was successful, but I knew going in that Apple didn't design these to be repaired by the owner. So I knew I may be out the money and in need of a phone if I screwed something up. That's just the way it works.

    Some Idiot -

    Hello guyz. Please help me. I tried to replace my iphone 7 battery. When i was removing the 4 tri wing screws on the cover that is covering the battery cable Etc, I used many screwdriver because at first I didn’t know that those are tri wing screws. I ordered .6 tri wing screwdriver. I successfully removed the 2 screws but the other 2 cannot remove. I think they are stripped or they are damaged because of what i did pn my first try. I dont know what to do. My iphone battery health is 73 percent. I want them to be removed but i dont know how. Pleaseee help mee guyss. (Sorry if my english is bad, im from Philippines) please help me

    Ryan Sacramento -

    The battery placement during install needs to be spot on or else the connector won’t line up. There is no wiggle room in the cable

    afabobo -

    In step 29 there is the way to cerrectly align the battery by connecting it first, then adhering it, and finally disconnect it.

    Daniele Carminati -

    The heating via hair dryer didn’t work as expected for me. Instead, this video worked perfectly - https://www.youtube.com/watch?v=e743HCkx...

    Brandon Francis -

    Wait. What? You gave me 30 steps on how to remove the old/faulty battery. Where are the steps showing how to install the new battery and put everything back together?

    Bob Satmary -

    Do you really need to remove the taptic engine and barometric vent? Can’t you do it without removing those components?

    ClaytonM223 -

    Did this back in 2021 and it took a lot of patience to do screws were one of the hardest things to deal with being so tiny. Guide was good.

    Not for someone who doesn’t have patience and determination to fix things themselves. I did crack my screen trying to lift it with suction device and felt smudged wasn’t good enough to get underneath phones screen while pulling on suction cup.

    Good overall fix it guide just plan on few hours to do.

    DJSan -

Abschluss

Vergleiche dein Ersatzteil mit dem Originalteil. Möglicherweise musst du fehlende Teile übertragen oder Schutzfolien vom Neuteil abziehen, bevor du es einbauen kannst.

Um dein Gerät wieder zusammen zu setzen, befolge die Anleitung in umgekehrter Reihenfolge.

Entsorge deinen Elektromüll fachgerecht.

Die Reparatur verlief nicht wie geplant? Schau in unser Forum zur Fehlerbehebung.

Paige Reisman

Mitglied seit: 07/04/14

23082 Reputation

115 Kommentare

Does this effectively negate the waterproof feature of the new iPhones?

Tubby -

yes , unless it is sealed back with new waterproof tape, which almost no one has yet

Atronx -

No you can buy the replacement. See the above guide for a link on how to do that and iFixIt sells them. Recommend buying more than one because installation is tricky - must get it aligned perfectly though the spluger and pointy tweezers can help reposition minor slipups.

lovemymac -

The back adhesive is available on ifixit. So you can make it water proof-ish again.

Recall, an original iPhone is far from waterproof after only a month usage.

Guenter -

iPhone 6 take battery off put new one now not changing at all but saying yes but no going up new battery saying all time 6@.all time

ant2101 -

Is there any way to put back the waterproof sealing after changing the battery for iPhone 7? Thanks

Steven Tanda Putra -

I too would like to know this! It's a shame they don't elaborate as such. There is this part here - Display Adhesive iPhone 7 Display-Klebestreifen which I assume needs to be put on after the screen is taken off but this guide says it's not needed? But for a screen repair it is? Does it get placed on the phone housing or screen? Thanks

blitzn -

Yep, we have a guide for replacing the seal (display adhesive) now. I don't know how waterproof the seal will be afterward, but I think it's worth doing regardless.

Jeff Suovanen -

Most of the adhesives that are being sold are not rated to be waterproof, and are not the geniune OEM brand materials.

Atronx -

Probably too late, but there are many vendors that sell the waterproof seal for iPhone7. Use alchohol and tweezers to remove the old seal and glue, align the new seal and stick it. Compared to the battery change, it’s a breeze.

hiroo yamagata -

Hi!

Now I got a huge problem concerning the HomeButton/ForceTouch-function.

It does not work anymore. I think it's a safety measure by Apple to prevent people from changing their batteries.

ANY HELP, please? :(

87schiller -

Those functions aren't related to the battery. Double-check your work, reseat the cable connectors, and inspect the cables and home button hardware carefully for damage.

Jeff Suovanen -

I know this is a month late, but hopefully this helps someone. On the 7, 3D Touch and the home button are routed through the same flex cable that comes out from underneath the metal backing of the display and plugs into the board.

This flex cable is very easy to pull and damage when taking the screen off for the first time. In most situations you won't see this damage because it will be underneath the metal backing of the display.

If this same thing happens to you, you'll unfortunately need a screen replacement to fix it.

Cody Dover -

My problem is with the 4 tri screws holding the 1st bracket down. They just spin, all 4 of them. The screw heads aren't stripped, as they all spin, they just don't back out. I've applied backpressure in hopes that would help lift the screws, but no luck.

Jeff Hurst -

Is Iphone 7 battery connector same as battery connector of Iphone 6S or other models?

Tumen -

No. Different connectors.

Ben -

Might want to update your website.

iHelpU.Tech is currently working on obtaining certifications from Apple Inc. Currently none of our repairs are backed by Apple Inc.

obed -

You dont have to remove the Taptic Engine but it gives you more room to work with the glue.

nicolay.94 -

Hello there, I got a dead iPhone 7, so I tested the battery, and the only “weird” thing.. is that the battery is rated 3.8v… and on this one.. im having a reading of 4.1V…. maybe this overpowered issue is preventing the iPhone to turn on???

jbermudez27 -

So, I changed the battery of my iPhone 7 with the kit provided by IFIXIT a couple of days ago, and cononutBattery is reporting that the battery is already at 95% (1862 out of 1960 mAh), with only 1 charge cycle. Is this normal?

Federico Baier -

Hi Federico

Did you try the following tip?

For optimal performance after completing the guide, calibrate your newly installed battery: Drain it below 10%, then charge it uninterrupted to 100%.

Takehiro -

nice video but if possible upload a pdf file

thank you very much…………….

Ali Zain -

The step by step guide can be converted to a pdf by selecting Options>Download PDF.

Sam Goldheart -

in this website can i have mobile and tab schematics ?

Ali Zain -

This is a truly fantastic account of how to do this. Well done.

I had to abandon when the kit I was supplied did not include a tri screwdriver but I watched the engineer finish my work and it was exactly as shown here.

hdisgreat -

mnvery east to follow quide but i almoust did burn down my phone when i was removing battery it cathed on fire and i have no idea did i puncture it or what.

Samuli Karppinen -

In any such venture, when dealing with precision components. DON’T RUSH, if you have any issue with hands that tremor for whateverr reason when handinlng small items, DON’T TRY THIS, LEAVE IT TO SOMEONE WITH STEADY HANDS !!

Shaun O'Connor -

My iPhone 7 wasn't not charging. So, After searching on Google, I found this guide "iPhone 7 not charging". And, with this guide I get to know about that, my iPhone battery got damaged. And, My iPhone warranty also got expired. So, I have decided to replace the battery by myself. And, this guide really helped me to replace my iPhone battery. Just want to say thanks to you. :)

nagarakshya -

Can you pull the battery adhesive tabs without removing the Taptic Engine? Anyone tried that?

Balle -

@balleklorin You certainly can, but you’re much more likely to break the adhesive strips that way. You want to pull them at as low an angle as possible, and with the Taptic Engine installed you’ll have to pull them at nearly 90 degrees. My advice is not to take shortcuts, but it’s your phone and your rules! Good luck.

Jeff Suovanen -

Hi ! I want to do this repair but I read online that if I use a non-original battery Apple’s software will detect it and will slow down the phone (like it does for the damaged original battery).

Is it still true or is it fixed in the current IOS ?

Quentin barbry -

Not true at all. As long as you have a high-quality battery, the iPhone’s performance is just as good as with a brand-new battery from Apple. If you have any doubts, you can verify the performance by benchmarking it with the GeekBench app.

Jeff Suovanen -

Hi everyone, I’ve replaced my iPhone 7 Battery and for some reason i am still seeing the old battery readings (same percentage and same battery health percentage 80%) on battery settings. Will this fix after the battery gets calibrated?

Thanks.

Juan Fonseca -

my home button stopped working. Any ideas how to fix this ?

Dries Van de Velde -

I‘ve done it step by step, everything went well. everything works, except touchID wont work.

could anyone tell me what the reason could be?

thank you lads.

davidaigner -

Fun repair but why did apple change the battery screws to tri point… tri point suck!

[deleted] -

Follow this guide for the display adhesive. There should be a link for it here in this guide. I had to go looking for it. Austausch der iPhone Display Klebestreifen

minimalist -

super détail pour les vis et leurs tailles

ca va m’ aider , car au démontage rien etait fixé, et il en manque 2 ( au moins 12 vis en promenades)

donc avec le kit commandé je pourrai m aider des différents tuto pour retrouver leurs emplacements

cordialement marchal

Gros Lutin -

Excellent guide, but may I make a couple of suggestions:

1) in step 18 this guide should strongly recommend that anyone doing the waterproof sealant replacement MUST watch the linked “iPhone Display Adhesive Replacement” guide FIRST considering that it does require an additional tool (no, I did not have enough pennies on me to do the recommended heat treatment followed by weight-pressing the reassembled iPhone assisted by said pennies).

2) also in step 18, you could point out that the forward camera assembly at the top of the front plate of the iPhone 7 has a hooked ridge that must be fitted into the bottom plate for the re-assembly to work at all. Personally I had NOT noticed that, so when I tried to reassemble mine I hadn’t tried to make sure that the ridge was properly placed. Could you add a picture here of that ridge and perhaps recommend that everyone working on disassembly that they should see how it works so they can recall it upon re-assembly.

Arthur Maruyama -

I agree. Reassembly is NOT the reverse of the many steps! That ridge or plastic edge MUST be slid into first. Opening the iPhone doesn’t reveal that. Careful, because the waterproof glue can catch the battery cable too. Aligning the battery by connecting the battery cable/ribbon helps BUT be careful and remember to disconnect the battery BEFORE reconnecting the two data cables (Again, this would be obvious if the steps or reassembly pics were included. Number of steps = 60 more realistically because reassembly is just as important and risky!

lovemymac -

BTW: when I first completed my re-assembly, when I first looked at my screen there was a set of greyish bands that covered about 1/3rd of the screen. Not so dark that clearly blocked the use of those parts of the screen but rather noticable. I shrugged my shoulders, thinking that perhaps there was some internal damage that I couldn’t help having done.

But less than 24 hours after that, that banding has been considerably reduced (covering less than 10%) AND it is much less grey. It is such that I must bring up an app like Notes in order to have a mostly blank white screen in order to see what remains, so perhaps this was merely an artifact left by the ending heating I did to “cure” the waterproof adhesive, and over time it will disappear entirely.

Arthur Maruyama -

after doing this fix ive gotten a message - unable to activate touch id on this iphone —-its an iphone 7

Ryan D'mello -

super! merci

Ali Hadjeres -

Home button not working after battery replacement.

karllittau -

Ugh. Touch ID not working after replacing battery — I figure I damaged the cable attached to the screen. I hard rebooted (down volume + power) and it didn’t help. Sad. Everything else ok.

mason -

Thanks for the guide. Very helpful on two iPhones

For some reason i forgot to use the suction cup but was still able to open the phone without much difficulty (so don’t worry about needing iopeners etc. )

Of course one of my battery strips snapped, but with a bit of effort and pointed tweezers under the battery i managed to grab it after a few attempts and fully remove it.

Although you could do this without removing the screen, you will need to remove it to place a new sealant strip around the edge.

Stuart -

Just completed changing the battery on my Father-in-law's iPhone 7. He had purchased the phone used and I suspect the battery had been replaced previously as there was no adhesive seal holding the display to the case. In addition one of the screws holding the bracket was missing. Nonetheless the procedure went very well. The instructions were clear and easy to follow. The most difficult part of this project was removing the battery from the case as the adhesive broke almost immediately. Fortunately the tips that are in that step made removing the battery easy. Bottom line, read the instructions ahead of time, watch the video and TAKE YOUR TIME! Good luck!

Lon Adams -

I used this guide with the ifixit replacement kit and it went very well. I do wish though that the guide gave advice on how to install the new adhesive gasket when reassembling.

Thomas -

Hey Thomas! Glad to hear that everything went well. Sorry to leave you hanging on the adhesive install, we do have a guide but it’s a little hidden. Austausch der iPhone Display Klebestreifen

Taylor Dixon -

I followed every step. Replaced the battery. Played backwards every step. Now I am stuck with the Apple Logo slowly flashing on & off. I think I just killed my iPhone7. My Mac does not ‘see’ my phone when I connect it to iTunes.

Jeffery Barbour -

This guide doesn’t really explain how to reapply the display assembly adhesive, which is necessary to restore the iPhone 7’s water resistance. As previously mentioned, check out this guide.

Anthony -

i am not being able to do it… I have heated up the phone, to smooth the glue… but the cover doesn’t me off

matilde_napoleao -

Same problem brother. Were you able to remove the screen?

pranavdurai10 -

Good instructions. Two things that would be nice to add to reassembly would be how to apply the adhesive and seal.

Tom Fields -

My iphone fell in the toilet and was there maybe 5 seconds. I dried it and let it rest but then (I know) tried to to do things. The next day (I took it to a TekDry machine and they put it through for two half hour plus periods. After the first half hour, the start screen came back for a maybe a minute. (I almost paid.) Then nothing. I brought it home and plugged it in to charge it. After 5 hours (?) it began to flash- It was like a living creature trying to breathe- It would light up- then go dark- many times. I tried a hard reset and think I managed to turn it off. Now it is in a vertical position, off the charger. This is a newly refurbished phone. (I had it for a day)- I am wondering where I could take it to in Seattle for someone to open it up. It will turn on even now. Or should I give it a decent burial? I am in my 70s and techno-challenged. Any advice, expressions of gentle derogation or approval, are welcome.

Lyn Coffin -

Getting the adhesive to loosen was the hardest and most frustrating part of this with me trying it multiple times for a few days. Simply “warming up” the phone did not work, I had to make it really, really hot in order to lift the phone a fraction of a millimeter with the whole thing flying around the room and me hitting myself in the face with the suction cup multiple times. Using a thinner metal plunger did the trick, but scratched my case. Nevertheless, it was the only way to open up that beast. A third hand would have been be nice for that job x)

Wilk Polarny -

Me too. I stopped and bought the tool that has two suction cups and looks like pliers. It allowed me to gently squeeze, release, squeeze and eventually it began to separate. Also, that tool kept me from pulling to hard or opening too wide thus saving the ribbon connections. The iFixIt heat tool worked better than a hairdryer.

lovemymac -

hat geklappt, danke für die Anleitung!

LG Andreas von studi kompass

Andreas Baumann -

Hello. Do you ship this battery replacement kit overseas? I`m from the philippines.

pamiho -

Completed. This is now the second 7 that I have successfully replaced the battery on.

Kevin McNamara -

I have to agree with some of the other comments - the re-assembly instructions might have helped!!! Instead of having to switch between guides to figure out how and when to apply the screen adhesive. I successfully dismantled the iPhone, replaced the battery, got through the majority of the re-assembly, realised the instructions hadn’t included the screen adhesive, searched for the instructions, then re-disconnect the screen AGAIN, apply the screen adhesive, re-assemble the iPhone completely this time, only to find I’d broken the display at some point!!!

Andy Pounder -

Perfect install. Now phone is dead.

eddyfreemail -

I missed the “forced restart” after reassembly. That created some angst for me wondering where the trusty white Apple logo was hiding. I reread the notes and found the forced restart. All is good. Super nice tutorial. Many thanks,

Travis Witherington -

I just replaced a swollen battery on an iPhone7. I purchased the iFixIt kit that included the battery and all necessary tools for $35. Everything went well in the replacement. I’m glad I watched the vid on replacing the case adhesive FIRST! A little advise; 1) Read through the entire replacement steps at least twice. 2) Watch the videos for battery replacement AND adhesive application BEFORE starting. 3) TAKE YOUR TIME! Work slowly and uninterrupted. 4) Be organized with the screw/part placements. I do wish there were guide marks inside the case for exact battery placement. My placement was ‘off’ about 1/32 of an inch, it made connecting the battery a little tricky. But I persevered and now the phone works great! Thank you iFixIt for saving me LOTS of money on a shop repair ($100+) or a even more on a replacement iphone ($1000+)!!

TByrd -

I just replaced a swollen battery on an iPhone7. I purchased the iFixIt kit that included the proper battery and all necessary tools for $35 + shipping. Great news! Everything went well in the replacement. A little advise to you DIY types; 1) Read through the entire replacement steps at least twice. 2) Watch the videos for battery replacement AND adhesive application BEFORE starting. 3) TAKE YOUR TIME! Work slowly and uninterrupted. 4) Be organized with the screw/part placements. I do wish there were guide marks inside the case for EXACT battery placement. My placement was ‘off’ about 1/32 of an inch, it made connecting the battery a little tricky. But I persevered and now the phone works great! Thank you iFixIt for saving me LOTS of money on a shop repair ($100+) or a even more on a replacement iphone ($1000+)!!

TByrd -

I’ve made it, after all. How dare you not saying that one need new adhesive strips and sealing AT THE BEGINNING of this instruction or OFFER IT IN THE INTRODUCTION as all the other stuff, I’ve asked!!!

Axel Moering -

Great kit and tutorial, I had it done in one shot without buying any extra strips! Just go slow and you’ll get there eventually. Oh and, keep the hairdryer nearby, it will be your bff for this! Good luck and many thanks to the people in the comments as your warnings have been really helpful!!

Anthony Phuong -

Worked OK. Hard bits is screen removal - I used very narrow screwdriver. Advise using piece of A4 with step numbers to place various screws and parts on as you remove. Some very tiny screws in there.

Matt Franey -

I followed all the steps perfectly and the battery shorted out (the back heated up really hot and the phone wouldn’t turn on). Then I tried to do it all again but the pentalobe driver is not biting into the screws anymore so I couldn’t open the case.

Samuel Sharmat -

I replaced the battery and the Home Button no longer works. The are a few other comments posted on this here and a long chain in the iPhone 7 section. I have done a lot of troubleshooting to include reseating all the connectors , loosening the middle screw over the Home Button, hard resets, etc. No luck. I have done quite a few phone repairs successfully and have had good luck. I was very careful with this battery replacement and don’t know how I could have damaged a cable. Some repairmen suspect the heat application to loosen the seal. It’s the only reasonable explanation I can think of. I now have an iPhone 4 that looks like an iPhone 7!

mwbenson -

Thank you for the guide, it was really detailed (Y)

Kristóf -

Thank you so very much for publishing this very helpful instructions. They helped me sucessfully install a battery and save $33 doing it myself.

Scott Davis -

J’ai changé la batterie sans difficulté avec ce tutoriel. En revanche, la batterie se décharge rapidement même si le téléphone n’est pas utilisé, et même la lorsque le téléphone est éteint. C’est curieux et je ne sais pas d’où vient la panne: de la batterie ou du téléphone?

Pierre-alexandre98880 -

I replaced the battery, and put everything back together. When I turned on the phone I received “Touch_ID_Issue_Notification. Touch ID and home button do not work even though the screen and home button are the original. I rechecked all connection and ribbons and all red seated correctly and unharmed. I hard reset the phone (volume down/power button) and nothing works.

Anyone have any ideas oh to correct this issue?

mojeda118 -

me too i’m sorry to hear it. not sure what to do now haha f*ck

Daniel Harrity -

Thanks for tanking my home button.

Simple battery replacement causes home and haptics to stop working on an iPhone 7

Put a warning up.

BTC Repository -

you too?? any way to fix this?

Daniel Harrity -

my home button won’t work

Daniel Harrity -

Home button does not work after fitting new battery. I was very careful to not strain the leads while doing the job and have checked the leads with a magnifying glass and there is not a mark on them. Tried re-fitting old battery and all the other suggestions to be found on Google search but still nothing. Is there any diagnostic software to test it?

mrmrst -

what is the “vent” for? on the opposite side of the main loudspeaker

Simon Linden -

It is for the microphone.

Daniele Carminati -

“according to Apple it's a "barometric vent." Apparently adding all the waterproofing to the iPhone 7 and 7 Plus meant that it was more of a sealed box, and so to be able to have an accurate and working barometer, Apple used that space. The barometer is the thing that allows a phone to measure altitude, and Apple points out that on the iPhone 7 it can measure even minor changes like climbing a flight of stairs.”

https://www.theverge.com/2016/9/16/12941...

gowski -

Very straightforward guide. It took me 1h20m, although a lot of time was spent on cleaning the old adhesive. Now the iPhone is up and running as new. Many thanks to the author and all the contributors from the comments!

Happy fixing everyone!

Nicolai Bogaciuc -

After putting the battery, how long do you recommend charging it?

Julio Cesar Ortiz Soto -

When it reeaches 100%, leave it charging for another 2 hours. See our wiki.

Daniele Carminati -

My home button stop working aloso after changing the battery. There is a workaround with the Accessibility setting

Go to Settings > General > Accessibility > Assistive Touch (on)

Luis -

Update : the home button started working after a complete depletion of the battery and a complete charge. However, the touch ID with the fingerprint dosn’t seem to work.

Luis -

Slightly OT: Good Video, but could you please remove the underlying drum loop? It adds needless rush and distracts from the topic.

Heinrich Rebehn -

Hmmph.. It seems after I attempted this repair, the phone refused to connect to the internet (though it would connect to wifi and bluetooth just fine, as well as cellular) The cellular (as in sms and calls) works fine, but any sense of data via wifi or cellular just seems to no longer work. Ive reseated the connectors for the antennae but to no avail.. I do have to note the logic board area is getting hot (especially near the rear camera) and the phone makes a faint sizzling sound, which makes me think that there is a short.. Any tips?

Ty Frauenfelder -

Battery connector seems slightly longer on the ifix it battery compared to the apple baterys’s still works but make it far more difficult to reconstruct without squashing the battery

callumhardwick -

When I opened the phone i snapped the ribbon cable connecting the display to the phone. I’m heart broken but i hope this comment would warn someone out there.

abdo.soukkar -

This is a very thorough guide…until the end. “To reassemble your device, follow the above steps in reverse order” forgets to mention using a replacement display assembly adhesive to add waterproofing to the device. Nowhere in this guide does it mention the need for this part, which is sold by iFixit. I suggest amending this.

Richard Bent -

After the battery replacement Touch ID stopped working. I checked all of the flex cables and they appear to be intact. What could be the solution for this problem? Maybe it has to do at least one power cycle?

steroidofbrucie -

Ugh - similar issue to many here. I replaced the battery, being very careful with the ribbons and re-seating the connections. Everything worked fine - except the haptics. The phone is my son’s. If I use my thumbprint for Touch ID, it doesn’t recognize my thumb and gives the haptic feedback. My son can get in to his phone just fine, but the home button does not give haptic feedback to him. So the haptic engine is working only in the instance of an incorrect touchID or when hitting the volume button. But not otherwise. Everything else works fine…such a weird problem to troubleshoot. We re-seated all the connections and power cycled several times, including the shutting down through the settings menu.

ejschro -

Like several others commenting here I also completed the battery replacement only to discover that the home button no longer works. I’ve successfully performed several iPhone battery replacements with ifixit parts and instructions over the years without any problems. Since an inoperative home button post battery replacement seems to be a fairly common point of failure among ifixit customers commenting here, it’d be nice if ifixit would try to figure out the origin of the problem and include more pointed precautions in their instructions if needed, and provide a troubleshooting addendum to pinpoint and resolve the issue for those of us already past that point. I’m not sure how likely I’ll be in the future to buy more parts for DIY repairs if, despite carefully following the provided instructions, there seems to be a nonnegligible risk I end up with a damaged device. Trust and confidence seem essential to iFixit’s business model. I’m not feeling a whole lot of either right now.

tomaszki -

Significant amount of force indeed!

I yoyo’d the phone off of one of the battery adhesive strips. The incredibly slippery aluminum case slipped out of my right hand as I was pulling one of the battery strips out with my left hand. It shot across the table and I was sure it was going to rip the adhesive strip. But it held!

Keep a grip on the phone when pulling the battery strips out.

D george -

I haven’t started the repair yet, but after watching the video, I am wondering why is it necessary to disconnect the display? Why not just leave it side by side then change the battery? Seems like a lot of risk to damage connectors for no real reason….Anyone?

Mac -

I just followed the instruction and the apple logo just flashes on and off and does not turn on. Do I just need to keep it plugged in to charge for a while?

anthonymleperry -

Hi, is it necessary to fully charge the battery after the replacement.

Lance Lathanide -

What could cause the loudspeaker to stop working after replacing the battery? I don’t see any connectors for the loudspeaker that I might have accidentally dislodged. I followed all of the troubleshooting steps I could find to rule out software issues. I even did a DFU restore. Everything is working on the phone except for the loudspeaker. Thanks.

gowski -

I received my new battery and installed it. The calibration on the battery box is different than the instructions given on ifix.com. The website says to charge to 100% and keep charging for 2 more hours. Then use it until it dies. Finally charge it uninterrupted to 100%. The ifixit battery box says use it until it dies and then charge it uninterrupted to 100%. Which is best?

Samantha Weis -

Unplugging the display might not be necessary, but it does help to release the stress on the flex cables. So…while not mandatory if all you want to do is replace the battery, it is recommended. This guide was really useful to me for replacing the battery on my iPhone 7, and everything went perfectly fine on the first try. Thank you! :)

arsradu -

Replaced battery, great video, Screws very small. Dropped a screw in side so turned upside down to get screw out.

Tore cable at top which i think is front facing camera but now digitiser doesn’t work either.

Bum!

Guy Barrett -

Excellent tuto. Tout s’est passé comme sur des roulettes.

Je repars avec mon ephone 7 restauré !

Merci à toute l’équipe. Merci pour la trad en français !!!

Patrick -

Avec plaisir ! Et bravo à vous pour la réparation !!

Claire Miesch -

iPhone 7... Bought the battery replacement kit, didn't come with an iOpener. I used a CVS Heating Pad as an alternative after several heat ups I managed to remove the LCD without any physical damage. I put everything back together, and to my surprise there was a rainbow on the left side of the screen and everything is shaking. I am not blaming iFiixIt, I dind't have the right tools. Get the right tools!!

Kevin Perez -

Lets gooooo!!! I finished without managing to screw anything up!!!

Callum Wilson -

The iPhone 7 guides lack a critical piece of information: The cable that goes to the home button (which lies under the display cable) is too long. It will get crushed and crimped between the two halves of the phone during reassembly, breaking the Home button and requiring an entire screen replacement to fix it. Pictures here.

You have to shove this thing back in with a toothpick or spudger while bringing the right side of the phone together.

Gavin Stokes -

Replaced iPhone 7 battery with no major problems, EXCEPT…new battery install is tricky (you have to align the loose battery connector to the terminal on the board before you press down on the battery to fasten battery adhesive). LAST THING…battery kit included new adhesive to apply to the display for waterproofing…there are no steps on the battery replacement instruction page. I didn’t know about this until I buttoned up the iPhone (so it didn’t get installed).

v.wong -

Have previously changed a 6S battery & now successfully changed the battery on a 7. The guide works well & one month later the battery health is still on 100%. Thanks to iFixit I've now extended the life on my iPhone.

Peter Brown -

спасибо, за инструкцию, всё установил, всё работает

Илья Кривёнок -

Danke für die Anleitung.
Das hätte ich mir schon viel früher antun sollen:

Ladekapazität: 2h ---> 2 Tage

Es hat eine Weile gedauert, weil ich sehr vorsichtig war, aber der Lohn war ungemein. Jetzt muss ich mir keine Gedanken machen wenn ich mit nur 20%-Ladung mal kurz unterwegs bin.

Bill Hearts -

Hi, just performed battery and screen change . . . accidentally punctured the black connection piece of metal of battery just before it clips into circuitry but iPhone is charging and seems to be working. Is the metal connection arm just a conductor of energy, therefore small hole in it, probably won't cause any problems??

Robert Crowley -

Would have been nice if the adhesive had numbers or peel this first, etc. Even screen protectors come with these.

I installed it but I doubt it's anywhere near waterproof and I cleaned all surfaces with 99% isopropyl and the pointy stick.

NitWit -